Merryweather Fire King

Advert

Merryweather Fire King

Home Forums Work In Progress and completed items Merryweather Fire King

Viewing 25 posts - 26 through 50 (of 79 total)
  • Author
    Posts
  • #499996
    Bob Wild
    Participant
      @bobwild67557

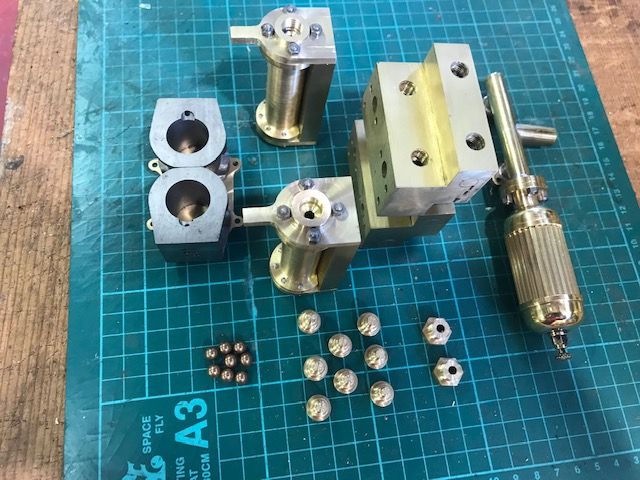
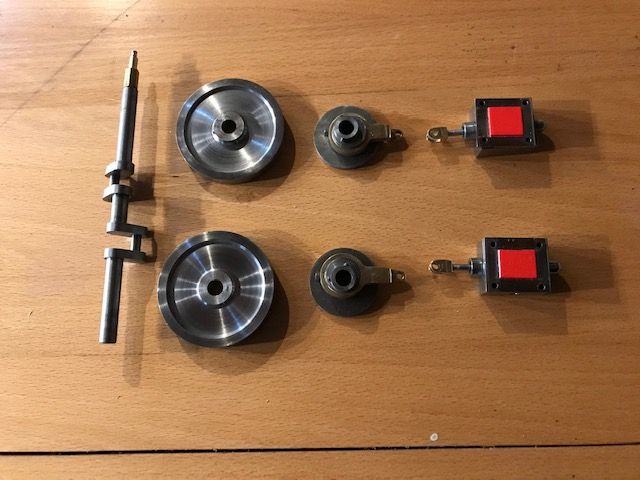
      Well I'm back from my tour of the UK from the Lake District to The Yorkshire Dales by way of Devon. In between pitstops I've managed to get the water pump finished. Here are the parts:

      pump parts.jpg

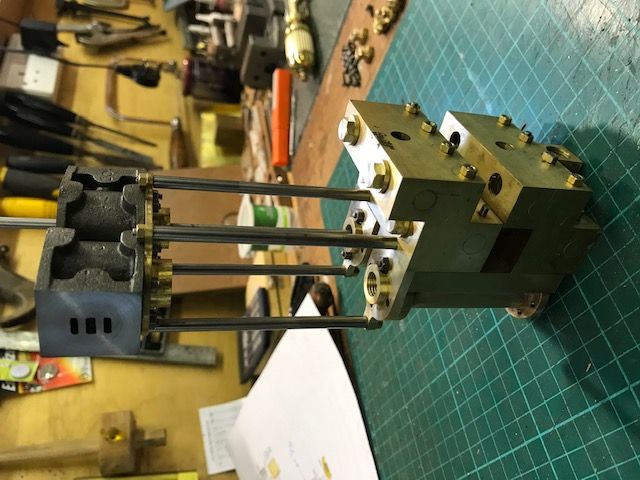
      And here is the assembly complete with the steam cylinders:

      pump and cylinders.jpg

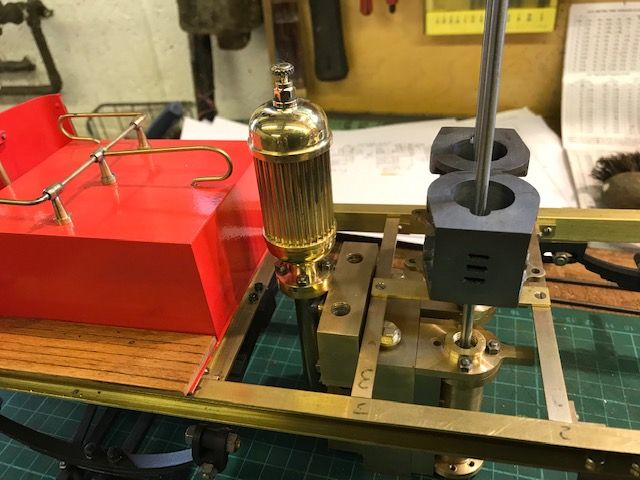
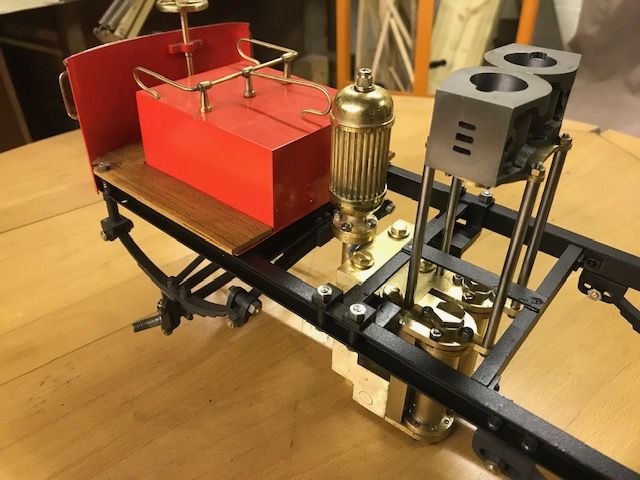
      and placed in the Merryweather:

      pump assembly.jpg

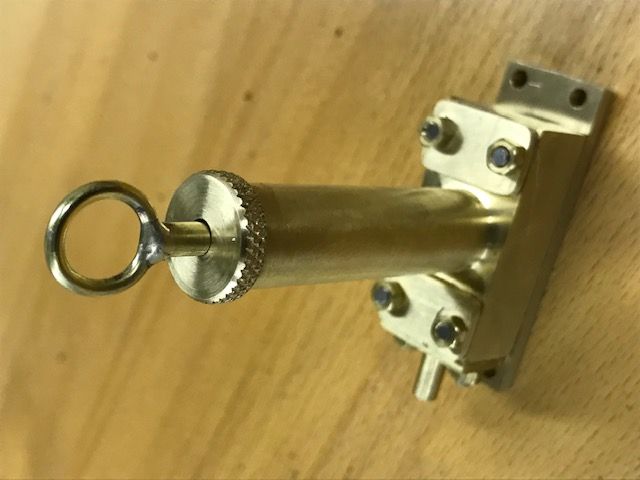
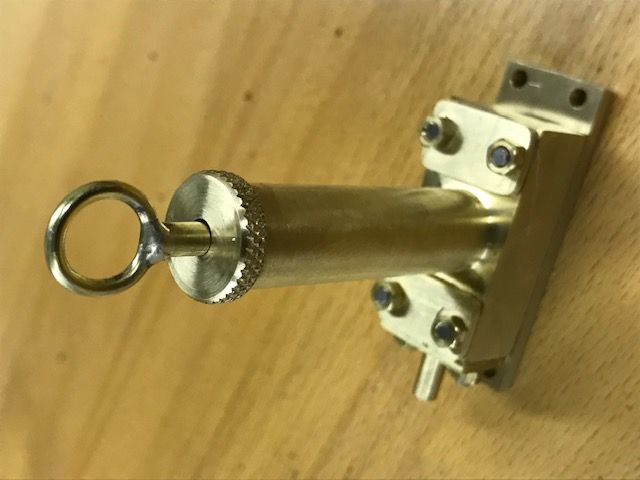
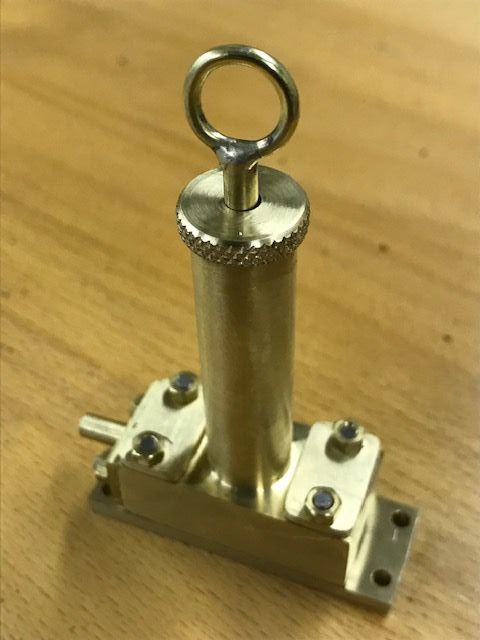
      Before I go any further I need to pressure test it. Been racking my brains thinking about how to do it and then it came to me. The Merryweather already has a hand pump for the boiler feed, so I can use that. And here it is:

      boiler feed pump.jpg

      My only problem when I build it is how to seal the joints. I have some fibre gasket material, Hylomar sealant and some PTFE tape, but haven't a clue which to use and where. Or should I get something else? Any suggestions would be most appreciated.

      Incidentally, I have just realised that this forum doesn't like Portrait photos. Note to self for the future.


      Edited By Bob Wild on 06/10/2020 23:21:13

      Advert
      #500009
      Paul Lousick
      Participant
        @paullousick59116

        Portrait photos are OK Bob, but you have to rotate them before you upload to your album. You can also grab a corner and drag to a smaller picture if they look too big in your post.

        Where did you get the pump drawings from ?

        Paul.

        Edited By Paul Lousick on 07/10/2020 04:17:37

        #500147
        Bob Wild
        Participant
          @bobwild67557

          Thanks Paul. The plans are from Julius de Wall based on a design in The Engineer magazine from 1908. There is a layout drawing and a lot more detail in the first post of this thread.

          Here is a rotated image of the pump. It has rotated the whole lot; so not much help. And you can see that if I crop the image half the detail will be lost. NBG

          boiler feed pump l.jpg

          Bob

          #500155
          Paul Lousick
          Participant
            @paullousick59116

            Hi Bob,

            Not sure how you rotated the photo but I saved it to my computer, used my editing software to rotate the image and uploaded to my album in ME. ( It should appear on your PC folder (using view / icons) in the correct orientation prior to uploading)

            Paul.

            pump 878025.jpg

            #500264
            Bob Wild
            Participant
              @bobwild67557

              Don’t understand that Paul. That image you did was just as the original on my PC. Could it be something to do with the fact that the original was taken with an iPhone. I have seen other issues between iOS and windows?

              #500271
              Paul Lousick
              Participant
                @paullousick59116

                Hi Bob,

                I have a similar problem when taking photos with an iphone in portrait position. The smart viewing software in the iphone automaticaly rotates the photo when in a landscape (horizontal) position. As does some PC viewing software.

                The problem arises when the photo viewer does not have a feature that detects that the photo was taken in portrait mode and displays it in landscape. By using a PC to rotate and save the photo, the default is now landscape.

                Paul

                #500654
                Bob Wild
                Participant
                  @bobwild67557

                  Oh Paul, this is hard. I suppose I need a non-windows photo editor. But I think I’ll just stick to landscape in the future!

                  Bob

                  #500668
                  Paul Lousick
                  Participant
                    @paullousick59116

                    Hi Bob,

                    I have not tried any, but there are photo editing apps for downloading to an iphone. Some free.

                    Paul

                    #500708
                    SillyOldDuffer
                    Moderator
                      @sillyoldduffer

                      Rotating Photos!

                      The root problem is there are several ways a digital image tells the computer which way is human up, and sometimes the camera and/or website and/or browser use the wrong one.

                      The best way to force images into human orientation is to open them at home with a photo editor, rotate them, and save them back. The orientation chosen by a human overrides all the others. Some basic editors may require the image to be changed in some small way before the rotation is remembered, for example by altering a pixel.

                      Unfortunately the software hosting this forum doesn't allow members to rotate photos. A moderator can rotate posted photos, but not those in Albums.

                      Messy for me to rotate Bob's photos earlier in this thread now because it would make a nonsense of too many other posts.

                      However:


                      Dave


                      Edited By SillyOldDuffer on 11/10/2020 10:29:28

                      #506908
                      Bob Wild
                      Participant
                        @bobwild67557

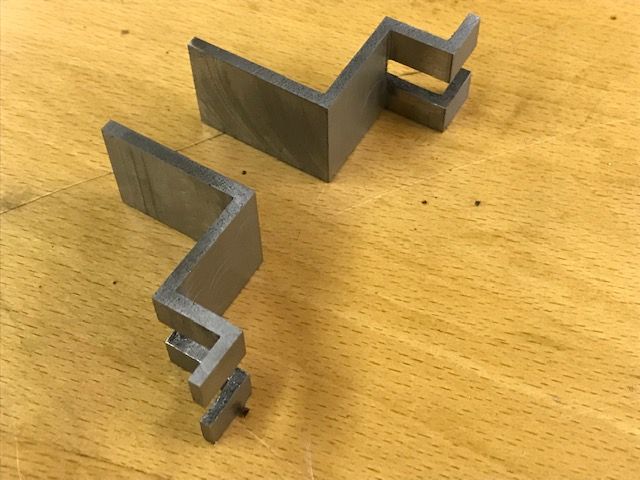
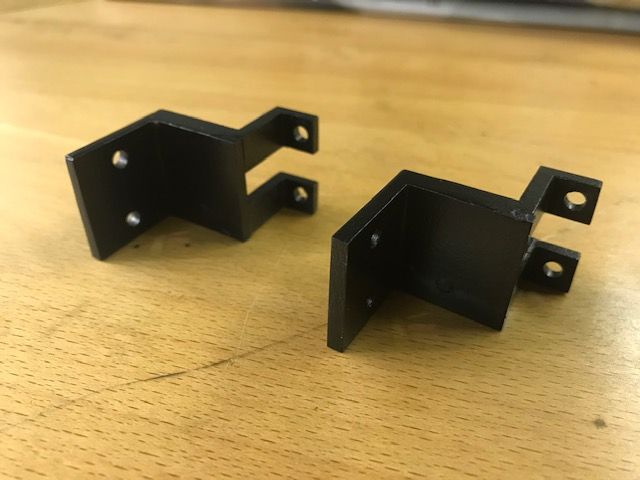
                        These brackets look fairly straightforward, but they have given me a real headache. So I thought they deserved a mention in my build thread::

                        too big brackets.jpg

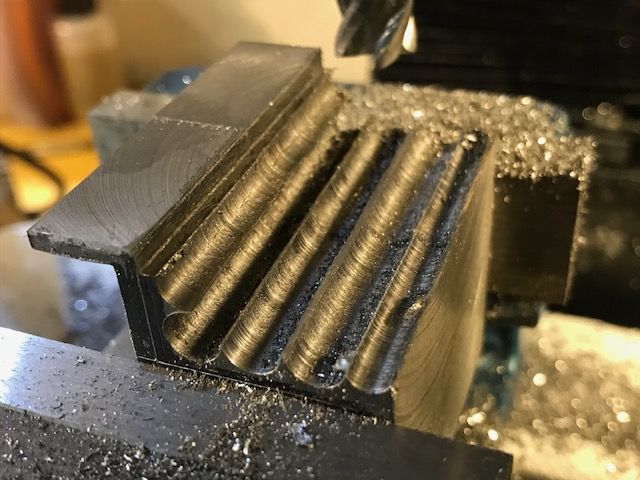
                        The drawing called for them to be bent from 3mm strip. But I wasn't confident in making the double bends in the right place, so decided to machine from solid. Two pieces were glued together so I could machine them as an identical pair. I chain drilled first to remove as much metal as possible:

                        chain drilling.jpg

                        This is where the problems started. Because I'm using Stuart cylinders I had to recalculate the width, and somehow while allowing for the 3mm thickness I ended up with then being 3mm too wide. I couldn't face throwing them away and starting again, so I cut off one face and screwed and glued another piece of machined angle. This gave me the opportunity to use JB Weld for the first time:

                        correct brackets.jpg

                        I painted the chassis while I was at it, and here is the pump assembly finally in position:

                        pump assembled.jpg

                        Next up, a leek test. I have learned from bitter experience not to delay this!!

                        #519679
                        Bob Wild
                        Participant
                          @bobwild67557

                          Oh this is so hard (for me). Not much progress in the last two months, but a lot of effort. Got the leak test going on the water pump and it failed miserably. The culprit being the soldering of the cylinders to their backplates. I figured out that I was paying too much attention to appearance by putting a neat bead of solder between the mating faces. So, two attempts later I finally smothered the joints with solder and ‘Bingo’. It finally was sealed OK.

                          The present nightmare is getting everything lined up. Each cross head has the water pump piston rod and the engine piston rod at opposite sides. The cross head thickness is 20mm and I would have liked to thread them both from the same side. But I don’t have any taps that long. So I had to tap them separately from each side. The only way I could think of to get the two rods aligned was to hit them with a big hammer (well a small one actually) and finally they do run more or less true. The challenge now is to get everything in line. That means four rods, four pistons, four crosshead columns and two cross heads with their column guides and crankshaft slots. Added to that I’be discovered that the pump rods are 10mm short (how did I miscalculate that?). So a bit more rework again! I did manage to get the crankshaft to rotate a bit until it fouled so I’m quite hopeful in that respect. I did get a tip from another member where he suggested that you could drive the crankshaft with the mounting nuts fairly loose and progressively tighten them over a period of hours. We shall see!

                          And another thing, I‘ve just got round to drawing out the boiler (because it’s snowing outside and can’t work for more than an hour in the workshop). Goodness only knows how I’m going to make that with twelve curved fire tubes, a very complicated super heat tube, not to mention the conical body. But that’s for another day.
                          Bob

                          #534963
                          Bob Wild
                          Participant
                            @bobwild67557

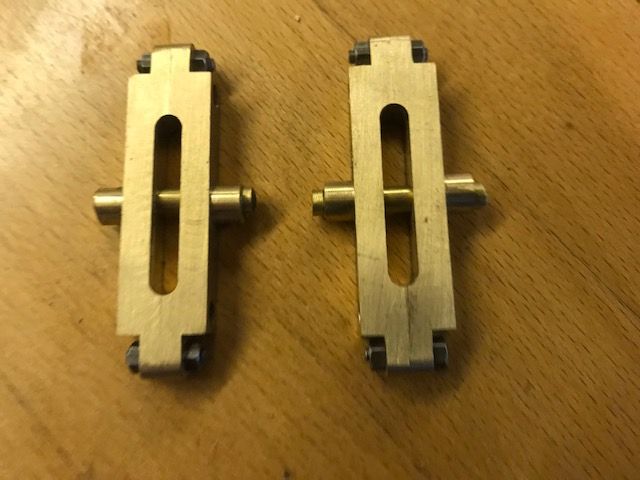
                            Finally got all the parts for the engine finished. First the crossheads:

                            cross heads.jpg

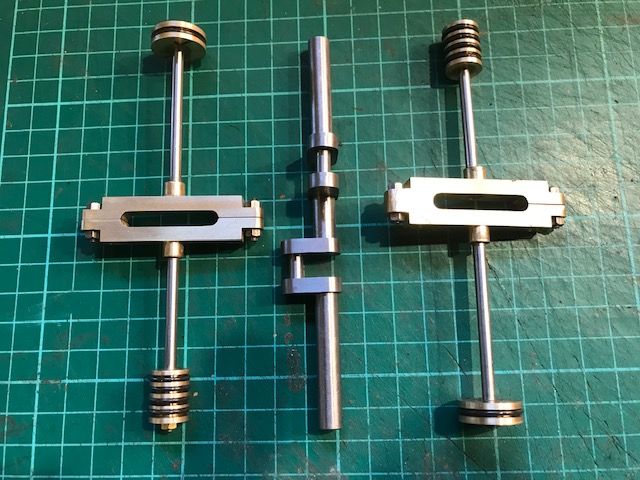
                            and with the pistons and crankshaft:

                            img_1117.jpg

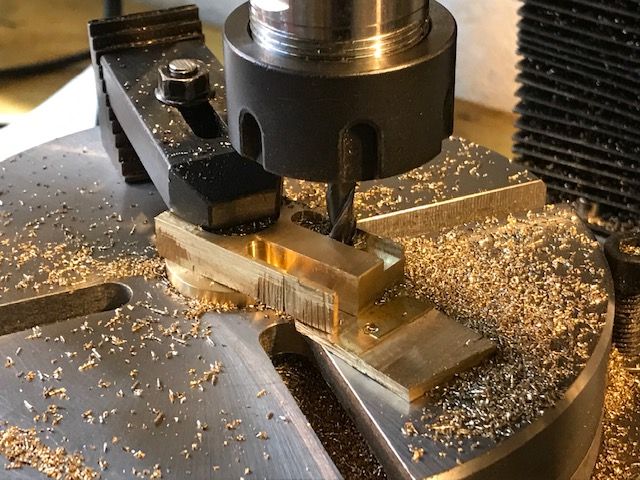
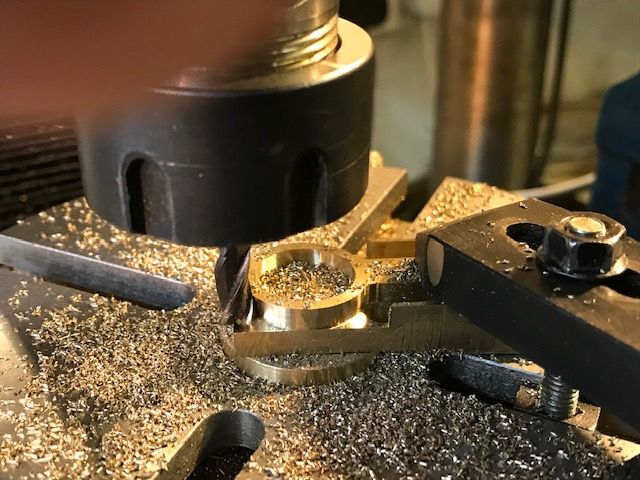
                            and to show my new toy milling machine, working on the eccentric rods:

                            milling eccentric rod.jpg

                            milling eccentric rods #2.jpg

                            and finally the valve chest and other bits:

                            valve chest etc.jpg

                            Spent ages lining everything up and getting things to move almost freely. I've got a way of mounting the assembly on the lathe so I can then try and run it in and get it rotating smoothly.

                            #534964
                            Jeff Dayman
                            Participant
                              @jeffdayman43397

                              Looking great Bob! yes

                              #536803
                              Bob Wild
                              Participant
                                @bobwild67557

                                Nearly finished the engine, and started to think about the boiler. So I posted this thread to aim at a wider audience, asking for advice on what, to me, looks like a daunting part of the build:

                                https://www.model-engineer.co.uk/forums/postings.asp?th=172017

                                Looking for any helpful advice.

                                Bob


                                Edited By Bob Wild on 28/03/2021 23:14:22

                                #546244
                                Bob Wild
                                Participant
                                  @bobwild67557

                                  Still struggling on. Finally got the engine assembled and after ages finding the tight spots (I now have a new meaning to the term “Quantitative Easing) it now turned over relatively smoothly. First run on air would not rotate, but there was a significant downward thrust at times. I had followed the dimensions in the book for the valve mechanism, which occurred to me was a metric conversion from the original imperial drawings. Upon reflection it occurred to me that there may be minor differences. So I reduced the width of the slide valve by ten thou each side. After a lot of fiddling with the timing – bingo, it run. It needed twenty psi to get it started, but it ran like the clappers and nearly shook itself off the bench! And then disaster. The crankshaft had come loose. I had prefabricated it, cross pinned it and loctited it, but two of the joints had come loose. So off to make another. I don’t think I can retrieve it so it’s a matter of staring from scratch. I’m wondering whether to persevere with loctite or to try and silver solder it or even soft solder it. I’m a bit concerned that if I use solder that it will distort. Help please, this is driving me mad!!!!!

                                  Bob

                                  #546367
                                  Werner Schleidt
                                  Participant
                                    @wernerschleidt45161

                                    Hello Bob,

                                    as I made my fire king steam engine all parts were good to move and so I start assembling all parts.

                                    After it was complete I could only move it at the shaft with a lever, a long screw driver . After I made some movements it was slightly better. And with many oil I can turned it very tight over.

                                    I decided to add compressed air , but it was stick. So I increased the pressure from one to two bar and suddenly it began to turn and after 20 sec it was much more free in movement. I reduced to 1 bar and it ran..

                                    For your problem with the crankshaft. Softsoldering is not strong enough , I don`t know if it stay straight if you silver solder it. Good luck.

                                    Werner


                                    Edited By Werner Schleidt on 22/05/2021 17:00:03

                                    #546693
                                    Bob Wild
                                    Participant
                                      @bobwild67557

                                      Hi Werner. Thanks for your reply – it’s always interesting to hear of other people’s experiences. As I mentioned it took me ages to get everything lined up. I did make all the clearance holes wherever I could to be much larger than they should have been and I tightened them up progressively to get the smoothest fit. So, I am going to have another go at prefabricating the crankshaft and will hope for the best. Anyway, I will have a little time to ponder as my dear wife wants me to take her in our caravan for a few weeks on one of our rare visits to the south of England!!!!

                                      Bob

                                      Edited By Bob Wild on 23/05/2021 23:07:19

                                      #547271
                                      Bob Wild
                                      Participant
                                        @bobwild67557

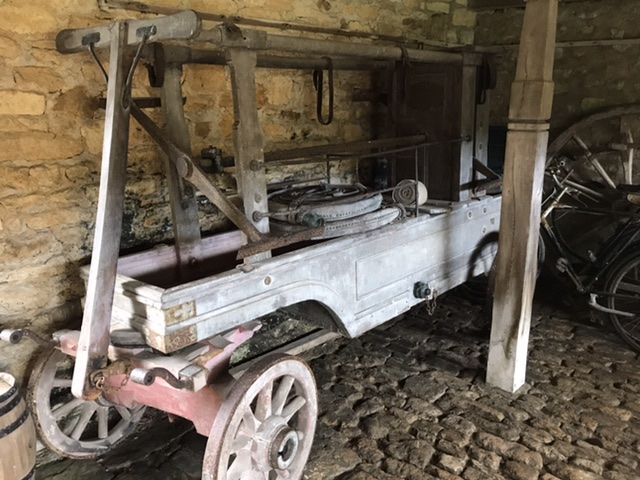
                                        059acea8-460e-4837-a530-b679feedb730.jpegFound this on my travels, but a bit older than mine:

                                        #551663
                                        Bob Wild
                                        Participant
                                          @bobwild67557
                                          At long last we have success. After so many attempts at getting the crankshaft made it runs. And to think that I was seriously thinking of abandoning the project and throwing it in the bin. 
                                           
                                           
                                          It is still a little tight and doesn’t turn as freely as I would like, but I can put up with it for now and it may improve with running. I have noticed however that the air coming from the exhaust seems to come out stronger from one cylinder than the other. I tried to set the timing so that the valves opened just before tdc. Perhaps one of you experts can advise which is better.
                                          Bob

                                          Edited By Bob Wild on 27/06/2021 22:55:01

                                          Edited By Bob Wild on 27/06/2021 23:01:27

                                          #551672
                                          Werner Schleidt
                                          Participant
                                            @wernerschleidt45161

                                            Hello Bob,

                                            congratulations to your running engine. Your engine need a run in time that is normal. And it depends on how good the valve is tight at the valve ports. And you need plenty of oil. The oil you give to the air pressure have not the same effect as later the mixture of steam and oil emulsion with water.

                                            This is my experience I made.

                                            #551682
                                            noel shelley
                                            Participant
                                              @noelshelley55608

                                              Well done ! Looks good and it runs ! running in should free it up, but a difference in exhaust note could be almost anything connected with the valve events, it may be as simple as setting or it could be the accuracy of the valve ports or the slide valves. Good luck. Noel

                                              #551892
                                              Bob Wild
                                              Participant
                                                @bobwild67557

                                                Thanks Werner – I’ve added more oil to the valve chamber.
                                                Noel – done some tests at low pressure. Giving a nudge at dead centre I notice that it goes with a much bigger thump at the top compared with the bottom. That suggests to me that the slide valve is slightly offset and needs centralising. I’ll try and improve this, not sure how. Unfortunately not for a while since Mrs W wants me to take her for a break in our caravan. Grrrrr

                                                Bob

                                                #555439
                                                Bob Wild
                                                Participant
                                                  @bobwild67557

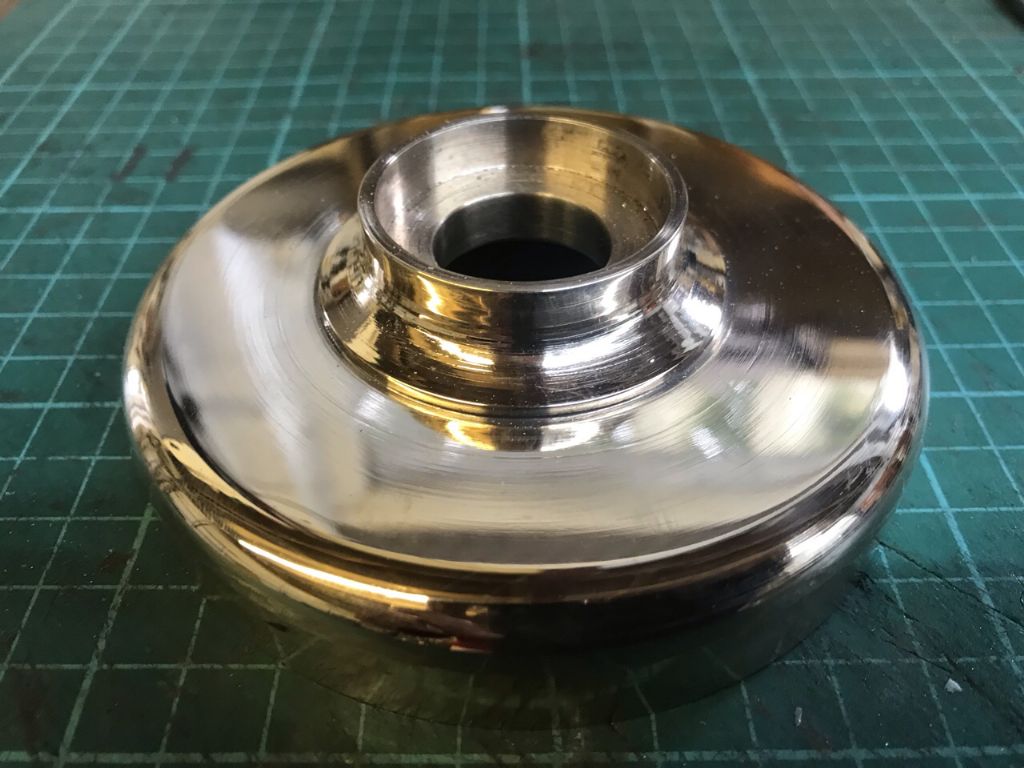
                                                  51ec6b77-bee8-4b68-90d0-6e3c8b4b29c3.jpegAt last. Can start to get moving on from that blooming engine. So started on the boiler. Some new techniques for me on this part, but very pleased with the result:

                                                  #559322
                                                  Bob Wild
                                                  Participant
                                                    @bobwild67557

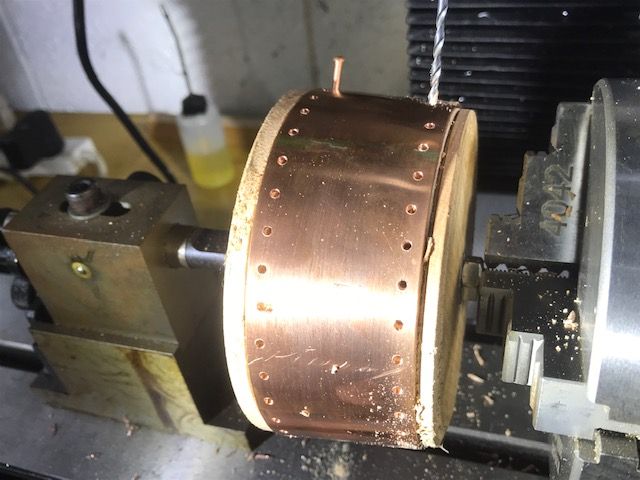
                                                    I said that I was a novice ! Made a lovely hardwood former to shape the lower tapered part of the boiler. Sawed off the excess overlap after bending and silver soldered the join after a fashion. Drilled two sets of 36 rivet holes at a 6 degree angle by tilting the head. Being a novice I completely forgot that the burrs from the drilled holes would dig into the wood. No amount of (gentle) tapping or prising would persuade the ring to separate from the former !!!

                                                    boiler 1.jpg

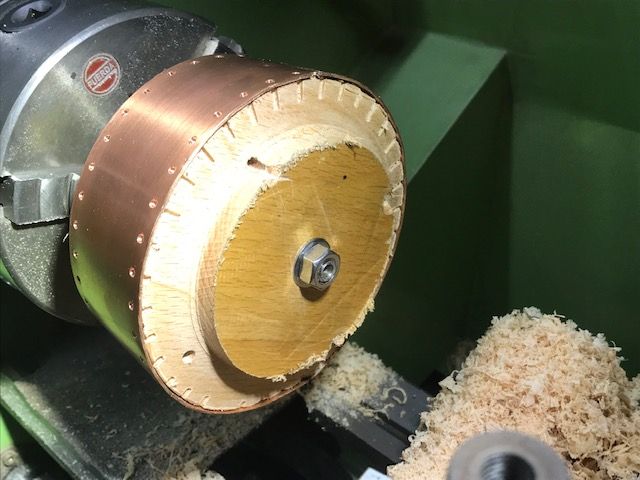
                                                    So as a last resort I decided to (hack) machine away as much wood from the former as I could to expose one set of rivet holes

                                                    boiler 2.jpg

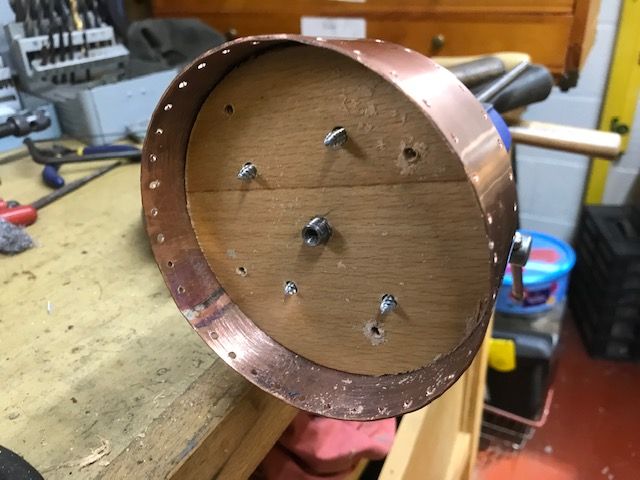
                                                    The former is actually made from two pieces of 25 mm beach screwed together. So I figured that if I drilled four clearance holes in one piece and bashed four screws it was worth giving it a try to separate the two pieces to improve my chance of getting the ring off the other piece of wood.

                                                    boiler 3.jpg

                                                    And bingo, it worked. And finally the ring came off the former in one piece. Got to fettle it up and figure a way of riveting it to its mounting plate. That will be in a while since SWMBO wants to go off in our caravan for a while.

                                                    But it gives me an opportunity to think about how to fix those rivets. My inclination is to glue the lower ones in place since they are purely cosmetic and don’t hold anything. Especially as the annealed copper scratches even when you look at it.

                                                    When it comes to the upper mounting plate I thought about tapping the end of the rivet and bolting the ring to its mounting plate. The rivets are 3/32 dia which is only a nat’s whisker over 8ba. So a little skim on the end of the rivet would make this possible which would avoid any bashing to form a proper rivet. Any thoughts from you experts would be most appreciated.

                                                    Bob

                                                    #568796
                                                    Bob Wild
                                                    Participant
                                                      @bobwild67557

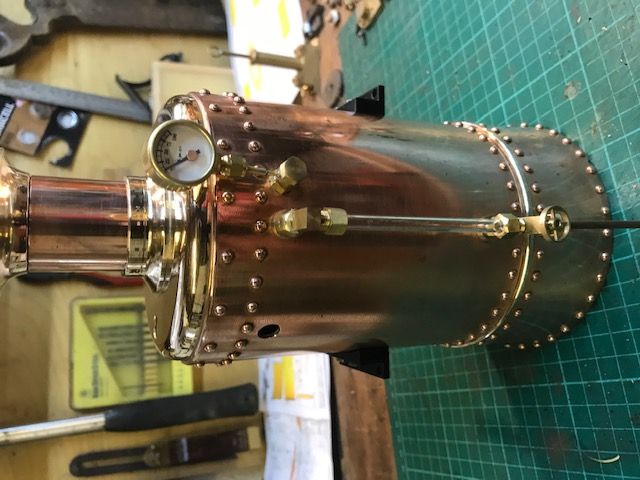
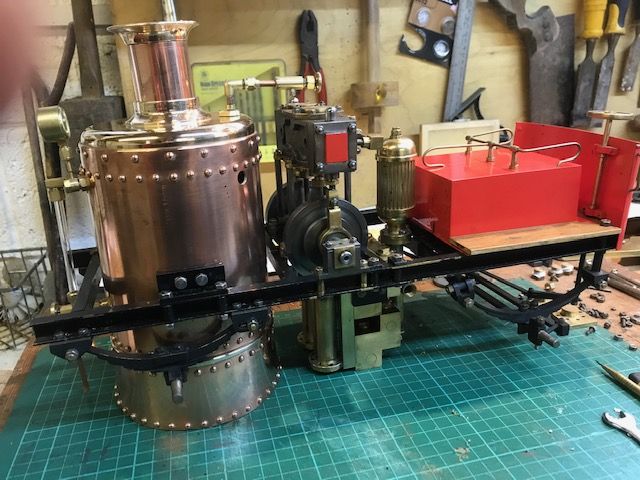
                                                      Still plodding on slowly thanks to the demands of Mrs W and her other hairbrain projects. But anyway, I have finished the boiler and mounted it in the chassis. Bit of a problem because I used the boiler tube which was 110 mm diameter rather than the 4 in as specified, being the nearest I could find. The upshot was that the rear cross brace and axle fouled. So I had to move them both which was a nuisance. Anyway I got it all to fit and am quite pleased with the results. Here are a few shots of the installation. Next up are the water tanks which will be interesting.

                                                      boiler.jpg

                                                      boiler in place.jpg

                                                      Sorry about the orientation. Blame Steve Jobs.

                                                      Bob

                                                    Viewing 25 posts - 26 through 50 (of 79 total)
                                                    • Please log in to reply to this topic. Registering is free and easy using the links on the menu at the top of this page.

                                                    Advert

                                                    Latest Replies

                                                    Viewing 25 topics - 1 through 25 (of 25 total)
                                                    Viewing 25 topics - 1 through 25 (of 25 total)

                                                    View full reply list.

                                                    Advert

                                                    Newsletter Sign-up