Mc Donald Model tractor

Advert

Mc Donald Model tractor

Home Forums Work In Progress and completed items Mc Donald Model tractor

Viewing 25 posts - 101 through 125 (of 359 total)
  • Author
    Posts
  • #538299
    Four stroke Fred
    Participant
      @fourstrokefred

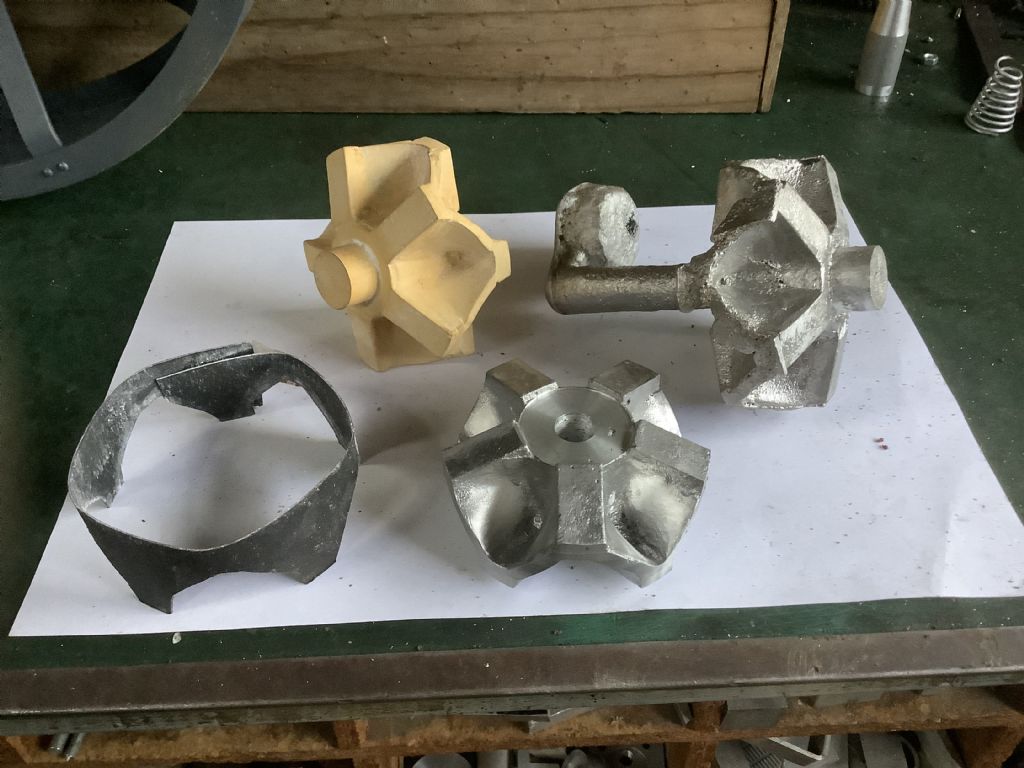
      f3414bb3-b25c-4b91-8e1f-c69c0187d7cc.jpegIt did rain over Easter but not as much as anticipated. After many months of thinking and days of making the pattern for the hubs they have been cast today and I am now in the process of cleaning them up prior to machining the flats for the spokes to be screwed onto. The casting was a tricky operation and a process that you may not find in a book or commercial foundry as I used a cardboard mask around the outside of the pattern to pack the first box . It was then removed and the second box packed. With the pattern and mask removed the aluminium was poured in and you can now see the results. Both sides of the hubs have the flats machined at different angles (72 and 75deg) to accommodate the “dish” effect of the inside of the wheel. All this adds to the complexity but that is how the full size tractor was made and this is scale model and should be correct as near as possible. Thanks for the comments.

      Fred.

      Advert
      #538342
      Roger B
      Participant
        @rogerb61624

        Those are some trickey castings. I'm still following and enjoying smiley

        #538633
        Four stroke Fred
        Participant
          @fourstrokefred

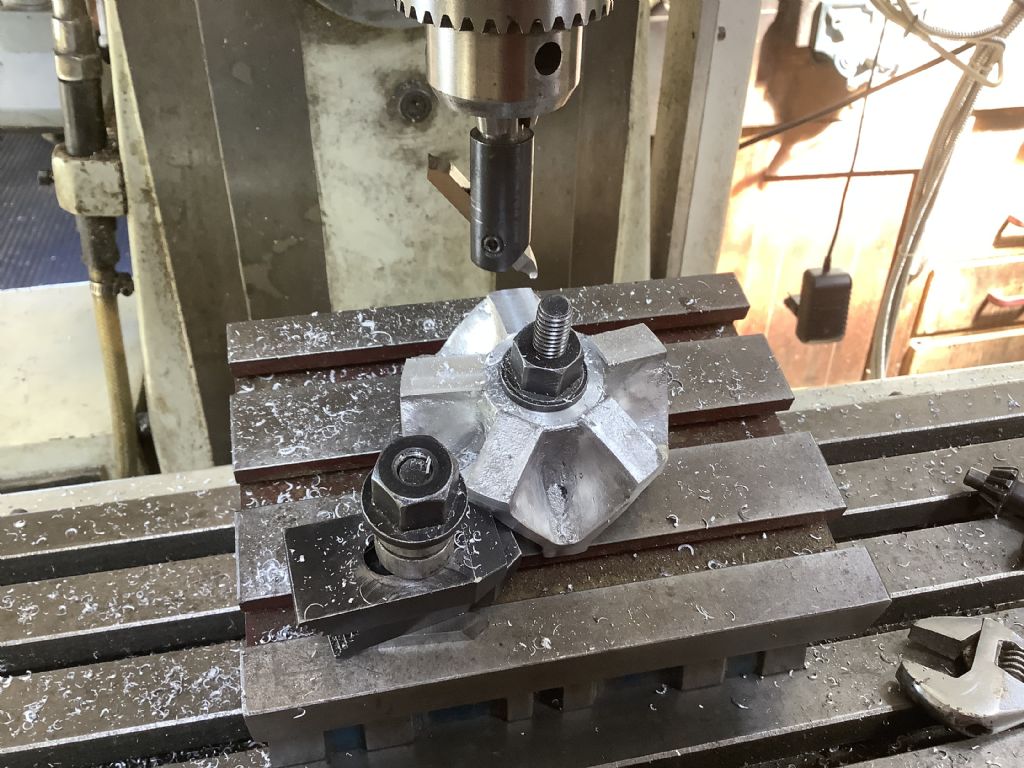
          Today I cast another front hub as a spare and to be used to set up machining operations. As they say “practice makes perfect “ and it doesn’t take much longer to make three than two when all the casting equipment is out. The photo shows milling the spoke flats making use of an adjustable angle plate and digital protractor. If all goes well one wheel should assembled by tomorrow night!

          Fred.

          9e7408ca-fec5-487c-a856-74288225513c.jpeg

          #539436
          Four stroke Fred
          Participant
            @fourstrokefred

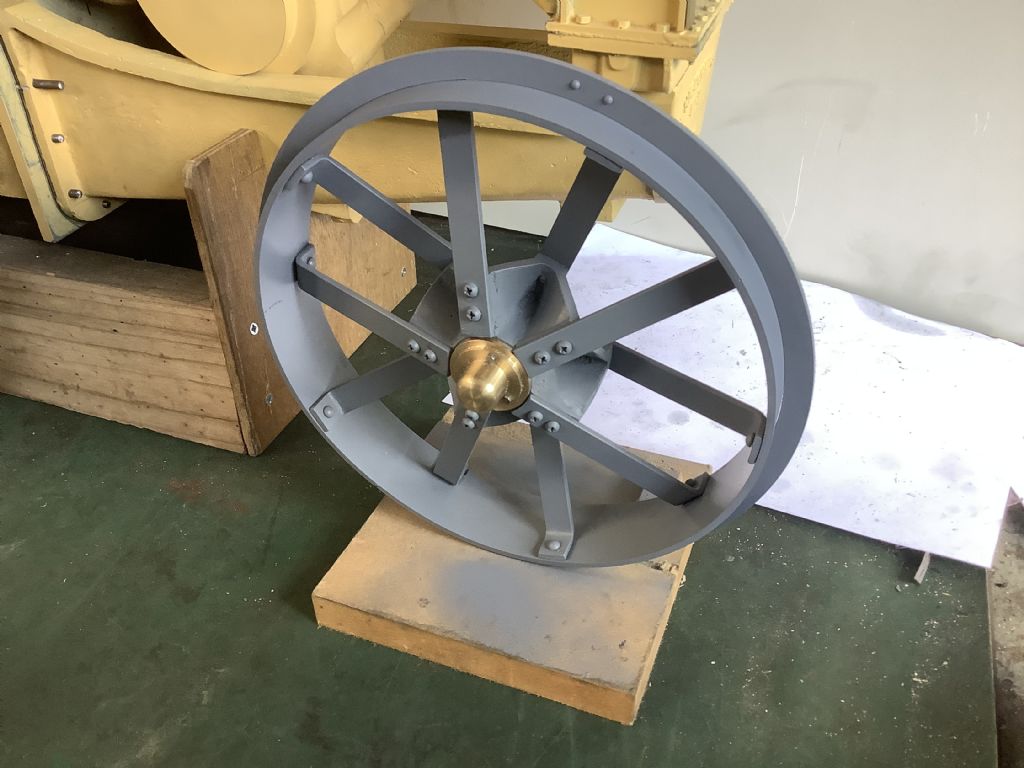
            One front wheel made one more to go. The thought of making these wheels have been hanging over my head like a big black cloud for quite some time but now at least I know they can be made! The front wheels on the full size tractor did not have the outer rim disc fitted but the owners hand book shows that some tractors had them ,obviously to help with the steering. The 3mm screws used to hold the spokes to the hub have had the heads reshaped ,using a form tool, to represent rivets and the heads will have the slots filled in later.

            Fred.

            b6b1aa45-009a-49f9-b835-912f07b913c6.jpeg9fe57c54-7487-4a7e-856e-3c5ac153de07.jpeg

            #539977
            Four stroke Fred
            Participant
              @fourstrokefred

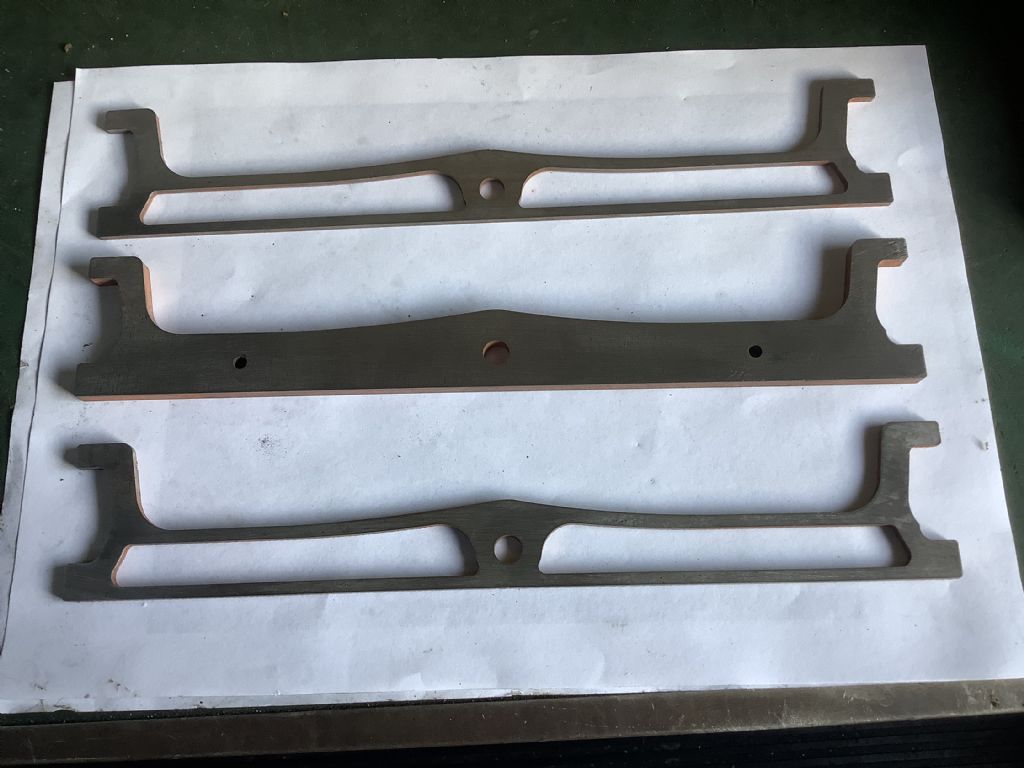
              These are the laser cut parts for the front axle beam. The are made from mild steel – 3.0mm for the outer parts and 6.0mm for the centre section. They are designed using CAD and saved as a DXF file then taken to the laser cutter where he works his magic! These parts will be riveted and silver soldered together with the parts that form the king pins. Both of the front wheels have now been made and I hope to have the second rear wheel completed next week. It will be good to see the model standing on its own wheels and when the steering is connected that will be even better.

              Fred.

              e4cf1bb7-7f92-4cb2-82fc-d452b6a2e05a.jpeg

              #540390
              Roger Best
              Participant
                @rogerbest89007

                yes Fantastic work Fred.  Thanks for showing us.

                Edited By Roger Best on 18/04/2021 15:58:20

                #540416
                Alan Jackson
                Participant
                  @alanjackson47790

                  I have just started to go through this fantastic model being built.

                  What wonderful skills you are showing us all.

                  Thanks Fred

                  Alan

                  #541187
                  Four stroke Fred
                  Participant
                    @fourstrokefred

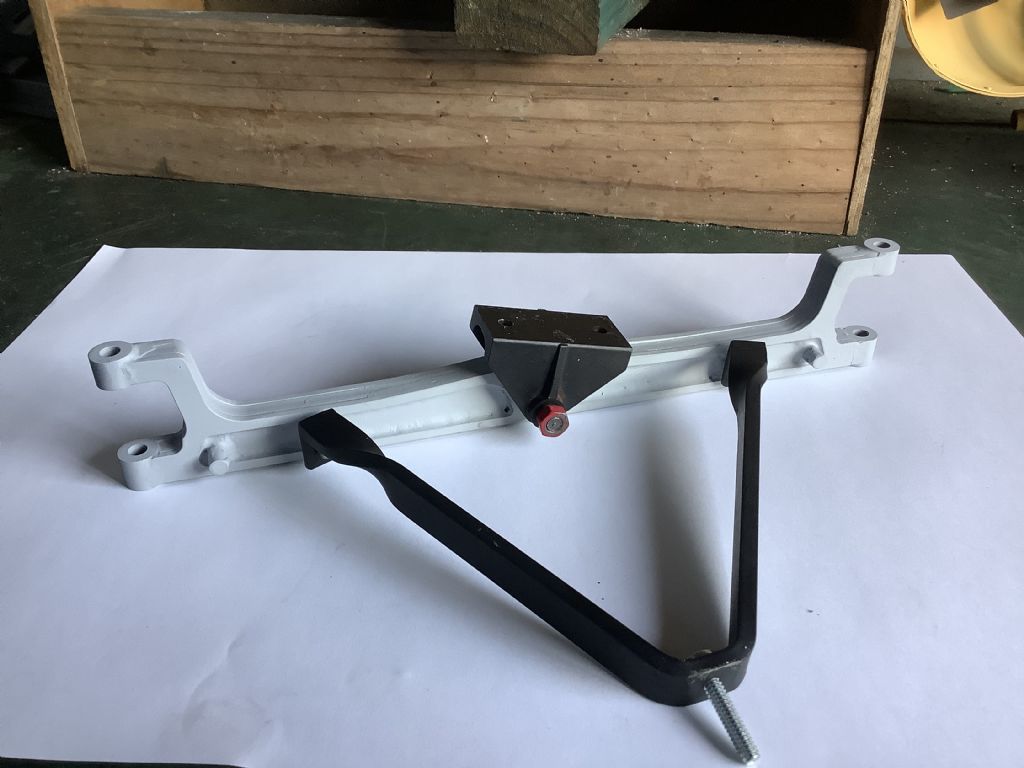
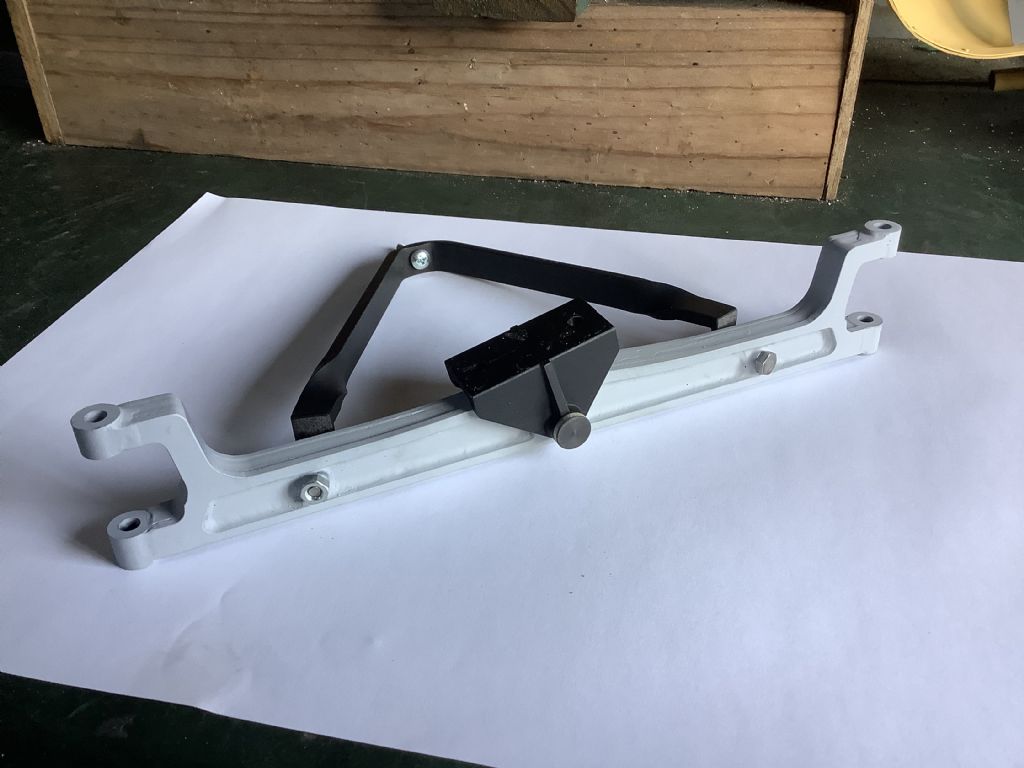
                    Thanks Alan and Roger for the feed back and I am pleased you enjoy reading about the Mc Donald tractor. The photographs show progress so far on the front axle beam. There is still some minor work to do and then make all the parts for steering gear. The parts shown in a previous picture were cleaned, clamped together and then drilled for six 1/16” steel rivets to hold the parts together for silver soldering. The job was pre fluxed before the rivets were tapped over as this left a path for the solder to flow through. “ Liquid Steel “ ( epoxy) was the used to fillet the inside edges to give the effect of a casting. The perch ( the black part on the axle) is fabricated from six pieces of machined steel silver soldered together. I now have all the laser cut parts on hand to complete the mudguards and these will keep me busy for the next few weeks.

                    Fred3a28b6c8-b08d-4534-8df3-b742435f76ed.jpeg9f4ba24b-4b54-43f4-9ffd-01293f7621e7.jpeg

                    #543218
                    Four stroke Fred
                    Participant
                      @fourstrokefred

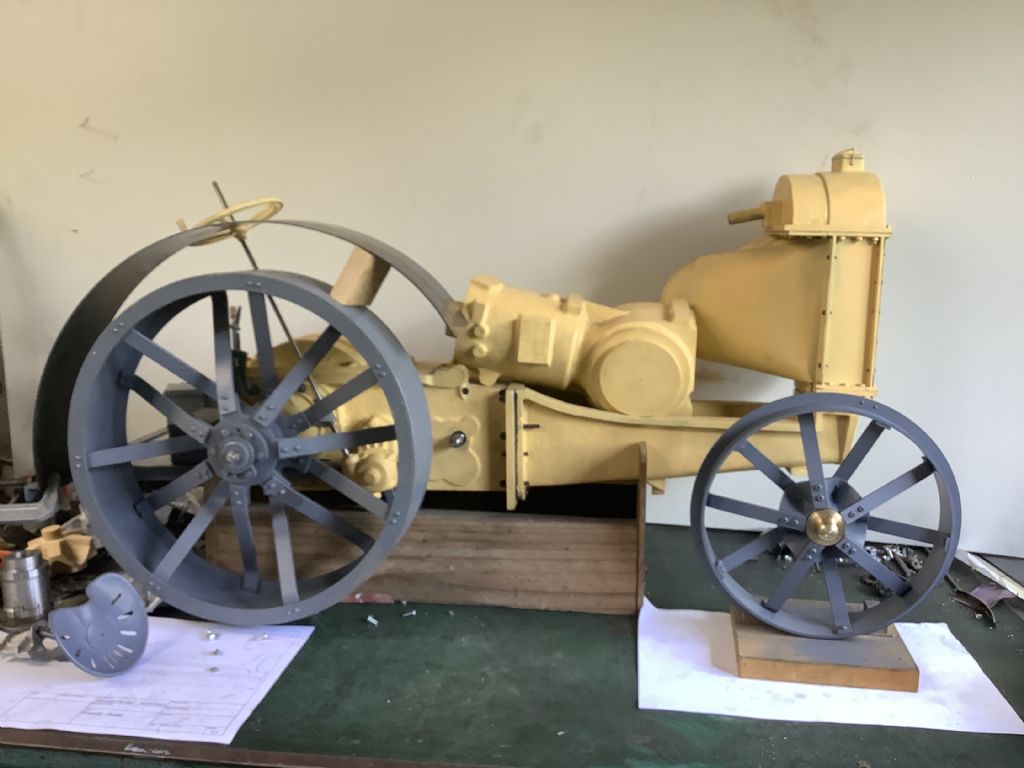
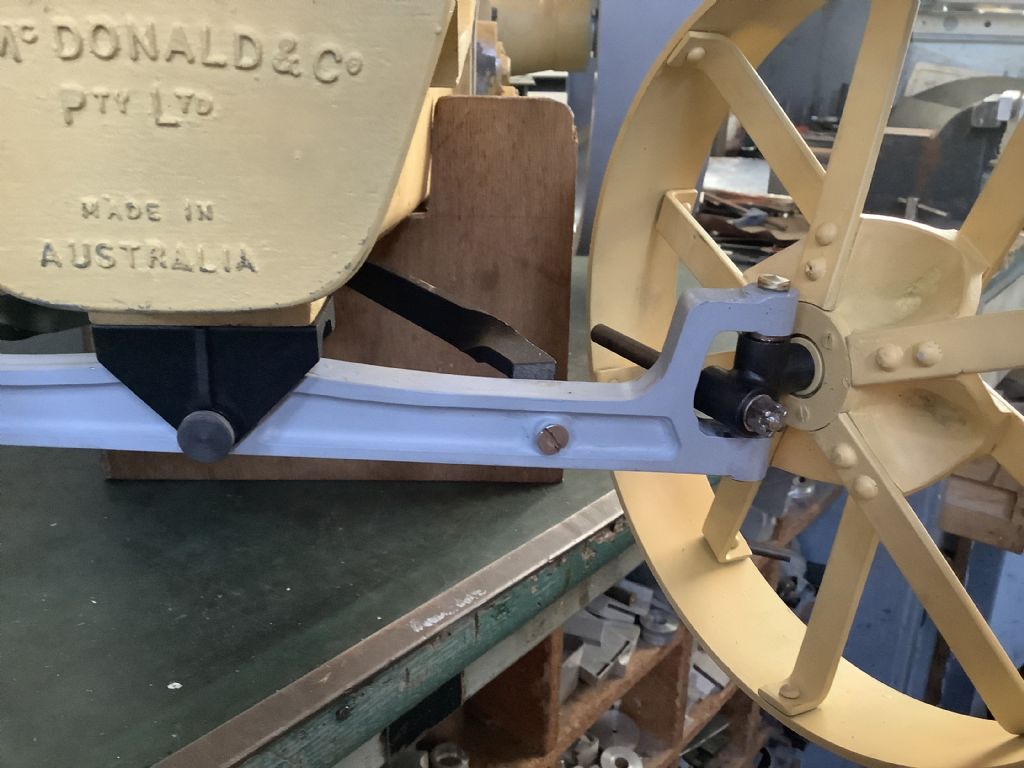
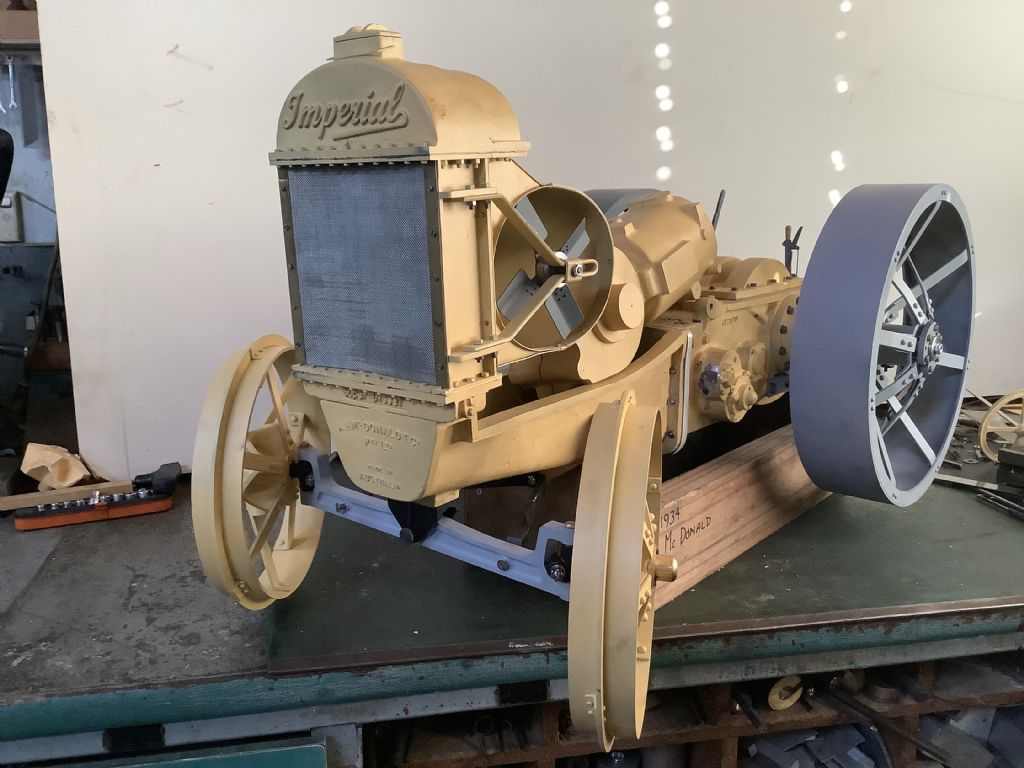
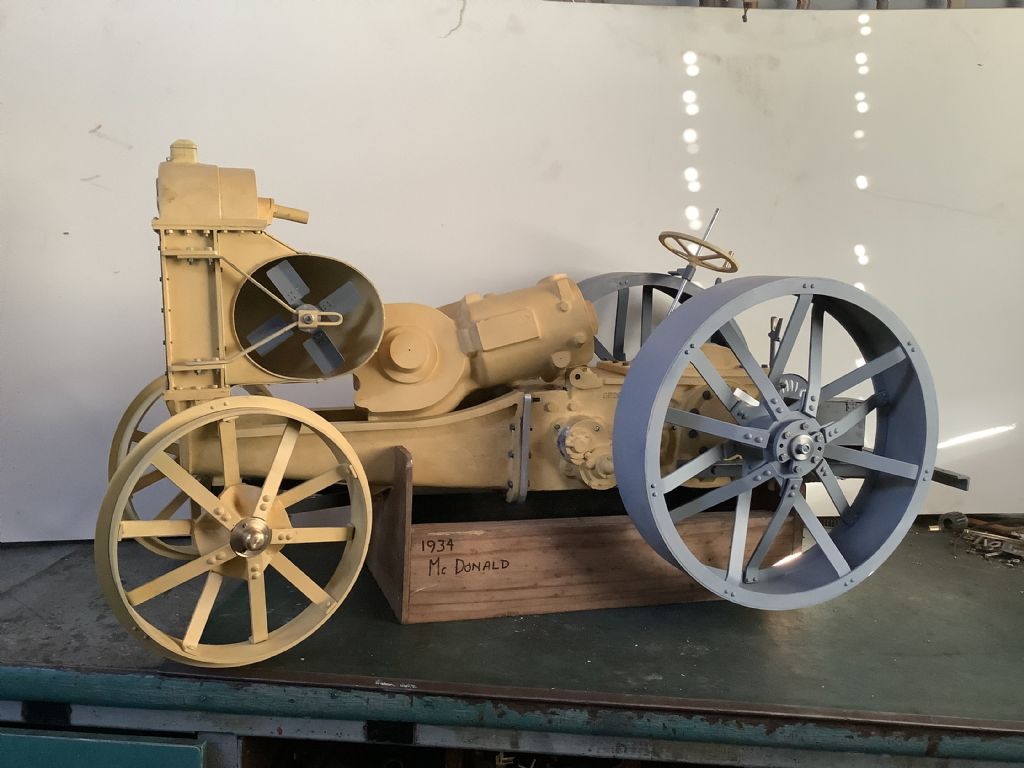
                      The Mc Donald now has four wheels but the steering has yet to be connected up. The screws used in the beam axle are temporary and will be replaced when I have made them. The next stage is to add the mudguards, fit the seat and bolt the tool boxes in place. I have to admit that I had to ask a friend to fusion weld the curved parts of the mudguard to the vertical parts as I don’t posses a TIG welder. On the full size tractor this joint has a curve and silver solder would not make a satisfactory job where as welding will give more “ meat” to the joint and can be filled to shape later. At this stage I do have to think about the engine as it forms an integral part of the machine and has many parts bolted to it and these can’t be made until the engine is in place ( or at least the external shape). These parts include the fuel tank, lubricator, air box and the drives to the gearbox and cooling fan. As a result there may seem to be a lull in proceedings but I will be busy with CAD for a few days.

                      Regards
                      Fred.43c577d0-9fd9-4ccd-876d-c24d657074dd.jpeg
                      05874d5f-b0cc-4f2d-ac55-081343d86efa.jpeg88e9d120-1852-422f-af65-e4b97408c36a.jpeg

                      #543261
                      Adrian R2
                      Participant
                        @adrianr2

                        Fascinating watching this come together and the thought that is going into each piece. A question on the front axle – why did you decide to make it from plate sections? Presumably you thought cast aluminium would not be strong enough around the pivot, but why not machine from solid steel?

                        Edited By Adrian R2 on 05/05/2021 10:46:21

                        #543269
                        Four stroke Fred
                        Participant
                          @fourstrokefred

                          Good Day Adrian and thanks for your interest in the tractor. I did think of casting the front axle beam in aluminium but thought that it would not be strong enough particularly around the king pin area. As I don’t mind embracing “ new” techniques and methods I decided these parts could be laser cut ,with me providing the DXF files to the laser cutter. The fabricated part is certainly strong enough and I think would have taken less time to make than machining from a solid lump of steel or aluminium. ( I don’t have CNC machines but wish I did). When designing and making parts such as this there are often many options with the final choice depending on the equipment, experience and time and as you get older the last factor is important !

                          Regards,

                          Fred.

                          .

                          #543639
                          Four stroke Fred
                          Participant
                            @fourstrokefred

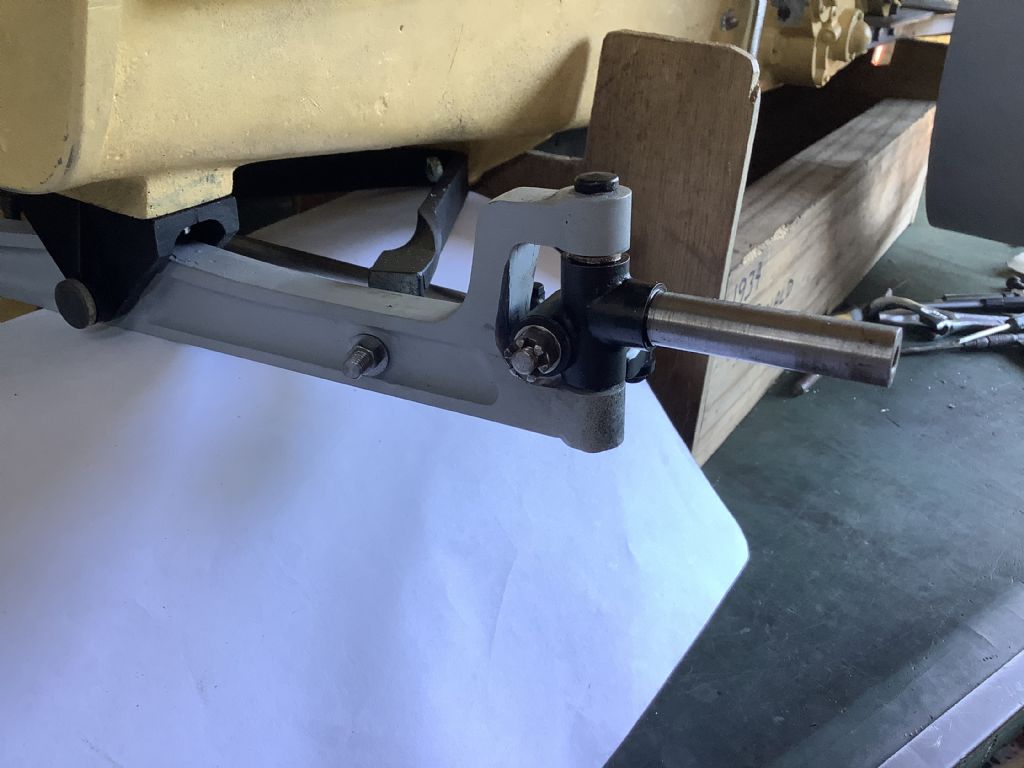
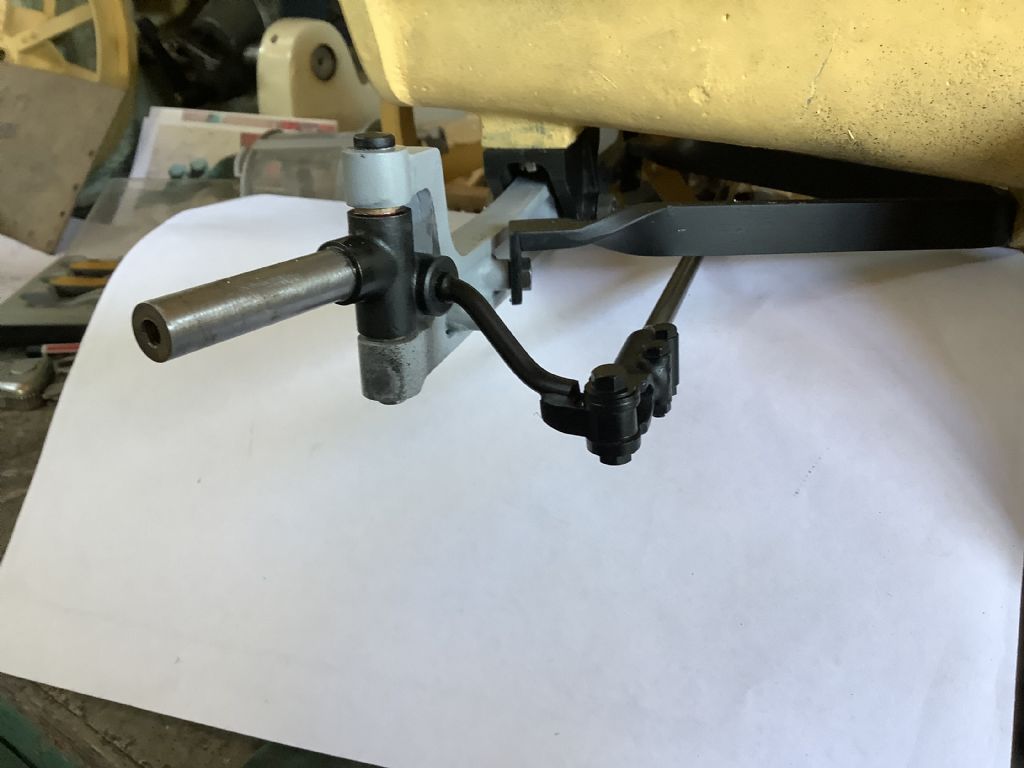
                            af16c073-0bf4-40ec-b706-780dea45d81f.jpegToday I made a start on the steering arms and the rod that makes the connection between these parts. It doesn’t look much for a days work but it all went together very well. The right hand arm is a little more complicated as it has a “U” shaped part that connects to the steering rod from the steering box.

                            Fred

                            ebd4c92f-5f49-4b2b-956b-6c4e5ae156e9.jpeg

                            #543644
                            Dominic Bramley
                            Participant
                              @dominicbramley60728

                              Still following and still enjoying!

                              Have been flicking back to page 1 to to compare the pictures of the full size machine. The model is amazingly accurate!

                              Regards

                              Dom

                              #543658
                              Four stroke Fred
                              Participant
                                @fourstrokefred

                                Good Day Dom,

                                I am lucky in that the full size tractor is not far from my home and so far I have spent 20 hours making sketches and taking photographs. If I am not sure how a part works or it’s dimensions I just pop down to the farm a round trip of 34 klm. I am very grateful to the local owner for allowing me to do this as with out these visits it would be difficult to gain the required information – he is also interested to see a model of his tractor being made!

                                Fred.

                                #545703
                                Four stroke Fred
                                Participant
                                  @fourstrokefred

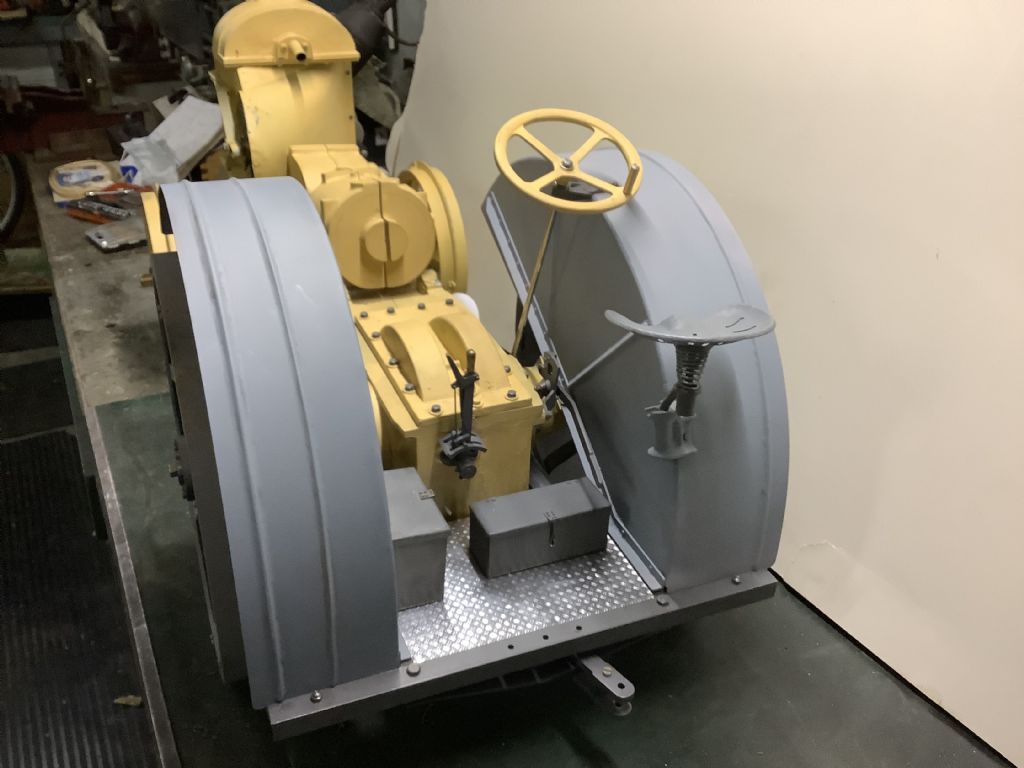
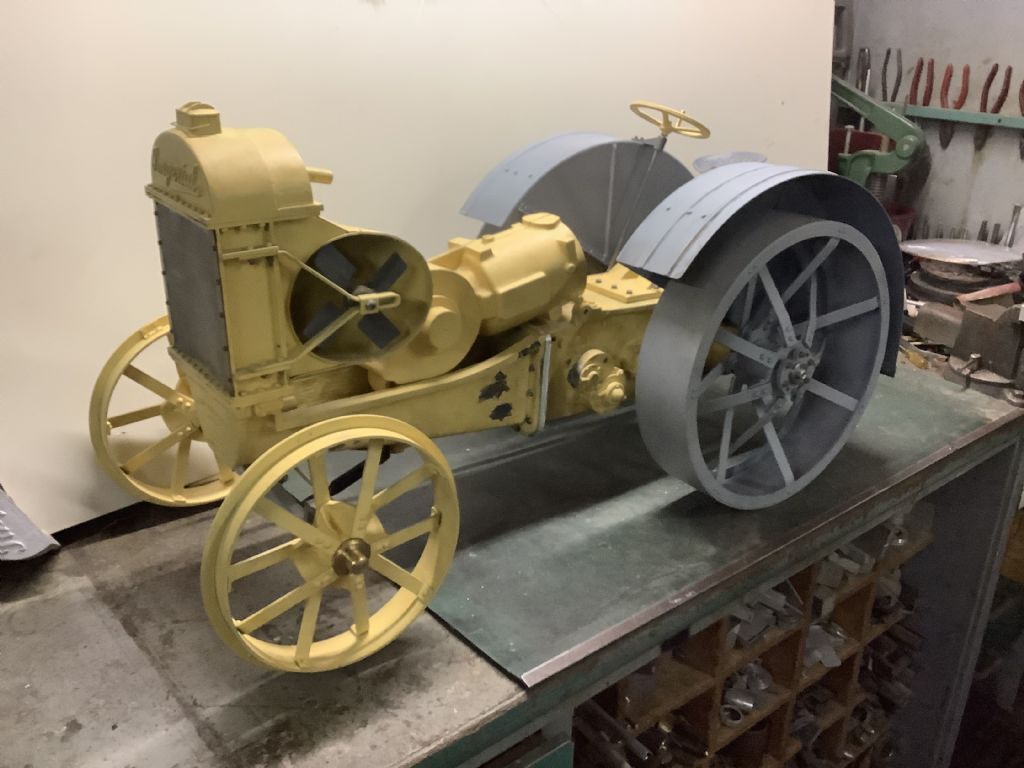
                                  49275ab4-4583-492e-860e-9030b9bb4eec.jpegThe tractor now has working steering, mudguards fitted and the tool boxes added to the platform. The mudguards took a while to prepare as before they were fitted the strengthening ribs had to be added and shaped. On the full size tractor these were rolled to shape and gave extra strength as the vibration from the single cylinder engine would have caused fatigue due to the vibration. On the model these ribs are made from “D” shaped brass and are held in place by rivets and solder. Before I start the engine I will make the oil pumping system and the bonnet. The oil system pumps oil to the main bearings and also the cylinder to lubricate the piston and is worked by an extension arm from the injector pump.

                                  Fred.88c9d308-74b7-4192-9b79-d3eda25952b6.jpeg

                                  #545713
                                  Michael Gilligan
                                  Participant
                                    @michaelgilligan61133

                                    Getting better all the time !!

                                    MichaelG.

                                    #545721
                                    Adrian R2
                                    Participant
                                      @adrianr2

                                      I'm intrigued by the operator controls (model and fullsize) – are there any pedals or is it all done by hand while standing on the platform like a traction engine? I can see gear level and another lever so is that brake or clutch and how did one start and stop it?

                                      Edited By Adrian R2 on 18/05/2021 10:24:23

                                      #545723
                                      Four stroke Fred
                                      Participant
                                        @fourstrokefred

                                        Good Day Adrian,

                                        The gear lever is at the rear of the gearbox and is in a “H” pattern (with H on its side). Forward right is reverse, forward left is low, back left is second gear and forward right is top. The throttle will be a hand control on the top left near the bonnet. The lever on the right is the clutch and there are no foot pedals and there are no brakes. Brakes were available on later models and consisted of a band brake of an extended shaft from the gearbox but the tractor that this model is scaled from does not have brakes. Perhaps it never went fast enough to warrant them !

                                        Fred.

                                        #545738
                                        Adrian R2
                                        Participant
                                          @adrianr2

                                          Thanks Fred, that makes my uncle's Field Marshall look positively modern. I guess there can't be any hills on the farm where it lives then? We have pretty flat land as well so brakes don't get used a lot but they are still nice to have when manouvering or hitching up.

                                          #547641
                                          Four stroke Fred
                                          Participant
                                            @fourstrokefred

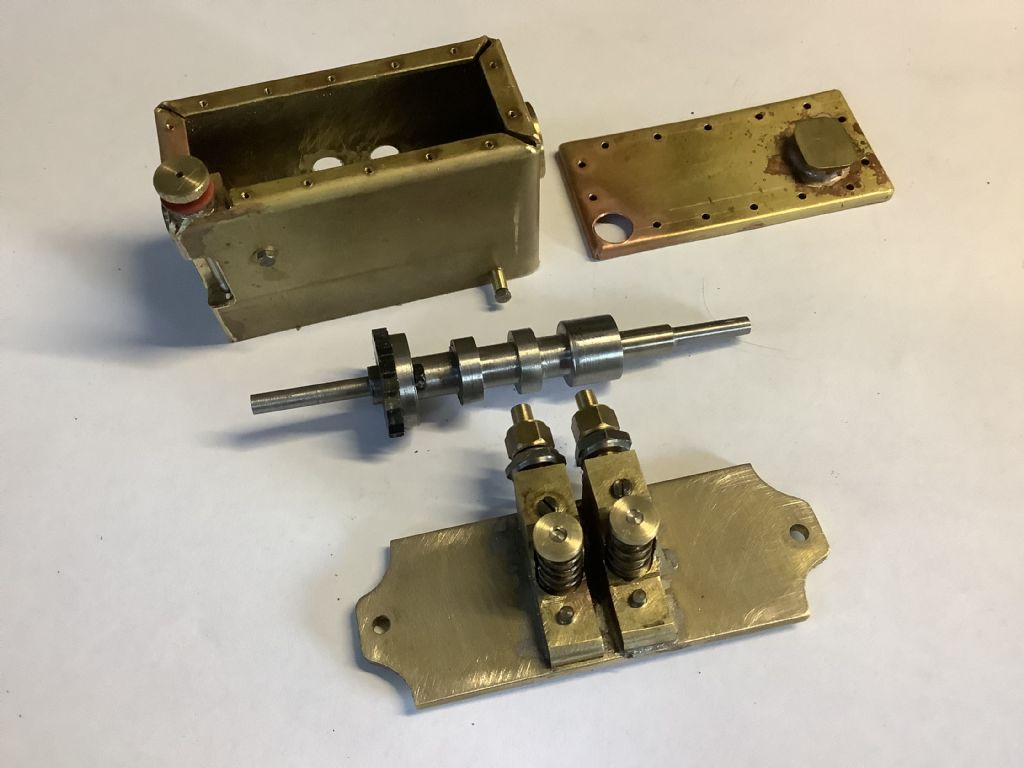
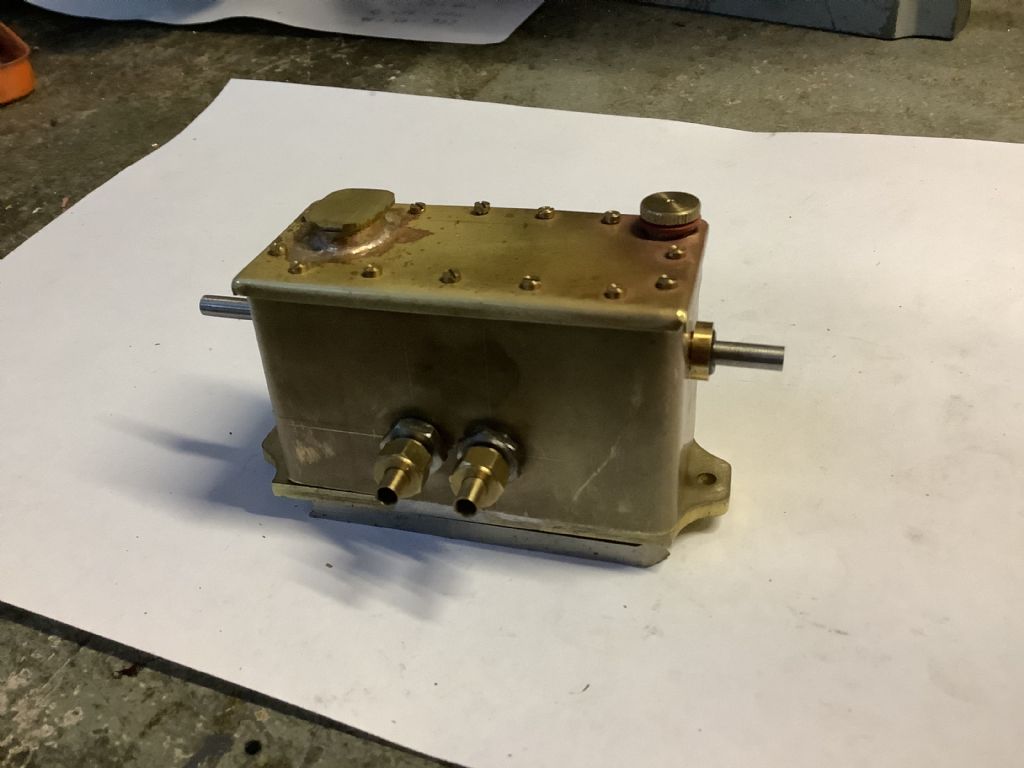
                                            6fea64a0-db97-4c6e-b09b-da54e3a355cc.jpegThe photographs show this weeks progress in the form of the oil tank and pump – small parts but took quite some time to make. The pump is driven by an extended arm from the injector mechanism. The tank contains two pumps with one feeding through the main bearing on the right hand side and the other feeds oil to the cylinder/ piston and then on to the small end of the con rod. The drive shaft is concentric to the camshaft with the drive being by a one way clutch and ratchet. The two pistons are 3.2mm dia and the stroke is 3.4mm and all the check valves are 2.5mm stainless steel balls. A sight glass is fitted to the front left hand corner to enable the oil level to be checked.
                                            Fred.

                                            88c05b15-6a6d-4c8a-9900-c93967494645.jpeg

                                            #547697
                                            Roger B
                                            Participant
                                              @rogerb61624

                                              Excellent smiley

                                              How many teeth are on the ratchet wheel, in other words what is the reduction from crankshaft speed? 3.2 x 3.4 mm is quite a lot of oil.

                                              #547739
                                              Four stroke Fred
                                              Participant
                                                @fourstrokefred

                                                Roger the present ratchet wheel has 19 teeth but if this needs to be increased it can be replaced. The lever that will be attached to the drive shaft is adjustable and will control the amount of movement on the clutch/ ratchet. It is hoped that the engine can be made to run at quite low realistic speeds and give sounds that are characteristic of the full size tractor.

                                                Fred

                                                #547748
                                                Four stroke Fred
                                                Participant
                                                  @fourstrokefred

                                                  I have now assembled the oil pumps and checked that all is well and that they work. If they pump to much oil I can either make a finer ratchet wheel with more teeth or reduce the height of the cam and in doing so reduce the stroke of the piston but this can be done when the engine is made and hopefully running.

                                                  Fred.

                                                  #549397
                                                  Four stroke Fred
                                                  Participant
                                                    @fourstrokefred

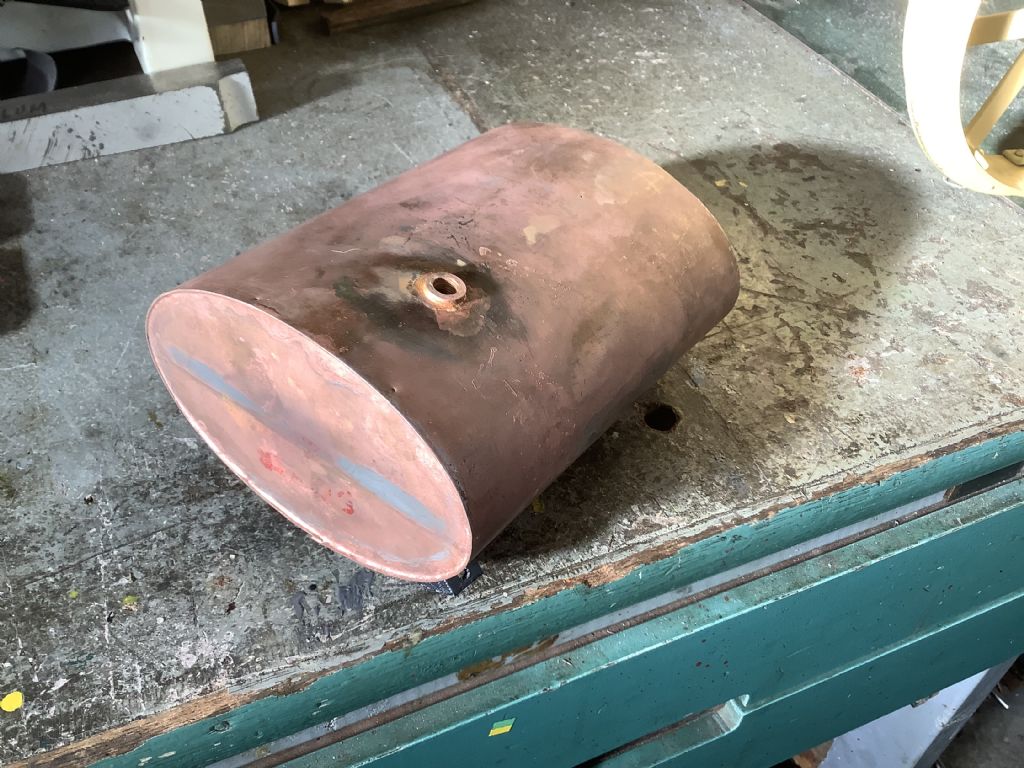
                                                    10c01e46-09ea-485c-8f3b-7166dfbfbaad.jpegWinter has arrived with early morning temperatures down as low as 3.2C and for us that is cold and as a result it’s less conducive to be in the workshop handling cold lumps of metal and machines. The fuel tank is the last part that can be made before the engine as all other parts are attached or require the engine to be in place to check measurements. The fuel tank is made from steel despite its coppery appearance, this being due to being dipped in my acid bath to clean off the silver solder flux. The top water cooling pipe from the radiator passes through the fuel tank and has yet to be fitted as is the filler cap. I am now in the process of working on the engine design and checking for the availability of suitable bearings – needle rollers for the connecting rod ends and ball races for the main bearings. The next part may take some time to finalise as I am still deciding if the crankcase / cylinder barrel will be a single casting or split in to two parts for ease of casting and machining. There is plenty to think about and also I need to check the engine on the full size tractor for the final details.
                                                    Fred.

                                                    #549406
                                                    Four stroke Fred
                                                    Participant
                                                      @fourstrokefred

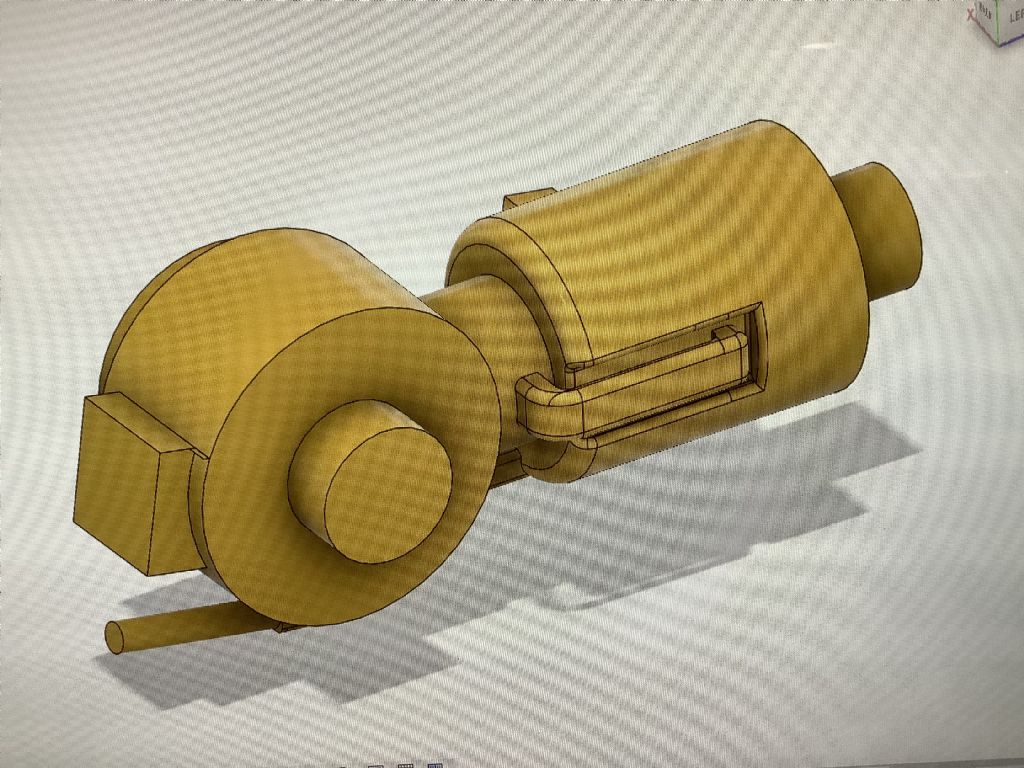
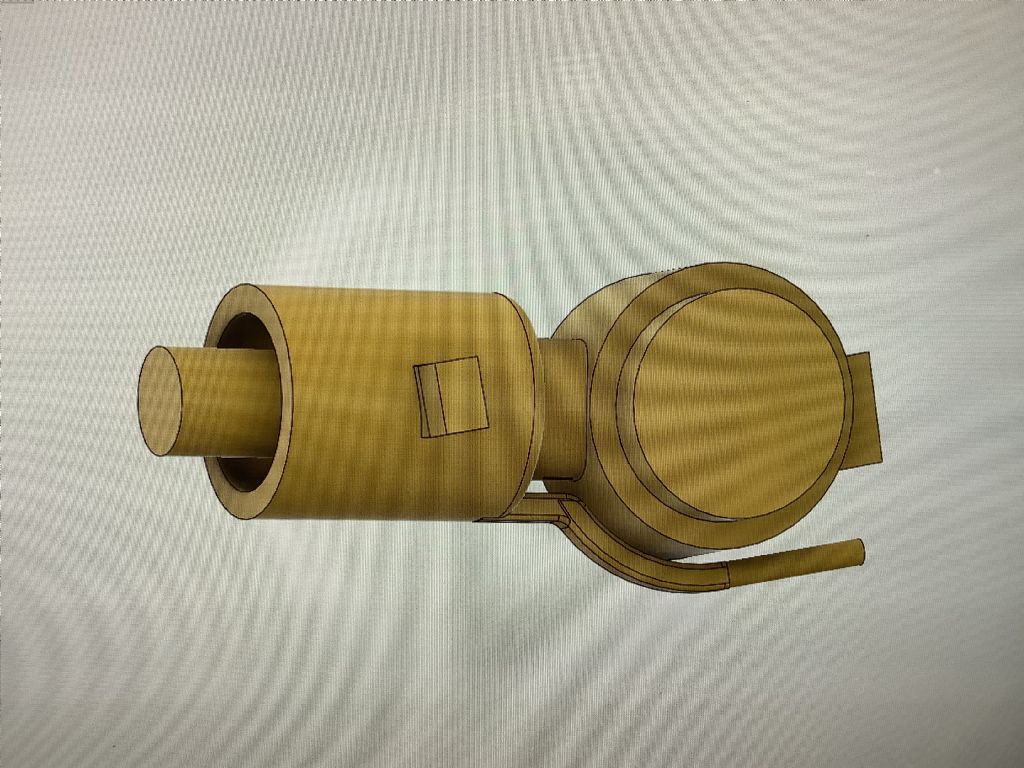
                                                      d4ff746d-2123-4064-b252-fff3fb1b7c37.jpeg3afe1007-9f70-48ef-a6af-94b70182238c.jpegThis is what I hope to achieve in sand as this is the core for the engine and all I have to do now is make it ! The strobe effect is from the monitor but I thought it would be interesting to see the shape needed to make the engine hollow. The shape at the bottom is the water inlet and the top picture shows the transfer passage to the cylinder. I did consider making the casting in two parts but this proved to be difficult. The transfer passage will be made as a seperate unit and glued into place. 3D CAD is very good at helping to solve problems and visualise what the finished object has to look like. All I want now is a magic wand to make it a reality!
                                                      Fred

                                                    Viewing 25 posts - 101 through 125 (of 359 total)
                                                    • Please log in to reply to this topic. Registering is free and easy using the links on the menu at the top of this page.

                                                    Advert

                                                    Latest Replies

                                                    Viewing 25 topics - 1 through 25 (of 25 total)
                                                    Viewing 25 topics - 1 through 25 (of 25 total)

                                                    View full reply list.

                                                    Advert

                                                    Newsletter Sign-up