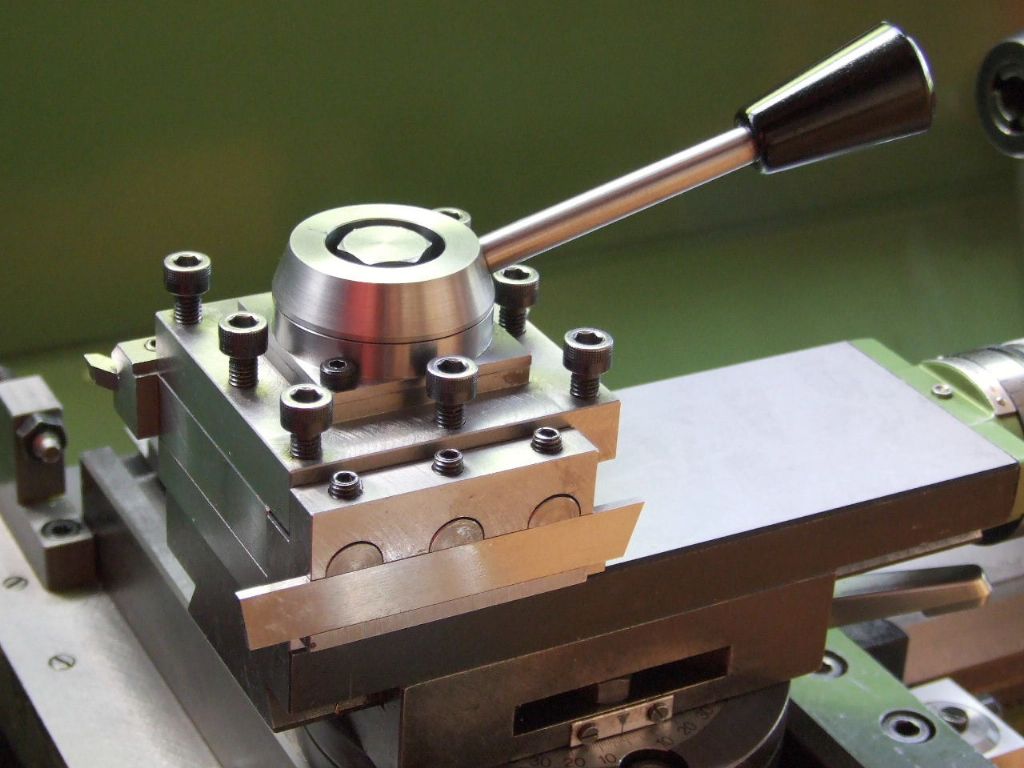
The GHT type rear toolpost is detailed with drawings in L H Sparey's book The Amateurs Lathe. Not really a beginner project though. More intermediate level.
For perhaps a little more money why not get GHT'S Workshop Manual?
There is an earlier version in Ian Bradley's Amateur's Workshop.
Both GHT and IB give detailed instructions and drawings.
AJReeves also supply drawings & castings for a few different R/Toolposts inc. the GHT ones.
Might be worth checking how the centre-height, and dimensions of cross-slide & slots in your (is it a?) Portass compare with those of the Myford / Drummond machines that most of the kits were aimed at – if they are not the same, be prepared to have to 'make it to fit', some castings might be more suitable than others – by the same token, a ready-made RTP for a Myford might not fit your Portass – anyone know?
The photo posted by Martin Kyte is not the GHT design. It may be the base casting, or a machined block to the same dimensions, but the turret is a quick change tool-post of either a OEM Dickson or a clone. If you refer to GHT's information and drawings you will find that it has an indexed split turret that clamps the two parting blades into two angled grooves. It is difficult, requiring very accurate measurement and machining, to get the grooves in a position whereby the blades' tips arrive at centre height when protruding a useful distance from the turret. Any in-accuracy leads to the blades not protruding far enough to be useful or too far to be useless. The reason for the angle is to obviate the need to grind any rake on the blades which reduces their thickness behind the tip. I would suggest that this is a quite a negative aspect of the design as, if a rake is ground on the blade which is then thinner behind the tip, this relieves any tendency to rub against the sides of the parting groove and allows for a more free egress of swarf, although you could argue that this gap is an opportunity for swarf to jam between the work and blade or that the thinning of the blade weakens it. Perhaps GHT had this in mind when considering his design criteria.
I only know what works for me and it is not the GHT design of rear parting tool-post. BTW, my Myford OEM tool-post has two tee-slot securing bolts, so there must be variations in design just as there was with the early and later Myford vertical slide.
The photo posted by Martin Kyte is not the GHT design.
Edited By Chris Crew on 06/07/2022 08:17:58
I never said it was. It was a response to the post that said the Myford version had only one hold down bolt. I bought mine from Myfords and not eBay or RDG.
The best parting set up I have used is the T section parting tool blade available from Eccentric Engineering (and others) held in their own holder designed for the job. Works just fine in the front toolpost, right way up. Much better than the conventional tapered type parting blades. And it can be held upside down in a rear toolpost if desired. Highly recommended.
The GHT type rear toolpost is detailed with drawings in L H Sparey's book The Amateurs Lathe. Not really a beginner project though. More intermediate level.
Correction: It is actually in The Amateur's WORKSHOP by Ian Bradley. And of course in GH Thomas's book too. Sparey's design is a single-bolt square pillar bit more like the factory Myford item.
The Bradley/Thomas item comes in several iterations for long and short cross slides. The long slide version has three hold-down bolts, two smaller ones on the "toe" and the large central bolt through the toolpost itself. Short slide and Drummond M-Type model has just the two smaller bolts in the toe and hangs off the back of the cross slide as in David George's photo above.
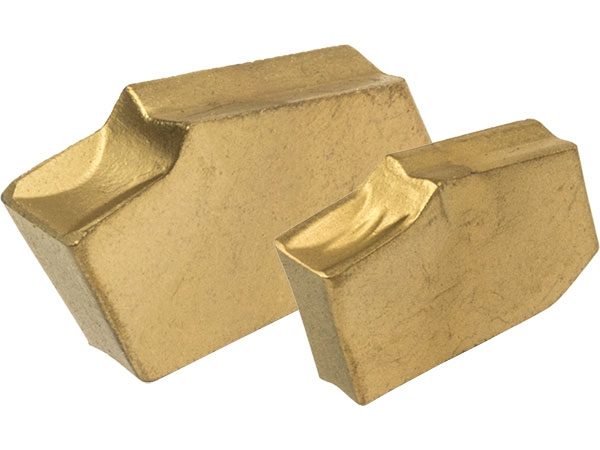
There seems to be nothing much (except the taper) to keep the carbide tip in place, and nothing to stop the tip being driven deeper into the tapered recess.
The front rake angle is the killer as regards a problem with digging in.
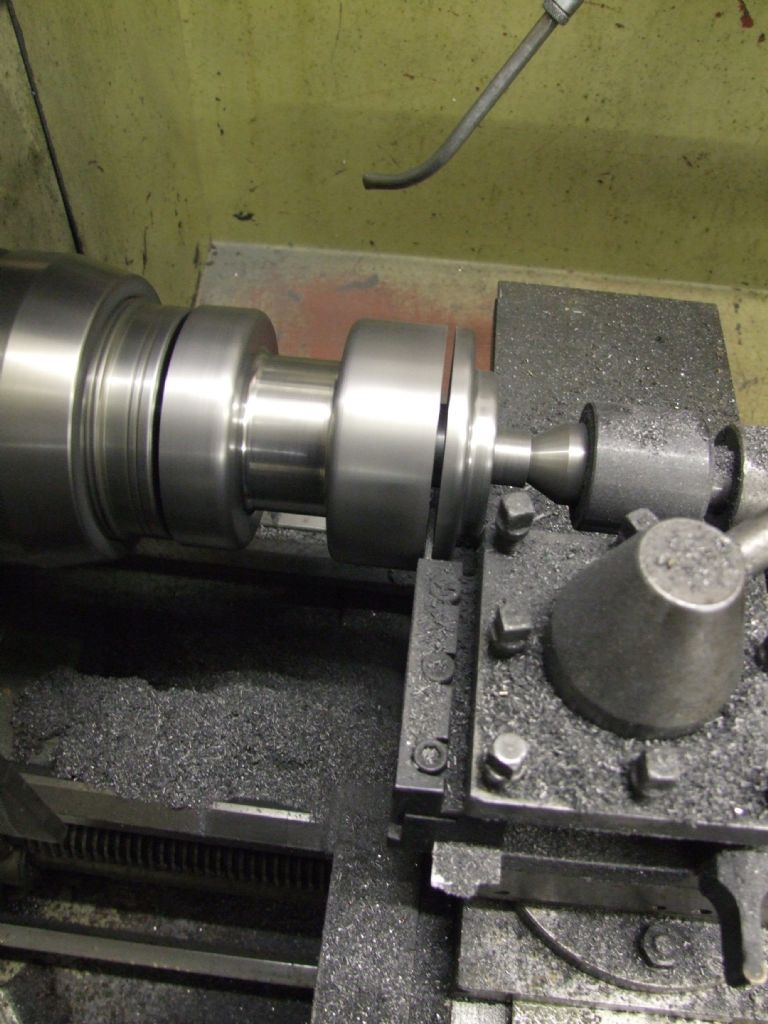
This is the blade holder I made for my Emco Maximat Super 11 lathe. This was the second blade used in 40+ years. The blade is 13 x 2 mm section, it has a dovetail section and is only ground on the front at 10 degrees.
The section of the blade means the swarf is turned on its side as it leaves the cut and it never caused a jam. I now use an 8 x 1,5 mm on my Emco compact 5, with the same style holder. Parting off is carried out with the carriage locked and at normal turning speeds.
Might be worth checking how the centre-height, and dimensions of cross-slide & slots in your (is it a?) Portass compare with those of the Myford / Drummond machines that most of the kits were aimed at
On my Portass PD5 the centre is about 48.5mm above the top of the cross slide. How does this compare with a Myford?
I'm not sure I need a casting for the rear toolpost. Can't I just machine it from a piece of 50mm square mild steel?
Myford is about 2-1/16" from cross slide to centre height. Yes you can make a rear toolpost from a square block with a single bolt going right through it to the T slot below. Plenty like that. It relies on the cross slide being long enough for the block to be out of the way during normal turning. Otherwise you can quickly slip it on and off as needed if there only the one bolt to loosen.
There seems to be nothing much (except the taper) to keep the carbide tip in place, and nothing to stop the tip being driven deeper into the tapered recess.
Thanks – Rowan
I use these insert blades on my "large" lathe and the small lathe and they are OK. The higher the blade, the more rigid it is. I use a 26 and 32 mm high blade. My inserts (SP200 from Korloy) are 2 mm wide. After the first parting job, the insert is fixated and you can (re)adjust the tool height.
On steel, I don't part off the last 0.5 mm to avoid tool tip breakage.
I use lubrication (not cooling) on all parting jobs.
I run at 800 RPM, CD 0.2 mm/rev (power feed). I would like to run faster but than the lubrication splashes around.
There seems to be nothing much (except the taper) to keep the carbide tip in place, and nothing to stop the tip being driven deeper into the tapered recess.
Thanks – Rowan
All the parting tools I saw in industry were as per your link so yes satisfactory.
I don't think it is a good idea to learn parting using an insert blade. You will break a lot of inserts before you know how to do it. In the end you will spend a lot of money replacing these broken inserts.
Start by a T-shape or Tapered HSS tool. Let it stick out no more than 10 mm to start with. To keep it sharp, you only have to grind the tip.
Get a HSS blade as high as possible (more rigid). Thin blades ( my smallest is 1.2 mm 1/2" high) require less cutting force and are more suitable for a small lathe.
Posted by Rowan Sylvester-Bradley on 06/07/2022 11:02:09:
…nothing to stop the tip being driven deeper into the tapered recess.
The tapered recess is just that, tapered not parallel. So once in place the insert does not move any further. I gently tap a new insert in place with a nylon hammer. I use 3mm inserts, but I use a relatively large industrial lathe:
On a smaller lathe I'd use a narrower insert, probably 2mm if you go the insert route, narrower still if using HSS.
The front rake angle is the killer as regards a problem with digging in.
This is the blade holder I made for my Emco Maximat Super 11 lathe. This was the second blade used in 40+ years. The blade is 13 x 2 mm section, it has a dovetail section and is only ground on the front at 10 degrees.
The section of the blade means the swarf is turned on its side as it leaves the cut and it never caused a jam. I now use an 8 x 1,5 mm on my Emco compact 5, with the same style holder. Parting off is carried out with the carriage locked and at normal turning speeds.
I hope these notes help,
Regards
Gray,
Hi Gray, I hope you are well? I'm slightly puzzled, I understand the 10 degrees front rake but what about the top of the parting blade, is its face parallel with the lathe bed but no back rake angle?
I use Zero top rake on the parting tool in the back toolpost. Perhaps that accounts for the very few dig ins experienced.. The blade was secondhand when I was given it, when I bought the ML7 back in the early 80s. It has never broken, and has a lot of life left, yet, unlike tools fitted in the front post, and with positive rake.
No top rake, decreased forces tending to drag the tool into the work?
I don't think it is a good idea to learn parting using an insert blade. You will break a lot of inserts before you know how to do it. In the end you will spend a lot of money replacing these broken inserts.
…
Good luck
Not my experience, at least with the NCIH blade holder Rowan asked about! GTN2 inserts are stubby bruisers, quite hard to break even in my clumsy paws.
The secret of parting off seems to be rigidity and a steady feed. Quite easy on a well-adjusted big fast lathe with a Gibraltar rear tool-post and auto-feed. Much harder on a small slow slightly worn lathe, fitted with blunt carbide inserts overhung on a bendy QTCP that are then fed jerkily into the job by an over-cautious human.
And of course the edge has to be straight and at the right height, RPM and feed both correct, swarf cleared from the slot immediately, the cut well lubed, and care taken the edges don't pinch the tool as it approaches the centre.