Making a rotary broaching tool

Advert

Making a rotary broaching tool

Home Forums Workshop Tools and Tooling Making a rotary broaching tool

Viewing 11 posts - 1 through 11 (of 11 total)
  • Author
    Posts
  • #494329
    John Hinkley
    Participant
      @johnhinkley26699

      I recently decided to replace my aged revolving centre (with a simple cone point) with one fitted with a modified double-cone to give more legroom for lathe tooling. I pondered what to do with the old centre and remembered reading about a rotary broaching tool on Mike Cox's web site, here .

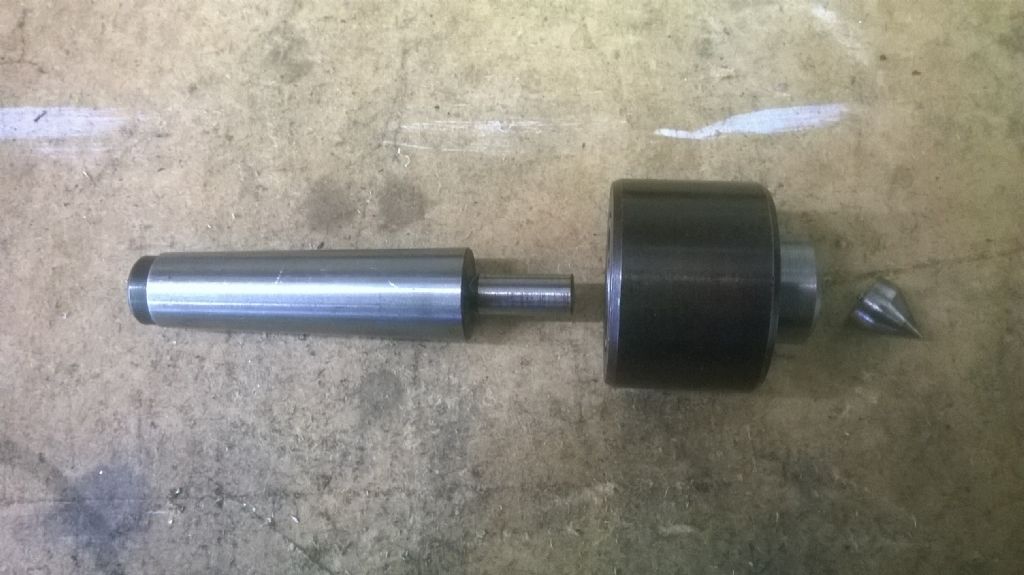
      It occurred to me that instead of the broaching bit rotating in the mounting block, I could "re-purpose" the old revolving centre to achieve the same result. Chucking the centre in the lathe, I proceeded to remove the point, which turned out not to be very hard at all. I then centre-drilled the resulting flat end 6mm and was then able to press out the Morse taper, leaving me with a small collection of pieces:

      Component parts

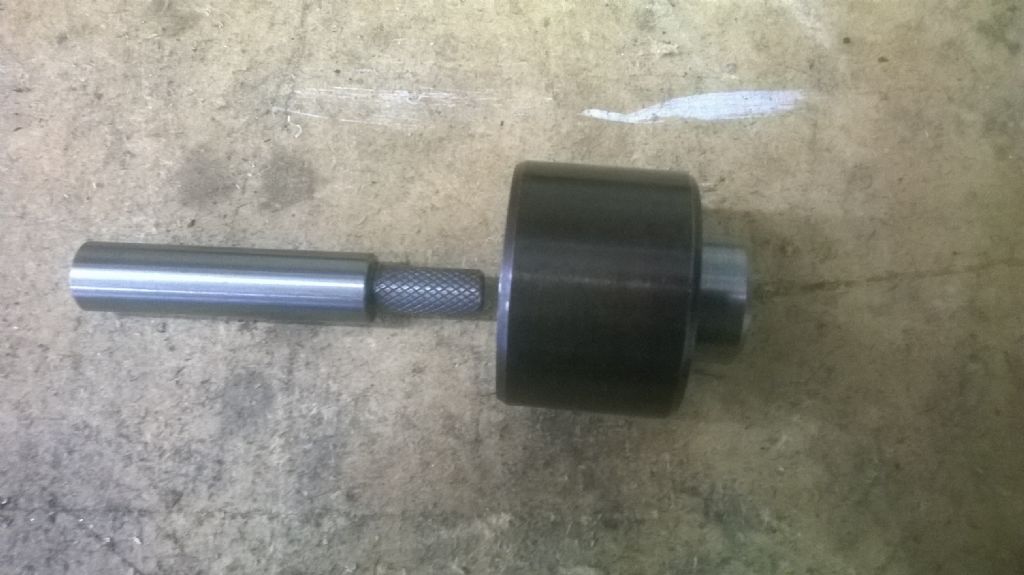
      Scavenging around the spares boxes turned up a piece of 12mm silver steel which was turned to suitable dimensions to make a new spindle.

      New spindle parts

      A further rummage located a lump of mild steel with which I can make the toolpost mounting. Lunch intervened at this point, so I'll carry on at a later juncture.

      John

      (With grateful acknowledgement to Mike Cox for the inspiration for this project. I would also like to add that it is no criticism of his original design, just a slightly different approach to solving the rotary part of the tool while re-using an otherwise redundant bit of kit.)

      Advert
      #19934
      John Hinkley
      Participant
        @johnhinkley26699
        #494604
        John Hinkley
        Participant
          @johnhinkley26699

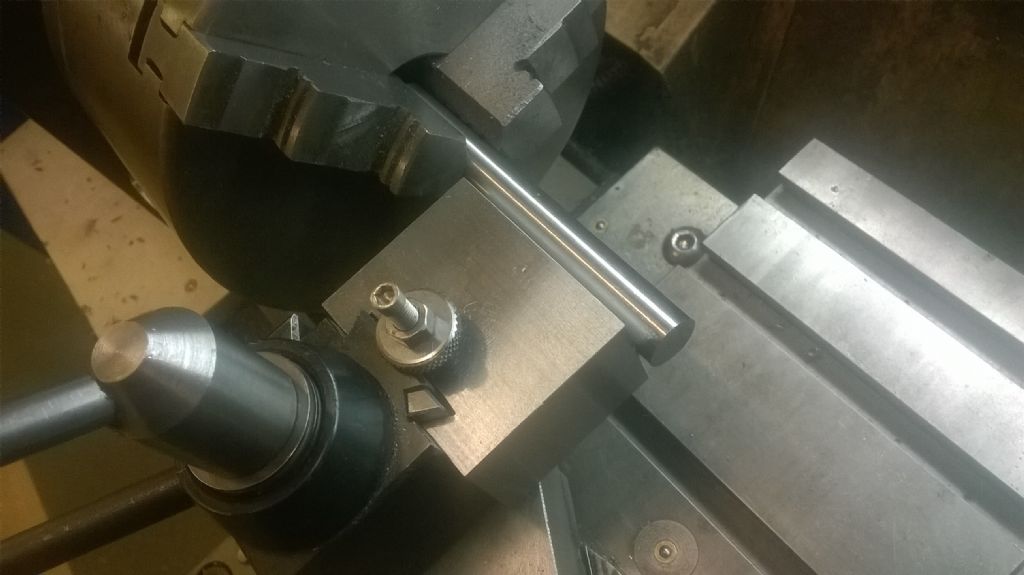
          Further, steady progress today. I've finished machining the dovetail in the mounting block, drilled for the height adjustment screw and made the height collar. Mounted on the QCTP, it was aligned with the lathe centreline, the outer side being parallel to the piece of silver steel rod used for the purpose.

          Aligning the block to lathe centreline

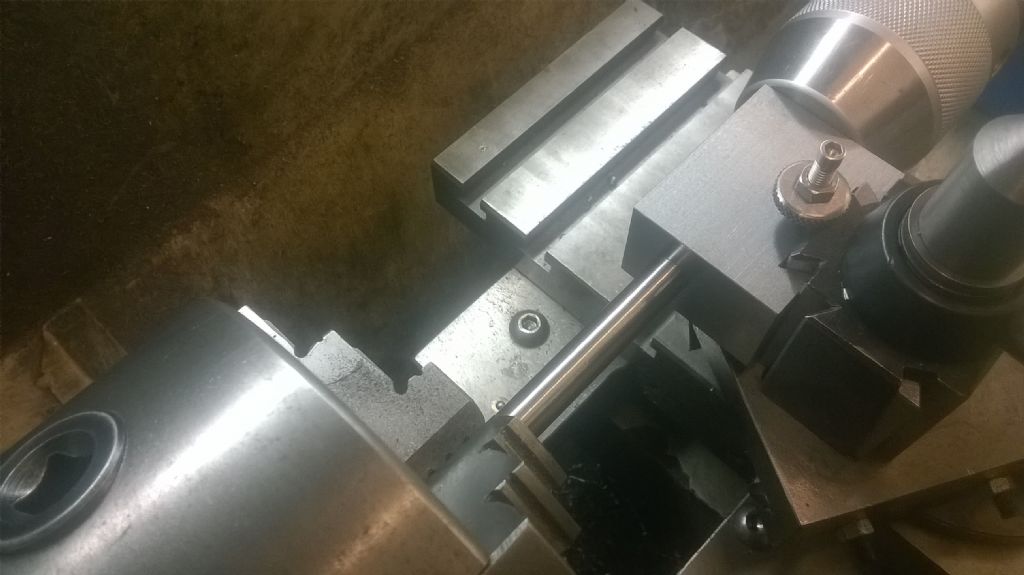
          Next job will be to drill the hole for the spindle. To that end, I set it up as below. With one hand, I'll be moving the cross slide, with another I'll be providing the thrust with the tailstock and with my other hand applying lubricant!

          This is the set-up I'll be using, though with a drill, or series of drills, not a piece of drill rod.

          Drill set up

          Tomorrow will see me doing the drilling and I think I'll put in a grub screw to retain the spindle in place and maybe add some sort of thrust bearing. The design is evolving as it progresses.

          When that is complete, I'll need to for an angle on the outer and rear faces by 1° using the surface grinder to obtain the angle of dangle for the cutter.

          But for now, it's dinner time!

          John

          #494849
          John Hinkley
          Participant
            @johnhinkley26699

            Yesterday I did do the drilling and then gardening duties interfered. Hedge trimmer battery recharged overnight and finished the hedge this morning, so moved on to grinding the side and rear face of the tool block to give the 1° faces such that the cutter is presented to the workpiece at an angle and allow the tailstock to abut the rear face perpendicularly and not try to skew the block as pressure is applied.

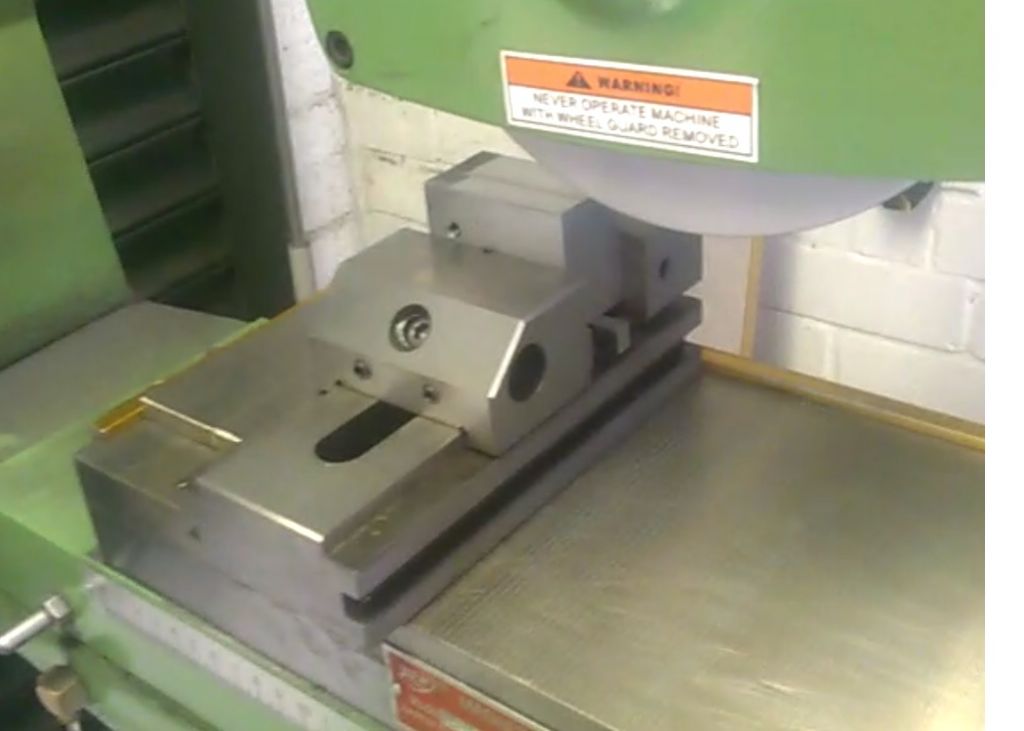
            Grinding the block side face:

            Grinding the side 1?

            It's slightly out of focus as its a still from a hand-held video shot on a phone, but you can see the set up I used. Basically just a one degree angle block sitting on the base of the vice. I understand that the exact angle is not hyper-critical, it just has to be less that the relief angle ground on the cutter.

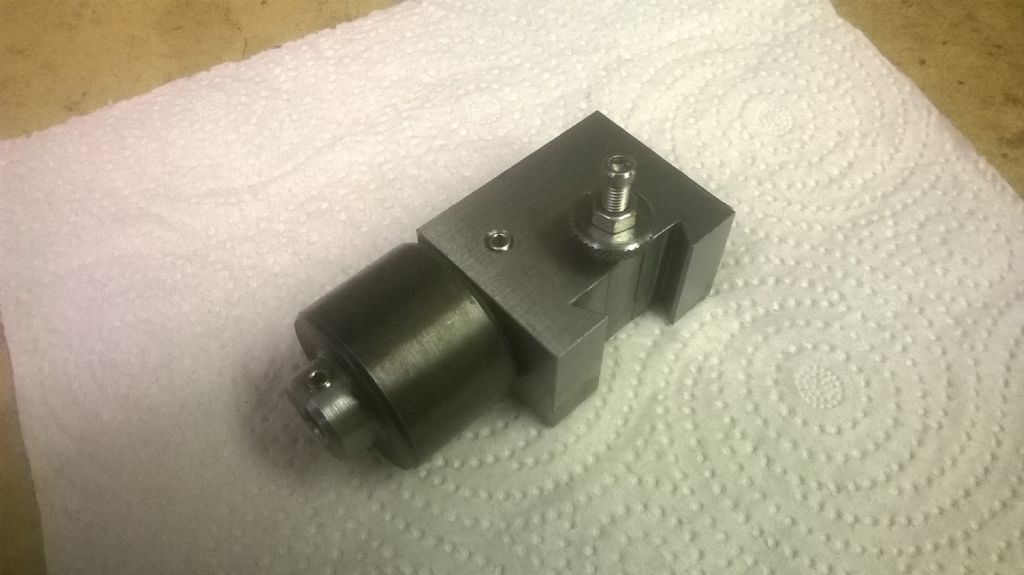
            All ground and assembled, waiting for the cutter(s) to be made:

            Finished tool

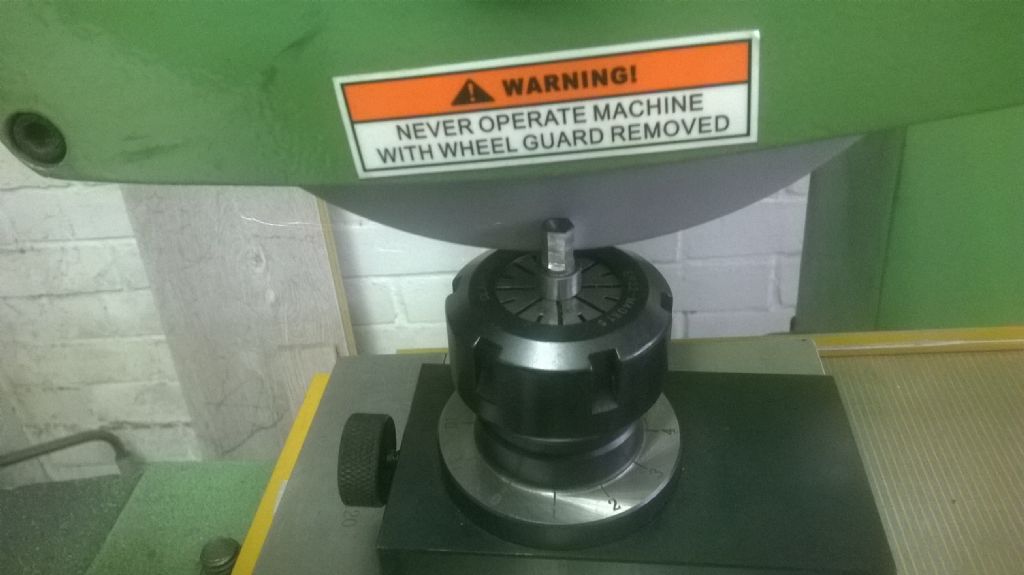
            That will have to wait until tomorrow as I've a hospital appointment to attend this afternoon. That'll also give me some time to mull over the machining of said cutter and its subsequent grinding. I have an idea to use my Stevenson's ER32 sharpening fixture to make use of the built-in angles and indexing facilities that will provide. I intend to make just one cutter at first, and this will also be a rare foray into heat treatment. I just hope the plumber's blowtorch is up to the job.

            John

            P.S. Gawd, I hope it works after all this!

            #494891
            John Hinkley
            Participant
              @johnhinkley26699

              Hospital appointment later than I thought it was!

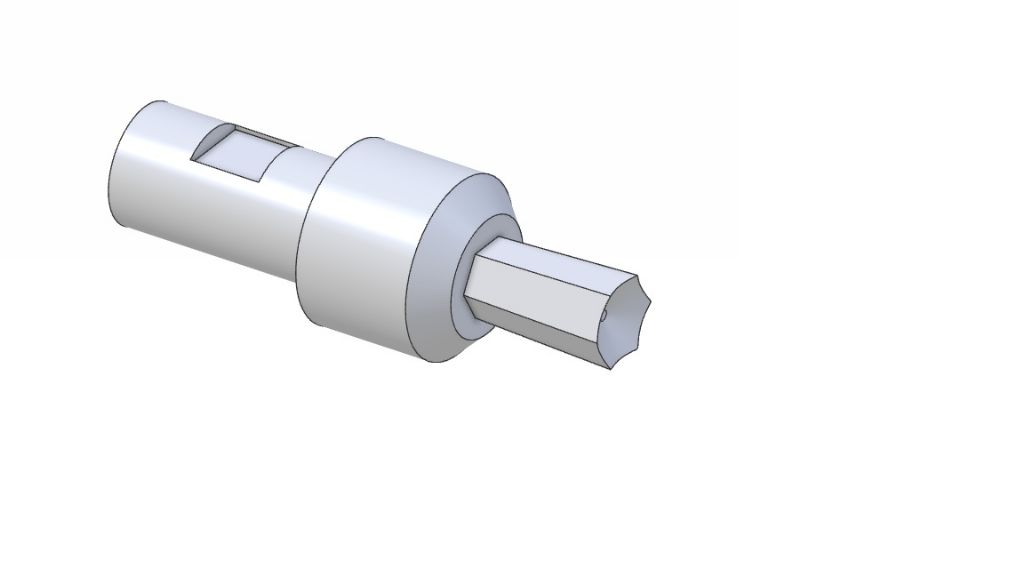
              I've knocked up an Alibre Atom 3D image of the cutter. Hopefully make one in silver steel tomorrow.

              Cutter 3d image

              This to make a cutter 6mm tip to tip diameter, for scale.

              John

              #494903
              Roderick Jenkins
              Participant
                @roderickjenkins93242

                Hi John,

                I would put a good radius at the root of the hexagon. I didn't on my first attempt and it snapped off at the transition.

                HTH,

                Rod

                #494921
                John Hinkley
                Participant
                  @johnhinkley26699

                  Good point, Rod. I'll give some thought to how I can achieve that. I think I've got a small hss radius tool somewhere that I made for a job I did for a friend a couple of years ago.

                  John

                  #495096
                  John Hinkley
                  Participant
                    @johnhinkley26699

                    Latest instalment:

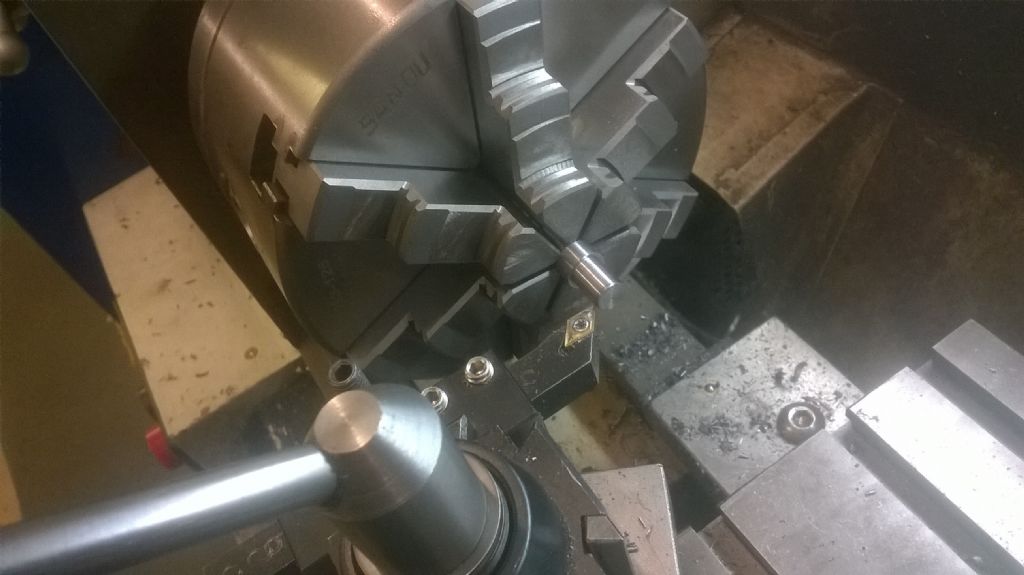
                    I decided to try out my latest extravagance – a 6-jaw chuck – to hold the stock for the cutter tool blank.

                    Turning the cutter blank

                    I just screwed it to the backplate with no particular attempt to true it up and the TIR was minimal – about 0.02mm at 25mm from the chuck jaws. Pretty darned good for a chuck that cost me a gnat's under a hundred quid brand new including postage! One of my better buys! Anyway, back to the plot:

                    I eventually settled on using a Stevenson's milling cutter fixture to hold and index the cutter. The standard angled faces meant that there was a ready-made 2° angle available for the side relief on the cutter.

                    Grinding in progress:

                    Grinding the cutter

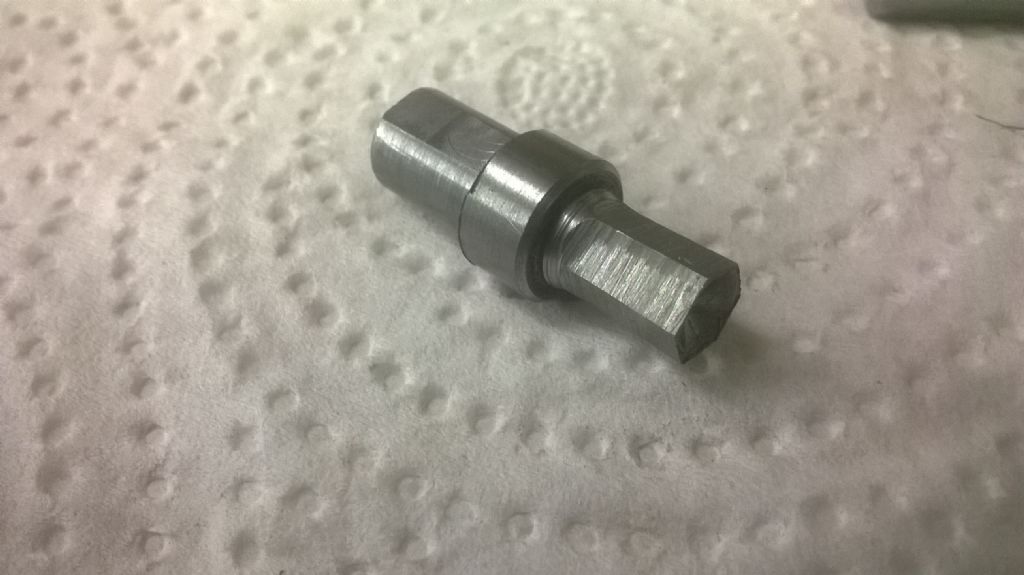
                    The finished cutter tool:

                    Cutter

                    Finish on the ground faces wasn't up to much using the white oxide wheel. I'll try using a diamond wheel next time.

                    I couldn't find my radius tool (see above), so I freehanded it (badly) to partially stress relieve at the join. Time will tell if I've done it well enough.

                    My first real attempt at heat treating – hardening and tempering – tomorrow, followed by a gentle introduction to broaching in brass to start with.

                    John

                    #495281
                    John Hinkley
                    Participant
                      @johnhinkley26699

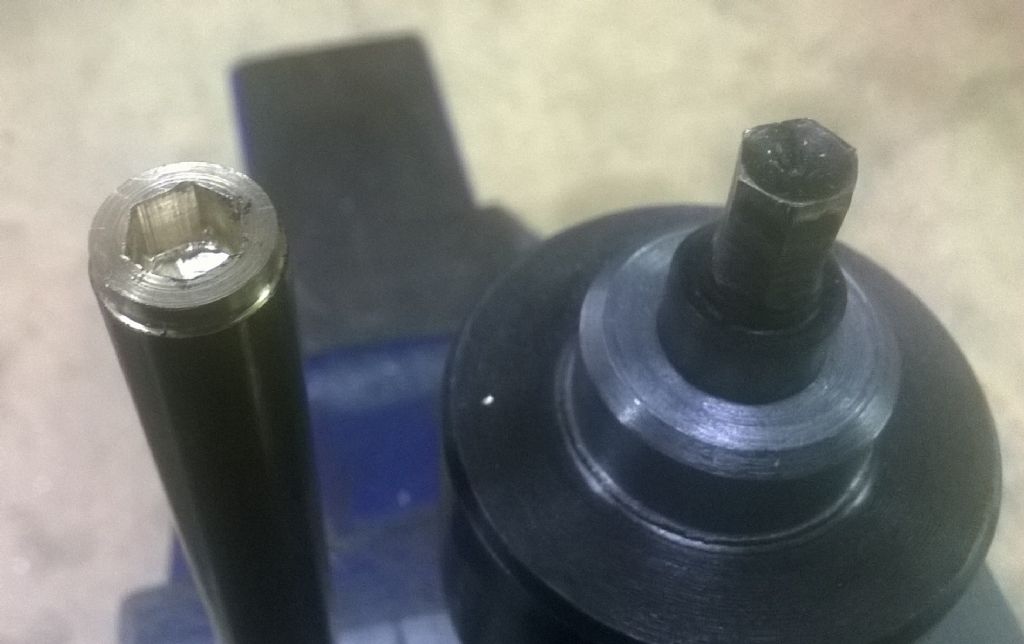
                      I watched a couple of YouTube videos about hardening and tempering as well as re-reading Mike Cox's how-to on his web site. Fired up the blowlamp (a Butane-fuelled one) and got the broach tool as hot as I could. Nowhere near as cherry as I thought it should be, but quenched it anyway, Straw coloured also eluded me for the tempering so I decided to try it out, anyway. Nothing to lose, I thought. The result is shown below:

                      The end product

                      Not a complete failure, but, as you can see from the state of the broaching 'bit', my efforts to harden and temper it were, shall we say, "less than optimal"! Perhaps I should have invested in a considerably bigger blowtorch rather than the frippery of the 6-jaw chuck! Doubtless the latter will get an awful lot more use than the former, however.

                      Despite the slightly disappointing result, I'm quite pleased with the outcome and will continue to experiment with other shapes and sizes of cutters from time to time and try to improve my heat treatment skills, or lack thereof.

                      Hope you've found this little project of mildly amusing interest which, by the way, I put in its own thread so as not to clutter up the "Workshop progress" thread and make it easier to ignore for those not into this sort of thing.

                      John

                      #495292
                      Baz
                      Participant
                        @baz89810

                        It looks from your photos as though you have a surface grinder, why don’t you make your broaching cutter out of HSS. I made the Hemmingway rotary broaching tool quite a few years ago and have made HSS broaching tools down to one millimetre square with great success, one way of using up broken centre drills. I silver solder the centre drill into a piece of 8mm silver steel before grinding to size.

                        #495295
                        John Hinkley
                        Participant
                          @johnhinkley26699

                          Thanks, Baz. I think I've got a blunt hss cutter or ten lying around in the drawer. I'll mount the diamond wheel on the surface grinder and have a play with that. Might try some carbide, too.

                          John

                        Viewing 11 posts - 1 through 11 (of 11 total)
                        • Please log in to reply to this topic. Registering is free and easy using the links on the menu at the top of this page.

                        Advert

                        Latest Replies

                        Viewing 25 topics - 1 through 25 (of 25 total)
                        Viewing 25 topics - 1 through 25 (of 25 total)

                        View full reply list.

                        Advert

                        Newsletter Sign-up