Home produced cutters

Advert

Home produced cutters

Home Forums I/C Engines Home produced cutters

Viewing 13 posts - 1 through 13 (of 13 total)
  • Author
    Posts
  • #59685
    Ramon Wilson
    Participant
      @ramonwilson3

      Hi all,

      I had hoped by now to have been well into another pair of scaled up diesel engines but thanks to a timely visit from  fellow forum member Bill Starling  I have recently been well and truly ‘side tracked’ into tackling something I have been putting off for far too long.
       
      In 1992! so my notes say I began a Bentley BR2 rotary engine. I knew nothing about petrol engines – still don’t – but did fancy it as a ‘machining project’ Intermittent work on it until 1996 saw all the major components made with the cylinder heads rough turned with the lower faces, combustion chambers and valve boxes finished. I packed it away for some reason with the quip in my notes “back soon”  Here we are fourteen years later and Bill’s visit provided the impetus to do something.
       
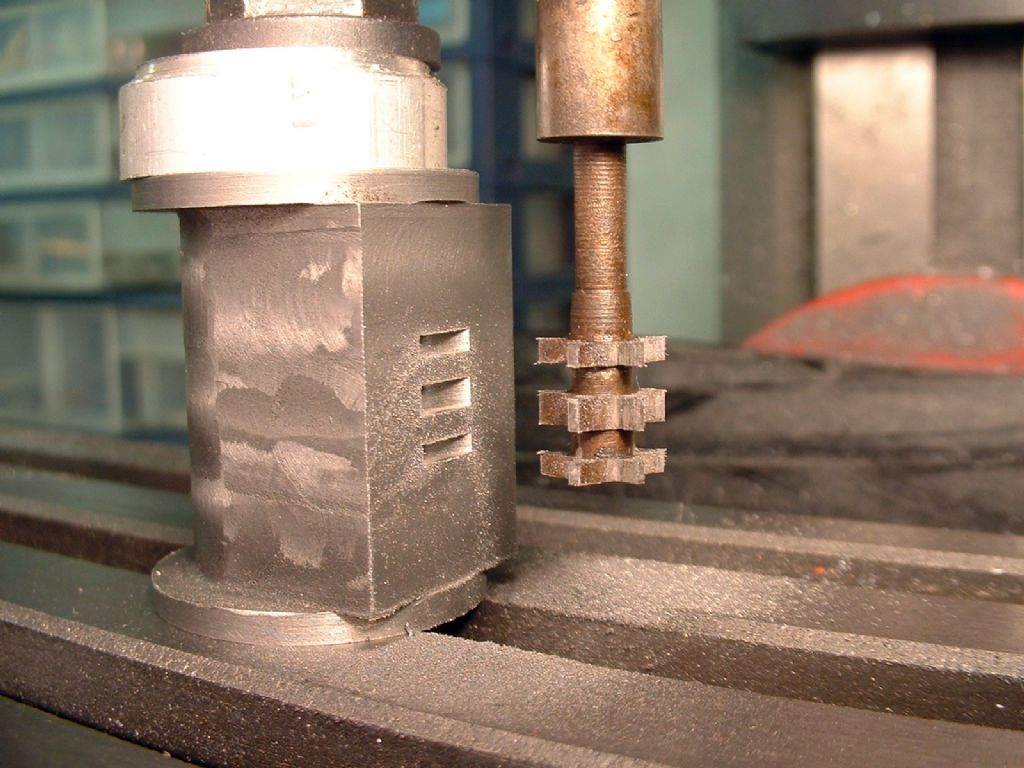
      I made several cutters to finish these heads off and thought that this might be of interest to those who as yet have to travel that path. It’s not difficult and gives another dimension to your machining capabilities.
       

      Left to right these are a 15mm x 40tpi LH tap. Not tempered it cut much better than anticipated, Next the counterbore for the valve boxes. Slow work due to having to clear the swarf from the flutes. It cut eighteen boxes and nine cages without resharpening though. The three spotfacers worked well too the right hand two are not tempered. All these and those in the next pic were made from silver steel and quenched in oil.


      This image shows the failures too! From the left the first did two fins in the set up piece before shattering. As I changed it out I noticed I had not locked the head on the mill. The second due to insufficient backing off became crowded and broke on the second fin on the first head. (Raise of eyebrows!) The third however cut all the side fins (one side on each head at a time) losing first one tooth at some stage, working well for some time with two before losing another finally flycutting with just one tooth until three fins left to do – sterling service I’m sure you’d agree. The fourth had little work to do then and the last cutter was made longer in order to clear the fixture when cutting the top fins.

      It was noticed that the crowding was exacerbated when using coolant – I can only brush it on – this seemd to make the swarf stick in the slots. The top fins were done without using any at the same speed – no sticky moments and the cutter did the lot without re-sharpening.
      Incidentally I have some pics showing the hand cut backing off and sharpening carried out if it will be of help to anyone.
       
      It was neccesary to modify some standard cutters too!
      The slot drill has a 4 degree taper ground on the bottom for cutting the tops of the fins. The next was a short boring bar made from an FC3 cutter for recessing the exhaust cages and the last two were ground away FC3 cutters for cutting the recesses in the bolting pads and the corners under the inlet valve face. All werer ground on the off hand grinder and cut well – but all were tested first
       
      The parts all began like this
      And finally finished yesterday like this

      This shows a couple of the exhaust cages and the rather fiddly cylinder head nuts

       
      So thanks to Bill I have made a major step forward on this project. It is going ba
      Advert
      #2288
      Ramon Wilson
      Participant
        @ramonwilson3
        #59687
        Ramon Wilson
        Participant
          @ramonwilson3
          I guess I exceeded the limit!
           
          …………….So thanks to Bill I have made a major step forward on this project. It is going back under the bench but not for another fourteen years.
           
          Hope this has been of interest and has helped some one
           
          Regards for now – Ramon
          #59688
          John Stevenson 1
          Participant
            @johnstevenson1
            They are awesome, I have to admire the patience of the people building these engines I know for a fact that I may well have the skill but definitely do not have the patience.
             
            If I was reincarnated as a vulture I’d have to kill something.
             
            John S.
            #59690
            Martin W
            Participant
              @martinw
              Ramon
               
              They are just brilliant, to be quite honest I wouldn’t know where to begin. Please post  more pictures and descriptions as the project advances. Personally I can’t wait to see the completed engine, I just hope that the next instalment isn’t 14 years on .
               
              Regards
               
               
              Martin
              #59693
              Howard Jones
              Participant
                @howardjones35282
                ramon what information are you working from?
                I bought the book but couldnt find enough detail to work from.
                I later found the articles done in model engineer, are you working from these?
                beautiful work, no doubt about it.
                #59707
                Ian S C
                Participant
                  @iansc
                  I must go nd see how they got on , the RNZAF museum in Christchurch, at the old Wigram Air Force base had an incomplete 1/4 scale Bentley rotary engine, I think the bloke that started it died , but it was nearly complete. I’ v got a box of stuff for their workshop, radio and instrument parts, and a big box of aircraft control cables, mainly Mosquito bits and pieces.
                  I think the cylinder heads  are made of steel, are your’s, I suppose aluminium would not be strong enough. Ian S C
                  #59778
                  Sub Mandrel
                  Participant
                    @submandrel
                    Bloody gorgeous!
                     
                    A BR2 puts the fear of God into me, but in the spirit of home made tools, this is one after a sketch by ETW:
                     
                    3/8″ OD.
                    Neil


                    #59792
                    Ramon Wilson
                    Participant
                      @ramonwilson3
                      Hi guy’s
                      Thanks for all the kind comments and interest. Thanks  for those who PM’d too.
                      I’d hoped to respond tonight but I’ve had a one of those nice but totally tiring days and am absolutely whacked. Tomorrow it will have to be.
                       
                      Regards for now – Ramon
                       
                       
                      #59795
                      Terryd
                      Participant
                        @terryd72465
                        No Rush Ramon, no rush,
                         
                        Take your time,
                         
                        Regards
                         
                        Terry
                        #59827
                        Ramon Wilson
                        Participant
                          @ramonwilson3
                          Hi again guys – a little less tired today.
                           
                          Regarding patience John, I guess it boils down to what you (one) wants to do. It’s taken me a long while to get round to this but once started I was surprised how easily each op transpired into the next. I definitely set out with the mindset of taking it one op at a time and to put it away again if it got tedious. It is a big hurdle in this project though so I’m well pleased its over.
                           
                          I have as said put it away again to get going on another pair of CI engines – the first block is in the vise ready to cut but I do intend to give a lot more time to the BR2 next year.
                           
                          Howard, I began by using the articles in ME and then bought the book. There are quite a few mistakes in both and also one or two in the ‘correction article’ subsquently published. Fortunately I noticed something early on (can’t remember what) that led me to double check everything. The biggest mistake that could cause real  problems is a 3mm error on the crankshaft both in the articles and the book and not mentioned in the corrections either.  I drew this out several times to convince myself this was wrong  but it was only this time after Bill had left that I finally plucked up courage to assemble the shaft in its housing and yes the maths proved right – Phew!! I have never seen a copy of the drawings so have no idea if they are direct copies of whats in the articles or vice versa. Anyone else know?
                           
                          The heads are indeed made from steel Ian, the only aluminium parts in the engine are the cylinder barrels and the cover over the thrust box. I believe the materials in the model are like for like in the full size.
                           
                          As there have been several PMs regarding the cutter manufacter here are a few more images with relevant captions
                           

                          The back faces of the fin cutter were difficult to get to so it was held in the drill chuck and the drill put in lowest gear to provide resistance against the filing action. Each tooth was backed off before hardening using a # 2 cut needle file. Each tooth was inked with felt pen and filed to leave a small land across it about .2-.3mm wide.


                          Transferred to the bench vice the outer faces were much easier to do.

                          When heat treated and in this particular case tempered it will be ready for sharpening
                           

                          The left one has been heat treated but not tempered and the right one is ready for H&T


                          The process is repeated using a small grinding point in a ‘dremel’  type tool putting less of an angle on and taking care not to grind below the front cutting edge.
                           

                          Likewise the top faces

                          The cutter ready for work. The uniform ‘tempering colour’ was achieved by heating it in hot sand keeping the smaller end toward the top and letting the heat build slowly through.

                          In
                          #59828
                          Ramon Wilson
                          Participant
                            @ramonwilson3
                             I really must learn to precis a bit more!
                             
                            …………………….Must admit I was getting a bit ‘nervy’ at this stage but the cutter sailed through without a hitch. Note there’s no coolant in use
                             
                            Well I hope this of use to those who have asked and to those thinking about having a go at cutter making themselves. The only thing I would add is that despite silver steel being recommended to be quenched  in water I always prefer to do it in oil. There is far less likelyhood of the cutter cracking and the slightly lower hardness achieved is more than sufficient to carry out the task, certainly in EN1a as in this case. That’s a personal thing though – ‘yer pays yer money etc’ but remember – however you do it cutting speeds are much lower than for HSS tooling.
                             
                            Thanks again for your kind comments, now its off to attack those ally blocks.
                             
                            Regards for now – Ramon

                            Edited By Ramon Wilson on 02/12/2010 15:07:54

                            #59838
                            Stovepipe
                            Participant
                              @stovepipe
                              Ramon,
                               
                               No need to worry about being able to precis a bit more. Most of us, I feel, are quite happy with your descriptions, which are easy to read and understand. As a beginner (with ‘L’ plates !) I could follow them very well.
                               
                              Dennis
                               
                               
                            Viewing 13 posts - 1 through 13 (of 13 total)
                            • Please log in to reply to this topic. Registering is free and easy using the links on the menu at the top of this page.

                            Advert

                            Latest Replies

                            Home Forums I/C Engines Topics

                            Viewing 25 topics - 1 through 25 (of 25 total)
                            Viewing 25 topics - 1 through 25 (of 25 total)

                            View full reply list.

                            Advert

                            Newsletter Sign-up