Heinrici without Castings

Advert

Heinrici without Castings

Home Forums Miscellaneous models Heinrici without Castings

Viewing 20 posts - 26 through 45 (of 45 total)
  • Author
    Posts
  • #521004
    JasonB
    Moderator
      @jasonb

      Video of theflywheel being cut in this post

      Advert
      #522359
      JasonB
      Moderator
        @jasonb

        Well I've checked and double checked my setups and think it's safe for me to post some more photos of progress and I do hope the weekends forum activity won't put others off posting about what they have been up to in there workshops.

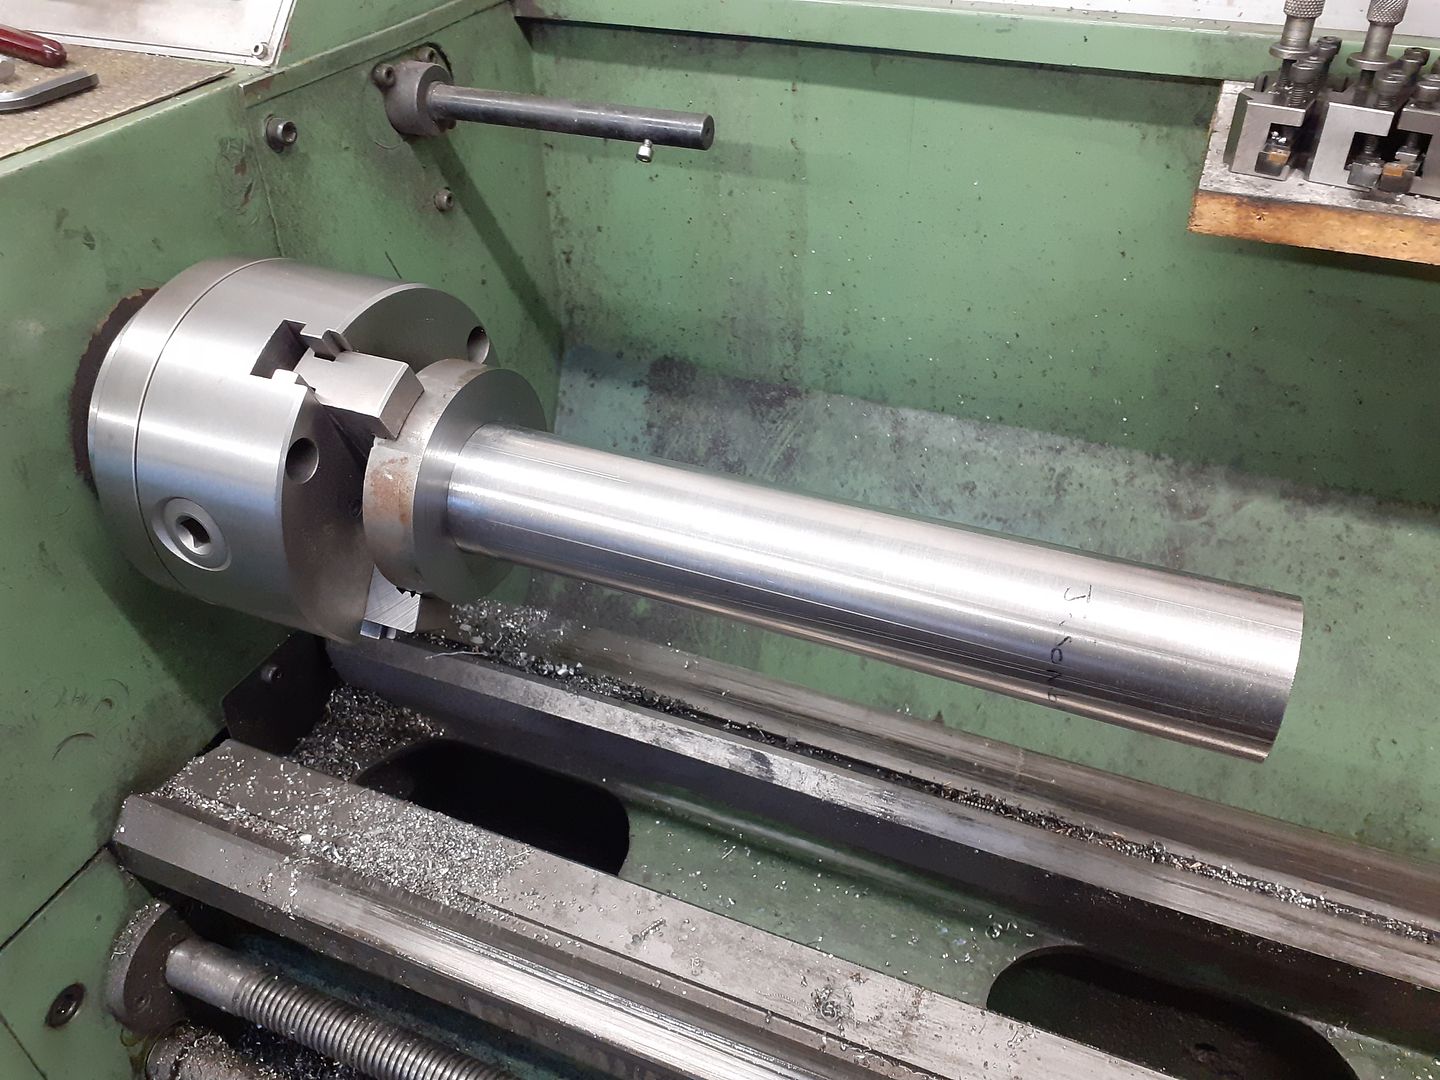
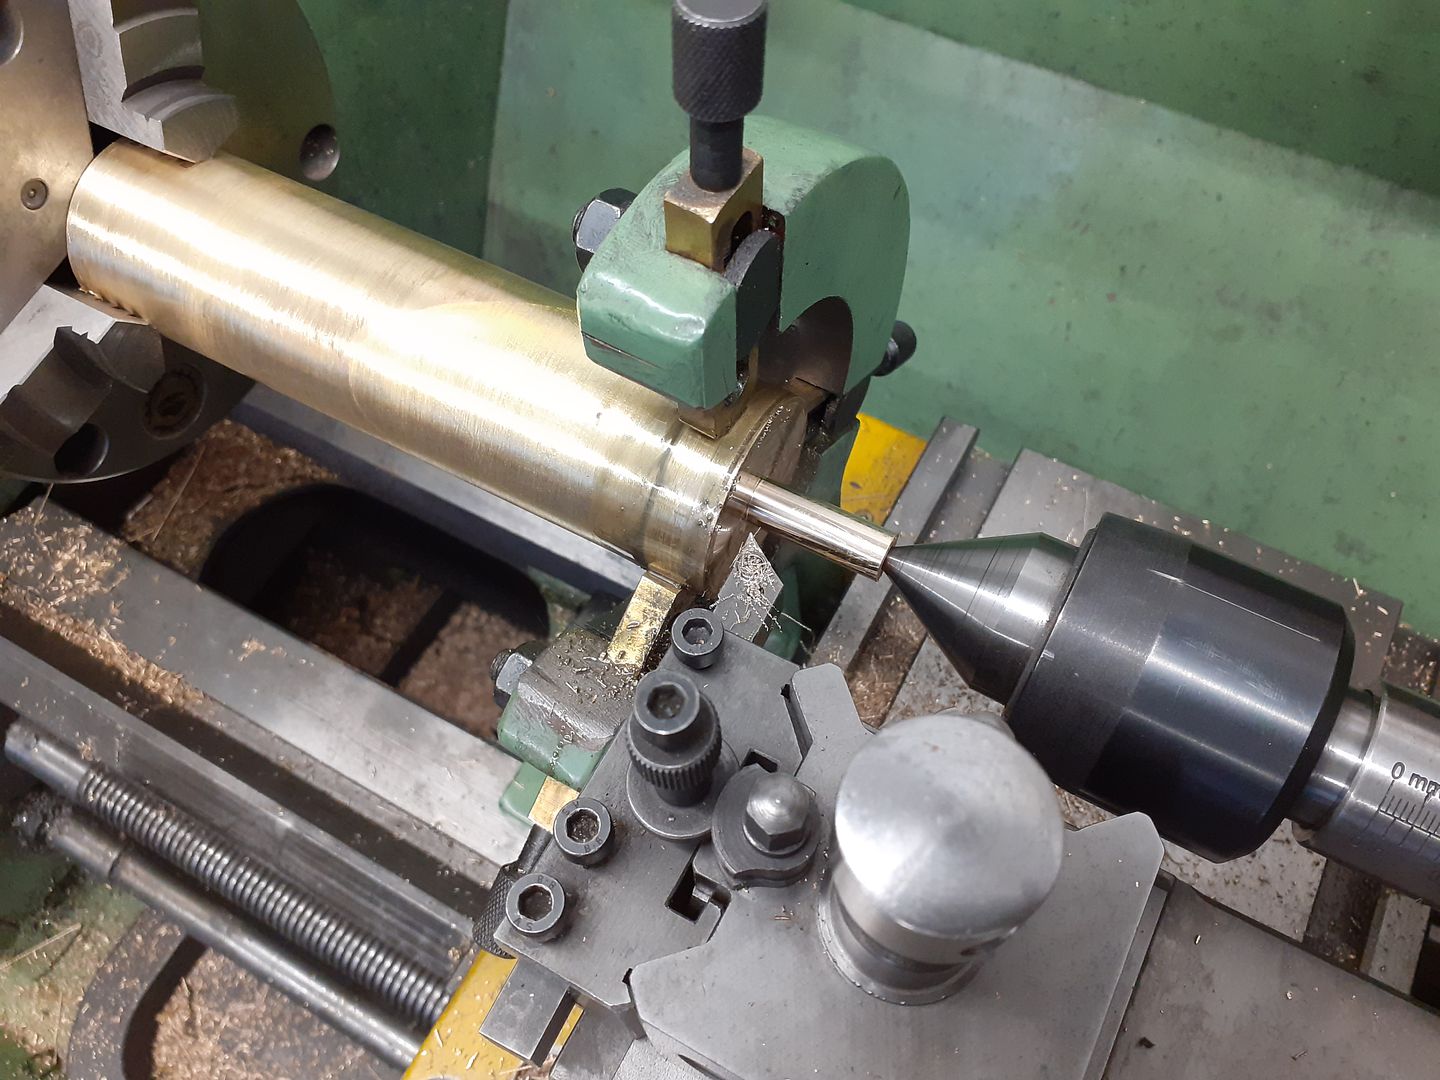
        First a pic of the flange that will be soldered to the hot cap being counterbored using the 45mm stainless tube to gauge final fit, not easy when the tube is not perfectly round or 45mm dia.

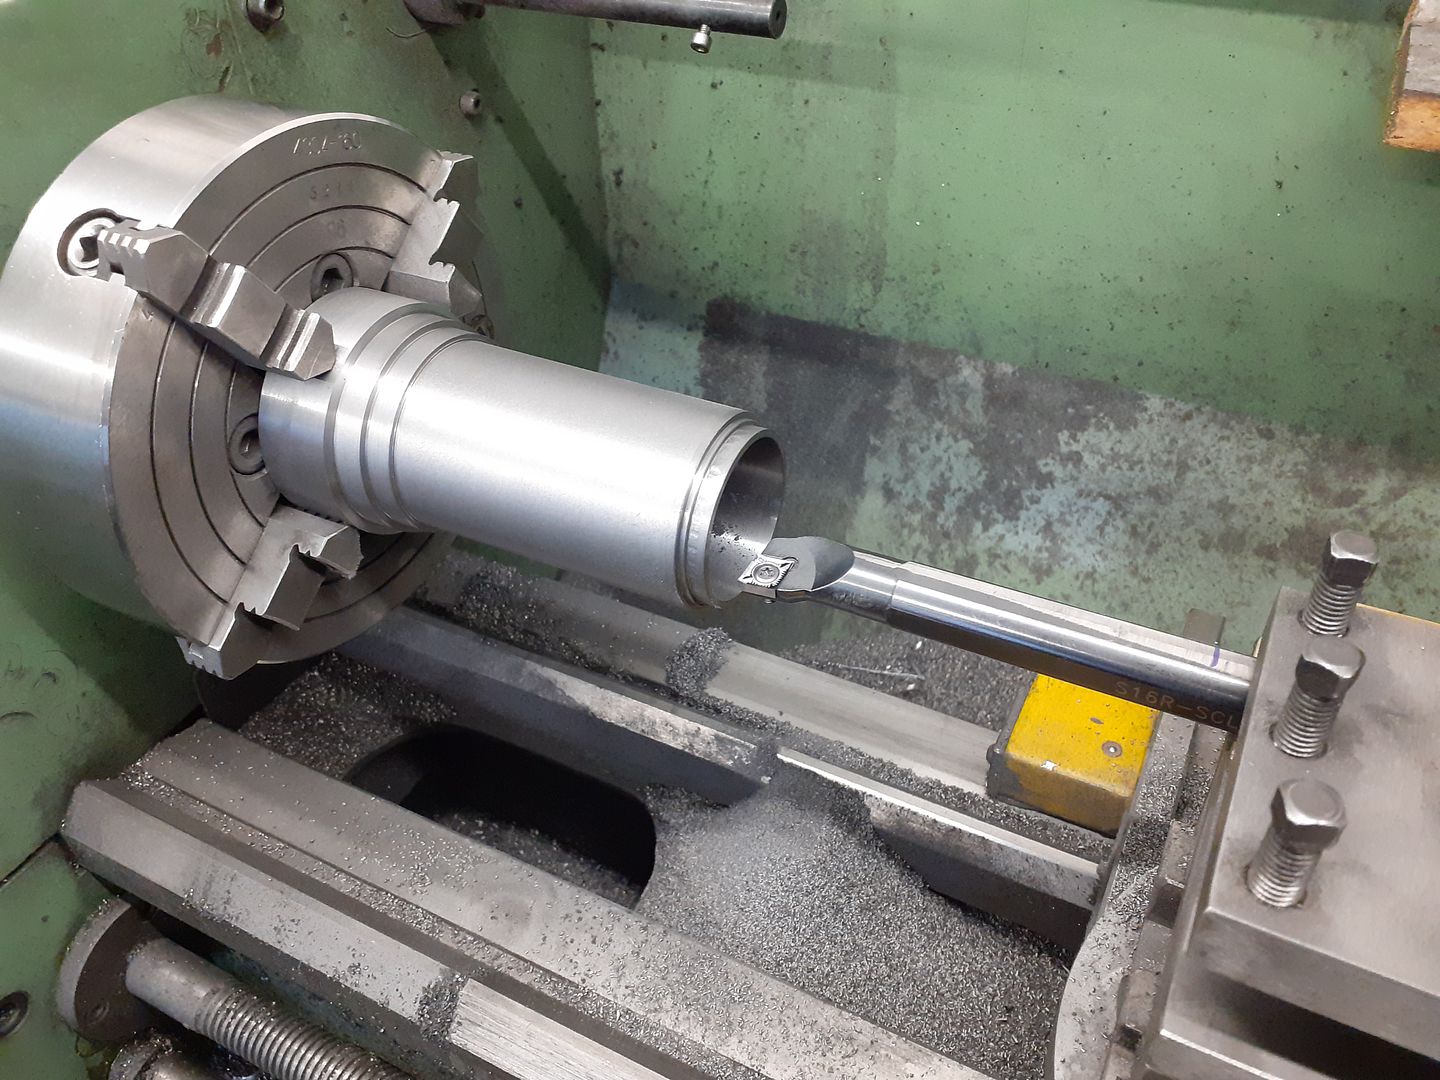
        The power cylinder was cut from some 65mm dia cast iron bar. Regarding the recent thread about boring bars this hole is 110mm long, 42mm finish dia and was cut with a 16mm insert boring bar. Started with blacksmith drills upto 1" then to 41mm with a CCMT insert 0.75mm DOC, 600rpm. Then for the last few cuts swapped to a CCGT with two cuts of 0.2mm and one of 0.1mm DOC all at 250rpm and ended up with less than 0.025mm ( 1 thou ) taper which was soon taken care of by selective use of a 3 stone hone.

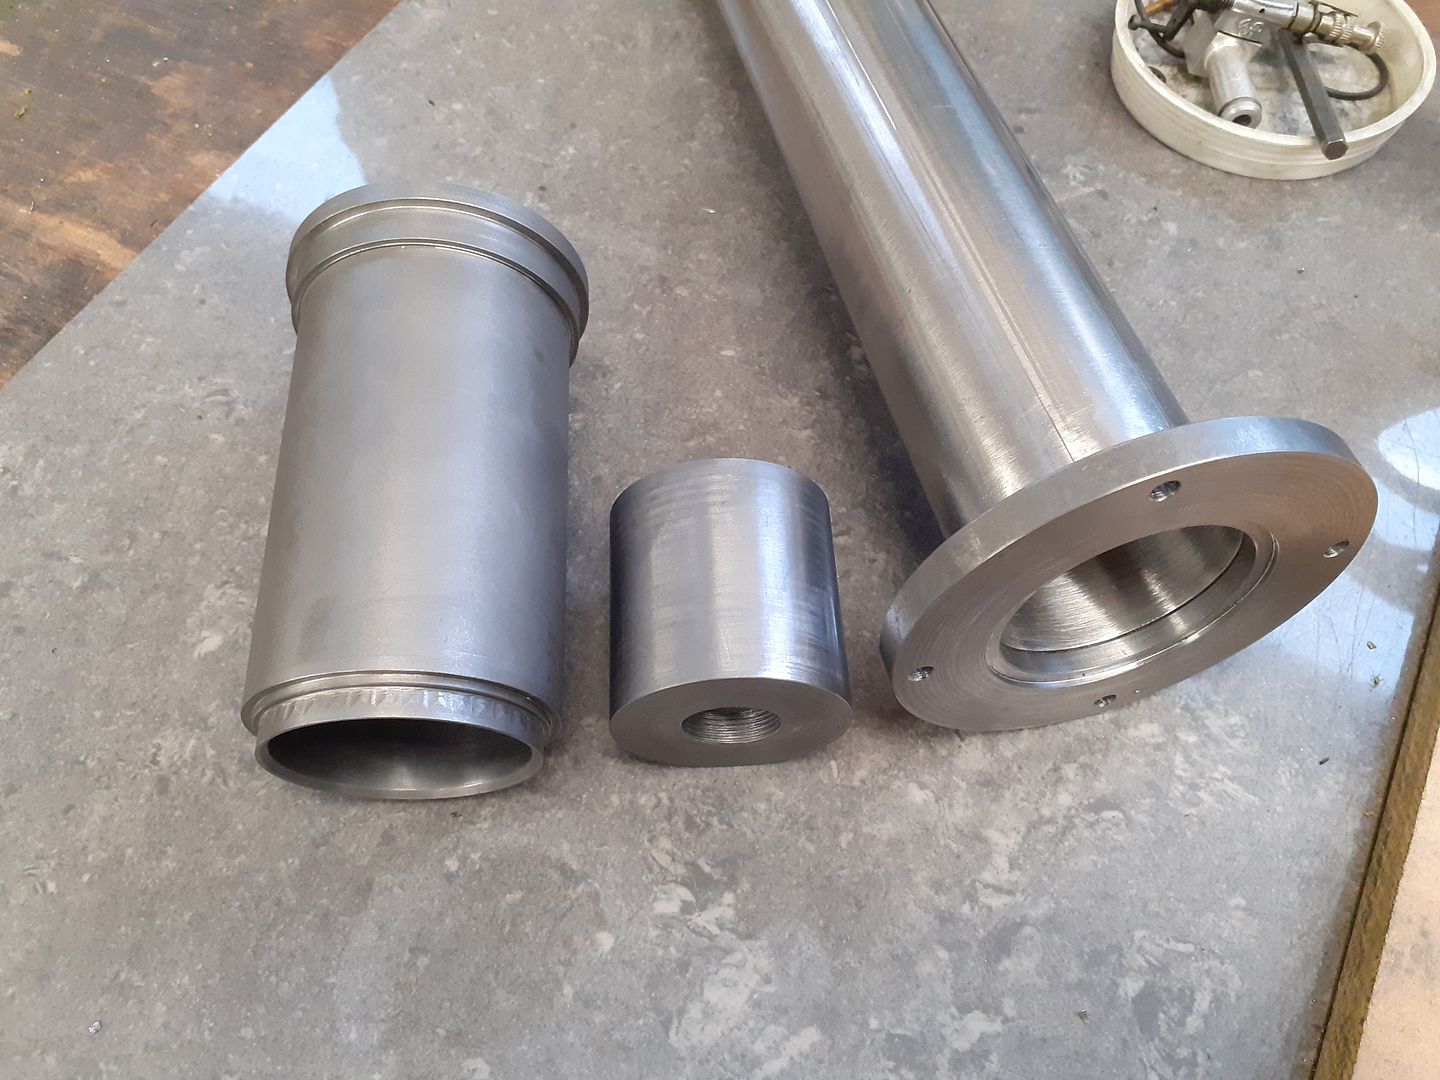
        And finally the near complete flange which just wants squaring off a bit, completed cylinder and in the middle the 42mm dia x 42mm long CI piston which as a 1.25mm wall and a M18 x 1 thread in the 6mm thick botton to more closely resemble an original rather than the CSK screws shown on the drawings I'm using as a basis for the engine.

        #523091
        JasonB
        Moderator
          @jasonb

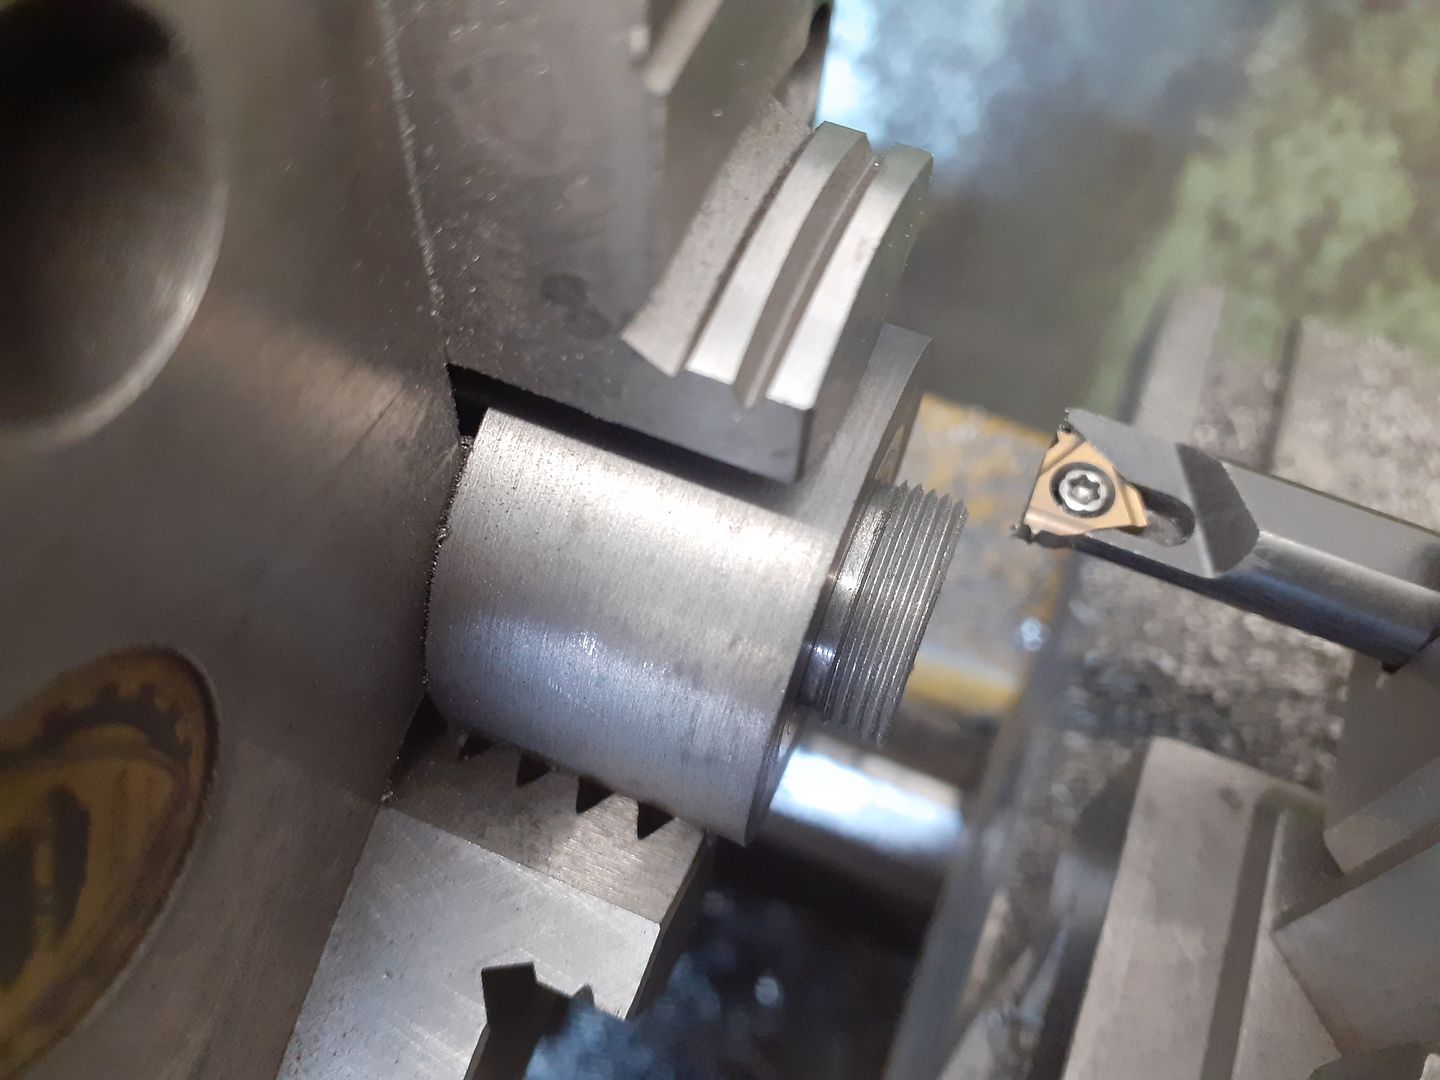
          The next part on the list was the yoke that fits inside the piston, a spigot was turned on the end and then threaded M18 x 1 running in reverse so the tool moves away from the face.

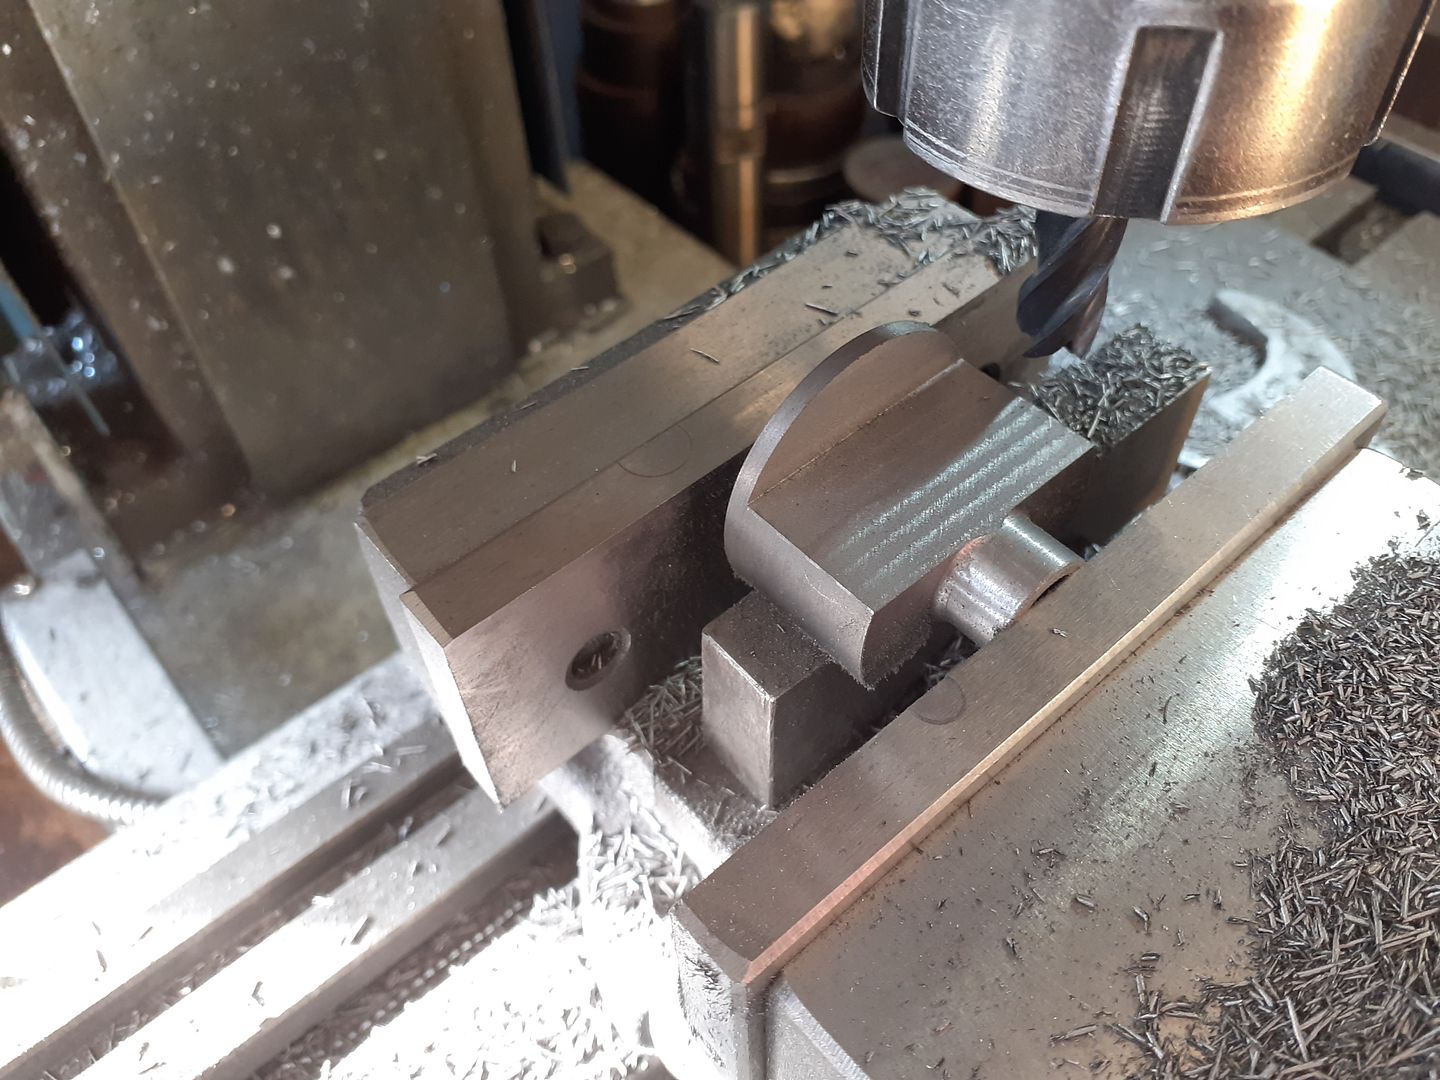
          Then over to the mill to machine most of it away but leaving a flange at the bottom

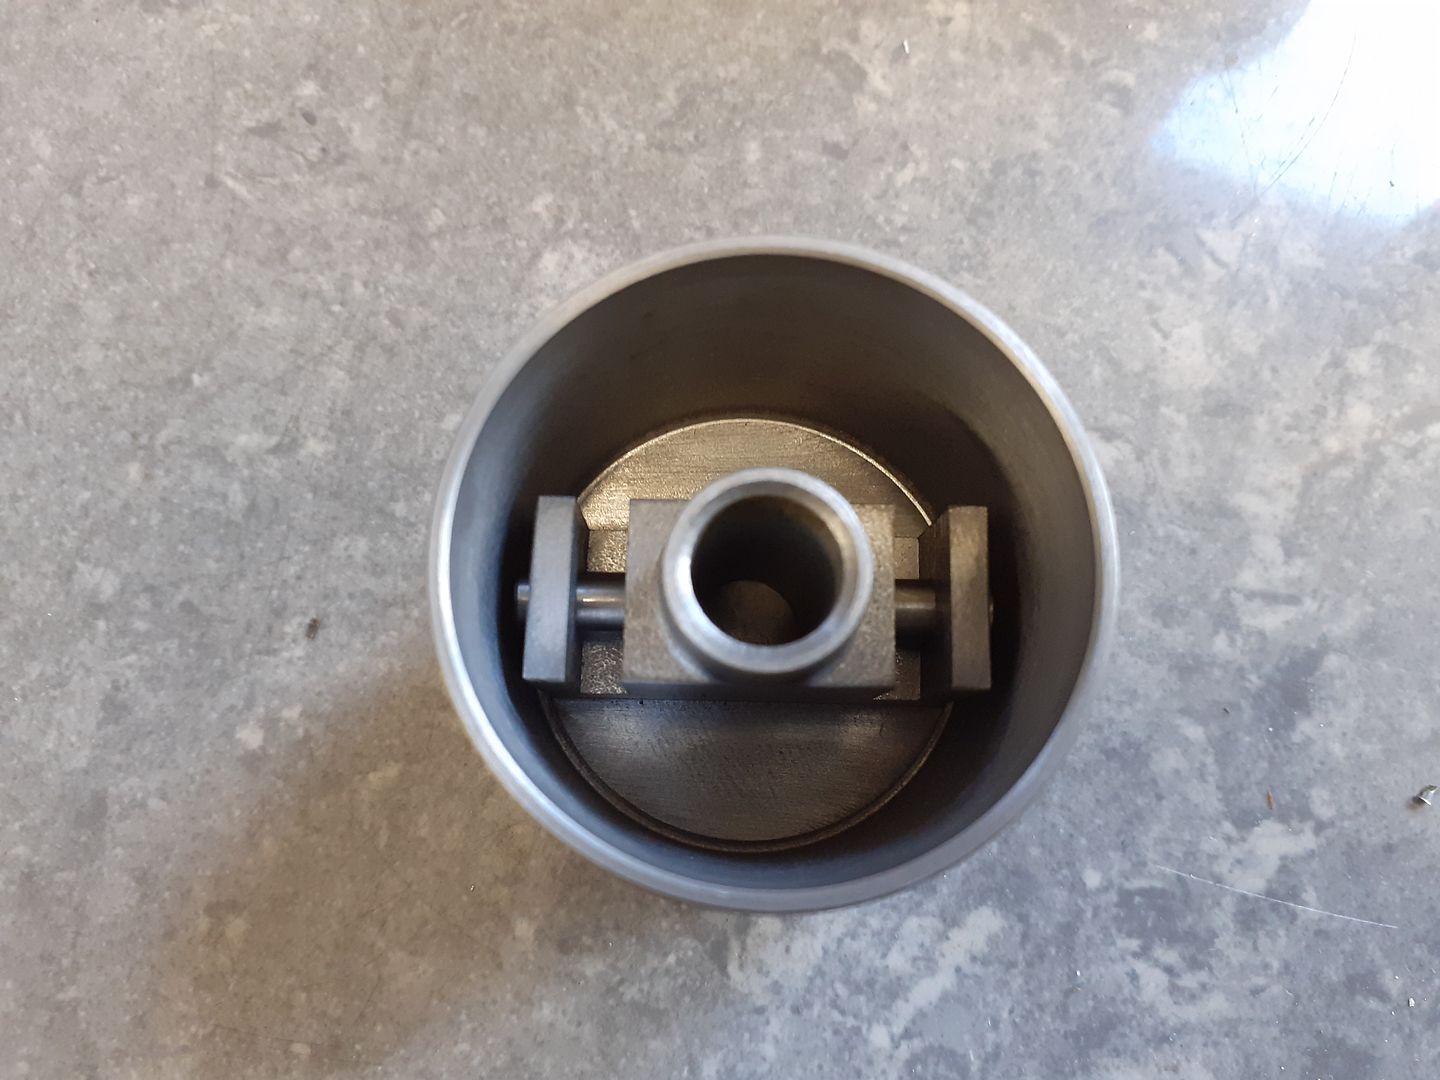
          A couple of 4mm wide slots were cut for the ends of the tuning fork shaped conrod and cross drilled for pins, picture of it assembled inside the piston

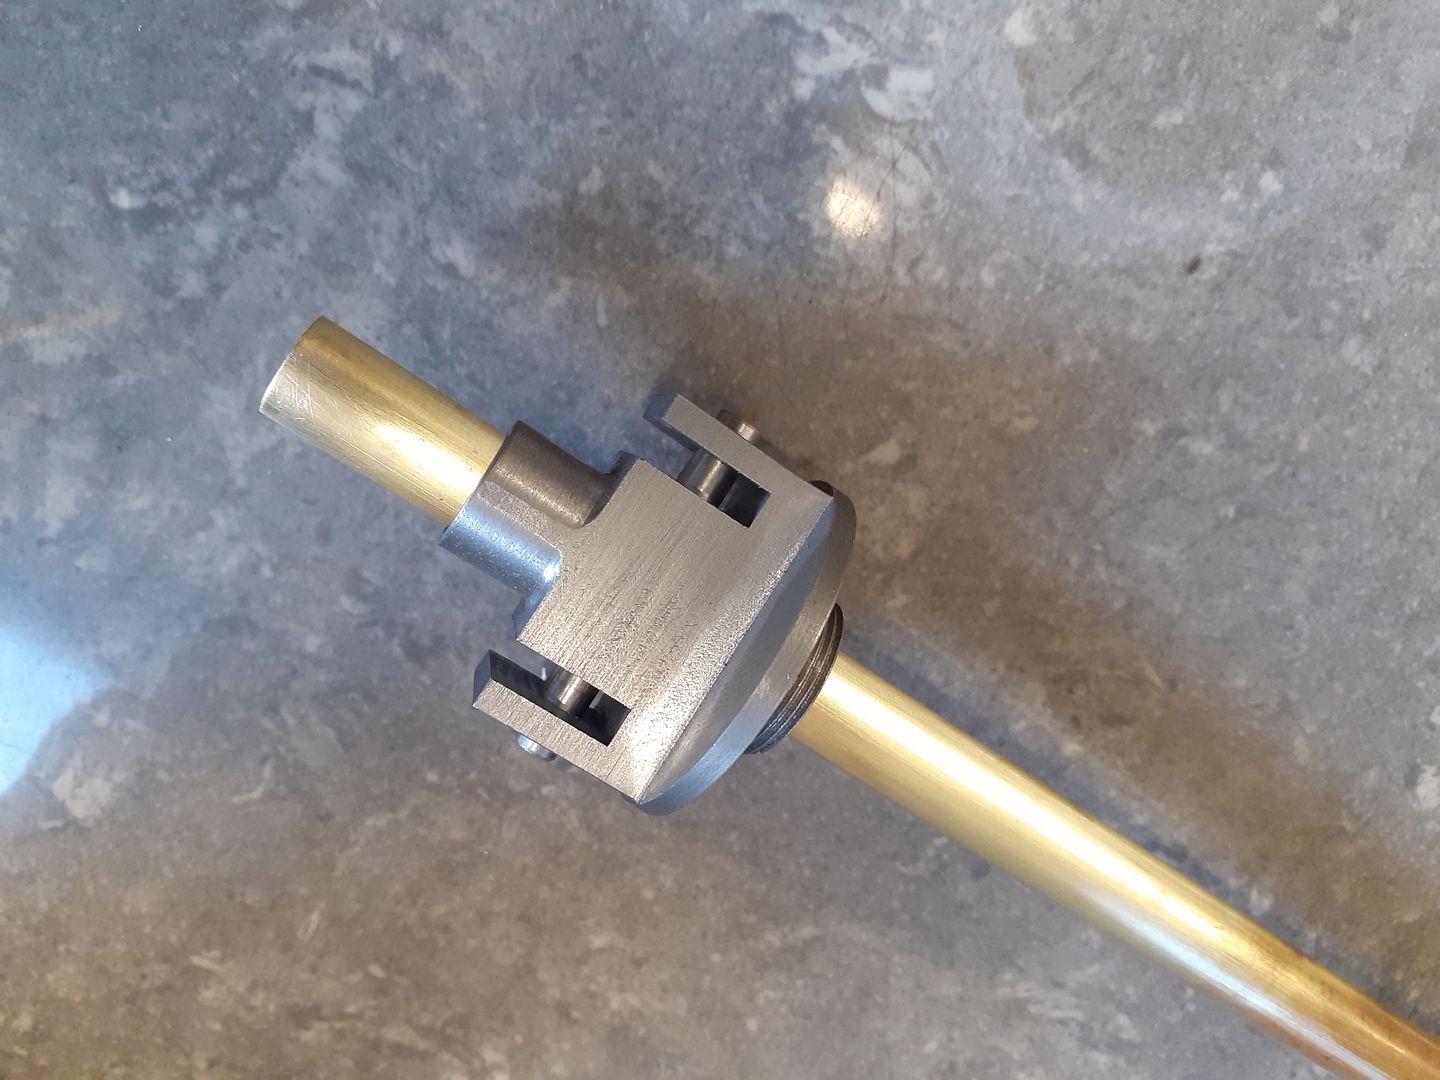
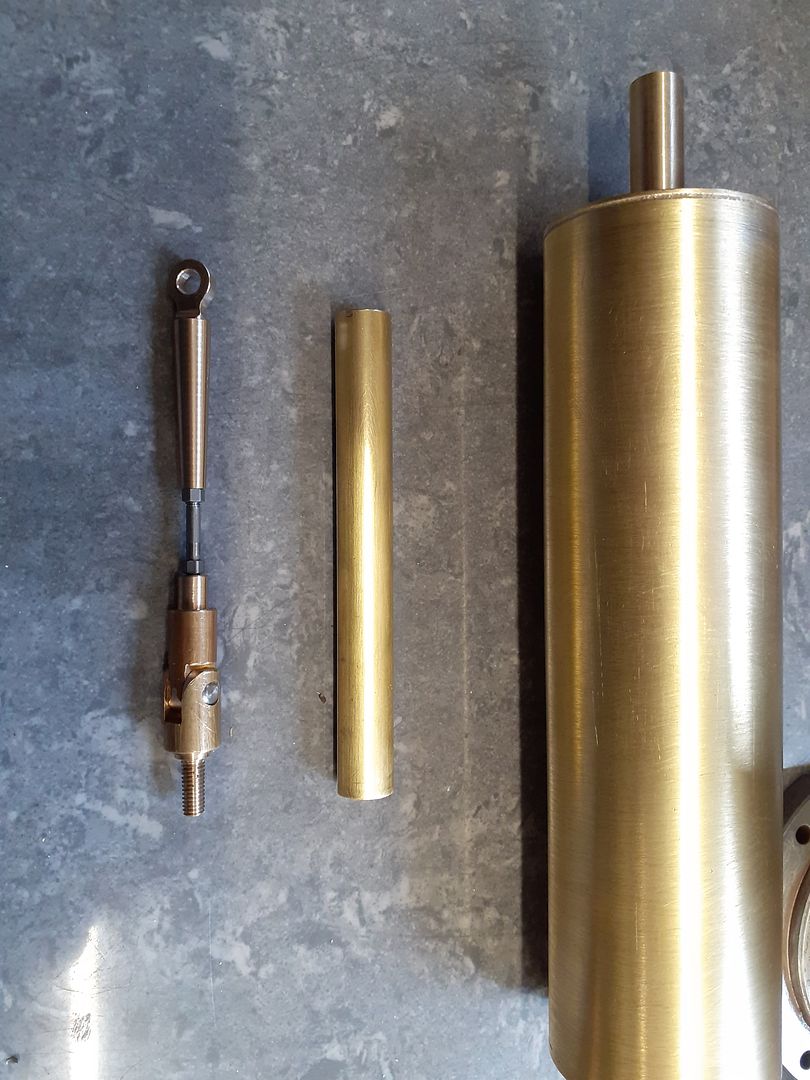
          And another without piston but showing the thin walled brass tube that forms the displacer's piston rod passing through it.

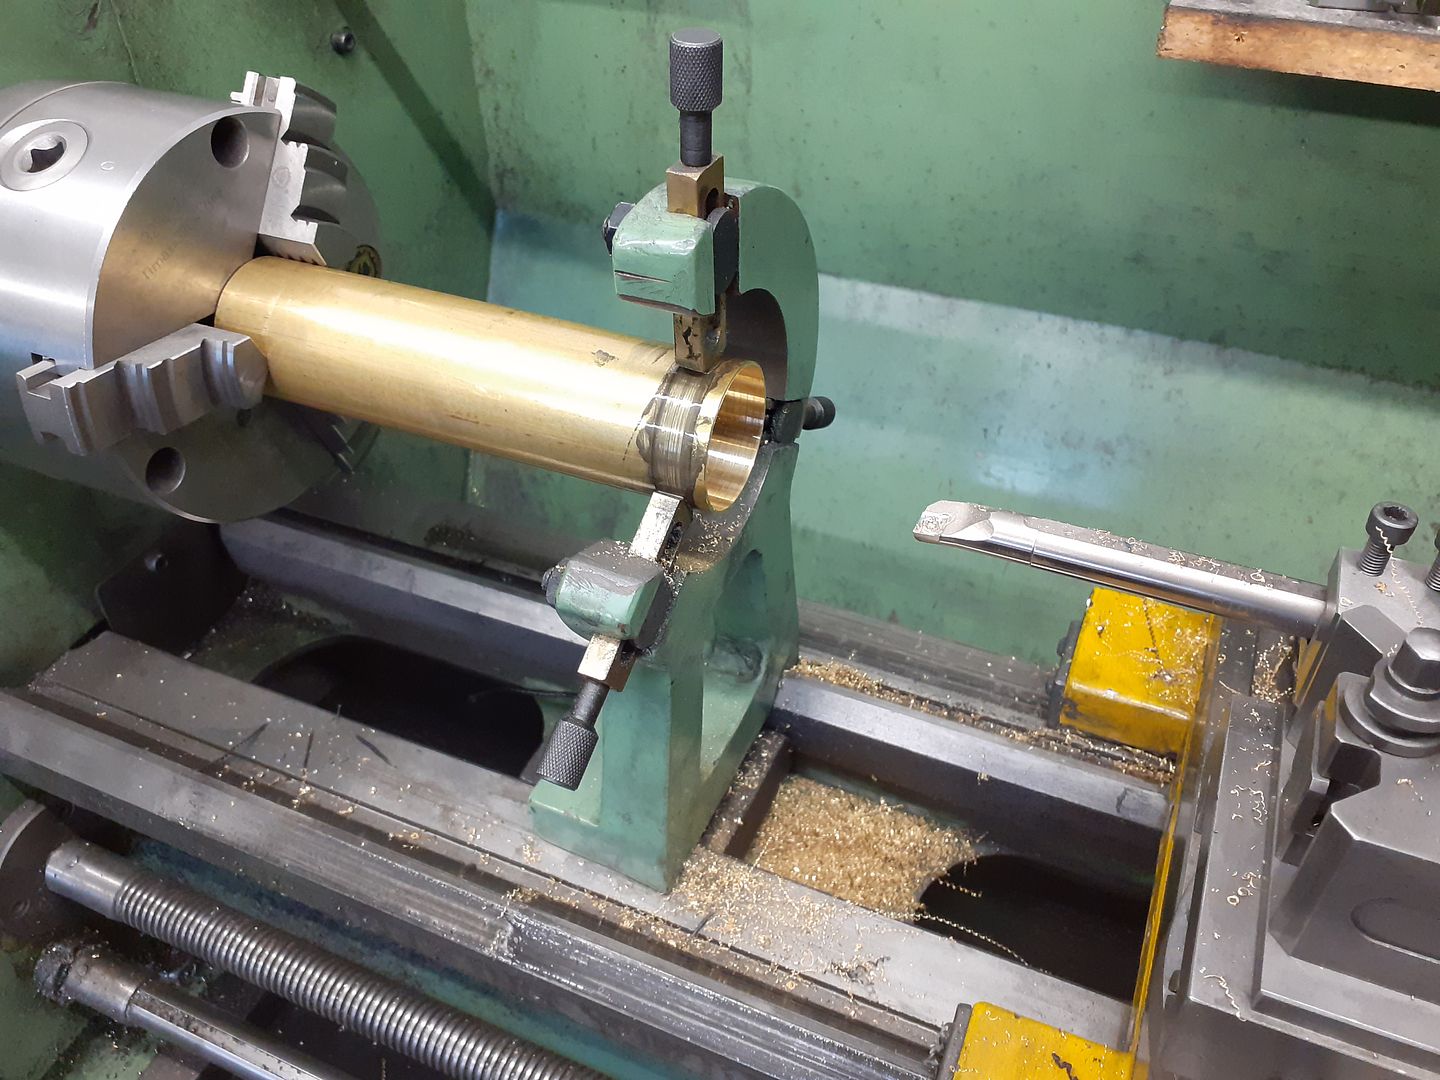
          Bearing in mind the weight issue that Jo mentioned on her engine while I was set up for squaring the ends of the brass tube for the displacer I thought I would thin the 1.25mm wall down to 0.9mm to save a bit of weight. I knocked up a bung to go in the end of the tube so that the chuck would not distort the tube which also allowed it to be tightened up well so no risk of the tube walking out of the chuck

          After silver soldering the endplates and a spigot into place it was back in the lathe to drill and tap the spigot. I then added ctr support while the spigot was turned down to finish size so it was a firm fit in the thin wall brass tube.

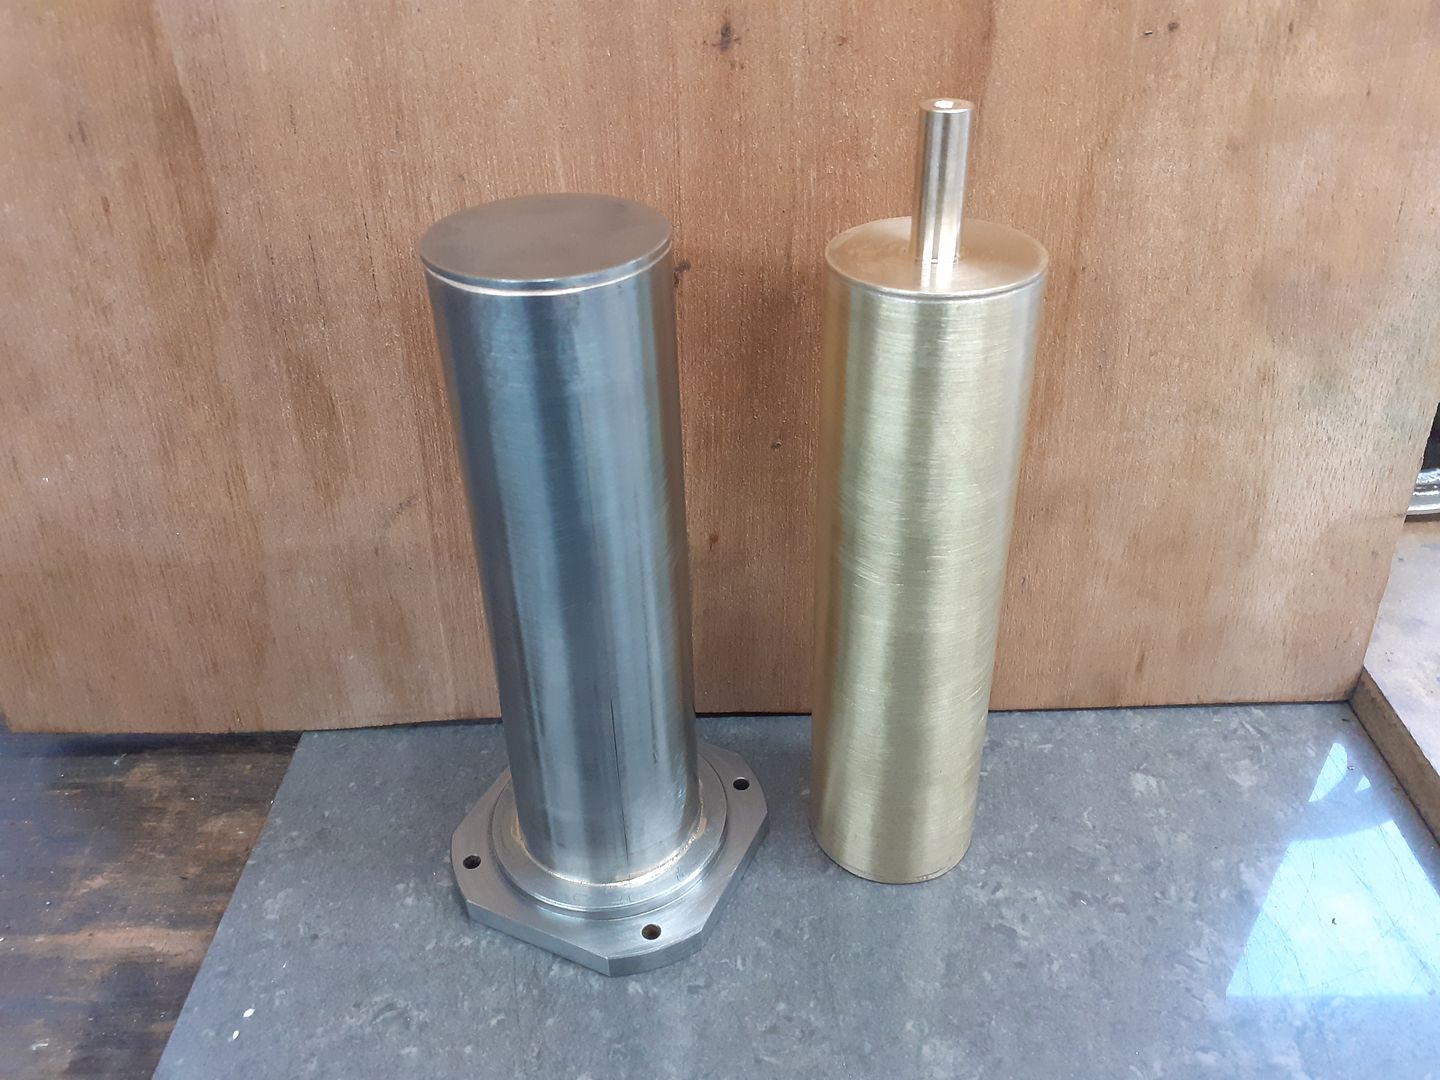
          Finally a shot of the finished displacer alongside the stainless steel hot cap with silver soldered end and mounting flange

          #524726
          JasonB
          Moderator
            @jasonb

            Next job on the list was to make the displacer rod which is made up on several pieces so that it does not tighten up as the rocking lever follows an arc, The drawings show the 2mm steel rod silver soldered into the two brass parts but I decided to allow for some adjustment if needed so went with a rod threaded M2.5 each end and some lock nuts. I also cut the thin wall brass guide tube to length

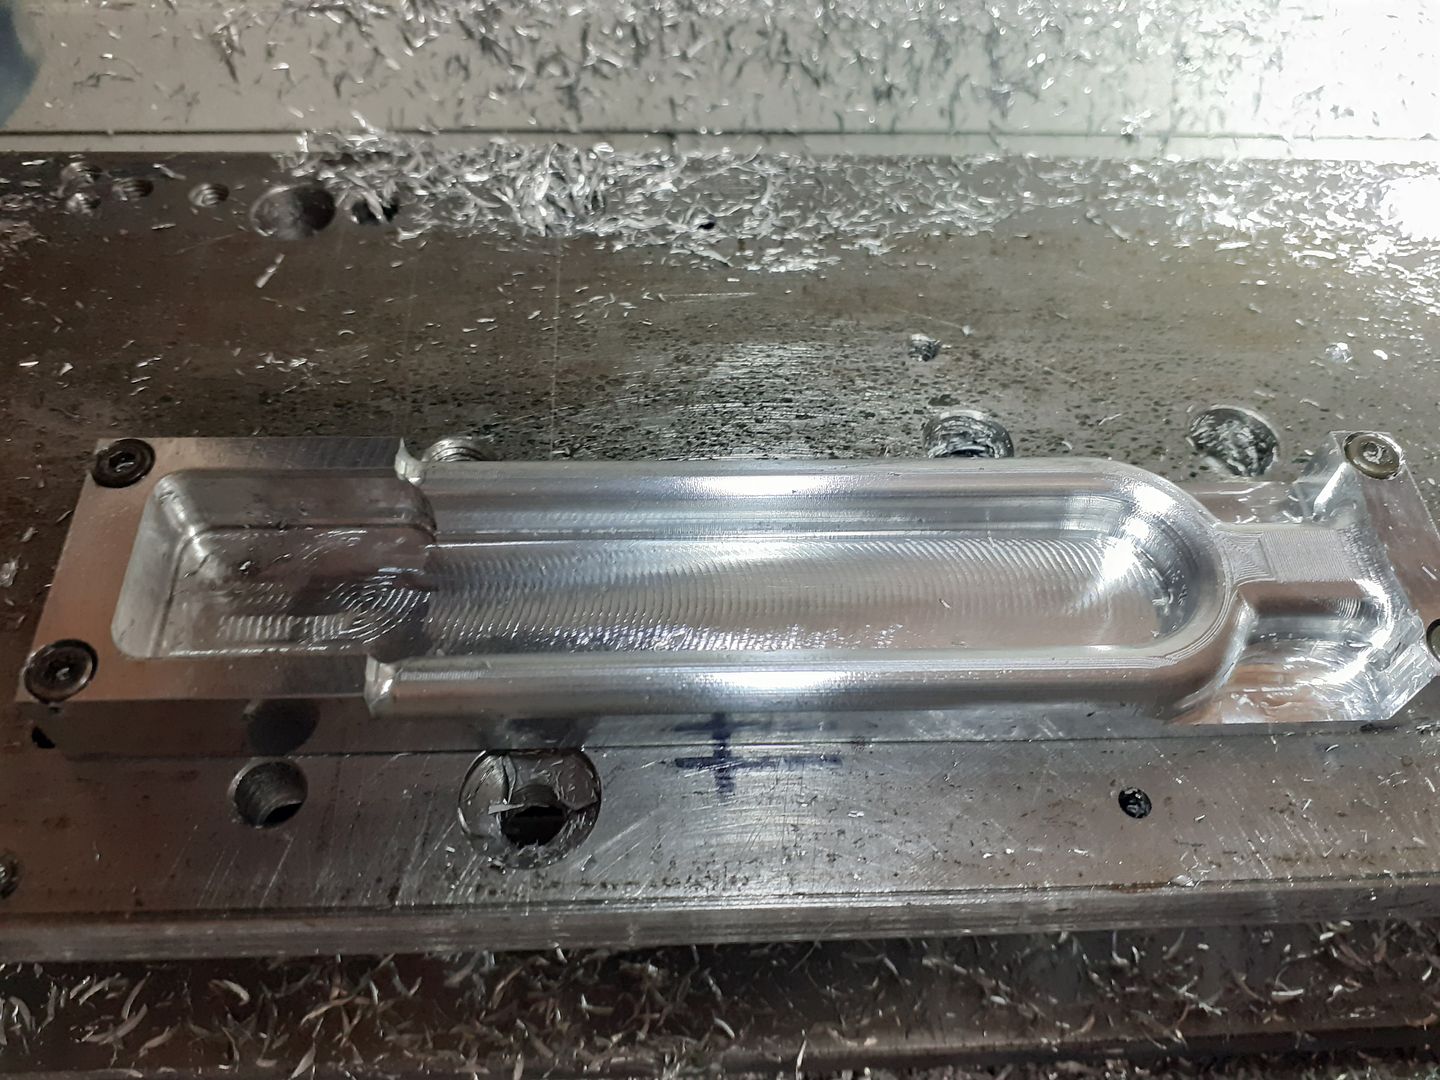
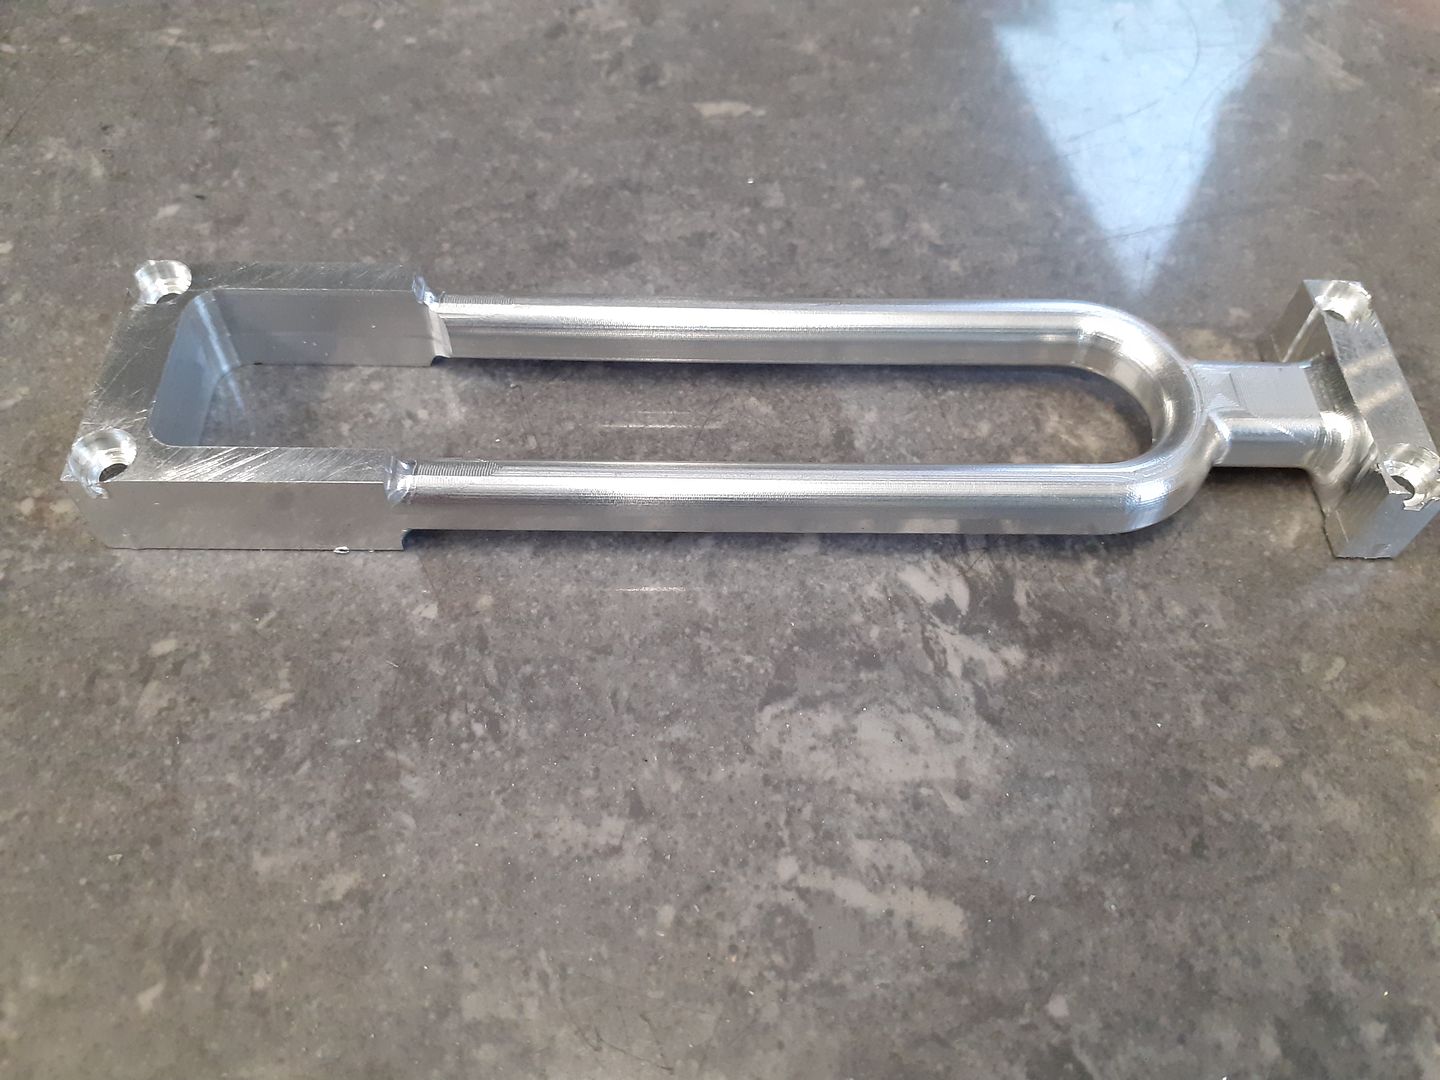
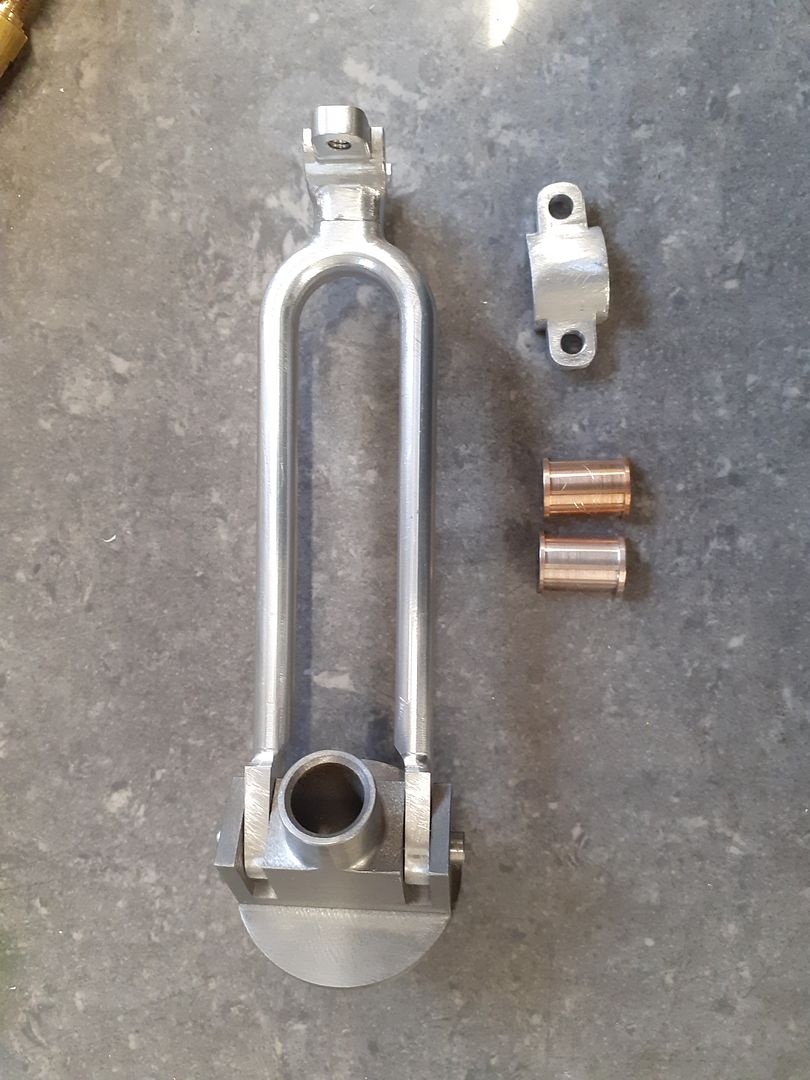
            The "tuning fork" conrod would have wasted a lot of metal if cut from one piece so I decided to do it in two. Firstly the actual fork was cut on the CNC holding it by two extra 6mm pieces left at the ends which made it easy to flip over and run the other side.

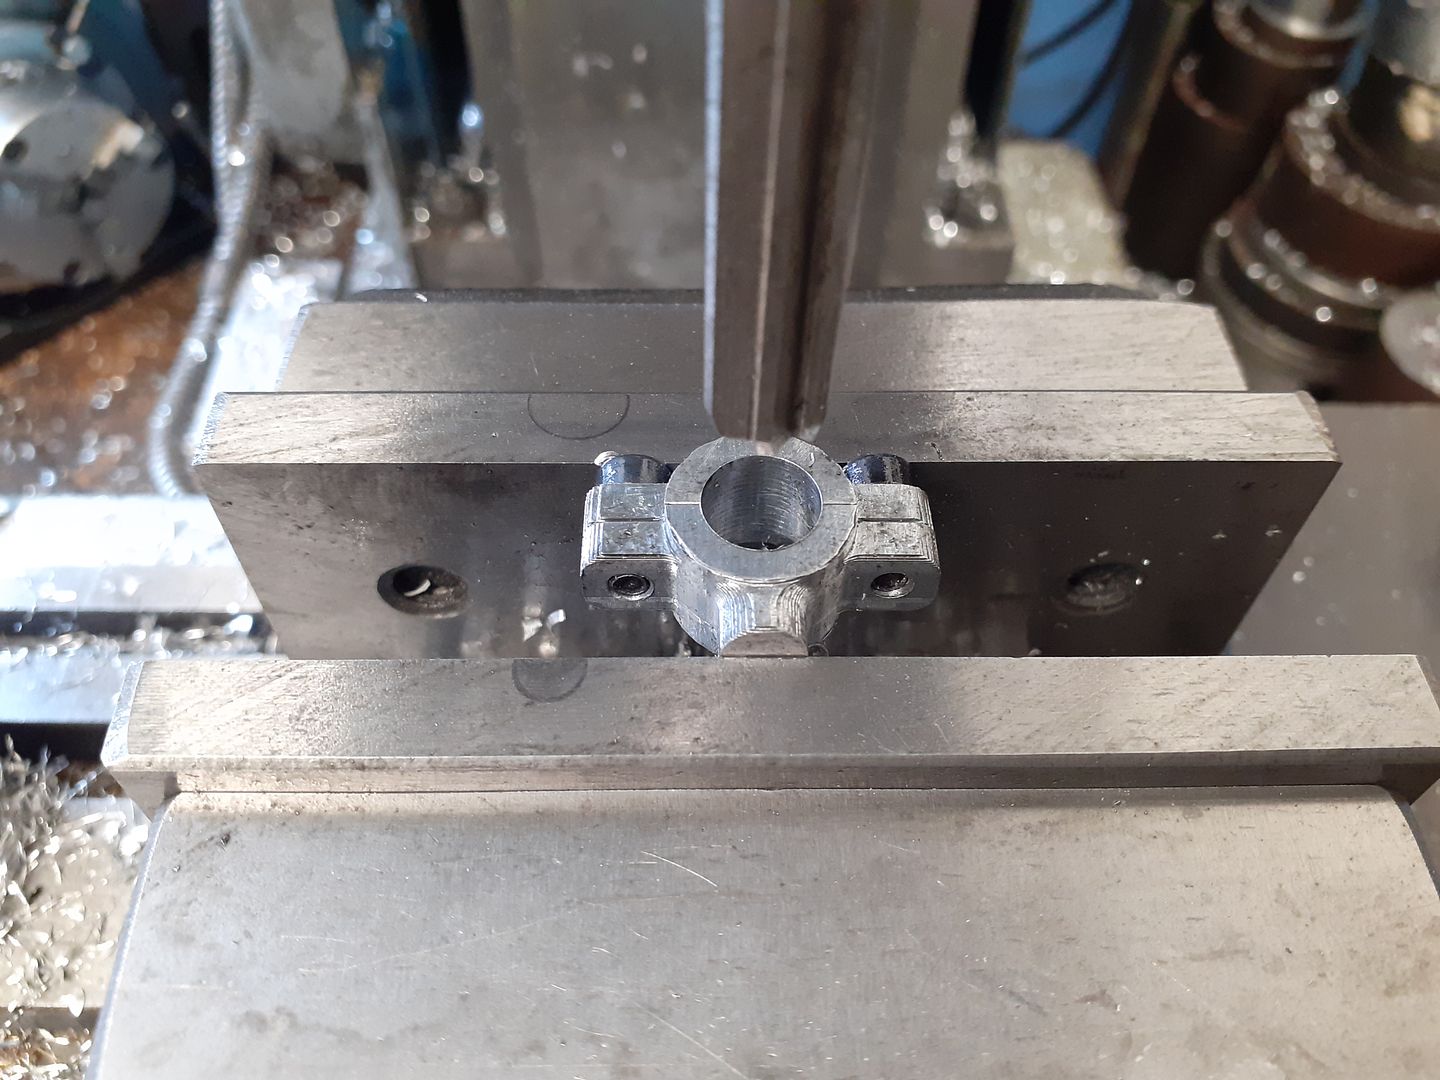
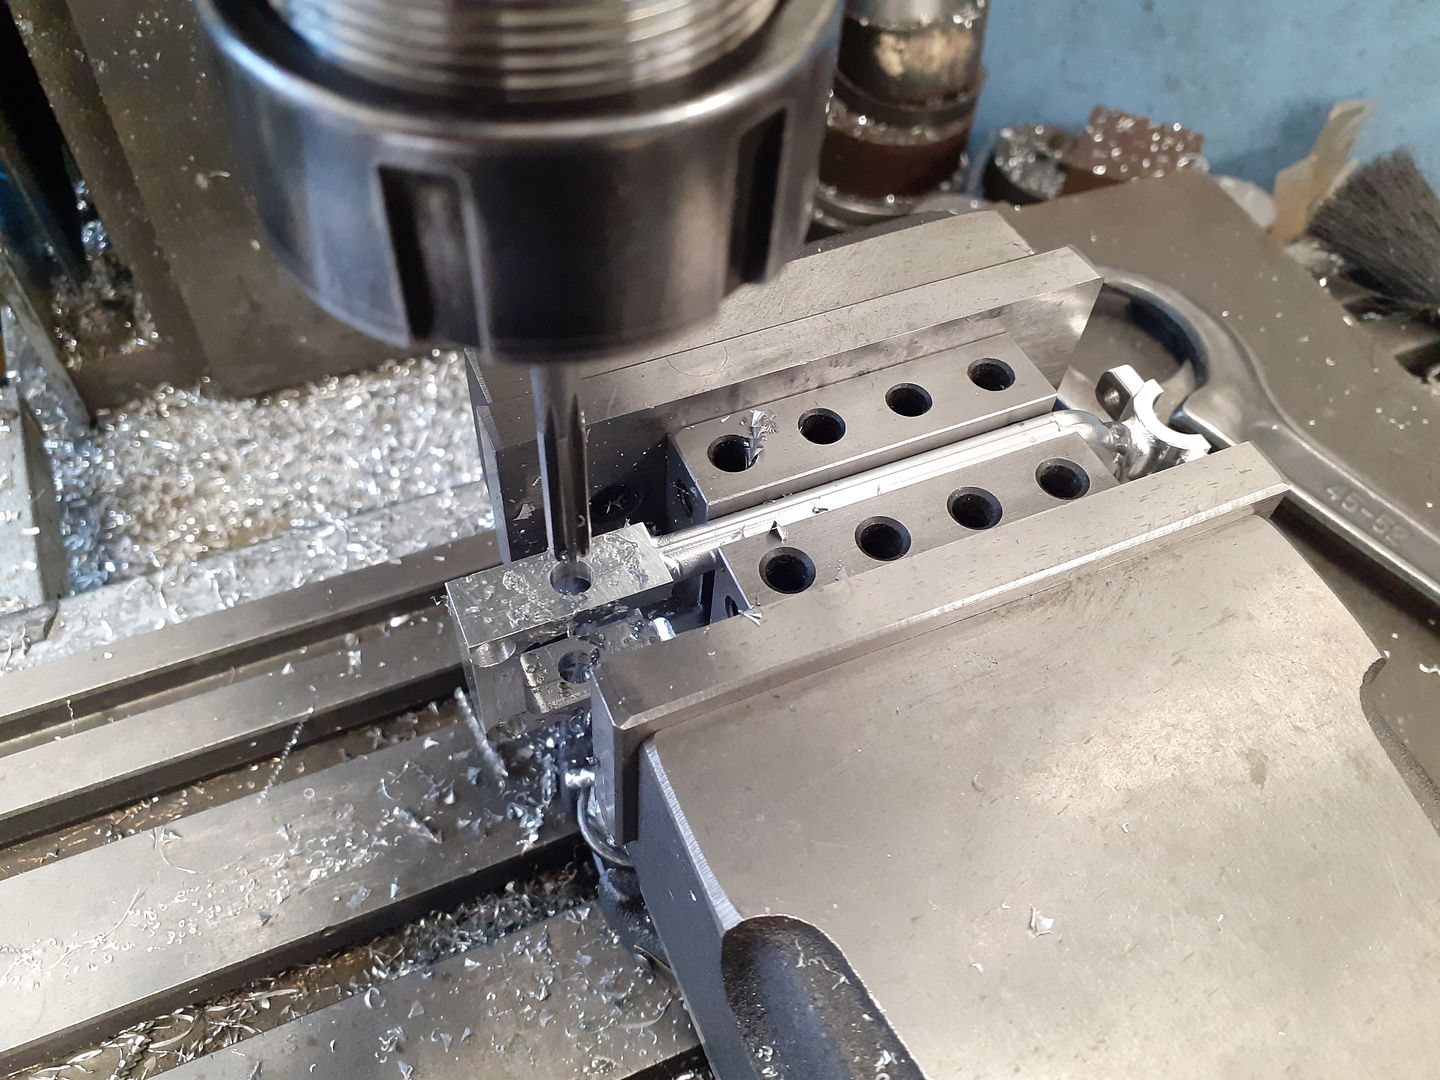
            The big end halves were also done on the CNC before reaming in the manual mill. I then managed to get two M2 counterbored holes in the bottom of the bore so that I could screw it to the top of the fork with a bit of JB Weld for good measure.

            The last thing to do was ream the small end before cutting off the holding material and rounding over the ends

            As with all the other pivoting or rotating holes through the aluminium bushes were fitter, in the case of the small ends there were Loctited into place and a traditional split bearing used for the big end.

            This got me to the stage of having enough completed parts to see if the Lady wanted to dance. I eyeballed up the timing so the displacer lead the power piston by 90degrees and she was displaying a promising bounce. So applied a little light oil to her joints and then gently warmed her bottom with my torch set as low as it would run. After 60seconds or so she decided to perform.

            Edited By JasonB on 04/02/2021 13:15:01

            #524736
            Ron Laden
            Participant
              @ronladen17547

              Wow Jason, that seems to have come on a long way in a short period of time and a test run also.

              It runs a treat you must be pleased with it, I was surprised how long it ran on for after the heat source was removed I was expecting it to run for a little while but not as much as it did.

              Really very nice indeed.

              Ron

              #524744
              Roderick Jenkins
              Participant
                @roderickjenkins93242
                Posted by Ron Laden on 04/02/2021 14:08:05:

                Wow Jason, that seems to have come on a long way in a short period of time and a test run also.

                It runs a treat you must be pleased with it, I was surprised how long it ran on for after the heat source was removed I was expecting it to run for a little while but not as much as it did.

                He forgot to turn the electric motor off devil

                Seriously though, amazing work (as always).

                Stay well,

                Rod

                #524853
                JasonB
                Moderator
                  @jasonb

                  Shush Rod, your not meant to mention thatsecret but thanks for the complement anyway.

                  Ron, it did all seem to come together quite quickly at the end. There are actually not that many parts to it and the majority of the work was in fabricating or cutting from solid to get the "castings". Had it been done from a casting set it probably would only have taken 2-3 weeks instead of just over 6weeks from when I cut the first metal. I still have the base to make and various fixings etc as well as deciding whether to go with spirit fired or put a small camping stove burner under it.

                  #525516
                  JasonB
                  Moderator
                    @jasonb

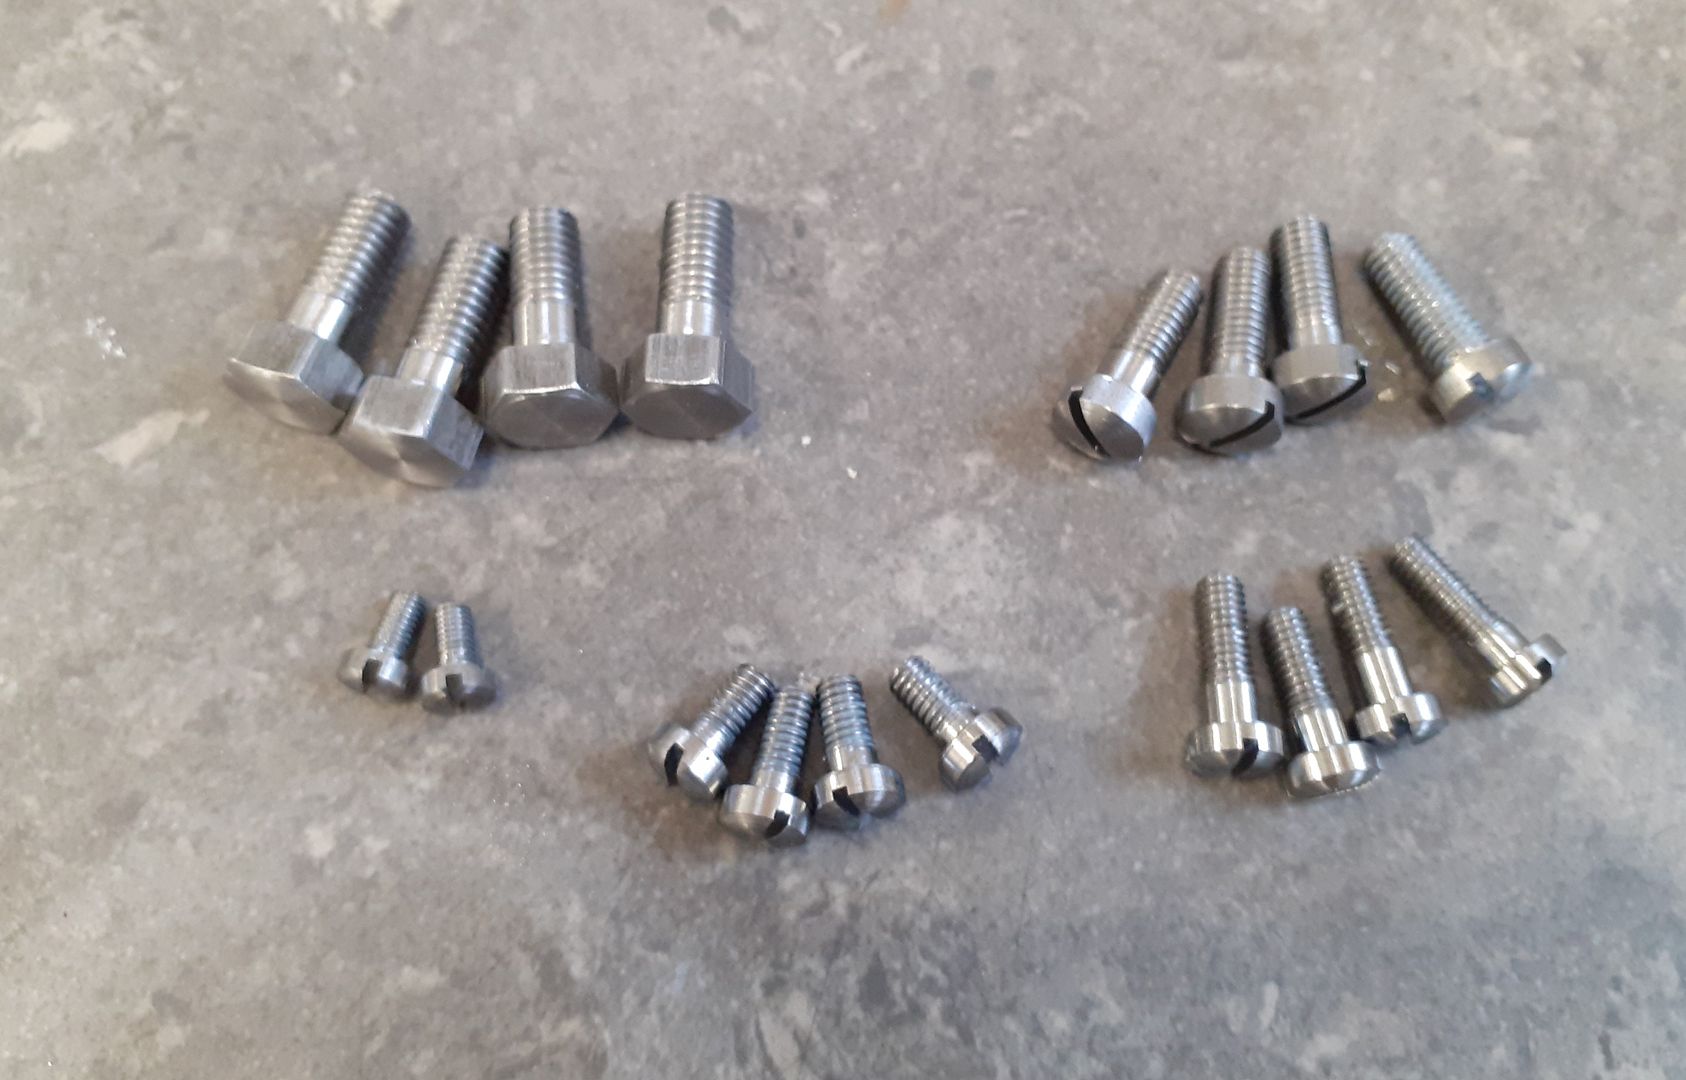
                    With two lots of Cyclocross streaming this weekend there was not so much progress but I did get the screws made for the engine ranging from M3 to M6, just a couple of nut still to do.

                    #527225
                    JasonB
                    Moderator
                      @jasonb

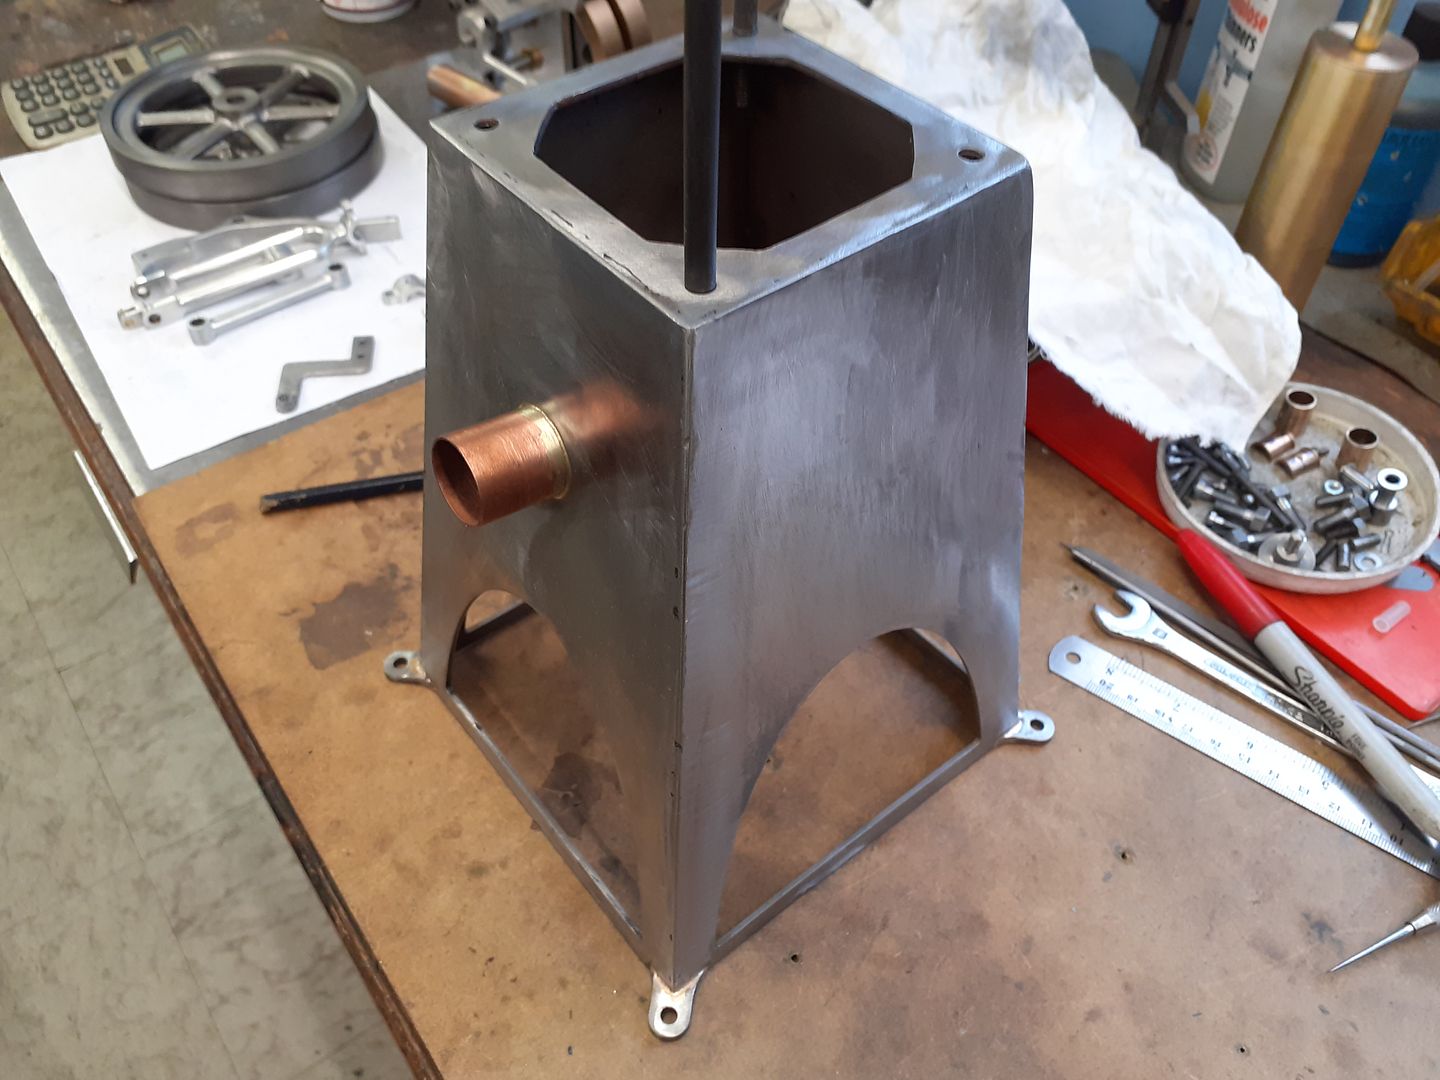
                      Now that the engine is know to work my thoughts turned to the stand. I was not so keen on the screwed together from plate and angle that was shown on the drawings that I have based mine on so decided to weld one up to look more like a cast base but go my own way as I'm not keen on the "1/4 pipe" profile around the bottom of the originals.

                      Four pieces of 2mm mild steel were cut out with an thin disc in the angle grinder and then trimmed to size on the manual lathe. I then used the CNC to cut out the arch shape in each leaving 3 tabs to stop the waste moving about. There was a small amount of burring as the cutter ramped into the cut but OK once in had settled down into the cut. 4mm 3-flute carbide at 5000rpm and 300mm/min feed.

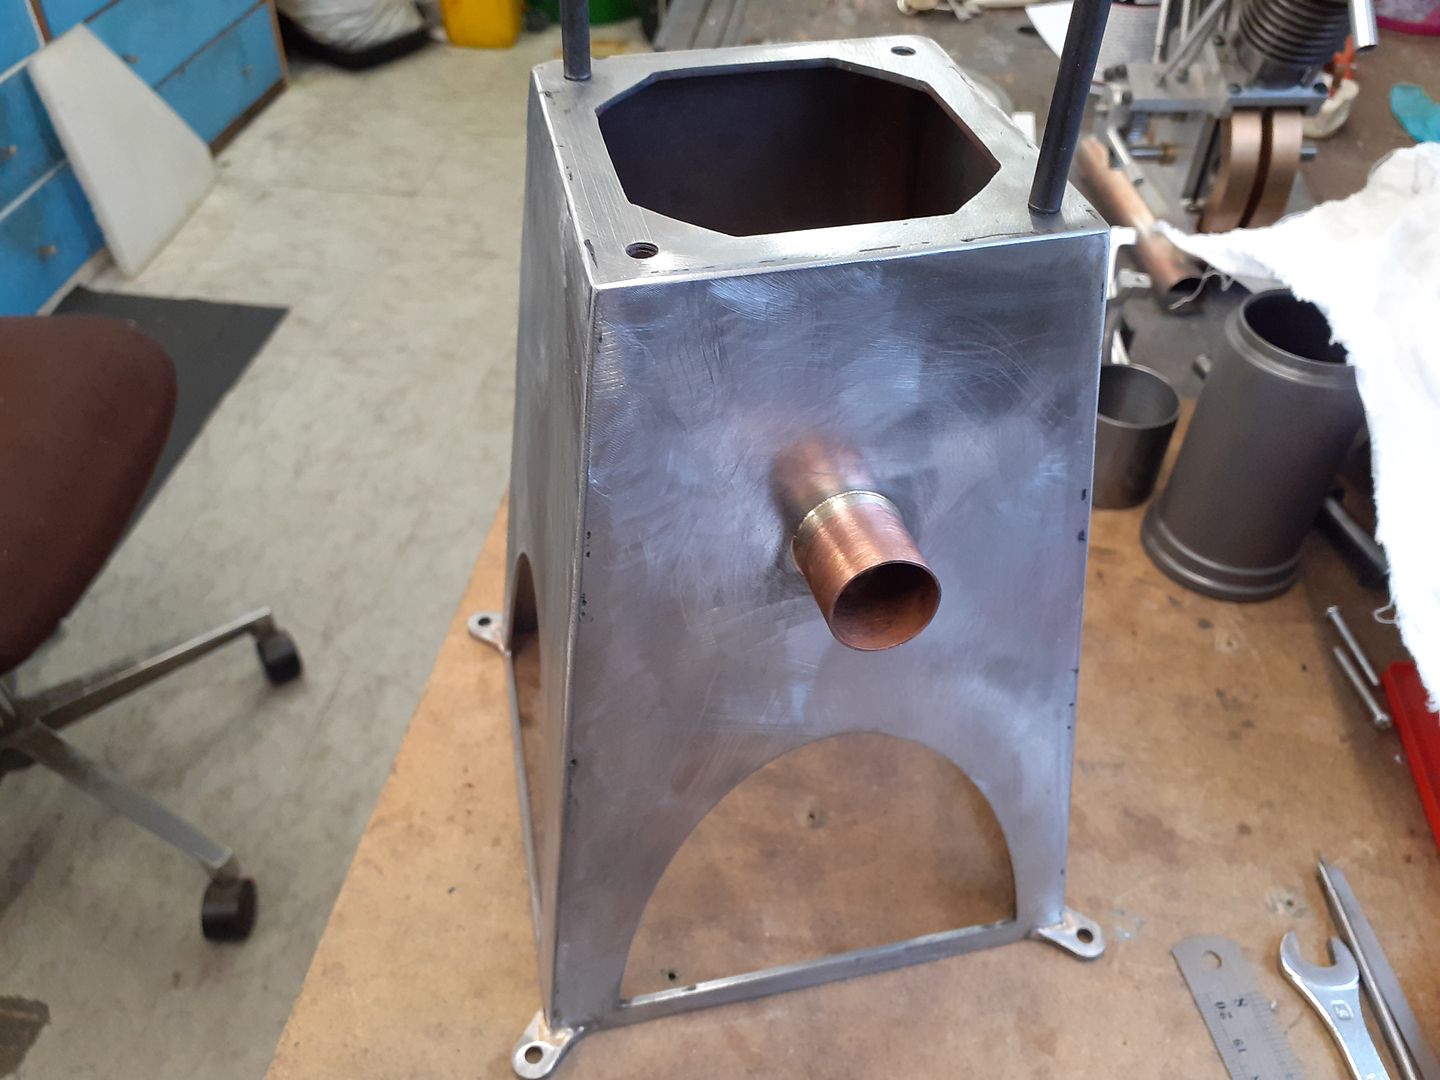
                      I silver soldered on a stub of 22mm copper tube for the chimney before clamping the plates to a piece of 3 x 4 angle and tack welding them. My welding is nothing to get excited about but OK for this sort of thing.

                      Then the rest of the joint was run.

                      I added a top plate from 2.5mm thick material and then gave the welds an initial clean up with the grinder.

                      Next job is to add some feet and cut a hole in the top for the hot cap to pass through.

                      #527836
                      JasonB
                      Moderator
                        @jasonb

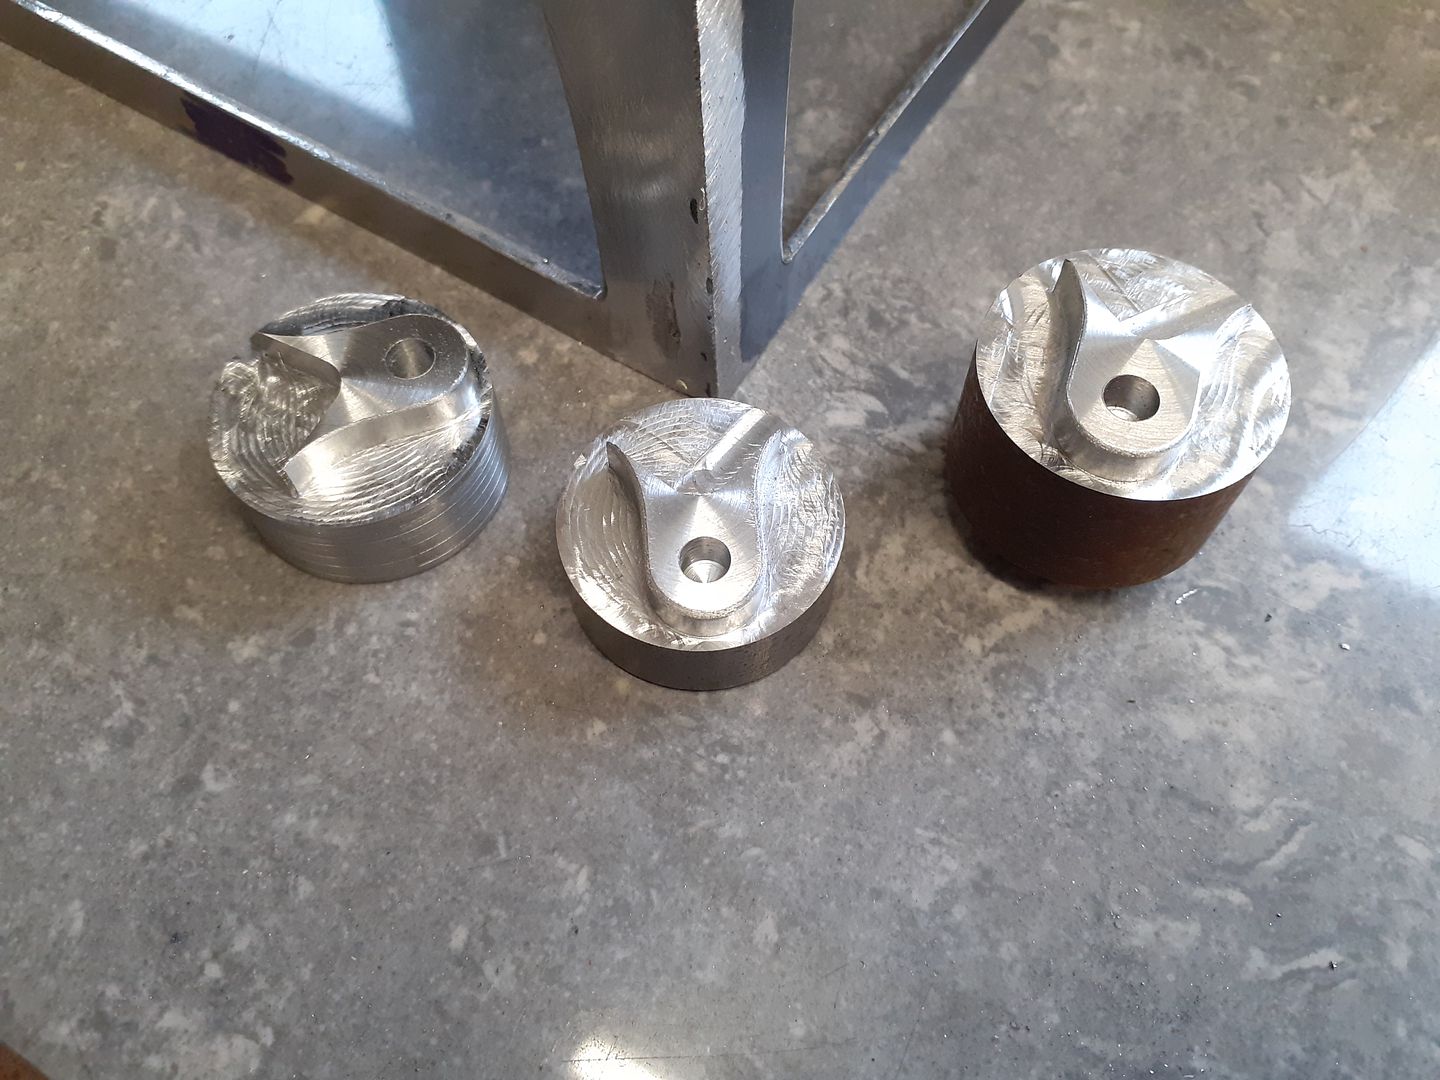
                        I used up some bar ends of 30mm steel to make the feet using the CNC to drill profile and round over the top outer edge before cutting off and silver soldering to the base.

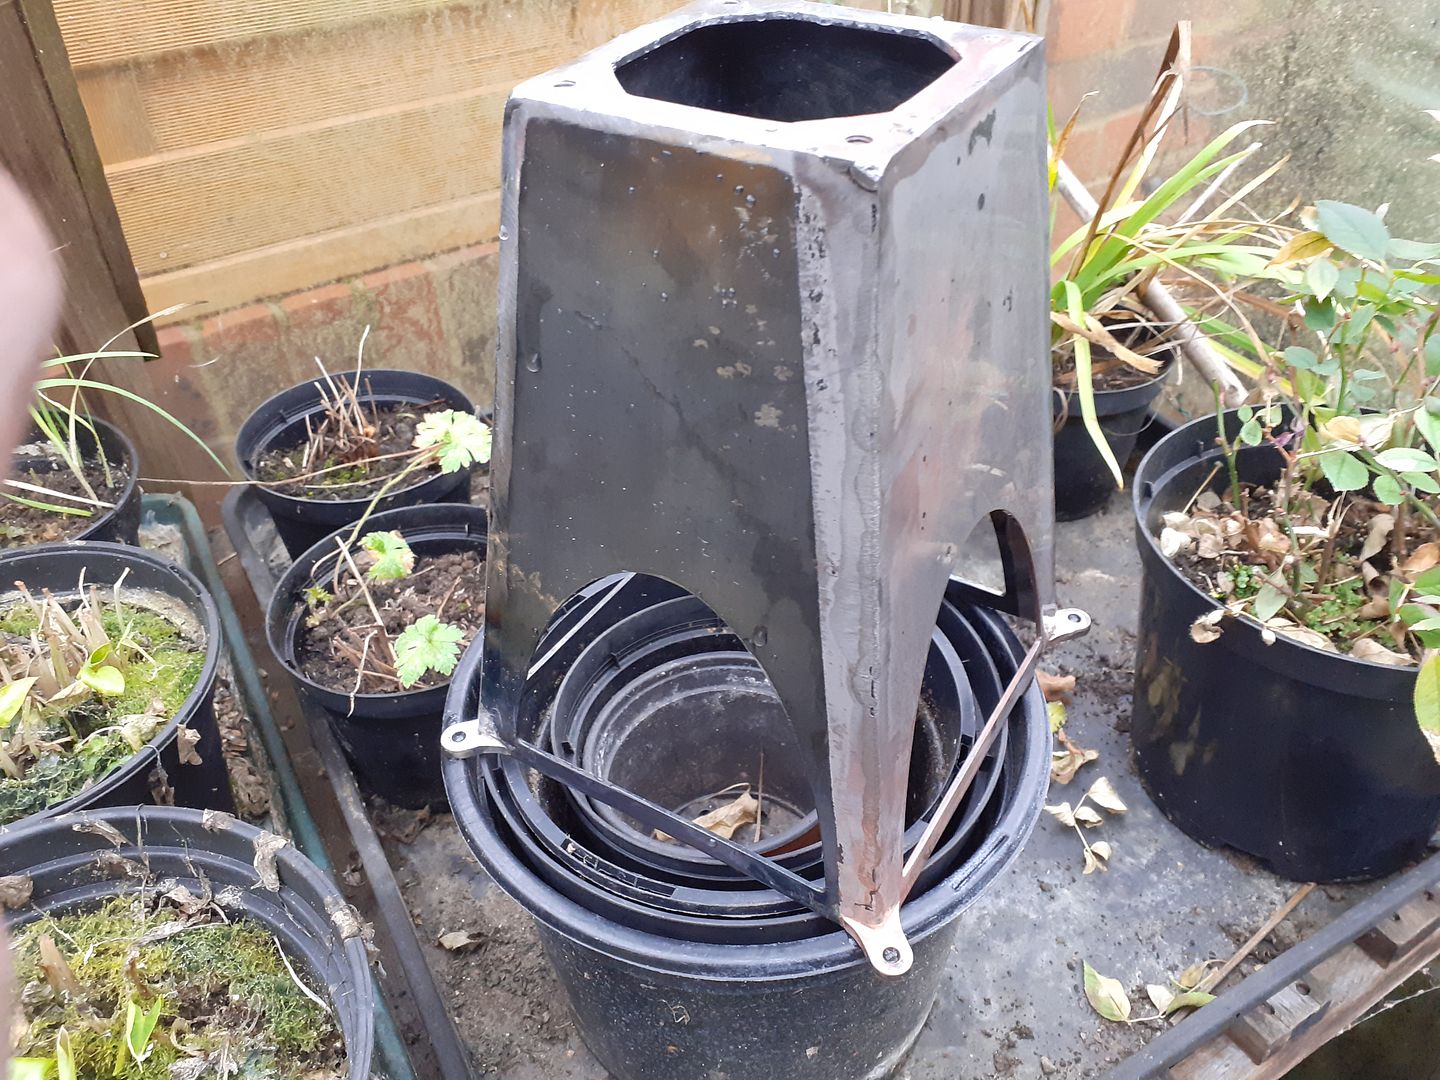
                        Ron asked about pickling black mild steel (hot rolled) to remove the mill scale so took this photo. The sheet used for 3 of the 4 sides had a very smooth scale on them which a flap disc in the 4.5" grinder just skidded off except close to the welds so after the silver soldering I filled a shallow tray with brick cleaner and left to marinade for 40mins. You can see that the side to the right is now bright steel with the tide mark wrapping part way up the left side. Excuse the plants but I normally do it outside but it was raining so took cover in the greenhouse.

                        The other two sides were treated the same which removed all the scale and any soldering flux and then a final fine flap disc to key the surface for paint, you can also see the hole to clear the hot cap flange has been milled into the top plate.

                        I've also test run it on the base using one of the cheap portable camping stove burners and it romps away with the flame set right at it's lowest

                        #527930
                        Ron Laden
                        Participant
                          @ronladen17547

                          Morning Jason

                          The base looks great I like the shape and the look you have achieved there. I am amazed at how just 40 minutes in the Brickclean de-scales the steel to a bright finish I would never have imagined that until you told me about it.

                          Ron

                          #530308
                          JasonB
                          Moderator
                            @jasonb

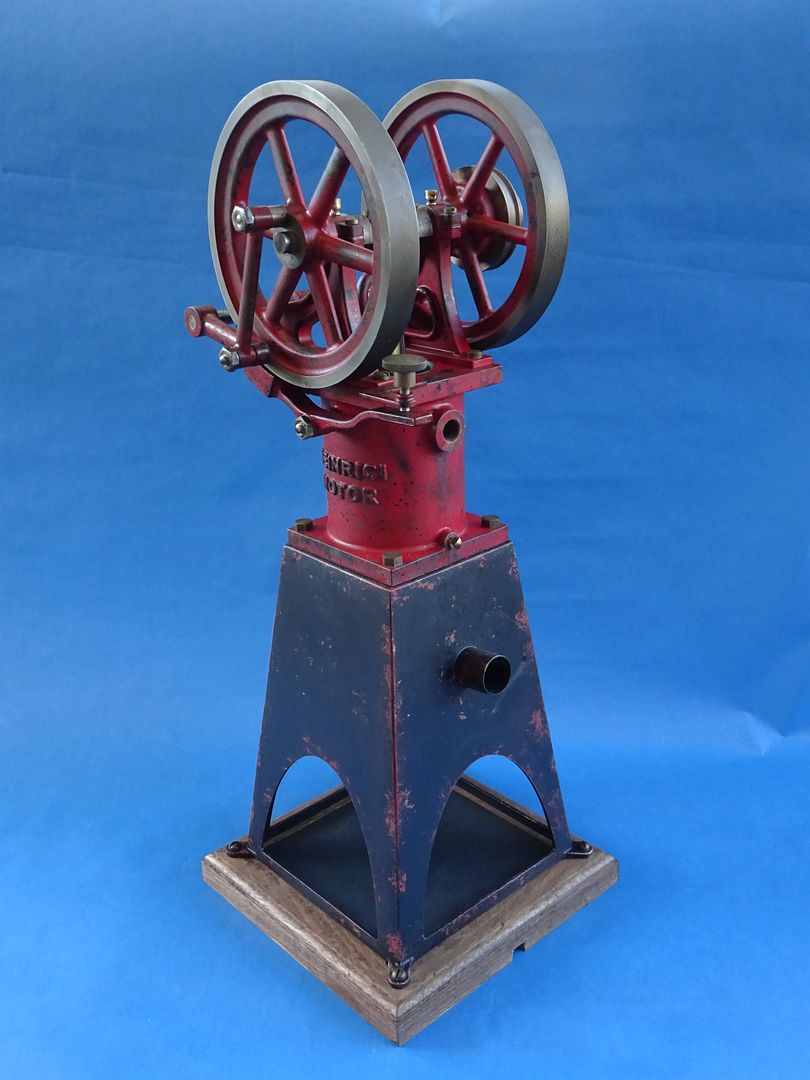
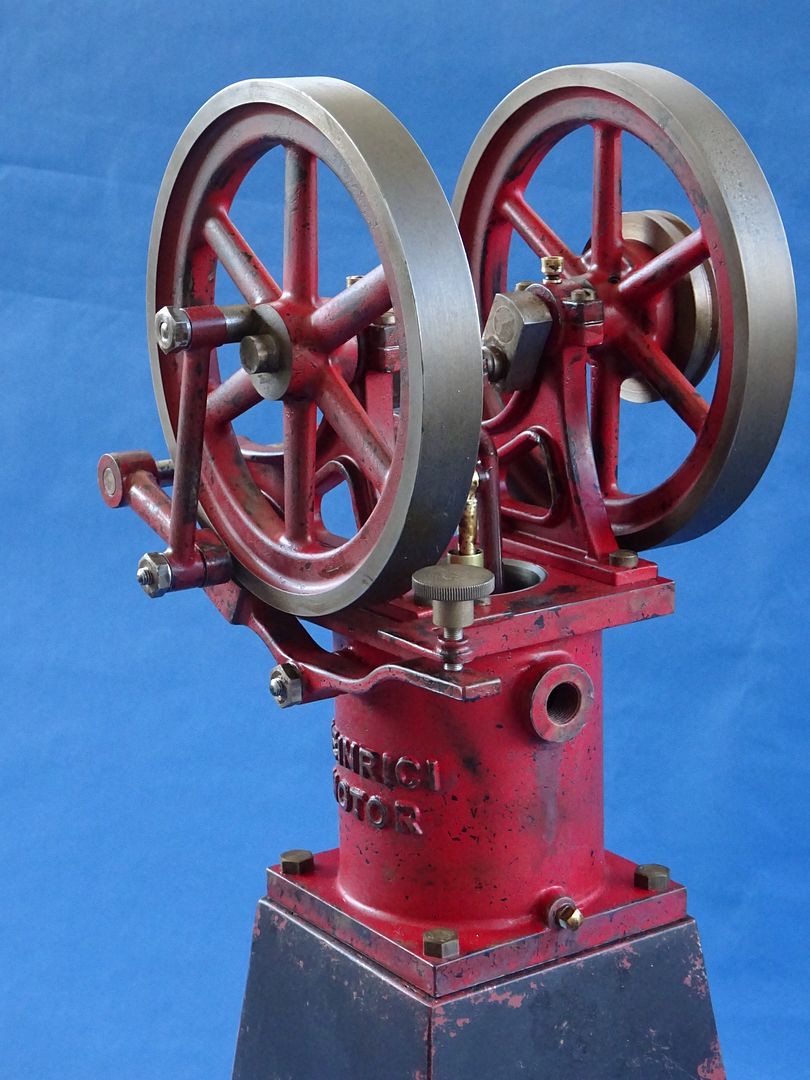
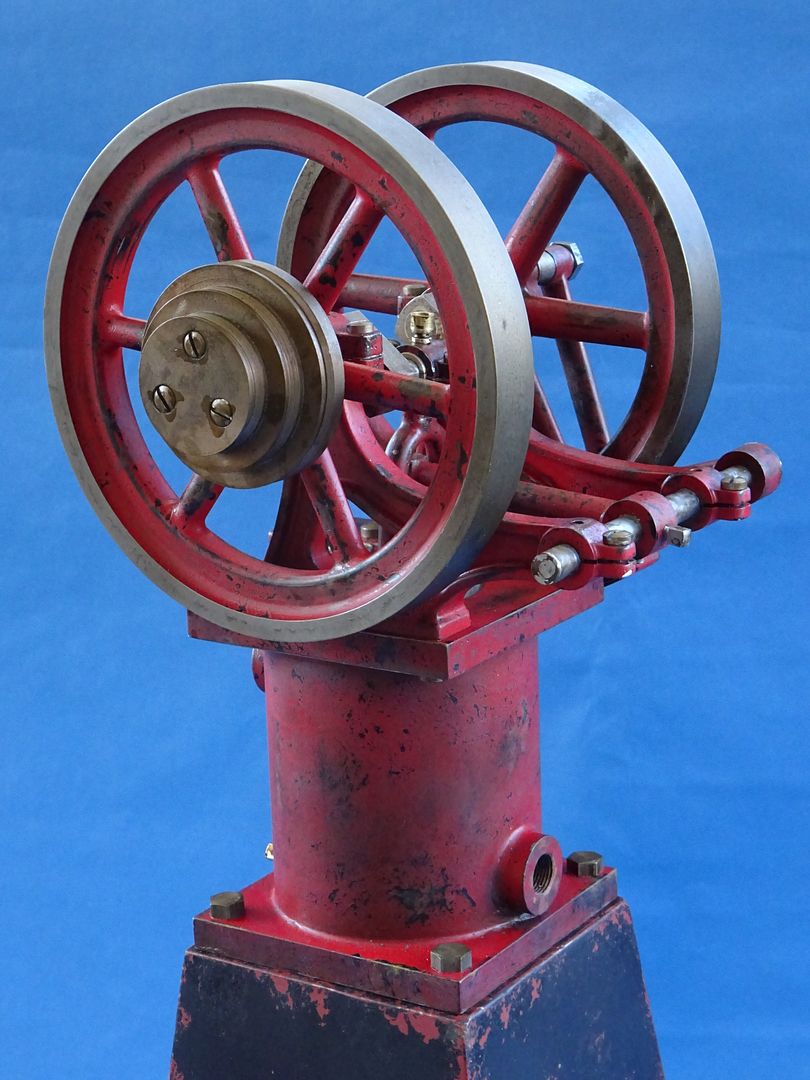
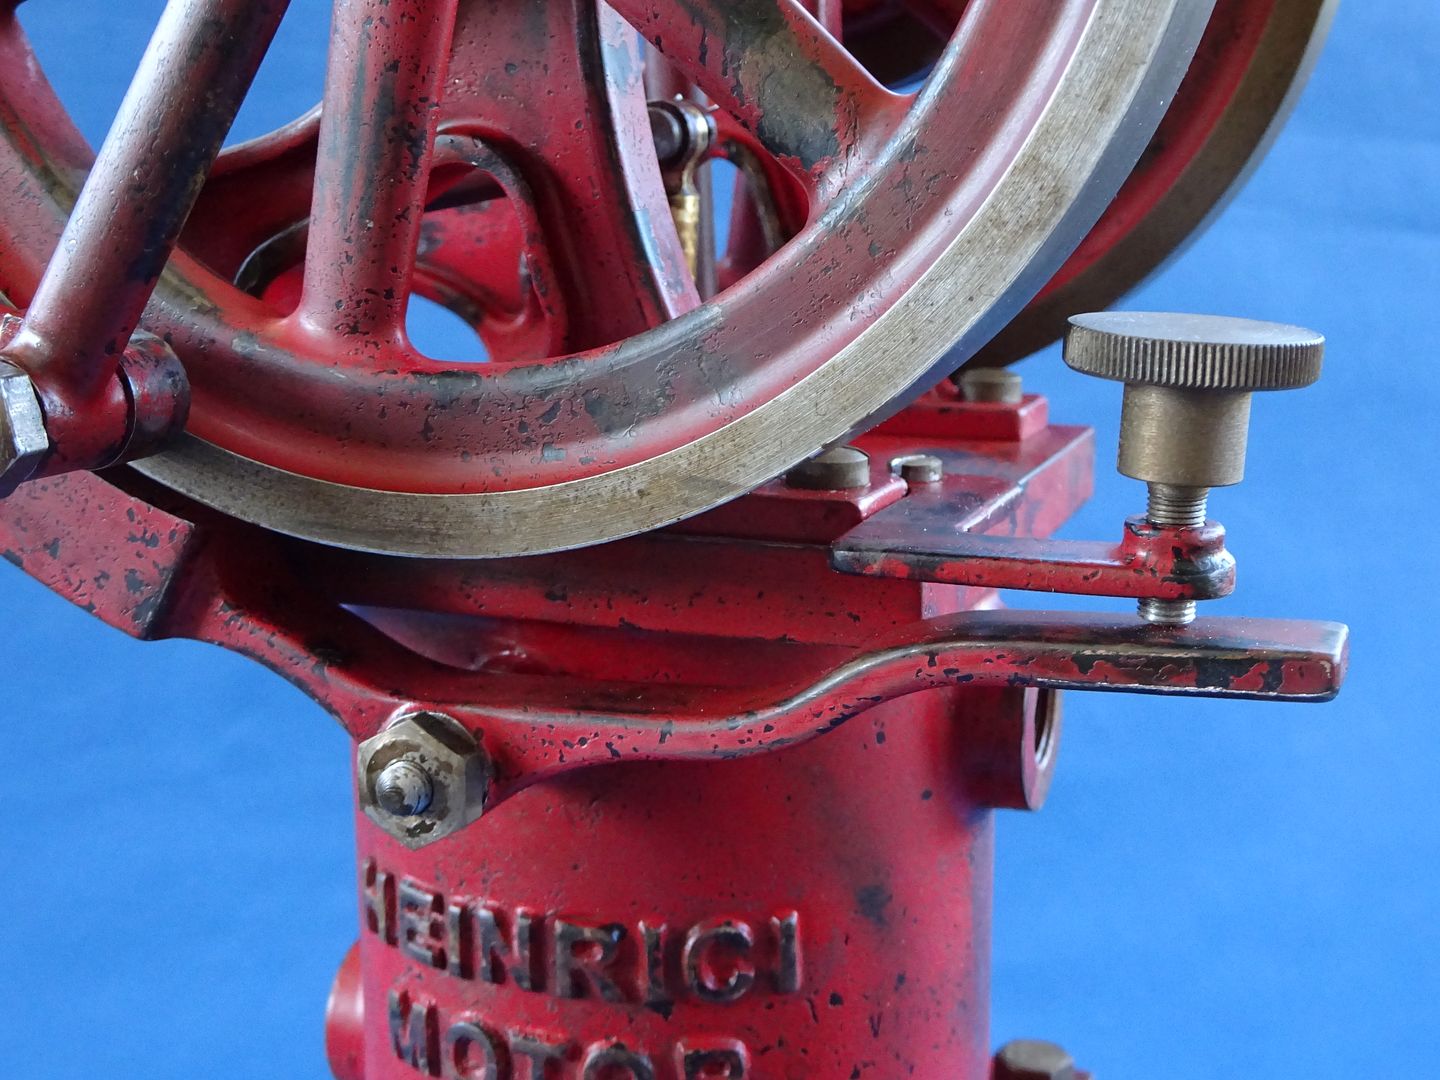
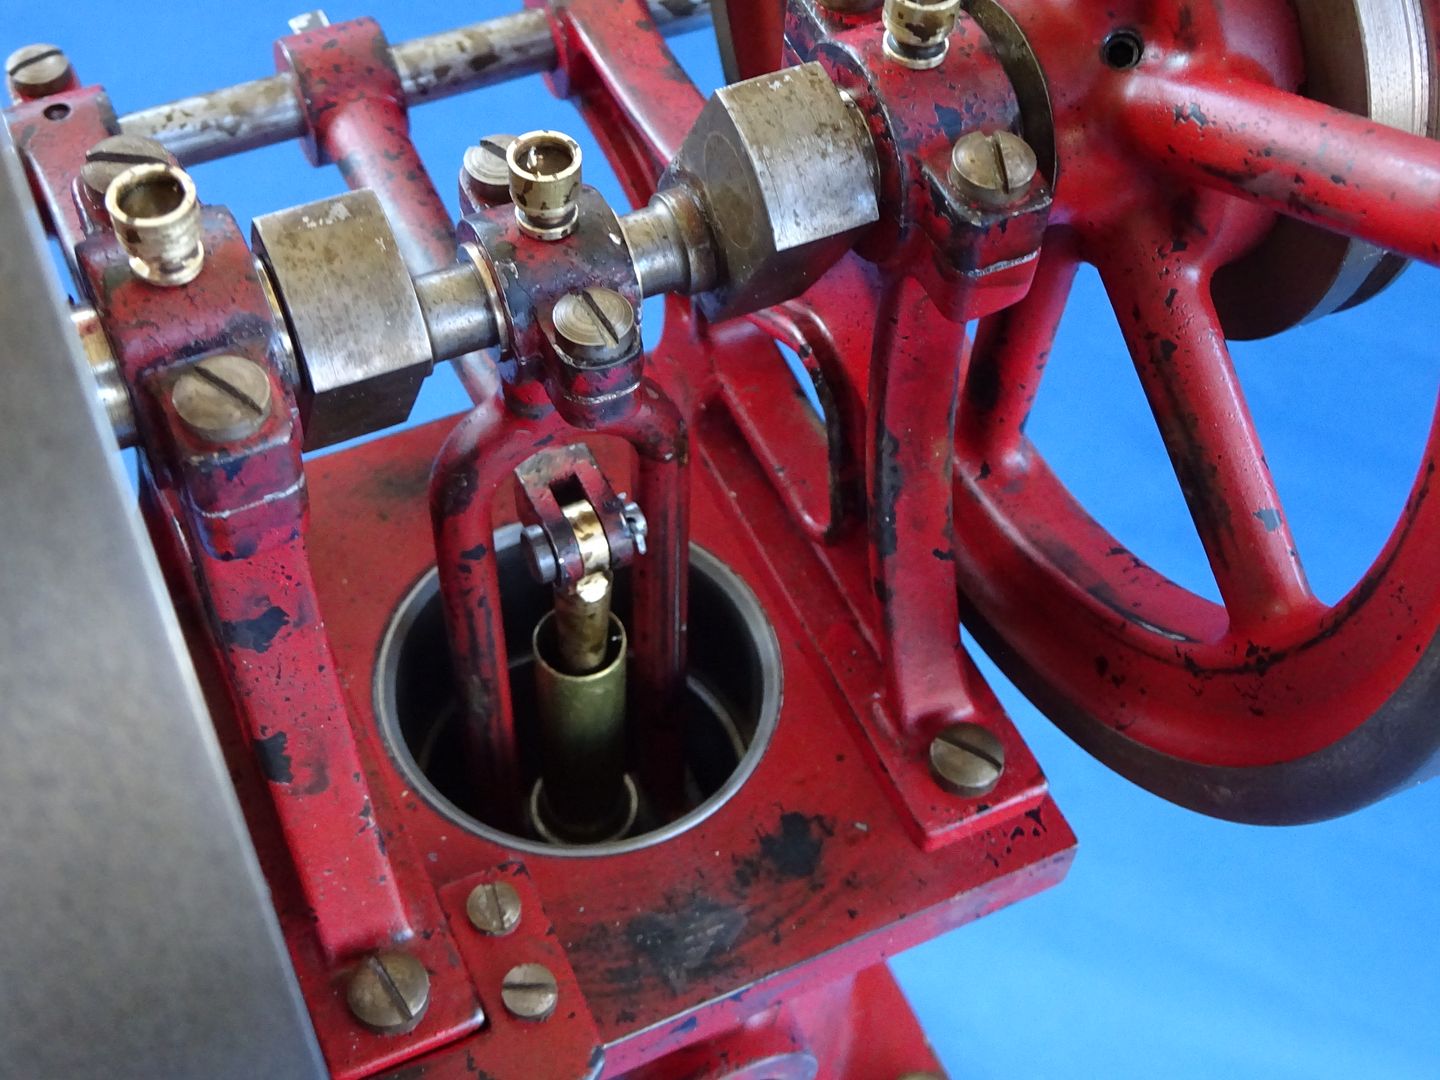
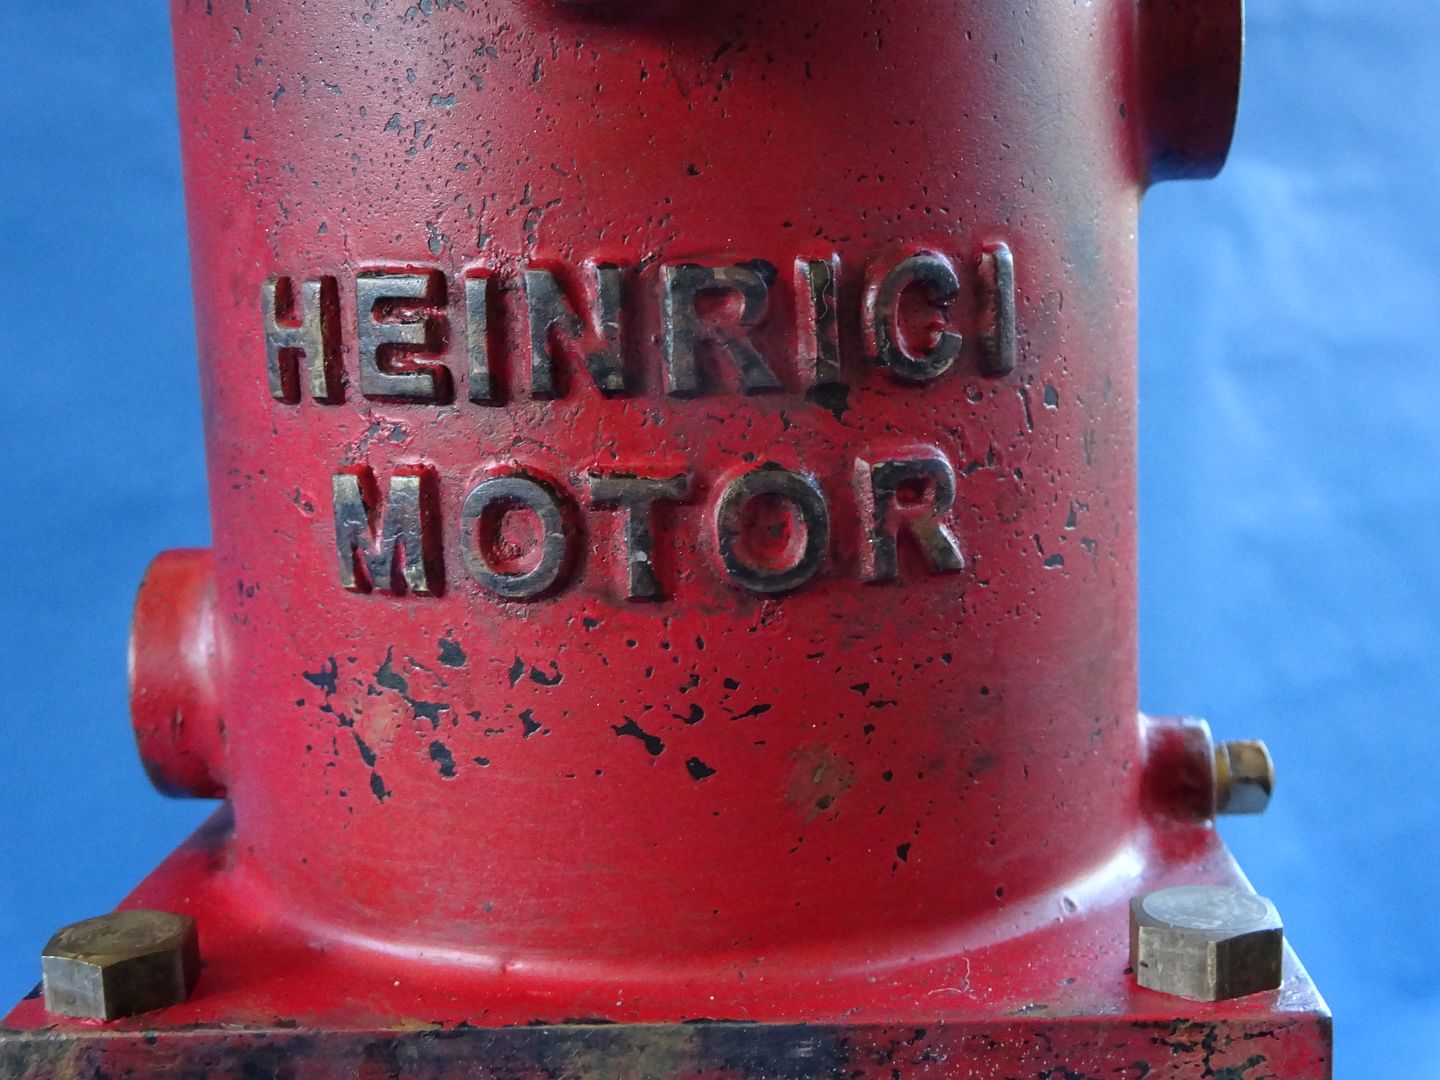
                            Well it's taken a bit longer to paint than usual as I went for something a bit different (no I have not deviated from Red Ramon)  For some time I have toyed with the idea of painting an engine in something other than the usual bright new paintwork and bright though not blinged up bare metal, I quite liked the patinated bronze of Ralf's original but that was not the materials originally used so I got busy with my paint brushed and the airbrush as well as the usual spray cans.

                            I made up a simple base and milled a hole in it for a cheap camping stove burner that will run the engine at it's lowest setting and it will carry on running for quite a while once the head source is turned off. I have run it for several times for about 15mins each time and the jacket does not get particularly hot as you can easily hold your hand on it and that is without any cooling water plumbed up.

                            Edited By JasonB on 26/02/2021 14:03:54

                            #530386
                            Roderick Jenkins
                            Participant
                              @roderickjenkins93242

                              That really is very effective. Most impressive, thanks for sharing the journey with us.

                              Rod

                              #530416
                              Ron Laden
                              Participant
                                @ronladen17547

                                That really is superb Jason, that looks to be very well used and years old and none of it looks as if it has been added, it looks like genuine age and general wear and tear from years of use. For me what makes it work so well is that you have covered every part from top to bottom and not just odd bits here and there.

                                Can I ask how you did the chipped paint work and also the discoloured bare steel its so realistic.

                                Great stuff Jason, some excellent work there.

                                Ron

                                #530426
                                DiogenesII
                                Participant
                                  @diogenesii

                                  yes – awesome finishing – nice work…

                                  #530449
                                  Craig Brown
                                  Participant
                                    @craigbrown60096

                                    Top work on the finishing there you really have aged it nicely. If you would have said it was an original engine I wouldn't even bat an eyelid

                                    #530456
                                    JasonB
                                    Moderator
                                      @jasonb
                                      Posted by Ron Laden on 26/02/2021 20:24:38:

                                      Can I ask how you did the chipped paint work and also the discoloured bare steel its so realistic.

                                      1. Prime the parts – Etch for the aluminium, High5 for flywheels and regular grey for the steel, couple of hours to dry.

                                      2. Satin black spray can over the lot applied in a couple of coats, allow to dry overnight.

                                      3. Apply mustard "resist" to areas where you want the black to show through with a sponge using a dabbing motion.

                                      4. Gloss red spray can applied straight after the resist, 2-3 coats, allow to dry for an of hour.

                                      5 With grey Scotchbrite pad and water rub the surface so red flakes off the resist also removing the resist at the same time. allow to dry over night.

                                      6. with 400g wet & dry used wet rub down the paintwork to get the work areas thin enough so the black starts to show through.

                                      7. using acylics and water apply rusty colours like Raw Unber, and Burnt Sienna blending and lifting off paint with a wet brush. add some Yellow Ochre to selected areas like the water connection threads and off corner.

                                      8. Airbrush diluted Sepia acrylic to soften and blend the previous weathering, this also gives the rust stain to the bare metal like flywheel rims, pully and the screw/bolt heads.

                                      9. Airbrush clear matt acrylic over the lot to seal it all in and tone down any of the gloss remaining on the red and allow to dry overnight

                                      10. Assemble engine

                                      11. Touch up and add sepia to shafts that had to be pushed through bearings during assembly.

                                      That's it for the engine.

                                      The stand was just red oxide coloured stove paint, resist, satin black stove paint, rubdown.

                                      #530457
                                      Ron Laden
                                      Participant
                                        @ronladen17547

                                        Wow, I can see why it looks so good with that amount of effort and the techniques and methods used, impressive stuff.

                                        As Craig mentioned you could show someone the engine and tell them it is years old and no one would doubt it.

                                        I forgot to say its also a very sweet runner responds really well to a change in heat level, very good.

                                        Mustard resist.??

                                        Ron

                                        #530481
                                        JasonB
                                        Moderator
                                          @jasonb

                                          I saw it on Youtube so it must work, really anything water soluble of the right consistency would do.

                                          #530486
                                          Ron Laden
                                          Participant
                                            @ronladen17547

                                            Well I would never have imagined that you learn something every day, obviously works very well as you have shown.

                                            Thanks Jason

                                          Viewing 20 posts - 26 through 45 (of 45 total)
                                          • Please log in to reply to this topic. Registering is free and easy using the links on the menu at the top of this page.

                                          Advert

                                          Latest Replies

                                          Home Forums Miscellaneous models Topics

                                          Viewing 25 topics - 1 through 25 (of 25 total)
                                          Viewing 25 topics - 1 through 25 (of 25 total)

                                          View full reply list.

                                          Advert

                                          Newsletter Sign-up