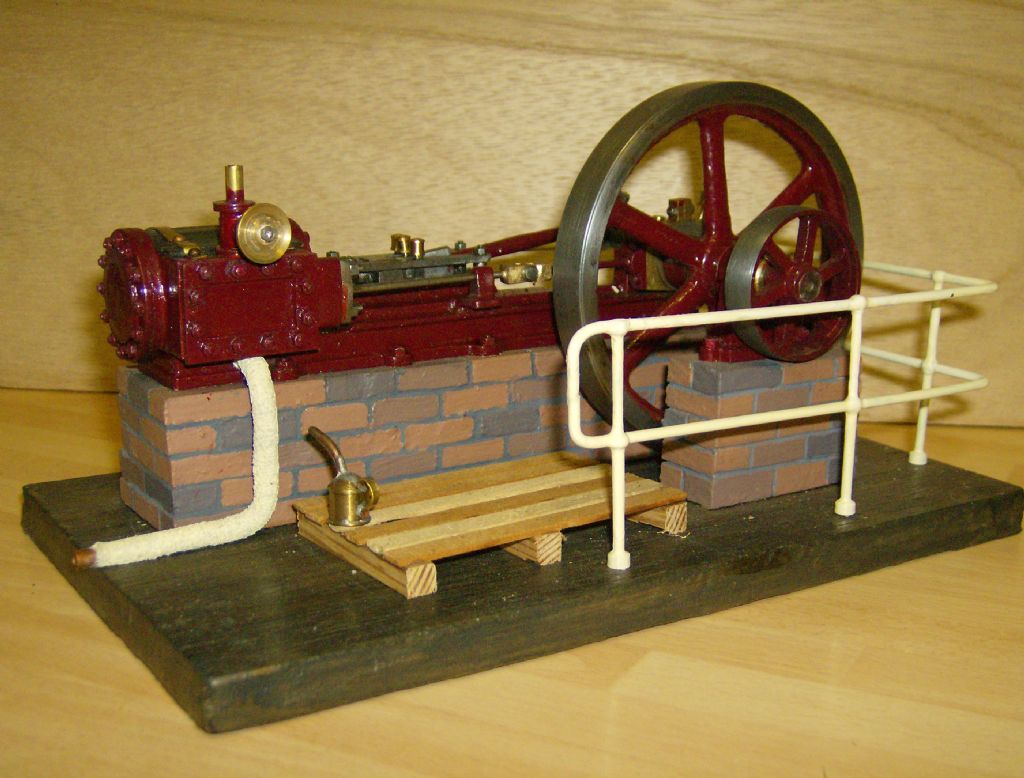
Has anybody built the steam engine kit : (40701) Liegende 12/36 ?

Advert

Has anybody built the steam engine kit : (40701) Liegende 12/36 ?

Home Forums Stationary engines Has anybody built the steam engine kit : (40701) Liegende 12/36 ?

Viewing 25 posts - 51 through 75 (of 144 total)
  • Author
    Posts
  • #197320
    JasonB
    Moderator
      @jasonb

      Polly model Eng do some nice machined metric screws, not sure of the hex size but they will have M2 thread. I think they get them from this german supplier

      I think there are more models painted in brunswick green than real engines ever were, takle a look at somewhere like prestons or any steam museum and you will see all sorts of colours not just dark green

      Edited By JasonB on 20/07/2015 07:46:27

      Advert
      #197363
      Neil Wyatt
      Moderator
        @neilwyatt
        Posted by JasonB on 20/07/2015 07:34:08:

        Polly model Eng do some nice machined metric screws, not sure of the hex size but they will have M2 thread. I think they get them from this german supplier

        I think there are more models painted in brunswick green than real engines ever were, takle a look at somewhere like prestons or any steam museum and you will see all sorts of colours not just dark green

        Edited By JasonB on 20/07/2015 07:46:27

        There seem to be a few 'national' preferences:

        • UK like Brunswick Green and Maroon/Crimson
        • Germany go for black with lots of shiny brass
        • Italy, lots of polished metal especially brass
        • USA paler bluey-green with signal red flywheels etc.

        A broad generalisation, of course, but has anyone noticed any other such trends?

        Neil

        Edited By Neil Wyatt on 20/07/2015 12:36:20

        #197377
        Nick_G
        Participant
          @nick_g
          Posted by Neil Wyatt on 20/07/2015 12:35:09:

          • Germany go for black with lots of shiny brass

          A broad generalisation, of course,

          .

          Of course it is Neil.

          I cannot think where that preference came from.?? surprise

          Nick winkwink

          #197585
          Brian John
          Participant
            @brianjohn93961

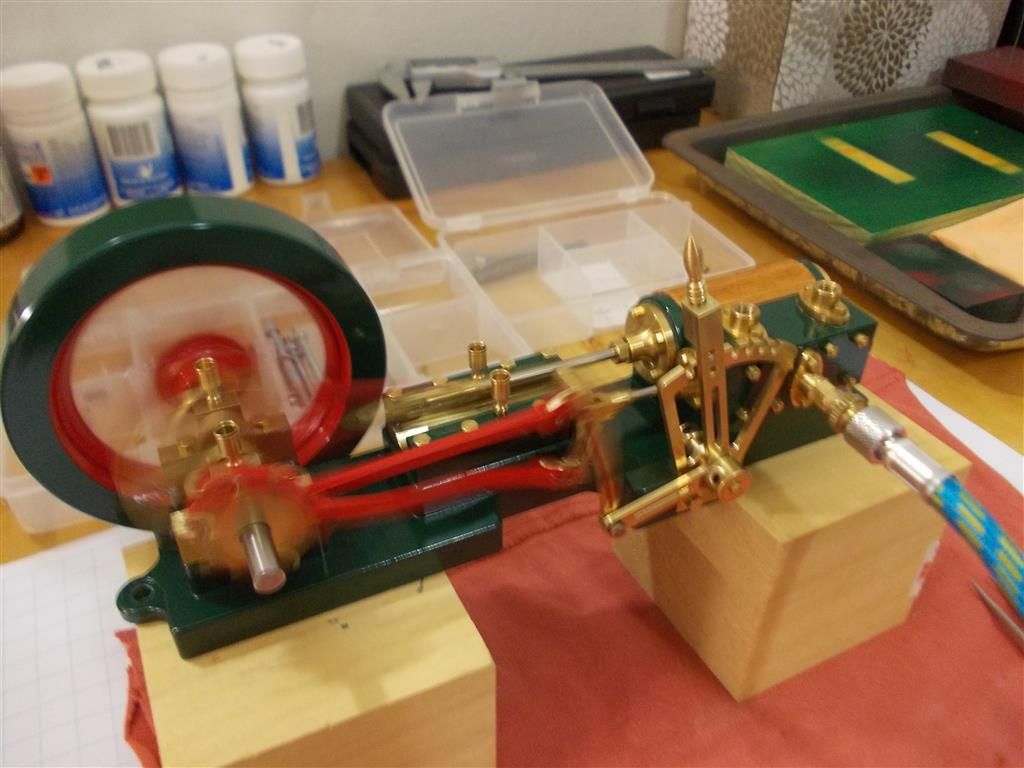
            I have assembled the engine for test running : it does run but not very well at this stage. I do not think I have the control/valve cylinder set correctly. It is the only part of the translated instructions that are not very clear to me. The main piston is set correctly as the cross head runs evenly in the cross head guide as per the instructions.

            The engine does not run when the reversing lever is on the middle notch (neutral?) and I think that is correct. It hardly runs at all on the 1st notch to the right or left . It runs very well on the 2nd notch to the right or left. Then it run slowly on the 3rd notch to the right or left. I think it should be running at maximum speed on the 3rd notch. This is why I do not think I have it set up correctly.

            Does anybody have any suggestions ?

            testing 1.jpg

            testing 2.jpg

            testing 3.jpg

            Edited By Brian John on 22/07/2015 13:36:02

            #197910
            Brian John
            Participant
              @brianjohn93961

              I have worked on the cross head and the cross head guide with 2000 grit sandpaper. I felt things were a bit tight there. It is running much better now.

              What is an acceptable amount of ''slop'' between the cross head and the cross head guide ?

              #199028
              Brian John
              Participant
                @brianjohn93961

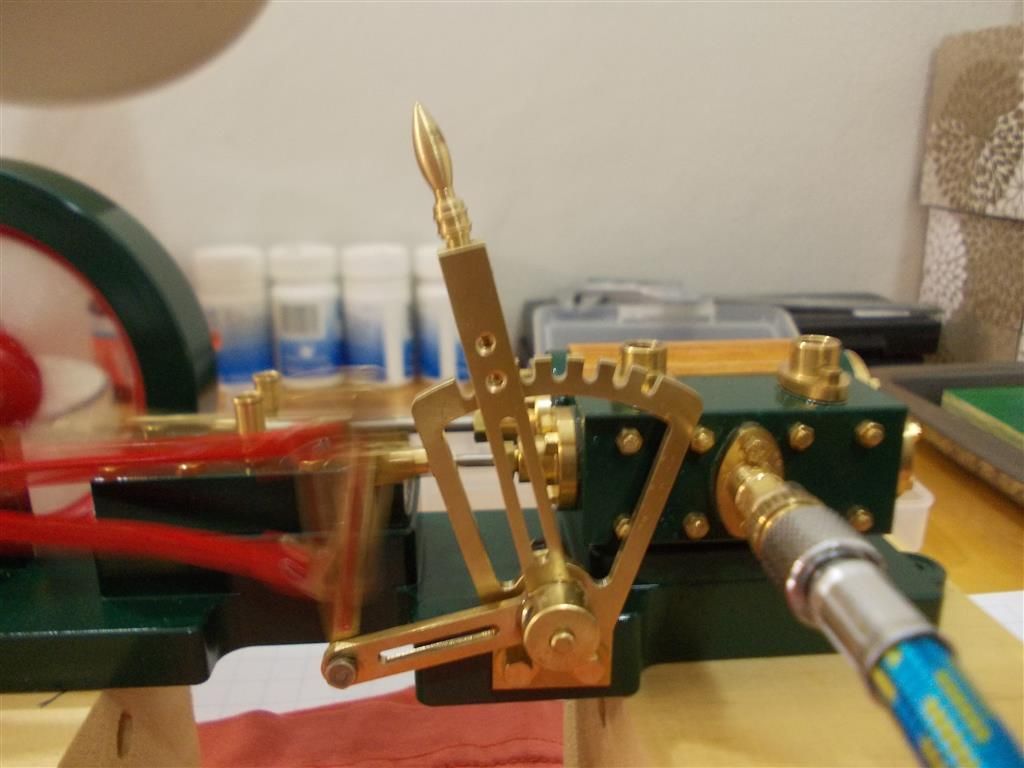
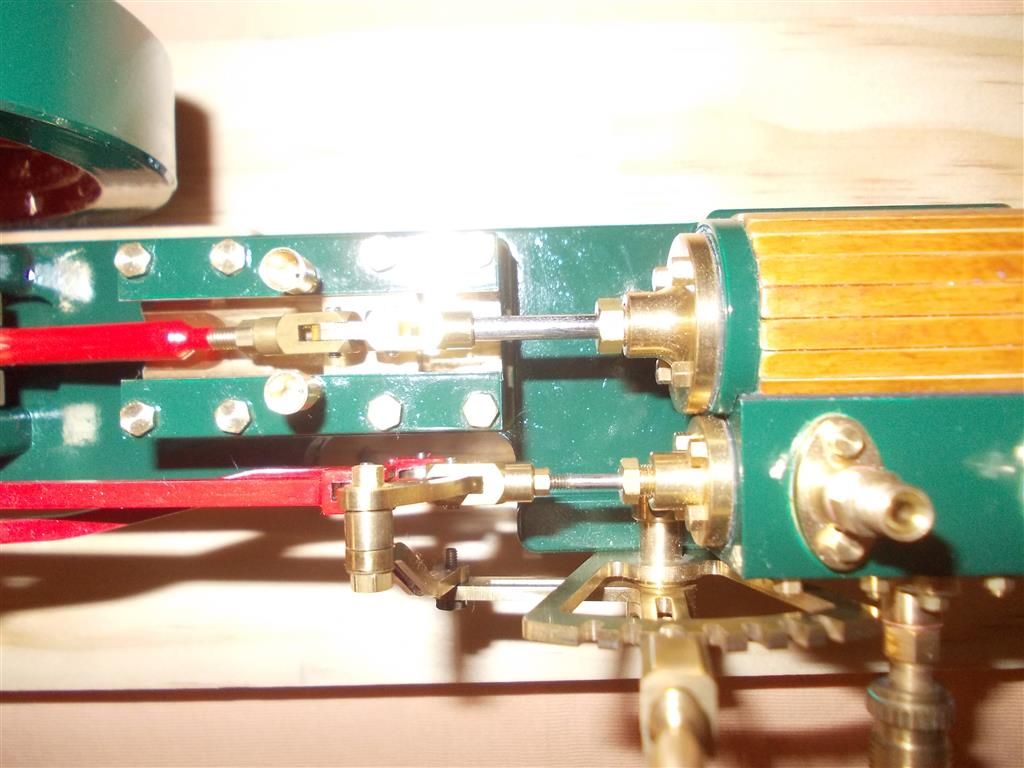
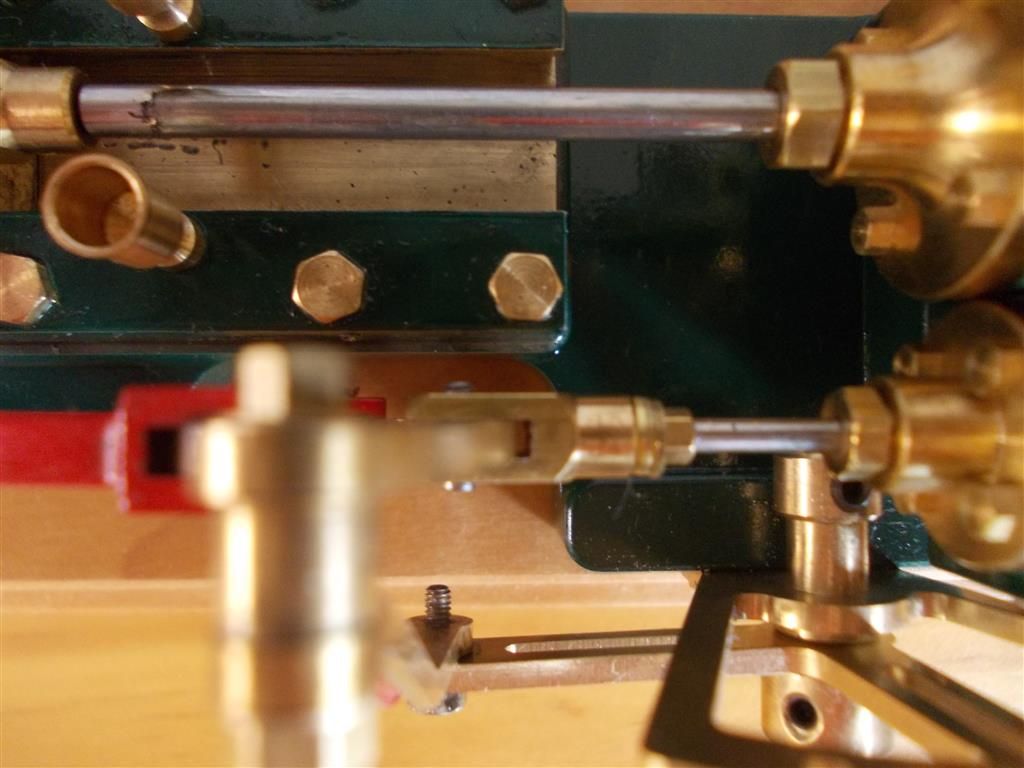
                I have got this engine running perfectly …for a while ! The problem is the lock nut on the control valve : it keeps coming loose. If I tighten it up too much then the engine binds. You can see the lock nut just in front of the clevis on the control valve rod. After about 30 minutes of running the control valve has worked its way out of the clevis hence affecting the timing and it starts to run badly. PM Research engines have a similar lock nut but I never had any problems getting their engines adjusted to run smoothly. Any suggestions ?

                NOTE : the engine is mounted on some scrap timber while I wait for the PU on the wooden base to dry and harden.

                lock nut 1.jpg

                lock nut 2.jpg

                lock nut 3.jpg


                Edited By Brian John on 03/08/2015 12:05:26

                #199044
                Neil Wyatt
                Moderator
                  @neilwyatt

                  The thread is possibly not perfectly aligned, so tightening it up may be skewing the clevis to one side.

                  Simple bodge – a drop of nut-lock.

                  No one will know except you and me

                  Neil

                  #199048
                  Brian John
                  Participant
                    @brianjohn93961

                    Neil : yes, I had considered that too but I thought I would try to get some other ideas here first. I know exactly where to set things now so it should be no problem to do it that way.

                    Oddly enough, the instructions mention using Loctite on the main cylinder locknut (you can see it on the connecting rod/clevis) but there is no need for Loctite there as it cannot possibly move ! They specifically mention NOT to use Loctite on the control valve rod

                    UPDATE : Amongst the many odds and ends left over in this kit was a small washer. I had been warned that there are many left over bits and pieces in this kit as it has been revised many times over the years so ''do not panic''. I decided to fit this small washer between the clevis and the lock nut. I will run it for a few hours tomorrow to see if it helps.

                    #199050
                    Neil Wyatt
                    Moderator
                      @neilwyatt

                      > They specifically mention NOT to use Loctite on the control valve rod

                      That's so you can adjust it. Once it's set right…

                      Neil

                      #199053
                      Michael Gilligan
                      Participant
                        @michaelgilligan61133
                        Posted by Neil Wyatt on 03/08/2015 14:48:19:

                        > They specifically mention NOT to use Loctite on the control valve rod

                        That's so you can adjust it. Once it's set right…

                        .

                        Brian,

                        Sounds like an ideal place to use Loctite 222

                        MichaelG.

                        [you shouldn't need me to find the specification for you]

                        .

                        Edit: … as I have mentioned before; Loctite is a brand-name, not a specific product.

                        Personally, I would not take seriously any advice to use or not use "Loctite" 

                        Edited By Michael Gilligan on 03/08/2015 15:37:04

                        #199094
                        Brian John
                        Participant
                          @brianjohn93961

                          The washer seems to be helping and the lock nut is not loose yet. But now the tiny screw holding the clevis is coming loose . Amazing : the only two screws you do NOT want to Loctite on the whole machine are the two which keep coming loose !

                          #199096
                          Michael Gilligan
                          Participant
                            @michaelgilligan61133
                            Posted by Brian John on 04/08/2015 07:36:31:

                            The washer seems to be helping and the lock nut is not loose yet. But now the tiny screw holding the clevis is coming loose . Amazing : the only two screws you do NOT want to Loctite on the whole machine are the two which keep coming loose !

                            .

                            Brian,

                            Please read my previous post.

                            MichaelG.

                            #199773
                            Brian John
                            Participant
                              @brianjohn93961

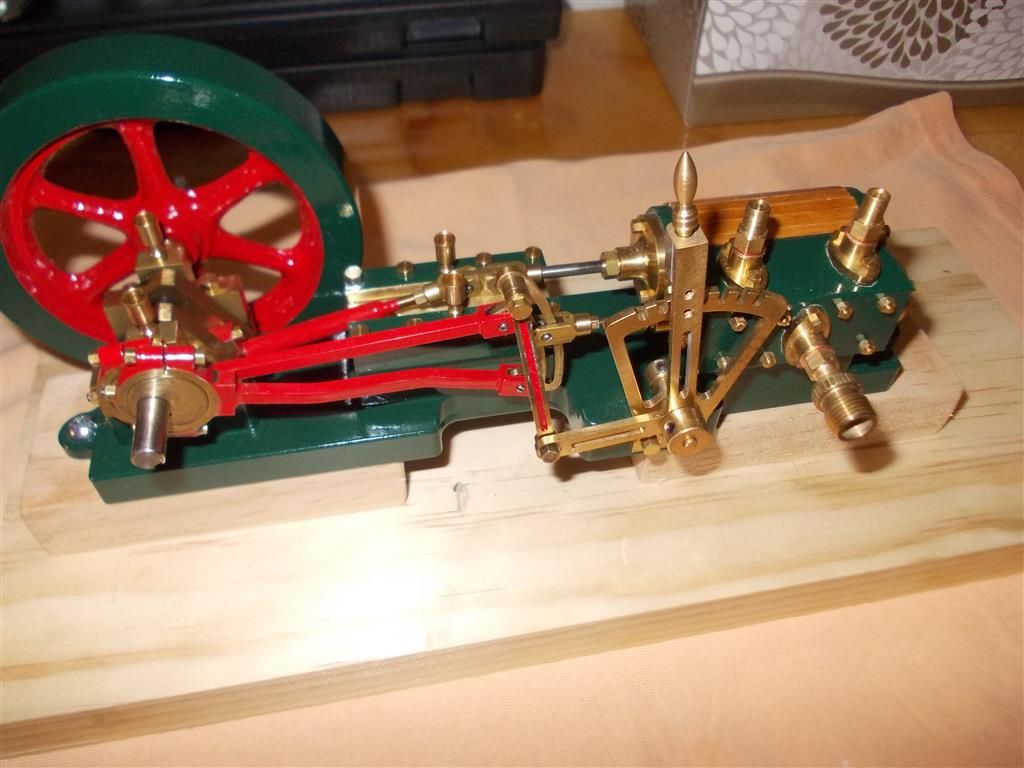
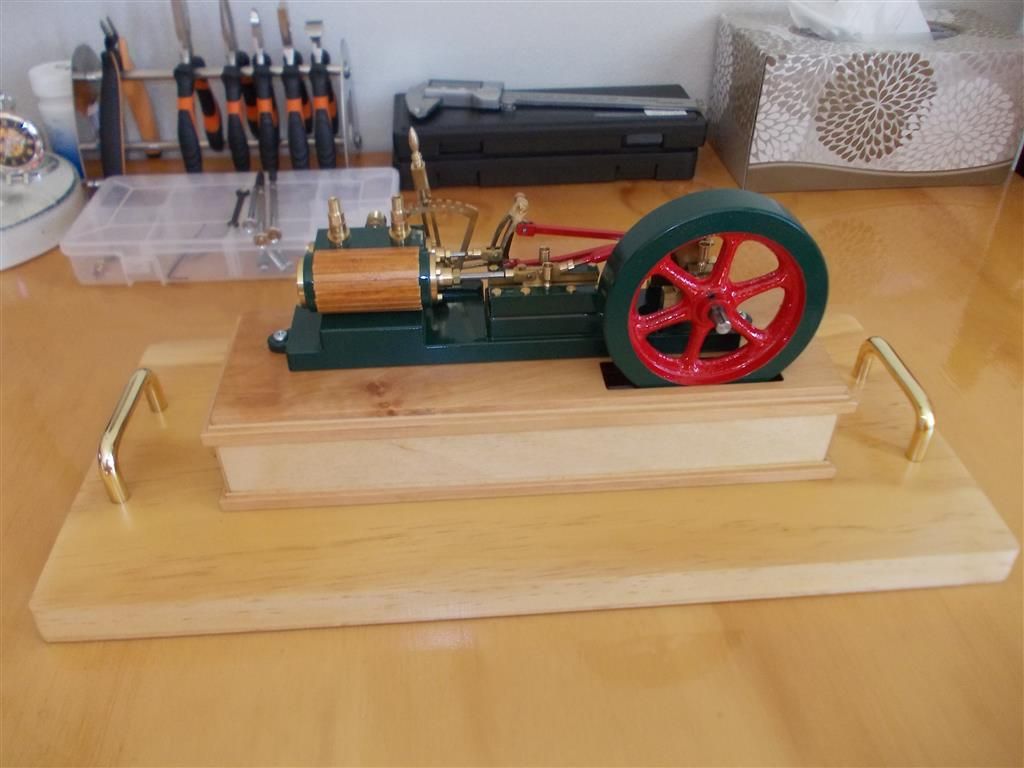
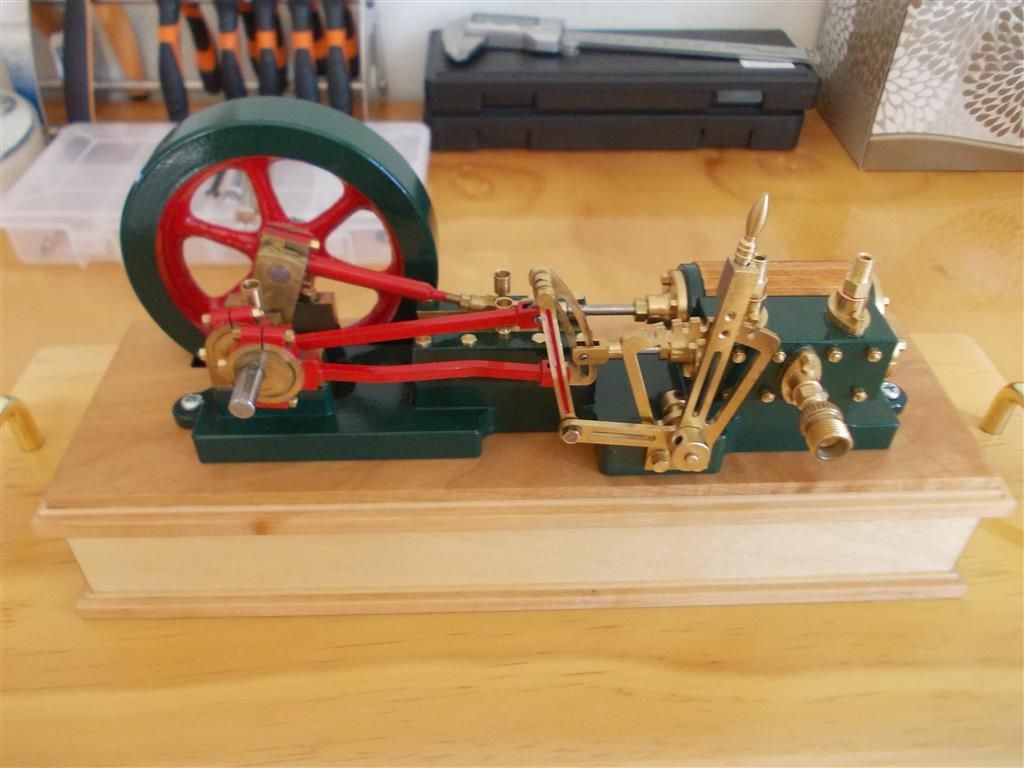
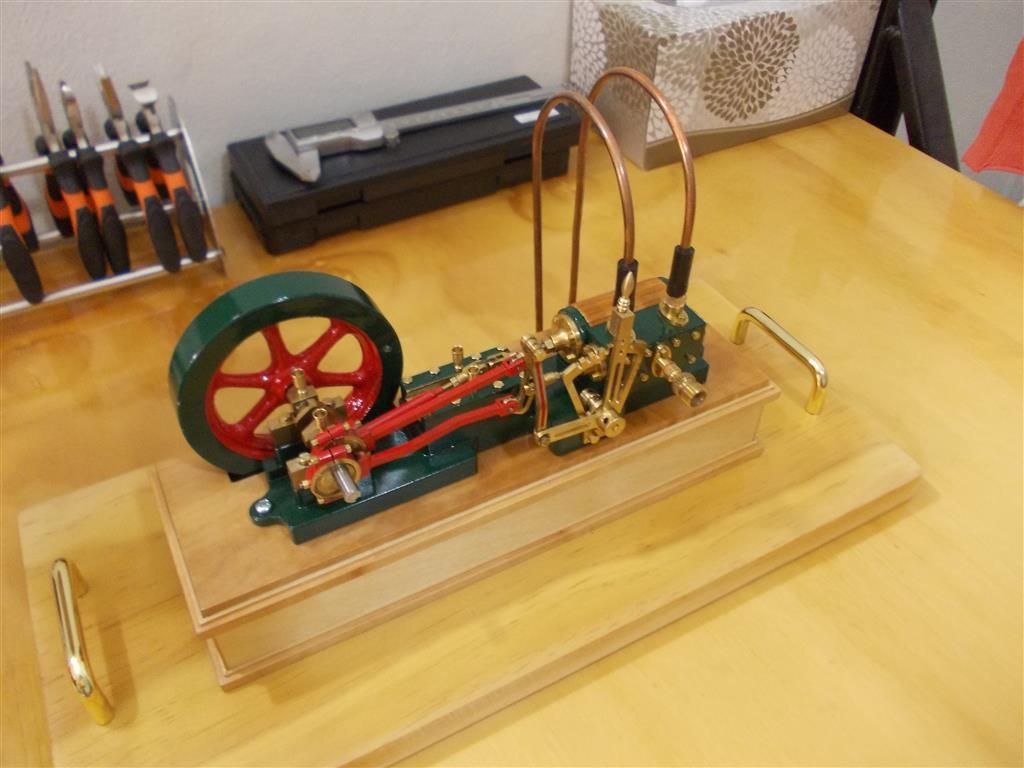
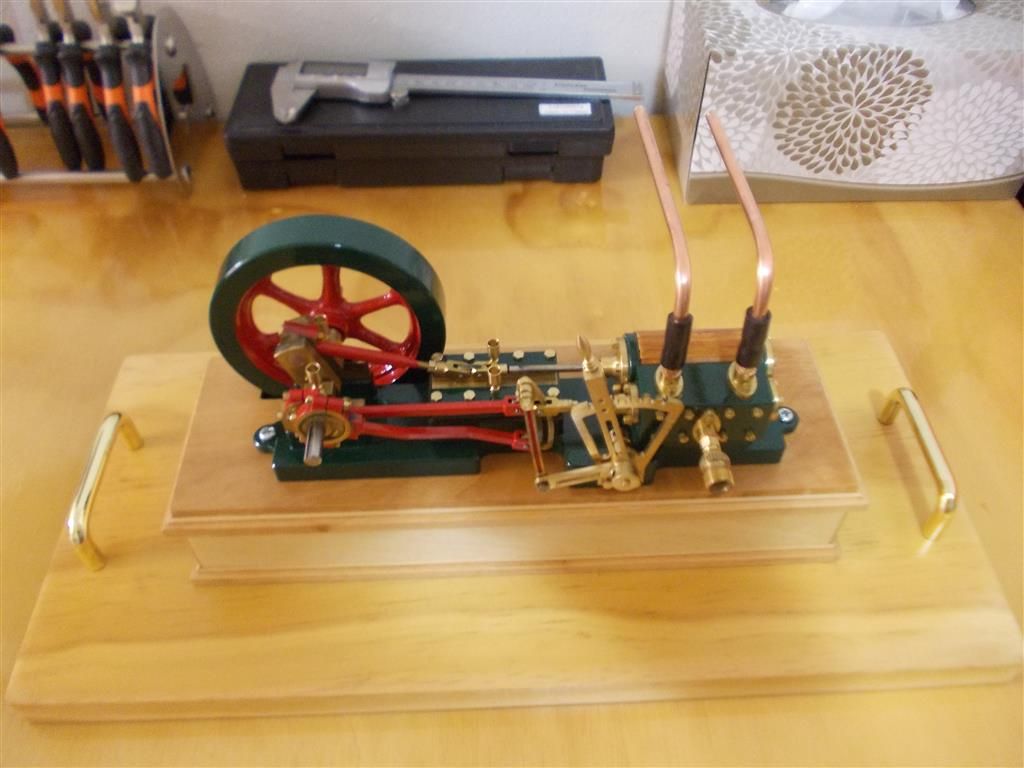
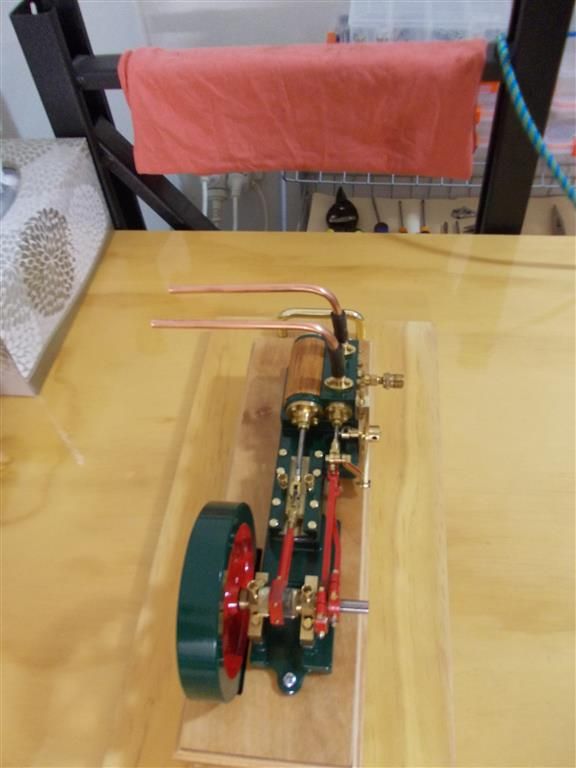
                              Here is the completed engine mounted on its wooden box. I think there was as much work to make the box as to build the engine ! The engine runs well on air ; I will run it on steam later this week. I will fit a displacement lubricator when I make a 3/16'' to 5mm adaptor.

                              completed engine 1.jpg

                              completed engine 2.jpg

                              completed engine 3.jpg

                              Edited By Brian John on 09/08/2015 07:20:09

                              #199886
                              Brian John
                              Participant
                                @brianjohn93961

                                Well, the first steam test did not go well. This is my first engine with the exhausts on the top rather than the sides and as I suspected the water is not readily emitted and the engine ''chokes''. I will try again tomorrow : I will only half fill the boiler to eliminate any water getting into the engine. Unlike my other engines, this one does NOT like water in the cylinders as it jams up tight !

                                The lock nut on the control valve is still causing problems. It is time to try something different : I have moved the lock nut to the farthest point on the rod closest to the cylinder and used Loctite to hold this in place. It is now no longer a lock nut ; it is an adjustment nut. Hopefully I can now use this to adjust the length rather than having to remove the cylinder cover and adjust the valve using a nut driver. I know exactly where the valve should be set so I will put three 8BA washers between the nut (total of 1.6mm) and the clevis and then Loctite the rod into the clevis.

                                I suspect that the thread on the clevis is a bit oversize and this is why it is not holding. If I could get spare parts then I would order another but Regner in Germany never respond to my emails.

                                locknut solution.jpg


                                Edited By Brian John on 10/08/2015 08:13:00


                                Edited By Brian John on 10/08/2015 08:30:00

                                #199908
                                Ian S C
                                Participant
                                  @iansc

                                  Some engines similar to yours have drain cocks fitted to the cylinder, to drain the water from the cylinder until it warms up.

                                  Ian S C

                                  #199911
                                  Neil Wyatt
                                  Moderator
                                    @neilwyatt

                                    It's a piston valve isn't it. Unlike a slide valve a pisto9n can't lift off its seat and let the water out.

                                    Don't force it, you could easily bend the valve rod.

                                    Neil

                                    #199918
                                    Brian John
                                    Participant
                                      @brianjohn93961

                                      I am trying to bend some copper pipe to fit to the exhaust so as to help the steam and water drain away but my results are not very elegant at this stage.

                                      1. Does anybody have any photos of other engines with the exhaust vents on the top of the engine ? I am not sure what I am trying to do !

                                      2. Why put the exhaust on the top anyway ?

                                      #200005
                                      Brian John
                                      Participant
                                        @brianjohn93961

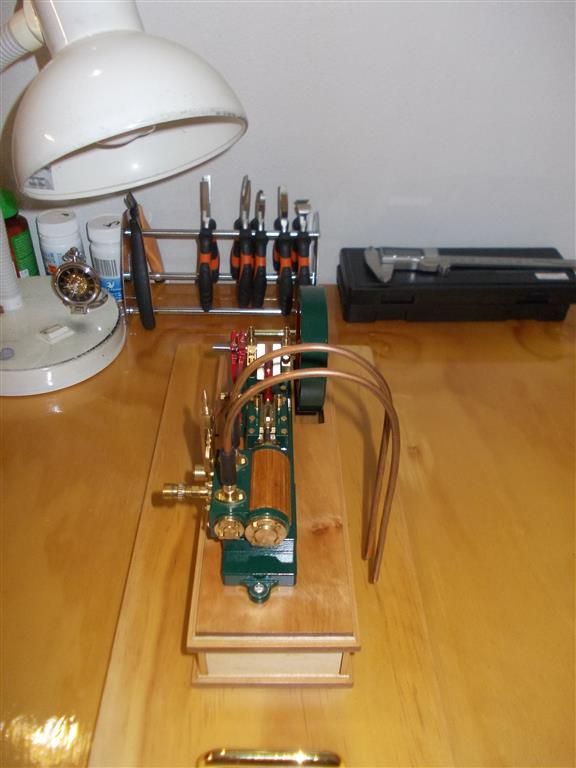
                                        Here is some 3/16 copper pipe used to make the exhaust. It was my first attempt at using the bending spring and I am not really happy with it….it looks ugly ! Today, I bought a bending tool used to bend pipe for brake lines. What is the smallest diameter I can expect to get on 3/16 copper pipe ?

                                        pipe work 1.jpg

                                        pipe work 2.jpg

                                        #200010
                                        JasonB
                                        Moderator
                                          @jasonb

                                          To me that will just make things worse as any steam making its way out of the engine will condense in those pipes and run back into the cylinder, if you want to pipe it away put a tight 90degree elbow onto each outlet then the pipe.

                                          Bend will be determined by the former on teh bender.

                                          Edited By JasonB on 11/08/2015 12:23:04

                                          #200017
                                          Brian John
                                          Participant
                                            @brianjohn93961

                                            The tube bender is useless as it puts a kink in the bend. I will take it back tomorrow. This is the best I could do for now as I have run out of pipe The good news is that my modifications to the control valve and its lock nut seem to be working as intended.

                                            NOTE : I did the rounds of air conditioning suppliers, brake line suppliers and the scrap yard today in the hope that I could find something to use as a nice short sharp bend but I came up with nothing. One guy suggested beer tap fittings which I will look into tomorrow.

                                            This is what I need  but I cannot find in Cairns :

                                            http://www.ebay.com/itm/20-Pieces-New-Schneider-Barb-Elbow-90-Degree-Brass-3-16-/151375065088?hash=item233ea83000

                                            pipe work 3.jpg

                                            pipe work 4.jpg

                                            Edited By Brian John on 11/08/2015 13:09:31

                                            Edited By Brian John on 11/08/2015 13:14:20

                                            #200021
                                            Ian S C
                                            Participant
                                              @iansc

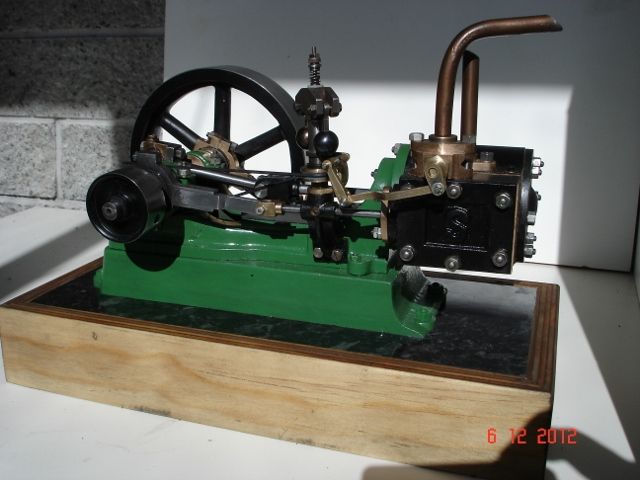
                                              Here's a Stuart Turner That I did a rebuild on with the plumbing on top, I think if I had done the original build, the exhaust would have been on the bottom, and if it was being built for steam, drain cocks would have been fitted. It will have to stay as is because it got nicked 2 or 3 months ago.

                                              Ian S C018 (640x480).jpg

                                              #200022
                                              Neil Wyatt
                                              Moderator
                                                @neilwyatt

                                                Here's a sensible brake pipe

                                                I've found copper brake pipe harder to bend to a small radius than 'ordinary' copper pipe. And if you have cunifer pipe…

                                                hpim0908.jpg

                                                #200024
                                                Michael Gilligan
                                                Participant
                                                  @michaelgilligan61133
                                                  Posted by Brian John on 11/08/2015 13:06:47:

                                                  … in the hope that I could find something to use as a nice short sharp bend but I came up with nothing.

                                                  .

                                                  Brian,

                                                  Please forgive me if this is an impertinent question … Why not wait until you have your lathe?

                                                  It would be an interesting and useful project to make some elbow fittings that are to your taste.

                                                  MichaelG.

                                                  #200028
                                                  JasonB
                                                  Moderator
                                                    @jasonb

                                                    Brian, you could make a very simple version of those elbows that you linked to, just drill two holes at 90degrees into a block of metal so they meet and then solder a bit of pipe into each hole.

                                                    This is 1/4" stainless pipe bent on one of those cheap Record hand benders, about 3/8" internal radius

                                                    Edited By JasonB on 11/08/2015 14:49:30

                                                    #200046
                                                    Brian John
                                                    Participant
                                                      @brianjohn93961

                                                      Michael : Wait until I have the lathe ? How would I use the lathe to make a 90 degree pipe bend ? That is not something I thought I would be making on a lathe.

                                                      Jason : yes, tubes into a block should work. I see now that the height above the steam outlet must be kept to a minimum. I still think it is a poor design putting the exhaust on the top.

                                                      Edited By Brian John on 11/08/2015 17:40:27

                                                    Viewing 25 posts - 51 through 75 (of 144 total)
                                                    • Please log in to reply to this topic. Registering is free and easy using the links on the menu at the top of this page.

                                                    Advert

                                                    Latest Replies

                                                    Home Forums Stationary engines Topics

                                                    Viewing 25 topics - 1 through 25 (of 25 total)
                                                    Viewing 25 topics - 1 through 25 (of 25 total)

                                                    View full reply list.

                                                    Advert

                                                    Newsletter Sign-up