Has anybody built the flame eater “Nick”?

Advert

Has anybody built the flame eater “Nick”?

Home Forums Miscellaneous models Has anybody built the flame eater “Nick”?

Viewing 25 posts - 126 through 150 (of 246 total)
  • Author
    Posts
  • #242341
    Ian S C
    Participant
      @iansc

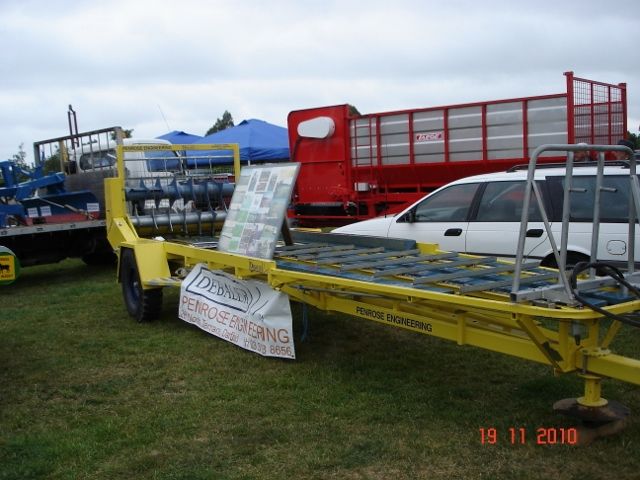
      Confession time, the flywheel in the photo that I posted has just a drilled hole. Brian you don't need a split bush in your FW, the reason I use them is that as they are temporary they would require otherwise require a hole to line up for the grub screw to go through. Put in a normal bush with some Loctite (not essential the grub screw will hold it in place). Just as an aside, a bush split as my ones are can be used in a pulley to save cutting a keyway, just make the slit the right width for the key, I have actually used this in full size to mount a sprocket on a 35 mm shaft on one of our Bale Feed Machines with hydraulic drive, it worked almost too well, the machine got a jamb up, and burst the right angle gear box. The bush was mounted with shaft lock, one 3/8" grub screw on top of the key, and another at 90*, through the bush and onto the shaft, a 3/8" square key was used. Ian S Ctest 036 (640x480).jpg

      Advert
      #242345
      Brian John
      Participant
        @brianjohn93961

        If I ever get that far, I might drill and tap another hole for an M3 grub screw to go right through the FW and the bush all the way to the crank. The original grub screw will hold the bush in place while this is done.


        Edited By Brian John on 11/06/2016 14:19:09

        #242546
        Brian John
        Participant
          @brianjohn93961

          I had go at fixing the wonky those flywheels. One of them I fixed by putting three grub screws at 120 degrees as per Jason's suggestion. That worked well with that wheel and it runs quite nicely now. The other one will require more than that as the hole was not drilled on centre.

          This second wheel has the crack in it so no great loss if I stuff it up. I got it running true using the external jaws as before. Then I drilled with a 7.5mm stub drill followed by an 8mm jobber drill. The correct stub drills and reamers are still on their way from China and I am not going to wait another three weeks to try this. I then made a brass bush to fit this hole in the wheel and drilled the bush out to 6mm……no reamer this time. The crank fits nicely in the bush and the bush is a tight fit in the flywheel.

          Can somebody explain to me why I now need to split this bush ? I still do not understand that. What would be wrong in using this bush just like it is ?

          Edited By Brian John on 13/06/2016 08:38:18

          #242548
          roy entwistle
          Participant
            @royentwistle24699

            Absolutely nothing Depends how tight it is in flywheel  if any play at all use Locktite ( or similar )

            Roy

            Edited By roy entwistle on 13/06/2016 08:42:53

            #242555
            Brian John
            Participant
              @brianjohn93961

              There is no play ; as a matter of fact I may have to knock it all the way in with a piece of wood. I Intend to use the three grub screws I have already drilled to press on the bush. I will drill another hole on the other side of the hub to go right through the bush to the crank. I do not think I can redrill through the already tapped holes.

              #242563
              JasonB
              Moderator
                @jasonb

                Brian either split the bush so the grub screws will close it up tighter OR leave solid but drill and tap right through flywheel and bush so the screws bear on the shaft.

                #242590
                Brian John
                Participant
                  @brianjohn93961

                  Do you think I could redrill through the already tapped holes or is that a dumb idea trying to do that ?

                  #242618
                  JasonB
                  Moderator
                    @jasonb

                    Probably safer for you to drill and tap new holes on the other side of the hub, if the drill wanders you could easily wipe out the existing M3 threads

                    #242636
                    Ian S C
                    Participant
                      @iansc

                      In the worst FW I was going to suggest that you plug the hole after making it well over size, then reboring it to size. You could always go up in size for the grub screw. My grub screws start off as off cuts from the end of over length screws, and most of my FWs and pulleys have 3/16"/ 10 32 UNF screws. The very small ones have 1/8" Whitworth on to as small as 1/8" shaft. Ian S C

                      #242753
                      Brian John
                      Participant
                        @brianjohn93961

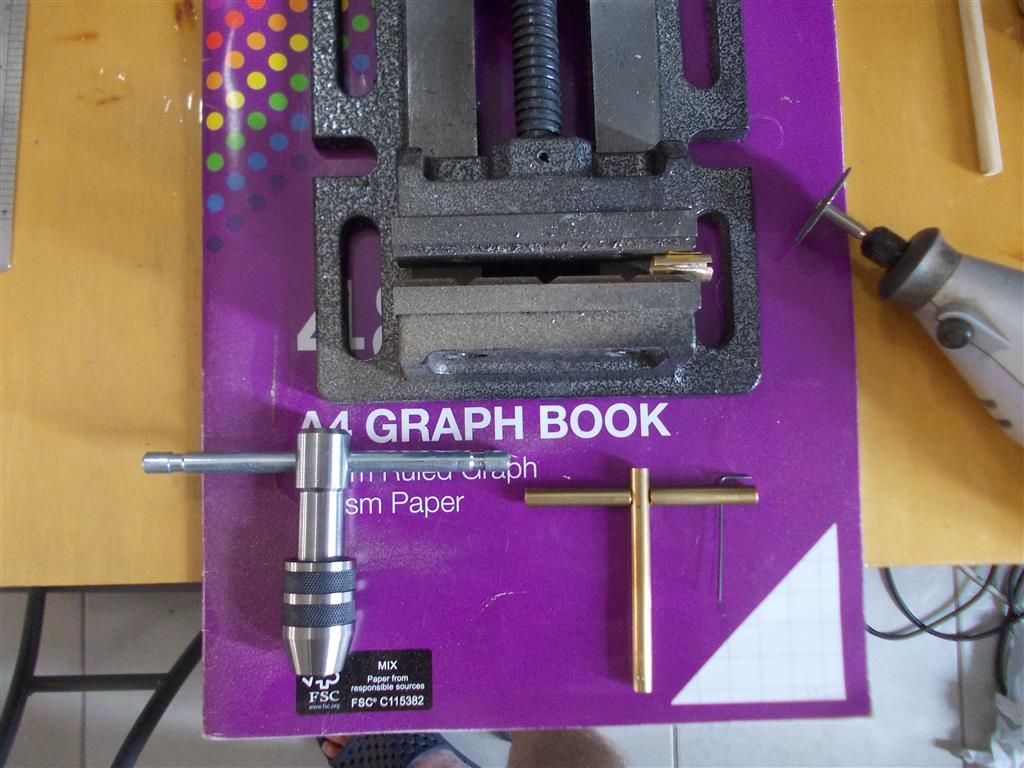
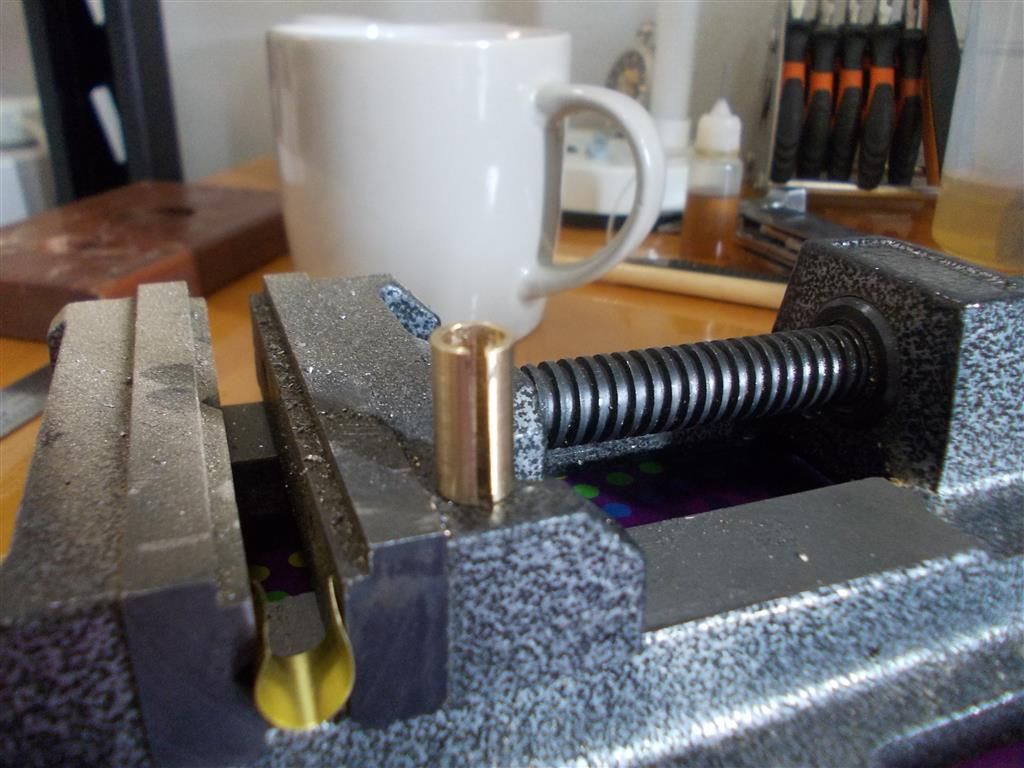
                        I had intended to drill out the holes for M4 grub screws and use a solid bush then I remembered that in order to tap the holes on flywheels I need a special tool. My usual tap wrench will not let me get in close enough. A few months ago I made a brass tool to take M3 taps which can be seen in photo #1 below but I did not make one for M4 taps. (The taps are held in place with M2 grub screws.)  I decided it would be easier to split the bush then to make another tool and I did that using the Dremel tool.

                        The bush was a tight fit in the FW hole so I knocked it in with a piece of wood remembering to insert the split between the grub screws.

                        It all looks good but it is a bit tight for the crank ; I can only just get it on but not all the way. I might have to polish (800 grit) or drill (6mm) the inside of the bush to get a better fit. The problem is that using the external jaws as I did to hold the inside of the FW rim, then the jaws are almost fully closed up. The drills cannot be inserted all the way through the FW or they will hit the almost closed chuck jaws ; they only come out the other side about 10mm. A 6mm stub drill would have been better but I did not have one at hand. I have ordered one for future jobs.

                        I have now started polishing this FW starting off with 120 grit as per Jason's suggestion. It certainly gets the job done a lot quicker !

                        bushing 1.jpg

                        bushing 2.jpg

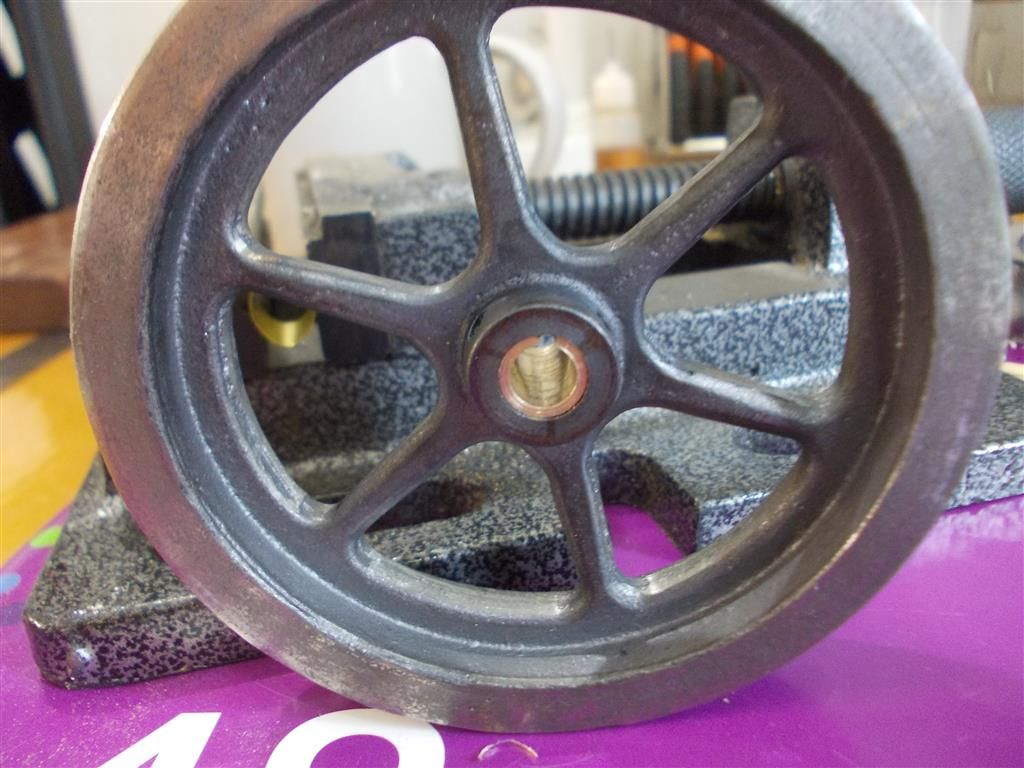
                        bushing 3.jpg

                        Edited By Brian John on 14/06/2016 10:28:12

                        Edited By Brian John on 14/06/2016 10:29:48

                        Edited By Brian John on 14/06/2016 10:31:42

                        #242849
                        Brian John
                        Participant
                          @brianjohn93961

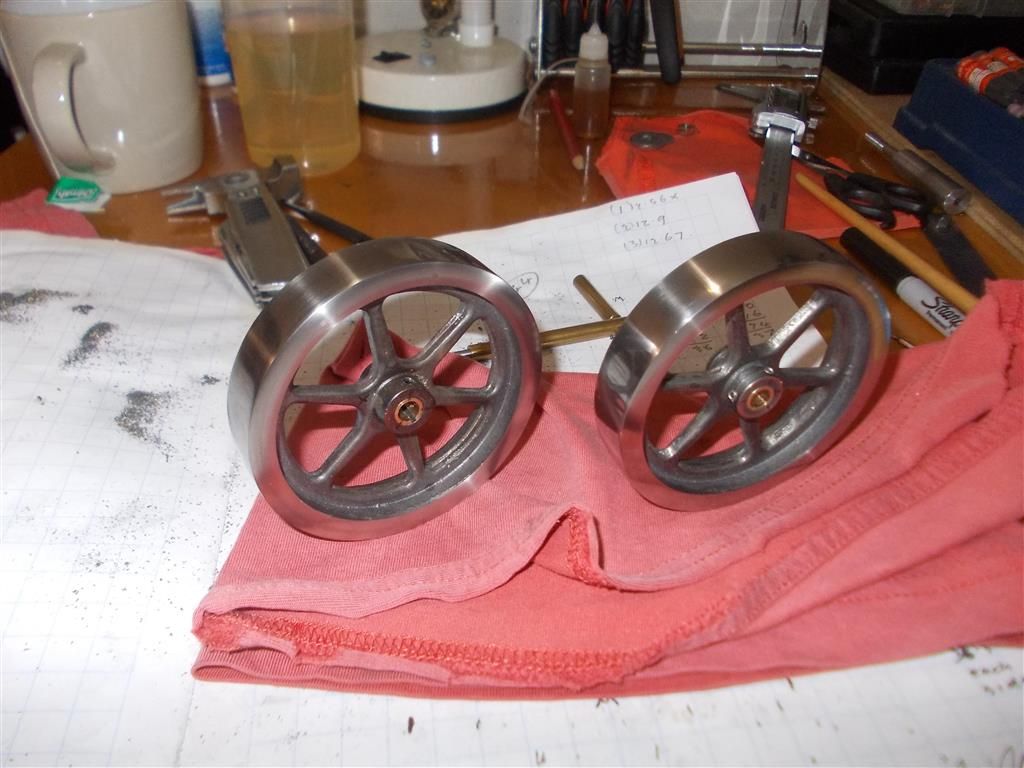
                          Both flywheels have now been bushed and polished. It is much quicker when you start with 120 grit ! I am not entirely happy with the FW that has the crack in it. If it did not have a crack then I would give it another light machining but I am worried about the structural integrity of it. Depending on how deep it is, that crack could be why I have had so much trouble dealing with this FW compared to the other one. Anyway, I have a replacement FW on the way and I now know how to machine it. I might even give the face plate another go.

                          Tomorrow I will hone the cylinder then make a piston to fit.

                          bushing 4.jpg

                          #242855
                          JasonB
                          Moderator
                            @jasonb

                            Good to know the 120g worked for you

                            It is possible that the flaw extended into where you were drilling the hole and that would have thrown the drill/reamer off line.

                            Edited By JasonB on 15/06/2016 10:09:40

                            #242864
                            Ian S C
                            Participant
                              @iansc

                              Brian it's probably better to hold the bush in the vice at 90* to what you have, ie by the ends, then it won't tend to close up as you make the final bit of the cut which if you are using the Dremel would mean a broken disc. My special tap wrench for getting in difficult places is a 4" Crescent spanner. Ian S C

                              #242868
                              Brian John
                              Participant
                                @brianjohn93961

                                I see your point about how the gap will close up as I get to the end of the cut.

                                Do you mean just to hold it by the ends but only 1/3 of it in the vice ?

                                #242878
                                JasonB
                                Moderator
                                  @jasonb

                                  Much like this Brian but with the slot facing upwards

                                  #242879
                                  Brian John
                                  Participant
                                    @brianjohn93961

                                    Of course, thank you….I just couldn't see it before. I will do it like that next time.

                                    #242979
                                    Brian John
                                    Participant
                                      @brianjohn93961

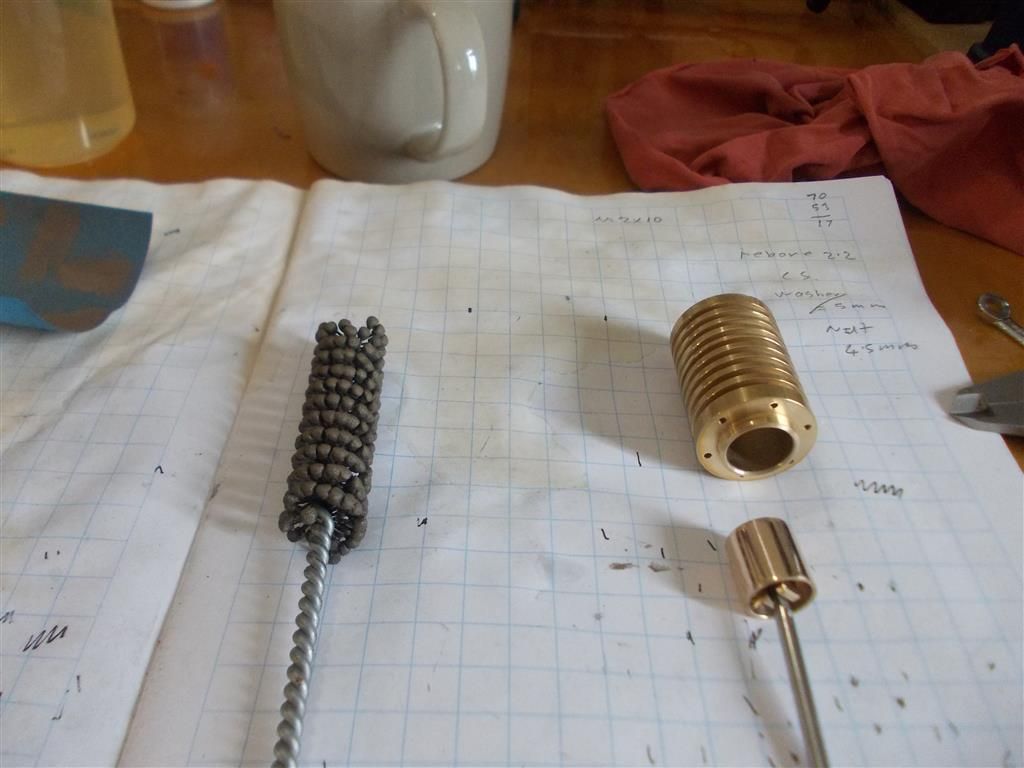
                                      I attempted to use my new 18mm flex hone to put a mirror finish on the inside of the cylinder. I was advised that I could use an 18mm flex hone on a 16mm cylinder and that this would be no problem. My next engine will have an 18mm cylinder so I thought I could use one flex hone for both…..bad mistake. The 18mm was much too big and I simply ended up scratching the inside of my 16mm cylinder. I set up the boring bar again and took a small cut to restore the surface to what it was before.

                                      I then made a piston which is slightly too big and polished that to a mirror finish by spinning the piston rod in my hand drill while wrapping 2000 grit wet and dry around the piston with my left hand. I now have a good finish on the piston but I would like to get a better finish on the cylinder. The boring bar does not give the highly polished finish that the instructions require. I could buy another flex hone but I do not want to waste any more money on these. It was an experiment that did not work. I have wrapped some 2000 grit around a piece of dowel and I am running this in and out of the cylinder by hand while it is turning slowly in the lathe chuck. I will keep doing this until I can get the piston inside the cylinder and hopefully the finish on the cylinder will be much improved. It may be a slow job !

                                      Could this be used to polish the inside of cylinders ?

                                      http://www.ebay.com.au/itm/SP-Brake-Cylinder-SP63035-Hone-2-Arm-/142006266684?hash=item21103bab3c:g:N34AAOSwQaJXSEIj

                                      piston cylinder 1.jpg

                                      Edited By Brian John on 16/06/2016 10:18:39

                                      Edited By Brian John on 16/06/2016 10:52:44

                                      #242991
                                      Ian S C
                                      Participant
                                        @iansc

                                        Not too sure about the flex hone thing, never seen one. Even a dowel with a split say a couple of inches long and a strip of wet and dry (start with a good bit courser than the 2000 grit, say 400 to 600, 1200 is as fine as you need [ didn't know you could get 2000]) in the split and wrapped around the dowel in the direction of rotation. Spin the dowel reasonably fast with the cylinder in place (hand held), move the cylinder back and forth about an inch, and hold it light enough for it to rotate very slowly. Only remove machine marks, use oil. or cutting fluid, and clean out thoroughly, measure to check that the bore is parallel, and round.

                                        Brake cylinders are made of cast iron, harder than brass. Ian S C

                                        #242992
                                        Brian John
                                        Participant
                                          @brianjohn93961

                                          How do you measure that the bore is parallel ?

                                          Edited By Brian John on 16/06/2016 12:27:04

                                          #243089
                                          Brian John
                                          Participant
                                            @brianjohn93961

                                            I finished polishing the inside of the cylinder with 1500 grit wrapped around a piece of dowel while the lathe chuck was slowly spinning at about 400RPM. I got the cylinder to a good finish then concentrated on reducing the diameter of the piston by polishing that with 1500 grit. The piston is now a good fit in the cylinder with excellent compression. Should this be ''drop through'' like the Stirling engines or is a bit of resistance acceptable ?

                                            I just realised that all the parts are now made and the engine is ready for assembly !

                                            NOTE : I do intend to remake some of the parts such as the cylinder bracket and the crankshaft with silver solder when the replacements arrive from Germany but I may as well put together what I have already made and see what happens.

                                            Edited By Brian John on 17/06/2016 08:59:17

                                            #243115
                                            Ian S C
                                            Participant
                                              @iansc

                                              As long as the piston fits the same in both ends of the cylinder that should be near enough. the fit should be the same as the Stirling Engine, friction is the main problem with these engines, maybe more so with the flame licker. Ian S C

                                              #243116
                                              Brian John
                                              Participant
                                                @brianjohn93961

                                                I may have to give the piston another light touch with the 1500 grit so that it is drop through.

                                                I might add a drop of oil first and see what that does to everything.

                                                #243125
                                                Ian S C
                                                Participant
                                                  @iansc

                                                  It should be dry, it gets hot inside the cylinder, and the oil just gums up the works. Ian S C

                                                  #243126
                                                  Brian John
                                                  Participant
                                                    @brianjohn93961

                                                    But that is what they said about the Stirling engine too and it will not run without a bit of oil in the cylinder.

                                                    #243134
                                                    SillyOldDuffer
                                                    Moderator
                                                      @sillyoldduffer
                                                      Posted by Brian John on 17/06/2016 13:51:00:

                                                      But that is what they said about the Stirling engine too and it will not run without a bit of oil in the cylinder.

                                                      Been there done that Brian!

                                                      I'm on my second Stirling and they both needed light oil on the cylinder to run at all. However, now the first engine is well run-in and much polished, it works best without oil. Now that it goes as it should, Ian is quite right : after a bit the oil gums up and stops the engine.

                                                      After 3 days work I've just got my second engine to the point where the piston doesn't need oil. Unfortunately there's more to do – some of the bearings are still too sticky for good running.

                                                      I think, as first built, that my engines aren't as smooth as they could be. Repeated cycles of "oil, run, clean" help polish up the rough bits until the engine no longer needs oiling. Someone more skilled than me probably gets closer to perfection straight off the lathe than I do, but then I am just a learner.

                                                      Cheers,

                                                      Dave

                                                    Viewing 25 posts - 126 through 150 (of 246 total)
                                                    • Please log in to reply to this topic. Registering is free and easy using the links on the menu at the top of this page.

                                                    Advert

                                                    Latest Replies

                                                    Home Forums Miscellaneous models Topics

                                                    Viewing 25 topics - 1 through 25 (of 25 total)
                                                    Viewing 25 topics - 1 through 25 (of 25 total)

                                                    View full reply list.

                                                    Advert

                                                    Newsletter Sign-up