Has anybody built Beng’s Danni Steam engine.

Advert

Has anybody built Beng’s Danni Steam engine.

Home Forums Stationary engines Has anybody built Beng’s Danni Steam engine.

Viewing 25 posts - 201 through 225 (of 304 total)
  • Author
    Posts
  • #311565
    Brian John
    Participant
      @brianjohn93961

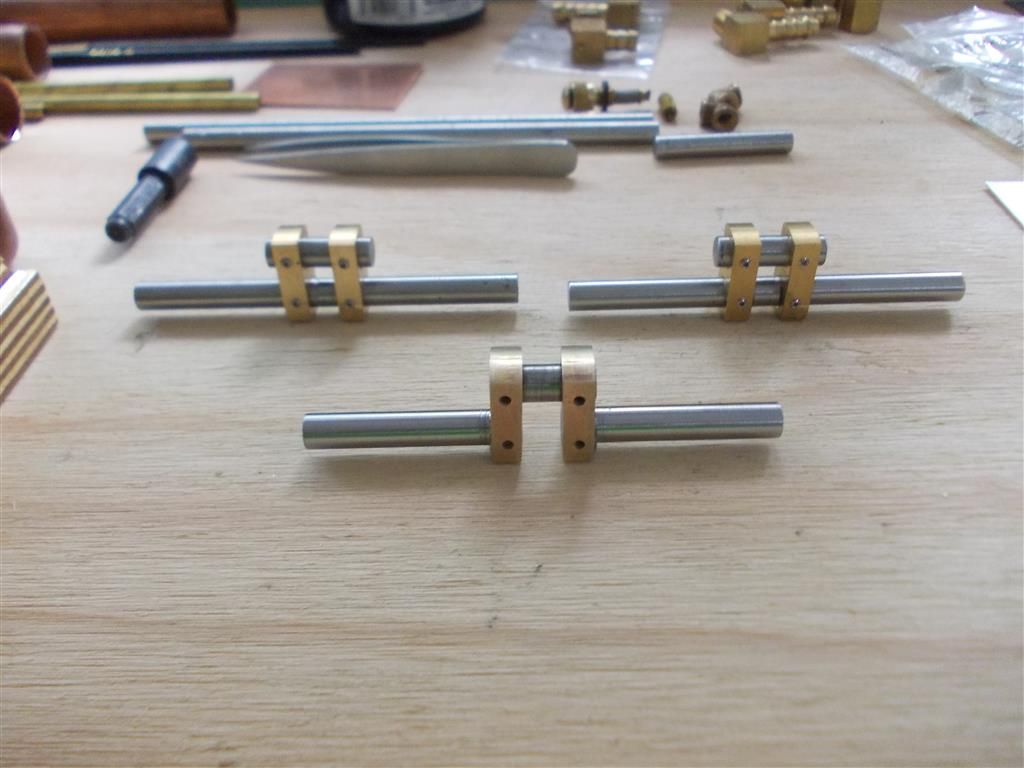
      I have completed one crankshaft using the solder paste. It fits well and runs smoothly in the bearings. The large plastic syringe of solder paste seems to be mostly air and that makes it an expensive option. I will use 243 degree soft solder on the next crankshaft. The M2 X 2mm grub screws are removed after the solder has set.

      Removing the middle part of main shaft turned out to be more trouble than I thought. I had intended to use the slitting saw on the lathe but the main shaft would have interfered with the lathe chuck. I then opted to use a cutting wheel on the Dremel tool but that only cuts half way before the tool comes up against the main shaft. I had to finish off with a hacksaw and hand files.

      crankshaft 1.jpg

      Edited By Brian John on 12/08/2017 05:51:21

      Advert
      #311579
      roy entwistle
      Participant
        @royentwistle24699

        There is absolutely nothing wrong with hacksaws and files, ( and the occasional cold chisel )

        Roy

        #311724
        Brian John
        Participant
          @brianjohn93961

          I have finished the second crankshaft using 243 degree soft solder. It does not stay nicely in place like the solder paste so there was a bit more to clean up afterwards but it is certainly a lot cheaper. I will stop at two crankshafts as I am only building two engines.

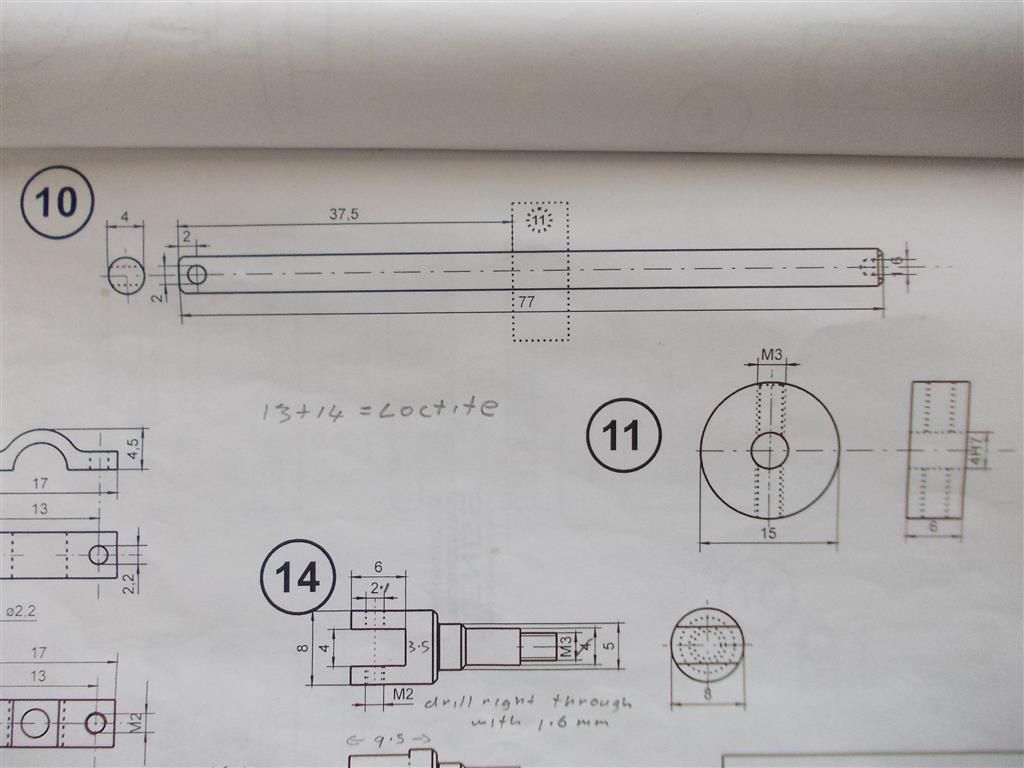
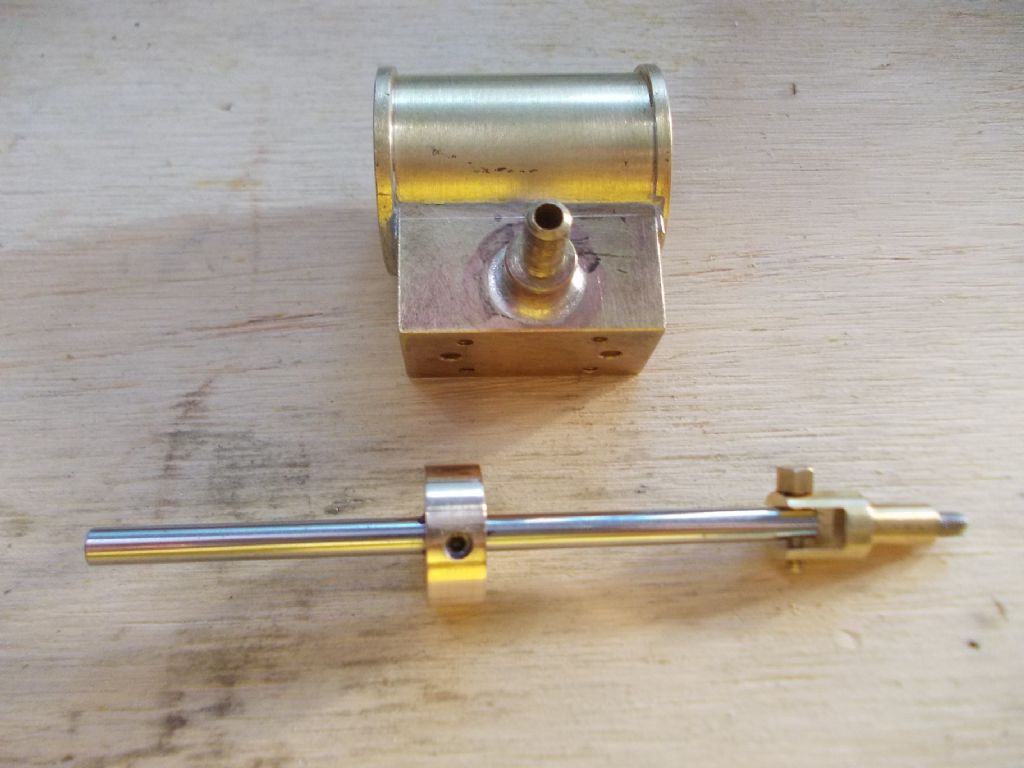
          Once I solder the cylinders to the steam chests then I only have the piston assembly to complete. The instructions say to fit the piston slightly oversized to the piston rod and then with the piston rod supported between centres in the lathe, to turn the piston to fit the cylinder. That seems overly complicated and I doubt that the two M3 X 5mm grub crews will hold things firmly in place while the piston is machined. My preferred method would be to cut the piston diameter to fit while the bronze work piece is mounted in the chuck. The cylinder can easily be placed over the piston to check for fit. Once a good fit is obtained, then part off and drill/ream the centre hole.

          Why machine the piston while it is fitted to the piston rod ? I do not see any advantage to that.

          NOTE : I went to Rustys today but the guy with the second hand tools says he does not have any plumbers irons. I think I will use the solder paste for the steam chest/cylinder assembly.

          piston 1.jpg


          crankshaft 2.jpg

          Edited By Brian John on 13/08/2017 08:30:26

          Edited By Brian John on 13/08/2017 08:32:34

          #311731
          roy entwistle
          Participant
            @royentwistle24699

            You machine the piston on the piston rod to maintain concentricty

            Roy

            #311735
            Henry Artist
            Participant
              @henryartist43508

              As well as low temperature solder paste I also use silver solder paste (55% silver content) for very small and neat brazed joints. I get my silver solder paste from Bengs Modellbau. It's not cheap but a little goes a long way. There are some helpful videos on the Bengs website.

              It is a product that is commonly used by jewellers so you might like to check out the companies that supply the jewellery trade in your own country.

              #311748
              JasonB
              Moderator
                @jasonb

                As Roy says it is usual practice to finish turn the piston on its rod. There will be a tiny amount of clearance between rod and the hole in the piston so as you tighten the grub screws they will tend to pull it off to one side and also can twist the piston on the rod.

                Best bet would be to file two shallow flats on opposite sides of the piston rod for the grub screws to bear against then the risk of the piston rotating while being machined will be greatly reduced. This is also usual best practice when you have a grub screw bearing against a rod, it should have a flat to seat on not straight onto the rod because if it slips you will chew up the rod surface and that can make it hard to remove the part at a later date.

                #311754
                Brian John
                Participant
                  @brianjohn93961

                  Henry : the solder paste I used was the silver solder paste. It is good stuff but quite expensive : $20 for a small syringe which is mostly filled with air ! I bought it from the marine and boating supply shop. I assume the boaty people like to keep it around for emergency repairs at sea. I will be using it again for the steam chest/cylinder assembly as I am not so confident about using soft solder and a plumbers iron to do the job.

                  Jason : okay, I will file two flats for the grub screws to bear against and see how I go.

                  #311780
                  JasonB
                  Moderator
                    @jasonb

                    John that was not a true silver solder paste that you use as I said before it is a soft solder with 1 or 2 % silver content hence the name " silver bearing"

                    The type Henry mentions has 55% and is the paste form of the silver solder that you have used on your boiler so will have a melting point around 650deg.

                    #311782
                    Brian John
                    Participant
                      @brianjohn93961

                      Okay, thank you for that information. No, I have never seen that for sale anywhere. I should imagine it must be VERY expensive !

                      Perhaps not as expensive as I thought. Is this it ?

                      http://www.gemcuts.com.au/euro-tools-silver-solder-paste

                      Edited By Brian John on 13/08/2017 13:21:14

                      #311787
                      JasonB
                      Moderator
                        @jasonb

                        Not that expensive, see CuP Alloys, Harris also make one so you should be able to get it from where you have got Harris stuff before

                        #311947
                        Brian John
                        Participant
                          @brianjohn93961

                          The day started out bad and only got worse : my computer died this morning and I lost all my data and photos after using the system recovery discs. I knew I should not have tried soldering the steam chest to the cylinder today but decided to give it a go anyway using the solder paste.

                          I used some toothpicks to try and keep those steam holes open. I had made some stainless steel pins but I could not get them to sit correctly. The toothpicks quickly went up in flames so that was a useless idea. Other than completing the steam engine to see if it works, how can I tell that the solder has blocked the holes it should have blocked and not blocked the holes it should not have ?

                          #312160
                          Brian John
                          Participant
                            @brianjohn93961

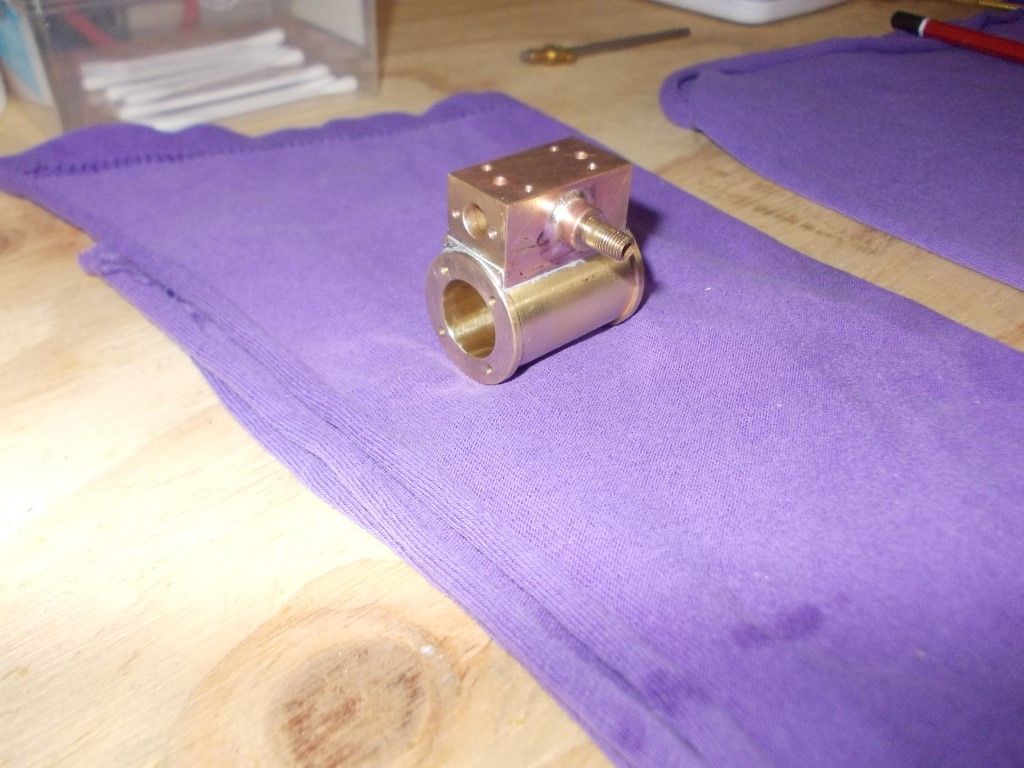
                            The steam chest & cylinder assembly looks okay : I soaked it in citric acid and scrubbed the flux off with a wire brush. I polished the inside of the cylinder with some 2000 grit to make sure all the flux was removed. The only part I have left to make now is the piston. I will try to complete one engine by making that part tomorrow.

                            Lawrie : will you be connecting the two cylinders together with a steam pipe on your double engine ? I had a twin cylinder engine from PM Research once and the two cylinders were connected.

                            cylinder&steam chest 1.jpg

                            Edited By Brian John on 15/08/2017 14:19:23

                            #312272
                            Lawrie Bradly
                            Participant
                              @lawriebradly72996

                              Hi Brian, I am very impressed with your soldering of the crankshaft and cylinder. I am yet to build up the courage to tackle mine. I do intend to link the twin cylinders with a common inlet steam pipe. I've also bought some displacement lubricators on eBay and will use one on the single and one on the twin engine. The lot I bought (buy it now) had 3 for about $140 (So I've got a spare for the next project.) Two types of lubricator were advertised by the same seller in China with different prices for lots of 2 and 3. I bought the more elaborate type and buying the 3 was better value. I got a similar one locally years ago and fitted it to a rotary valve engine that I had also got the plans for on eBay. The lubricator works okay, not brilliantly, but I think it's better than nothing.

                              #312287
                              Brian John
                              Participant
                                @brianjohn93961

                                Lawrie : I found that the 243 soft solder penetrated further in along the shaft than the solder paste as I could not remove the grub screws from that one. I ended up filing them flat.

                                I buy my displacement lubricators from Executive Model Design in the US. ( LUB-2 = 3/16-40 thread ) Postage to Australia is expensive from the US so I wait until I have a large order and buy about $400 worth of items. The postage is the same as if I buy just a few things.

                                **LINK**

                                #312639
                                Brian John
                                Participant
                                  @brianjohn93961

                                  I finished the piston today and fitted it to the piston rod using two M3 X 5mm grub screws. I filed two flats in the piston rod as discussed above. I also put low strength Loctite down each screw hole before tightening everything up. I just realised that all the parts are made….. it is actually finished ! All I have to do now is assemble it and hope it works. If it doesn't then I will have a very interesting paperweight.


                                  piston 3.jpg


                                  Edited By Brian John on 18/08/2017 08:06:17

                                  Edited By Brian John on 18/08/2017 08:08:13

                                  #312642
                                  JasonB
                                  Moderator
                                    @jasonb

                                    Soldering looks to have gone well, look forward to the video.

                                    #312649
                                    Henry Artist
                                    Participant
                                      @henryartist43508
                                      Posted by Brian John on 13/08/2017 11:01:27:

                                      Henry : the solder paste I used was the silver solder paste. It is good stuff but quite expensive : $20 for a small syringe which is mostly filled with air ! I bought it from the marine and boating supply shop. I assume the boaty people like to keep it around for emergency repairs at sea. I will be using it again for the steam chest/cylinder assembly as I am not so confident about using soft solder and a plumbers iron to do the job.

                                      Not all solder pastes are the same.

                                      The solder paste I use for silver soldering has a melting point of 630C. The solder paste I use for soft soldering melts at 183C. Both are supplied by Bengs Modellbau and are better than the solder paste sold for electrical repairs.

                                      I use different sizes of gas torch depending on the join I am making. For model engineering gas torches are better than soldering irons.

                                      Further information on solder pastes can be obtained from Felder GmbH.

                                      #312671
                                      Lawrie Bradly
                                      Participant
                                        @lawriebradly72996

                                        I can't wait to hear how it works!

                                        But, from my experience in making and restoring various machines, can I say that if it doesn't work first up, a bit of perseverance won't go astray.

                                        Best of luck.

                                        #312688
                                        Brian John
                                        Participant
                                          @brianjohn93961

                                          There will be a bit of fettling required tomorrow to get the piston to run smoothly in the cylinder for the full stroke. I think I know how to fix that. But the unexpected problem is that the flywheel cannot be fitted on the axle : the supplied small block of timber on which the engine frame sits is 18mm thick and this is not high enough to allow the flywheel to be fitted. It needs to be at least 20mm thick to give enough clearance for the flywheel. I don't have anything to hand at the moment so I will have a look in Bunnings scrap bin tomorrow.

                                          Lawrie : how thick are your supplied small blocks of timber ?

                                          DOH : I did not take enough off the flywheels when I machined them. Diameter should be 80mm but mine are 82mm. I was not thinking of clearance when I machined them.

                                          Edited By Brian John on 18/08/2017 12:45:51

                                          #312821
                                          Lawrie Bradly
                                          Participant
                                            @lawriebradly72996

                                            Yeah Brian, Before reading the edit to your post just now I checked the dimensions of my engine. The small wood block is 17.7mm thick. I had machined the flywheel to exactly 80mm and the clearance between it and the wood base, measured with a feeler gauge is 20 thou (0.5mm). Pretty tight.

                                            #312829
                                            JasonB
                                            Moderator
                                              @jasonb

                                              I would find a way to pack up the engine, the extra diameter is worth keeping as it will give a smoother running engine at slower speeds.

                                              #312831
                                              Brian John
                                              Participant
                                                @brianjohn93961

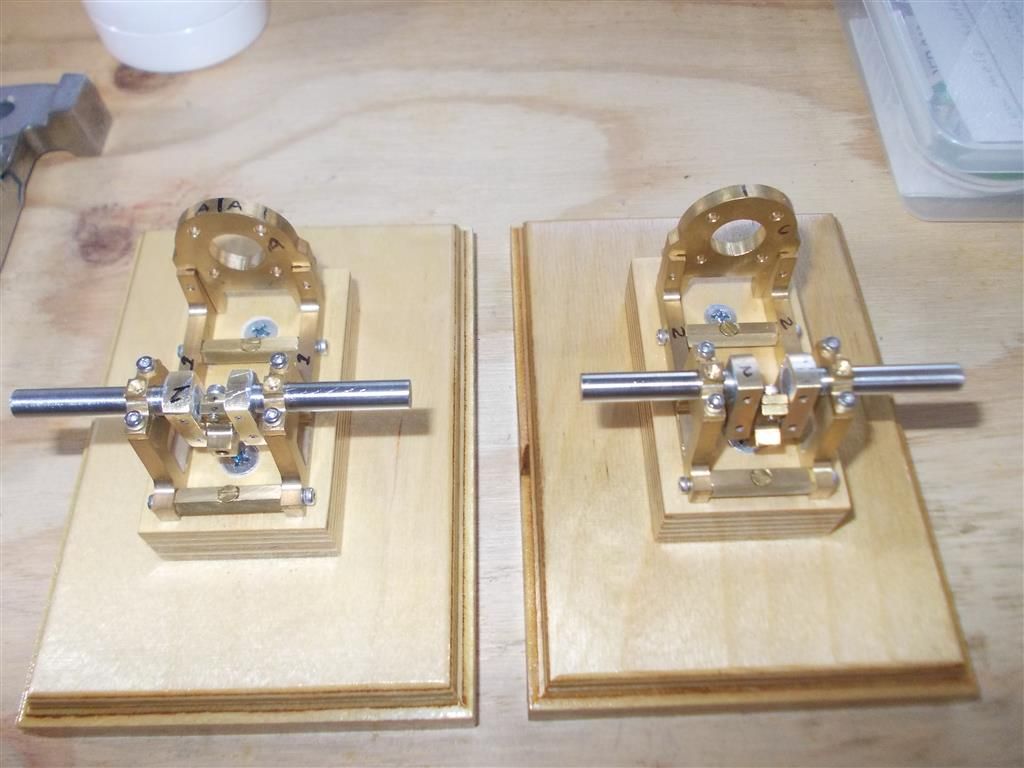
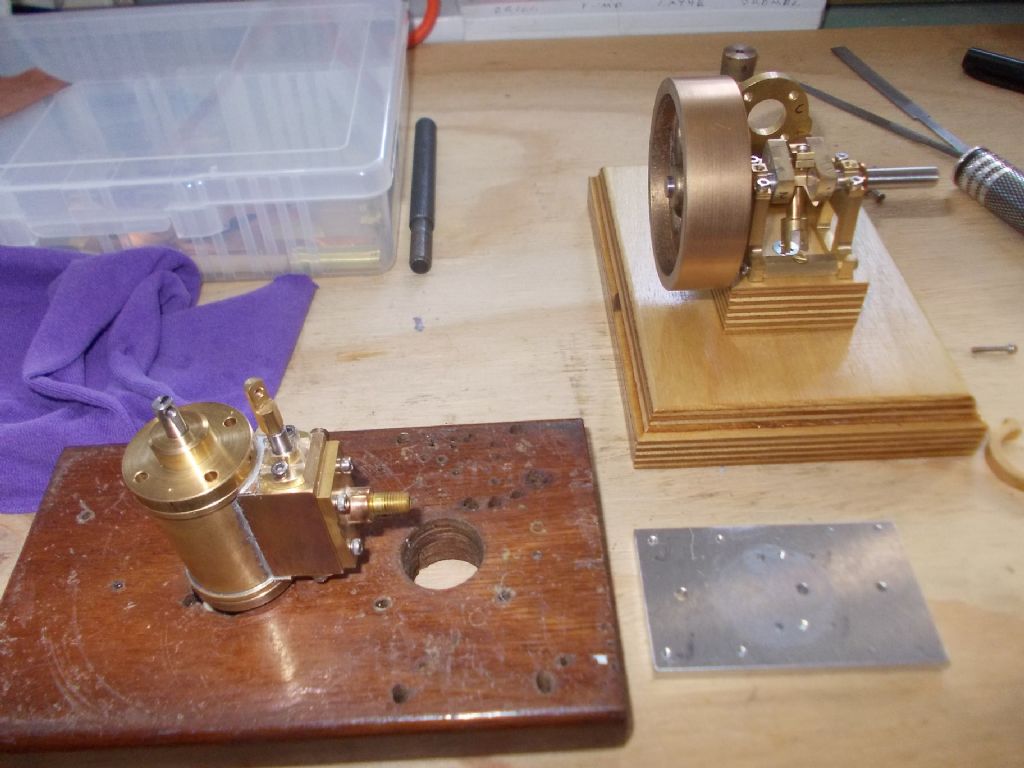
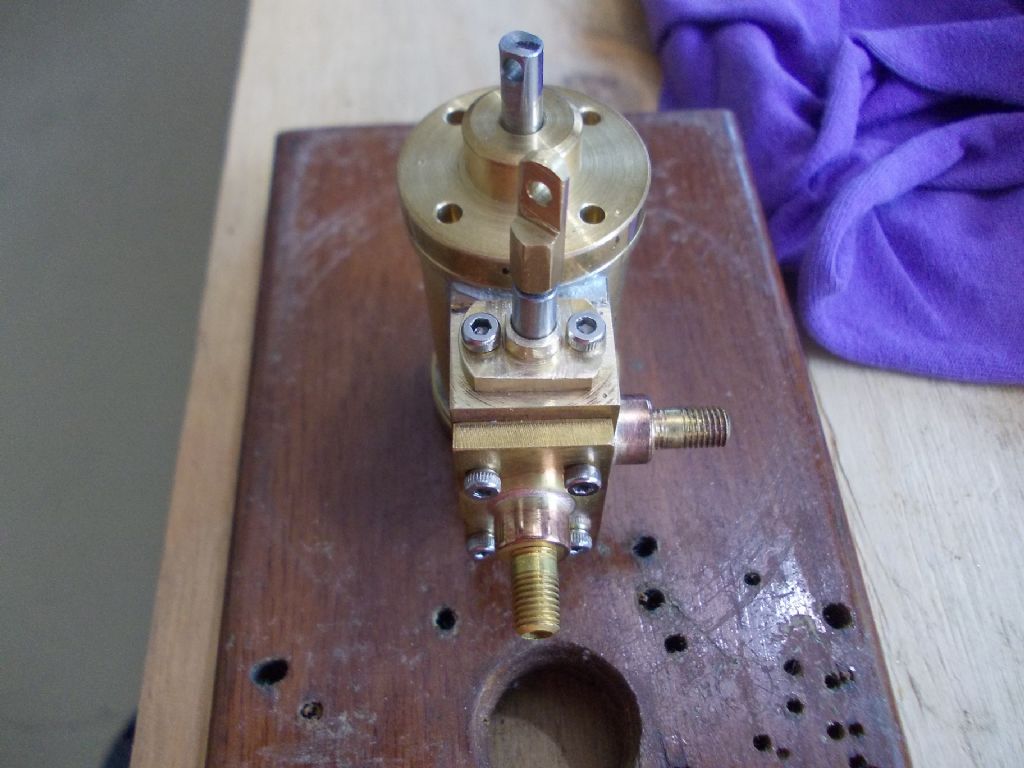
                                                I have found some 5mm thick aluminium plate which will fit under the small wooden block. There is a piece of it in the photos below already cut to the exact size from another job. I will fit that later and in the mean time I will use a smaller flywheel from the spare flywheel box.

                                                I got the main piston moving smoothly in the cylinder ; that did not take too long. But the big problem is the control valve (21) and its rear cover. I have spent over an hour filing, fiddling and fettling but I cannot get the control valve to move once the rear cover is tightened. Just that last little bit (1/8 turn) to tighten the screws will jam it stuck. I am out of ideas for the moment. I may have to make another control valve although I am not confident that will solve anything. I have already widened the holes through which the screws pass from 2.2mm to 2.6mm.


                                                assembly 1.jpg

                                                assembly 2.jpg


                                                Edited By Brian John on 19/08/2017 07:39:22

                                                Edited By Brian John on 19/08/2017 07:40:06

                                                Edited By Brian John on 19/08/2017 07:41:08

                                                #312833
                                                JasonB
                                                Moderator
                                                  @jasonb

                                                  More likely to be the hole in the cover is not quite at right angles to the flange and as you tighten it up the hole is pulled over at an angle.

                                                  Is the other side of the cover flat or does it have a spigot on it? If you decide to make the cover again then machine the side that goes against the valve chest and the hole at the same time then turn it around to do what can be seen in the photo now.

                                                  #312859
                                                  Brian John
                                                  Participant
                                                    @brianjohn93961

                                                    Yes, that makes sense but I am not sure how that could have happened. I made two of everything and the other one is no better. I need to work out what I did wrong before I try making another. (The other side is flat.) 

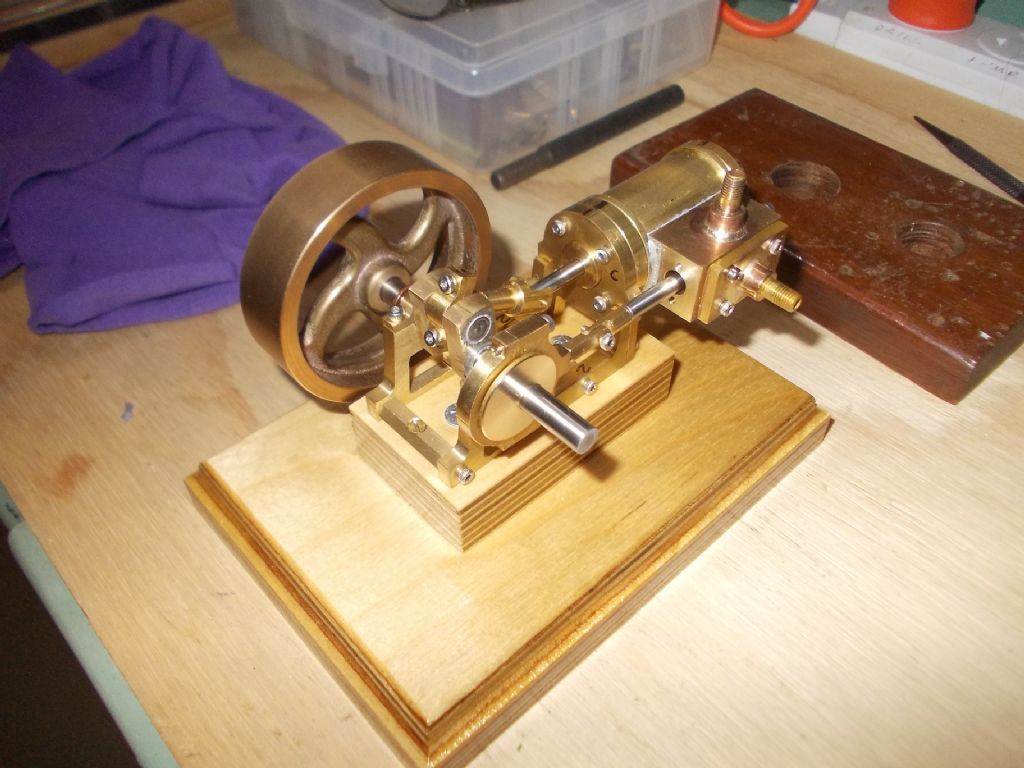
                                                    I have gone ahead and assembled the rest of the engine without that rear cover. There was a problem with the eccentric being too thick but I have machined that down and everything now runs smoothly.

                                                    Setting the timing : where should the control valve be with the piston is at TDC ?

                                                    assembly 3.jpg

                                                    Edited By Brian John on 19/08/2017 12:03:50

                                                    Edited By Brian John on 19/08/2017 12:11:08

                                                    #312862
                                                    Lawrie Bradly
                                                    Participant
                                                      @lawriebradly72996

                                                      Model making certainly can be a pain in the backside, can't it.

                                                      JasonB's advice that the cover face against the steam chest may not be at right angles to the hole seems to me to be worth pursuing. To add though to the possibilities, the valve gear that I'm making works more smoothly in one position (180 degrees) opposed to another. I haven't got to the point yet of trying to make anything work, but I think to fix my problem I might have to allow a little more clearance (maybe a thou or two more) between the valve and the hole it runs in. Maybe your valve needs a smidgen more clearance too?

                                                      Unrelated, I actually can't agree with Jason that it would be a good idea to retain the flywheel's 82mm diameter. The piece of 5mm aluminium packing is never going to look elegant. The specs say 80mm, so why not go with them? The YouTube video of the prototype shows it running very smoothly indeed.

                                                    Viewing 25 posts - 201 through 225 (of 304 total)
                                                    • Please log in to reply to this topic. Registering is free and easy using the links on the menu at the top of this page.

                                                    Advert

                                                    Latest Replies

                                                    Home Forums Stationary engines Topics

                                                    Viewing 25 topics - 1 through 25 (of 25 total)
                                                    Viewing 25 topics - 1 through 25 (of 25 total)

                                                    View full reply list.

                                                    Advert

                                                    Newsletter Sign-up