Taig Australia have not responded to my emails nor is there a phone number on their website. Machinery House do not have the generic milling slide in stock and will not have them until November…..even that sounds like ''maybe''. So I will have to source something from overseas.
This looks good but I often have problems when ordering from India :
I am hoping it is not : the Tag requires a mounting block before fixing to the carriage whereas the Machinery House type is mounted directly to the carriage. I have asked the ebay supplier to provide more photos of the base so I can see how it is mounted to the lathe.
I have a Taig one and that is identical. Mounting is via twoi stepped holes in the body.
You only need a mounting block if your lathe won't allow it to hang over the side of the cross slide, you need an adaptor to fit it to the topslide mountings OR you want to use it at an angle.
I am basing my comments on what I read here : they are quite specific about requiring a mounting block. Anyway, it is not going to be as simple to mount as the Machinery House version. I will call the Melbourne and Perth offices tomorrow to see if they have them in stock.
Machinery House from whom I bought the Optimum lathe have a generic vertical mill slide which will fit my lathe. I simply remove the top slide by undoing one bolt and use the same bolt to attach the slide to the carriage. I am not sure if the Taig attaches so simply. The generic slide is also metric.
I have received some more photos from the Indian seller : it has two holes threaded 1/4'' X 20 TPI.
UPDATE : I have just found out that the vertical slide which fits the Optimum lathe is a Toolmaster L276 and this also fits Hafco lathes so that would explain why it is sold out all across Australia.
The only thing I would wonder about is the finish and fit of the dovetail etc Brian. The Taig one is perfect. The generic one should be worth a try though and is simple for you to use. You may find that it doesn't fit in the ideal place on your lathe as the point the compound slide swings on seldom goes much past the centre line of the lathe. It too could still be mounted on a plate to offset it.
I have a Taig one and that is identical. Mounting is via twoi stepped holes in the body.
.
Neil,
In light of the new photo that Brian received from India; and comparison with the picture of Tony Jeffree's Taig/Peatol example … Can we assume that 'identical' is an innocent overstatement ?
1. After numerous phone calls to many companies I have realised that I am not going to buy the Toolmaster L276 milling slide in Australia until they get a new shipment which is expected in November. Going on past experience that will mean it arrives in January next year…maybe ! Do they sell Hafco lathes in the UK ? Somebody might have the Toolmaster slide there ?
2. The steam chest is soldered to the cylinder using solder paste which I have never used before. Is flux required for solder paste and, if so, is it special flux ? I am getting different answers using Google search on the internet. I know solder paste is a mix of flux and solder but that does not mean that the metal to be soldered should not be pre-fluxed first.
Brian, the paste is the flux, and as long as the metal to be joined is clean (as in any soldering), the paste is applied between the bits of metal, which if required is held in place as it is heated, the solder in the paste will melt when the soldering temperature is reached. I'v never used the stuff myself(too mean to buy it), I tin both bits of metal, place the bits together, then using an old screwdriver or similar metal rod with insulated handle, press the bit together as you heat it, when the solder melts take the heat off, but keep the pressure on until it cools this will leave you with a nice thin joint, which is the strongest, and if you have tinned it correctly there should be a minimum of solder on the metal outside the joint area, the solder paste should work the same.
As Ian says the paste is a mix of flux and finely ground solder so just apply lightly to each surface, put them together and head you will know when its done as you will see the silver fillet of solder form around the joint edge.
Clean it off well with water and soap after as the flux is quite corrosive, not so bad on brass but on steel items you can come back the next day to a rusty part.
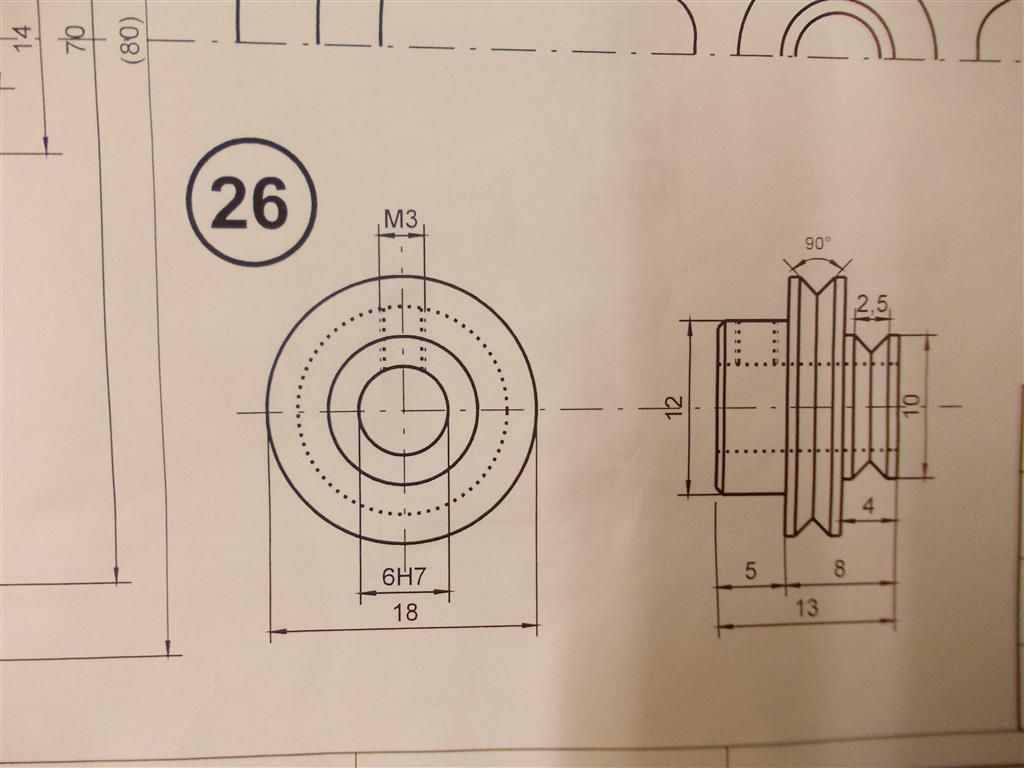
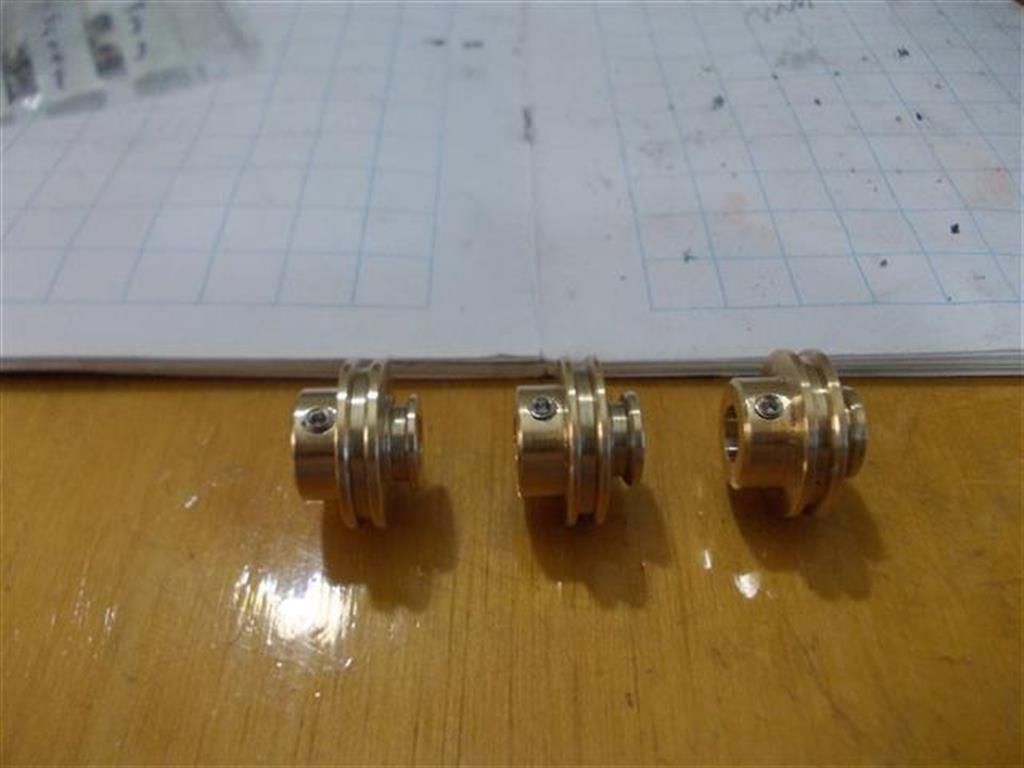
I am making as many parts as I can while I decide what to do about the lack of a vertical slide. Today I made the pulley (part 26) ; I actually made three of them. I did not have a 45 degree pointed tool to make the cuts as the per the diagram so I used the flat edge of a parting tool to shape the grooves then rounded off the edges with a round file held against the opening of the grooves while the pulley was spinning in the chuck. The grooves are 1.2mm deep so I am hoping that is enough to keep any pulleys in place.
What would such a 45 degree tool look like….I do not have anything in my kit box that would do it ?
A tool with a V end with an angle of less than 45 degrees both sides being cut with the compound slide. A tool where one side is at 45 degrees and the other less – one side being cut with the compound slide. Or a V tool with 45 degrees on both sides aka a form tool where it would be plug cut in one go or to reduce the load on the lathe via compound slide set at 45 degrees.
Brian, could you rig a vertical slide using an angle plate and your top slide?
I suggested that earlier John. Brian seems to be a bit worried about making something up to do the job.
I suspect he will have to as one mounted where the compound slide fits probably wont travel far enough past the centre of the lathe to make full use of it so will need mounting on a plate to offset it. On the slides itself it may be difficult to find metric ones as well.
I was initially reluctant to make something if a vertical slide could be bought off the shelf but due to the lack of availability it looks like I may have to go the ''home-made'' route. I am thinking about it while I make up all the other parts.
John : the Toolmaster L276 is metric and it will fit my lathe exactly but there are none to be found anywhere.
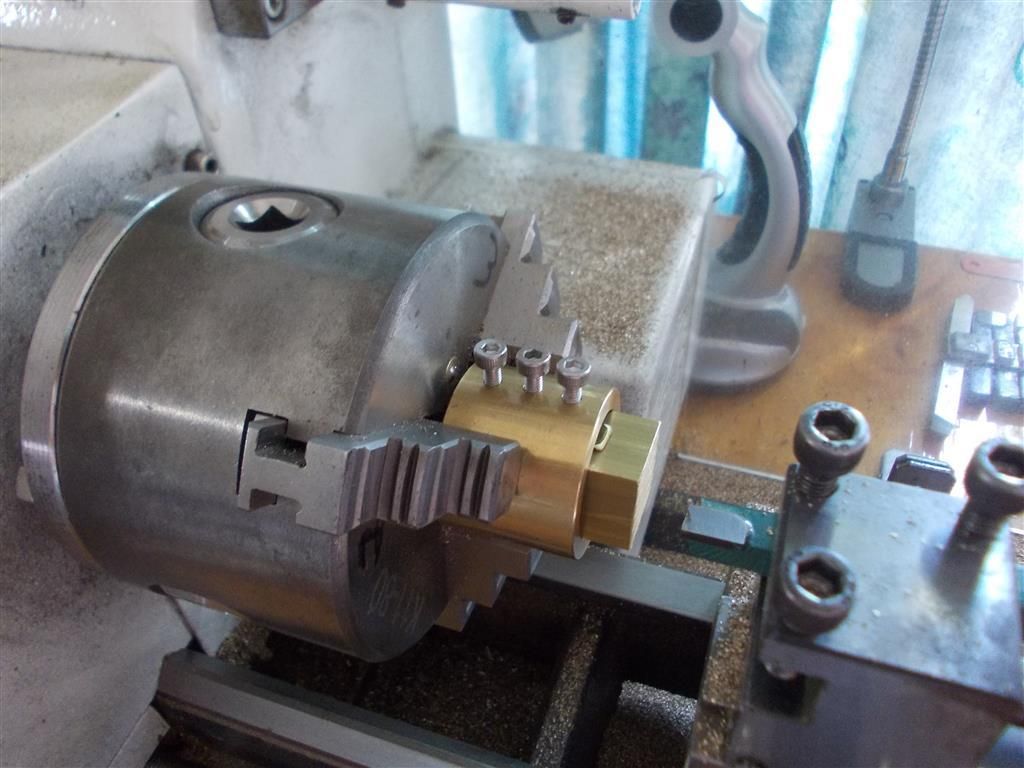
In the meantime : the steam chest is 16mm square X 30mm long. The supplied brass is about 32mm long so the ends will have to be faced off. I do not have a four jaw chuck so I intend to make a jig using some 30mm diameter X 24mm round brass I had in my scrap box. I will drill/bore the hole (about 22.6mm diameter) in the cylinder take the square brass and then drill and tap the cylinder for three M3 grub screws to hold it in place. I should then be able to face off the ends.
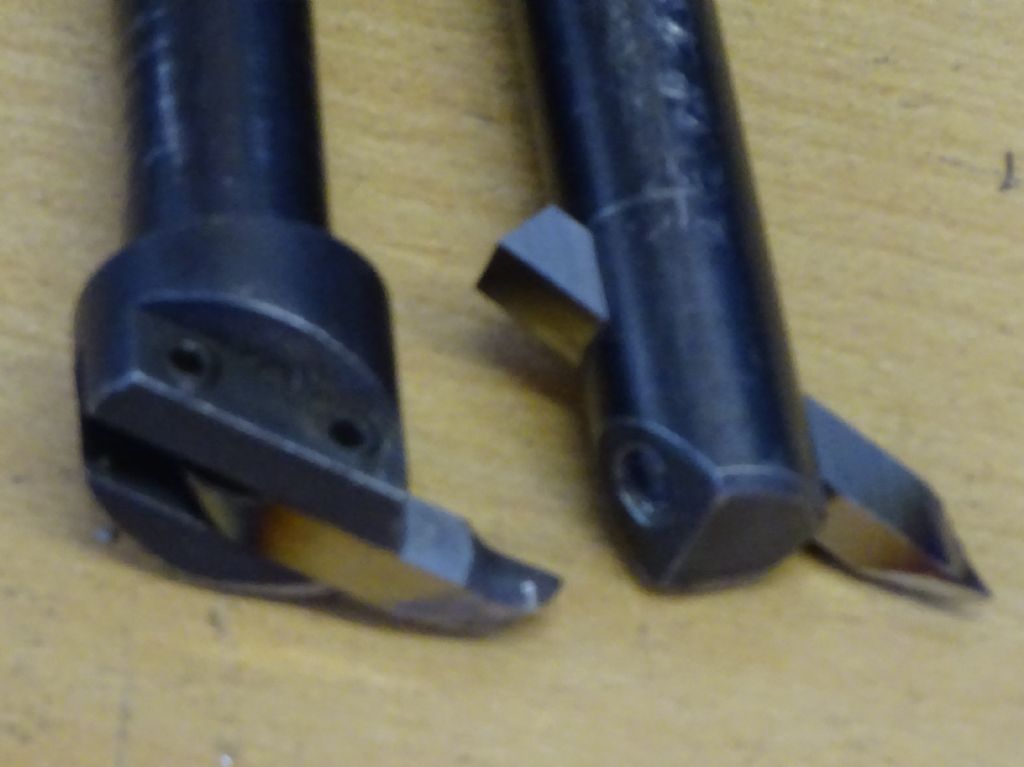
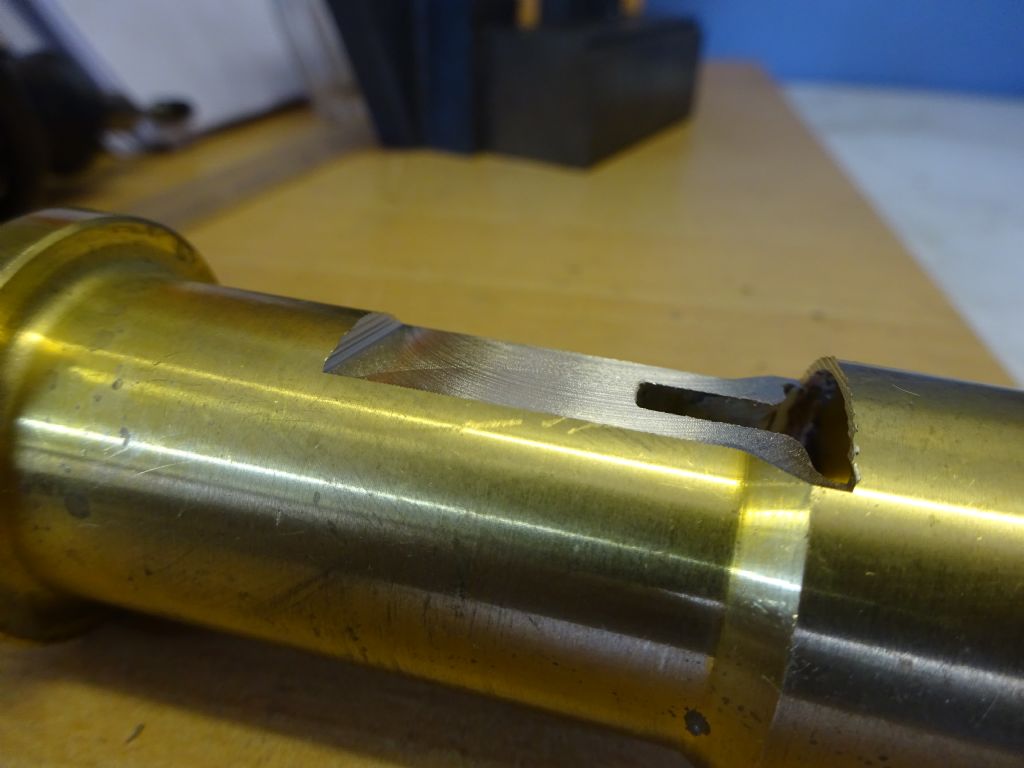
Here you go brian, flycutting as I suggested earlier.
Infact I used the boring bar on the right as it will be easier for you to make one but a small flycutter like the one on the left will also do the job with the right cutter in it..
Take off the topslide then use a tee nut, stud and nut to hold the cylinder in position, pack it upto ctr height. Set the cutter tip to be 15mm from the central axis, you could do this by touching it against the top or bottom flange. Then simply take a cut, advance the carrage a little, take another cut and so on.
As you can see this gives a good flat surface to solder to and the corners are nice and square.
I would suggest a trial cut first on some scrap and also when rotating it is hard to see the cutter so you may want to refit the chuck guard for this.
Okay, I can now see how that would work. I will have to order a fly cutter and make up the cylinder.
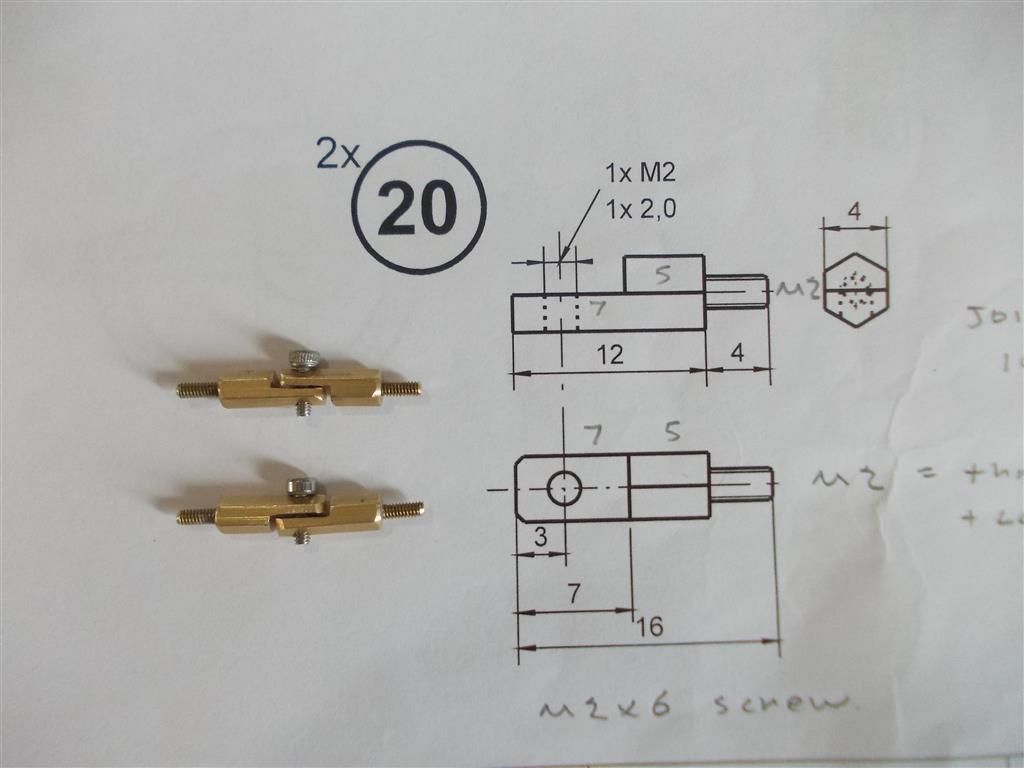
Today I made up two of the joint parts (20). This connects the control valve to the eccentric outer race. The plans call for the M2 thread to be cut on the spigot (?) with a die but I have found it much easier to leave off the spigot then drill and tap for an M2 threaded rod. The threaded rod is held in place with Loctite. This gives a neater finish with the parts sitting flush when screwed together.
… The plans call for the M2 thread to be cut on the spigot (?) with a die but I have found it much easier to leave off the spigot then drill and tap for an M2 threaded rod. The threaded rod is held in place with Loctite. This gives a neater finish with the parts sitting flush when screwed together.
I have made the jig for the steam chest and it has worked well : the square brass has been faced off and shortened to 30mm ready for drilling and tapping. I probably overdid it with three M3 socket caps….two probably would have been enough.
Can I use this jig somehow to drill the 6H7 hole for the control valve like drilling a hole for an eccentric ? The centre of the hole is 6mm from the side so that makes it 2mm off centre. I think I need a 4 jaw chuck for that. The diagrams are on page one of this thread. I may have to drill it in the drill press, lining up one side with the drill bit to ensure the hole is parallel with that side.