Further Adventures with the Sieg KX3 & KX1

Advert

Further Adventures with the Sieg KX3 & KX1

Viewing 25 posts - 201 through 225 (of 383 total)
  • Author
    Posts
  • #466564
    JasonB
    Moderator
      @jasonb

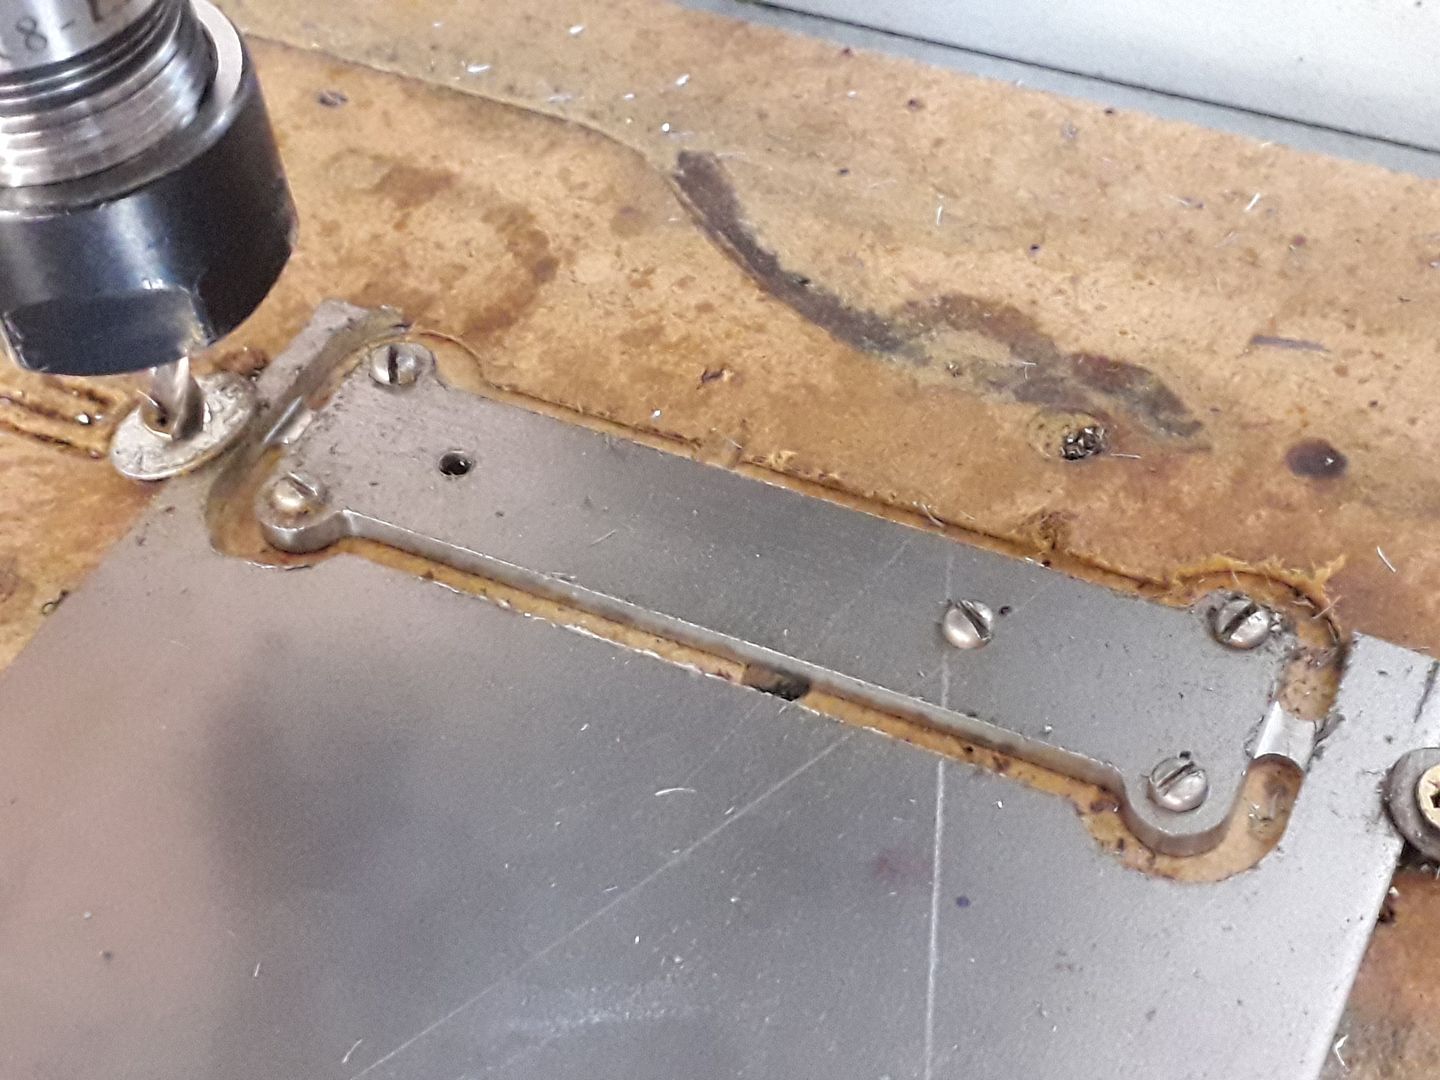
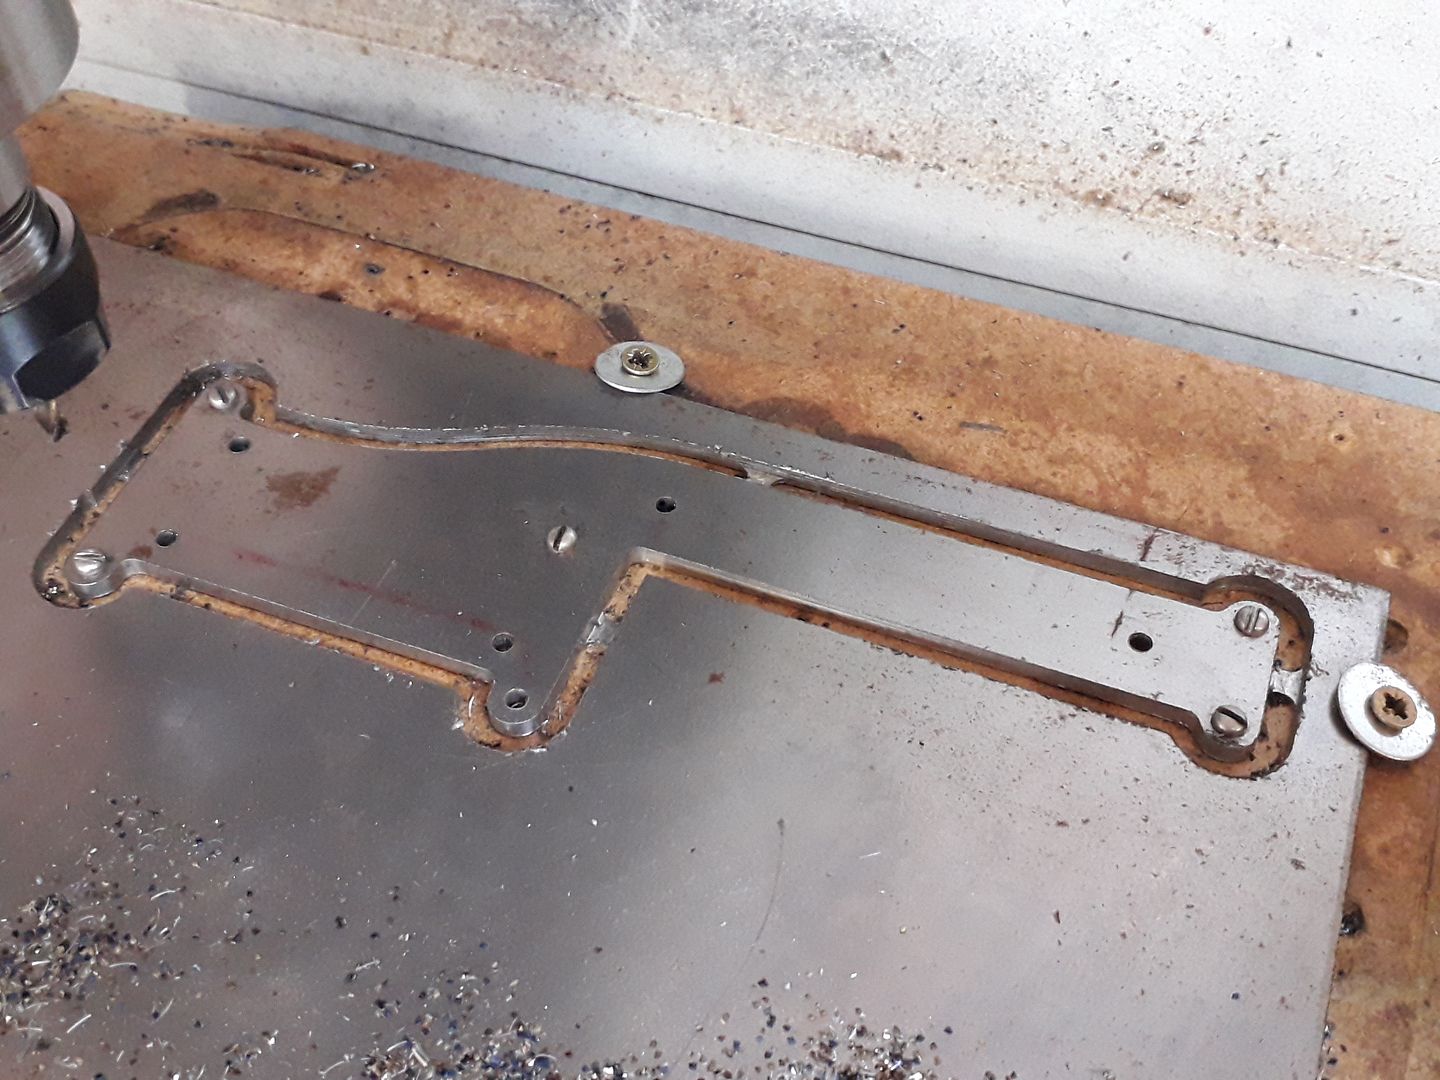
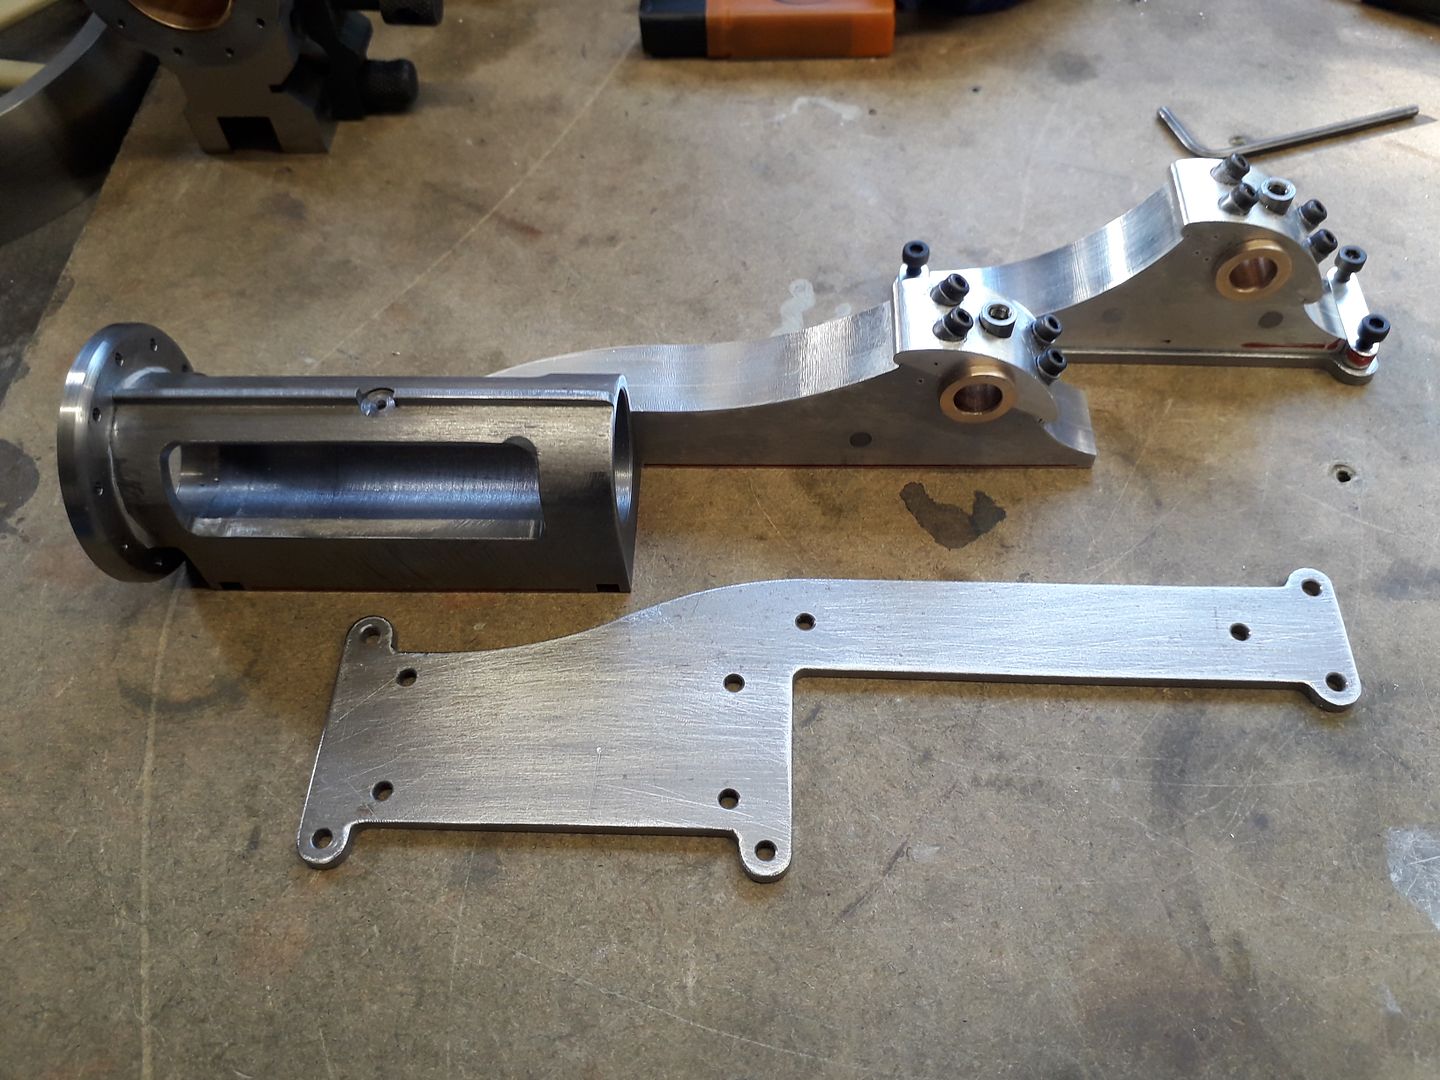
      Some of simple drilling and profiling cuts produced a couple of parts destined to become part of a "casting"

      I think it's S275 steel at 3mm thick, 3mm dia holes were drilled with the first code and then screws added to help hold the part down before before changing to a 3-flute 4mm dia cutter to do the shape in 4 depth increments and then a final 0.25mm full height finish pass. Couple of tabs used just to hold the bits in place.

      Small one in place and the other to show how it mimics the shape of the other parts but is 1mm larger all round.

      No video of this one as it's not particularly exciting.

      Advert
      #469912
      Ian Johnson 1
      Participant
        @ianjohnson1

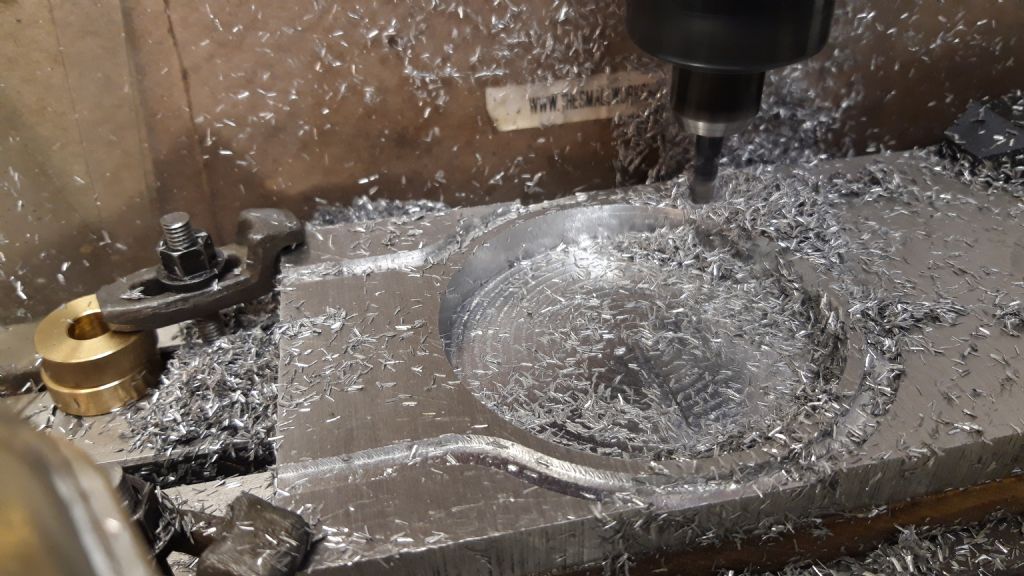
        I needed to make a new cup holder for my partner's new electric wheelchair, the previous cupholder would not fit, and anyway, I fancied using my KX1. CNC'ing the main shape.

        Vectric V carve made a good job of working out the tool paths. I used a 6mm end mill for both the pocket and outer profile. Taking it steady with 2mm deep cuts in the 10mm deep pocket, and the same with the profile which was 12mm deep.

        20200430_192342.jpg

        I included 5mm wide tabs, but put two of them where all the material was cut away!! No harm done it all held together okay.

        20200501_194013.jpg

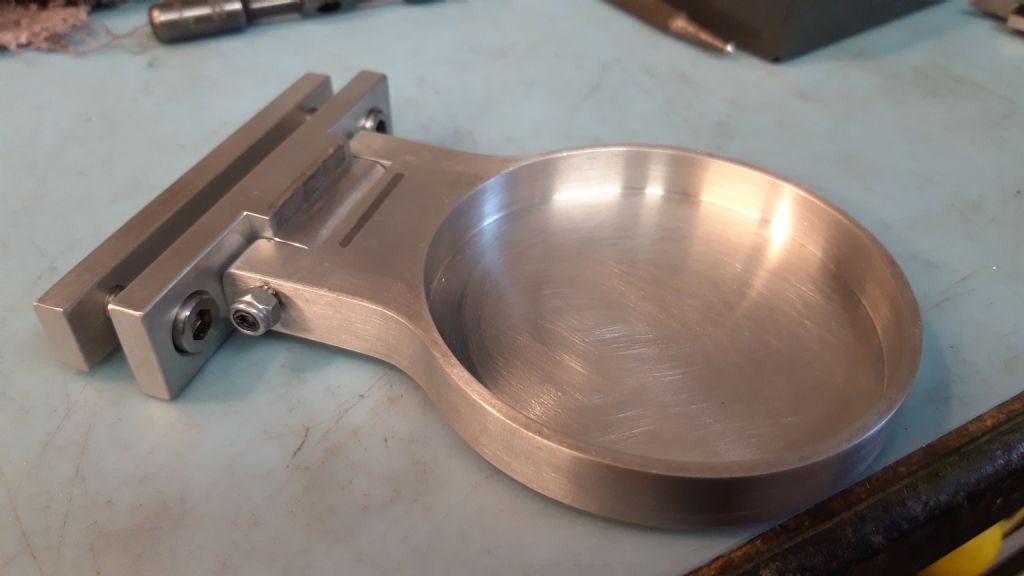
        The other parts were done on the manual mill and lathe, producing the hinge bracket, backing flange and M4 pivot screw.

        I glued strong magnets into the bracket and a mild steel bar into the main body. Worked out nicely.

        20200506_194957.jpg

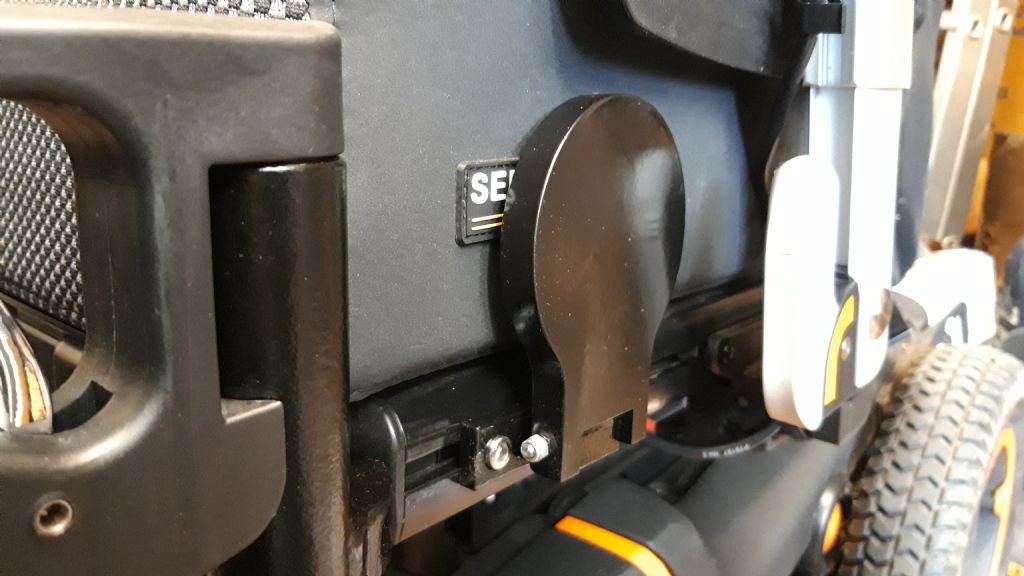
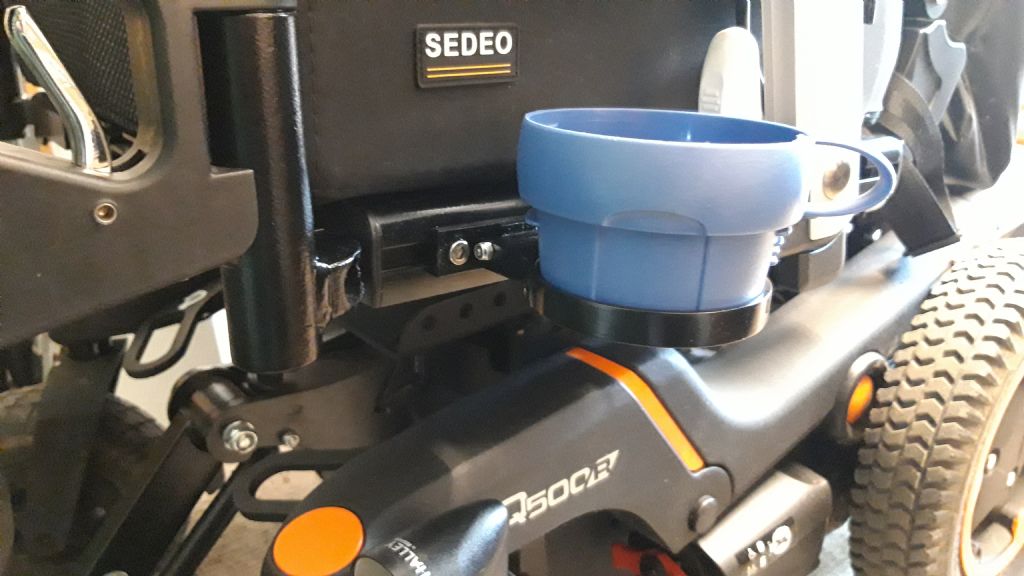
        Painting is not my favourite job but the black matches the wheelchair.

        20200507_114557.jpg

        20200507_161014.jpg

        Just got to wait until we can get out and road test it now!

        Ian J

        #469915
        JasonB
        Moderator
          @jasonb

          That came out well

          #469925
          Jimmeh
          Participant
            @jimmeh

            I have really been enjoying this thread. It's great to see the range of work these small machines are capable of.

            Nice work guys, keep up the great posts!

            #469928
            Ian Johnson 1
            Participant
              @ianjohnson1

              Thanks Jason and yes the little Sieg CNC mills are great, I am still finding out the limits of the KX1, and this was just approaching the outer profile max at about 93mm diameter on the Y axis. I was getting a lot of chatter on the cuts especially on the deep last pass, I think the spindle bearings need nipping up? I shall investigate further. But otherwise the machine is performing great.

              I was going to powder coat it but chickened out when I thought the glue holding the magnets and steel bar would melt, so I used car spray paint.

              IanJ

              #481763
              JasonB
              Moderator
                @jasonb

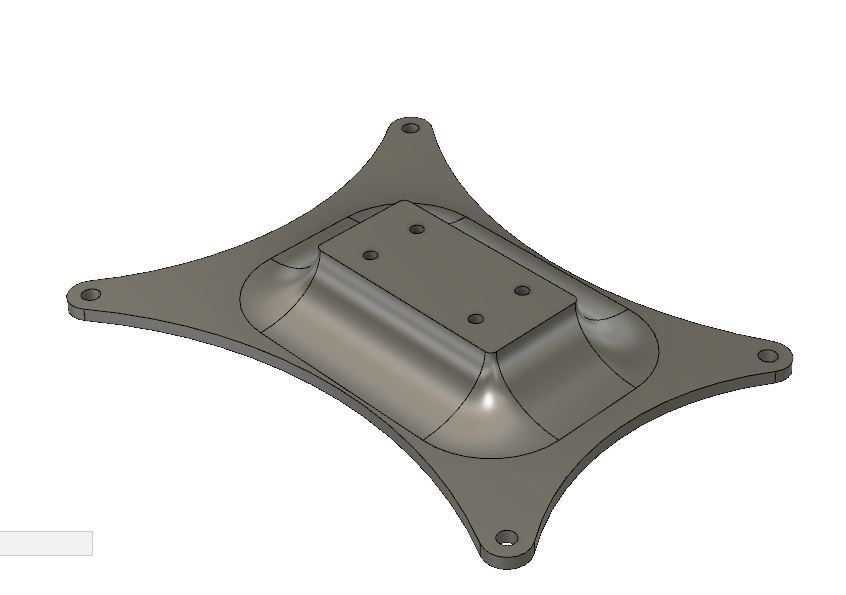
                I thought it was about time to dust off the KX3 and make a bit more swarf. The chosen candidate was the base for my current engine project which I had made a bit more shapely than the engine it is based on but making the four sides concave rather than just rectangular and the curve from top out to the edges is a 1/4 ellipse so not easy to do with an off the shelf cutter particularly to get it to flow around the corners of the upper rectangular mounting surface.

                Roughing

                The usual 3D clearing using a 6mm dia cutter was showing quite a long run time in the simulator as it was basically just doing an ever decreasing rectangle so lots of movement and little cutting to start with as it just nipped off the far corners so I thought I would try one of ARC's 25mm insert cutters. I changed to a pocket clearing cut which spiralled down 1mm and then worked around the waste before spiralling down again, I generally prefer to use more of the cutters edge but with the inserts the cost of a couple of corners is not too great even if the sides don't see an equal amount of wear.

                I will need to look at the helix that the tool follows as it spirals down if I use the method again and also support more of the work as it was getting a bit chattery as I got down to the 4.5mm (4mm plus 0.5 finish) thickness. I have already played around with this and got the tool to ramp down as it moves along which together with a few more tweaks cut about 40% of the run time.

                Contour

                I had already sawn to rough shape on the vertical bandsaw so only needed a couple of 0.5mm clean up contour passes and a final 0.25mm finish one and it was while doing these that I realised something was wrong as there was a lot more coming off the left hand side than the rightangry Turns out that I had located the work based on the ctr position I had used when drawing it which was the middle of the rectangular top section (black sharpie marks on video) but F360 defaults to the ctr of the stock which being an asymmetric part was off to one side, luckily there was enough to play with except for a couple of the rounded corners so out with the JBWeldblush

                3D "Steep and Shallow"

                From the earlier Filer & Stowell flywheel I had found that I was using the wrong type of path with some input from Andrew and Barrie so opted for what F360 calls "steep and Shallow" which allows you to set the stepover or scallop for both steep and shallow surfaces which results in a more even finish, I went with 0.25mm in both cases and used a 4 flute Arno ball ended cutter. Quite happy with how that turned out as it needed almost no cleanup work prior to paint.

                I also drilled the holes on teh CNC, the larger than normal spotting holes are due to me not having modified the file after altering the hole spacing on the mating part so had to run teh spotting path again with a slow downfeed so the 6mm spotting drill did not get pulled over by the previous overlapping holes.

                Final job was to add some bosses around the corners which still need a bit more filleting but the Upol Rapid filler was living upto it's name this afternoon and almost setting before I could apply it so just gave it ablow over with etch for now.

                Feeds 'n' speeds etc in description when watch on you-tube

                #481822
                Ian Johnson 1
                Participant
                  @ianjohnson1

                  Nice work Jason, a difficult shape made for CNC. I'm not familiar with F360 you say it defaults to centre, is it the same as Vectric Vcarve? I tell the program where to start from in the job set up and dimensions (usually the centre of the job or one corner). I can use an offset start position too.

                  IanJ

                  #481832
                  JasonB
                  Moderator
                    @jasonb

                    Ian. I've only used Vectric 2D for a very limited time so can't say if it's the same as yours.

                    First thing to do in F360's CAM is the set the X-Y-Z orientation so machine knows which way up to machine the part and and how it is placed on teh mill.

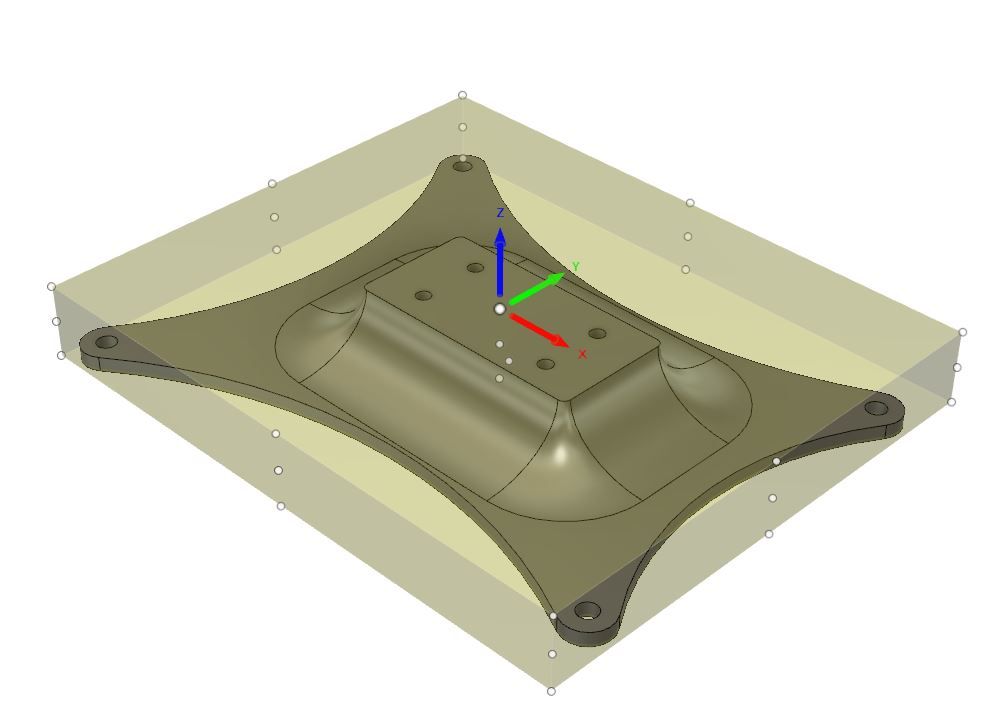
                    Then you enter the stock material details where you can set shape, (round or rect) specific size or add a machining allowance to part, this gives the transparent box shown beloworigin.jpg

                    Then you can set your origin, the 27 dots on the image above are points on the stock that can be used, there is also the option of a similar number of points based on the model bounding box, any selected point or what I should have used in this case was "model origin"

                    If you look at the finished item, the two M3 holes should have been in line with the counterbored ones used to hold the work as they were placed 15mm either side of the stock's ctr which is a couple of mm different to the models origin.

                    #481845
                    Ron Laden
                    Participant
                      @ronladen17547

                      That is very impressive Jason imagine attempting that in manual, the finished item looks superb. Good to see my favourite end mill in action, on aluminium I run mine at the mills top speed 2500 rpm, what speed were your running it sounded higher.

                      Great stuff.

                      #481847
                      Ian Johnson 1
                      Participant
                        @ianjohnson1

                        Thanks for the F360 explanation Jason it looks more advanced than Vcarve

                        IanJ

                        #481860
                        JasonB
                        Moderator
                          @jasonb

                          Ron, 3750rpm which gives a cutting speed of about 300m/min which is towards the slow end for these inserts, feed was modest 300mm/min giving 0.04mm chipload. The speed is what F360 suggests for a 25mm cutter in aluminium but I reduced its suggested feed rate a lot for the lighter machine.

                          If you click on the play arrow on the video and then "youtube" bottom right so it plays in a new Youtube screen you can see all the details by clicking "Show More" just under my name

                          #482034
                          Ron Laden
                          Participant
                            @ronladen17547

                            Thanks Jason, out of interest how long did it take to programme a part like this and how long the machining time start to finish.

                            Ron

                            #482196
                            JasonB
                            Moderator
                              @jasonb

                              Ron, I probably spent 20-30mins on the CAM playing about with a few settings to see what would work best with the 25mm cutter and the steep and shallow but usually need less than that for things I'm more used to for example I cut the cam and that took about 2mins to do the CAM.

                              Cutting time for the base was just under 2hours plus tool changes, Tool moved 45.875m in total (well work actually) and 69.3% of the original rectangular block was cut away. As said earlier I got it down to about 1hr 30 with a few changes after I had seen what it really cut like.

                              #485256
                              JasonB
                              Moderator
                                @jasonb

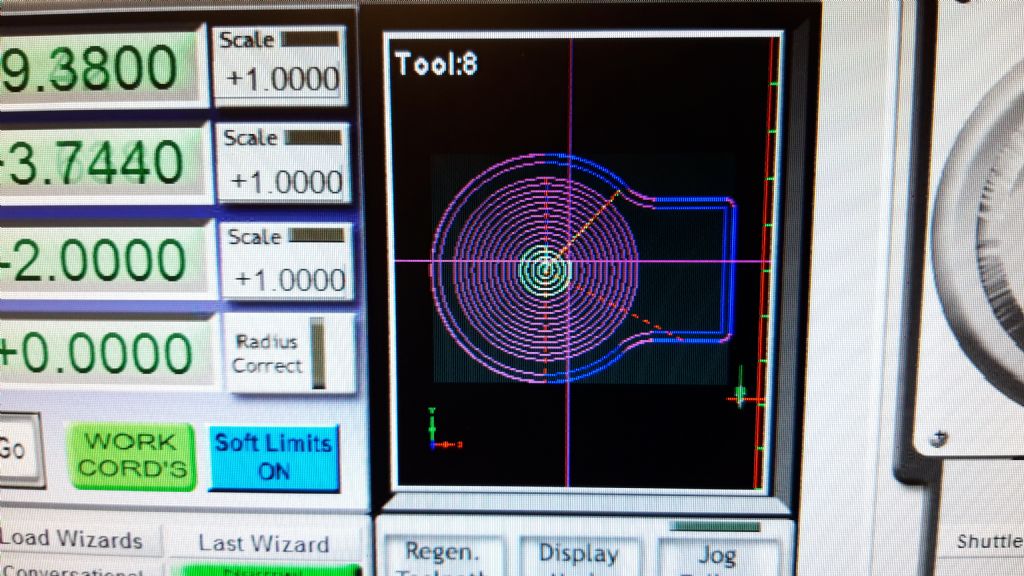
                                I carved a cylinder head for my current Thompson engine out of a bit of 50mm cast iron bar yesterday, this is the finishing "Steep & Shallow" cut from Fusion after the adaptive clearing and external contour cuts had been done.

                                6mm 4-flute R1 cutter at 5000rpm and 400mm/min feed with a 0.25mm stepover.

                                #485314
                                Ron Laden
                                Participant
                                  @ronladen17547

                                  Is it my imagination Jason or is the feed rate higher than I have seen before plus the transit time between cuts seems quicker..? Maybe just me but overall it looks faster. 

                                  Ron


                                  Edited By Ron Laden on 13/07/2020 09:59:05

                                  #485316
                                  JasonB
                                  Moderator
                                    @jasonb

                                    It's the same as I often use and possibly slower, I think the previous Steep & Shallow that i did was at 480mm/min rather than 400 on this item

                                    #485332
                                    Andrew Johnston
                                    Participant
                                      @andrewjohnston13878

                                      Nice looking part with a good finish. Only one comment; the cutting action was creating more noise than I would expect. Of course that could be an artifact of the recording. The noise seemed a bit "squeally" which is indicative of too small a chip load?

                                      Andrew

                                      #485378
                                      JasonB
                                      Moderator
                                        @jasonb

                                        The uploading to Youtube does always seem to add a few high frequency squeals which is not helped by the phone being about 3" from the mill's head. I did get a good squeal out of it on the adaptive mostly at the 11 and 5 o'clock positions as it circled around the work (3-flute, 5000rpm, 300mm/min 5mm high x 1mm DOC) but happy for the rest of the time.

                                        Yes it could probably have been fed faster as the 0.02mm chip load was small and given the amount of chip thinning on the remaining 0.5mm  of  material that was left by the adaptive with a 6mm tool and the small stepover it is just tickling the surface.

                                        What I really need to do is set up a test piece and run it with a few different settings as doing individual parts means one is never quite the same as the other and it may be a month or two between even doing a roughly similar cut. But with the draw of models to make I can't see that happening.

                                        Edited By JasonB on 13/07/2020 13:28:25

                                        #487416
                                        JasonB
                                        Moderator
                                          @jasonb

                                          As mentioned in another thread I have been drawing up some patterns for Graham Corry of Alyn Foundry, the original intent was to get them 3D printed particularly the flywheel but prices coming back are rather high. I said that some of the smaller parts would be within the capacity of the KX3 so this afternoon I made some sawdust.

                                          Cutting details are under the video if you watch it on Youtube. Feeds could have been faster as the cutters were quite happy with the loads but as there was a fair amount of stickout – 40mm in the case of the ball nosed cutter I decided to play safe and things turned out reasonably well.

                                          #487624
                                          JasonB
                                          Moderator
                                            @jasonb

                                            A bit more sawdust production today, upped the amount of material being removed having found the cuts yesterday were no trouble.

                                            #487729
                                            Ron Laden
                                            Participant
                                              @ronladen17547

                                              Looks good Jason, that certainly saved some manual machine time and a lot of handwork.

                                              What wood do you use for patterns, is it a hardwood or does it depend on how often they will be used.

                                              Ron

                                              #487736
                                              JasonB
                                              Moderator
                                                @jasonb

                                                Hardwood gives a nice crisp pattern, the bearing caps are beech and the bits posted yesterday maple.

                                                #488057
                                                Owain Samuel
                                                Participant
                                                  @owainsamuel55325

                                                  Joining in, I’m in the process of recomissioning a KX3 that’s stood for 5-ish years due to life, dead computers, changing jobs and the law of sod. The machine was bought from arceuro about 8 years ago, it went on to near -as-damnit play for itself in the first year with a job engraving room number plates I obtained through a colleague at my then employer. It then was used until a major reorganisation of the garage lead to it being temporarily decommissioned, then it’s PC died when attempted recommissioning, I changed jobs and for a while had no time or energy to sort it. That was about 5 years ago, Since then due to life and a lack of time, it’s sat, becoming more buried in random workshop crap. Then, along came Covid-19 and furlough.

                                                  So, I’ve obtained a new PC from my tame IT man. The current challenge is connecting the beast to the PC, following a lot of googling and research I’m going with a UC100 motion controller to (hopefully) make it connect with a USB. If that doesn’t work, it’s plan B. I’ve spent a lot of furlough learning fusion360, so watch this space.

                                                  Owain

                                                  #488082
                                                  JasonB
                                                  Moderator
                                                    @jasonb

                                                    let us know how you get on, I'm sure as computers die and ones with parallel port and older operating system become harder to find others may be in the same boat. Mine was one or the USB ones which helps.

                                                    #488106
                                                    Owain Samuel
                                                    Participant
                                                      @owainsamuel55325

                                                      It’s started well, following a lot of research and reading last night (guess who until yesterday didn’t know Arc didn’t sell the KX3 any more) and a very useful and downright impressive phone call to Arc this morning, I’m making progress. Just emailed Mach support about the licence to unlock the software (because I’m reinstalling it on a new PC, and the last registration was 4 computers/tablets and 3 email addresses ago). DPD should deliver the UC100 today, so it’s all progress in an upward direction.

                                                      Gawd, I can’t half get a lot done when I didn’t have to go to work…

                                                      Owain

                                                    Viewing 25 posts - 201 through 225 (of 383 total)
                                                    • Please log in to reply to this topic. Registering is free and easy using the links on the menu at the top of this page.

                                                    Advert

                                                    Latest Replies

                                                    Viewing 25 topics - 1 through 25 (of 25 total)
                                                    Viewing 25 topics - 1 through 25 (of 25 total)

                                                    View full reply list.

                                                    Advert