Further Adventures with the Sieg KX3 & KX1

Advert

Further Adventures with the Sieg KX3 & KX1

Viewing 25 posts - 101 through 125 (of 383 total)
  • Author
    Posts
  • #425355
    JasonB
    Moderator
      @jasonb

      While others prefer to discuss the shape of their heads I found a bit of time to run the CAM for some cams. In the past I would either have used CamCalc with multiple offsets of the mill at angular increments around the cam or used the inside out boring head method particularly on cams like this with a flank radius. Both of which take a while to setup and in the CamCalc case a long while to cut.

      This time with 0.4mm deep x 5.5mm high roughing passes and a slightly slower fed 0.2mm DOC finish pass on the silver steel the cam was done in 2.30mins with no need to do any blending with files after. I can't see me wanting to go back the the old ways of doing things.


      Edited By JasonB on 21/08/2019 16:42:17

      Advert
      #425362
      Ian Johnson 1
      Participant
        @ianjohnson1

        That turned out nice Jason. There's something satisfying about watching a machine do stuff all by itself. Once bitten by the CNC bug it becomes natural to think CNC rather than manual.

        Ian

        #425453
        Ron Laden
        Participant
          @ronladen17547

          Two and a half minutes to machine a cam and no blending afterwards, you cant knock that can you.

          On the manual methods Jason, what is the inside out boring head method I was trying to figure that one out.

          #425473
          JasonB
          Moderator
            @jasonb

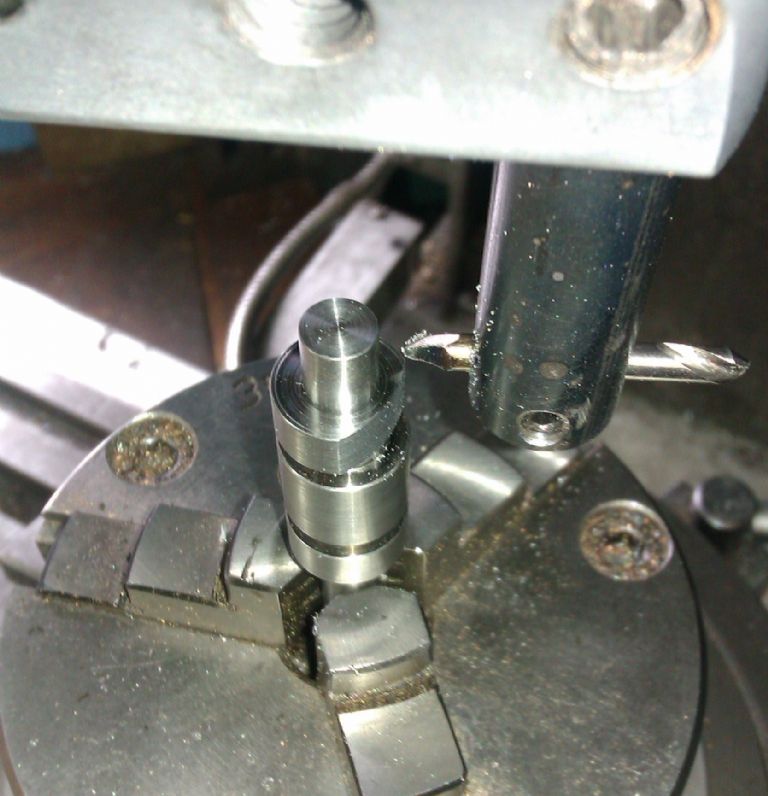
            Ron, the work is set to stick up vertically on a rotary table and then a boring head with a tool suitable for cutting external diameters is positioned above and set to the flank radius of the cam. The work is then moved sideways and as series of plunge cuts are taken which form one flank.

            imag1507.jpg

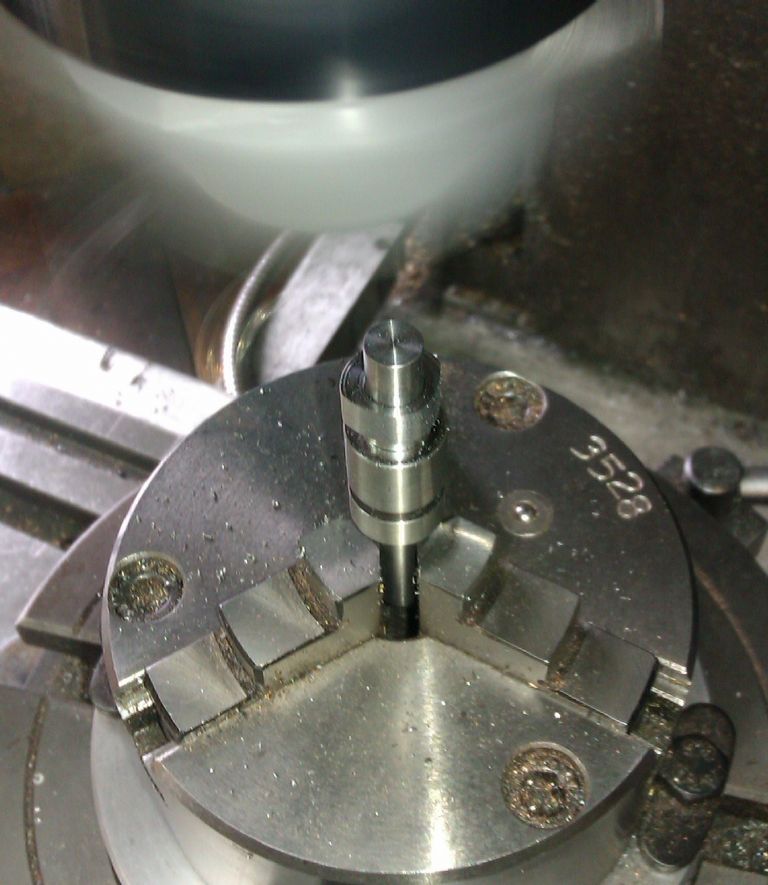
            You then turn the rotary table a degree or two and make another plunge cut and keep on doing this which slowly forms the base radius.

            imag1508.jpg

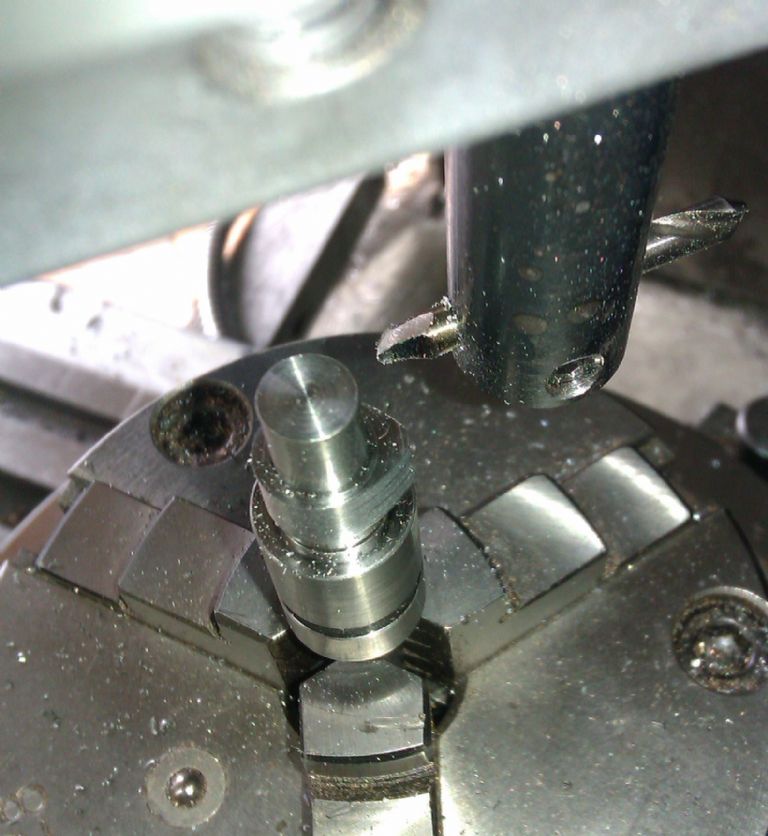
            You carry on until you are left with just the width of tip required

            imag1509.jpg

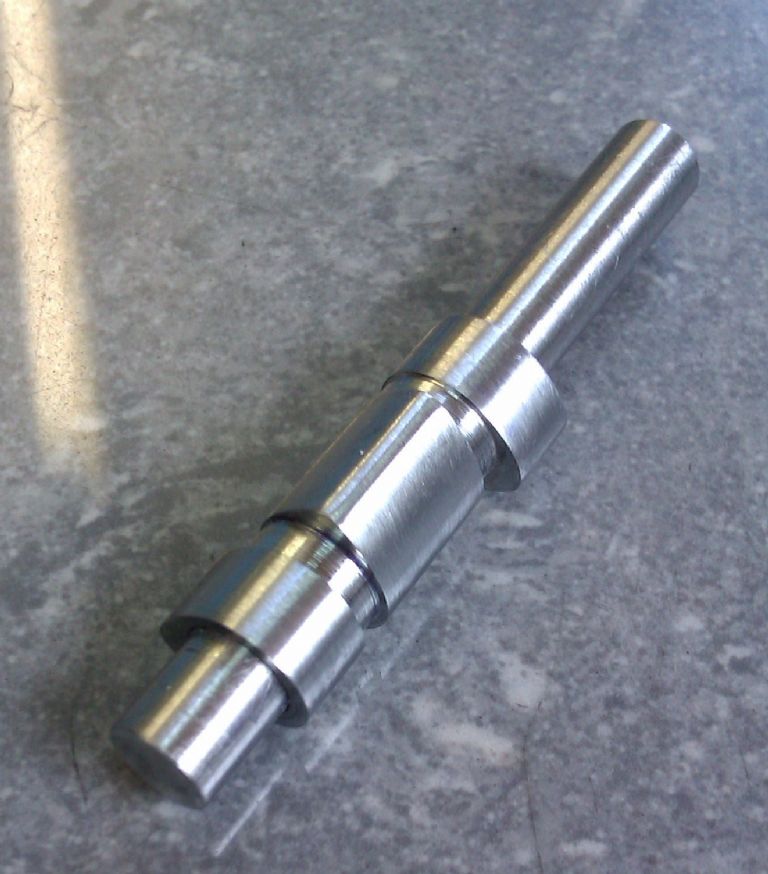
            Once the milling is complete the tip is rounded by filing and any slight facets blended away. As the cuts are a large arc you get less obvious facets than if holding the cam horizontally and cutting with the end of a milling cutter but they are still present.

            imag1510.jpg

            #425475
            Ron Laden
            Participant
              @ronladen17547

              Thanks Jason, I dont think I would have figured that out, interesting and worth remembering.

              Ron

              #426402
              JasonB
              Moderator
                @jasonb

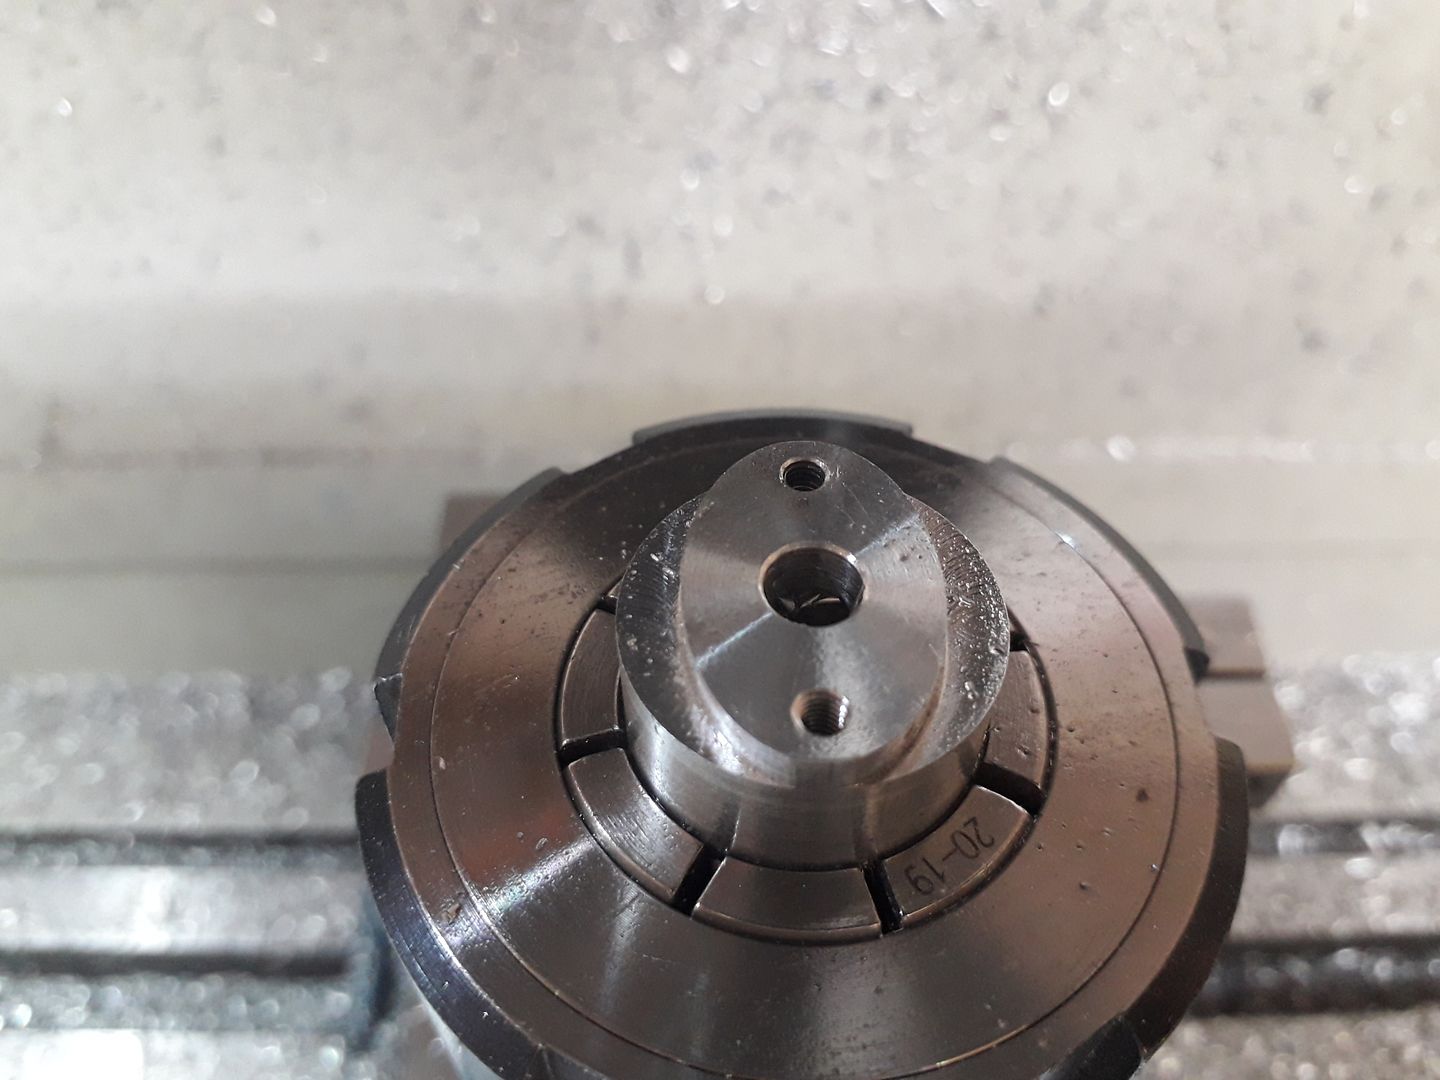
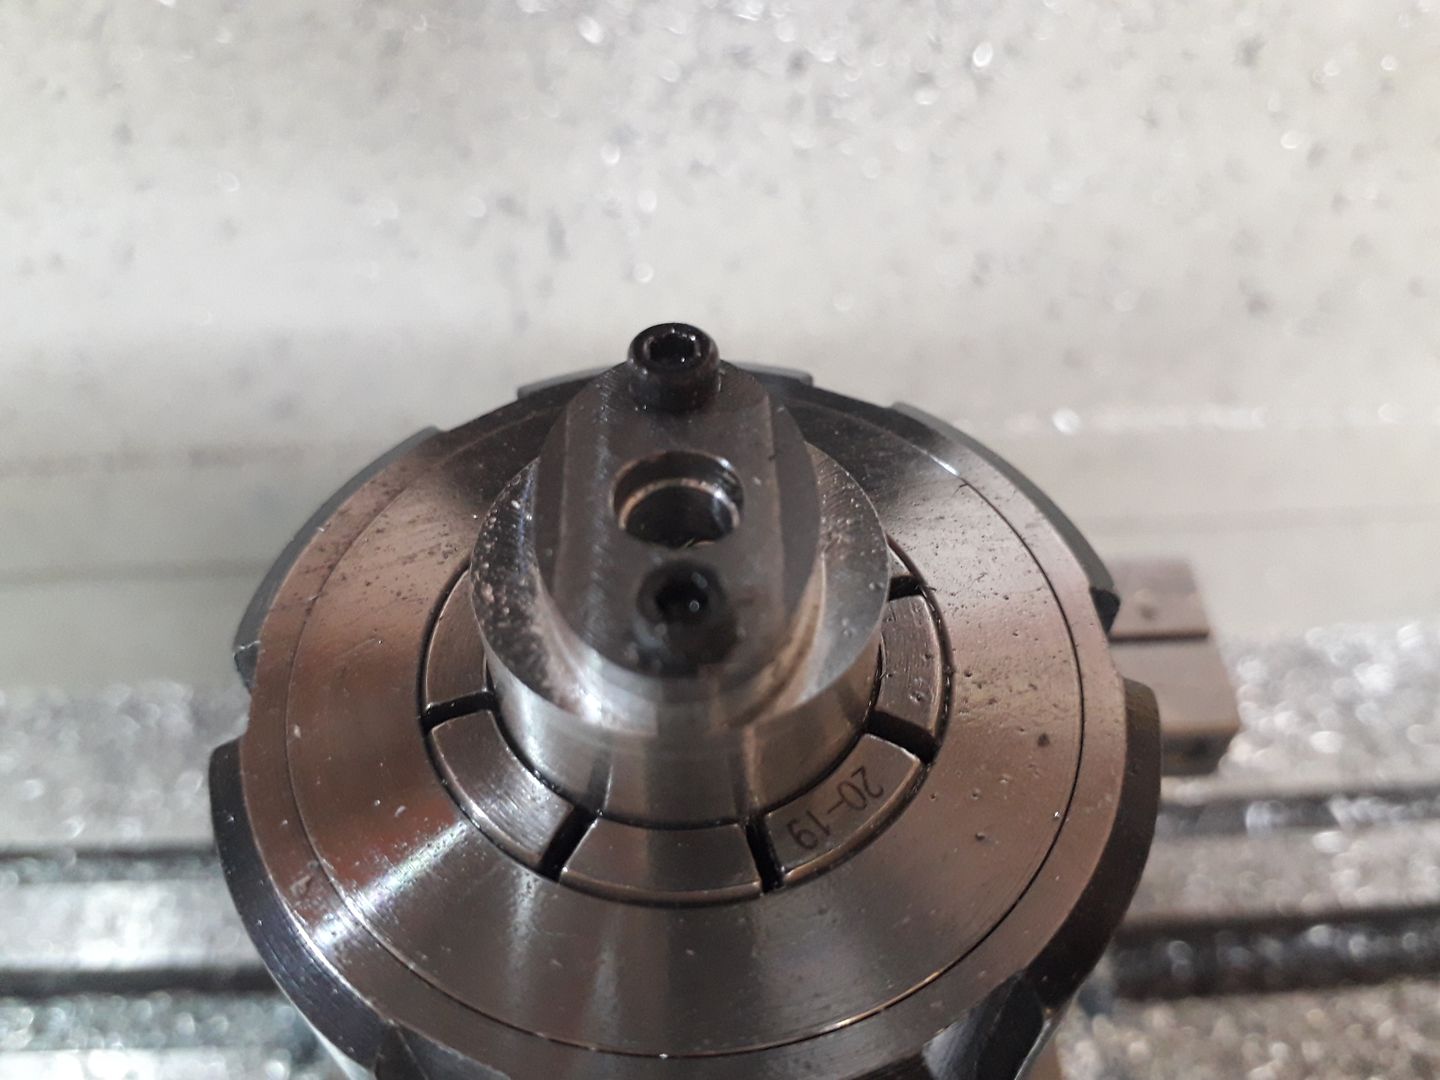
                Nothing too exciting on the machine this week so I did not take a video. Firstly did the eliptical flange on the end of the stock that will form the carb body.

                Then used that to hold a bit of 1.5mm stainless steel that will be the exhaust flange

                Rest of the carb was done with conventional tools and has a throttle barrel rather than the straight through venturi type.

                #427646
                JasonB
                Moderator
                  @jasonb

                  Today we have a Conrod which may be of interest to roderick.

                  2014 (HE15) aluminium, I made up the two parts on the manual mill, screwed them together with sacrificial brass screws and then popped in the two holes and while I was at it made a plate to hold it on for machining.

                  3D profile done with a 4 flute 6mm dia cutter with 1mm corner radius so no stress risers at 5000rpm, modest feed of 300mm/min. Then change to a 4mm cutter again with teh 1mm radius to do the recess in the middle. 12mins plus 2mins for the other side.

                  #427681
                  Ian Johnson 1
                  Participant
                    @ianjohnson1

                    Cool! Great video thanks for sharing.

                    I like those cutters with the radius, seems to leave a better surface finish, and last a bit longer than the normal sharp edge cutters.

                    Looking at the tool paths, they seem a bit weird to me (I use VCarve) It machines the two diameters then plunges straight down the middle! Not sure if VCarve would do a tool path like that on a similar job.

                    Will you be using bushes and split bearings for the small and big ends?

                    Ian

                    #427684
                    JasonB
                    Moderator
                      @jasonb

                      Hi Ian, yes it's a sudden move and one of the reasons I was using that feed.

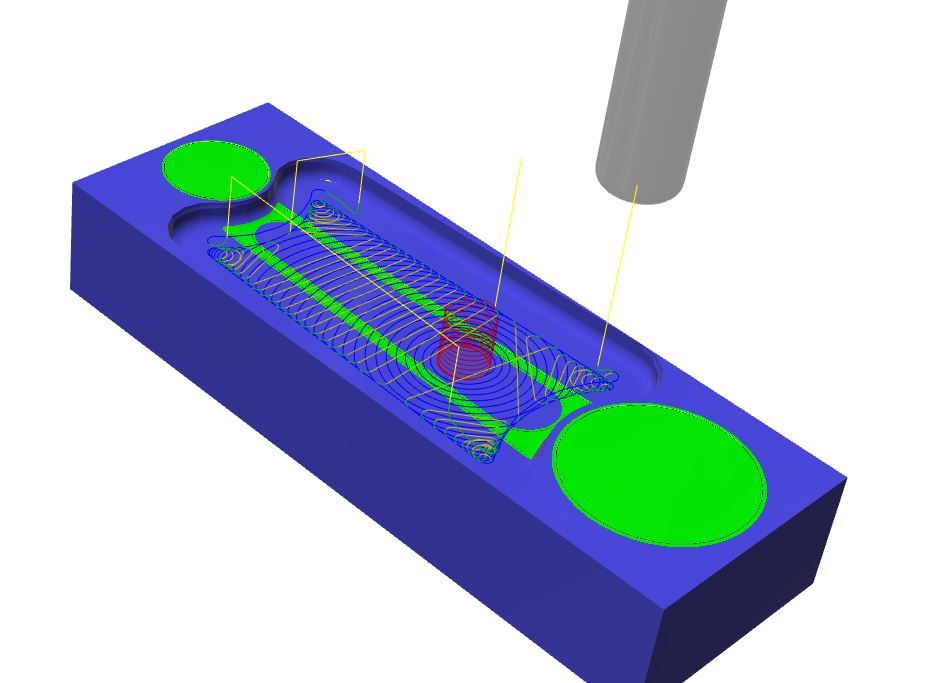
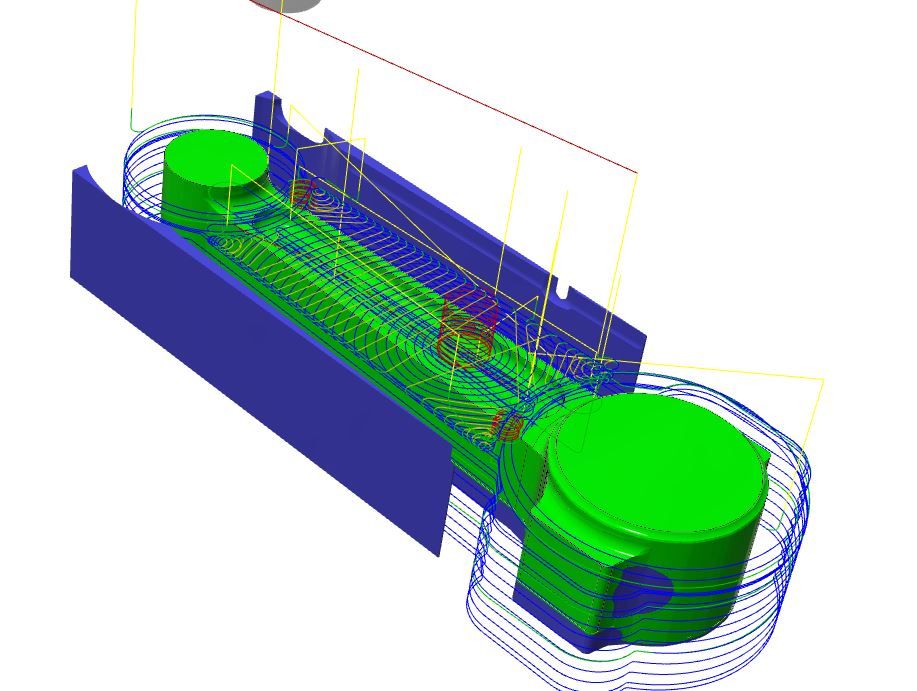
                      I was having a job getting Fusion 360 to cut in the way I wanted which was to do the outside profile in two 5mm high cuts with a flat bottomed cutter and then the details with a round corner. So as I could not do this I first did a horizontal cut to reduce the height of the central rod as shown below – green is a finished surface of the part and mauve the stock

                      conrod1.jpg

                      The problem was that when it cam to run that in Mach3 the machine kept stopping on the same line with "internal movement error" and I could not get rid of that so opted to leave that out, had it run then that move about 1.25 into the video would have not been very deep.

                      Another problem with not being able to get it to do the 2D contour was that some waste was left down the sides as the 3D contour does not work its way in so I milled that away first manually so there were not loose bits of waste flying about that may have got between cutter and work. That notch in the mauve on the far side also triggered a crash warning so another good reason to cut away the waste.

                      I doubt it is the program just me not being able to set it up correctly.

                      conrod2.jpg

                      The dural should run OK as it is without bearings, quite common on small IC engines.

                      Edited By JasonB on 05/09/2019 20:14:03

                      #427690
                      Andrew Johnston
                      Participant
                        @andrewjohnston13878
                        Posted by Ian Johnson 1 on 05/09/2019 19:43:33:

                        I like those cutters with the radius, seems to leave a better surface finish, and last a bit longer than the normal sharp edge cutters.

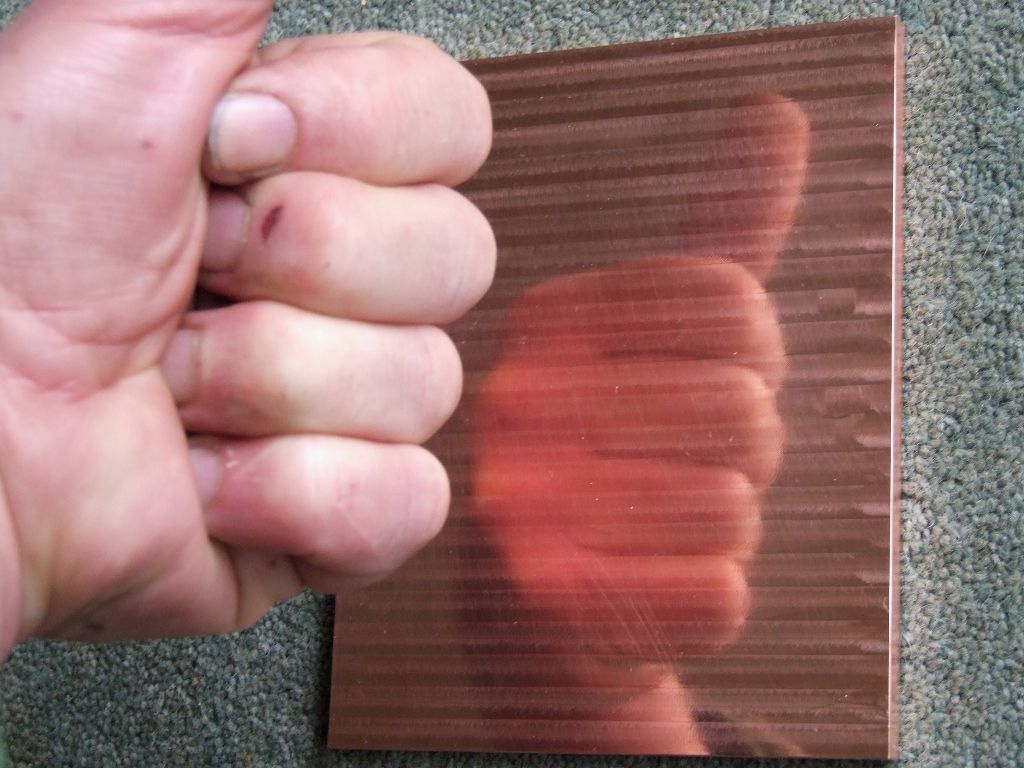
                        Good, but expensive. If one is primarily cutting on the side, as you should be, then the radiused end doesn't really matter. But they are very good for leaving an excellent finish. I use them for heatsinks where good heat transfer is needed. Like this copper heatsink for an experimental inverter (essentially a VFD) using silicon carbide semiconductors::

                        mirror finish.jpg

                        And of course if you need to leave a small radius on a profile they're much more robust than a small ballnose cutter.

                        Andrew

                        #427694
                        Ian Johnson 1
                        Participant
                          @ianjohnson1
                          Posted by JasonB on 05/09/2019 20:11:30:

                          Hi Ian, yes it's a sudden move and one of the reasons I was using that feed.

                          I was having a job getting Fusion 360 to cut in the way I wanted which was to do the outside profile in two 5mm high cuts with a flat bottomed cutter and then the details with a round corner. So as I could not do this I first did a horizontal cut to reduce the height of the central rod as shown below – green is a finished surface of the part and mauve the stock

                          conrod1.jpg

                          The problem was that when it cam to run that in Mach3 the machine kept stopping on the same line with "internal movement error" and I could not get rid of that so opted to leave that out, had it run then that move about 1.25 into the video would have not been very deep.

                          Another problem with not being able to get it to do the 2D contour was that some waste was left down the sides as the 3D contour does not work its way in so I milled that away first manually so there were not loose bits of waste flying about that may have got between cutter and work. That notch in the mauve on the far side also triggered a crash warning so another good reason to cut away the waste.

                          I doubt it is the program just me not being able to set it up correctly.

                          conrod2.jpg

                          The dural should run OK as it is without bearings, quite common on small IC engines.

                          Edited By JasonB on 05/09/2019 20:14:03

                          Thanks Jason that makes sense. Early on while learning the Vectric programming I had a similar problem machining a small crank with a raised boss, very like your con rod small end, I ended up programming the boss diameter over-size to get down to correct depth, because my brain couldn't suss out how to do it any other way. I'm a bit cleverer now though!

                          Ian

                          #427697
                          Ian Johnson 1
                          Participant
                            @ianjohnson1

                            mirror finish.jpg

                            And of course if you need to leave a small radius on a profile they're much more robust than a small ballnose cutter.

                            Andrew

                            That's an impressive finish on copper Andrew. How did you hold it down? Double sided sticky tape, superglue or something?

                            Ian

                            #427766
                            Andrew Johnston
                            Participant
                              @andrewjohnston13878
                              Posted by Ian Johnson 1 on 05/09/2019 22:16:38:

                              That's an impressive finish on copper Andrew. How did you hold it down?

                              It was quite a thick plate. about 3/8", so I held it in the machine vice on parallels. Can't remember exactly what the final thickness varistion was, but probably less than a couple of thou.

                              Andrew

                              #427771
                              Ian Johnson 1
                              Participant
                                @ianjohnson1

                                Ah! Thanks, I couldn't gauge the thickness from the photo, I thought it was thin plate.

                                Ian

                                #427782
                                Ron Laden
                                Participant
                                  @ronladen17547

                                  You learn something every day or at least I do, I didnt know corner radius cutters existed until I read this. Just looked them up, quite pricey but obviously good in the right application.

                                  #427784
                                  JasonB
                                  Moderator
                                    @jasonb

                                    Ron, if you just want to leave a fillet in the corner of a part then a worn endmill can have it's corners ground to a radius does not have to be perfect as the 4 will average out the shape and for fake castings you don't really need it perfect anyway.

                                    They are not too expensive, I think the 6mm carbide one I used was £2 more than a standard 4-flute from the same source

                                    #427787
                                    Ron Laden
                                    Participant
                                      @ronladen17547
                                      Posted by JasonB on 06/09/2019 13:24:28:

                                      Ron, if you just want to leave a fillet in the corner of a part then a worn endmill can have it's corners ground to a radius does not have to be perfect as the 4 will average out the shape and for fake castings you don't really need it perfect anyway.

                                      They are not too expensive, I think the 6mm carbide one I used was £2 more than a standard 4-flute from the same source

                                      Thanks Jason, what a good idea, I have a couple of worn endmills I will give that a go.

                                      Ron

                                      #427809
                                      Roderick Jenkins
                                      Participant
                                        @roderickjenkins93242

                                        My stupid machine won't play with the computers any more. I HATE RS232 angry

                                        Rod

                                        #428632
                                        Old School
                                        Participant
                                          @oldschool

                                          Jason I follow this thread with a great deal of interest, I have a few projects waiting to go onto the machine. Can you reveal your source for milling cutters with the radiused corners please.

                                          #428633
                                          Michael Gilligan
                                          Participant
                                            @michaelgilligan61133
                                            Posted by Roderick Jenkins on 06/09/2019 15:56:42:

                                            My stupid machine won't play with the computers any more. I HATE RS232 angry

                                            Rod

                                            .

                                            Cue song : **LINK**

                                            MichaelG.

                                            #428635
                                            JasonB
                                            Moderator
                                              @jasonb

                                              4-flute which I mostly use as the majority of the metal gets removed first with a standard cutter so you don't need 2 flutes to clear a lot of aluminium swarf and the big bonus is you can feed twice as fast as a 2-flute and still have the same chip load.

                                              I did also but a 2-flute in 6mm but have not used it yet.

                                              A bit of paraffin and some air when cutting aluminium seems to stop anything sticking to the coated end as uncoated seem a bit harder to come by.

                                              #428647
                                              Ron Laden
                                              Participant
                                                @ronladen17547
                                                Posted by JasonB on 12/09/2019 07:53:24:

                                                4-flute which I mostly use as the majority of the metal gets removed first with a standard cutter so you don't need 2 flutes to clear a lot of aluminium swarf and the big bonus is you can feed twice as fast as a 2-flute and still have the same chip load.

                                                I did also but a 2-flute in 6mm but have not used it yet.

                                                A bit of paraffin and some air when cutting aluminium seems to stop anything sticking to the coated end as uncoated seem a bit harder to come by.

                                                Jason, your 4 flute link goes to Model Engine Maker pages..?

                                                Looking at those 2 flute prices they are very good some of the ones I found when I had a look were £30 upwards.

                                                #428660
                                                Old School
                                                Participant
                                                  @oldschool

                                                  I use that company for PCD inserts for turning high silicon content aluminium and parting off inserts for aluminium will try their milling cutters now.

                                                  #428673
                                                  JasonB
                                                  Moderator
                                                    @jasonb

                                                    Sorry these are the 4-flute

                                                    #430456
                                                    JasonB
                                                    Moderator
                                                      @jasonb

                                                      Time to make a bit more swarf or more precisely 86.5% swarf and 13.5% left in the part which is the ignition bracket for the Midget engine.

                                                      6082 Aluminium, 3-flute carbide 6mm dia, 55deg helix, uncoated

                                                      Facing 5000rpm, 330mm/min feed, 0.5mm DOC, 5.0mm WOC to remove the saw marks and level the top

                                                      Adaptive 5000rpm, 330mm/min feed, 5.0mm height of cut, 1.0mm stepover. The cutter was not so happy with conventional cutting causing a bit of vibration in teh chip tray but OK climb cutting.

                                                      Contour 5000rpm, 330mm/min feed, 3mm height of cut, 0.5mm depth

                                                      Helical bore 5000rpm 330mm/min, 0.5mm pitch. First time I had done this and very happy how it turned out. The hole was rough bored with a 0.5mm pitch followed by a 0.25mm full depth finishing cut and then a spring pass at the same diameter.

                                                      Finished off with conventional machine and hand tools.

                                                    Viewing 25 posts - 101 through 125 (of 383 total)
                                                    • Please log in to reply to this topic. Registering is free and easy using the links on the menu at the top of this page.

                                                    Advert

                                                    Latest Replies

                                                    Viewing 25 topics - 1 through 25 (of 25 total)
                                                    Viewing 25 topics - 1 through 25 (of 25 total)

                                                    View full reply list.

                                                    Advert