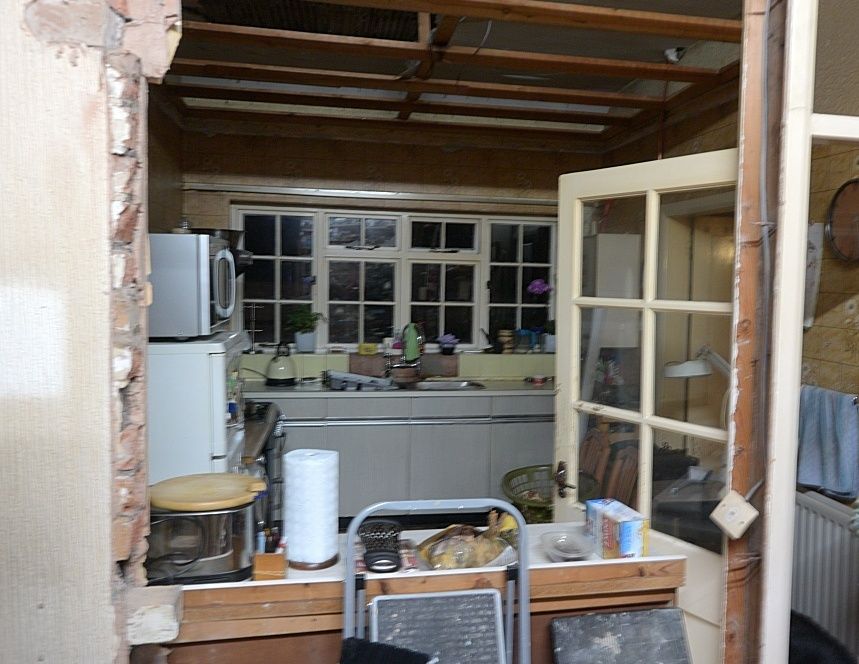
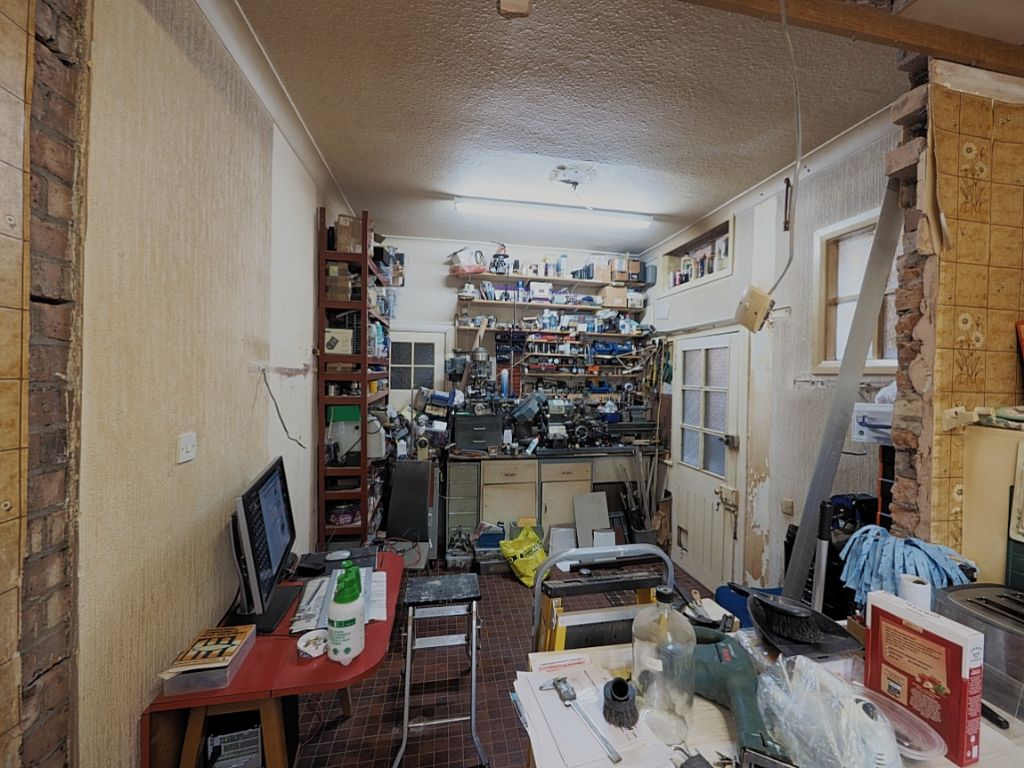
While my wife and I were away for a few days holiday we phoned our son and discovered he was removing part of a wall. Came as a bit of a surprise but we did intend to do it when I got back. So I just helped remove a damaged false ceiling that needs extending anyway right up to by new workshop wall. Things look like this at the moment.
Wifey gets a new kitchen so we have decided to use Ikea units. The installation info they provide is hopeless. The new wall will be stud partitioning. In one of the catalogues they show metal strips fitted across the wall and the tops of all units seem to clip into them in some way including the base units. I can't find these in their catalogue so wonder if they are a standard type. Also surprised that the bottoms of the wall cabinets don't seem to be fastened or supported.
In a video they show legs being fitted to base units and a plinth fitted over these. Again not details or signs of either in the catalogue. I also assume they are also screw jacks for levelling?
I'm brain dead now from doing the layout and sorting out the bits and pieces and am hoping some one has fitted them this way and can provide some info. It will be Ikea units though. We have fitted other things they do and have been pretty satisfied with it.
I have not done an Ikea for a few years (luckily) the ones I have done in the past used a angle bracket in the corner of the wall cabs with a large hole in it and a plate over that to give basic adjustment. They may have gone over to the cab hangers that most other makes use that hook onto Z shaped metal brackets or in your case if a stud wal you can buy the same section in lengths so it picks up the studs. The alternative is to cut out a strip of plasterboard and replace with ply then screw the supplied short plate sinto that.
Bottom of cabs are not fixed.
Legs are adjustable to level the base units. Legs will either screw to bottom or carcase or have a spigot that fits a 10mm hole and additional screws.
I'm not keen on IKEA as they don't have much adjustment so you need a good plumb wall to start with. Backs are flimsy 3mm hardboard fitted with tacks, odd size units, no space at the back for services, sink wastes that don't easily fit UK waste pipe, etc
I have just installed a new Ikea kitchen, and found that it is easier to mount the cabinets directly to the wall and avoid using the rail. This is especially so where two walls are not at 90 degrees to each other and there needs to be some 'fettling' of the cabinet positions to get everything to fit.
The plinths do clip to the cabinet legs, and the Metod legs are adjustable for levelling. Product code for the legs is 402.055.99. They are pre-adjusted to the 80mm height of the plinth.
Our daughter had an Ikea kitchen fitted. Very pleased until the mice appeared. No fault of Ikea or the fitters as she did not know to get the wall/floor joint totally sealed. The plumbers had opened the floor to route pipework and cut holes twice the dia of the pipes. Again no sealing attempted.
Most kitchens have a plinth around 150/200mm in height. Her one is around 100mm. It was a nightmare trying to effect anything like a cure. My advice is to seal everything first before fitting any unit.
Thanks Anthony I had looked all over the place for a guide of some sort. I also searched for it. The part number brought up the legs.
Thanks Jason. I wondered where I would need to get the rail from. I'd noticed that several places sell it but Ikea's might be different. As I am putting in the partition wall I can make sure it's square to at leas one wall but as it turns out not much will run along it as the stove needs back onto it. There needs to be door in it too
I've only used Ikea bedroom stuff but the quality seems more than ok to me. They also have some interesting ideas. My wife likes stuffing things in cupboards so it's impossible to see what's in then – Ikea – pull out draws. They also have a pretty large selection of options on cabinets. One I'll make up myself and just fit their doors too it unless there is not so deep as usual that's also rather tall.
The floor boards here rotted out long before we bought the house so it's all going down on concrete, The rest of the house has always had a solid floor. I decided to leave some of the wall in just to be safe. It's not load bearing and doesn't match up with the joists above. It leaves a sort niche that nicely takes a sink. My wife has expressed doubts about this as there will no window above it. I just said well there is a drain on the other side of the wall so ok so far.
Ikea's 3D kitchen planner proved useful. Better still my son got carried away playing with it. The original idea of a layout didn't work out well so I had a bit of lateral thought and that worked well – my son did it all then. Now just have to go through what can go in what which means another visit to Ikea to measure drawer depth and a few things like that.
It's been a long time since I went kitchen shopping. Hopefully Ikea have improved. My testing at that time included pulling a drawer out and then sitting on it. Ikea failed the test with a loud cracking sound. Interestingly magnet's salesman happily accepted the test (I hadn't asked at Ikea) and magnet passed. The last kitchen was bought from a small bespoke place in Birmingham – stained pine – and also passed my test as do the DIY units I built for my hobbyshed.
Backing up any joints with a decent glue will probably help.
We got an IKEA kitchen fitted last year in France. I planned with IKEA help at IKEA Bristol and a very helpful English speaking guy at IKEA Brest downloaded the plan from Bristol and we ordered it. The units seem good quality at a reasonable price.
I had help in the installation as we wanted it done as quickly as possible – I take for ever on my own! – and it went very well and very quickly. As usual with IKEA stuff the instructions are all in the illustrations but they were easy to follow, no problems once the method was grasped. The accuracy is all in screwing the hanging rail onto the wall nice and level. The units – wall and floor – just hook over the rail and hang there, you then screw the units together. A small space is left between the back of the wall and the back of the unit, which is handy to thread the wires down to the under wall unit lights, and makes tiling up underneath easier. You don't need as many feet as you think and they do adjust. To secure the rail to a plasterboard wall we used those wall fixings that have a split steel anchor that is pushed through the hole in the plasterboard and then the far end is pulled back by the machine screw, don't know what they are called, but very effective and secure, and if you have the fitting tool, very quick to fit. Plus with the number of fixing holes provided for in the hanging rail you can easily up the number of fixings you have from the number they suggest if you feel it necessary.
We are very pleased with the installation, looks very good, well made with 25 years guarantee so they say. We also renewed all the white goods from IKEA as well and have been very impressed – they all seem to work well, were reasonably priced too and have a 5 year guarantee as standard. The only problem with the kitchen units from IKEA is that their sizings are not always the same as from other kitchen suppliers units.
No connection with IKEA needless to say other than satisfied customer.
I think Magnet are one of the few that use high density chip board. My wife will test the Ikea's idea of keeping tins, flour and who know what in deep drawers in base units for them.
No white goods other than a USA style fridge freezer as my wife is good at filling up the 2 we have at the moment. Both will be going.
The fridge freezer will look a little odd where it's going. The "utility room" that we are creating is my workshop. The washing machine was going in there but the plumbing changes that would be needed are a nightmare so may do that when the boiler is changed. Just mean changing one base unit in the kitchen when it's moved. When that happens it will be under my lathe. I'll probably get swarf in my socks.
We were going to fit a 1 1/2 bowl main sink but no sensible place to put the kettle nearby. So quick change. Bigger main single bowl sink and a rather small one where the kettle can be close. The small one can use some of the plumbing used on the old sink.
Just need to talk to Ikea about rejigging some of the tall units now. The carcasses all seem to be the same and everything comes it's own package so they should be able to do this.
I'me hopping water and a gas pipe can be run behind the base units. If not some will have be under them.
Just about all the companies use MFC – Melamine faced chipboard of one quality or the other for the carcases. depending on who you go to backs will be 3mm hardboard, 8mm MFC or a few good quality ones 18mm MFC. All the bespoke ones I do use 18mm back or 19mm if real wood veneered rather than melamine. Makes for a far more rigid cabinet which is nice as I usually do stone worktops which you don't want on wobbly units. But like anything you pays your money…………….
The rail you originally mentioned is a "French cleat" but probably now some cost down design by some "Scandinavian clot"
Kettle near sink. – not allowed in recent electrical regulations.
Close is a relative word, In this case 5m is too far. The distance was or maybe still is 300mm according to the IEE. I probably can check that but wouldn't put a socket that close anyway. I can't find any signs of updates.
Not much movement for the time spent. I was going to fit stud partitioning but we have a building coming in to build a block wall. I started getting concerned about obtaining straight timbers that would stay that way.
Photo with me new wide angle lens. The depth distortion is pretty impressive.
It looks like Panasonic do what Olympus do with 7mm focal length and jpg correction – it's probably actually 6.5mm. More width is available from raw. I'd didn't fancy the size, weight or price of the Olympus one.
I finish up with a workshop 5' 4" deep with room for more racking. The false ceiling behind the shot is removed as we need to extend it.
We tried the press on the draws test at Ikea yesterday. The flex but seem ok with say 50kg on them. As my wife will load them up with tins and all sorts we've restricted the width to 600mm.
We also bought the first cabinet. A tall one, 2.4m, They don't seem to have skirting board in Sweden so that is going to have to come off. Hardly any room behind the rear panel either, I doubt if 2.5mm twin and earth would fit. It might but I have my doubts. The wall may need channelling. Depends what I find when the tall cabinet is fitted as it needs to go up against the bit of wall that is left. I may have to pack out their unit hanging strips. They suggest a 125mm filler strip to match as wall to the side of a tall cabinet. Rather than do that and trim it to suite I'l remove some plaster and set some plaster board to match it when it's dead level.
We have some odd wiring sticking out now so suppose I will have to disconnect it under the floor boards on the first floor. I've found one from the past that is plastered in with tape over the end. Also some of the old rubber stuff that has been disconnected long ago. Interesting – it's still in good condition.
Looking at my kit now I'm wondering if I will ever sort it out. Next thing is to dust sheets over the lot for yet more dust,
I'll add to this post as I go along. Might be useful for others doing the same. So far I would suggest buying a couple of units first rather than the lot so that installation problems can be planned. Being an Ikea family member helps. They pick the stuff for you then and do an excellent breakfast for £1.50 between 10 and 11am. At least I don't think I paid for picking and we had to do that ourselves when we bought some bedroom furniture.
They will take stuff back too some one starts and it proves too much etc.
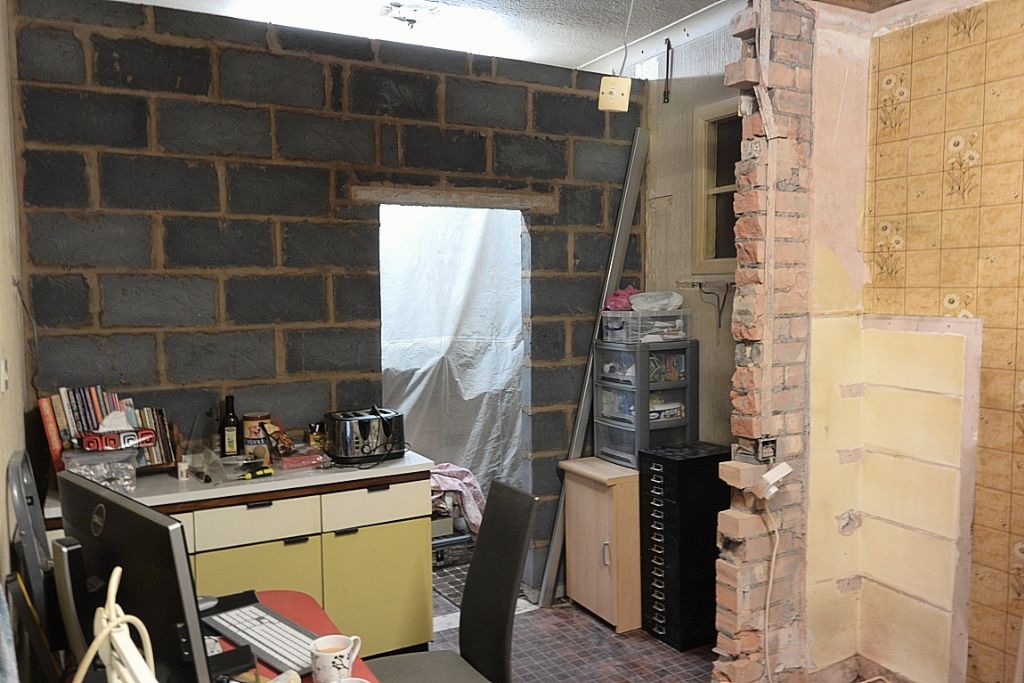
Had to wait a week for a wall builder. 2 blokes most of a day. Cost £600 plus a pair of low step ladders but I gained 7 sheets of plasterboard for the ceiling and 2 sheets of 9mm plaster board for making good walls. I will need some more of that. Doh – should have asked him to bring half a dozen.
Here's me workshop wall.
Talking to the builder he says that they mostly "dot" walls these days. This involves covering the wall with dots of adhesive and then pressing paster board flat onto it. I might compare the cost of that plus a sealer Wickes do against getting a plasterer in. I can try it out on the ceiling / wall repairs.
I've trimmed some wall plaster back. As I thought the wall underneath is flat and vertical. The plaster was out due to work done after it had been build. It can be fixed up true for the kitchen cabinets using timber and plaster board.
Can't use the current timber that held up the false ceiling. Looking around regularised constructional timber seems to be straight so will be using that for the studding.
If you are going to dot the walls then you really want tapered edge plasterboard so the joints can be taped and filled, if you are going to get them skimmed then square edge will be OK. Its not too hard to do just a bag of board adhesive, bucket trowel and a good 6ft level to tap the boards down with.
B&Q CLS is usually quite straight and dry as well as reasonably priced
There is no false ceiling in my workshop Jason. Use the full height or my racks. I asked them to stop short to leave things a little fluid as I can board that part up later. The gap will be handy for fishing for lighting wiring as well. Now the kitchen is longer we will need 2 strip lights, or maybe I'll look at down lights.
There is an 8ft straight edge leaning up against the wall Jason. Also have a 4ft one somewhere. The builder suggested a straight heavy piece of timber. When I did the bathroom walls I had the same height problem and had to add a taper onto the end of the boards to allow them to be jointed flush. I may try adding a taper to the smaller 9mm boards myself. A surform does it very quickly but I could put a narrow taper on thicker board with a knife, makes less mess.
The sealer is the biggest question. If the board needs skimming afterwards then I may as well have the plasterer in.. This is the stuff. Way too much to try really. It wouldn't surprise me if it's just water proof pva really.
Wickes CLS stud timber is £3.79 for 3m lengths in 5's. I haven't looked at B&Q yet but need to because I think that they have the splash back tiles at a lower cost. I should be able to take out the bit of waviness in the walls with those and back up the support rails to match. The treated constructional timber is £7.39 / 3m in 5's. It looks to be dead straight. There is also this man around the corner who is probably cheaper as Wickes are close too. The builder suggested Selco but the once I used those via my works account they seemed to be pretty expensive.
Studding is ridiculously cheap and much straighter and more stable than the planed stuff. It's ideal for making benches, never has big knots and I must say I have put up a fair few stud walls including in semi-damp garages and they all stayed where they were put.
I think CLS is planed Nei. Treated it's just as expensive as the other type I mentioned. However as I need 24 3m lengths I could treat it myself. The garage roof was unreinforced concrete over planking and had failed due to woodworm so I have plenty of good preservative. I had all of the replacement timber coated with it just in case they are still about,
The old ceiling was held up with sawn and treated timber. A bit on the light side – 2×1 but used some sort of extremely light foamed board rather than plaster board. It hardly weighed anything at all. Bit of a surprise when we pulled it down. The lath and plaster ceiling above that is in a disgusting state – water leak at some point probably.
Jason's correct CLS is cheapest. When I have fasted plasterboard to walls using screws I've used roofing laths that were screwed to the wall. The units wouldn't fit if I did that in the kitchen.
CLS is Regularised eg rough planed and the arrises knocked off as is most constructional timber these days.
Pre treated is better than doing it yourself as it is done in a vacuum chamber so the chemicals penitrate the timber far more, downside is it is often still damp so you can get a bit of shrinkage and it is heavy.
Wickes is cheaper for cls – just but B&Q only stock 2.4m lengths. B&Q employ people to go round changing prices daily. A lady my son new at university did it as a part time job. They insisted she did several hours of this every day and wouldn't job share the work.
I'd guess any timber yard is likely to be cheaper than both and the one round the corner keeps all of his stuff in a building rather than in the open air.
Toolstation do a wood treatment called Lumberjack. 3 coats are recommended and each soaks in easily. One can goes a long way and the drying time isn't too bad. As I have it I may as well use it.
The man who started Toolstation up also started Screwfix up and later sold it to B&Q. Looks like he may have sold Toolstation to Wickes as our local one has taken over some of Wickes's store. I've heard that he was going to start another but no idea what the name will be.
I used a tenon saw to cut the plaster and leave a clean edge for a pad chisel to work up to. They are also good for taking the tongue of floor boarding when it needs to be got up. Just work it in at a slight angle and once started it's easy to do.
I tried a reciprocating saw to cut back some brick work. It doesn't make so much mess as an angle grinder but dust still comes off and for some reason the blade seemed to cut quicker if the saw was rocked.
While this all takes time it should make installing the actual kitchen a lot quicker. One other simpler way of doing the same sort of thing with the walls is to use plasterboard on them and set it true. In this case though the units just fit leaving space for a pedal waste bin.
Electrics cropped up in another thread. I've checked. If white goods are built in there should be some way of switching them off that is easy to get at. Not so if separate – just need to be able to switch them off when they are pulled out. There may be some cross over here as it could be possible to pull built in units out.
Sockets are still ok 300mm from a sink – to the side. If plugs etc are positioned under a sink they must be positioned so that leaks wont drip on them.
Gas pipe bonding should be 10mm^2. I thought it was 6. Water pipe bonding should be after the stop cock. Wonder what happens if plastic is used???? It could be these days as push fit is much much quicker. Seems that gas can come into the house in plastic too so bonding is after the meter.
Some work was done here when wiring needed to be in some sort of metal conduit. That changed to plastic at some point. That's gone. If running vertical or horizontal from the points it's not needed. Only of it departs from those areas.
It looks like metal studding is the cheapest option for the ceiling. Less than £80. Timber over £100.
One problem. To get the price down I need to buy the sections in packs of 10. Works out that there is nearly enough stuff for a 3.6m x 7.2m ceiling. I can put extra main supports in though which should make it stiffer and stronger. They are usually covered with 2 layers of 9mm small sheets but I already have the 12mm 8×4's.
I found that another thick piece of plaster could do with removing and then remembered hearing the dreaded cracking noise when stripping wall paper with a steamer. I left that pressed up against the offending piece for 15min and heard the noise as it parted from the wall. One whack with a pad chisel and most of it just fell off.
It's probably a good idea to give the wall a rest periodically when stripping wall paper as the heat builds up slowly and then – crack. The wall paper here seems to have been stuck over a very thin backing paper. Makes it easy to get off. Must find out more about that.