DRO’s for Mini Mill

Advert

DRO’s for Mini Mill

Home Forums Work In Progress and completed items DRO’s for Mini Mill

Viewing 9 posts - 1 through 9 (of 9 total)
  • Author
    Posts
  • #213240
    Nicholas Farr
    Participant
      @nicholasfarr14254

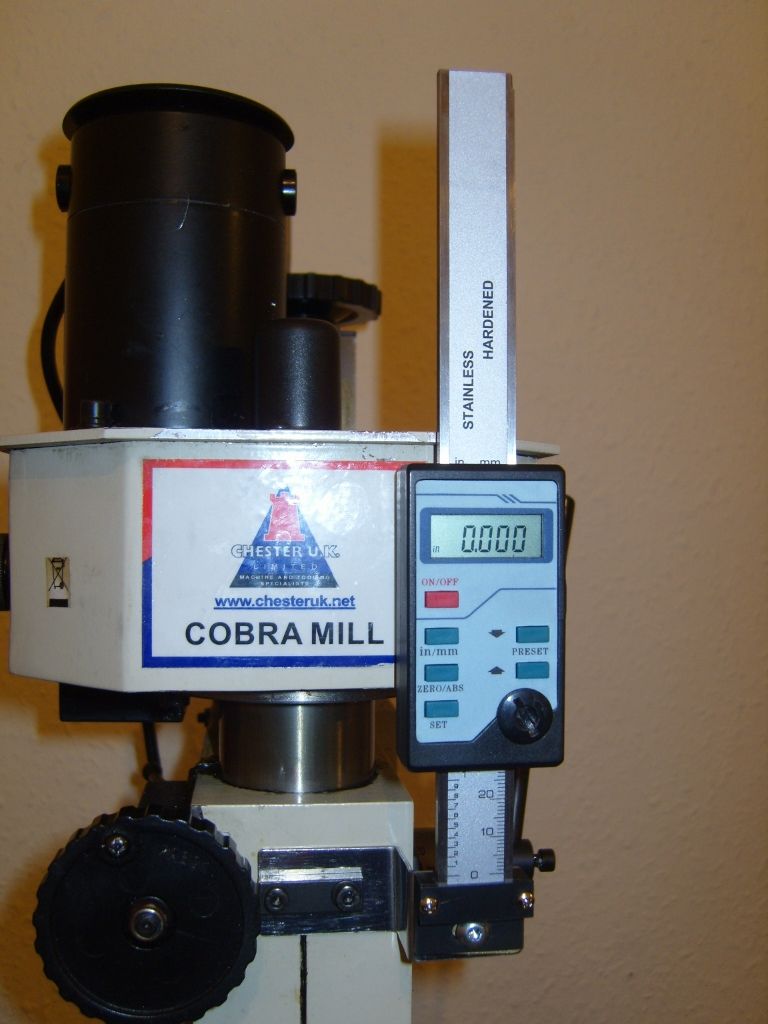
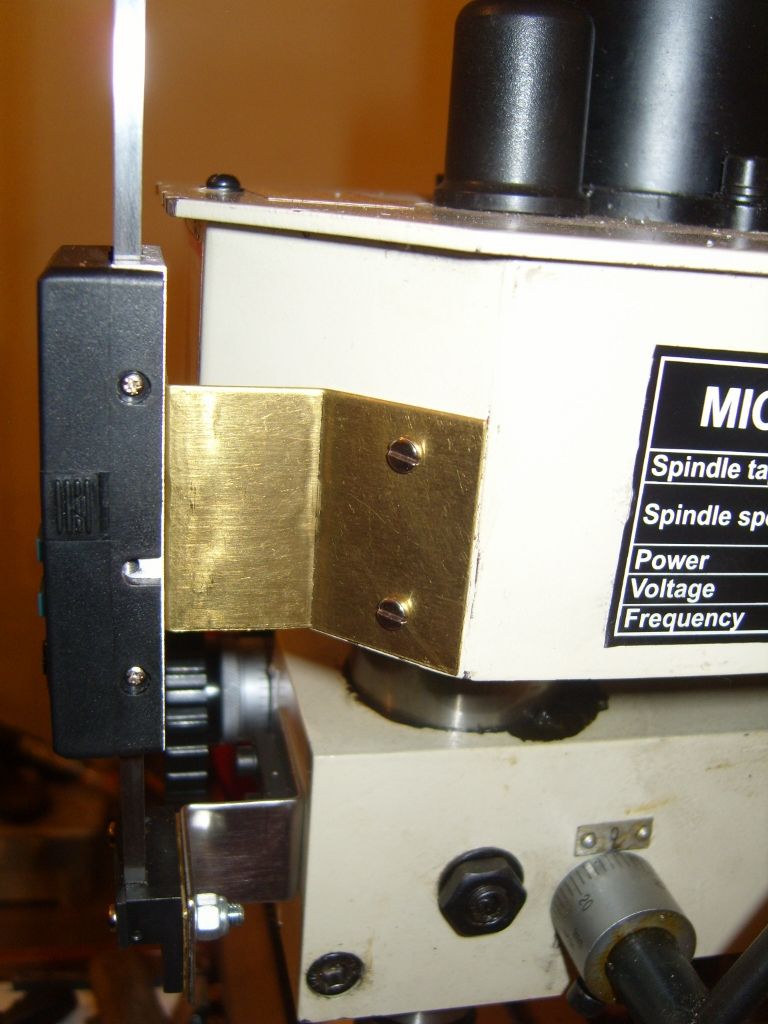
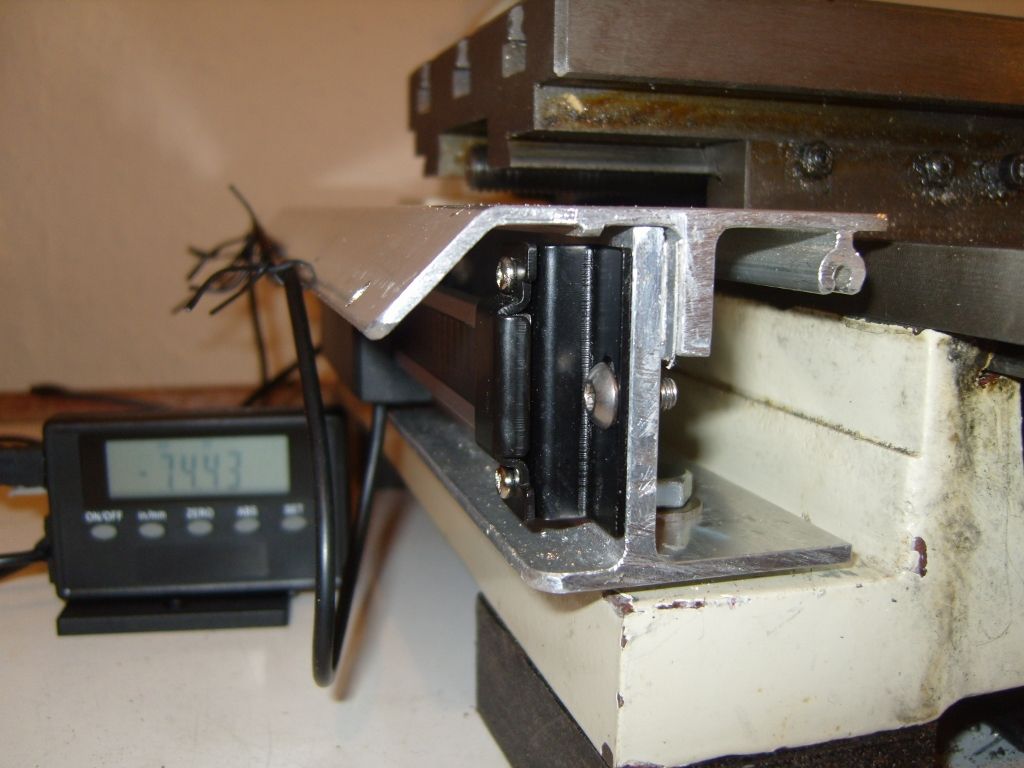
      Hi, I though it time I fitted DRO's to my Mini Mill. I have gone for three separate units and the first one I fitted last week is on the Z axis and has proved to be very satisfactory in use. This one consists of a vertical slider with is own DRO, the slider being attached to spindle drive cover and the bottom end of the bar attached main body of the mill head.

      s1030772 (768x1024).jpg

      s1030774 (768x1024).jpg

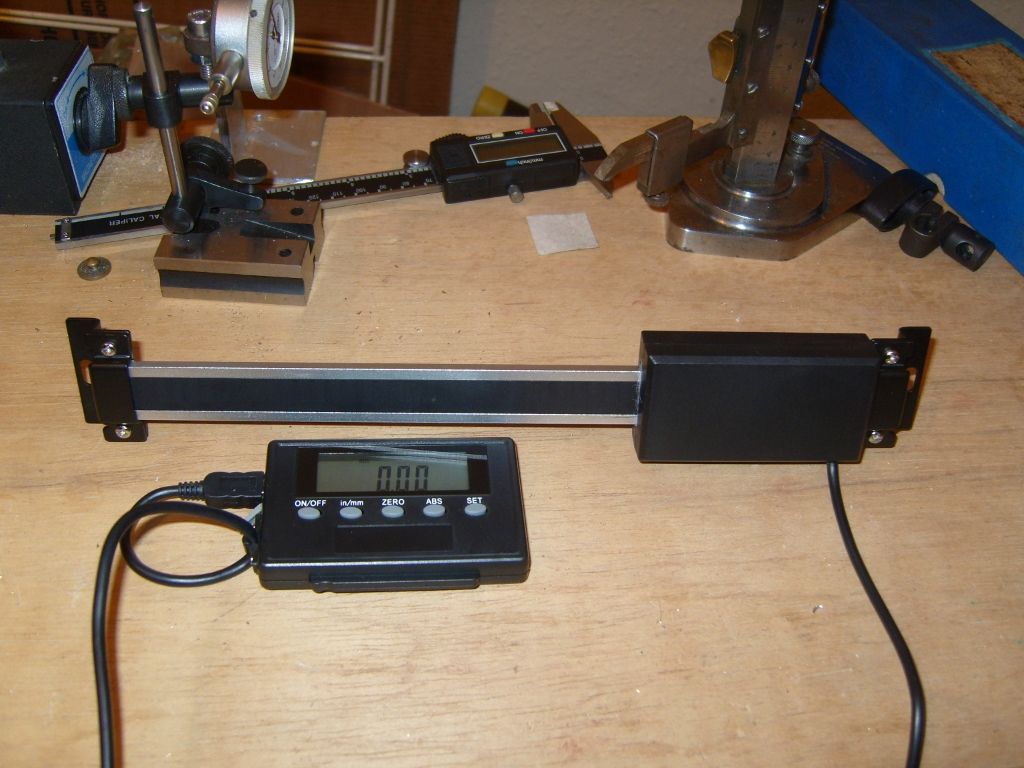
      The X and Y ones are the slider which is plugged into an Individual remote DRO type, there is no DRO on the slider itself.

      s1030775 (1024x768).jpg

      The bars of these two will be mounted onto an aluminium carrier which will also cover the bar and slider to protect them from swarf and oil ect.

      Regards Nick.

      Edited By Nicholas Farr on 19/11/2015 22:16:02

      Advert
      #31103
      Nicholas Farr
      Participant
        @nicholasfarr14254
        #213861
        Nicholas Farr
        Participant
          @nicholasfarr14254

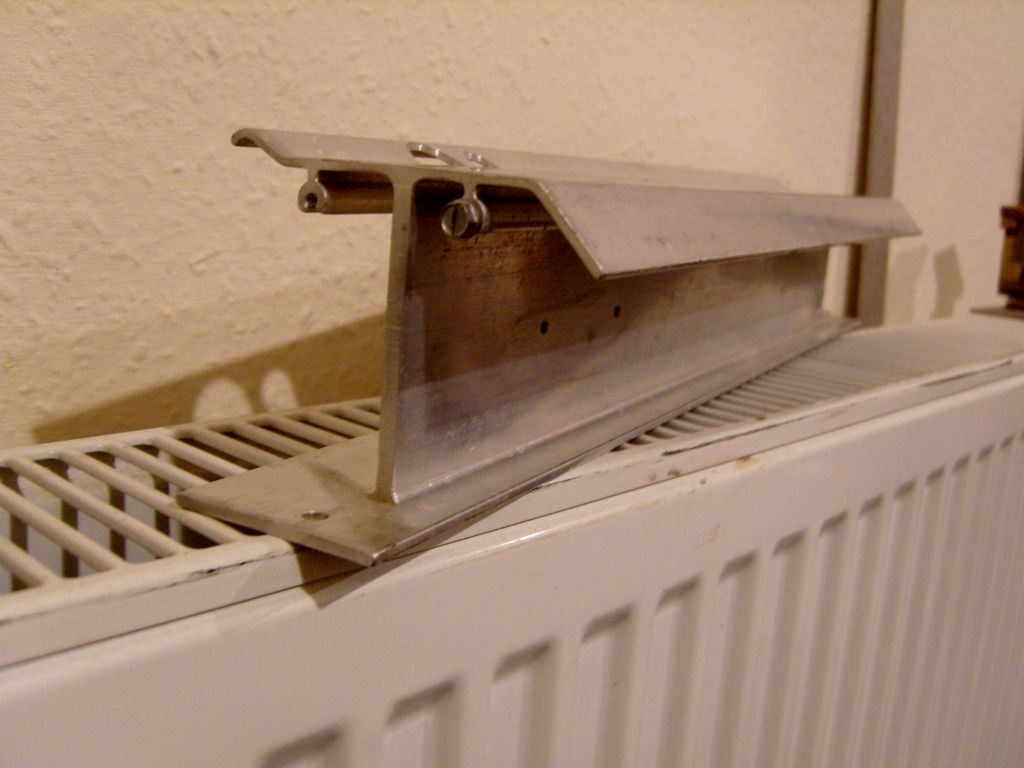
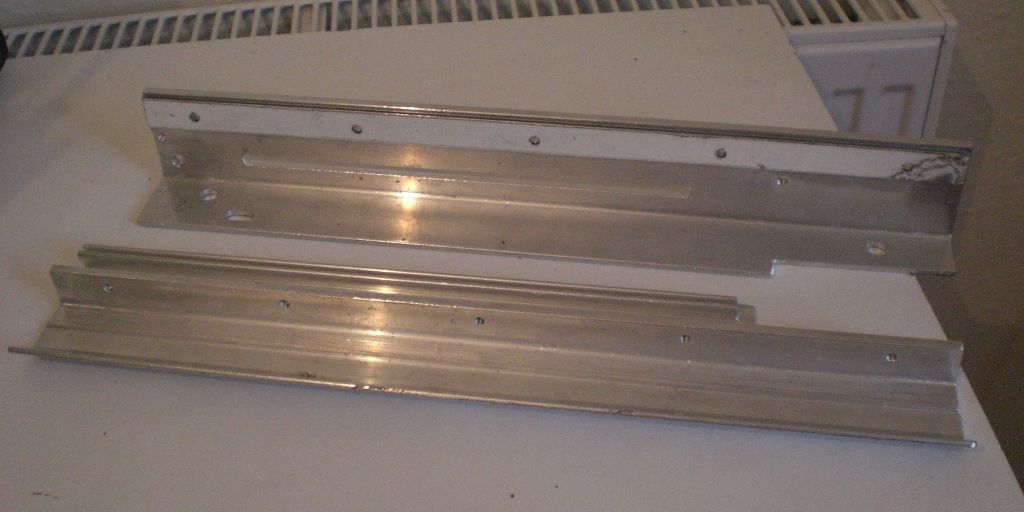
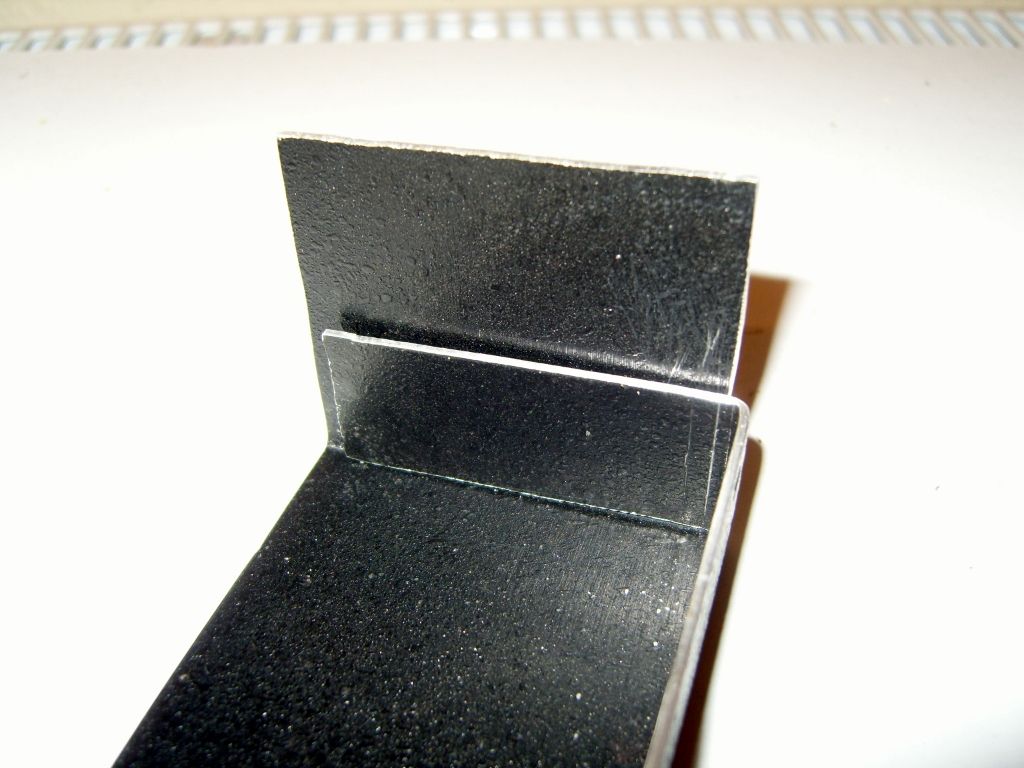
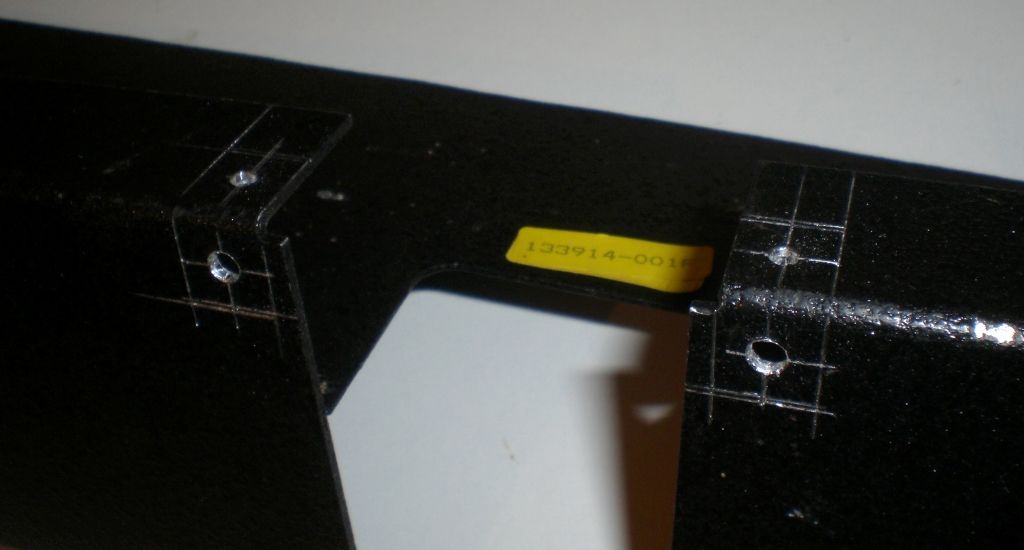
          Hi, the aluminium extrusion in the photo below was salvage from a scrap Telex printer and is what I have used to mount my Y slider bar onto.

          s1030771 (1024x768).jpg

          This had to be cut down, as it was too tall to fit under the mill table. Firstly using a hacksaw the upward angled bit on the left hand side was cut off at the bend and then the whole of the top part was cut off 20mm down the vertical web, then the section on the right hand side of the top, with the screw in it was removed as best I could with a normal 125mm cutting disc in my angle grinder. All the cut edges were then trued up on my mill and the two parts were cut to the required length. A 5mm slot was then milled into the lower part of the vertical web of the bottom part, long enough to accommodate the slider bracket for the full length of the slider bar. A hole was drilled in each end of the left hand side of the horizontal part of the bottom piece, to allow it to be bolted down with the bolts that hold down the left hand side of the mill. The vertical web of the top piece was drilled and tapped and matching holes were drilled in the vertical web of the bottom piece and a 15mm X 2mm packing piece was cut and drilled to allow it to be sandwiched between the top and bottom pieces, when they are bolted together.


          cimg2116 (1024x512).jpg

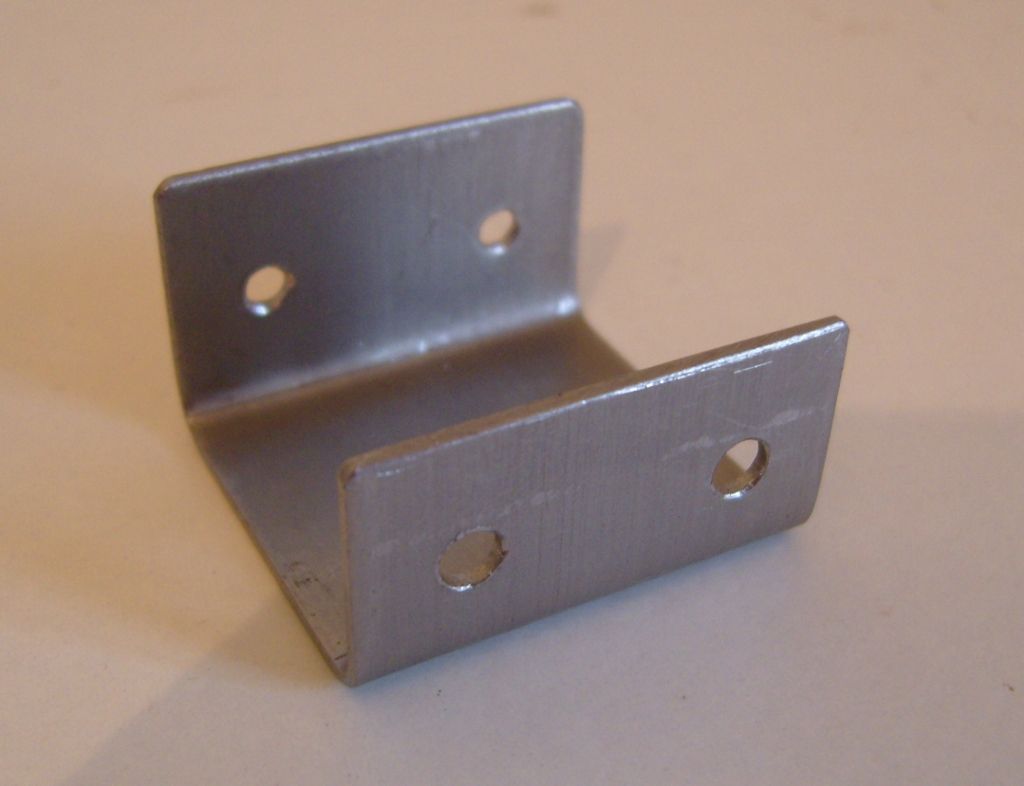
          A new bracket was pressed up for the slider, as the one that came with the unit was no good for my purpose.

          s1030776 (1024x786).jpg

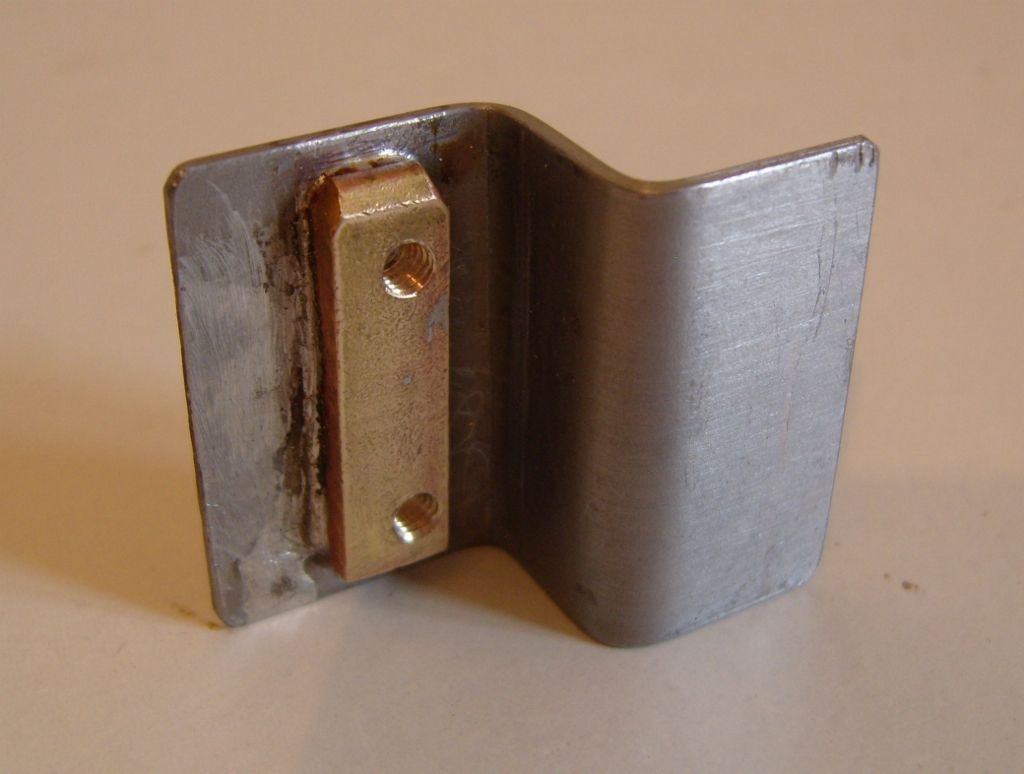
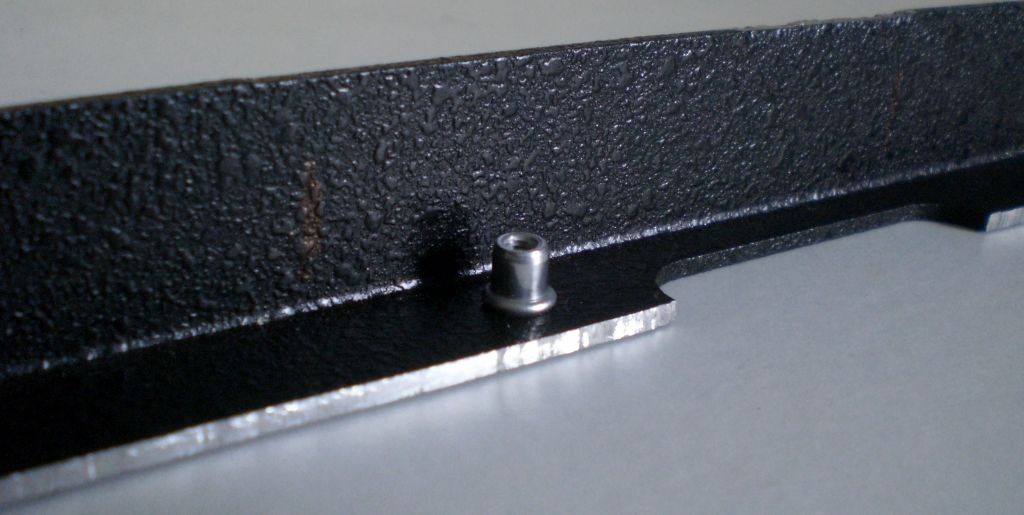
          An extension bracket was also pressed up to attach this bracket to the cross slide of the mill, then the earth pin from a scrap 13A electric plug was soft soldered on, to correspond with the two holes in the slider bracket and were drilled and tapped for the same.

          s1030779 (1024x774).jpg

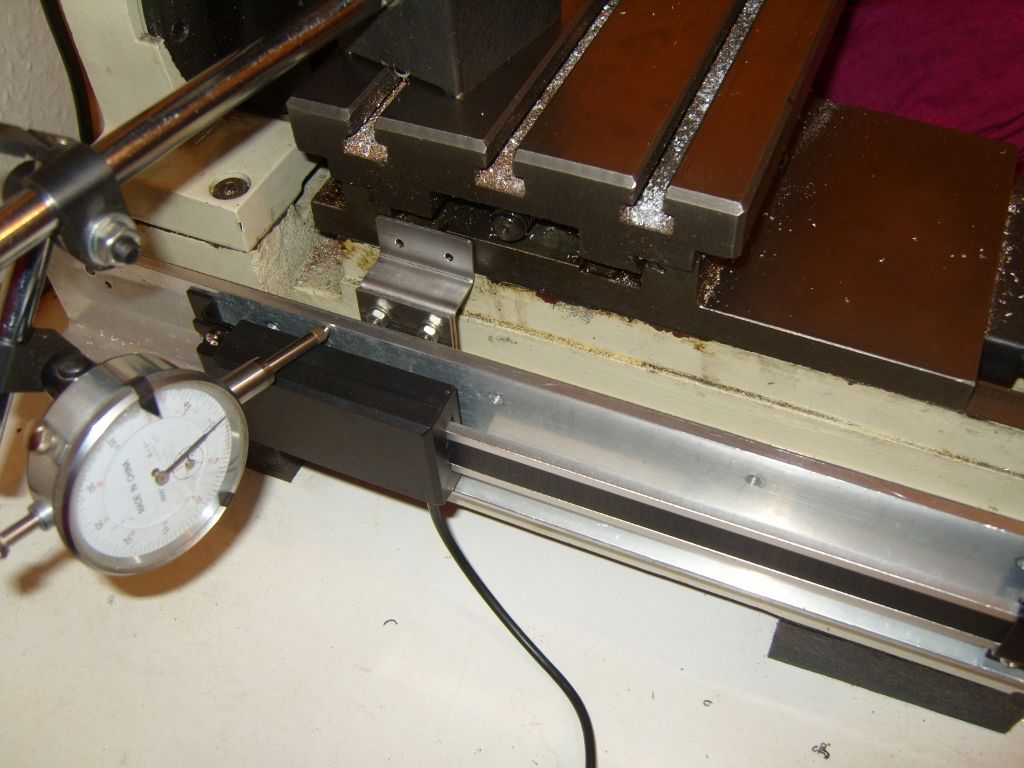
          The lower piece of the carrier had the slider bar fitted to it together with the slider bracket and extension piece and was mounted onto the milling machine, Then a DTI was set up to check that it was clamped down parallel to the cross slide, before the two holes were marked through the extension piece onto the cross slide and were drilled and tapped.

          s1030780 (1024x768).jpg

          Regards Nick.

          Edited By Nicholas Farr on 23/11/2015 23:23:36

          #214001
          Paul Lousick
          Participant
            @paullousick59116

            Hi Nicholas,

            Make sure that you have a protective guard over the DRO. I originally had these on my mill and they failed and started to give irrational readings. I suspect because of moisture or oil on the slide. Cleaning the slide had little effect. Replaced them TWICE. Eventually replaced them with better glass scales.

            Paul.

            #215388
            Nicholas Farr
            Participant
              @nicholasfarr14254

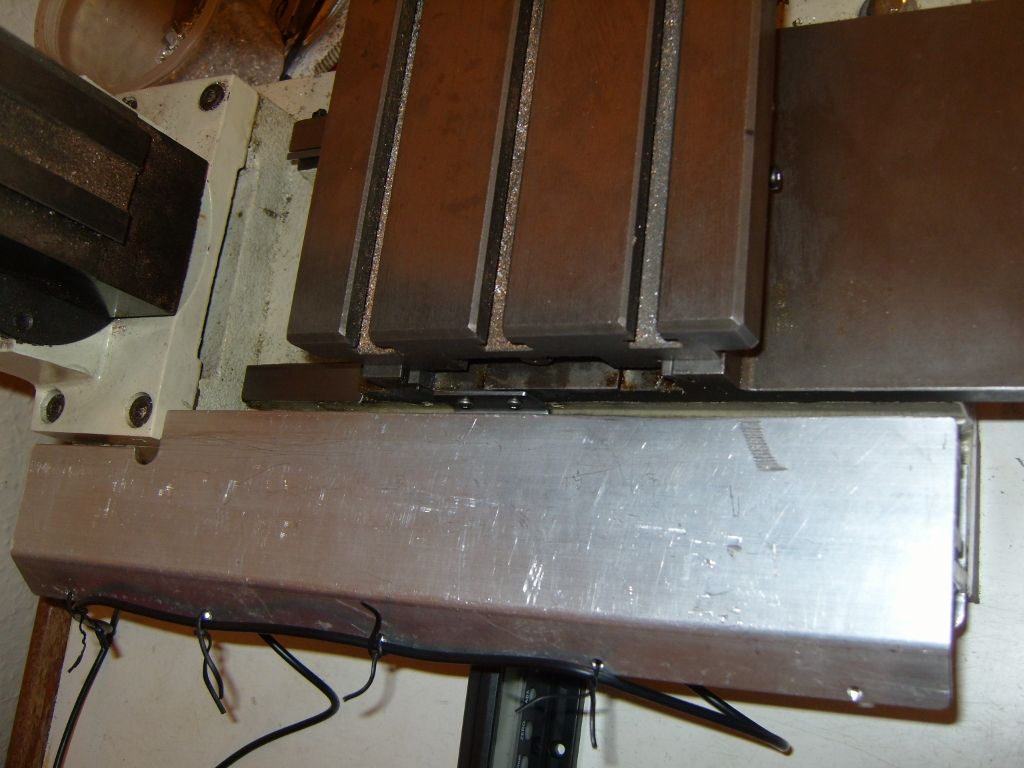
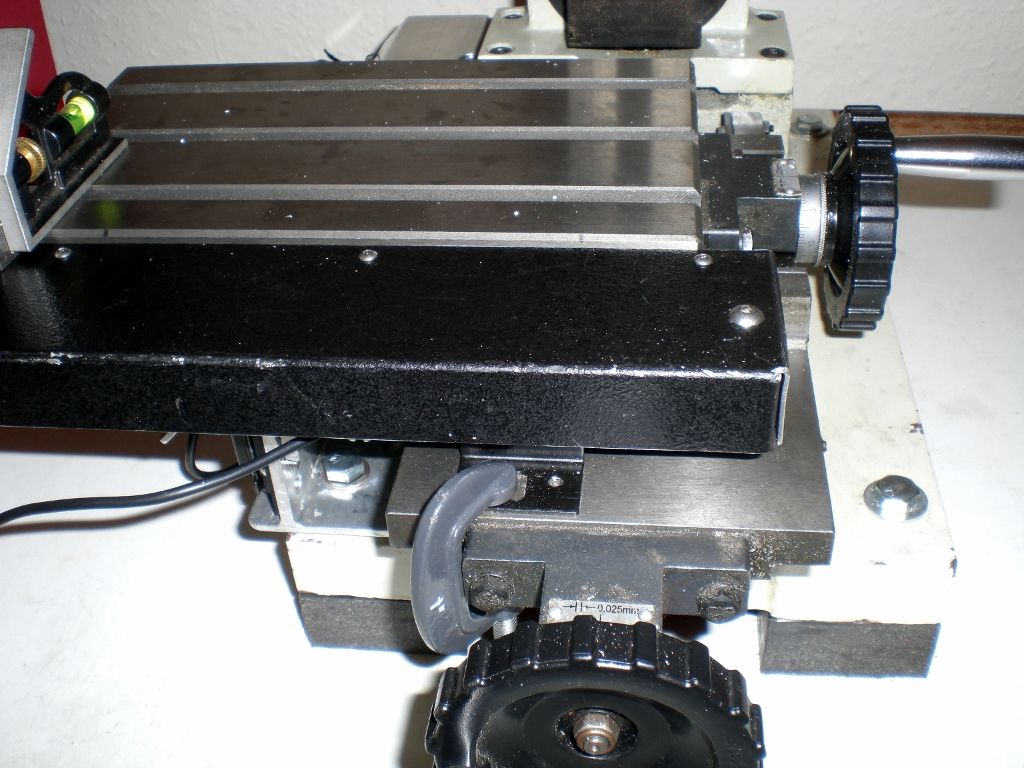
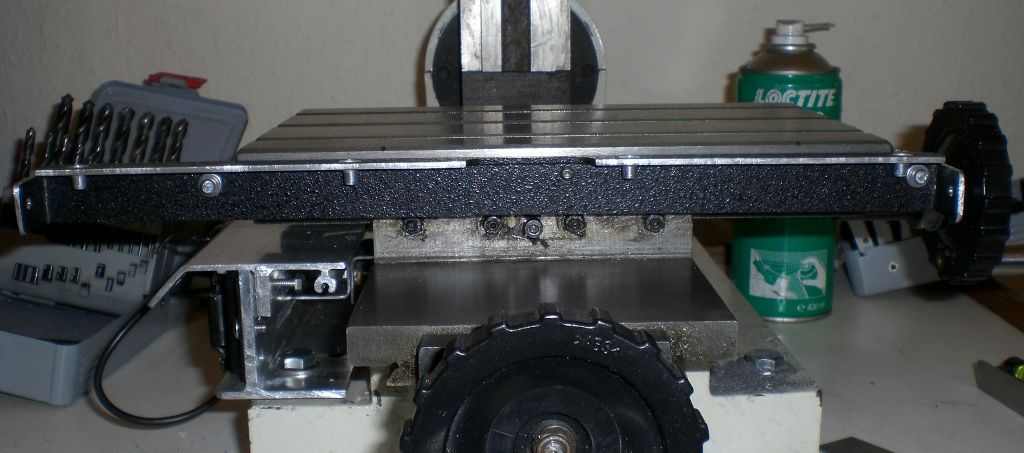
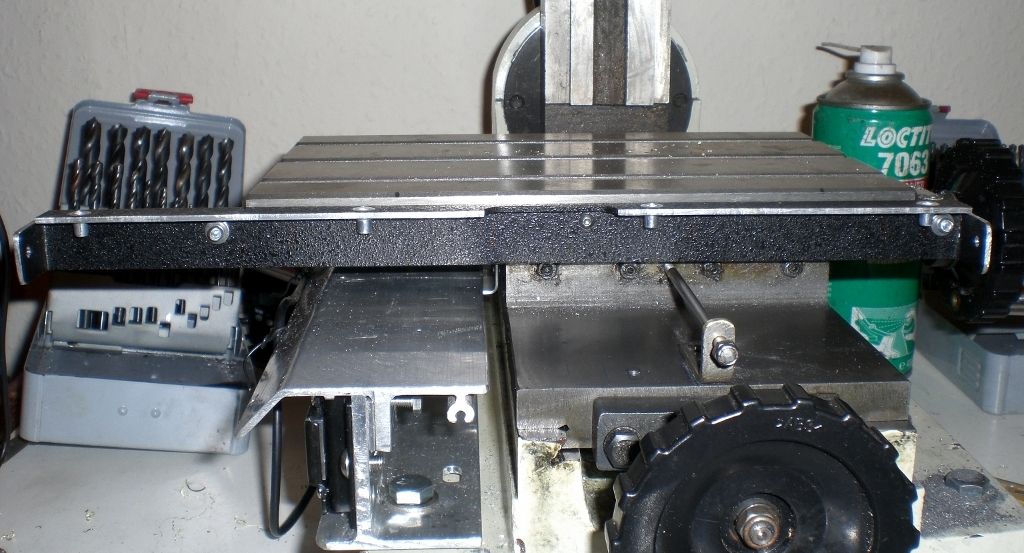
              Hi Paul, a protective guard over the slide and bar has been in the plan all along, The photos below show the Y slider and bar completed and guarded from swarf and oil ect.

              s1030782 (1024x768).jpg

              s1030784 (1024x768).jpg

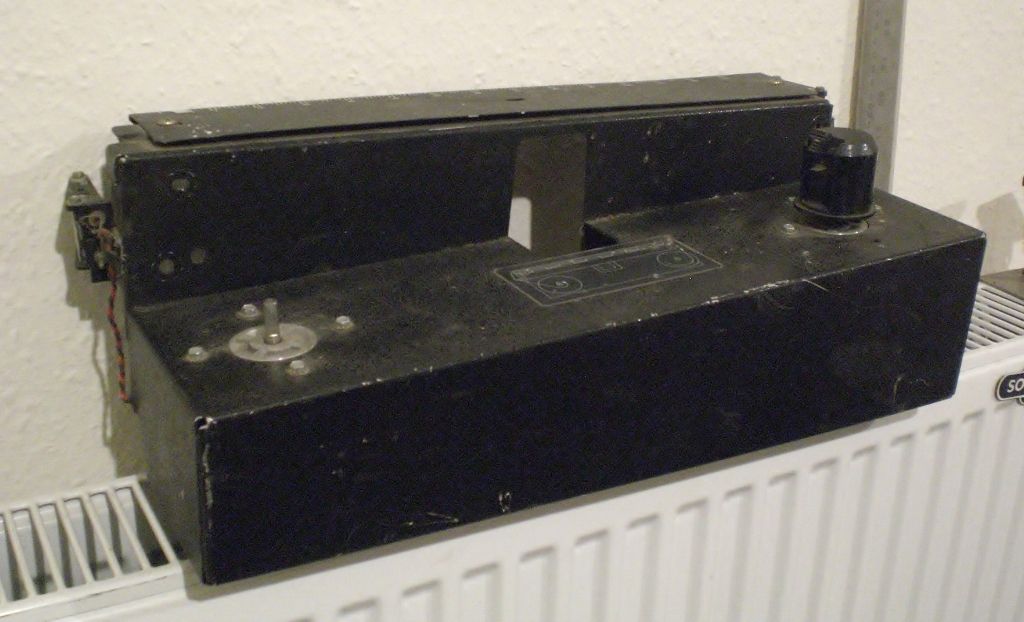
              Turning attention to the X slide bar and slider, the next photo shows the printer ribbon assembly from the same Telex machine as the aluminium extrusion that the Y slider guard was made from.

              cimg2113 (1024x622).jpg

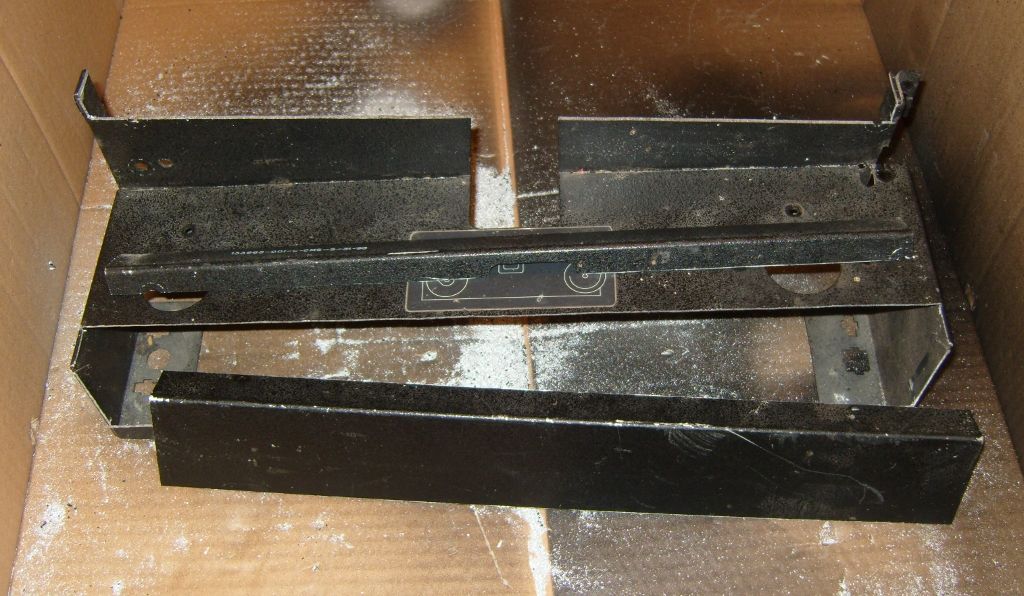
              Two sections were cut out with a jigsaw, as shown in the next photo.

              s1030799 (1024x596).jpg

              The larger section at the bottom of the photo had each end pressed up as shown in the next photo and the excess bit that is sticking up, was then cut off to the same level as the other fold.

              s1030800 (1024x768).jpg

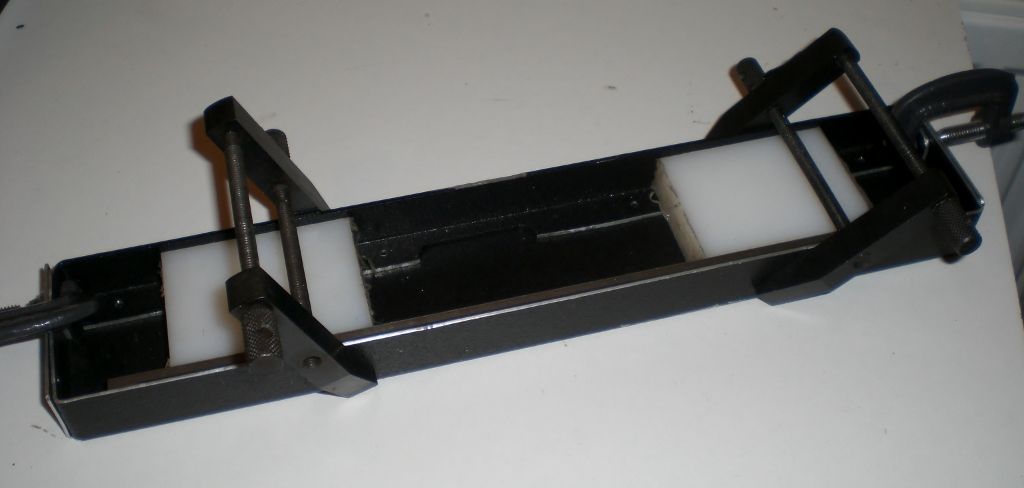
              The smaller section that was cut out, had both ends folded in on the wider side, so that it fitted snugly between each end of the open side of the pressed up section in the above photo. The narrow side was then drilled with four pilot holes and was then clamped into the pressed up section with spacers between it and the opposite side to get the two parralell and the four pilot holes were marked through with a transfer punch. see photo below.

              cimg2120 (1024x488).jpg

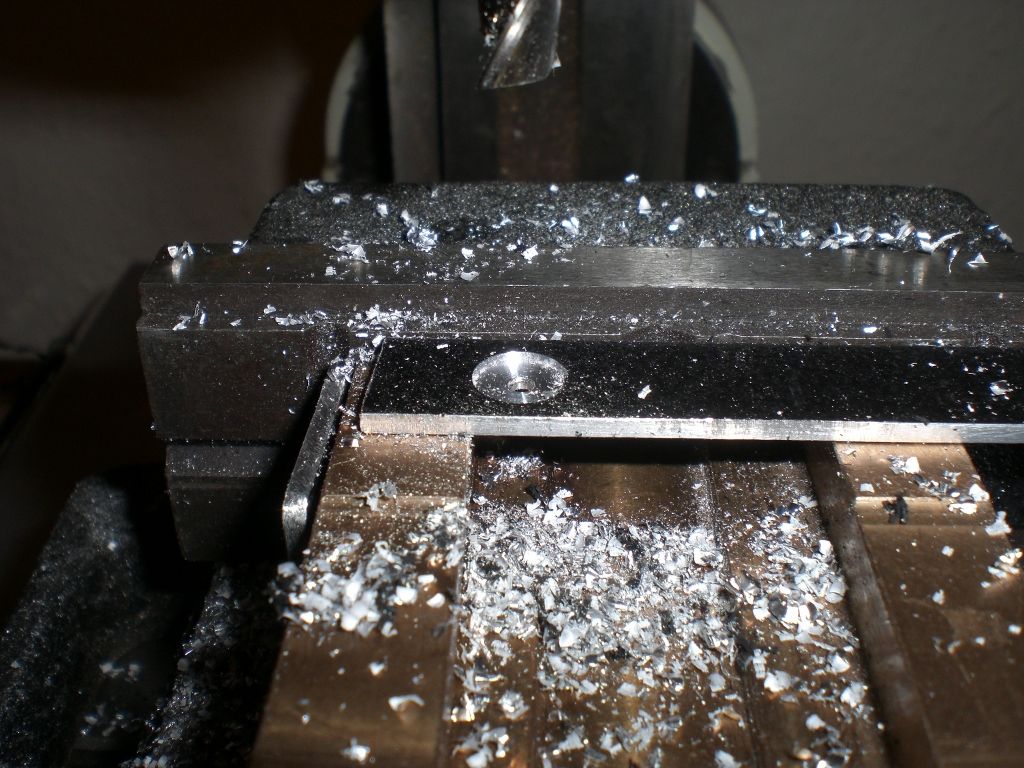
              The smaller section was then held in a vice on my mini mill with the top side upermost and the four pilot holes had an 8.5mm recess cut centrally on each of them using a slot drill, to accomadate the thickness of the flange of 3mm threaded inserts, so that the threaded insets are flush with the top side of this section.

              cimg2119 (1024x768).jpg

              Regards Nick.

              #215544
              Nicholas Farr
              Participant
                @nicholasfarr14254

                After repairing the pulling pin of my threaded insert riveter **LINK** I riveted all the threaded inserts into the section shown below.

                cimg2122 (1024x435).jpg

                cimg2126 (1024x515).jpg

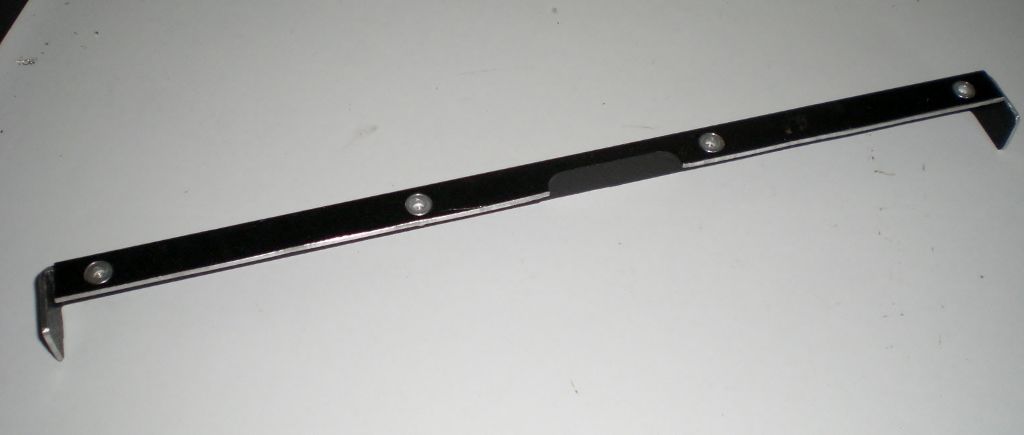
                This was then attached to the larger section that carries the slide bar and holes were drilled for 3mm bolts through the larger section and the folded ends of this section.

                Two 90 degree fixings were marked out, drilled and cut out from another area of the printer ribbon assembly and were pop-riveted to the smaller section of the slide bar carrier, for fixing the carrier to the miling table.

                cimg2127 (1024x550).jpg

                cimg2128 (1024x540).jpg

                The slide bar was also fitted into the carrier. This whole assembly was then setup onto the machine and held in place with a small G clamp.

                cimg2130 (1024x768).jpg

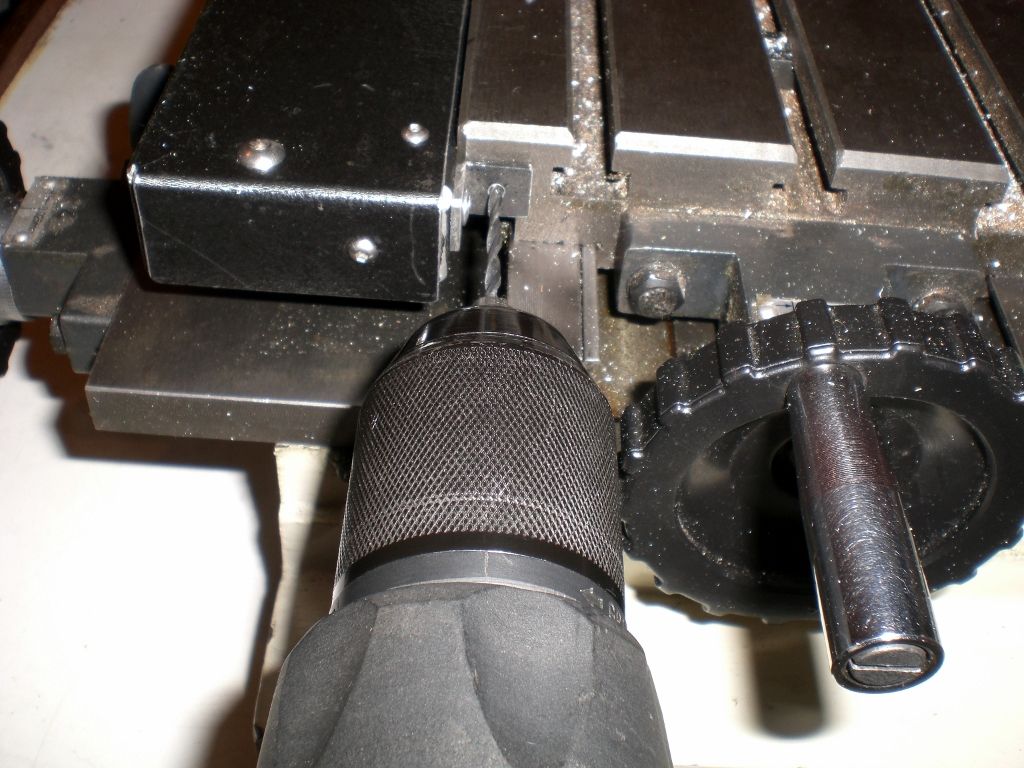
                After checking the carrier was running at the same level as the table, using a small adjustable square as a depth gauge, the holes for fixing it to the table were marked through with a drill.

                cimg2131 (1024x768).jpg

                Regards Nick.

                #215560
                Frances IoM
                Participant
                  @francesiom58905

                  Nick – the Mill would appear to be a Sieg X1 – how do you clamp the table with this cover on ? –

                  #215623
                  Nicholas Farr
                  Participant
                    @nicholasfarr14254

                    Hi Frances, yes it is basically the same as the X1. During the make-it-up as I go along plans, I anticipated the problem with the table clamp, but now that I have bolted the small section of the slide bar carrier to the table, you can see that the carrier is above the socket head screw which clamps the table.

                    cimg2133 (1024x453).jpg

                    The solution to getting access to the screw is solved by making a longer one by threading a piece of 4mm silver steel at one end the same length as the socket head screw and threading the other end a little longer than a 4mm nyloc nut. The nut was then screwed on as tight as possible and then just knocking the little bit of thread sticking through, just like riveting. A supporting right angled bracket was pressed up from a scrap piece of 3mm thick brass, which was cut off from a larger piece of sheet. This has a hole in the upright part for the longer screw to pass through and is bolted down to the Y axis saddle.

                    cimg2134 (1024x768).jpg

                    s1030812 (1024x768).jpg

                    The next photo shows how the slide carrier clears the new longer table clamping bolt and it's easier to use also.

                    cimg2137 (1024x768).jpg

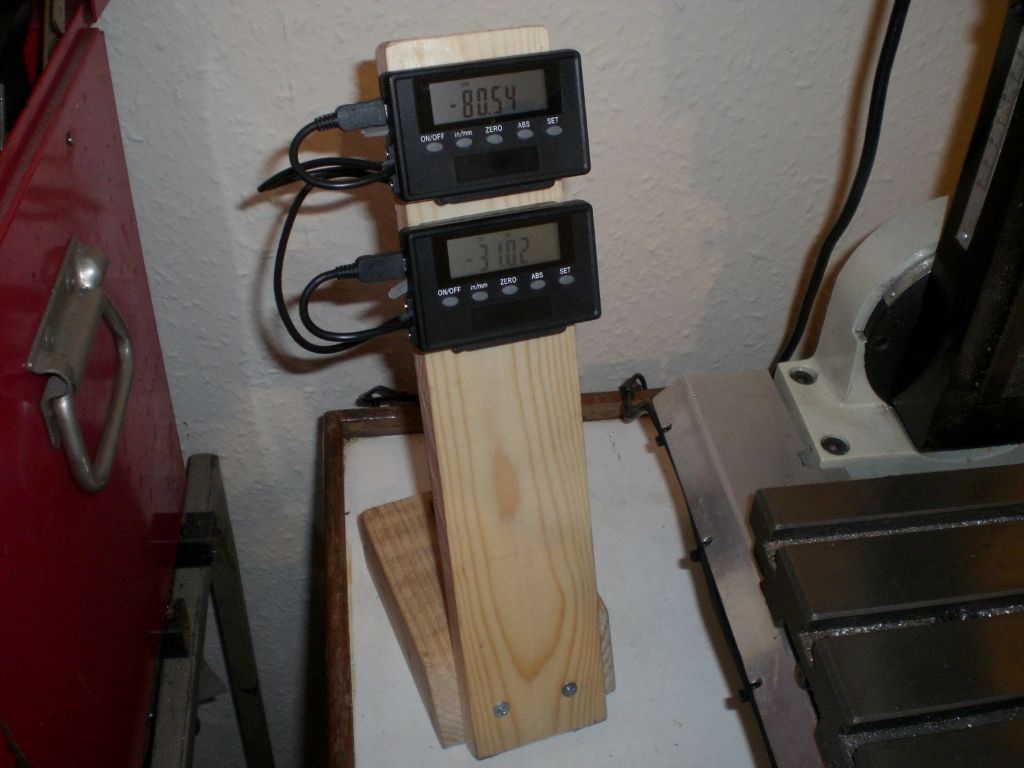
                    Just need to make something to hold the displays in a suitable place.

                    Regards Nick.

                    Edited By Nicholas Farr on 08/12/2015 21:56:01

                    #215997
                    Nicholas Farr
                    Participant
                      @nicholasfarr14254

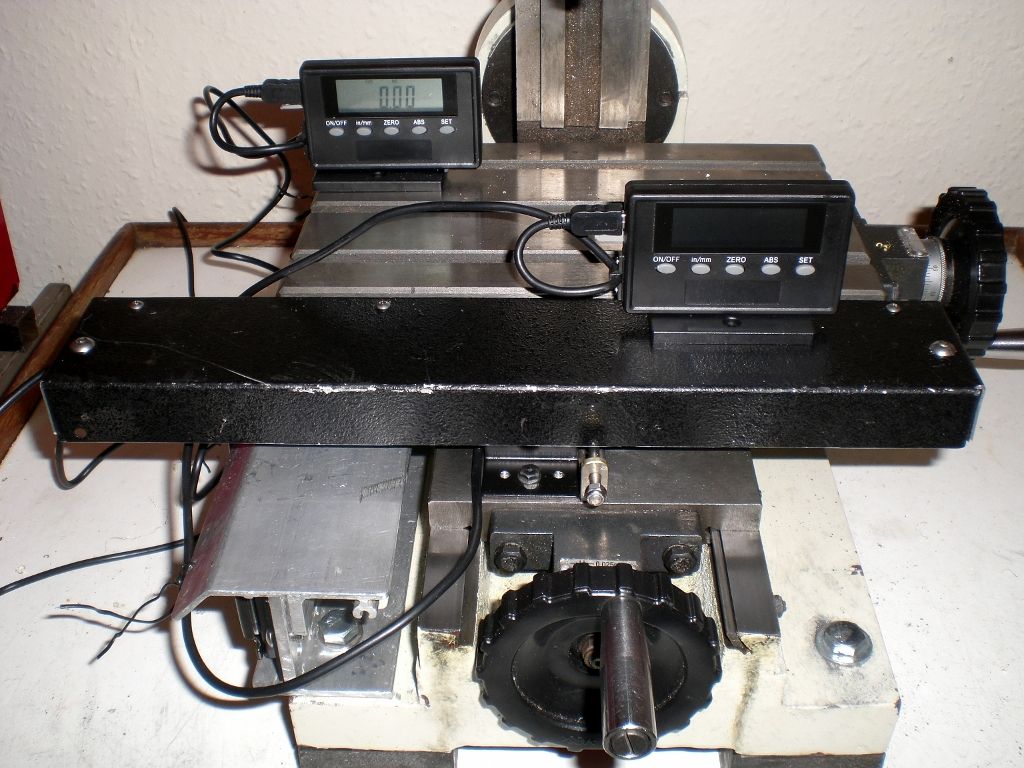
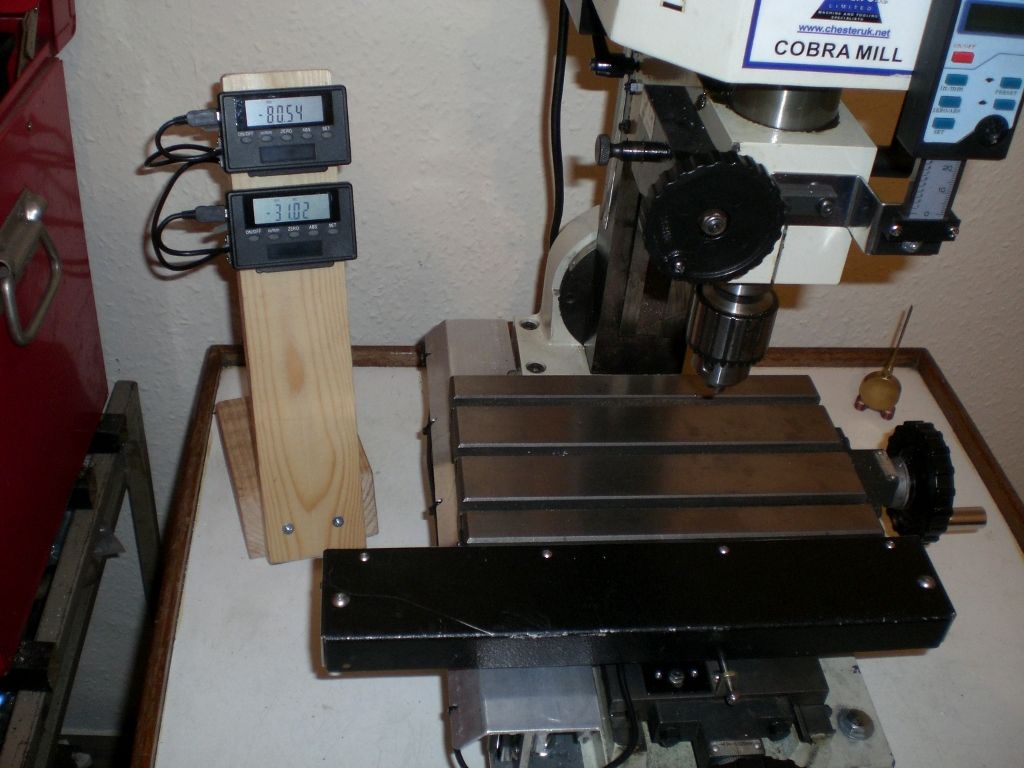
                      Hi, I made a not too elaborate but functional stand for my displays, it is not fixed and can be moved from one side or other and the leads are cable tied to it to help keep them out of harms way.

                      cimg2138 (1024x768).jpg

                      cimg2139 (1024x768).jpg

                      This compleats this project.

                      Regards Nick.

                    Viewing 9 posts - 1 through 9 (of 9 total)
                    • Please log in to reply to this topic. Registering is free and easy using the links on the menu at the top of this page.

                    Advert

                    Latest Replies

                    Viewing 25 topics - 1 through 25 (of 25 total)
                    Viewing 25 topics - 1 through 25 (of 25 total)

                    View full reply list.

                    Advert

                    Newsletter Sign-up