Dial indicator disassembly

Advert

Dial indicator disassembly

Home Forums Workshop Tools and Tooling Dial indicator disassembly

Viewing 21 posts - 1 through 21 (of 21 total)
  • Author
    Posts
  • #727016
    MikeK
    Participant
      @mikek40713

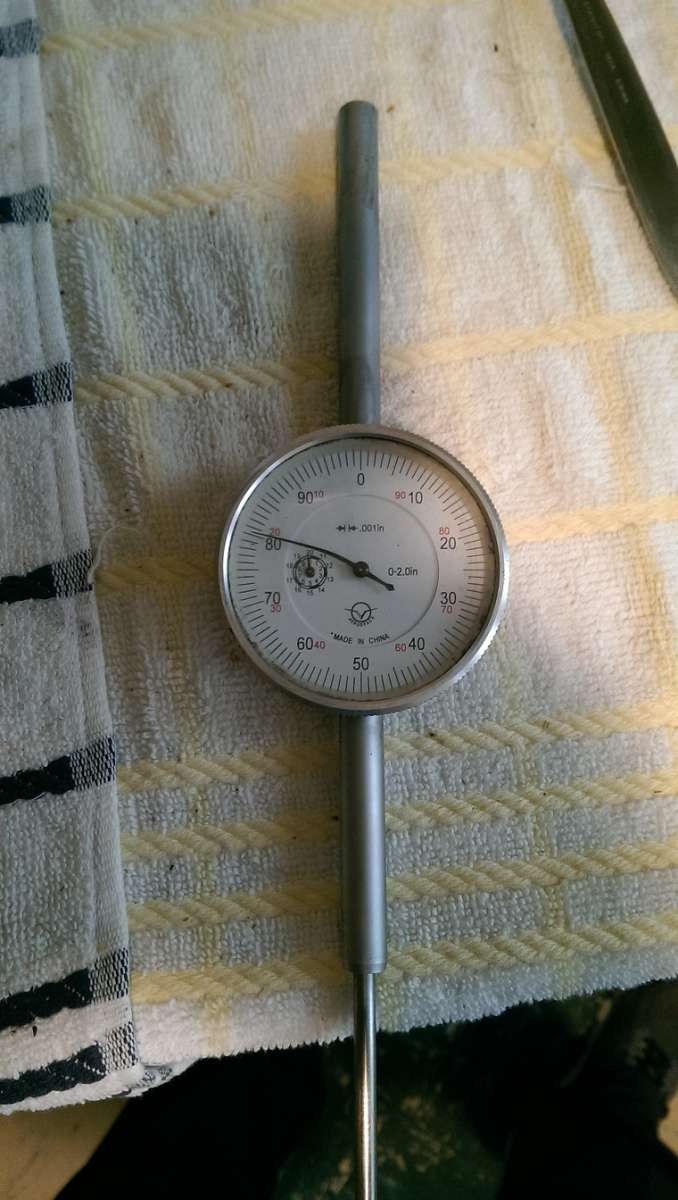
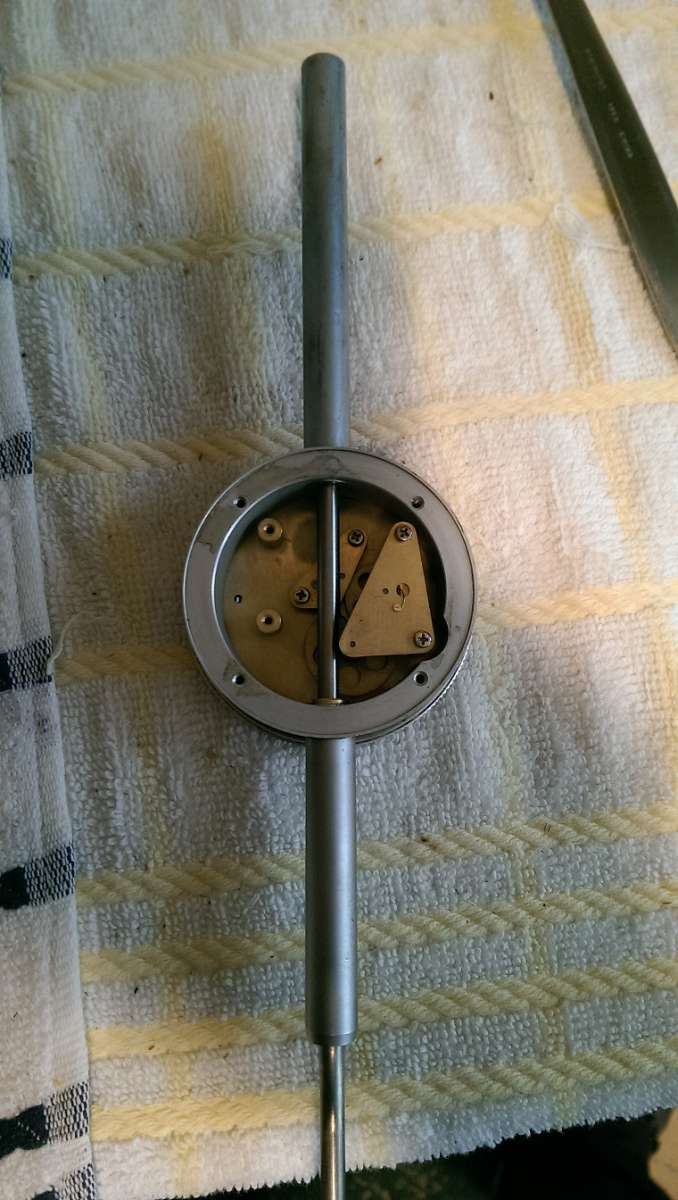
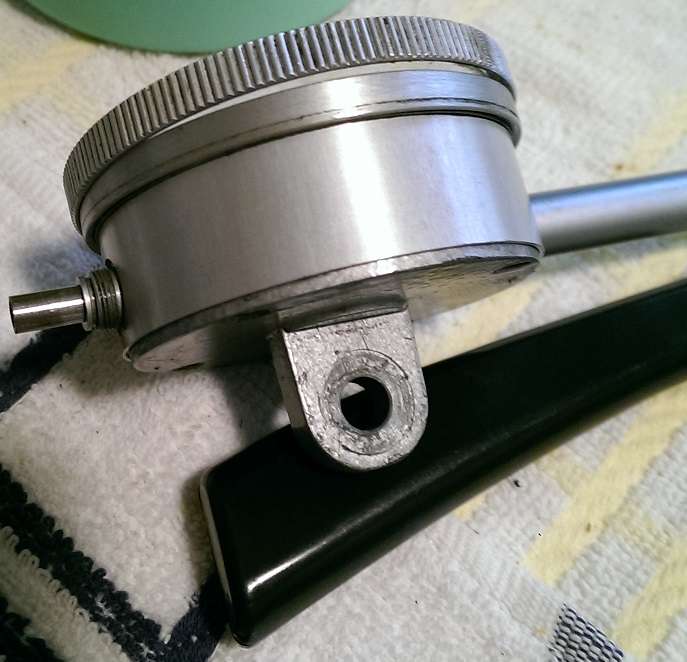
      I got this used 2″ indicator recently. Some jabroni bent the needle, which scrapes against the crystal and makes an awful noise. I’ve seen several YT videos on repair, but I still can’t get the front bezel off. There’s no gasket like some of my other indicators, so I don’t think I can pry the crystal out. And I’ve tried pulling the bezel off, but it doesn’t want to budge even though it rotates smoothly.

      Any ideas on getting this apart?  Does it actually come off the front and I just need more muscle?

      Mike

      IMAG1854IMAG1855

      Advert
      #727017
      Grindstone Cowboy
      Participant
        @grindstonecowboy

        On some, there is a hole on the side of the bezel which you can line up with three (usually) hidden grubscrews in turn around the periphery of the dial, and remove each one. This will release the workings from the body. I think Baty and John Bull are like that.

        Not always the case though, I have a Moore & Wright which does have a hole, but I can’t locate any screws anywhere. I suspect some sort of spring or circlip is used to retain the bezel, but don’t want to risk messing it up trying.

        Hope this at least gives you an idea where to look. I recall Doubleboost had a series of YouTube videos on dial indicator repair, might be worth a search.

        Rob

        #727020
        MikeK
        Participant
          @mikek40713

          Thanks, Rob.  I’ll check out Doubleboost.

          The one YT video that looked very close to the indicator I have, showed the bezel pulling right off without much force.  But I’m quite strong and couldn’t do it.  I’m about ready to bolt the indicator to a bar and use that for leverage.  I checked for the screws you mentioned, but didn’t find anything…These Chinese units just aren’t built with the quality of the name brands.

          Mike


          #727021
          MikeK
          Participant
            @mikek40713

            No screws appear to hold it on.  I tried the valve grinding suction tool mentioned in the Doubleboost video to no avail.  And closer inspection shows that the crystal seats under the bezel ring.

            I put the reinstalled the back and clamped the lug in a vice.  Pried the bezel – with a huge pry bar – and the whole mechanism started coming out.

            This might be a “can’t be disassembled, just toss it” tool.

            #727022
            Speedy Builder5
            Participant
              @speedybuilder5

              I went to a jewellers, and he used a ventouse (Rubber sucker) to pull the glass off. You can get a rubber sucker from an auto parts shop as they are used for sticking to valve heads when grinding them in.

              Bob

              #727039
              Hopper
              Participant
                @hopper

                The Long Island Indicator website is a great resource. They list how all the major brand bezels come off here https://longislandindicator.com/crystal-installation-instructions/

                A lot of them have a concealed spring clip or circlip.

                You should not have to use the kind of force you are talking about. Be careful not to distort the whole shebang.

                Unless of course the Chinese cheapies use a bezel that is rolled on during production and not designed to come off again, much like the bezel on old motorbike and car speedos.

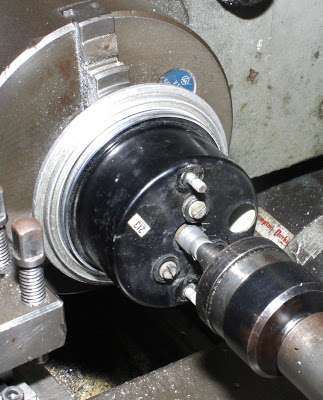
                They can be “unrolled” by making a holding fixture in the lathe from a suitable block of wood with a recess turned in it so the speedo/indicator can be sat with the face into the wood. A tool mounted in the toolpost something like a turning tool held upside down can then be used to get  in behind the rolled edge and gradually work it outwards as the chuck is rotated by hand. The Harley bodgers on YouTube do it by working round the rim with a small screw driver on the bench but that leaves a plethora of marks, bends and splits in the edge of the bezel, which they then replace. That’s cheating!

                m+bezel+fitting,items+needs+to+roll+a+bezel+on.3.g

                #727044
                larry phelan 1
                Participant
                  @larryphelan1

                  How could someone bend the needle ??

                  I doubt if even I could do that !

                  Must have jammed the unit  in something solid.

                  #727048
                  bernard towers
                  Participant
                    @bernardtowers37738

                    With a bent needle I would imagine its been apart before!!!

                    #727065
                    SillyOldDuffer
                    Moderator
                      @sillyoldduffer
                      On larry phelan 1 Said:

                      How could someone bend the needle ??

                      I doubt if even I could do that !

                      Must have jammed the unit  in something solid.

                      Which begs the question, ‘what other damage has been done?‘  As an extreme force must have been applied, quite likely the delicate precision gears and bearings are bent too, making the instrument sticky and inaccurate, and these are a much more difficult repair,

                      Expensive instruments are often manufactured with maintenance in mind, coming apart sensibly and with spares available, at least when the device was being sold new.

                      There are many ways manufacturing costs can be reduced by not supporting maintenance: welds, rivets and one-way press-fits rather than screws;  glue rather than O-rings;  anything that speeds production, etc etc.   The product is cheaper, likely performs as well as more expensive equivalents out of the box initially, but can’t be kept spot-on by maintenance, and is difficult or impossible to fix when it goes wrong.

                      For infrequent work, or if the item is likely to be dropped or stolen, the cheap version is often more economic.  When a cheap instrument fails, replace it.   How long they last depends on how often and how hard they are worked, plus how tolerant the operator is of gradually increasing malfunction.   Hobbyists can be very tolerant, for example happily using an ancient name brand-dial bought fourth hand off ebay, blissfully unaware the poor old thing hasn’t performed to spec since 1978!    Doesn’t matter provided it gets the job done.

                      I can’t think of a good reason for repairing a cheap DTI that’s difficult to get into.   More trouble than it’s worth, unless of course, repairing things is your hobby, or maybe doing post mortems!  How designers approach assembly vs maintenance is interesting though.

                      Personally I think the trend towards making everything replaceable rather than fixable is a bad thing.  Although it makes ownership cheaper today, it’s very wasteful, and impossible to sustain in the long run.   Don’t worry, we will all be long dead before it fails.

                      Dave


                      #727097
                      MikeK
                      Participant
                        @mikek40713

                        I did try the “rubber sucker” valve tool.  And then with a magnifier was able to see that the crystal sits under the bezel, so it’s not coming out first.

                        I don’t know how the jamoke bent the needle, but the back was missing one screw.  Not visible in the photo is that the needle is bent *and* twisted.  The unit otherwise functions well.  The movement is smooth, but because the needle scrapes the crystal it makes a horrible screeching sound and has scratched it.

                        From the site Hopper posted [thank you]: “Aerospace dial indicator: these cheap made-in-China indicators aren’t worth fixing, but you can replace the crystal, if you can get hold of one. The thin bezel pries off with a screw driver (put the whole indicator in a vise so you can get leverage) and no tools are required to put a new flat crystal in place. We do not carry these crystals.”

                        Hmm…That’s just what I did.  I’ll try this again and go for broke.  I only paid $7 (shipped) for this and was excited that it actually worked.  But sometimes the little kid inside says “Burn it!”

                        Mike


                        #727120
                        old mart
                        Participant
                          @oldmart

                          If there is no obvious clamping system as already mentioned, then you could simply try a large screwdriver blade top and botton levering against the central tube. Thats how most Mitutoyos dials come off, takes about one second.

                          #727123
                          Nicholas Farr
                          Participant
                            @nicholasfarr14254

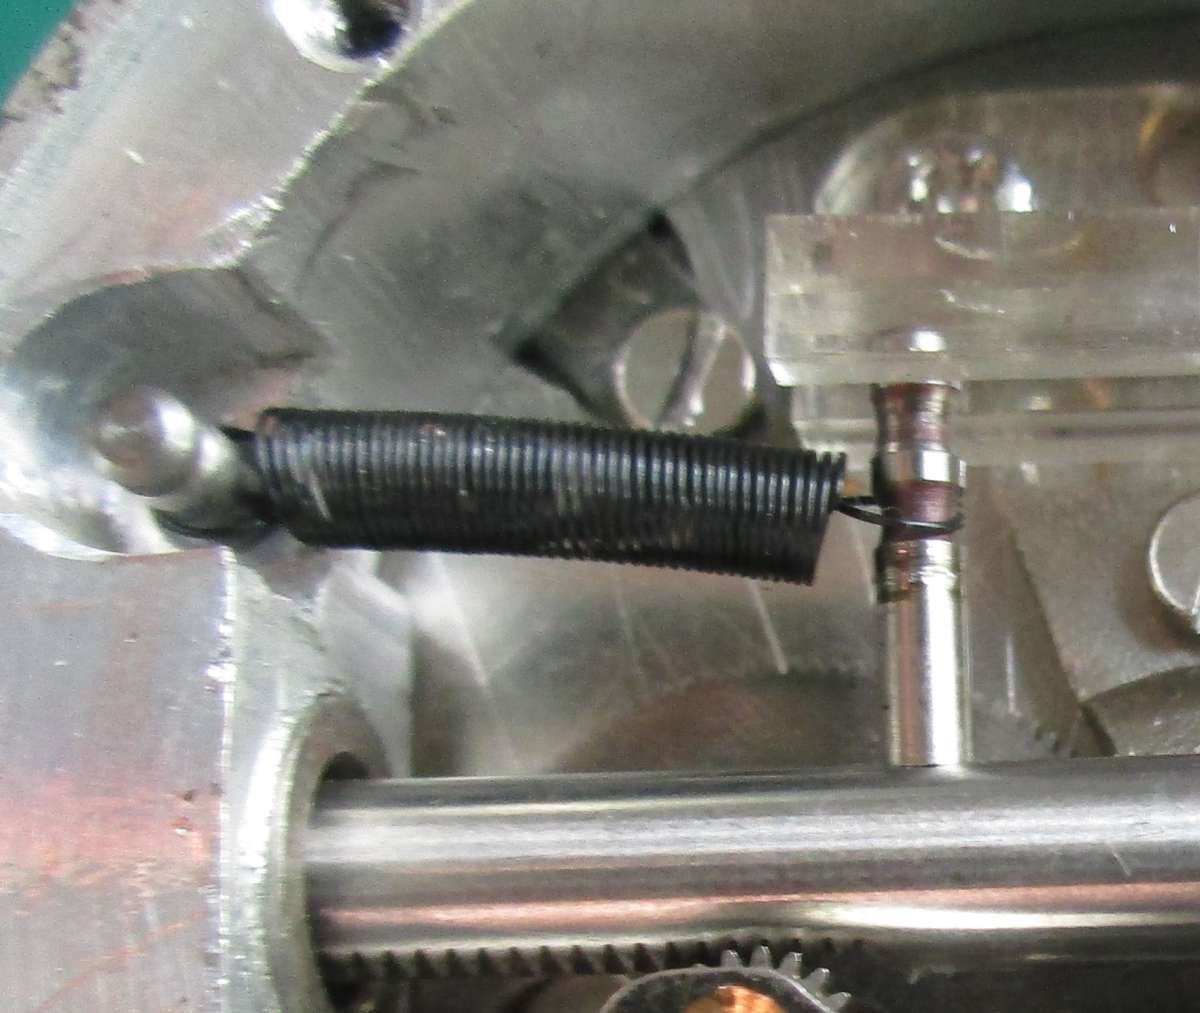
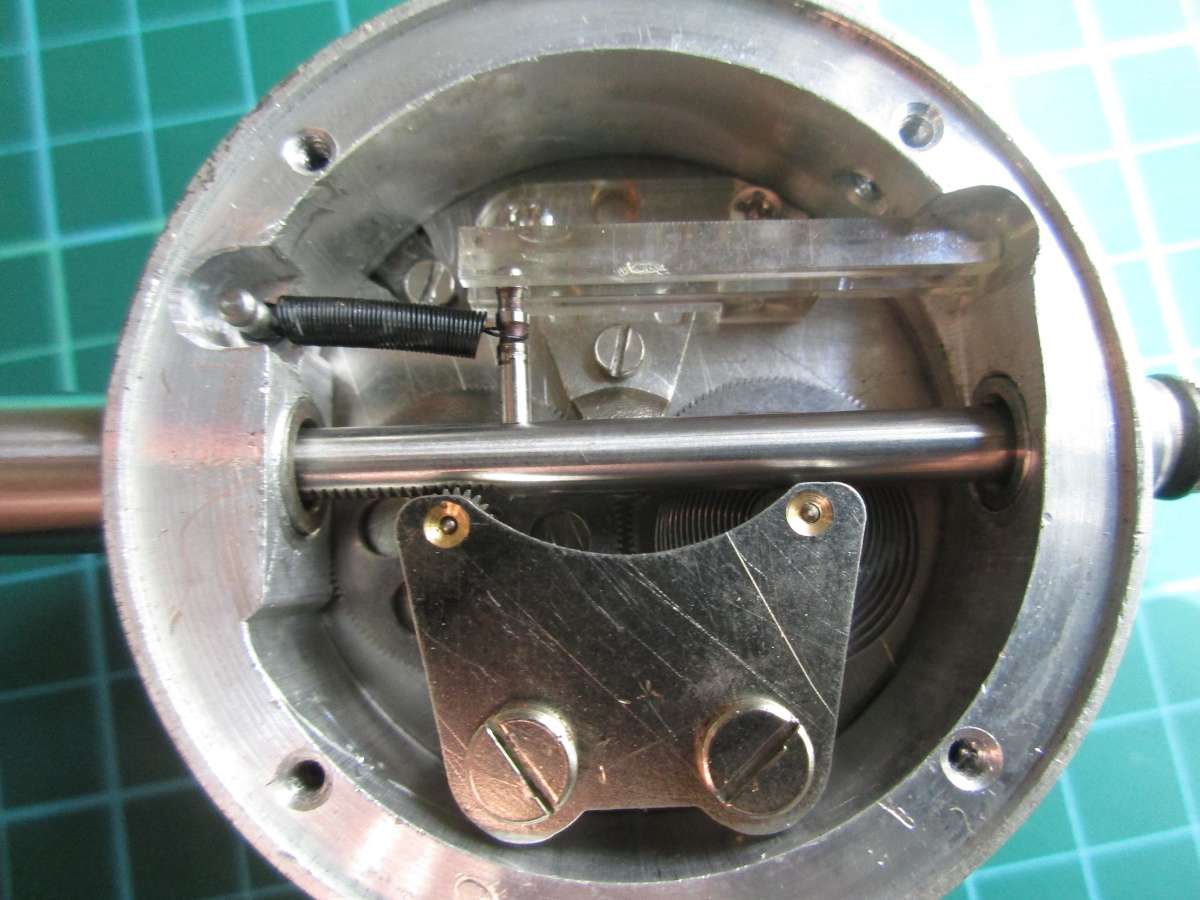
                            Hi, I have a couple of 2″ DTI’s made in China, and looking at it there is no obvious way of getting the bezel off, as there are no screws which you often find holding them on. So I took the back off one, and found a small screw nipping down a piece of steel with a slot in it, which can be seen just above the spring in the photos below, loosening the screw allows the piece of steel to slide inwards, and then that side of the bezel will lift up above the body. I didn’t take the bezel completely off, but I guess once the bezel is lifted above the body, it can slide over the body to enable the body to be lifted clear, but of course you would have to juggle the attached indicator past the needle.

                            Screw and Plate

                            DTI

                            I can’t see anything like it on Mike’s one though.

                            I cant see how Mike’s needle has been bent while in use, as it would have had to have some sort of obstacle for it to hit, like a pin that you see in pressure gauges, it was probably done be someone trying to take it apart.

                            Regards Nick.

                            #727133
                            Ian P
                            Participant
                              @ianp
                              On Nicholas Farr Said:

                              Hi, I have a couple of 2″ DTI’s made in China, and looking at it there is no obvious way of getting the bezel off, as there are no screws which you often find holding them on. So I took the back off one, and found a small screw nipping down a piece of steel with a slot in it, which can be seen just above the spring in the photos below, loosening the screw allows the piece of steel to slide inwards, and then that side of the bezel will lift up above the body. I didn’t take the bezel completely off, but I guess once the bezel is lifted above the body, it can slide over the body to enable the body to be lifted clear, but of course you would have to juggle the attached indicator past the needle.


                              I can’t see anything like it on Mike’s one though.

                              I cant see how Mike’s needle has been bent while in use, as it would have had to have some sort of obstacle for it to hit, like a pin that you see in pressure gauges, it was probably done be someone trying to take it apart.

                              Regards Nick.

                              I think the 2″ on the OP’s indicator refers to the plunger travel not the bezel diameter.

                              When I first saw the image I thought it was a 1 micron resolution and as such would be worth restoring, having now looked at the picture more closely realise it has a one thou resolution, so not really that special. What I would use one with along travel for is as a depth gauge on a pillar drill.

                              Ian P


                              #727134
                              Nicholas Farr
                              Participant
                                @nicholasfarr14254

                                Hi IanP, yes, a bit of a senior moment on my part, as mine are 1″. But the construction and principles are much the same.

                                Regards Nick.

                                #727140
                                MikeK
                                Participant
                                  @mikek40713
                                  On Ian P Said:

                                  I think the 2″ on the OP’s indicator refers to the plunger travel not the bezel diameter.

                                  When I first saw the image I thought it was a 1 micron resolution and as such would be worth restoring, having now looked at the picture more closely realise it has a one thou resolution, so not really that special. What I would use one with along travel for is as a depth gauge on a pillar drill.

                                  Ian P


                                  You guessed one of my intended uses, Ian.  And I blame my cheapness on my father.  It’s inherited!

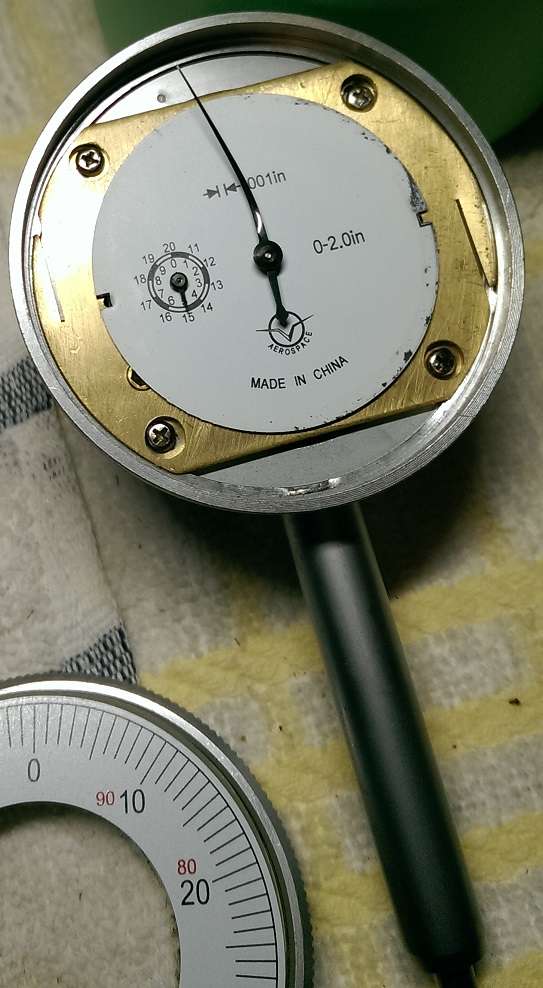
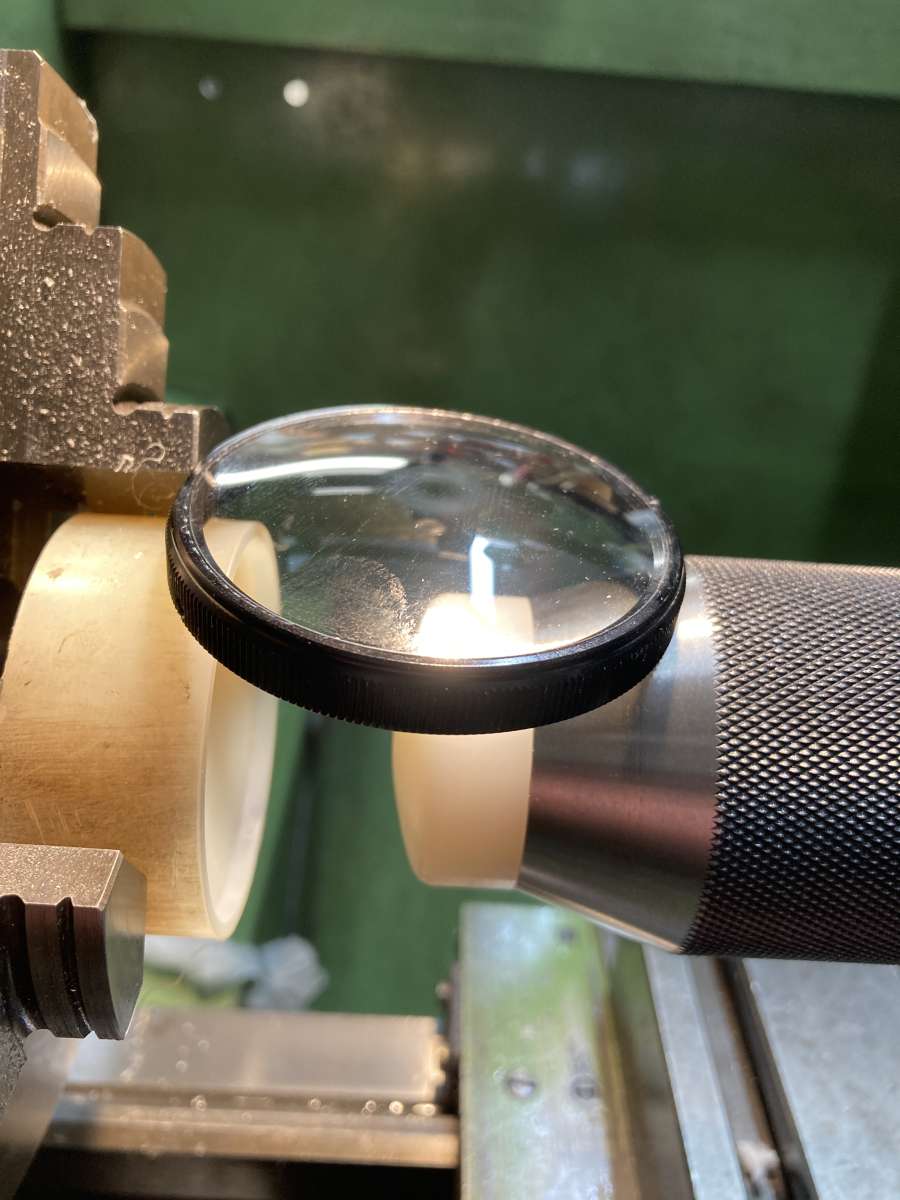
                                  Being encouraged by the information in Hopper’s link I gave it another shot today.  With success!  I had not realized that the bezel was in two pieces and had been prying under the larger part that is attached to the clock mechanism.  Once I pried under just the knurled ring it came off with almost no effort.  (Now to see what damage I’ve done while prying the wrong part.)

                                  Mike

                                  IMAG1857

                                  #727163
                                  MikeK
                                  Participant
                                    @mikek40713

                                    This appears to be the extent of the damage I caused.  The brass tab on the right side is bent, which is where I pried the first time.  That brass plate being what holds the other bezel part to the clock body.  Should be an easy fix.

                                    I swear, I’ll do some real machining today to make up for this.

                                    Mike

                                    IMAG1859

                                    #727204
                                    roy entwistle
                                    Participant
                                      @royentwistle24699

                                      You should be able to get a new crystal from any clock materials supplier

                                      Roy

                                      #727210
                                      JohnF
                                      Participant
                                        @johnf59703

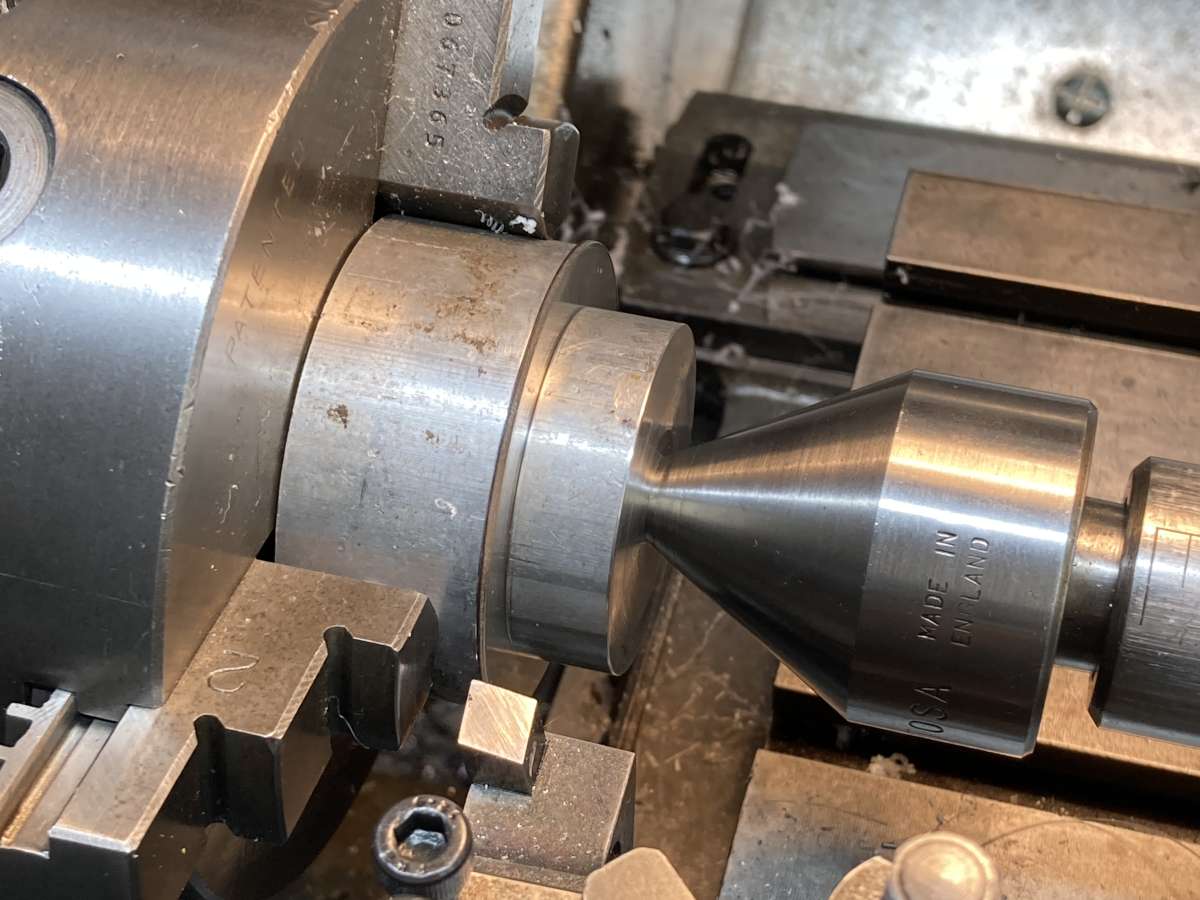
                                        I recently fixed a couple of indicators, a Baty & A Mitutoyo, during the fix both needed new crystals which I made from flat acrylic sheet ex Ebay.  Sawn to close size then turned clamped between centres held by pressure.

                                        A couple pics may help,  one was flat & the other curved so had to make a tool to insert it.

                                        John

                                        F615EF94-BA03-4A65-B031-B829BDE74982D95DB4D5-9536-47A4-91D9-9269F98ADE7B

                                        #727213
                                        Bazyle
                                        Participant
                                          @bazyle

                                          Glad that is sorted.
                                          In passing I happen to have on my desk a Mercer type 12, 5 tenths, +/- 25 on the dial, full travel 1/2″ The bezel has one very small hole, about 25 thou. Not needing to but how would that come off?
                                          The smaller dial counts full revolutions ie 50 thou. I rather wonder why they would do that rather than number the alternate revs with a tick at in between so the numbers were full 1/10″.

                                          #727217
                                          AStroud
                                          Participant
                                            @astroud

                                            Replacement dial glasses (perspex) can be found here on the Bay

                                            item number 394577123951 – Replacement Glass Instrument Gauge car / Clock Face Dials PERSPEX NOT GLASS 2mm!

                                            #727230
                                            MikeK
                                            Participant
                                              @mikek40713

                                              That replacement crystal looks great, John.  As the circular scratch from the needle on mine doesn’t affect viewing the tick marks I’ll probably live with it, but I’m encouraged to know that they can be easily made.  And mine is flat, so even more so if it does end up bothering me.  A shame I can’t take pride in having resurrected a quality brand.

                                              Mike


                                            Viewing 21 posts - 1 through 21 (of 21 total)
                                            • Please log in to reply to this topic. Registering is free and easy using the links on the menu at the top of this page.

                                            Advert

                                            Latest Replies

                                            Viewing 25 topics - 1 through 25 (of 25 total)
                                            Viewing 25 topics - 1 through 25 (of 25 total)

                                            View full reply list.

                                            Advert

                                            Newsletter Sign-up