DEPTH MICROMETER reassembly

Advert

DEPTH MICROMETER reassembly

Home Forums Workshop Tools and Tooling DEPTH MICROMETER reassembly

Viewing 15 posts - 1 through 15 (of 15 total)
  • Author
    Posts
  • #657918
    Dan Shilling
    Participant
      @danshilling

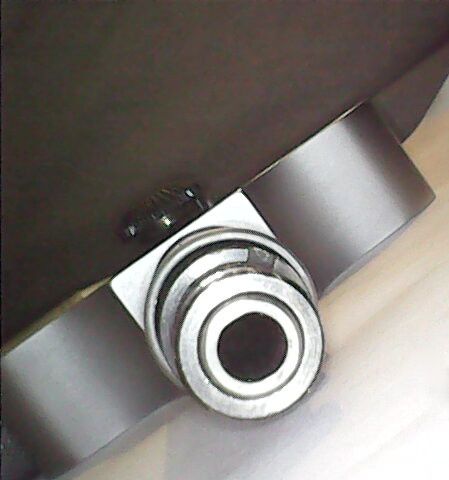
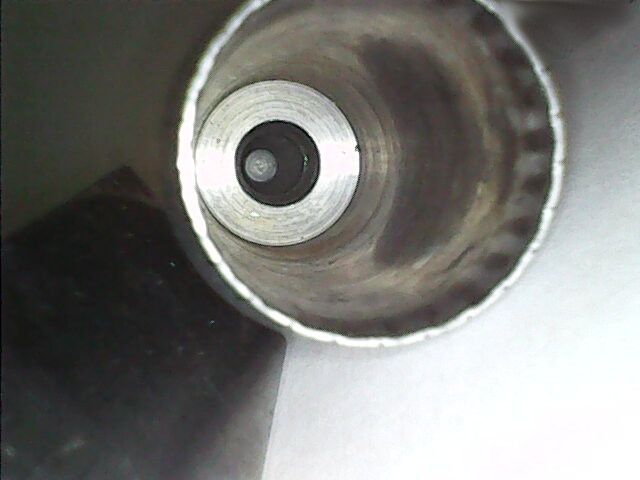
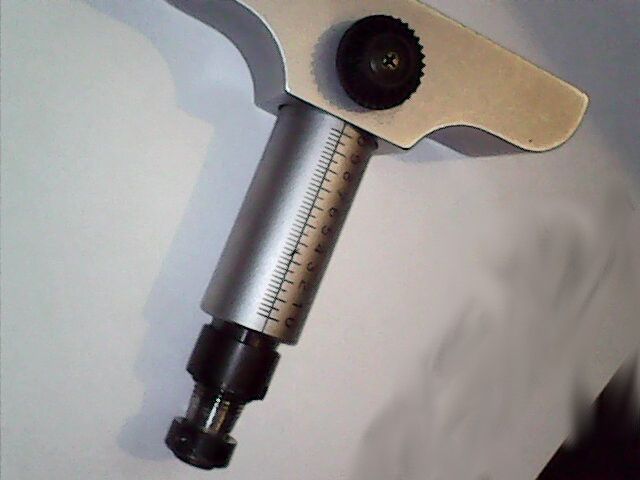
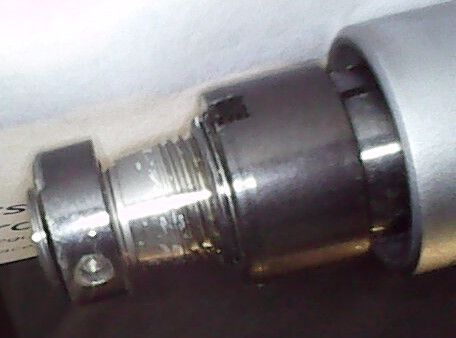
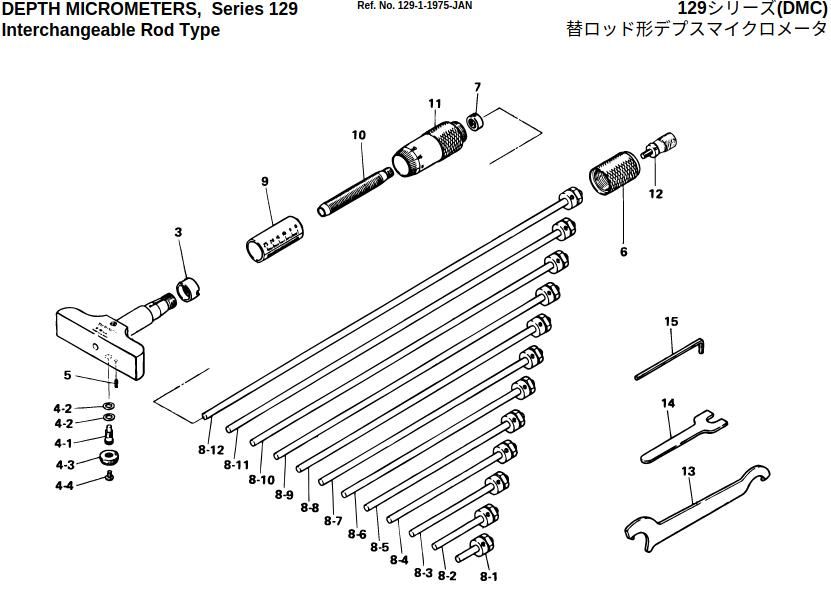
      I was given this MITUTOYO 129-128 0-3" DEPTH MICROMETER; however I'm not sure if something is missing or how to put it back together again. Any suggestions apart from the bin! Please see photo's.

      5.jpg4.jpg3.jpg2.jpg

      1.jpg

      Advert
      #21068
      Dan Shilling
      Participant
        @danshilling

        trying to put back together again but not sure something missing

        #657919
        David Jupp
        Participant
          @davidjupp51506

          You might be able to download a parts list for it from the Mitutoyo web site

          **LINK**

          #657920
          Dan Shilling
          Participant
            @danshilling
            Posted by David Jupp on 25/08/2023 15:53:50:

            You might be able to download a parts list for it from the Mitutoyo web site

            **LINK**

            David yes it seems to be this one

            thank you for the suggestion.

            6.jpg

            Edited By Dan Shilling on 25/08/2023 16:01:44

            Edited By Dan Shilling on 25/08/2023 16:08:41

            #657922
            noel shelley
            Participant
              @noelshelley55608

              Forgive me asking but you do realise that you need the depth rods for it to be any use ? As shown in the above post. Noel

              #657945
              Dan Shilling
              Participant
                @danshilling
                Posted by noel shelley on 25/08/2023 16:45:04:

                Forgive me asking but you do realise that you need the depth rods for it to be any use ? As shown in the above post. Noel

                it came with some rods, lets say enough to be useful and the spanner shown as 13 but not 14 & 15. Not sure if this can be saved at the moment:

                nut 3 is too tight to undo – possibly LH – and I think spindle 10 is there but stuck as shown on the last picture of the OP.

                Edited By Dan Shilling on 25/08/2023 18:41:02

                #657966
                old mart
                Participant
                  @oldmart

                  Do not try to move nut 3, it is for adjusting the fit of the micrometer threads as you screw them in and out. Your their photo shows the knurled parts 6 and 11 which should be unscrewed (RH thread) and screwed back together with one of the length rods between them, only finger tight. In your photos, the nearest part in the first photo looks like the micrometer leadscrew 10 and the nut 7 which have to be fitted into part 11. They can also be seen in the bottom of the fourth photo and at the left side of the fifth photo. The micrometer leadscrew minus the nut has a tapered part next to the nut thread and there is a corresponding taper inside the barrel, part 11. When the parts 10 and 11 are tgether the thread for the nut 7 should be visible. What ever you do, never hold the threads on part 10 with anything metallic, you will scrap the lot, use only plastic pads if you must grip them in pliers. Do not do up the nut 7 tight yet as adjustments will have to be made.

                  If you can get the mic back together, there will be some fine adjustments before it can be used, first things first, at this early stage.

                  #657974
                  Dan Shilling
                  Participant
                    @danshilling
                    Posted by old mart on 25/08/2023 20:31:00:

                    The micrometer leadscrew minus the nut has a tapered part next to the nut thread and there is a corresponding taper inside the barrel, part 11. When the parts 10 and 11 are tgether the thread for the nut 7 should be visible. What ever you do, never hold the threads on part 10 with anything metallic, you will scrap the lot, use only plastic pads if you must grip them in pliers. Do not do up the nut 7 tight yet as adjustments will have to be made.

                    thanks for that info I definitely won't touch nut 3 now that I know or the threads on 10.

                    it all goes together as you describe only it seems the leadscrew (10) is stuck, so much so that the taper does not touch part 11 anymore.

                    I cannot think how to free (10) as shown on my last photo. I suppose normally it should undo freely.

                    As it is a taper a collet chuck probably would just slip off or worst ruin the taper.

                    #657981
                    old mart
                    Participant
                      @oldmart

                      The screw 10 should unscrew from the base of the mic, (RH thread). The lock might be jammed and should be backed off or maybe totally removed first, the 4.1 to 4 series of parts. If you still cannot unscrew 10, then you will have no option but to unscrew 3 about 1/2 a turn, as that would also clamp 10 and make it hard to turn. Have you got the spanners that are made for this mic?

                      Edited By old mart on 25/08/2023 21:17:32

                      #657992
                      noel shelley
                      Participant
                        @noelshelley55608

                        If you get it working then I can give you the dimensions of spanner 14 which is needed to set /calibrate the rods. Good luck. Noel.

                        #658065
                        Dan Shilling
                        Participant
                          @danshilling
                          Posted by noel shelley on 25/08/2023 22:13:09:

                          If you get it working then I can give you the dimensions of spanner 14 which is needed to set /calibrate the rods. Good luck. Noel.

                          I managed to release the spindle and get it back together but as yet adjusted. Yes dimensions of spanner 14 would be good however I noticed the rods that came with it are 1/8" and float quite a bit so I wonder if they are for this gauge after all!

                          #658066
                          Dan Shilling
                          Participant
                            @danshilling
                            Posted by old mart on 25/08/2023 21:10:48:

                            The screw 10 should unscrew from the base of the mic, (RH thread). The lock might be jammed and should be backed off or maybe totally removed first, the 4.1 to 4 series of parts. If you still cannot unscrew 10, then you will have no option but to unscrew 3 about 1/2 a turn, as that would also clamp 10 and make it hard to turn. Have you got the spanners that are made for this mic?

                            Edited By old mart on 25/08/2023 21:17:32

                            The lock is free. I has to resort to unscrew 3 1/2 a turn as you suggested – luckily I have the spanner for 3.

                            10 then came out easily I think it was turned in too much. Not sure how tight that thread should feel – at the moment I have tightened it with a slight play.

                            I have reassembled to check it 'works' though unlikely to be accurate anymore.

                            But it seems the rods that came with it are from some other micrometer unfortunately as they are quite a bit smaller in diameter.

                            #658225
                            old mart
                            Participant
                              @oldmart

                              When I looked at one of my depth mics, I realised that the lock mechanism holds the depth rod, and has nothing to do with the micrometer thread 10. The collar 3 should be tightened back up in stages with the micrometer thread 10 screwed in halfway, tighten until resistance is felt and then back it off slightly until the thread feels smooth throughout its travel. With the nut 7 removed from 10, find the shortest rod and put it in place within 10 and stand the mic base on a flat surface. Then unscrew the thread 10 until it just touches the head of the rod. You then remove the rod and fit the barrel 11 with the zero in line with the inner scale. Take care not to turn 10 as you fit 11. Hold the parts together tightly on the taper as you fit nut 7. Then assemble with the shortest rod and screw on 6 finger tight. Check how close you are to zero using the flat surface. If you are close, a fine adjustment to the inner barrel 9 can be made by turning it, or if the zero is too far, then unscrew 7, break the taper and try zeroing again. This requires some patience, and luck. Hopefully, the rods will still be set, they are difficult to calibrate.

                              Before reassembly, you should use a spray degreaser (not water based) and lubricate the threads with light oil.

                              #658240
                              Dan Shilling
                              Participant
                                @danshilling
                                Posted by old mart on 27/08/2023 17:20:52:

                                When I looked at one of my depth mics, I realised that the lock mechanism holds the depth rod, and has nothing to do with the micrometer thread 10. The collar 3 should be tightened back up in stages with the micrometer thread 10 screwed in halfway, tighten until resistance is felt and then back it off slightly until the thread feels smooth throughout its travel. With the nut 7 removed from 10, find the shortest rod and put it in place within 10 and stand the mic base on a flat surface. Then unscrew the thread 10 until it just touches the head of the rod. You then remove the rod and fit the barrel 11 with the zero in line with the inner scale. Take care not to turn 10 as you fit 11. Hold the parts together tightly on the taper as you fit nut 7. Then assemble with the shortest rod and screw on 6 finger tight. Check how close you are to zero using the flat surface. If you are close, a fine adjustment to the inner barrel 9 can be made by turning it, or if the zero is too far, then unscrew 7, break the taper and try zeroing again. This requires some patience, and luck. Hopefully, the rods will still be set, they are difficult to calibrate.

                                Before reassembly, you should use a spray degreaser (not water based) and lubricate the threads with light oil.

                                Thanks for running through that. I have followed it carefully and I am pleased with the result and you're right it does require some patience!

                                #658242
                                old mart
                                Participant
                                  @oldmart

                                  Good result, things sometimes work out well.

                                Viewing 15 posts - 1 through 15 (of 15 total)
                                • Please log in to reply to this topic. Registering is free and easy using the links on the menu at the top of this page.

                                Advert

                                Latest Replies

                                Viewing 25 topics - 1 through 25 (of 25 total)
                                Viewing 25 topics - 1 through 25 (of 25 total)

                                View full reply list.

                                Advert

                                Newsletter Sign-up