Cura slicing with too many long moves?

Advert

Cura slicing with too many long moves?

Home Forums 3D Printers and 3D Printing Cura slicing with too many long moves?

Viewing 12 posts - 1 through 12 (of 12 total)
  • Author
    Posts
  • #635663
    John Doe 2
    Participant
      @johndoe2

      Hi folks. I am new to 3D printing and am using Shapr3D and Cura 4.31 with an AnyCubic Mega S.


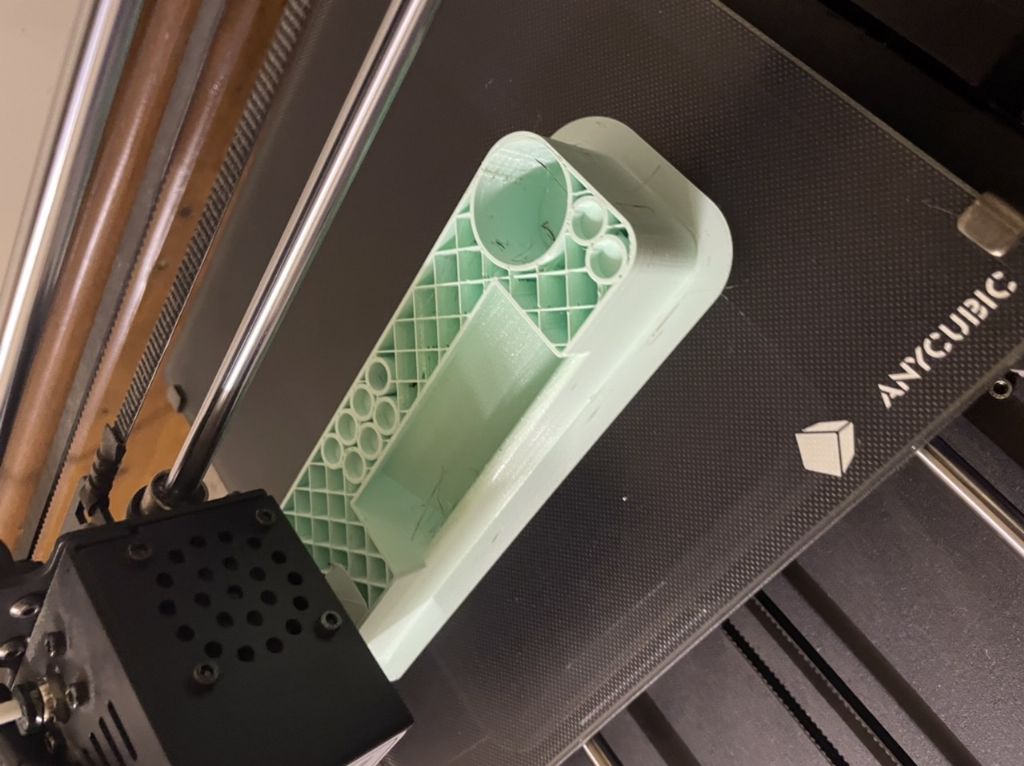
      I am printing a tool holder of approx 170 x 50 mm, consisting of various tubes and other shaped holes to hold certain tools.

      I notice that during the print, the nozzle moves from one end of the print to the far other side to do, maybe a second's worth of printing, then travels all the way back to where it was. It does this throughout the print shape – traveling a lot rather than printing at one end and gradually working across.

      On a 35 hour print with about 700 layers, all this extra traveling must significantly add to the print time.

      Any thoughts?

      e3047836-edbb-47e0-beb7-71cea1a74c61.jpeg

      Edited By John Doe 2 on 02/03/2023 10:47:20

      Advert
      #31719
      John Doe 2
      Participant
        @johndoe2
        #635670
        Henry Brown
        Participant
          @henrybrown95529

          I've noticed it and put it down to a possible aid to cooling of the part being printed before the next layer or just a quirk in Cura.

          I vaguely remember reading that Prusaslicer is more efficient in its tool path but when I tried it I found it was less user friendly that Cura, especially for supports…

          #635679
          SillyOldDuffer
          Moderator
            @sillyoldduffer

            Possibly to do with the time calculation, which may be biased in favour of long straight runs because these are faster than moving the head in more than one axis. Much as it's faster to drive some distance to get on a motorway rather than take the shortest route through a maze of country lanes and busy town centres!

            The orientation of the work may make a difference. John's tool holder has several cylinders and much cross-hatching, which the head has to navigate in a complicated way for best efficiency. Telling the software to align the job at an angle so that the head can print all the time by running along several straight lines might speed printing this particular object up.

            I don't know how clever 3D slicing software is when it comes to recognising shapes and how they might be aligned to optimise print-head movements. Not very I suspect. Possibly, it's not worth the effort on a hobby printer because every shape is 3D different, and it's easier to program straight head movements that simply scan the print area.

            There's an analogy with TV sets and cameras, which also place dots (pixels) at XY coordinates. TVs scanned 405 lines in my youth, and 625 lines later – much better. Not because scanning was perfect, but because designers were limited by the analogue technology on the day. It was quicker and simpler to scan than to skip around the screen. Technology moves on! Digital made a big difference: images are compressed in transmission, and only the pixels of that changed on screen since the previous frame are altered. Modern TVs don't have to scan like old TVs because they're smart. Likely the algorithms used for 3D printing will improve in the same way. Being 3-dimensional makes the sums more complicated, and I guess more compute power is needed to calculate the most efficient head route than is available from most computers at the moment. Might need a dash of Artificial Intelligence too!

            Dave

            #635686
            John Doe 2
            Participant
              @johndoe2

              Thanks – all advice appreciated.

              Yes, it is breaking off from printing at one end to travel all the way to the opposite edge and doing a single tiny ~ 3mm curve before travelling all the way back again ! Every layer it does this.

              I like the idea of orienting the print so the fill-in webs are aligned X, Y rather than @45° good idea !

              Cura uses some really wacky patterns for support structures, which seem needlessly complicated to me.

              It also seems to me that a certain amount of experimentation is required because one cannot, it seems, rely on the temperature, filament diameter and other parameters given for the filament. I discovered that I can change feed temperature during a print, and have reduced it by 10° which has reduced the amount of stringing.

              Is there a good way of calibrating one's filament, and a good test piece to use to refine the settings?


              Edited By John Doe 2 on 02/03/2023 13:05:05

              #635687
              lee webster
              Participant
                @leewebster72680

                Maybe you need to update Cura to the latest version? I found Prusa slicer was not as good when it came to supports, so I stay with Cura.

                #635689
                Henry Brown
                Participant
                  @henrybrown95529

                  I've only used PLA, various makes – I quite like Sunlu but other makes are usually ok, and always use 200/60 hot end/bed and it always works fine. I have found that the room the printer is in needs to be a minimum of 16 degrees or above and it is very important to bag the PLA back up after use to avoid moisture ingress.

                  I have played about with software and following this did the simple 25mm cube to get ny X, Y, Z and extrusion settings correct, it's quick and easy to do. I have done a benchy and some other tests downloaded from Thingyverse but don't bother now.

                  I've avoided trying PETG despite having a couple of rolls. This is because the printer is in the living room, due to concerns about fumes, I may try it when the sunroom warms up later in the year when I can open the doors…

                  #635692
                  Ex contributor
                  Participant
                    @mgnbuk

                    Is there a good way of calibrating one's filament, and a good test piece to use to refine the settings?

                    Have a search online for a "temperature tower". There are several on Thingiverse – I can't recall exactly which one I use as my computer crashed since I downloaded it. The file is resident on my printer SD card, so I have not had a need to find it again.

                    This short program builds a tower comprising 2 blocks a short distance apart with an unsupported bridge between them. Each level prints at an increasing temperature (IIRC 5 degree increments from 180 to 225 C). For easy reference, the temperature each layer printed at is embossed in one of the blocks. When cooled, inspect the tower for the layer that looks to have printed the best. Run this program whenever you change to a fresh reel of filament to see how the new stuff works compared to the reel just run off – IIRC mine takes around 45 minutes & doesn't use much filament.

                    I am currently running Anycubics own brand PLA at 205 C extrusion temp on a 60 C bed. Bed grip on Anycubic's textured surface is tenacious until it has fully cooled, when the part just lifts off. Minimal stringing & good layer adhesion.

                    I have been using Gyroid infill recently – some suggestions online (through testing) that this has the best strength in all axes. Latest Cura version is 5.2.2

                    Nigel B.

                    #635722
                    Henry Brown
                    Participant
                      @henrybrown95529

                      Just remembered this: Teaching Tech This is where I got the test cube from, I should have said it was 20mm square and actually makes a five sided box in my earlied post…

                      This chap is as good as anyone I've found for 3D printing video's, no connection just found his videos helpful.

                      #635743
                      John Doe 2
                      Participant
                        @johndoe2

                        Thank you for all your suggestions. I will give them a go.

                        Central heating boiler has just packed-up though, so that will have to take priority.

                        #635757
                        Henry Brown
                        Participant
                          @henrybrown95529

                          Nooo, I've just had to buy a new PCB for ours John, spooky…

                          #635871
                          John Doe 2
                          Participant
                            @johndoe2

                            Mine too, Potterton 80E. The PCB luckily is simple and has no "intelligent" components – just transistors, diodes and relays, so I will try re-soldering the whole board, in case there is a dry joint, and then maybe replace some components if I find any failed ones.

                            Apparently the PCB is a common failure item, but the cynic in me says that engineers could easily change a PCB and charge for their time and the mark-up of a new board, but, hey.

                            Edited By John Doe 2 on 03/03/2023 11:35:18

                          Viewing 12 posts - 1 through 12 (of 12 total)
                          • Please log in to reply to this topic. Registering is free and easy using the links on the menu at the top of this page.

                          Advert

                          Latest Replies

                          Viewing 25 topics - 1 through 25 (of 25 total)
                          Viewing 25 topics - 1 through 25 (of 25 total)

                          View full reply list.

                          Advert

                          Newsletter Sign-up