Coil winding machine

Advert

Coil winding machine

Viewing 17 posts - 1 through 17 (of 17 total)
  • Author
    Posts
  • #531929
    John Haine
    Participant
      @johnhaine32865

      Being as how the next clock needs a coil with a lot of turns on it I thought I would lash up a cnc coil winder, since I have a couple of spare steppers, a GRBL Arduino controller that can accommodate another driver, and a driver to fit on it. The idea is to use one stepper driving the bobbin and pretending to be say the X axis while the Y axis stepper drives an M6 leadscrew backwards and forwards. On the leadscrew an anti-backlash nut will drive a carriage with a guide for the wire. Just to keep myself motivated I thought I'd log the build as I go…

      To attach the bobbin to the motor I will use a mandrel in an ER16 collet so I'll need a suitable chuck. I've got a full set of collets and various closers, so the options were either to butcher a chuck extension, which would be a shame and anyway they are made of tough and hard steel, or make one. I chose the latter just for fun…

      img_20210305_115614780.jpg

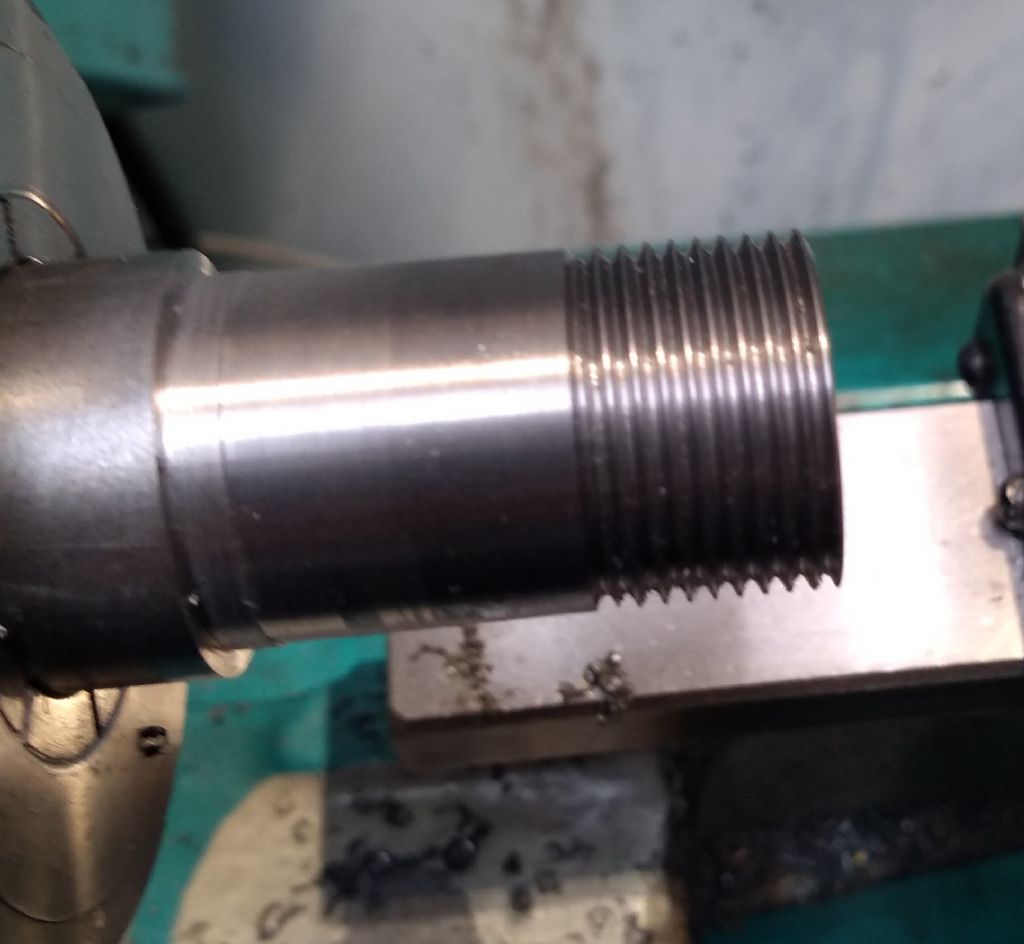
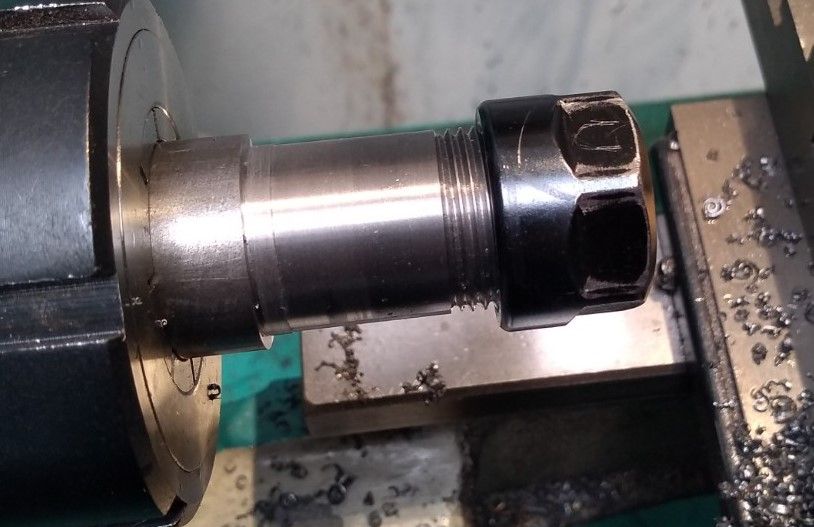
      Turned down a length of 1" FCMS to 22mm by CNC and threaded a 15mm length M22 x 1.5 using Mach 3 – yes it does do threading, I was quite pleased with this thread, made my own tool as well. Nut fits very smooth and shake free…

      img_20210305_115634637.jpg

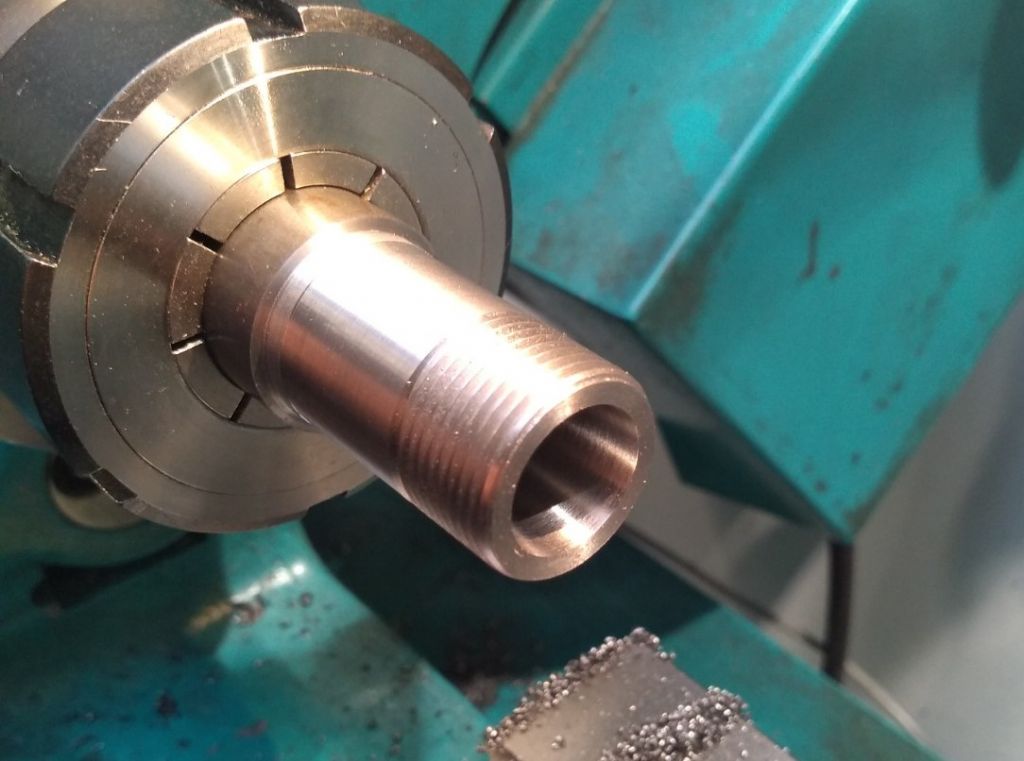
      Next to bore out the taper.

      img_20210305_162120445.jpg

      8 degrees half-angle, 16mm dia at the mouth and 20mm deep. Body was drilled 10mm dia x 22mm first.

      Advert
      #15337
      John Haine
      Participant
        @johnhaine32865
        #531932
        John Haine
        Participant
          @johnhaine32865

          img_20210305_162105451.jpg

          A collet in the closer nut fitted to the taper. Back of the taper was drilled to the full length of the chock and reamed out 1/4" to fit the stepper shaft.

          img_20210305_170416573.jpg

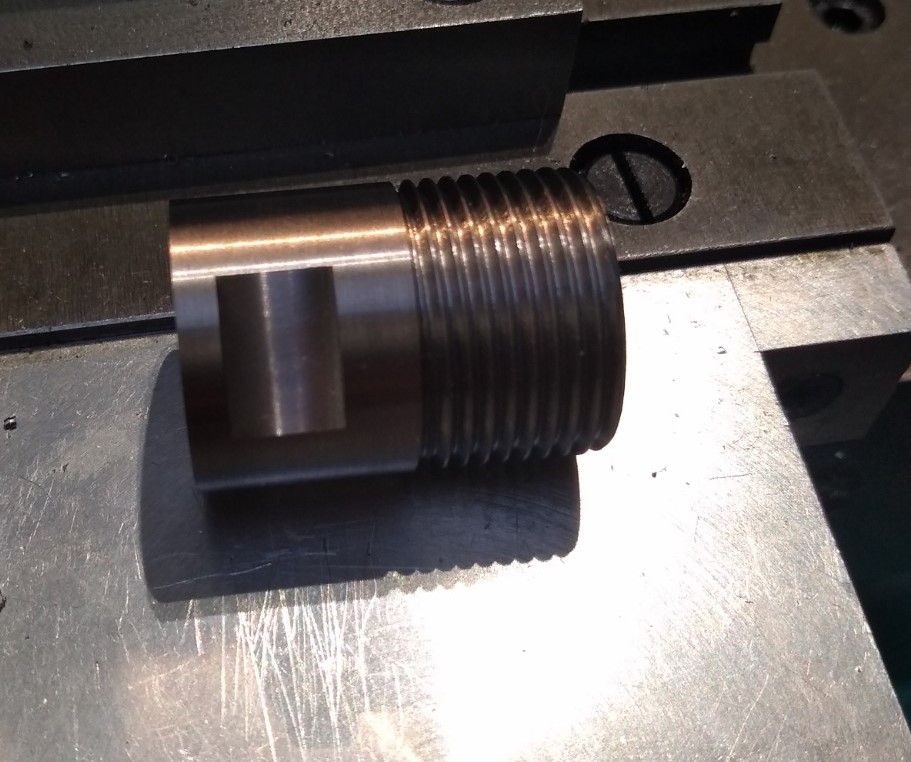
          Then I transferred the bar in the collet to the mill and added 19mm a/f spanner flats. Then back on the lathe, parted off to 30mm LOA. This is the finished article temporarily fitted to the motor – need a set screw to fix on to the shaft.

          img_20210305_171655843.jpg

          All that went quite well! Next to start on the machine frame.

          #532025
          David George 1
          Participant
            @davidgeorge1

            Hi John. An interesting project what lathe are you using and did you convert it to CNC.

            David

            #532034
            SillyOldDuffer
            Moderator
              @sillyoldduffer

              What a good idea! I'm sure it will work. How many turns do the coils need? Anything over about 30 turns takes ages, it's a tedious job – worse the coil is wound neatly – and I always lose count!

              Dave

              #532042
              John Haine
              Participant
                @johnhaine32865

                David, it's a Super 7, which I converted 10 years ago. Dave, at least 1000 turns, as many as I can get on a certain bobbin size. I tried a "manudraulic" method using my motorised DH to turn the bobbin and guiding the wire by hand but it was tedious and not very successful. Need to get better feed and more consistent tension.

                #532045
                duncan webster 1
                Participant
                  @duncanwebster1

                  Excellent, keep the write ups coming. Will at least save me from butchering more relays when I need coils

                  #532158
                  Martin Kyte
                  Participant
                    @martinkyte99762

                    Are you making provision for coil tape between layers?

                    regards Martin

                    #532243
                    John Haine
                    Participant
                      @johnhaine32865

                      Ah, should I? The voltage and current in my application will be very low, is there any reason other than for insulation.

                      #532333
                      Martin Kyte
                      Participant
                        @martinkyte99762

                        It does help prevent the coils from the next layer burying themselves in the layer beneath and making an untidy coil. I have only would coils by 'hand' before but by that I mean on a mandrel in the Myford using the auto feed to traverse the winding with the wire lead throgh a friction device in the toolpost. The feed being reversed at the end of each layer. I found a layer of transformer tape when reaching each end helped to give a flat surface for the next layer and prevented the burying issue. You may find that you have enough control especially on wire tension to eliminate the problem.

                        regards Martin

                        #532350
                        John Haine
                        Participant
                          @johnhaine32865

                          Thanks for the explanation Martin. I want to maximise the number of turns on a given size bobbin and using only 0.15mm wire so I think tape would probably take more space than would be lost with a bit of untidiness. There's a few YouTube videos of diy coil winders that show pretty neat layering without tape so I hope it will work OK.

                          #533989
                          John Haine
                          Participant
                            @johnhaine32865

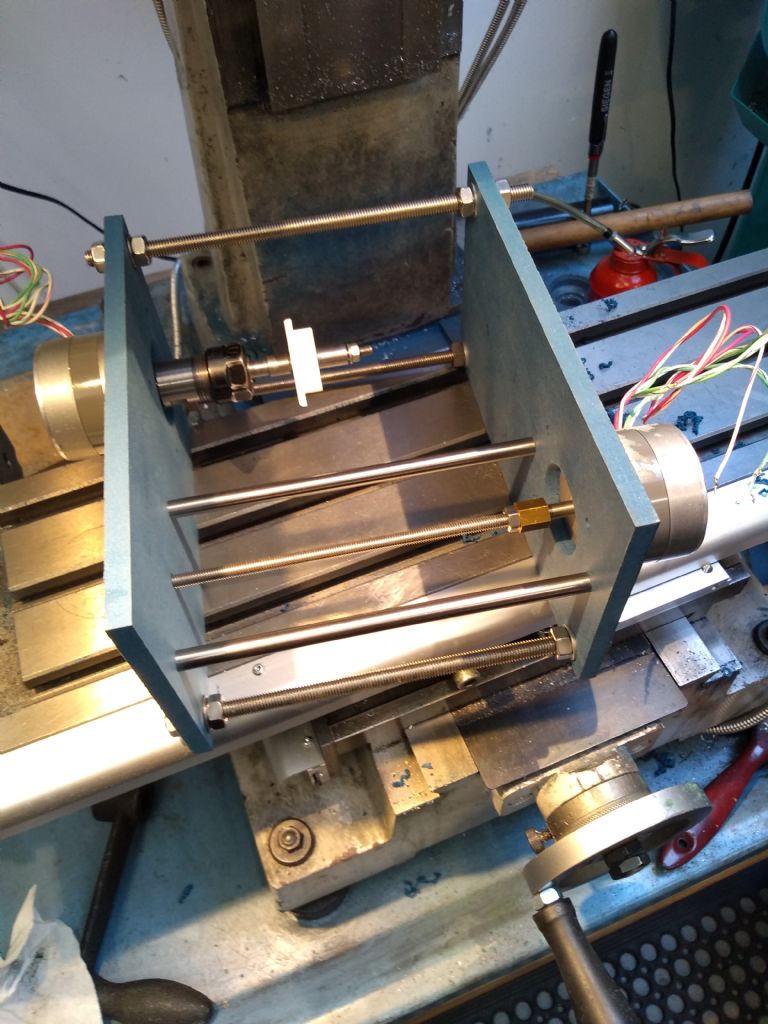
                            Slow progress but have got the basic framework together.

                            img_20210315_120550451.jpg

                            Back left motor drives the bobbin, front right the carriage. The carriage will run on linear bearings on 2 silver steel 8mm rails – these left over from a previous project to build a 3D printer. 3D printer inspired (if that's the word…) the use of M8 studding and 8mm Valchromat (left over from clock case) for the framework. The rails are also captive on M5 bolts clamping them on to the end plates, so the whole structure is very rigid. Definitely for function not looks. I have to admit that the chuck and the leadscrew coupling are both loctited in place on the stepper shafts. Next bit to make is the carriage.

                            #534316
                            John Haine
                            Participant
                              @johnhaine32865

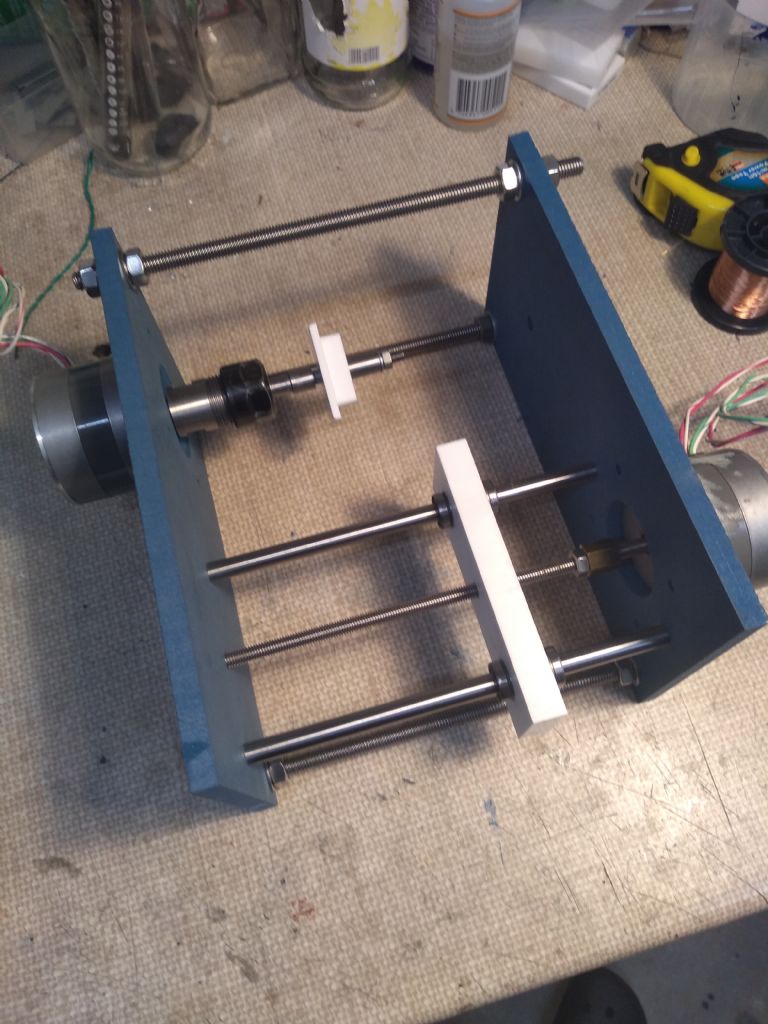
                              img_20210316_223219857.jpg

                              Carriage made, a block of Corian with linear bearings and threaded hole for leadscrew. Trial assembly. Need to figure out spool mounting and wire run now.

                              #537643
                              John Haine
                              Participant
                                @johnhaine32865
                                I added an extra stepper driver to the Uno in the electronics box that normally runs the mill power feed, generated a simple text file of G code and downloaded it to my phone, works exactly as expected.  Next step, add something to hold the wire reel and run the wire onto the bobbin.  Just posted my first video!

                                Edited By John Haine on 02/04/2021 14:53:13

                                Edited By John Haine on 02/04/2021 14:53:37

                                #538345
                                John Haine
                                Participant
                                  @johnhaine32865

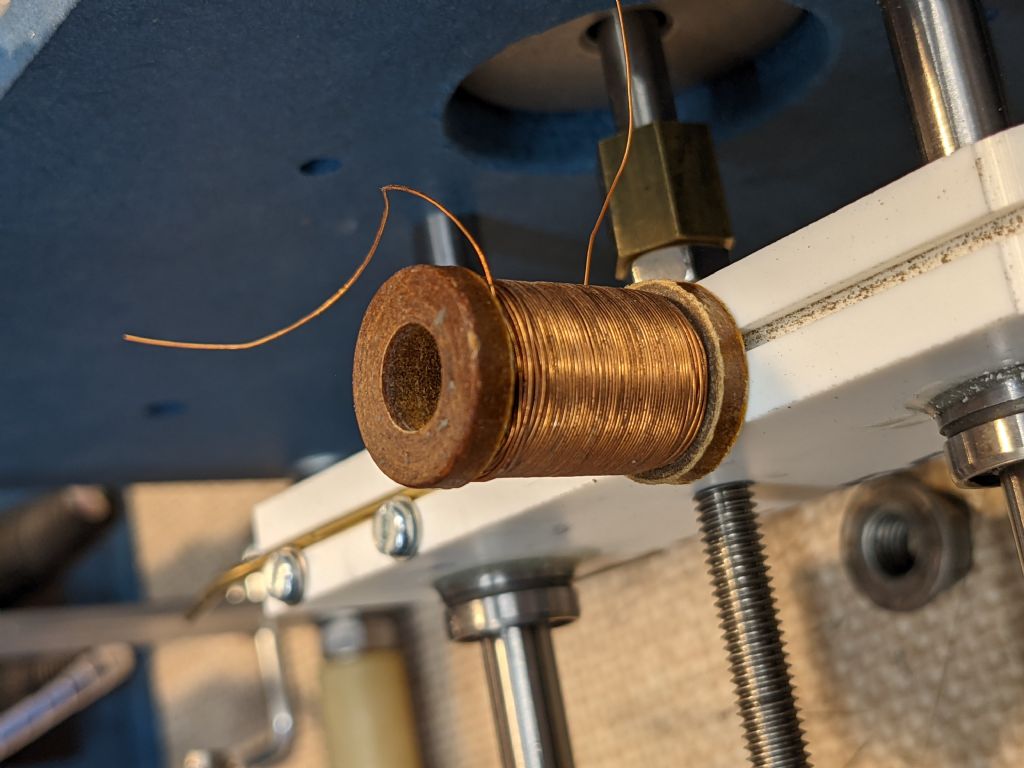
                                  First coil wind completed. Not too bad for 1st attempt. 300 turns of 0.27mm at 60 per layer.

                                  pxl_20210406_111042236.jpg

                                  Bobbin made from a bit of 16 od / 8 id SRBP tube from the scrap box. New phone posts photos on their sides!

                                  So far just typing G code into GRBL Controller app on my phone a line at a time.  First a G91 to select incremental mode.  Then, for one layer the statement is

                                  G01 X18 Z60 F50

                                  For the next layer the same but X-18….and so on.


                                  Edited By John Haine on 06/04/2021 13:17:57

                                  #538410
                                  SillyOldDuffer
                                  Moderator
                                    @sillyoldduffer

                                    I'm impressed!

                                    smiley

                                    #538583
                                    John Haine
                                    Participant
                                      @johnhaine32865

                                      thanks Dave! There were quite a few breakages and pileups before getting this one, still need practice. Now I just need to remember what I needed to wind a coil for…

                                    Viewing 17 posts - 1 through 17 (of 17 total)
                                    • Please log in to reply to this topic. Registering is free and easy using the links on the menu at the top of this page.

                                    Advert

                                    Latest Replies

                                    Viewing 25 topics - 1 through 25 (of 25 total)
                                    Viewing 25 topics - 1 through 25 (of 25 total)

                                    View full reply list.

                                    Advert

                                    Newsletter Sign-up