CNC Lathe Scratch Build
CNC Lathe Scratch Build
Home › Forums › Work In Progress and completed items › CNC Lathe Scratch Build
- This topic has 172 replies, 28 voices, and was last updated 25 August 2022 at 18:08 by
sam sokolik.
-
AuthorPosts
-
26 December 2020 at 05:44 #515458
Joseph Noci 1
Participant@josephnoci1Posted by Neil Lickfold on 25/12/2020 21:57:09:Are you using any wavy bearing springs in your spindle pack at all? Or any spacers between the bearings?
A very nice project. Be interesting to watch the progress. Thanks for sharing what you are doing.
Neil, no springs, etc in the pack, I am not sure what you mean by tween' spacers – If you peruse the (many..!!) photos the assembly may make sense – the bearing cups fit snugly into the rebated bore of the headstock, and are separated by the rebate ( the boring of which in the mill can be seen in some of the photos). The bearing cones , on the spindle, then fit into opposite cups in the conventional manner, with the combined sheave pulley/pre-load nut holding the assembly together. All running in oil. There are oil spinner/flingers at each outer end, with O-ring seals in the outer headstock flanges, also seen in the photos..
I hope I have not missed something obvious in my 'design' here!
Joe
26 December 2020 at 05:56 #515459Neil Lickfold
Participant@neillickfold44316The idea of the wavy springs is to put a preloaded amount of tension onto the bearings, but does leave a small amount of movement with a large load. This is to allow for expansion if something gets hot or cold, the assembly does not jam up. The inner sleeve idea is that the pre tension load is determined by the sleeve length. So you can do up the rear nut holding the pully etc, but are not effecting the bearing preloaded state. Quite often the spindle bearings will come with information on the amount of preload that they should be, and the amount not to exceed. I can't remember what the N value of the springs are, but they use them in a lot of electric motor bearing installations.
26 December 2020 at 06:52 #515460Joseph Noci 1
Participant@josephnoci1Ok, I understand – I have basically followed the same construction as in the headstock on my Emco V10P lathe – and as is, I suppose, in most minilathes with taper roller bearings. The headstock body is a large chunk of aluminium and should help conduct heat away reasonably fast – in any case, the lathe won't be production standard..!
Joe
14 January 2021 at 17:53 #519829Joseph Noci 1
Participant@josephnoci1A lot of work, this 'little' lathe..
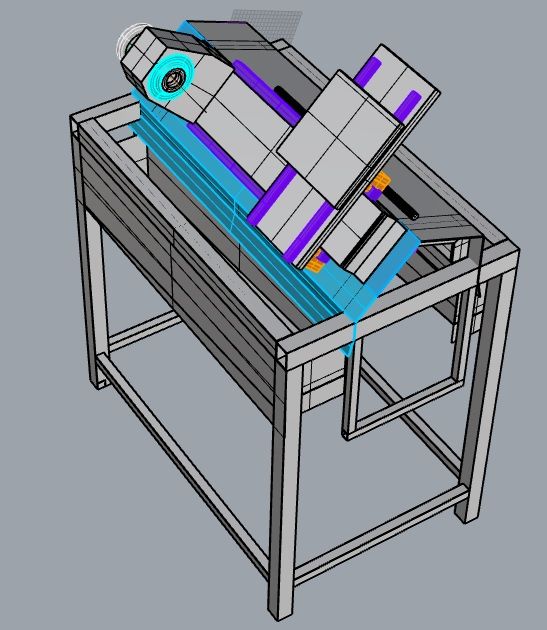
The Base frame as proto'ed in CAD
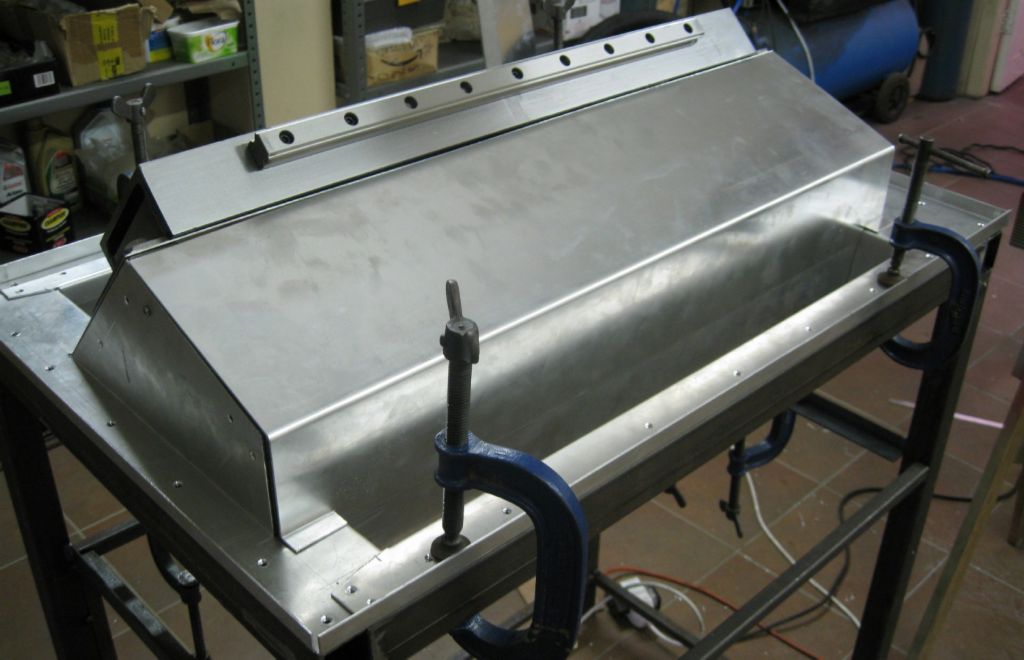
Fair progress made on the base frame and its cladding – base frame became a priority so that I can have it painted and then mount the lathe bed and start on the X and Y axis structures. The lathe bed needs to be in-situ to begin fitting Axis drive motors, etc.
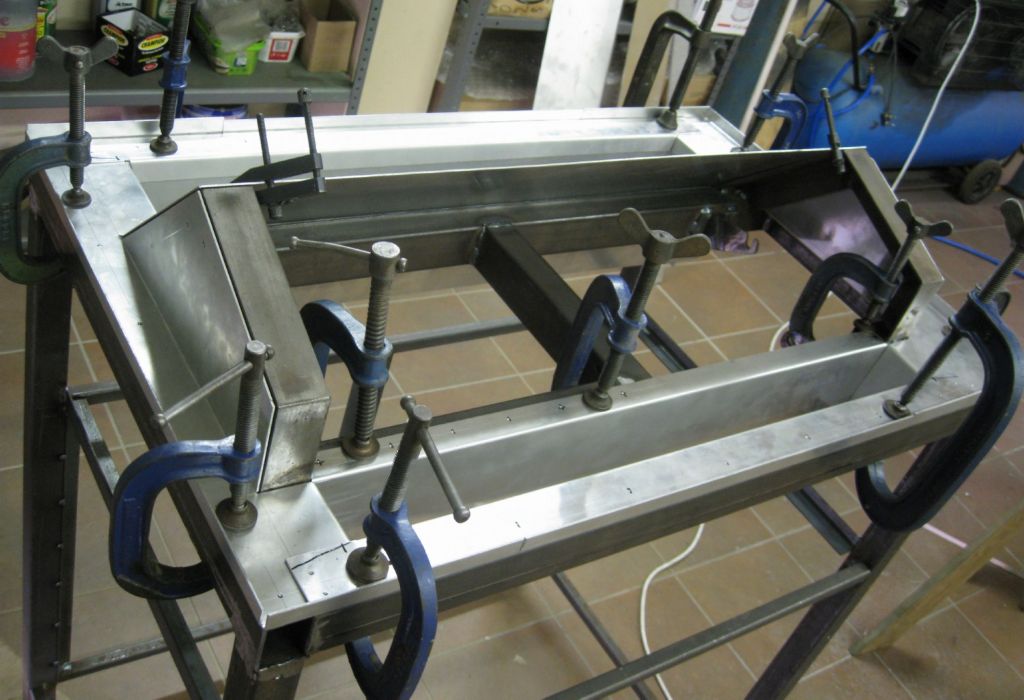
The base frame is made such that fore and aft of the lathe bed are two sluice cavities down which swarf and suds can spill, into a full frame sized tray under the lathe. The tray has a belly pan, leading the suds to an outlet pipe, into the suds tank – all that still to follow in coming months!
The render shows two trays, but that has changed to one big one.
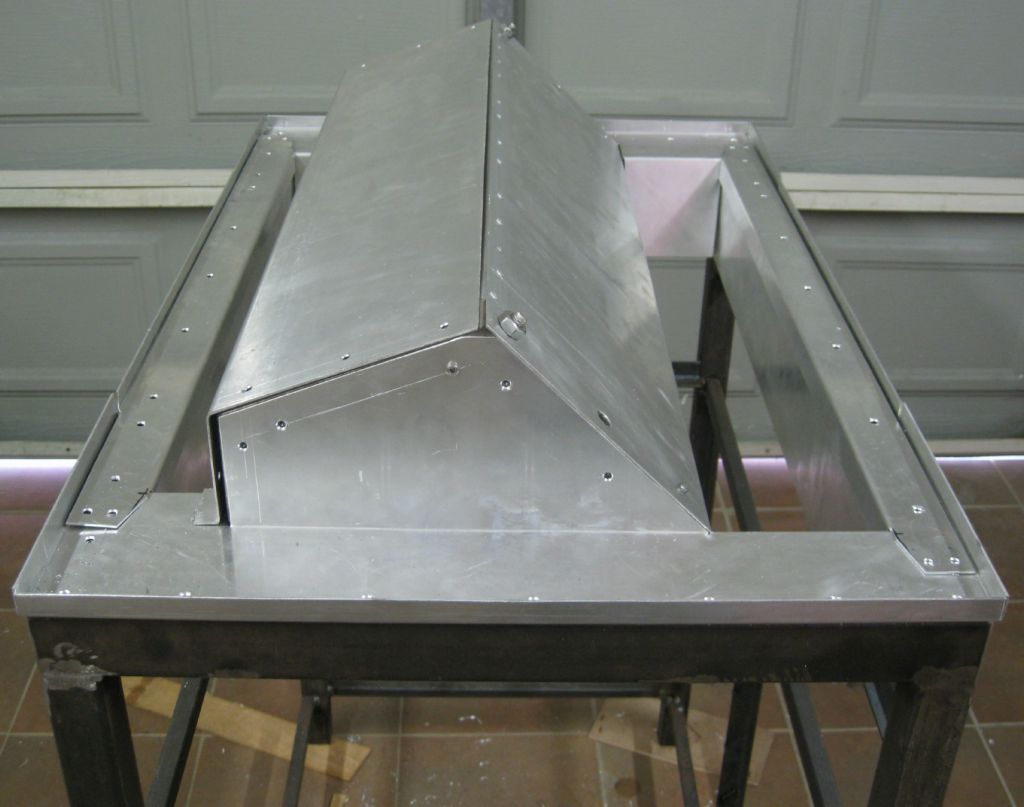
The top aluminium cladding fitment:
Cladding in place – Sluice cavities can be seen below.
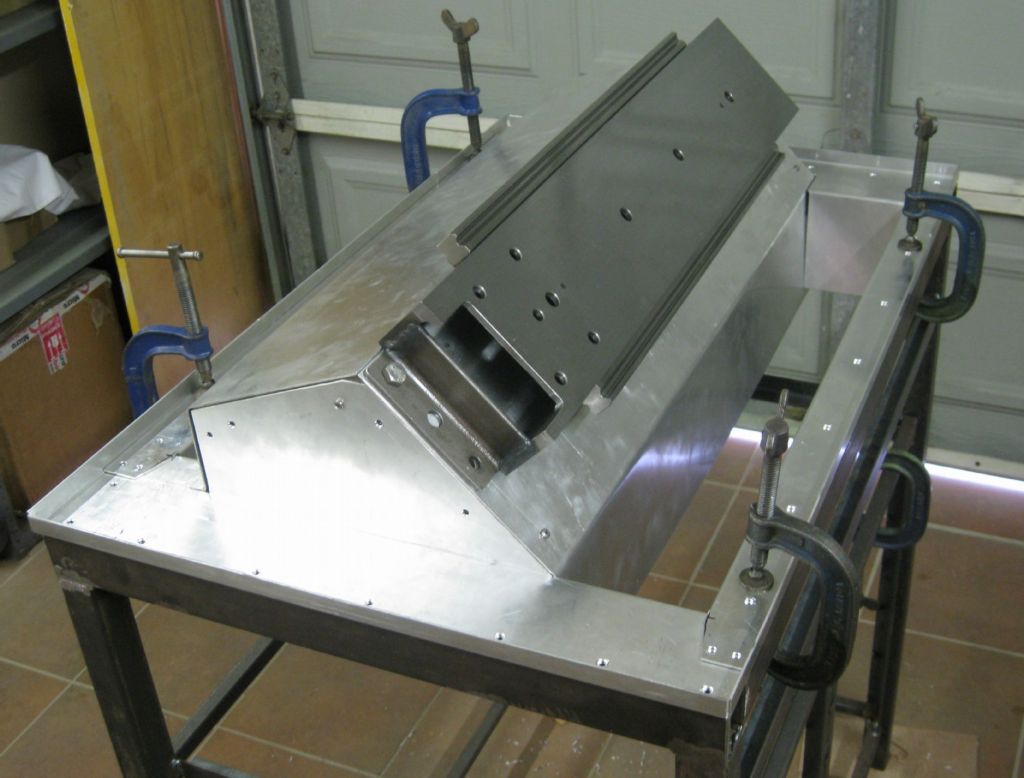
Lathe bed trial placement:
rear View of Bed and base frame.
The frame sides cladding is also complete. Will be fitting and drill all the pop-rivet holes on the weekend. Then a clean up, de-burr and off to the powder coaters..
Joe
30 January 2021 at 13:34 #523683Joseph Noci 1
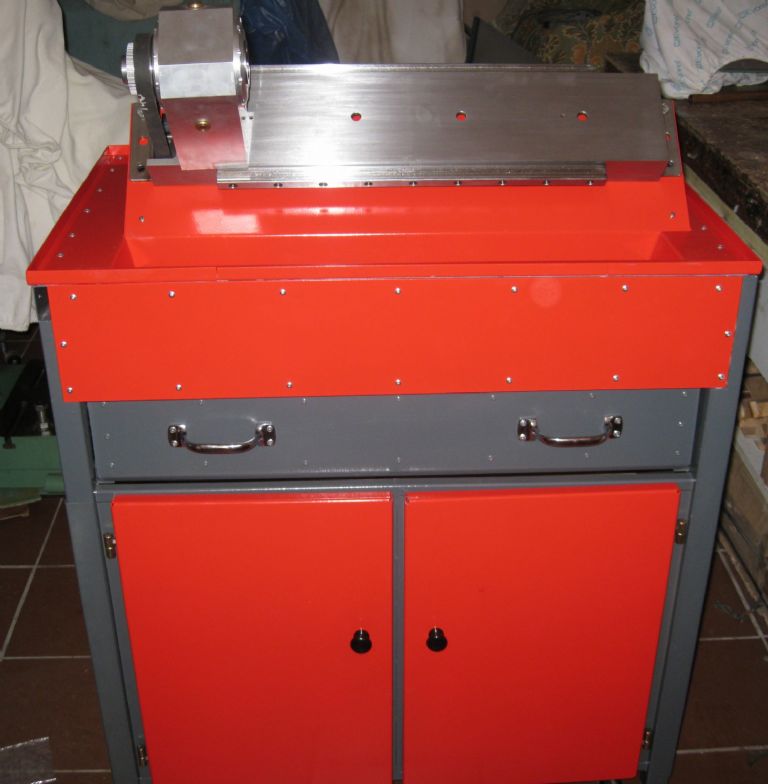
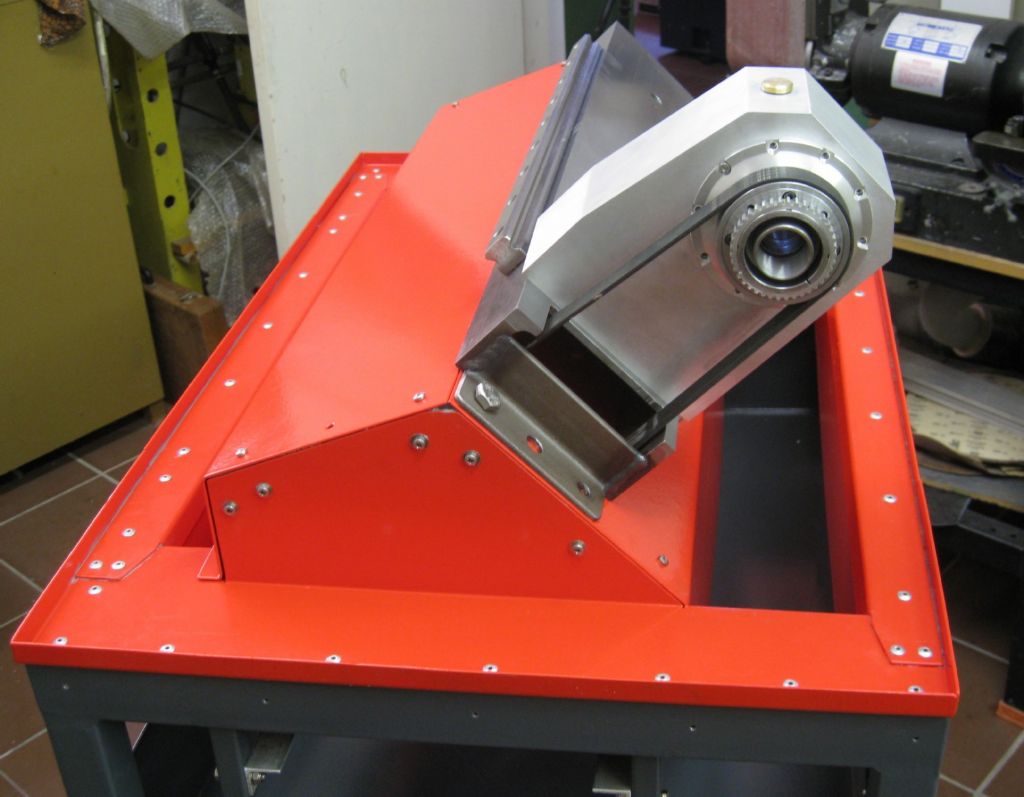
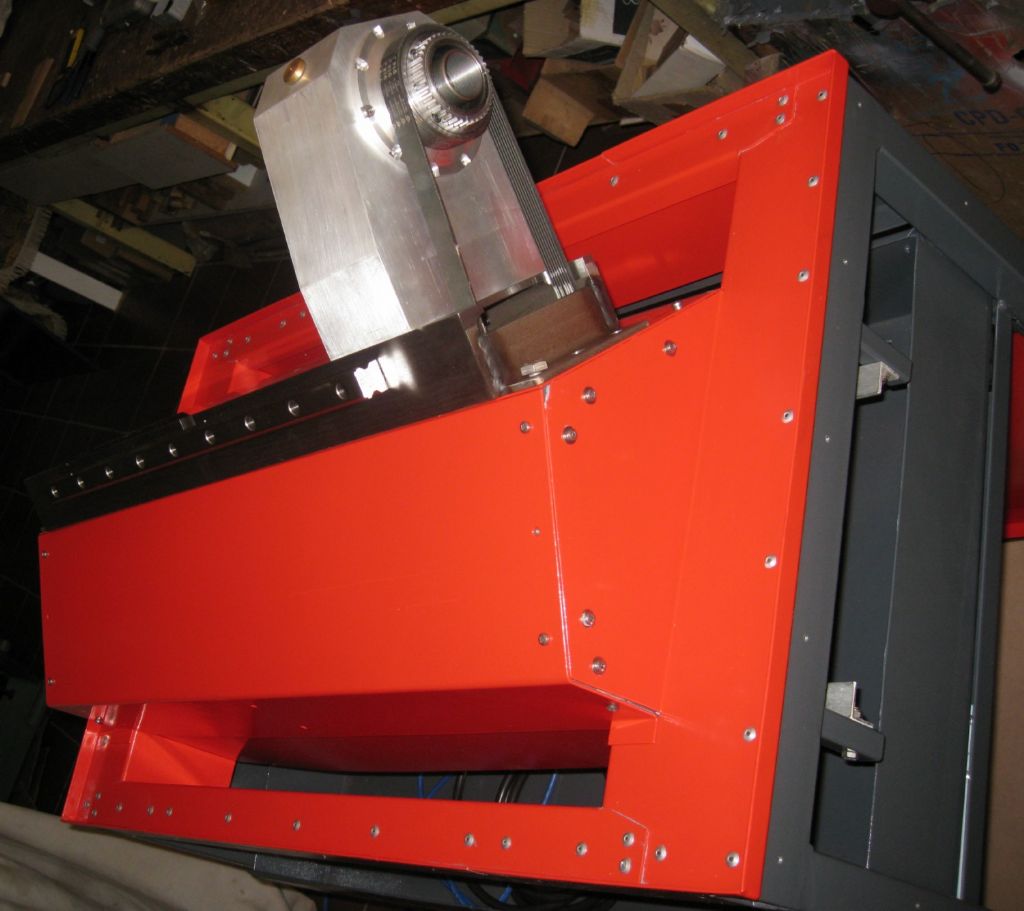
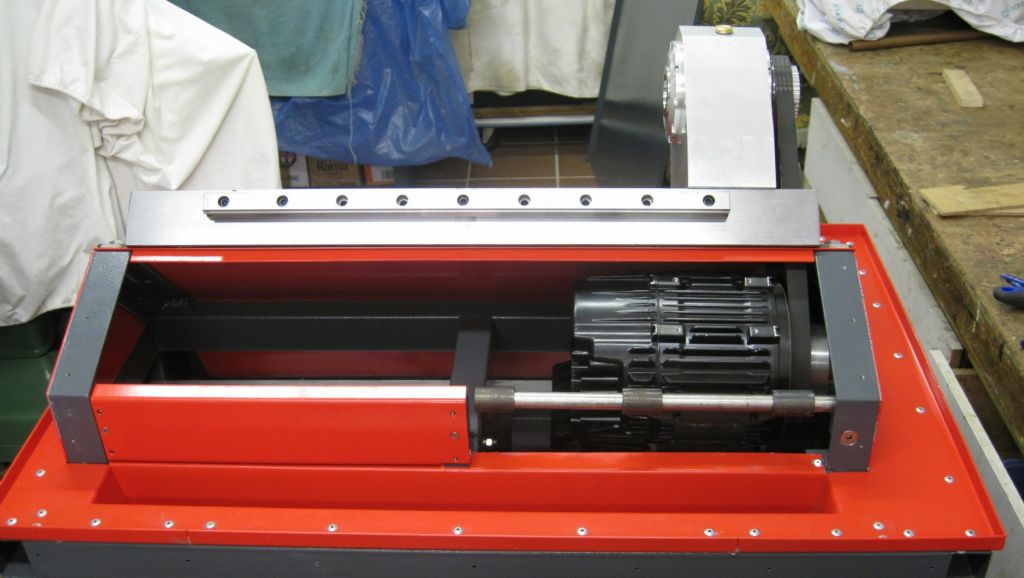
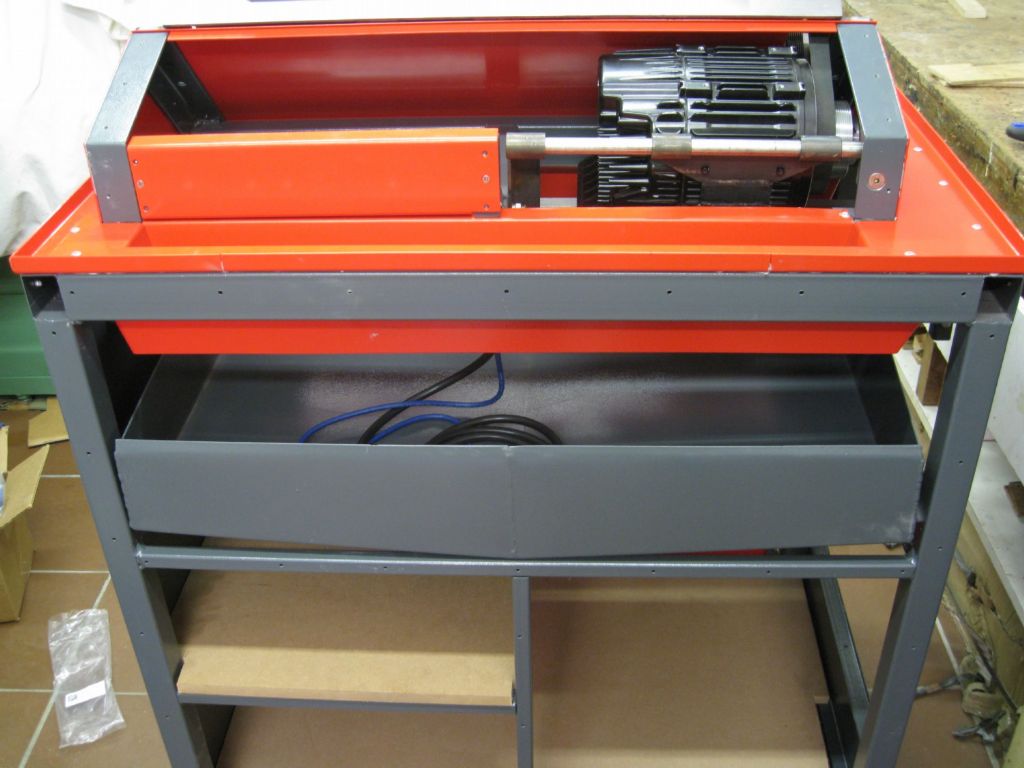
Participant@josephnoci1Lathe Frame and cladding back from powder coating, and part assembled.
Front View:
Lathe bed and headstock fitted.
The Grey horizontal part with the two horizontal handles is the Swarf drawer / coolant drain . The Swarf would be persuaded to go down the forward and rear swarf slots, seen in photos below as does eventual full flood coolant. The drawer has a shaped base to lead coolant to a drain hole, back to the reservoir and pump.
Left side view shows the front swarf slot – about 150mm at the mouth.
The Rear swarf slot, 80mm at the mouth.
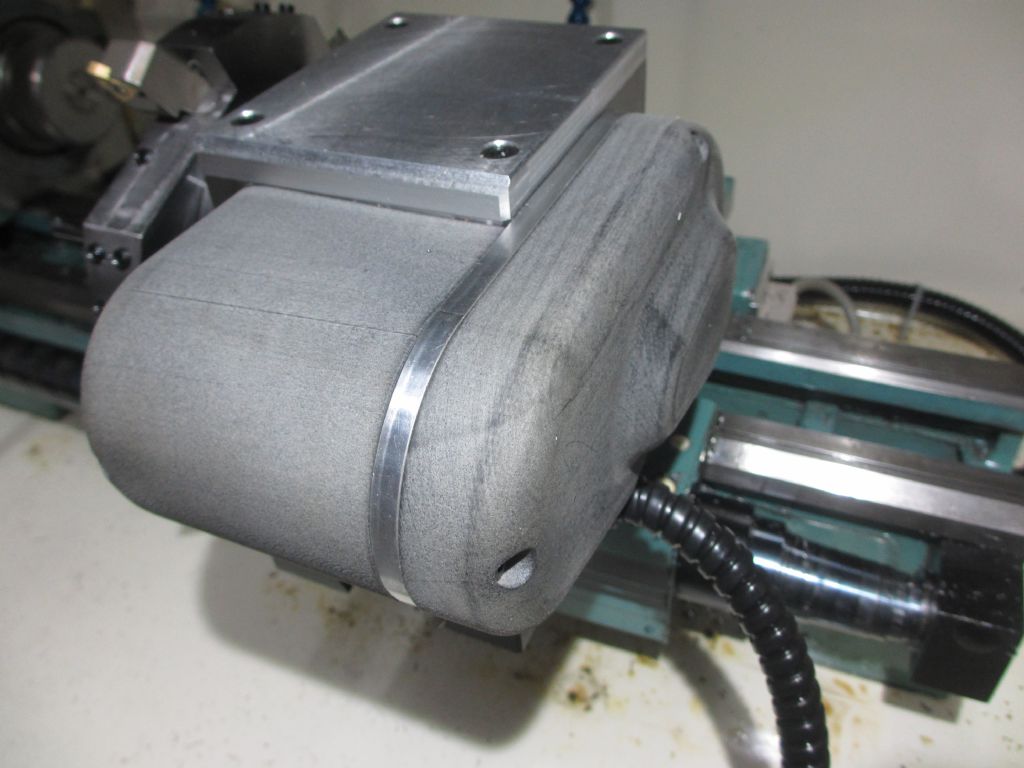
View under rear slant cover showing the Brushless 2KW motor – driven by step/direction pulses, with a 12000 step/rev resolution – will serve as the C axis as well eventually.
View of the rear wall, ( cladding to be fitted still) – shows the swarf drawer and its slope.
Lots to do still – On the cabinets – coolant drain, reservoir, pump, Electrical box and wiring, Upper cabinet sliding enclosure for splash guard,.
Then the lathe itself, at least it now sits on the cabinet, itself on sturdy casters, so I can get to all sides of the lathe and continue with the carriage and cross slide and associated ball screws, etc.
Have got together all the electronic modules (MESA Cards) and a suitable 64Bit mini-PC, with LinuxCNC installed, starting the great adventure with HAL, and the .ini files…Have got that all running and driving my CNC Router as a test bed – LinuxCNC is a whole new game!
Joe
Edited By Joseph Noci 1 on 30/01/2021 13:36:02
14 February 2021 at 20:48 #527334Joseph Noci 1
Participant@josephnoci1Next Installment on the lathe build..
Most of the major part manufacture for the lathe proper is done – some small items left to do – ballscrew to ballnut mating seals, pulley keyway broaching, etc..
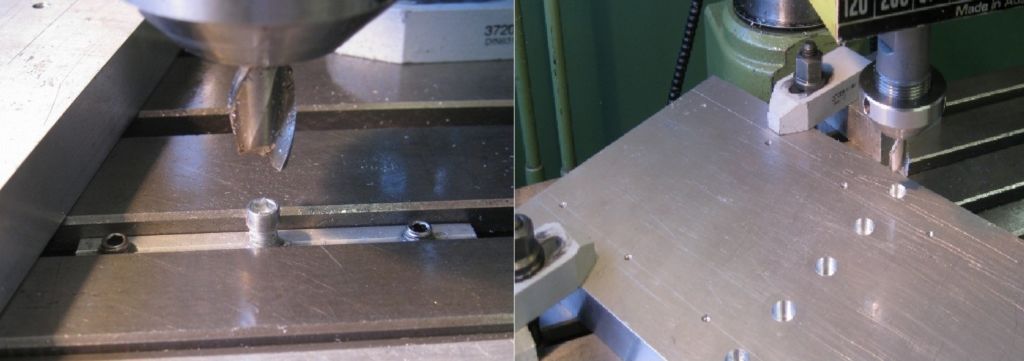
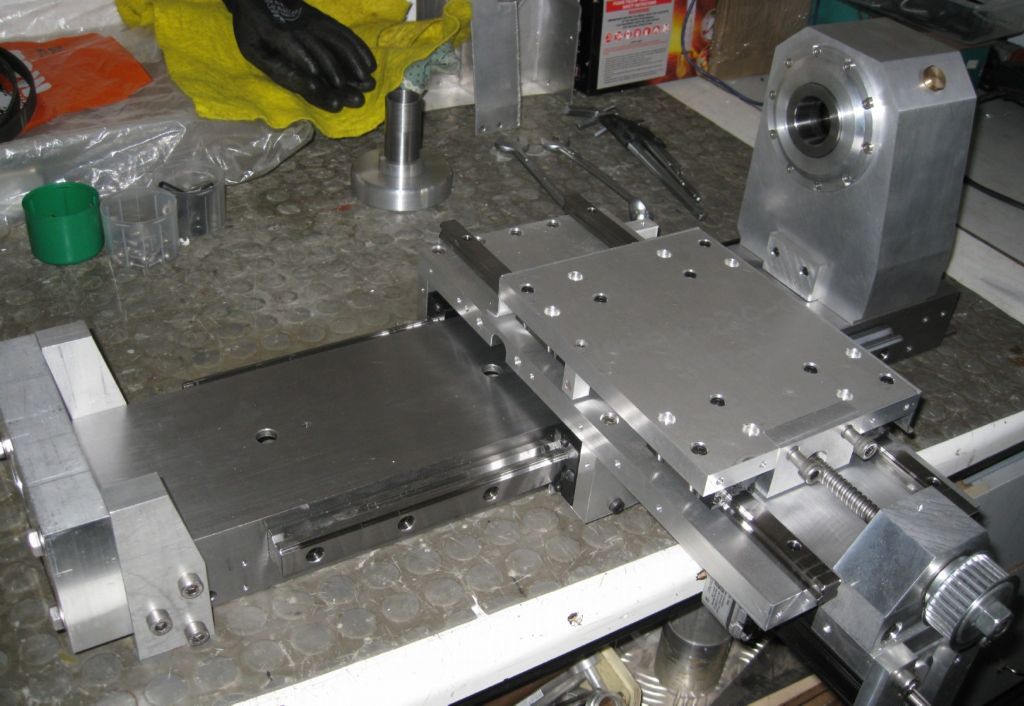
Doing the counterbores on the X axis slide plate / carriage –
Made an under-pin fitting into the mill slot, over which the thru-hole in the carriage plate slips, and then the plate is clamped to the mill table. The endmill, used to counterbore for the capscrew head, is centered over the pin. So, plunge, unscrew clamps, lift plate and slip next hole over pin, clamp and plunge.
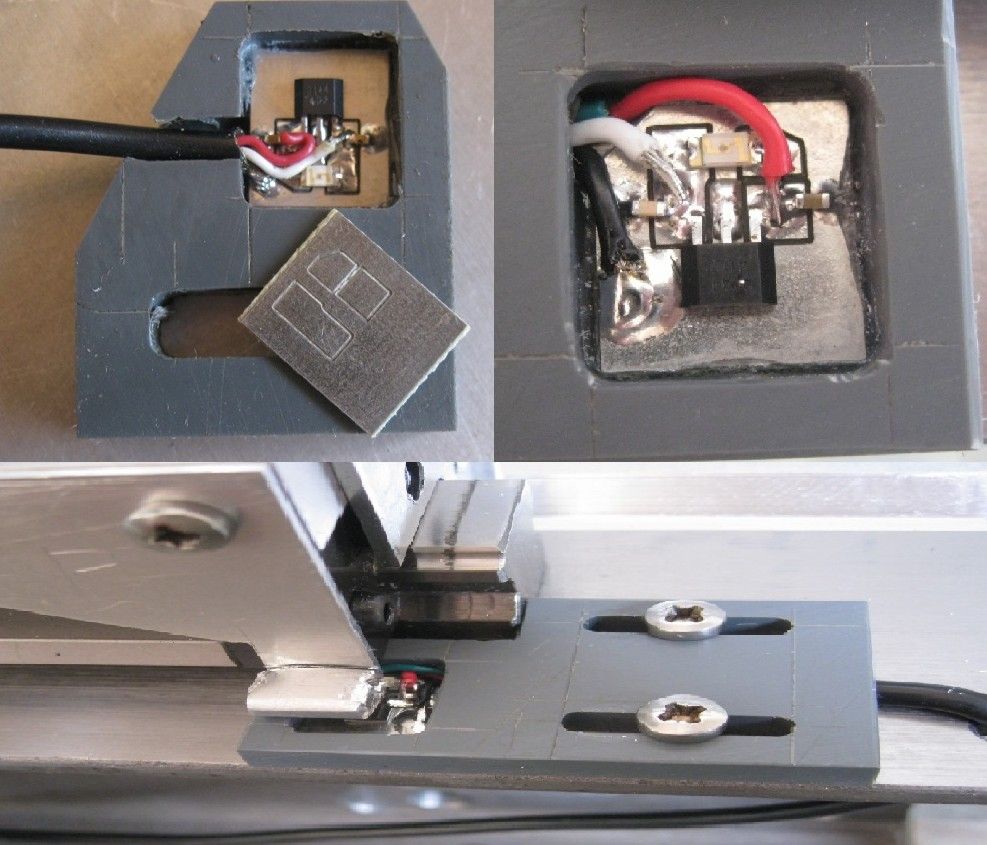
The X and Z axis limit switches where a bit of an issue – all the readily available sensors are rather large – mostly the tubular/cylinder style, and make an unsightly fit – so made up some Hall sensors which work very well, and fit cleanly. – these to be encapsulated in epoxy resin.
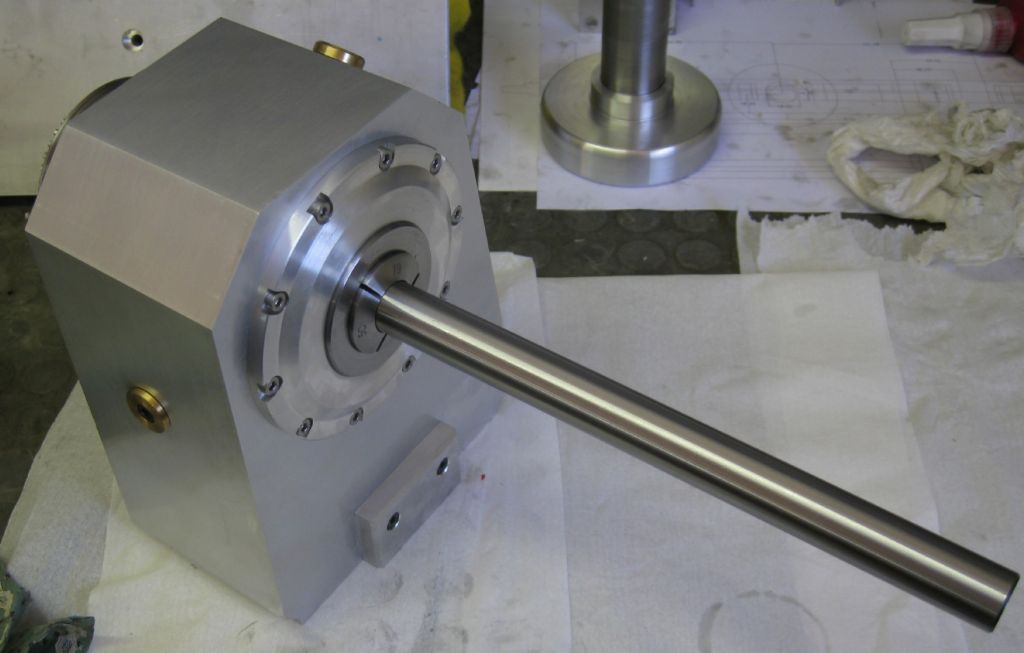
The headstock is all done – pulled the cheap Indian test bearings out and cleaned all parts, inc the final Timken bearings, oiled and assembled – feels soooo smooth!
19mm collet fitted with a 19mm ground test bar fitted to check runout. Bar is 300mm long, 0.005mm runout at collet, .012 at bar end – need to investigate that…
The small square plate at the base of the headstock, below, is the Z axis hard-stop for homing Z.
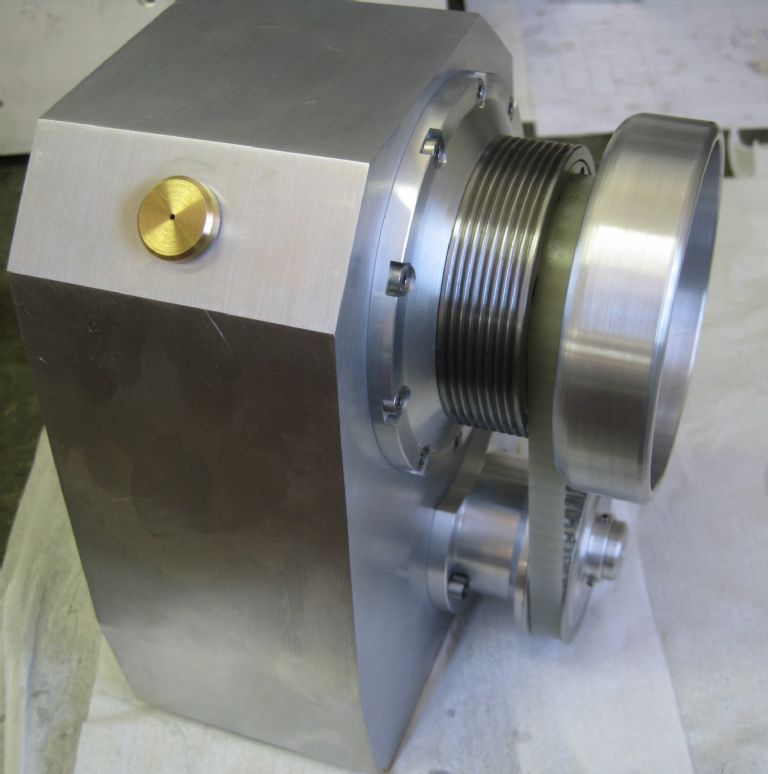
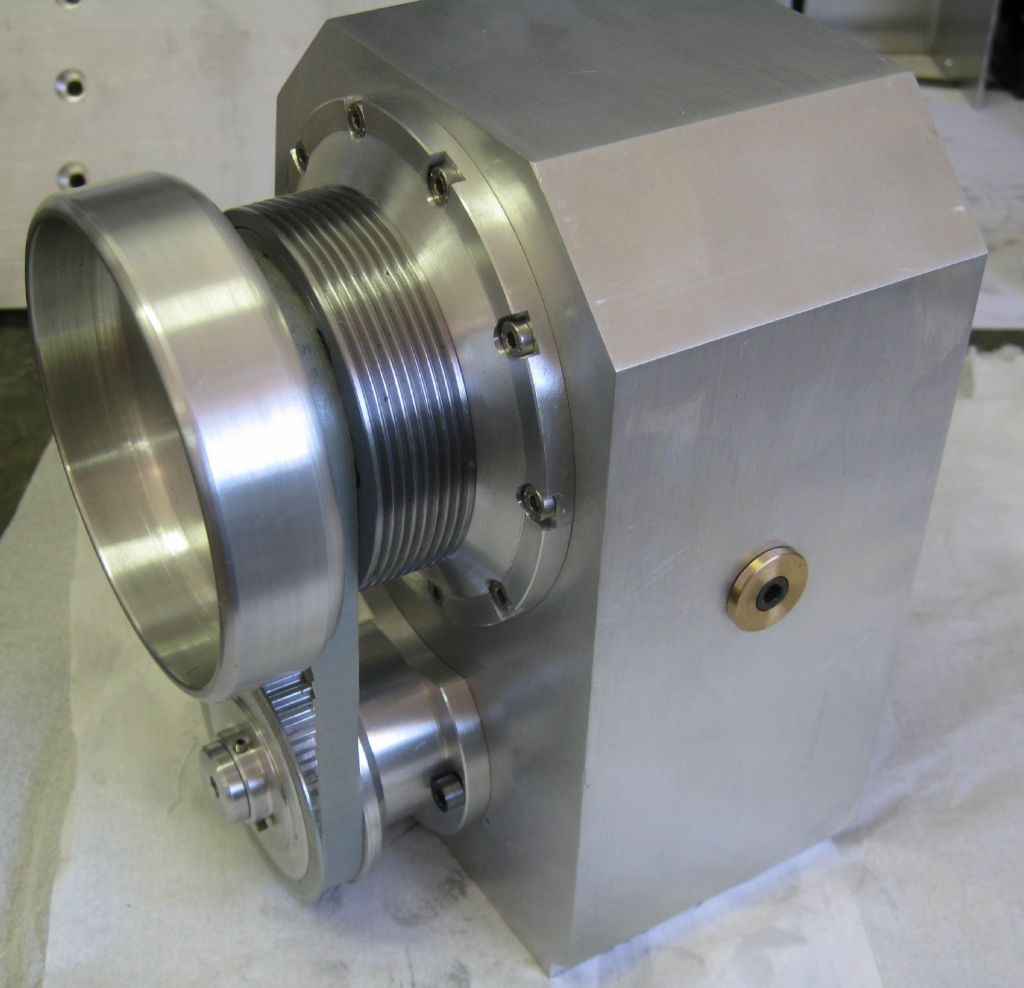
Manual collet closer wheel and drive pulley sheeve. Rotary encoder below
Brass button is oil filler with breather hole
Headstock alignment:
The whole lathe alignment is quite a daunting task.
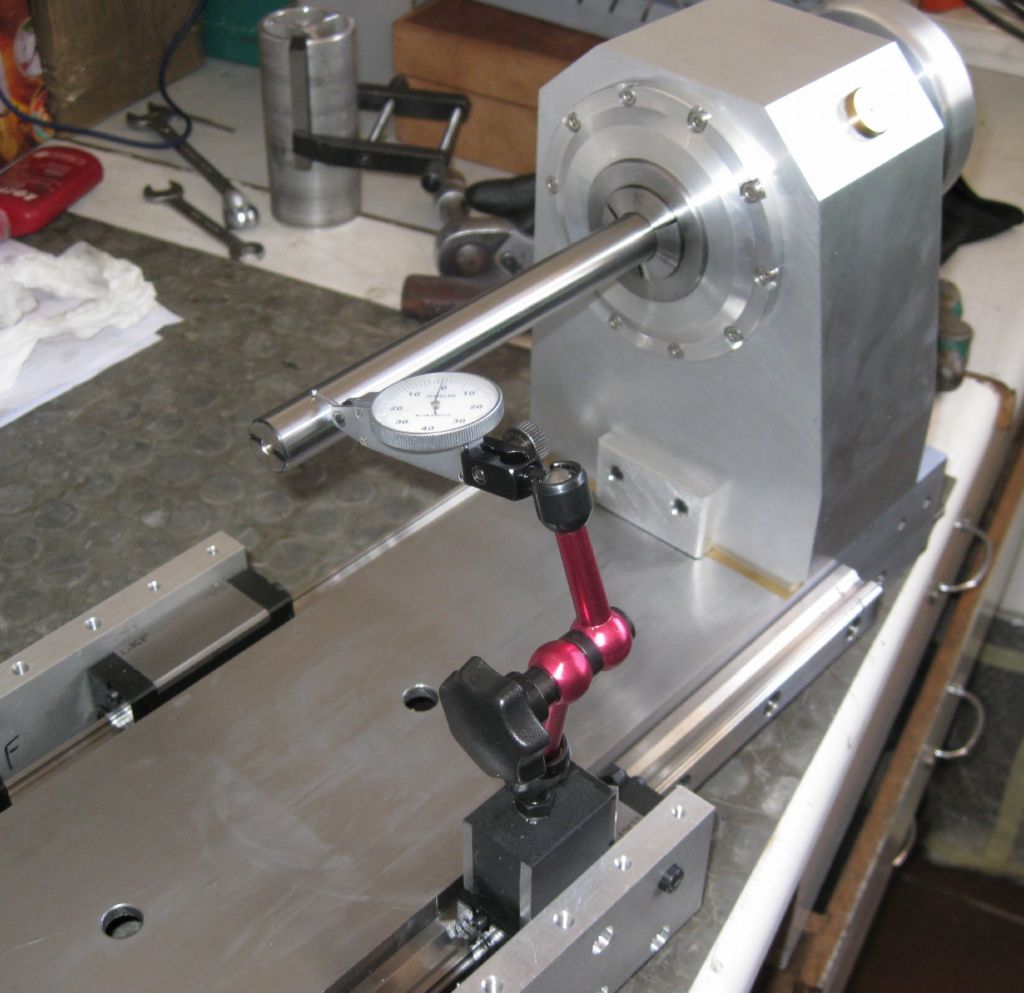
Headstock nod – to bed in Y and Z = using test bar, with an accurate square ( 70mm diameter x 160mm tall Aly bar, squared off at ends) with feeler gauge to test height to bar at collet and test bar end.
Then Z axis slide rails ( front and rear) height to test bar with dial indicator ( as below).
The headstock rotation – using dial indicator on side of test bar and rotate headstock til parallel.
Z slides are parallel to each other to 0.005 / 0.008mm, ie the steel bed width is parallel.
X axis will be done by machining a face and verifying for flatness.
X axis assy fitted and initially squared with headstock face.
More in a week or two..
Joe
Edited By Joseph Noci 1 on 14/02/2021 20:49:22
14 February 2021 at 22:25 #527359 Pete.Participant@pete-2
Very impressive Joe, do you have specific tasks for this when it's finished?
15 February 2021 at 05:48 #527383Joseph Noci 1
Participant@josephnoci1Thank You Pete. The build did not start with any major use in mind – the result is limited to what a 5C collet lathe can do and will only work under full CNC, so cannot even be used as a manual lathe – even with electronic handwheels fitted for X and Z. A six station auto-tool changer is in the design stage as well, and the structure is that of a conventional slant bed CNC lathe – the tool approaches the work from behind the work piece so manual operation is a recipe for a crash! Inverting the X infeed direction in the brain, while ignoring the direction in the eye is not easy!
You, and others, will have noticed by now my 'mechanical engineering' pleasure lies not in the building of models, steam (or otherwise) engines, etc – I enjoy building machines, which make more machines!
The lathe is a huge challenge. The build accuracy is not easy to achieve – my mill(s) are a lot smaller than the major parts of the lathe, so a flat lathe bed is not easy to achieve, etc. Since I am trying for better than 0,005mm on machined parts, aligning the lathe axis and headstock is key, and difficult!
Together with the ATC is intended a full C axis and basic live tooling – a milling spindle that can cut in X or Z axis on the work piece, so some additional mechanical challenges ahead.
And then the control software is another mission – there is no commercial controller and software available to control a Lathe with C axis and live tooling – to qualify, there is, but at major prices, for the big CNC names in industry – many thousands of Pounds! Likewise for the CAM software, which will be another interesting exercise.
The intent for the controller side is to use LinuxCNC and 'make' it work – another big journey! That will be the subject of separate topic of posts in due course!
Hope this rather narrow topic is of interest to more folk on the forums and not just taking up server space!
Joe
15 February 2021 at 08:02 #527388DiogenesII
Participant@diogenesiiPosted by Joseph Noci 1 on 15/02/2021 05:48:13:
…Hope this rather narrow topic is of interest to more folk on the forums and not just taking up server space!
Joe
Definitely not – I guess perhaps like many here, my own workshop practice has it's roots firmly in the century-before-last, and due in part to my own laxity, is anchored there at present due to a lack of detailed understanding of modern control systems & construction methods – so to me, this is essential reading – a guided walk through unfamiliar territory, if you like.
I find myself almost embarrassed at my inability to make informed comment other than bland noises of congratulation, so err too much on the side of that piece of advice that states 'It's better to keep silence and have the world think you a fool than open one's mouth and prove it..', I guess.
Threads like this one, and the 'Adventures with a KX' by JB et al are vitally important if the hobby is to have a widespread appeal and future to those burdened with the increasingly limited space and resources of modern living.
Think it's great, please carry on..
15 February 2021 at 13:38 #527474 Pete.Participant@pete-2
Joe, I completely understand where you're coming from, I enjoy fixing up machinery and old tools as much as I like making stuff, slight ocd forces me to make sure everything is painted and looking nice, some consider the machines and tools a means to an end, and making tools look nice ridiculous, it's a fair point, they are just tools, but I enjoy kitting my workshop out, it's a job in of itself.
I didn't really have much interest in modelling when I joined this forum, but I've convinced myself, when my ocd allows me to stop fixing up old lumps of iron, I might have a go at some modelling, there was a guy building a WW1 artillery gun on this forum, I'm sure you've seen it, sadly he's not posted an update for a while, it's an excellent build, and has inspired me to possibly make something similar in the future.
As with the above post, cnc definitely isn't my area of expertise, your posts are interesting and educational to me also, keep them coming.
15 February 2021 at 18:02 #527555Joseph Noci 1
Participant@josephnoci1Well, I believe in treating my equipment with care and that the machines will then deliver the design performance even after I am gone..
I could never feel comfortable going to make something on a machine that is covered in years of grime, chipped by careless tossing of tools onto it, greasy and messy, etc…I clean most of the gunk off the machine at the end of the day – makes it nice to start again the next day, without trying to dig the machine out the swarf and muck…
Just adds to the pleasure of making stuff!
Anyway, thanks both of you for the encouragement – I tend to get lost in the making, and sometimes wonder if the madness is maybe only mine – would rather not foist that on 'conventional' modellers!
Joe
15 February 2021 at 18:10 #527556SillyOldDuffer
Moderator@sillyolddufferYikes! Joe strikes again. Most impressive.
All I've done today is sharpen a pencil…

Dave
15 February 2021 at 22:19 #527610Roger Best
Participant@rogerbest89007 Super cool – and great progress. Well done.14 March 2021 at 14:34 #533848
Joseph Noci 1
Participant@josephnoci1BEWARE – Very little engineering in this post!
Well, a month later and some more work done – although this has been the mentally taxing part of the project so far..
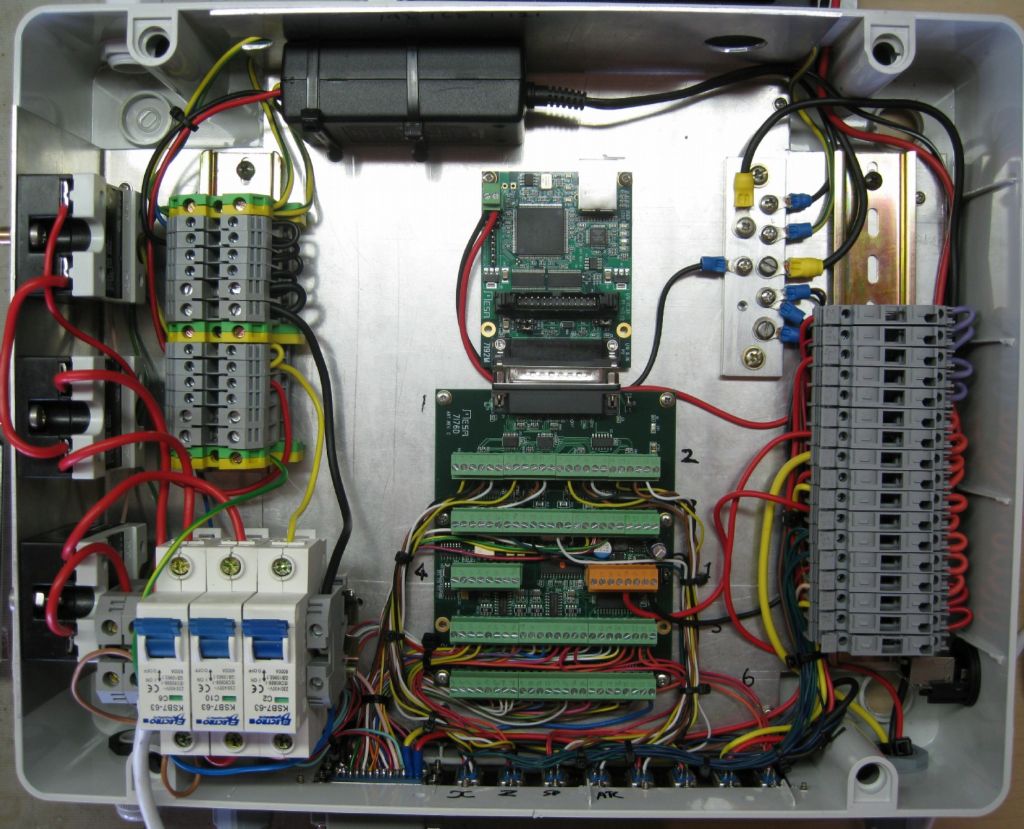
Most of the mechanical work is done – A little bit of metal bashing was done – enclosures for the LCD and Linux computer, Operator control panel, etc, and that was sent of for powder coating and so I had to start the wiring of the whole system – a task I dislike and have been putting of for as long as possible!
There are three brushless servo drives – X axis, Z axis and the main spindle. The axis servos require a power supply – 70VDC@10amps. The main spindle runs off 220VAC. There is also an 8 station ATC – the next project – and a milling Live Tool – the project after that! An operator control panel sits where one would normally grab a lathe's handwheels, with jog wheels, buttons, spindle and axis controls, etc. A mini PC sits with the LCD. LinuxCNC is loaded as this is the only way to go for a lathe with C_axis and live tooling. None of the multitude of other systems ( PlanetCNC, Centroid, Hico_Vital, Eding CNC, and a small handful of even less capable offerings) can do a lathe with C_axis and live tooling.
LinuxCNC, employs I/O cards that do all the Servo pulse generation/interpolation, as well as monitoring all I/O ( limit,home, control switches, jog controls, etc). These cards are made by MESA Electronics in the USA – they make a huge array of cards and enable the automation via LinuxCNC of almost any type of machine – Robot arms, Hexapods, multi axis lathe/mill, etc.
All this makes for wiring nightmare!
So this last month was mostly spent the wiring, which is 'mostly' complete – I am presently busy buzzing out pin-top-pin against my wiring diagrams.
Also over the last two months I have been trying numerous CAM packages – I covered CAM software needs in an earlier post – Since CAM will make or break the lathe's ability to do anything fancy, I spent a LOT of time evaluating various packages – I will discuss that in a topic previously raised on the subject for those interested.
Somer statistics of time on this project;
Mechanical work so far – 518 Hours (!)
Wiring – 78 Hours
CAM software evaluation – 97 hours.
Some photos of the wiring saga:
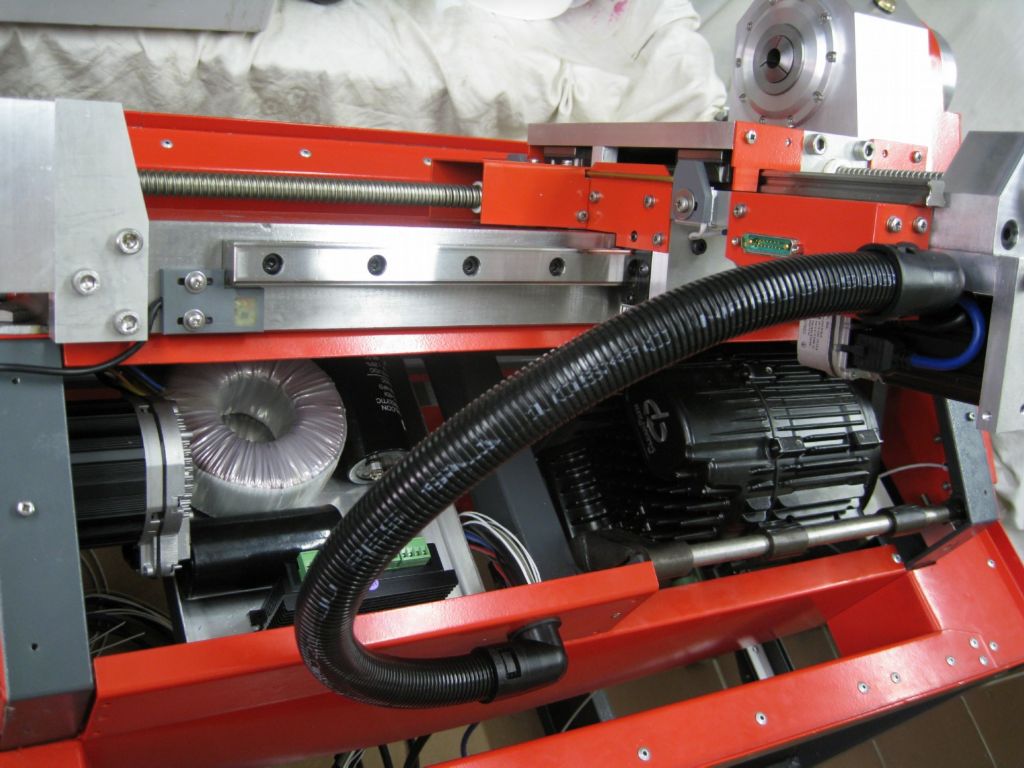
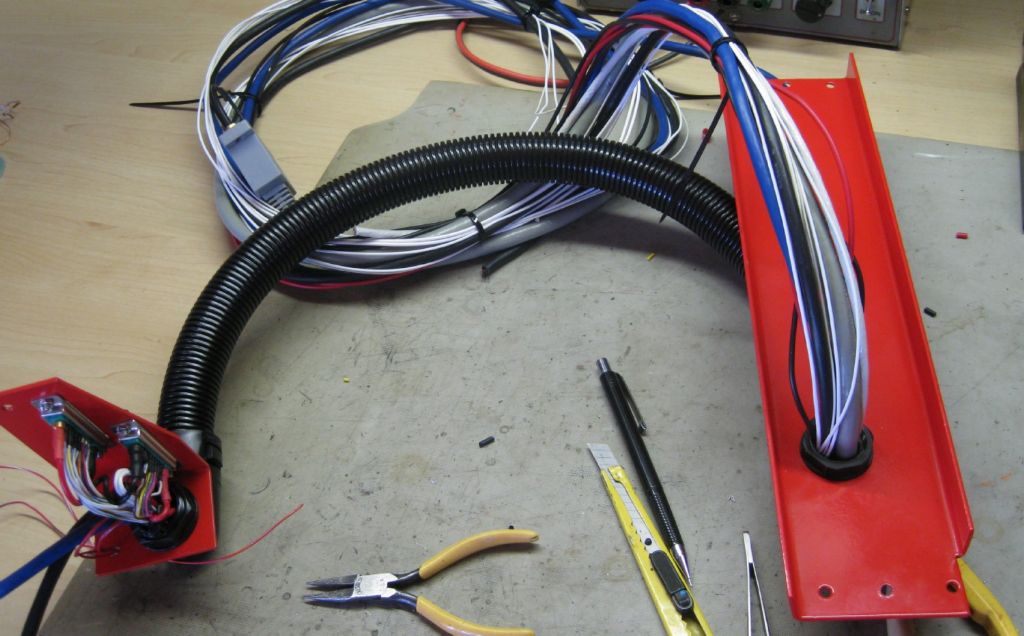
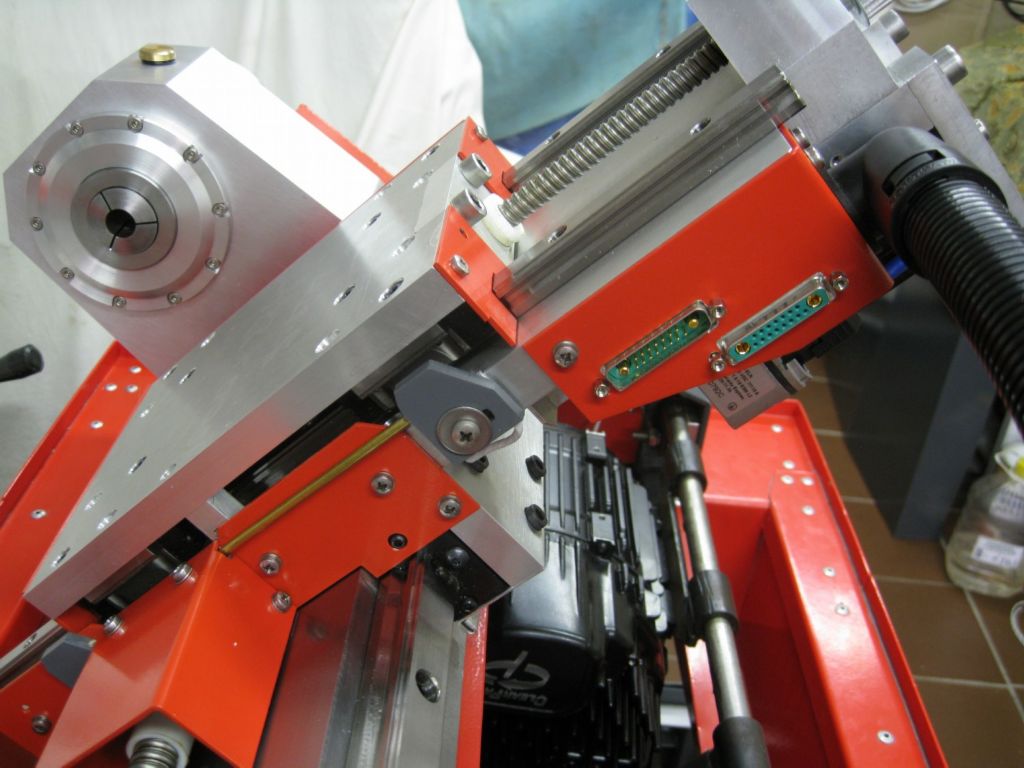
Inside the snake is the Loom to the ATC and Live Tooling connectors on the X axis – carries power and all control signals. Also visible, the power supply feeding the servos and live tooling.
The loom itself:
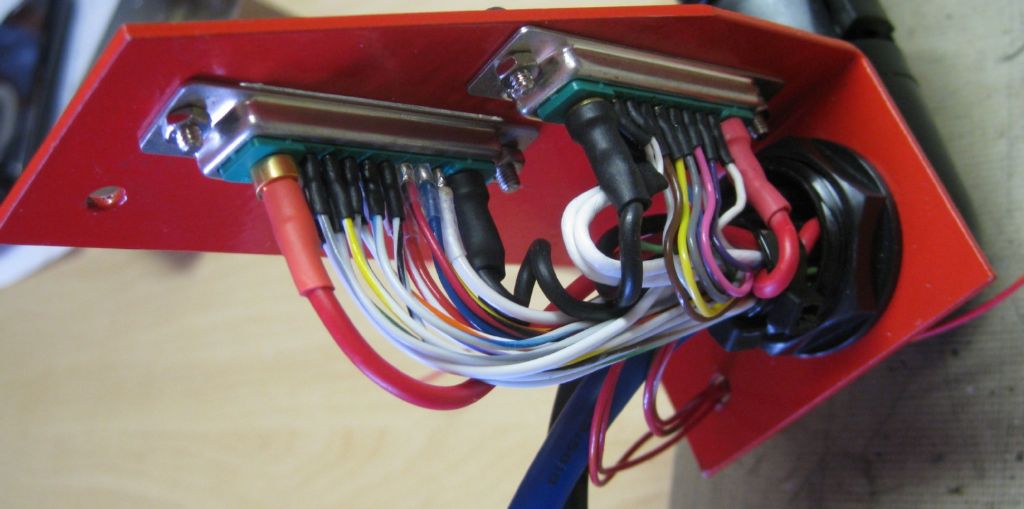
The ATC/Live Tool connectors:
Connectors to the ATC and Live tooling on the X Axis
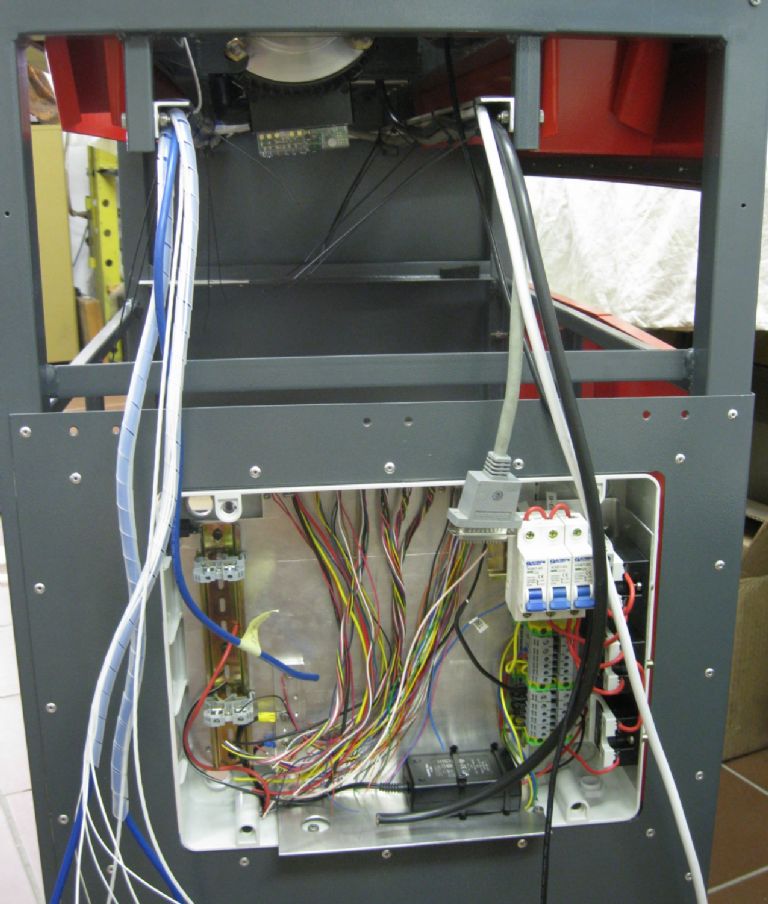
Start of wiring the main Distribution Box..
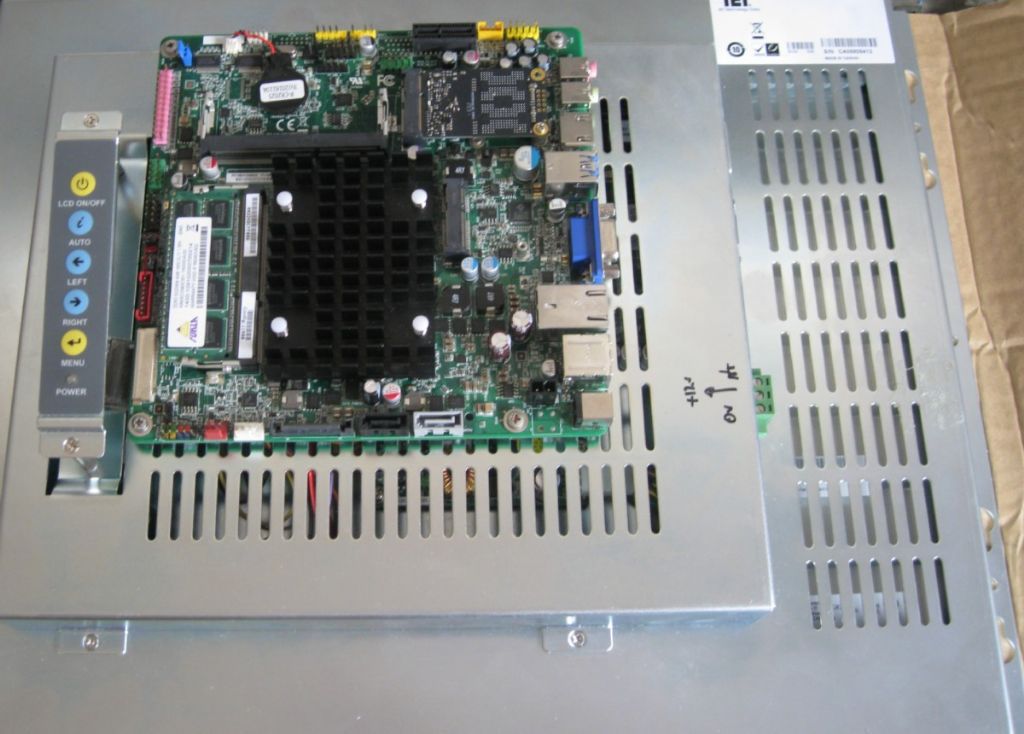
The Mini PC fitted to the rear of the LCD – PC is about 166mm square, 2GHz processor, 4GB ram, 128GB Solid state drive. Connects via ethernet to the MESA controller card
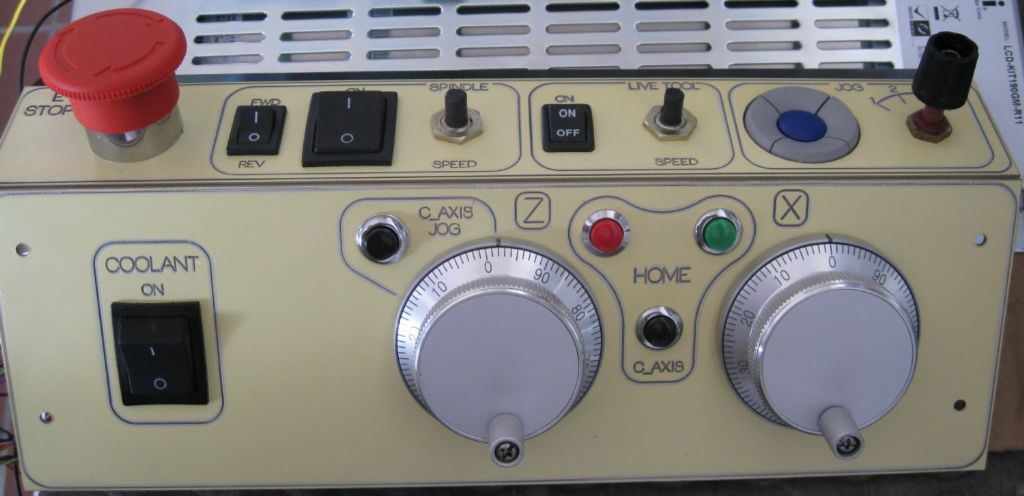
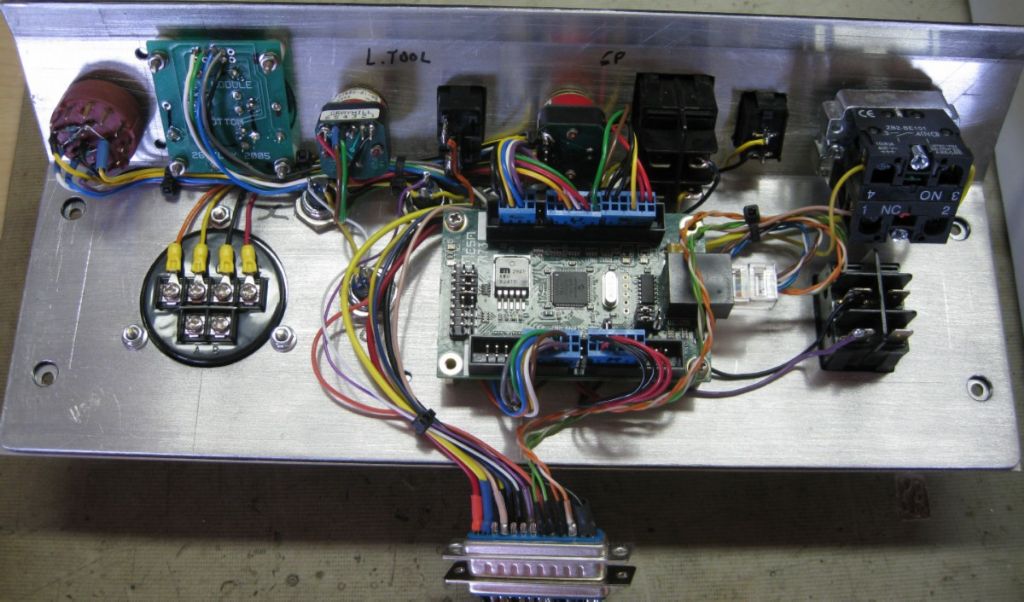
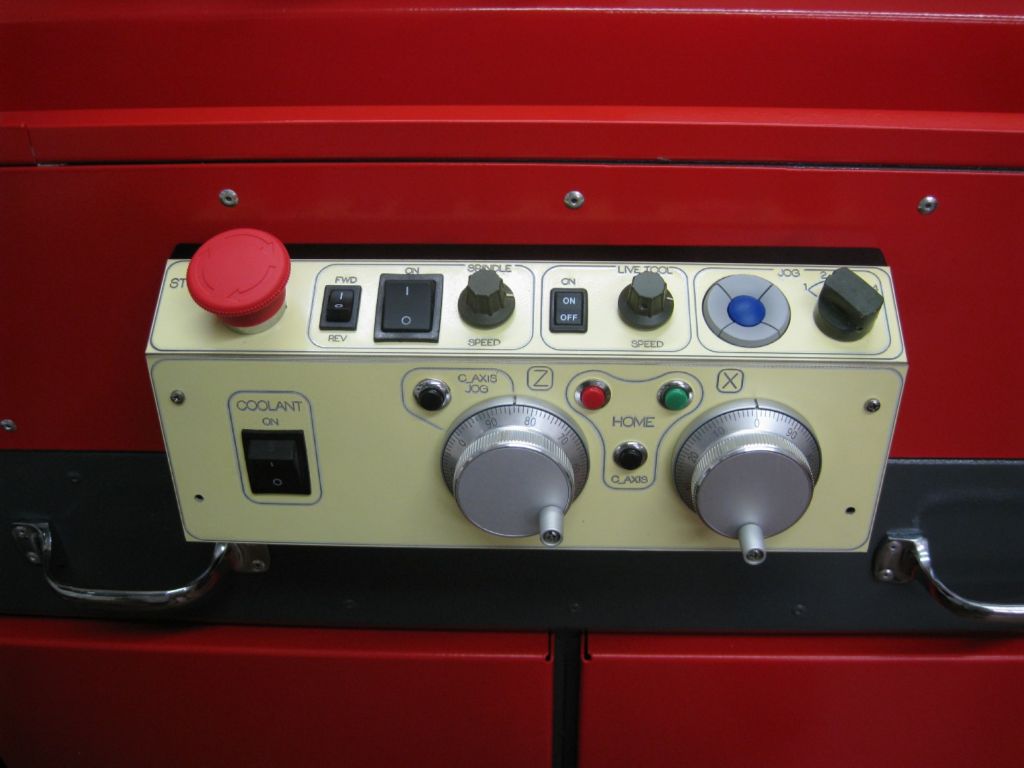
Operator Control Panel ( still short of knobs..)
Distribution Box Wiring 'complete'. The MESA control cards are visible in the central section.
Rear of control panel showing wiring and the MESA 7i73 Module – this module manages all the control panel I/O, jog wheels, etc, and sends the data to the main controller in the distribution box, serially, at 1.2megabaud.
Safety related controls – Spindle/tooling ON/OFF, E-Stop, etc, are wired direct to the main control card in the dist box, or to the Servo and or mains cut for E-Stop.
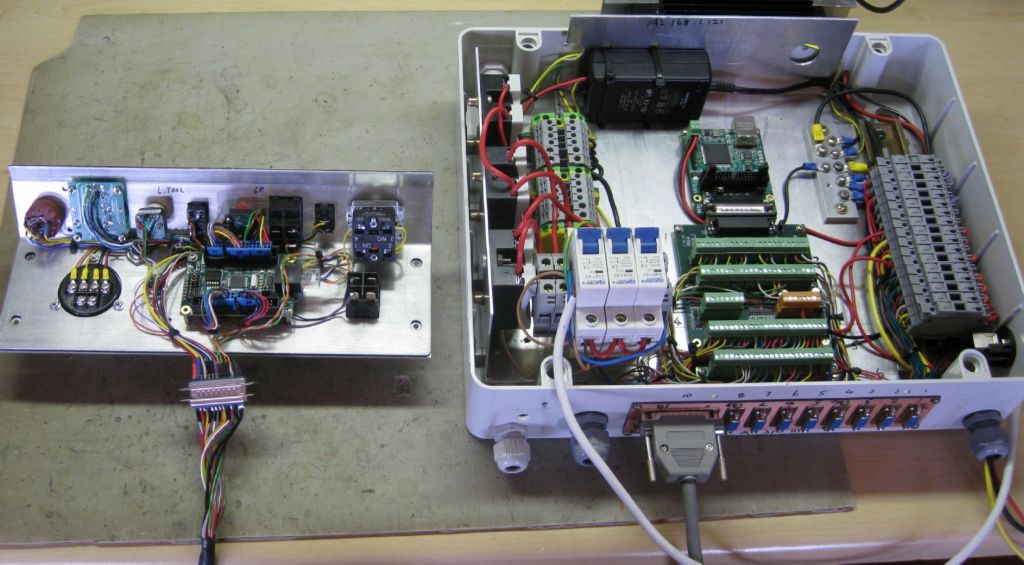
Dist. Box and Control panel connected and checking pin-to-pin wiring..
When the enclosures are back from the coaters I will assemble the display/PC and connect up to the dist box and control panel and then the fun starts trying to understand LinuxCNC and HAL…..
Joe
14 March 2021 at 14:49 #533854Joseph Noci 1
Participant@josephnoci1To add a few more statistics;
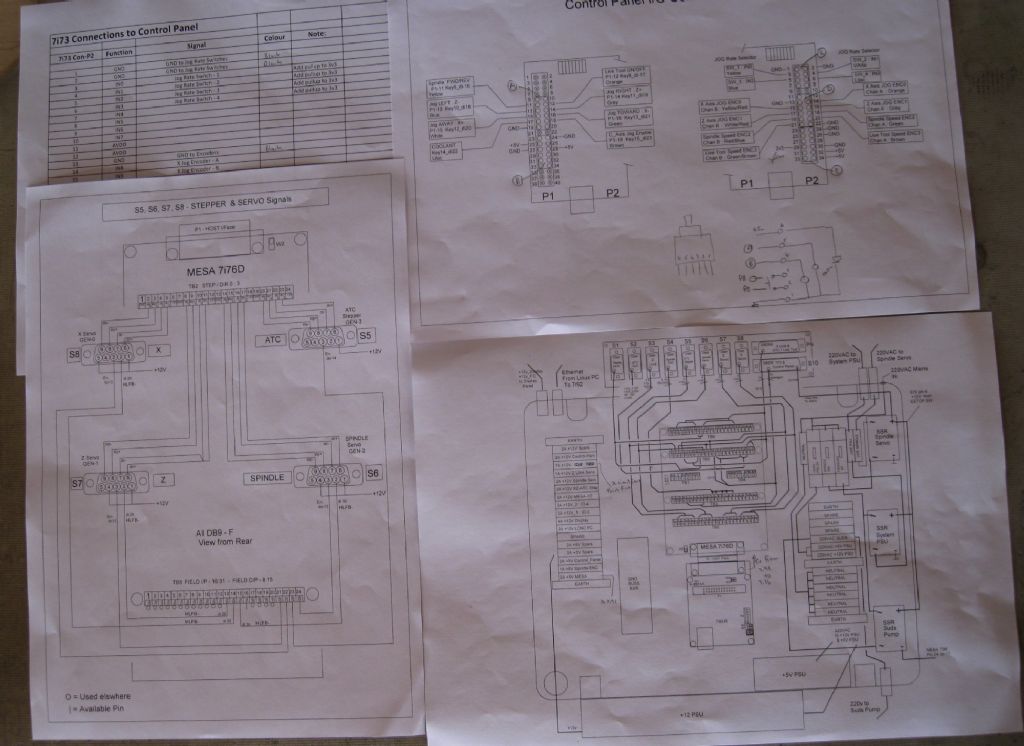
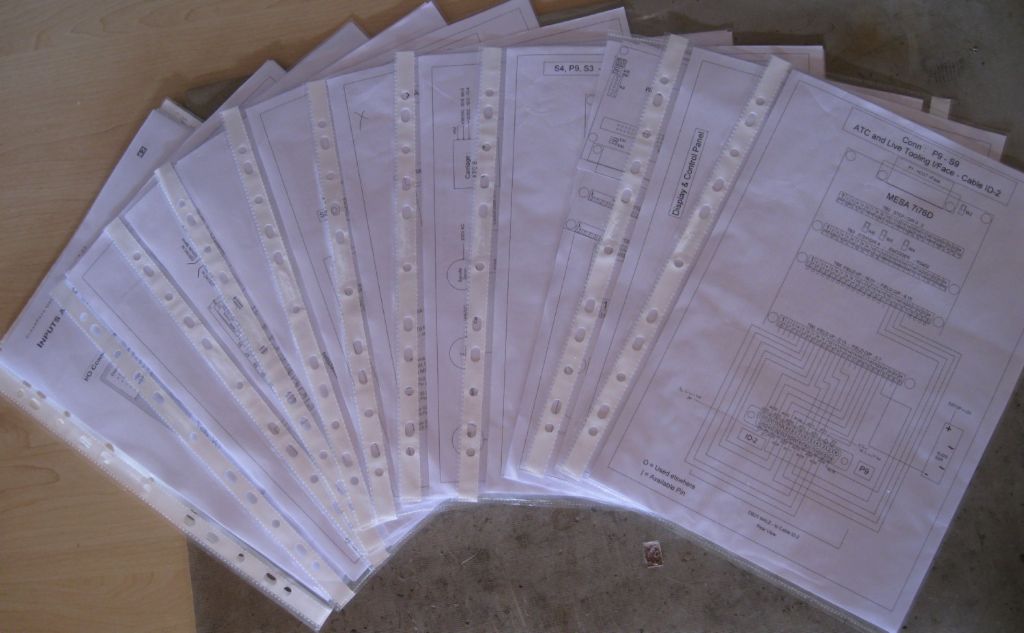
There are 42 detailed wiring and looming diagrams, and 18 detailed, wire colour coded, pin to pin wiring tables.
There are also 67 mechanical drawings and I have a very detailed , representative 3D model of the lathe, and a useful 3D model of the lathe stand.
sample of wiring diagrams and connection pin lists:
I must be nuts…
But I can't stop now..
14 March 2021 at 16:50 #533875Andy Carruthers
Participant@andycarruthers33275What an inspiration Joe
Thank you
18 March 2021 at 10:52 #534580Joseph Noci 1
Participant@josephnoci1Thanks Andy – Still nuts though..
On the mechanical side the 2 items still to be done are the live milling spindle and the ATC carousel – the latter a huge challenge and a lot of work!
All that on hold for a while now though. The current drive is to get LinuxCNC actually driving the lathe as a conventional 2 axis lathe to start with, and that is a massive task for me – LinuxCNC is cryptic and the setup of the HAL file ( Hardware Abstraction Layer) that defines functions ( JOG, stepper signal generations, spindle control, etc), connects those functions to hardware and software, and attaches hardware pins to controller I/O pins, is simply a nightmare for me. The language used and the syntax is like learning an extremely non-intuitive programming language, and simply understanding how all the functions and definition need to tie together is utterly daunting. The LinuxCNC documentation/help manuals are extensive, detailed and confusing in the hoards of info and detail, esp to a person who knows very little to nothing about that world of geeks..
So, if there are any LinuxCNC experts out there, able to help with creation of the HAL file in a fashion that can 'get' me going, please feel free to jump in! ( and if not for free, I am willing to talk on that as well!!)
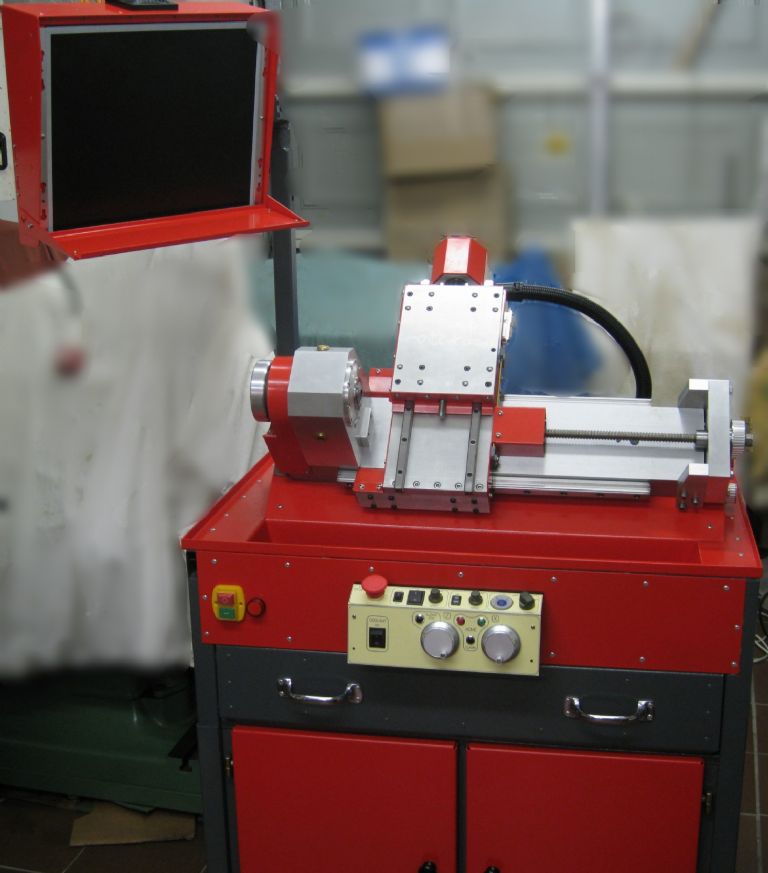
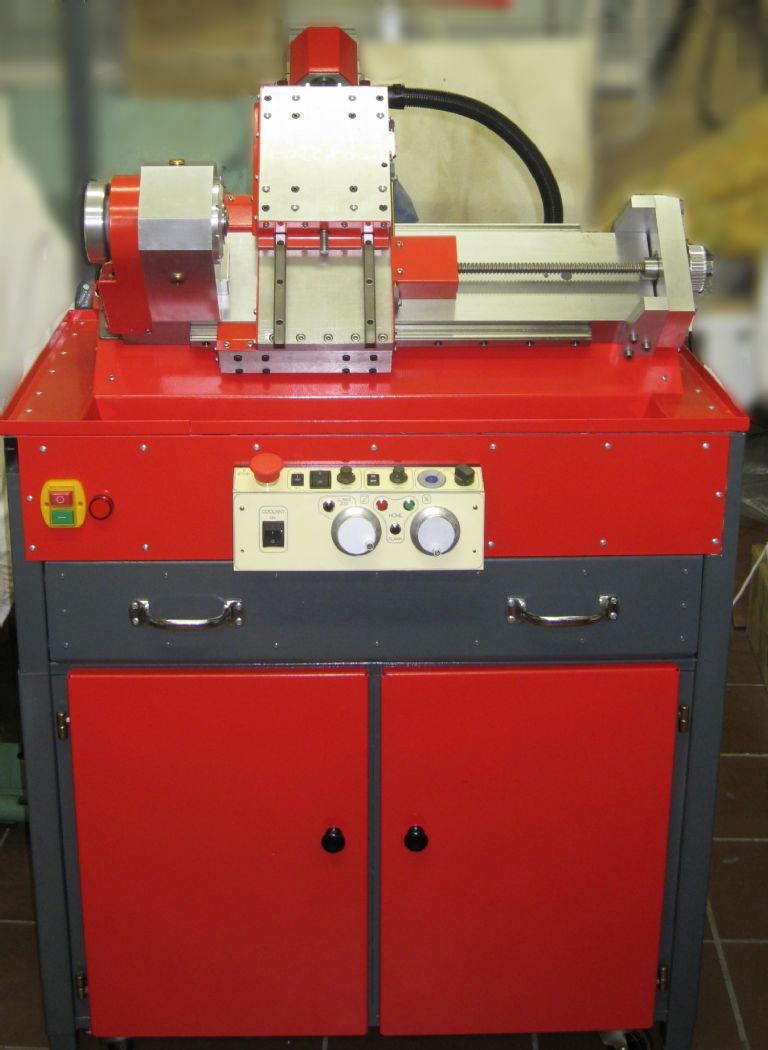
Photos below are now that the machine is in essence together – all mechanics bar the above mentioned are in place, display, computer, etc all done. All the wiring is done, all pins buzzed out, and all controls are seen by LinuxCNC ( HAL_Show) and toggle as required. So now just the HAL file to tie it all together!
Display bezel still not fitted as I need some access still to plug in keyboard and mouse cables..
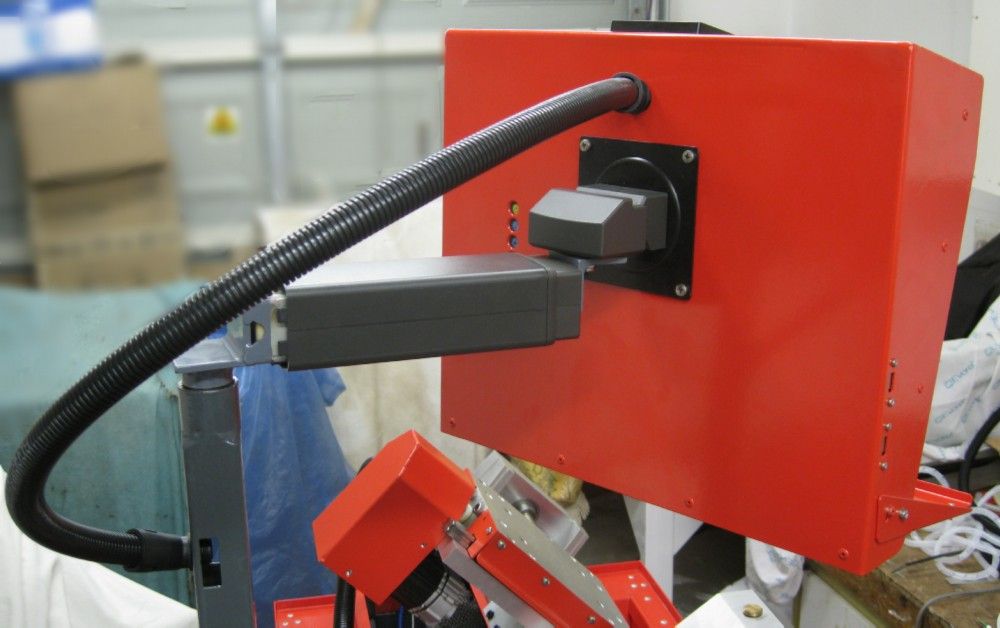
Rear of display – showing the re-purposed LCD desk stand as a support arm
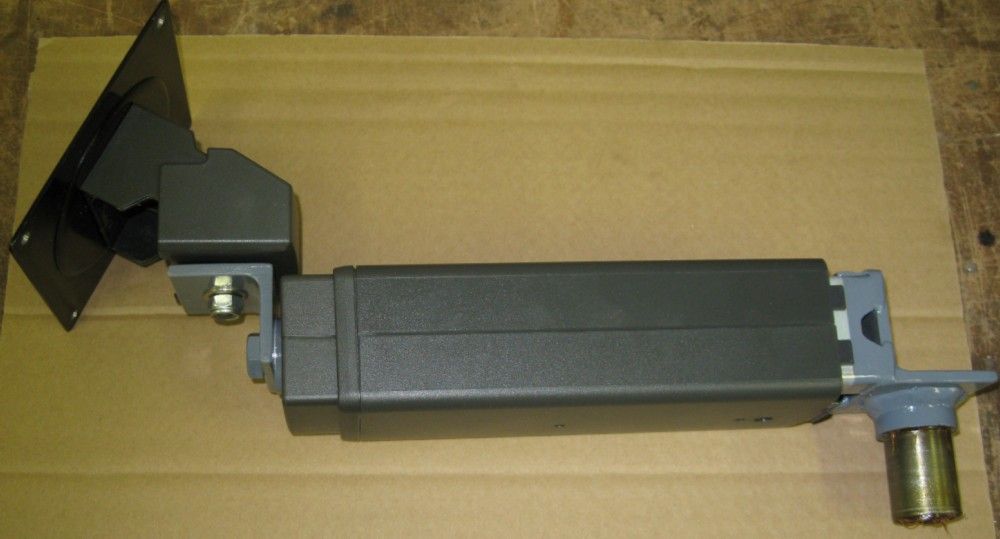
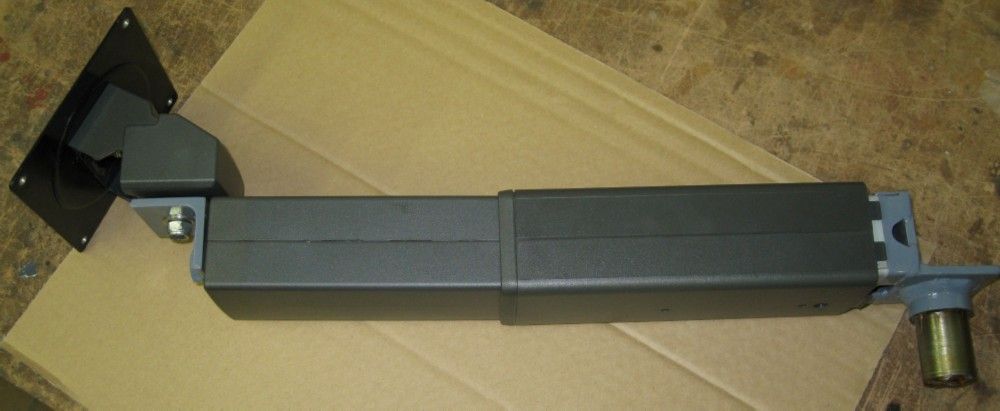
The stand 'bottom' end is now fitted with the rotary joint into the vertical pole, and the stand arm now lies horizontal, extending to the rotary joint now connected to the rear of the display panel. The stand could raise and lower to suit eye height at the desk, and so now extends horizontally instead of vertically, allowing the display to be pulled closer to the operator, or pushed away. The display can be maneuvered left right and all over the place..
The close swivel arm
And extended..
Now off into a huddle with HAL…
Joe
Edited By Joseph Noci 1 on 18/03/2021 10:54:27 – get rid of the darn faces..
Edited By Joseph Noci 1 on 18/03/2021 10:55:16
18 April 2021 at 15:48 #540387Joseph Noci 1
Participant@josephnoci1Have made slow progress.. A few other projects waylaying me as usual. Busy changing the steppers on my CNC mill to Clearpath servos and fitting a new controller – the UCCNC product, which so far looks very good, Will maybe create a thread on the build if there is interest.
But by far the largest contribution to the slow progress has been LinuxCNC…
LinuxCNC has driven me to virtual tears – to the extent that after many posts on the LinuxCNC forums I threw in the towel. LinuxCNC has some 'neat' tools – pncconf one of them, that allows one to run through a set of predefined setup pages, filling in parameters and info, and for a basic 3 axis mill, or 2 axis lathe, with no extras, no rotary axis, or C axis, or tool changers, etc, you most often are left with a LinuxCNC (lcnc from now on!) config which more or less works – that so since there are still issues to deal with such as the spindle VFD, its setup, how it is driven, and a few other things that will still bite you in the backside. And it does, with relish!
In my setup, the lathe requirement is for a C_axis, the spindle motor is also a stepper type drive, ie, step/dir pulse control, not a DC voltage as for a VFD. In a normal lathe with VFD drive, when you take the DC drive voltage – that which controls the spindle motor speed, down to zero instantly, the motor coasts to a halt per the deceleration rate set up in the VFD. In a stepper type drive, lcnc has to decelerate the step pulses itself. And there is no way to set that up simply, ie, via dumb-user configuration tools – so you have to dig into HAL – the Hardware Abstraction Layer. And that is a nightmare. It is a language and a syntax unto itself – variables are named willy-nilly, as you wish, so examples mean little to a befuddled user. I spent weeks and weeks pouring over the documents and user manuals and it is basically useless. It remains Greek to me…If you are an Expert C language coder/programmer, HAL will still mean nothing to you!
Helpful folk would write a paragraph of text with lcnc/HAL stuff in it, implying that is the answer to my woes – it was just so much more Greek – The more I pleaded for real basic assistance the more lost I became, and I gave up. Resigned myself to fitting mach3 onto the lathe a basic 2 axis lathe and basically dumping the whole project!
Then one of the real experts on the forum – A fellow named Andy – felt sorry for me ( I guess..) and said to not give up, so I tried again, and Andy kindly climbed in and has been helping me along.
So far I have a basic 2 axis lathe working nicely – Spindle stepper motor all nicely controlled, etc. No C Axis yet, But Andy is working on that and kindly explaining as we go along.
LinuxCNC is not simple, is not for beginners and only works if you have a very wide geek streek down your back! I would gladly have walked away after what was a very stressful period with lcnc, but for Andy, and for the fact that there is NO other controller solution for a C_Axis CNC lathe with ATC…
My LinxCNC rant for the day – I am sure I am not done boogying yet!
I also make very poor video's – no matter how I try! – The lathes first cut-
**LINK**
So, having sort of recovered from that project-depression, I decide to begin the ATC design, discussed in the following post..Joe
18 April 2021 at 16:23 #540394Joseph Noci 1
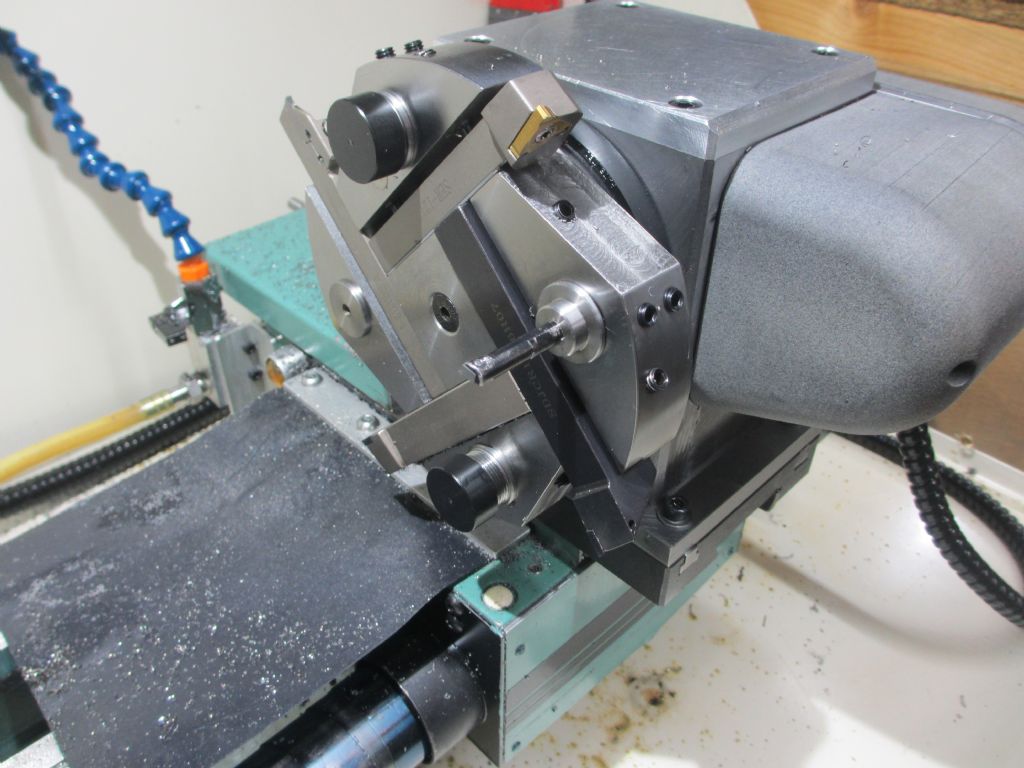
Participant@josephnoci1The ATC design is also a juggle of compromises. How many tools to accommodate, Tool clashes with headstock, chucks, etc, choice of inverted or conventional-up tip tooling, etc. Then of course how the changer will actually work – I have not got my head around that part yet!
There are many articles on the internet of DIY ATC's for a lathe, but I fear most of them are, in my humble opinion, simply a hack. The way they are machined, the accuracy of positioning and placement of tooling can only mean misalignment with the spindle axis at the best. I am not sure at all of the route to follow – The positioning and locking mechanism has not a simple solution – it must locate accurately, must lock firmly, have no play which will promote tool chatter, etc.
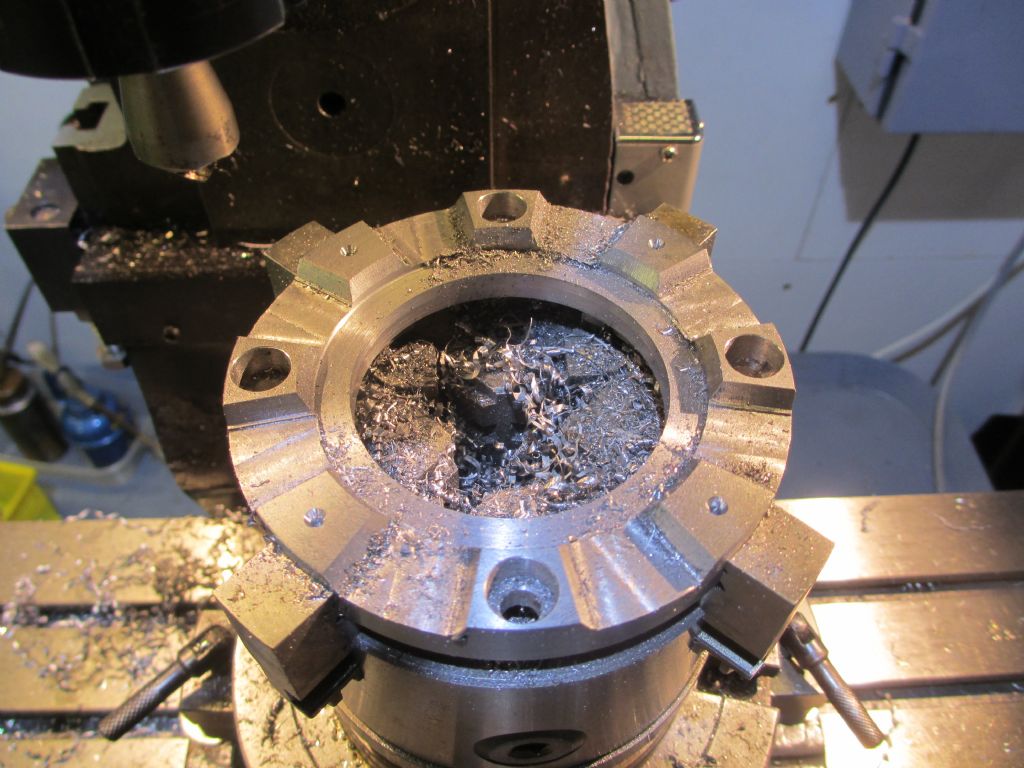
So I started with the simple part – the tool plate..
I decided on 8 tool stations, 4 of lathe cutters – normal facing/roughing/profiling tips, as well as threading, grooving and parting tips, and 4 stations to accommodate drill bits, centre drills, boring bars and internal threading tips.
I looked at MANY ATC's out there…
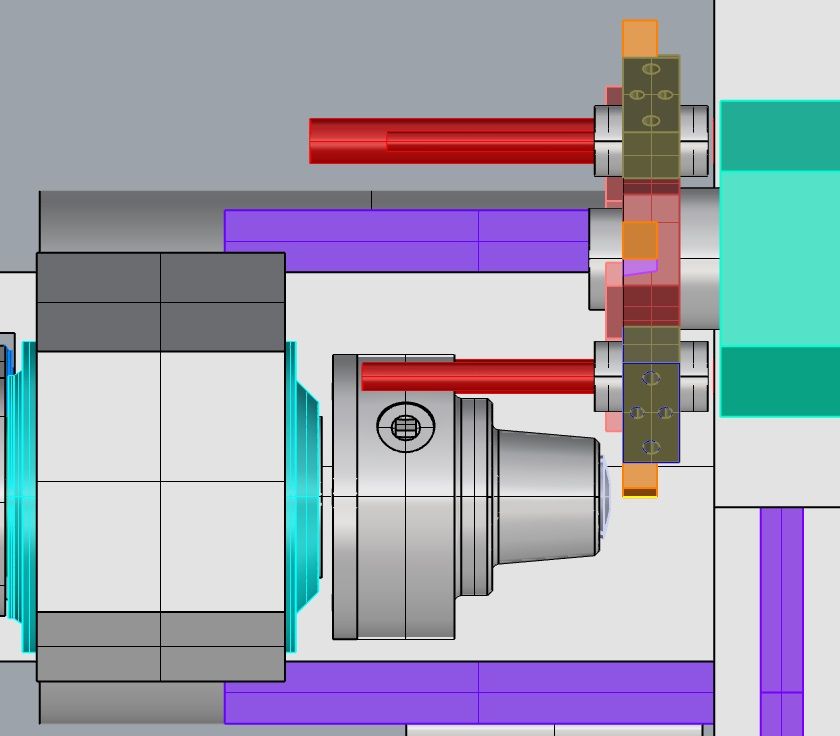
One of the big issues with tool placement and tool plate size, or rather , diameter, is the potential of a crash of axial tools ( boring bars, etc) with the headstock and chuck. Since my lathe has no chuck, that problem went away around the corner, and like LinuxCNC, came around the other way and bit me in the backside! The 5C collet spindle is almost flush with the headstock face, so there is no elongated space for the axial tools to flail about within..They will smack the headstock. The only way to prevent that is to have an axial tool placement radius of nearly 170mm, ie, a tool-plate diameter of more that 340mm – That's Big Haas lathe territory!
Headstock with no room for axial tool bypass..
On top of it, the current spindle implementation leaks oil and all my modifications to the oil well, the labyrinth seals, oil level, etc, have been wasted – it still leaks unacceptably.
So, a new spindle is in the works, with a trial taking place with greased bearings to see how they do for 20minutes at 4000 rpm, etc, etc….And the new spindle will be fitted with a 4inch OD, 5C collet chuck from Bison-Bial..
The design of the tool-plate is now a lot simpler, and has worked out nicely. I need to now work on the actual positioning and locking mechanism, but am a little lost – no neat solution apparent at the moment!
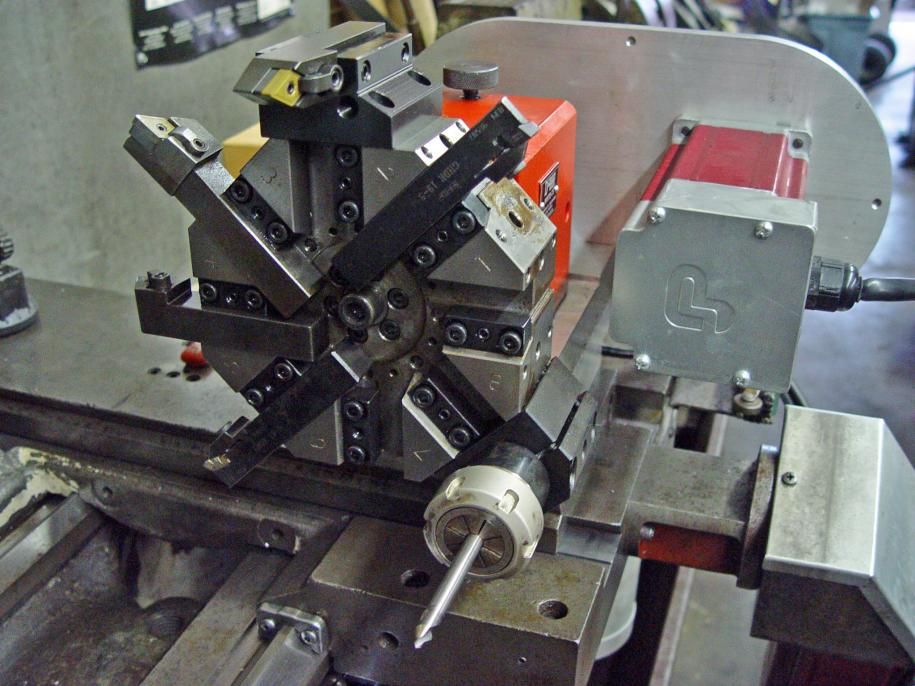
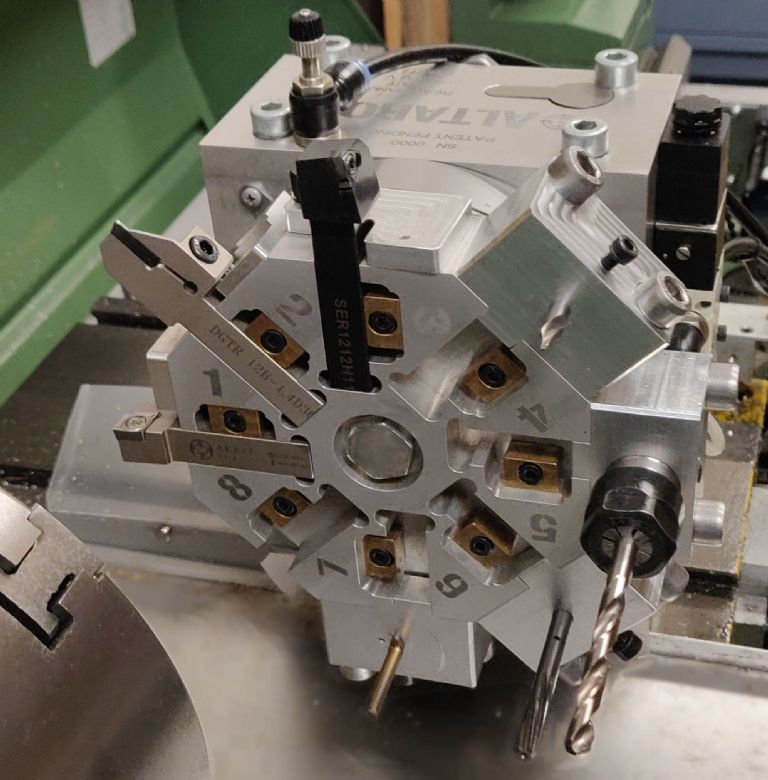
Here are some typical examples of tool-plate layouts – lots of similar to see, but few insights into the gubbins in the boxes..!
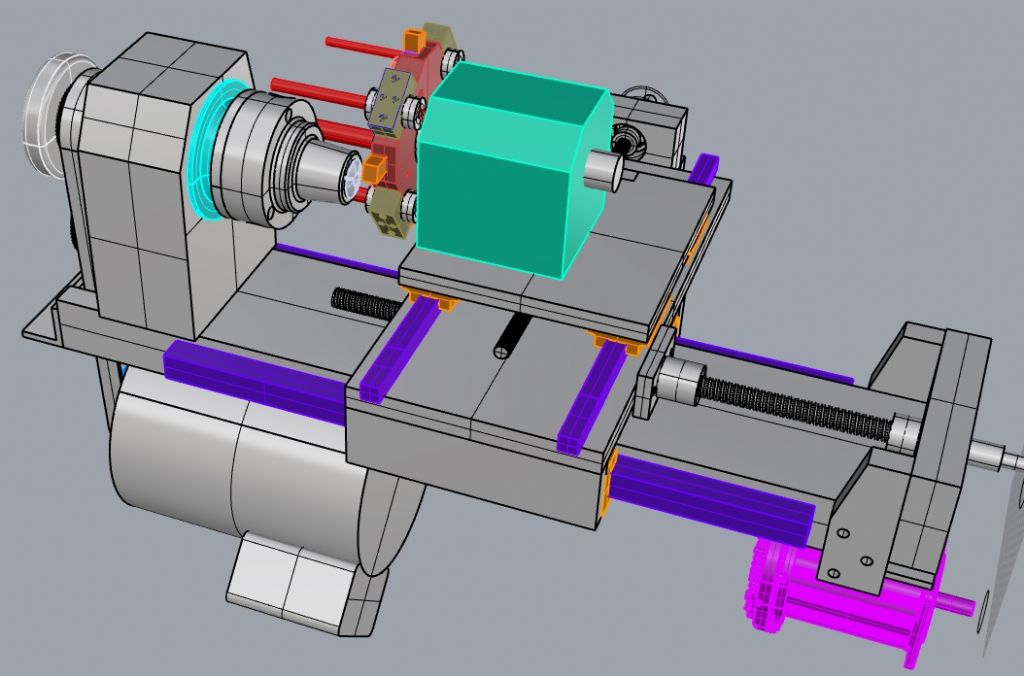
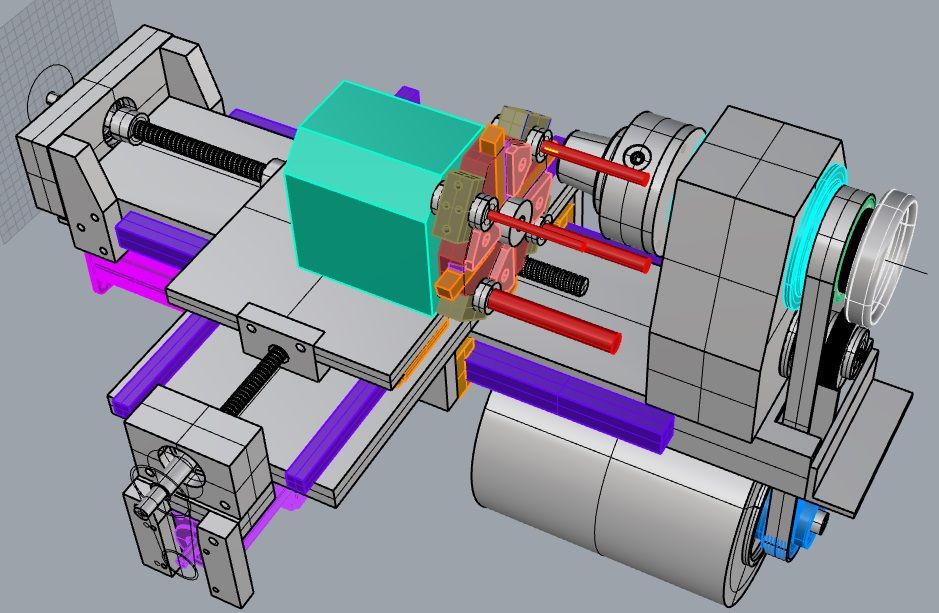
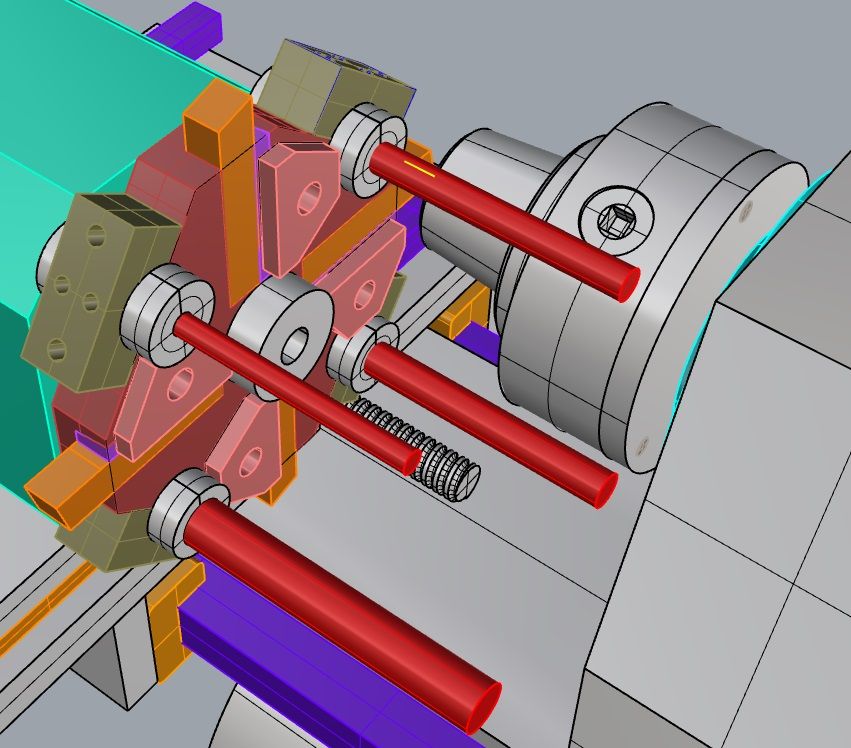
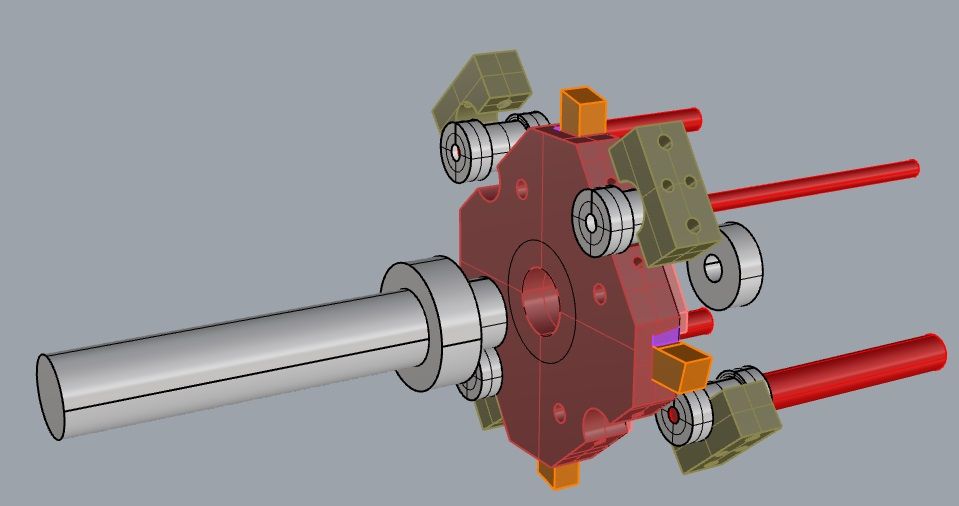
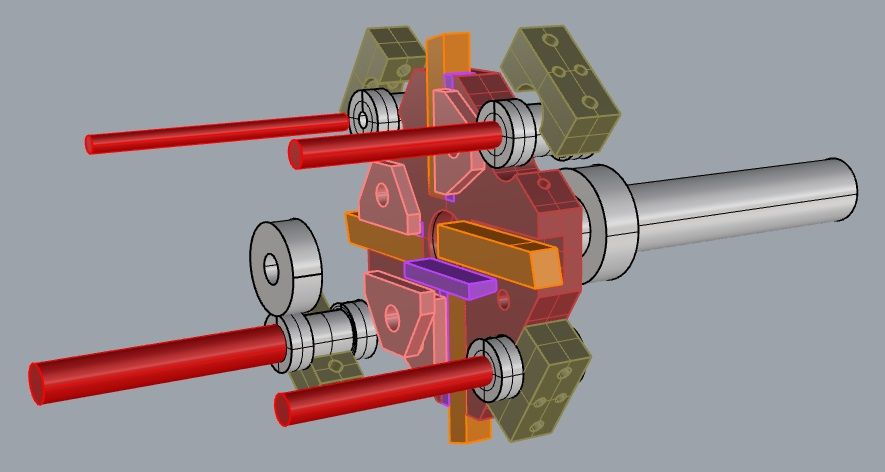
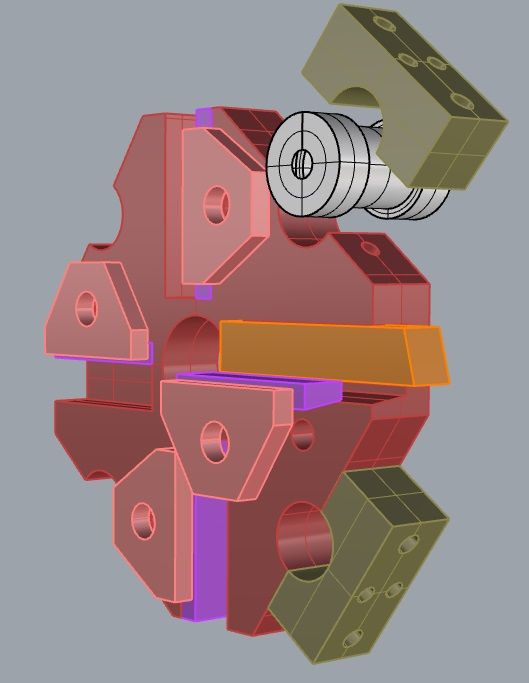
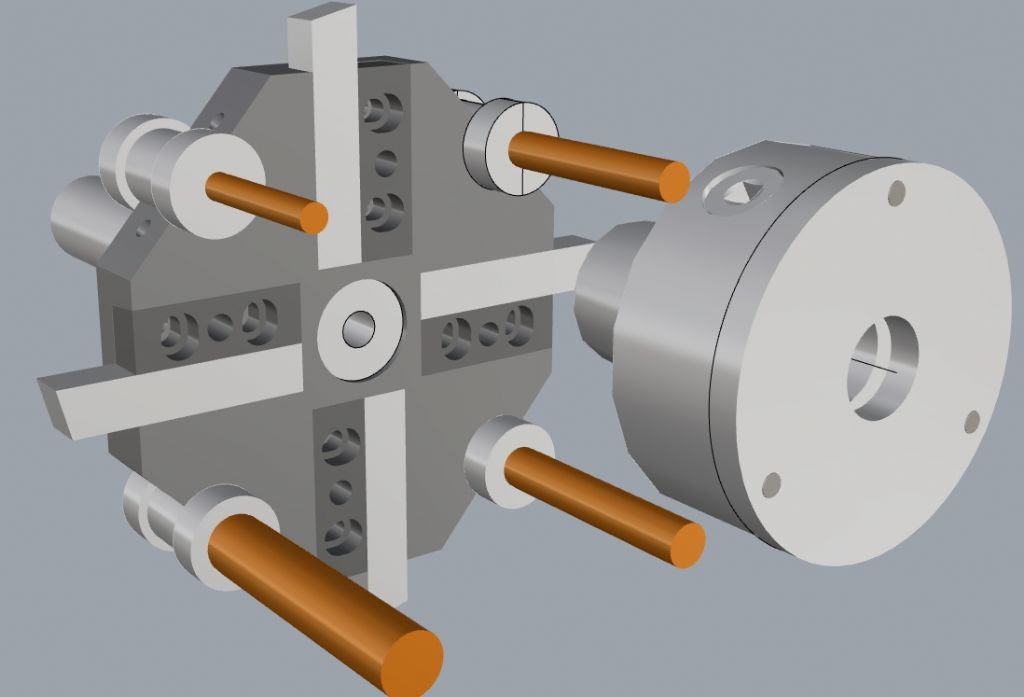
And my 3D models of the present design.( click to see a larger image)
Tools are operated inverted – swarf goes down, not up!
Rear of tool plate with spin-shaft.
Lathe tip-tools are held in place with taper wedges ( lilac below) and clamped with the pink clamps.
Joe
edit – typo's,typ'os, ty'pos..
Edited By Joseph Noci 1 on 18/04/2021 16:28:33
Edited By Joseph Noci 1 on 18/04/2021 16:30:18
18 April 2021 at 18:11 #540409DiogenesII
Participant@diogenesiiJoe, if it is any help in any way (and you haven't been there already) there are some useful downloads on high speed spindle /contact-free seals here, including labyrinth sections, photos, detail of design aspects:
19 April 2021 at 07:36 #540458Joseph Noci 1
Participant@josephnoci1Posted by DiogenesII on 18/04/2021 18:11:29:Joe, if it is any help in any way (and you haven't been there already) there are some useful downloads on high speed spindle /contact-free seals here, including labyrinth sections, photos, detail of design aspects:
Thank You for that info. I have searched 'somewhat' for commercial seals and did find quite a lot of info and a good number of sources. I don't have the capability to manufacture seals even similar to those types though! I would gladly purchase some seals but sit with my usual problems of sourcing from our backwater! Not to mention pricing! for a seal of 50mm ID x 90MM OD, prices vary ( for polymer seals..) from $140 US to $370 US – over here thats a lot of money! Better spent on tooling..
I had not seen the GMN source you provided – I will try contact them and see if they would quote.
Thank You.
Joe
19 April 2021 at 08:34 #540461Ex contributor
Participant@mgnbukI need to now work on the actual positioning and locking mechanism
The usual method of positioning on industrial turrets is with a Hirth / Curvic coupling between the disc and the body. With that, there are two basic solutions – the disc + half of the coupling moves forwards to clear the body coupling teeth before indexing, or the body part of the Hirth coupling can move axially within the body (but constrained radially) to allow the disc to rotate without "lifting".
Hydraulic operation of clamping is easier, but indexing is a bit more awkward – the Taiwanese all hydraulic turrets on various lathes at work use a complex Geneva indexing method using a hydraulic motor & rapidly "step" between positions. Control is quite simple, though, using a couple of proximety switches to count stations as they pass + a reference position switch & clamp / unclamp switches. A counter in the PLC gives a representation of the disc position, being incremented / decremented by the count switch depending on disc direction. The counter is a "ring counter" preset in the PLC with the number of disc stations that has no zero value. Usually the disc is indexed repeatedly to find the reference switch on the first tool call after powering up – at this point the "ring counter" is preset to the current station number (usually station 1), though some manufacturers make referencing the turret part of the initial machine reference procedure & some others use battery backed registers in the PLC memory to remember the disc position set at the point the machine was powered off, so no referencing required. One Cincinatti machine at work saved the cost of the reference switch by making the operator manually index the turret to station 1 & then confirm the position was set via the operator interface – many ways to achieve the same end !
All electric turrets use one motor to clamp/unclamp using a cam and a belleville washer stack arrangement, then index steplessly after unclamping. This type (variously made by Sauter, Duplomatic, Baruffaldi & Pragati) are mechanically complex and use a lot of precision ground hardened parts + a special absolute binary or BCD encoder for disc position + a solenoid operated plunger assembly for the locking arrangment. They also require quite a fast PLC to run them, as the timing of the locking plunger solenoid operation is critical. Locking is by reversing the motor after the locking plunger engages until a proximety switch actuates. There may also be an electromagnetic brake to lock the motor shaft after the "clamped" switch makes.
It should be possible to do a hybrid – hydraulic clamping with electric indexing – without undue difficulty, I think.
Live tooling drive to rotating tools in the turret is another can of worms to consider ! We have one machine at work with a Sauter all electric turret that has live tooling, but that uses the VDI tool mounting system not square shank tools. I have the manual for that turret that has sectional drawings that I could copy & post if that would help ? I would not like to try and make one, though !
On the turrets here that use a wedge to clamp square shank tooling, there are two counterbored holes & a tapped hole in the wedge rather than the plate you show – the counterbored holes line up with tapped holes in the disc & the tapped hole in the wedge is used to extract it. I think the face mounted wedge clamp shown would be restrictive & prone to collision with the workpiece / chuck. You need eyes everywhere when you have boring bars and turning tools mounted on a tool disc to be watchful of collison risks – you could do without introducing another one.
HTH
Nigel B.
20 April 2021 at 21:19 #540778Joseph Noci 1
Participant@josephnoci1Nigel,
Thank You for the post Nigel – A lot of very useful info there!
WRT your comments on the tooling clamping wedges – This was on of the areas that bugged me – Your proposed method is as on the two turrets I showed at the beginning of my ATC post – The reason I did not go that route ( but have decided to change now..) is simple – its a lot more steel to hog out of the tool plate on my small EMCO FB2 Mill! The wedges and such like are easy – all hogging will be done on the shaper, but the tool and wedge slots are all endmill stuff. But the result is not that elegant. The triangular wedge pressure plate is loose and will flop about when trying to tighten down the wedge, etc, so I decided to go the better route..
The indexing and clamping arrangement is still going to challenge me – There is a good series of article in MEW , by Simon Davies – No's 269-272 – He uses a taper cone interface between the tool plate and base and is rather attractive, but does require the base stock material for the tool plate to be very thick with lots of lathe work!
I favour the Hirth coupling, but I am not sure I will be able to achieve appropriate fit and tolerances – My mill is just on the small side for that size work at those tolerances in steel , if not spending days standing at the mill!
I suppose for this small size of lathe I could get away with an aluminium toolplate, but that just does not seem right..
Live tooling on this lathe is a bit of a misnomer! I intend to have only a single milling spindle, up to max 8mm endmill/drills with the spindle axis at the same height as the lathe spindle axis. The mill spindle will be able to swing so that its axis is either axial or radial to the lathe spindle, ie, you could mill a hexagon on the end of a shaft or a spiral groove into the side of the shaft in the lathe chuck, for example.
The ATC really does not downsize well! It has to have all the features with reasonable rigidity as its bigger brother's do, but fit on a small lathe with much reduced axis motor torque, etc. On top of it, my lathe is a 'slant bed' so the weight of the ATC falls down, affecting the X axis +ve acceleration..At least in my case the workpiece diameter is limited to the 5C collet capabilities, so ATC performance constraints are reduced somewhat.
Thanks again for taking the time to respond in detail Nigel.
We will see where this one takes me!
Regards
Joe
20 April 2021 at 22:26 #540796simondavies3
Participant@simondavies3Posted by Joseph Noci 1 on 20/04/2021 21:19:49:…
The indexing and clamping arrangement is still going to challenge me – There is a good series of article in MEW , by Simon Davies – No's 269-272 – He uses a taper cone interface between the tool plate and base and is rather attractive, but does require the base stock material for the tool plate to be very thick with lots of lathe work!
Joe, I have been following your series with great interest and no little admiration of the work that you have done so far. As the author of the articles in MEW, maybe I can add to your comments above:
the taper cone method eventually worked but took a great deal of effort to lock successfully in place. The big chunks of metal were machined on a combination of my Chinese 250×400 lathe and a fully CNC'd BF20 mill. For the tool plate/taper, I think these could be roughed separately and then welded/bolted together to make the finishing less traumatic. The main block could also be a welded plate construction, I ended up with a lot more metal than I really needed at this point.Locking the taper in position with a fine screw and lots of stepper torque 'just' works- if I revisited it, I would look closely at small hydraulics – derived maybe from classic car brakes or modern bicycle brakes, married to a stepper driving the master cylinder and maybe mounted off the lathe.
If it helps, all of the 3D drawings are available on Onshape in the public area, search for " Toolchanger for Emco 5PC ". Onshape allows 3D to 2D drawings to be derived as well as export in various forms – this includes components such as the toolplate which was directly derived from the Emco original.PM me if there is anything I can help with directly, very interested to see your project continue to go forward.
Simon
20 April 2021 at 23:32 #540802T.B
Participant@t-b-2Hi Joe
I built a small lathe ATC a while ago , after experimenting with a pawl and ratchet for a while I went with a hirth coupling design in the end.
I wouldn't be too daunted about making the couplings , mine where made on a Centec mill so not vastly different in size to your mill, while I'm sure there are inaccuracies in my machining of the couplings , due to the self locating nature of a hirth coupling its seems that its still very repeatable to the point where I struggle to measure any deviation in a closed tool position.
In retrospect I think the whole thing is massively over engineered but on the positive side its extremely rigid , I only wish I had made the toolplate to a better design !
I also often use a 4" bison 5C chuck for the reasons you state but still often wish the nose of the chuck was longer so I didn't have to cut down so many stub drills and boring bars etc.
-
AuthorPosts
- Please log in to reply to this topic. Registering is free and easy using the links on the menu at the top of this page.
Latest Replies
Home › Forums › Work In Progress and completed items › Topics
-
- Topic
- Voices
- Posts
- Last Post
-
-
New Member From The Isle of Man
Started by:
sprocket 3 in: Introduce Yourself – New members start here!
- 1
- 1
-
12 July 2025 at 11:34
sprocket 3
-
Sat nag
1
2
Started by:
duncan webster 1 in: The Tea Room
- 15
- 29
-
12 July 2025 at 11:17
 Vic
Vic
-
TurboCAD – Alibre File Transfers.
Started by:
Nigel Graham 2 in: CAD – Technical drawing & design
- 5
- 6
-
12 July 2025 at 11:10
SillyOldDuffer
-
“swedish iron”
Started by:
moonman in: Materials
- 8
- 9
-
12 July 2025 at 10:37
 Fulmen
-
Yet another scam
Started by:
 Dell
in: The Tea Room
- 2
- 2
-
12 July 2025 at 10:16
Bo’sun
-
The Silver Swan Automaton
Started by:
James Alford in: Related Hobbies including Vehicle Restoration
- 1
- 1
-
12 July 2025 at 09:54
James Alford
-
Another Day … Another ScumBag
Started by:
 Michael Gilligan
in: The Tea Room
- 12
- 18
-
12 July 2025 at 08:14
Diogenes
-
buying machine tools from aliexpress experiences?
Started by:
Jake Middleton-Metcalfe in: Manual machine tools
- 14
- 17
-
11 July 2025 at 22:26
Versaboss
-
Adjustable spanner thread direction
Started by:
 jimmy b
in: Workshop Tools and Tooling
- 8
- 8
-
11 July 2025 at 22:14
Nimble
-
Chester Champion, warco ZX15 drawbar
Started by:
martian in: Manual machine tools
- 5
- 7
-
11 July 2025 at 21:51
Howard Lewis
-
Bosch PBD 40 bearing upgrade
Started by:
th1980 in: Manual machine tools
- 6
- 12
-
11 July 2025 at 21:33
Howard Lewis
-
Square end on round stock – Milling?
1
2
Started by:
Roger TheShrubber in: Workshop Tools and Tooling
- 17
- 30
-
11 July 2025 at 21:23
Howard Lewis
-
motor and switch wiring Myford ML7
Started by:
1957jmh in: Workshop Tools and Tooling
- 4
- 6
-
11 July 2025 at 21:09
Howard Lewis
-
I’m Under Pressure
1
2
Started by:
howardb in: Related Hobbies including Vehicle Restoration
- 16
- 30
-
11 July 2025 at 19:12
Nealeb
-
Farm Boy
1
2
…
4
5
Started by:
Dalboy in: I/C Engines
- 15
- 102
-
11 July 2025 at 18:48
Diogenes
-
Sanjay’s Banjo Engine
Started by:
 JasonB
in: Stationary engines
- 3
- 9
-
11 July 2025 at 17:32
renardiere7
-
Old plastic handled screwdrivers
Started by:
 Dave Halford
in: Workshop Tools and Tooling
- 12
- 14
-
11 July 2025 at 17:14
 Robert Atkinson 2
-
Bridgeport ways and wear
Started by:
inline in: Manual machine tools
- 7
- 18
-
11 July 2025 at 09:16
Ian Owen NZ
-
Maisie lubricator
Started by:
ferroequinologist in: Locomotives
- 9
- 14
-
11 July 2025 at 09:09
Clive Foster
-
Transwave converter – plugged in motor, tripped RCD
Started by:
ell81 in: Beginners questions
- 8
- 12
-
10 July 2025 at 22:56
Master of none
-
Eight Trains
Started by:
 Vic
in: The Tea Room
- 1
- 1
-
10 July 2025 at 14:14
 Vic
Vic
-
Help Wire 3 Phase 2 Speed Motor
Started by:
Allan Day in: Electronics in the Workshop
- 13
- 23
-
10 July 2025 at 11:57
Andrew Skinner
-
Easiest/cheapest source of R8 socket
Started by:
Beardy Mike in: Workshop Tools and Tooling
- 8
- 10
-
10 July 2025 at 10:16
Pete
-
New (but well aged) member
Started by:
mikemunson in: Introduce Yourself – New members start here!
- 6
- 6
-
10 July 2025 at 09:23
 Dell
Dell
-
Bearing boxes for ball race
Started by:
Paul McDonough in: Beginners questions
- 11
- 20
-
9 July 2025 at 20:38
old mart
-
New Member From The Isle of Man
-


