CNC Lathe Scratch Build

Advert

CNC Lathe Scratch Build

Home Forums Work In Progress and completed items CNC Lathe Scratch Build

Viewing 25 posts - 1 through 25 (of 173 total)
  • Author
    Posts
  • #31325
    Joseph Noci 1
    Participant
      @josephnoci1
      Advert
      #505521
      Joseph Noci 1
      Participant
        @josephnoci1

        In between many projects I have a long standing one that I have finally made a start on – A 'small' CNC Lathe, build from scratch, not a CNC conversion…

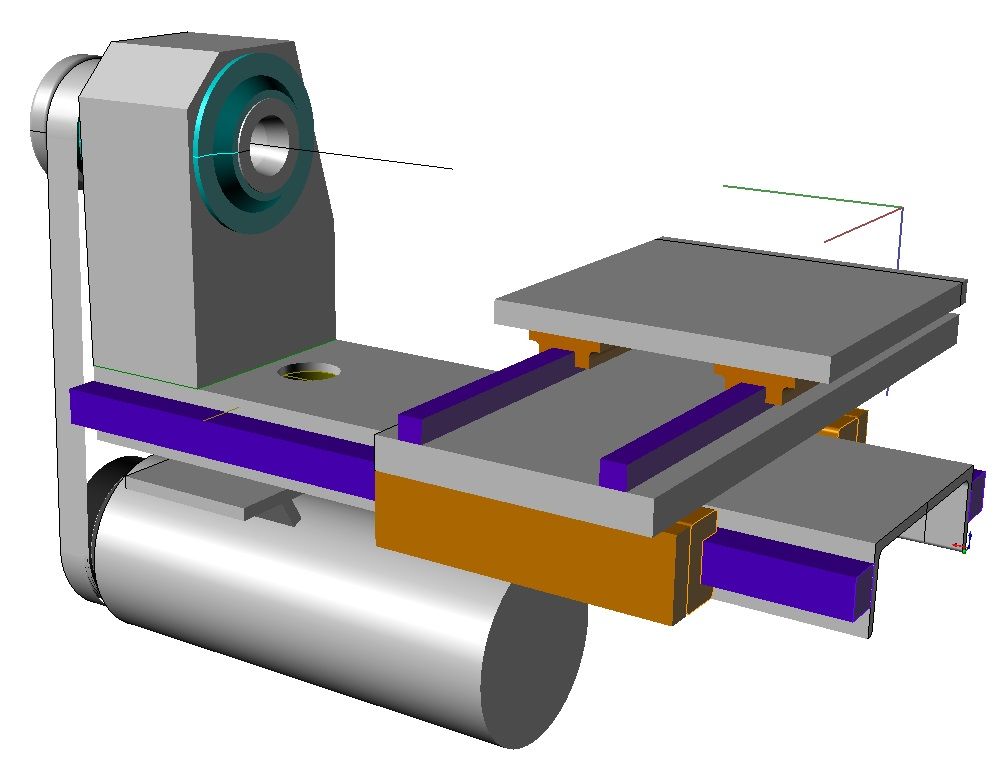
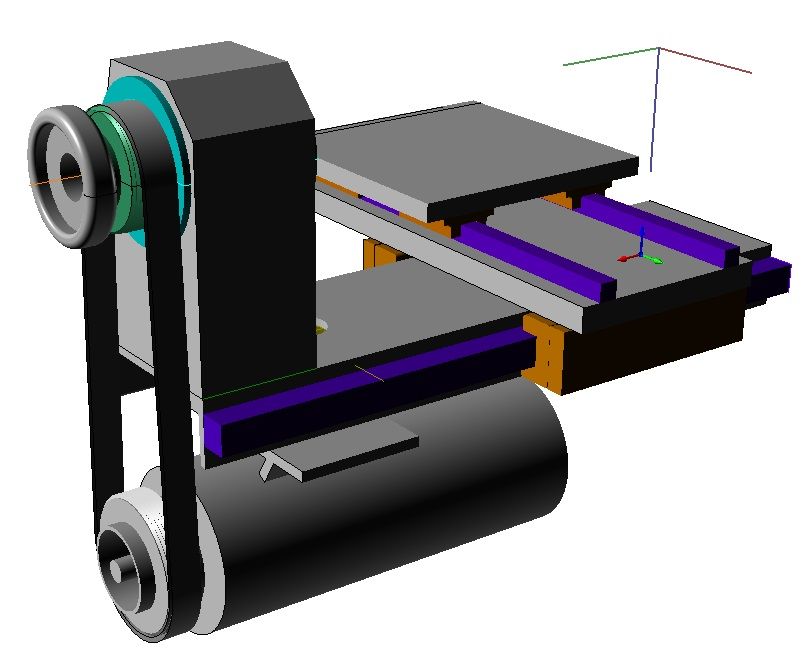
        The concept started small, an ER40 Collet spindle, 6000RPM capability, sort of 400mm x 400mm footprint…And then it Grew-some… I have a very nice pair of Taper Roller bearing, P5, but Imperial1-7/8 inch ID and thought to use them so moved to a 5C collet spindle. That allowed larger diameter work, so the bed grew to accommodate – to be made from 140mm wide U channel, 8mm thick. The Headstock to be made from a large chuck of aluminium, 7075 – I decided Aluminium is ok, it will conduct heat away easily, and the intended use is intermittent anyway. And so the size of the machine grew to be bigger than what my Mill is comfortable with and the challenge is now there..

        I did some rudimentary 3D design to get basic dimensions, and started by making the spindle and basic headstock assemblies.

        Some renderings of the concepts:

        cnc_lathe render 1.jpg

        cnc_lathe render 2.jpg

        The underslung motor is a 1KW 80VDC motor – to be driven by a GECKO servo drive with an encoder fitted , ie, a proper servo drive so the spindle can be positioned to any angle, do screwcutting easily, etc. Brushes don't bother me, again, service is not production…and I have the motor and GECKO drive..

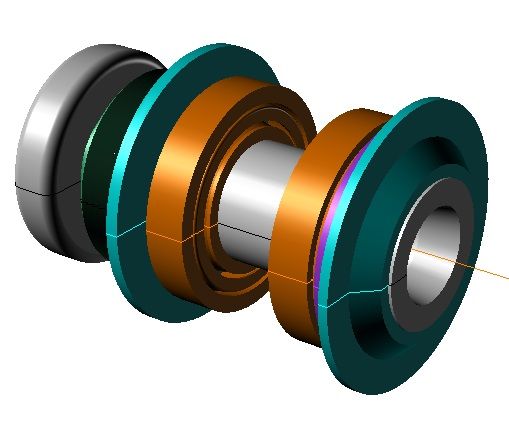
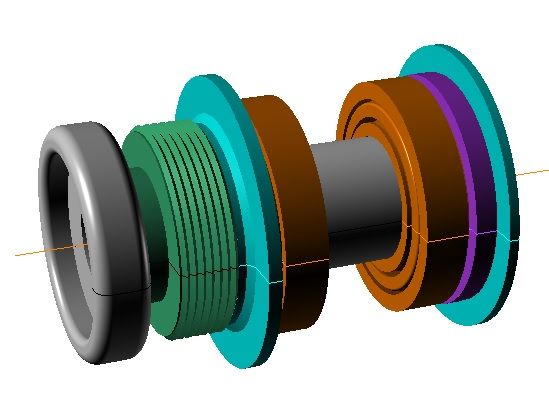
        The spindle with end-plate labyrinth seals – spindle bearing will run in oil – I still want 4000 to 5000 rpm out of those big bearings * TIMKEN*..

        spindle render1.jpg

        spindle render2.jpg

        So, with ideas in hand, The hunt for materials began – here in Namibia, that is a BIG challenge!

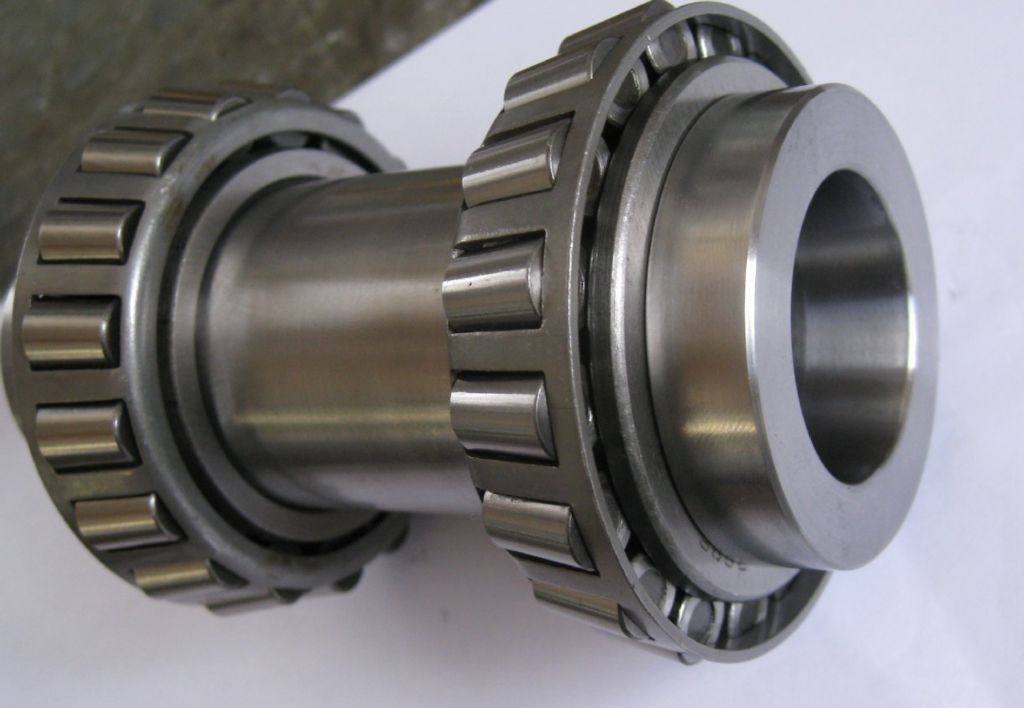
        I found a very nice ( even If I say so myself..) 5C spindle, hidden in a section of broken Rear drive shaft from a large Caterpillar at the local mine vehicle repair 'shop' – I just had to dig the spindle out from the swarf in the shaft…

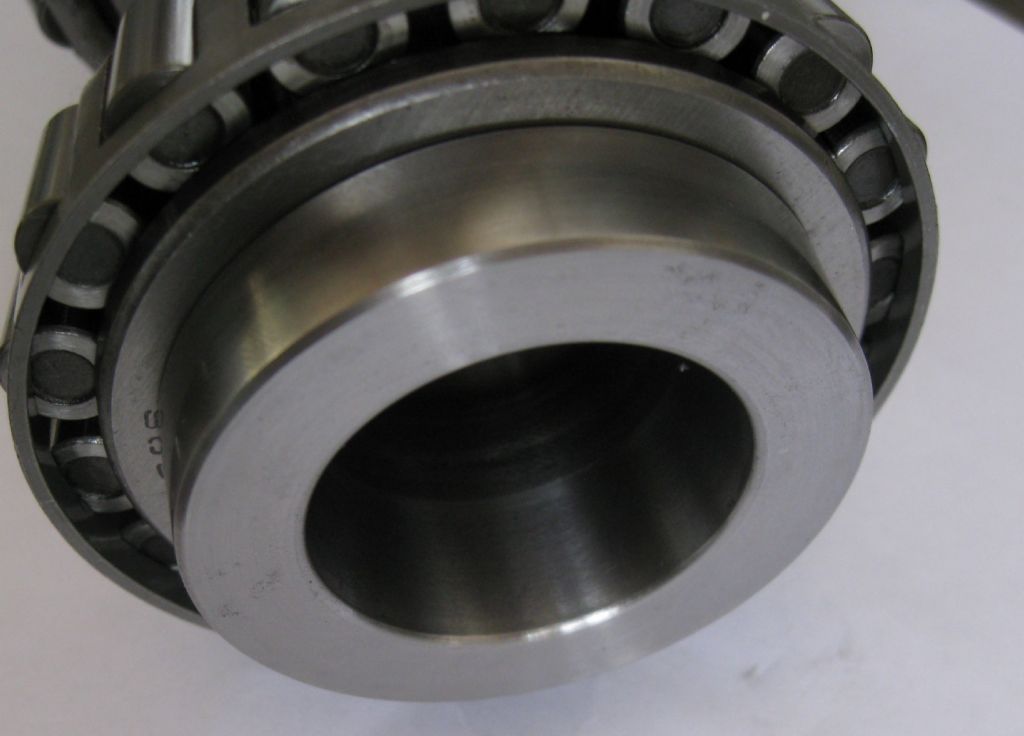
        Spindle all machined, and ground internally, and externally for a very snug bearing fit. 5C collet end seen here.

        spindle1.jpg

        spindle 5c end.jpg

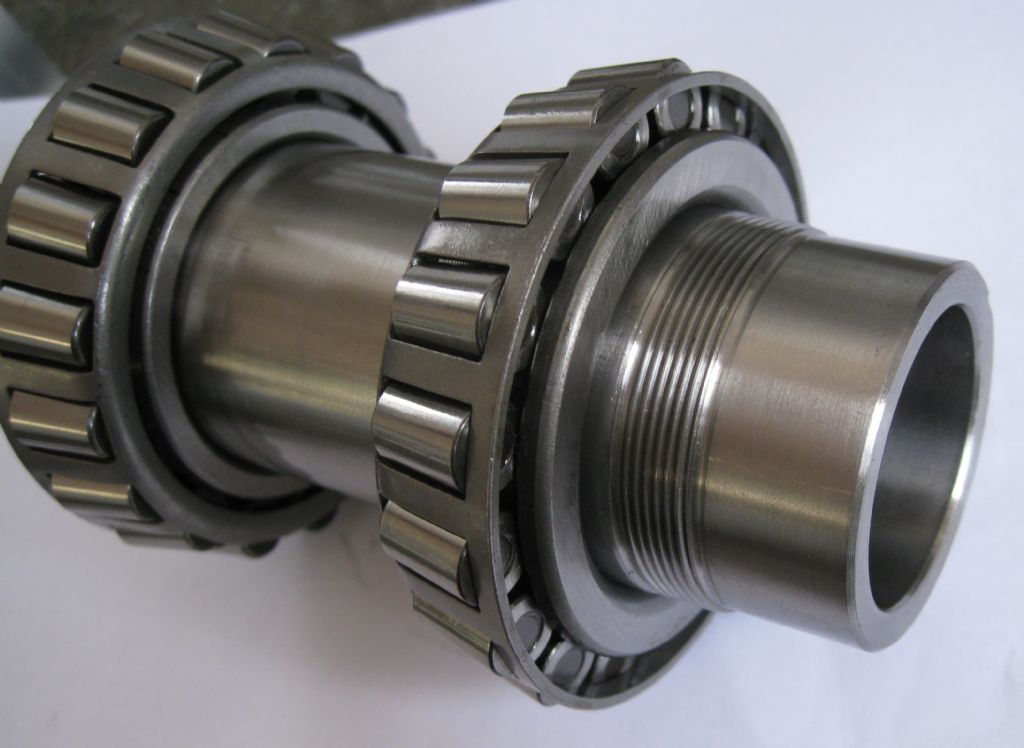
        rear or closer end seen here.

        spindle closer end.jpg

        Was hidden in a few buckets of this nice shiny blue swarf..The swarf came off HOT, sometimes flaming at the cutting edge, with a shiny smooth cut surface – no idea what the steel is!

        taper machining swarf.jpg

        Need to spilt into two posts as the thing complains my post is to long…

        Next – the headstock..

        Joe

        #505523
        Joseph Noci 1
        Participant
          @josephnoci1

          Now the Headstock…

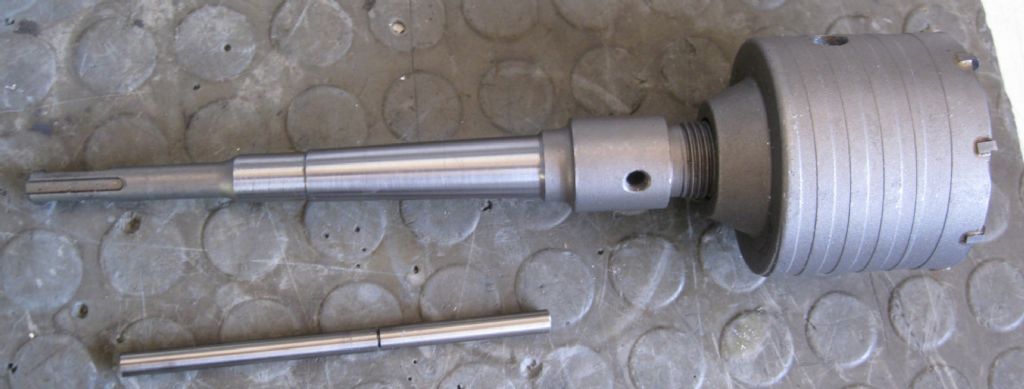
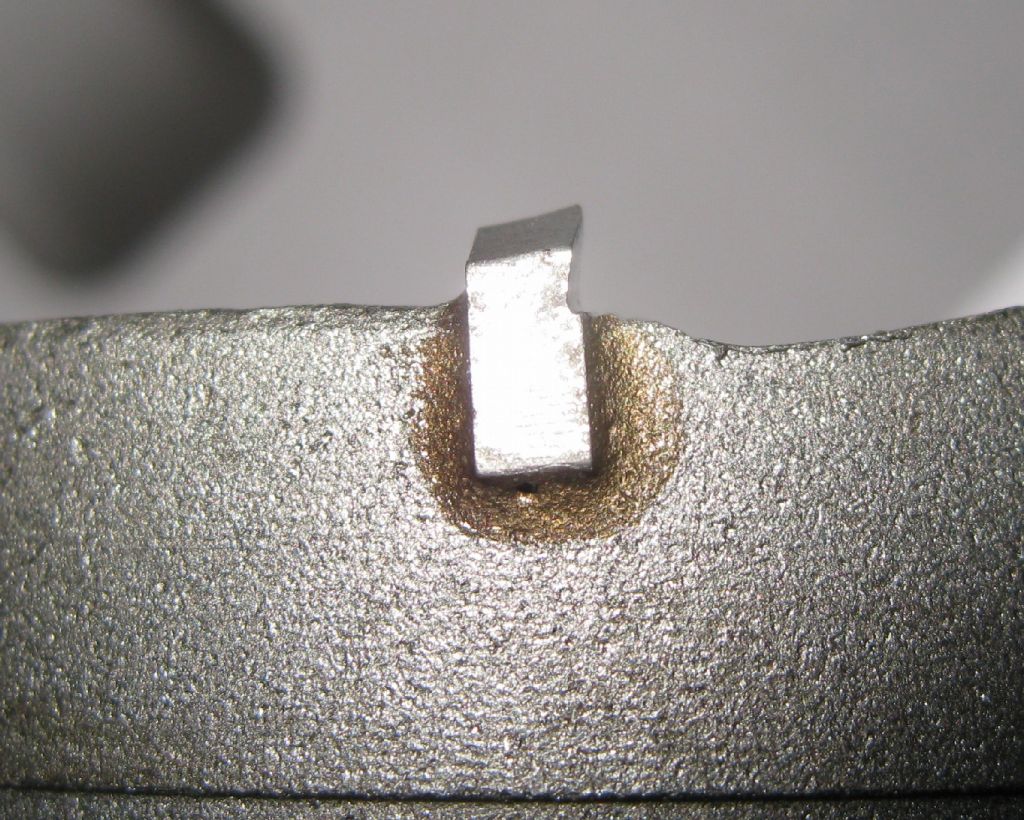
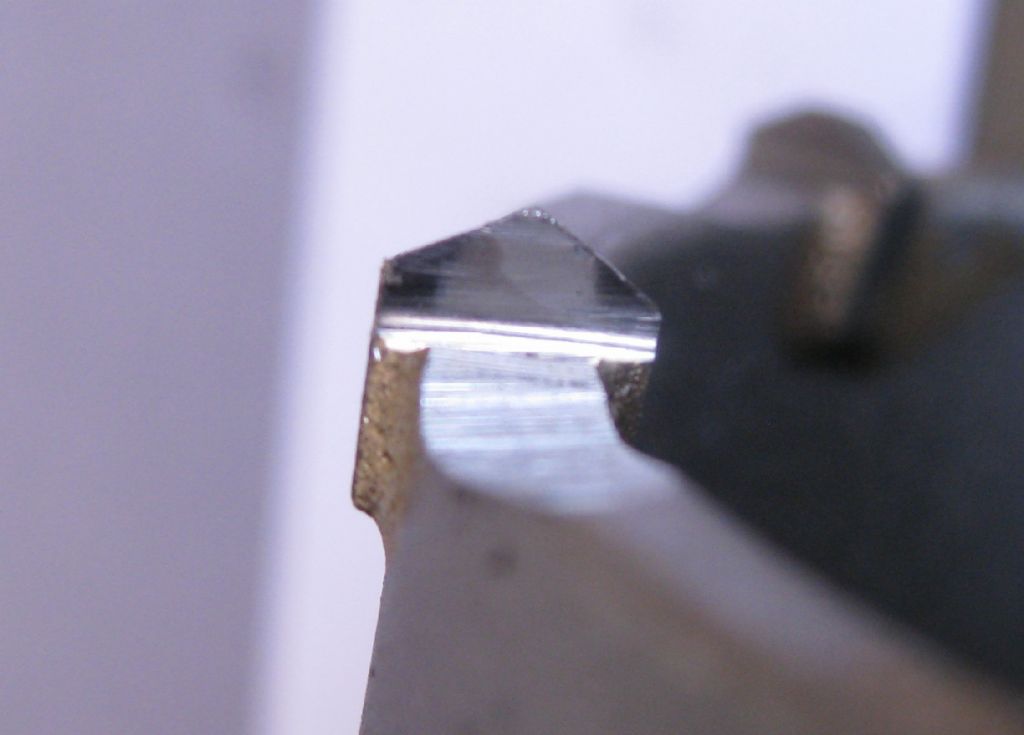
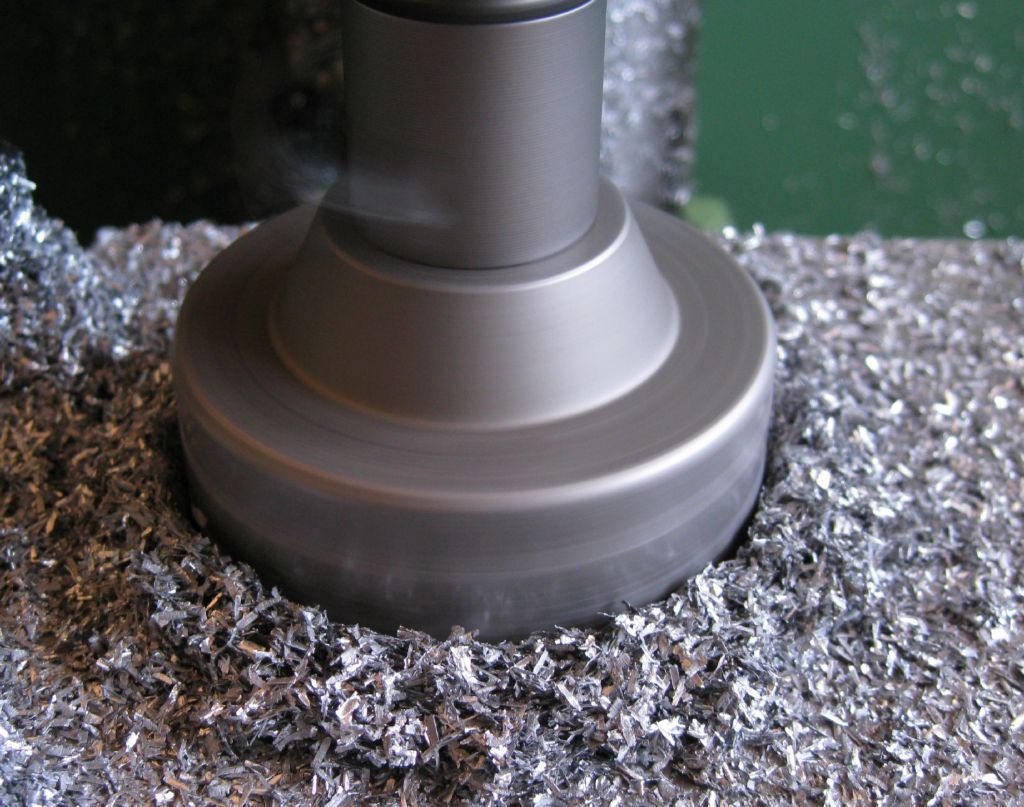
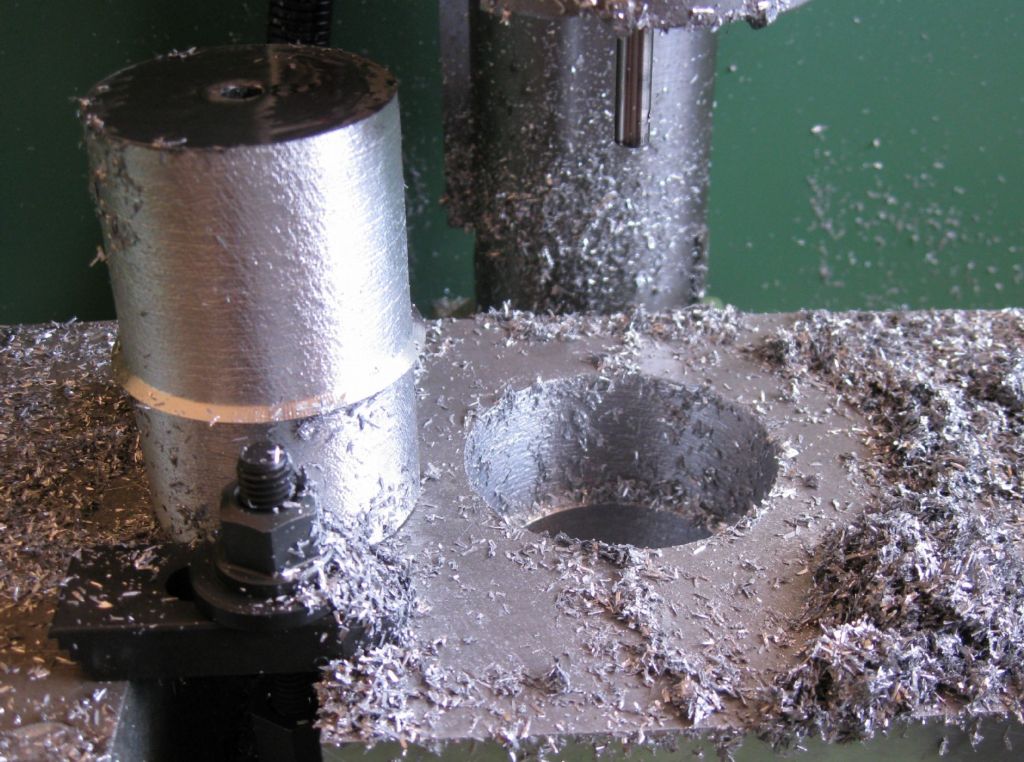
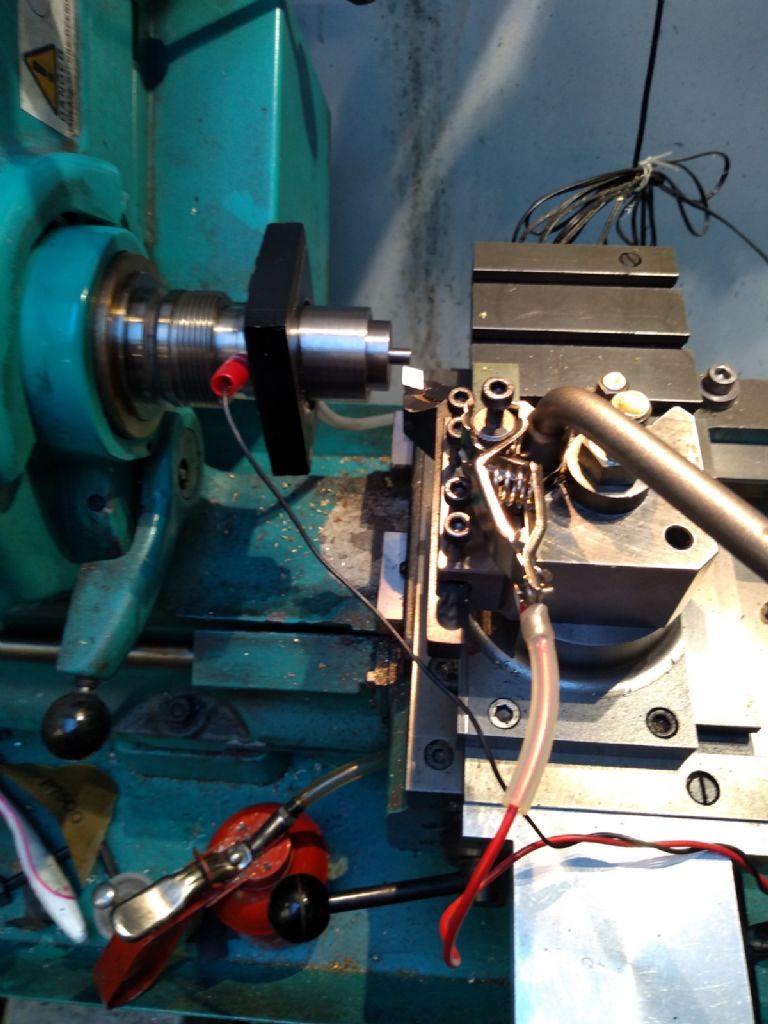
          This is a big block of Aluminium – 150x200x100mm – I need a hole through the 100mm depth, 70mm diameter or so, so tried a hole saw – waste of time – just clogs up and takes forever. Drilling and boring out increasing each time was just too much, so I purchased an SDS drive concrete coring bit – 70mm OD. Turned a MT2 taper on the drive shaft ( very nice steel too, that drive shaft!) and sharpened the cemented carbide teeth on the core bit – gave them a good positive rake. Set up in the EMCO FB2 mill and drilled a core out the block – took 31 minutes…

          SDS Coring bit – with taper machined on shaft

          sds core bit taper.jpg

          Teeth sharpened:

          positive rake grind.jpg

          Front view of teeth:

          positive rake grind front.jpg

          Making the hole:

          coring the hole.jpg

          The cored piece..done from both sides – lots of chatter, etc..

          the core removed.jpg

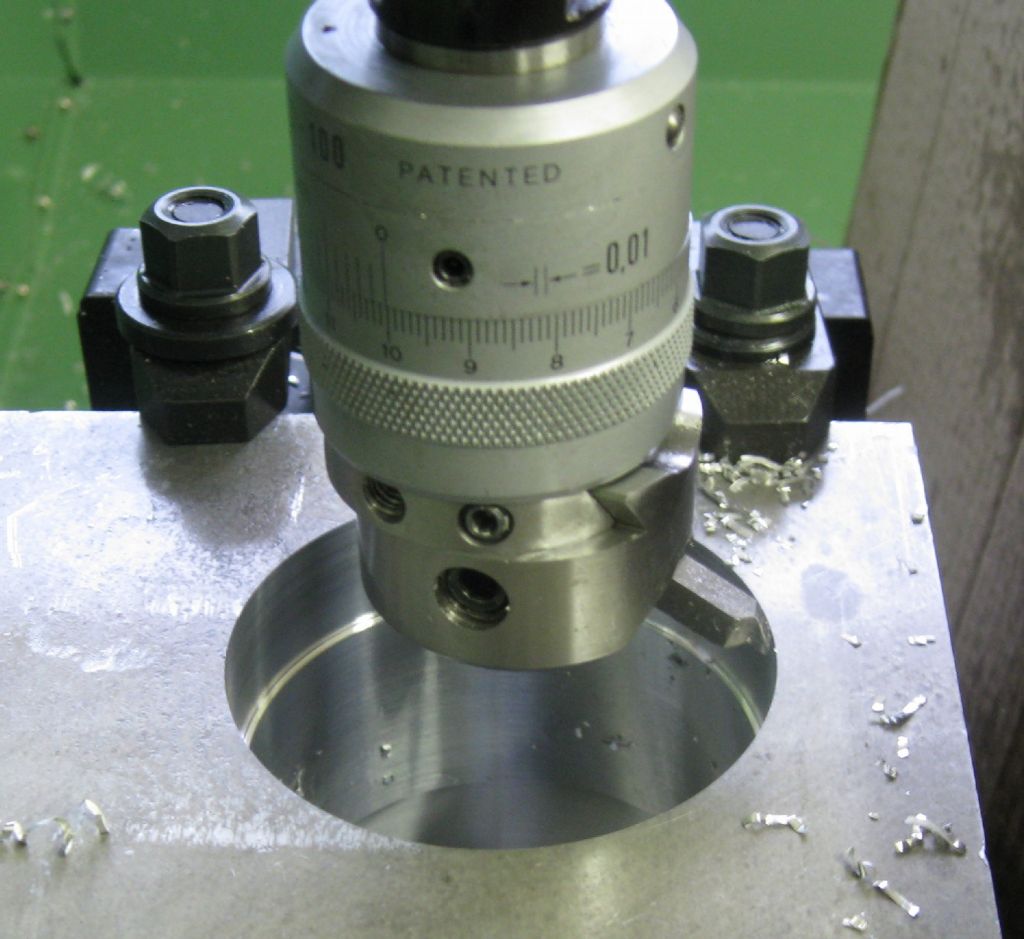
          Then boring out the hole and boring out for the bearings – rough bore first

          boring1.jpg

          The bearing boring had to be done from both sides, and I wanted the holes lined up to better than 0.005mm….

          So a mill tramming took place, which is covered in Graham's FB2 thread – took 2 days with lots of effort – was worth it!

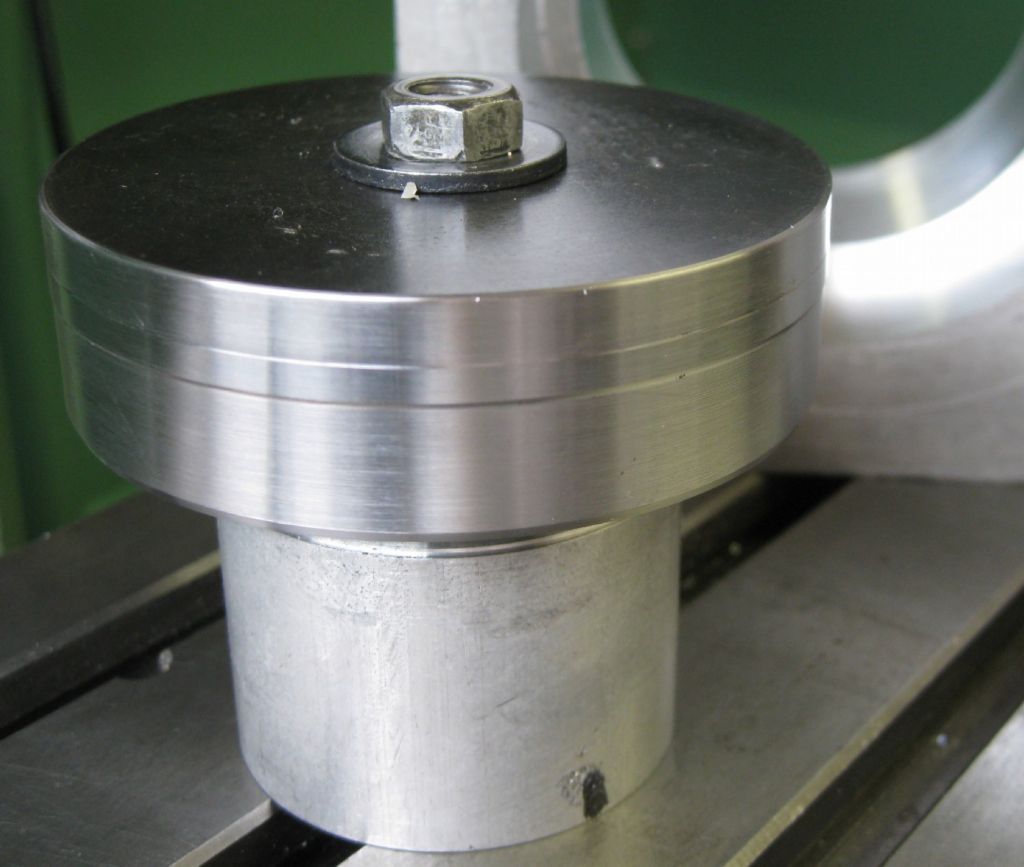
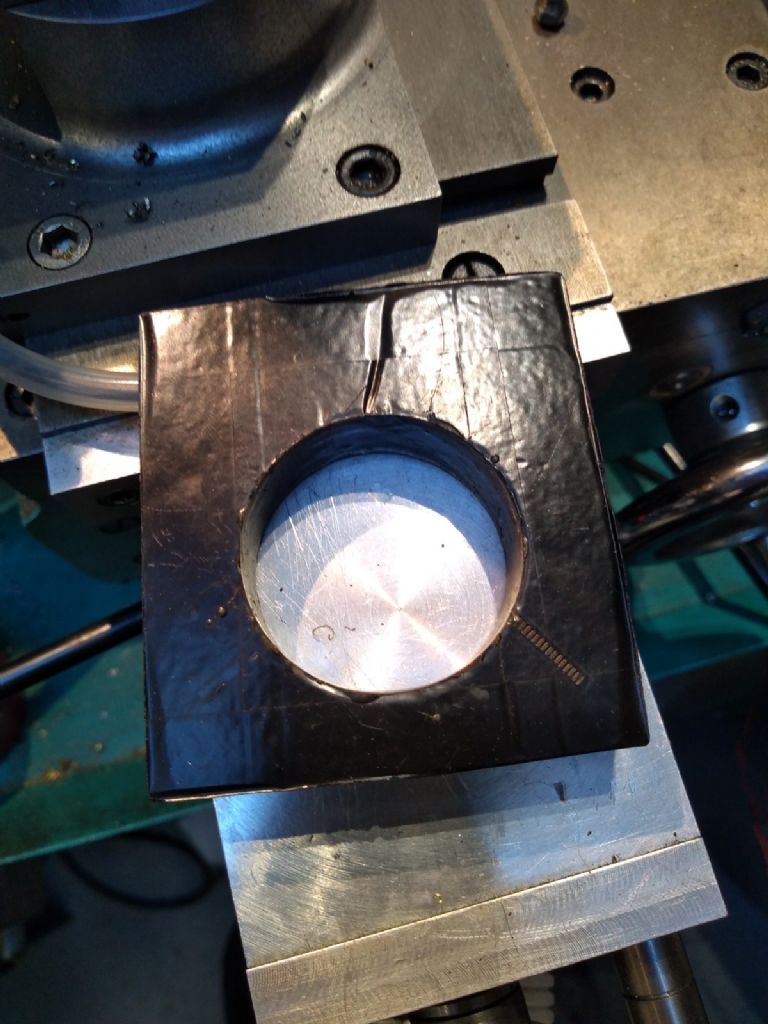
          The idea then was to fit a locating boss to the table, which would snug up into the inner bore. fasten the block down to the table, bore the bearing hole out, and then rotate the block over 180deg, slip over the locating boss, and do the second bearing hole. The boss was made from a hard steel, polished, and 'just' fits in the inner bored hole – it is a real bugger to get the block down on it – cannot be slipped over even a little skew…

          The boss:

          bore locating boss.jpg

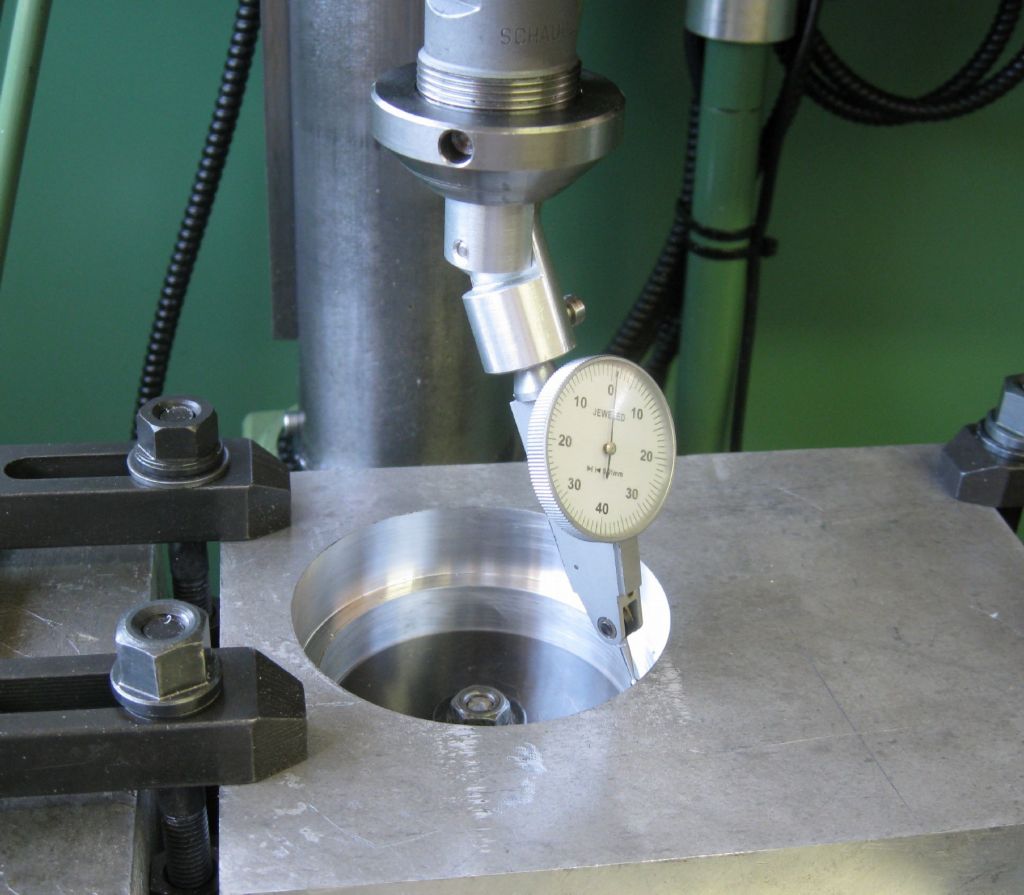
          The block slipped over the boss, and checking for center location before final boring of second bearing hole.

          final bore setting zero.jpg

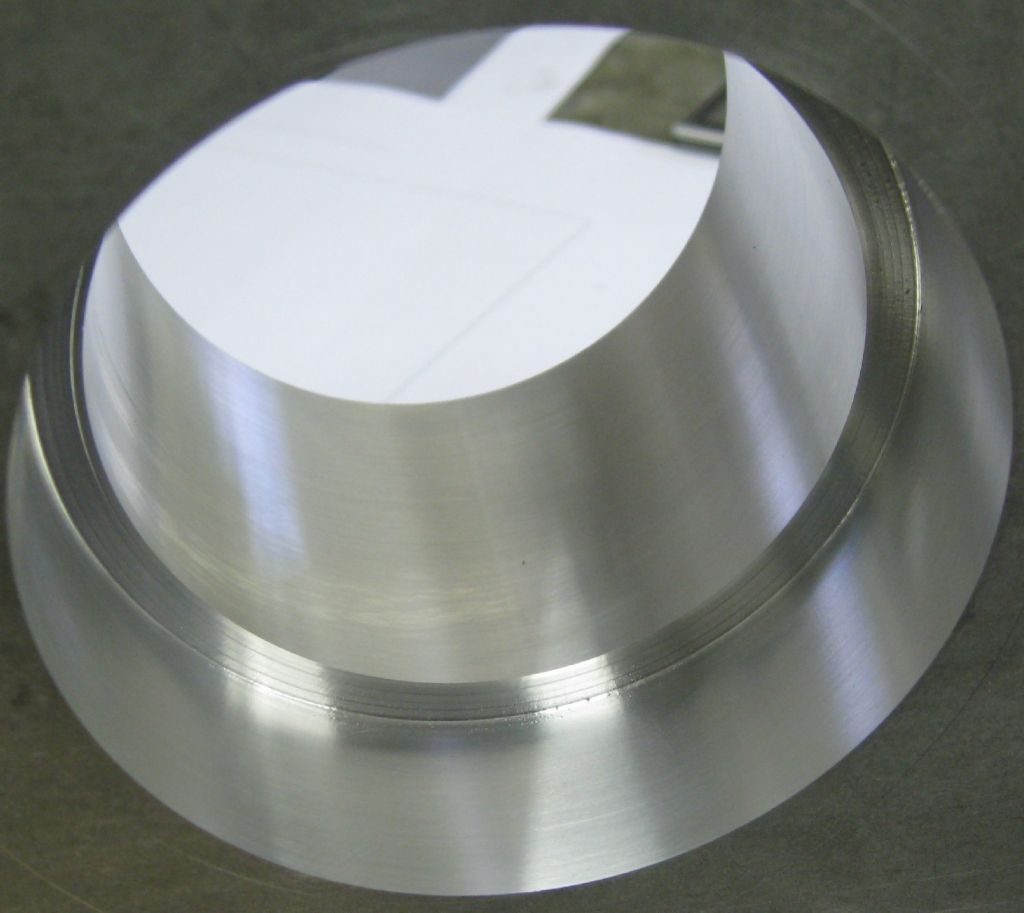
          The headstock block bored out:

          bored thru.jpg

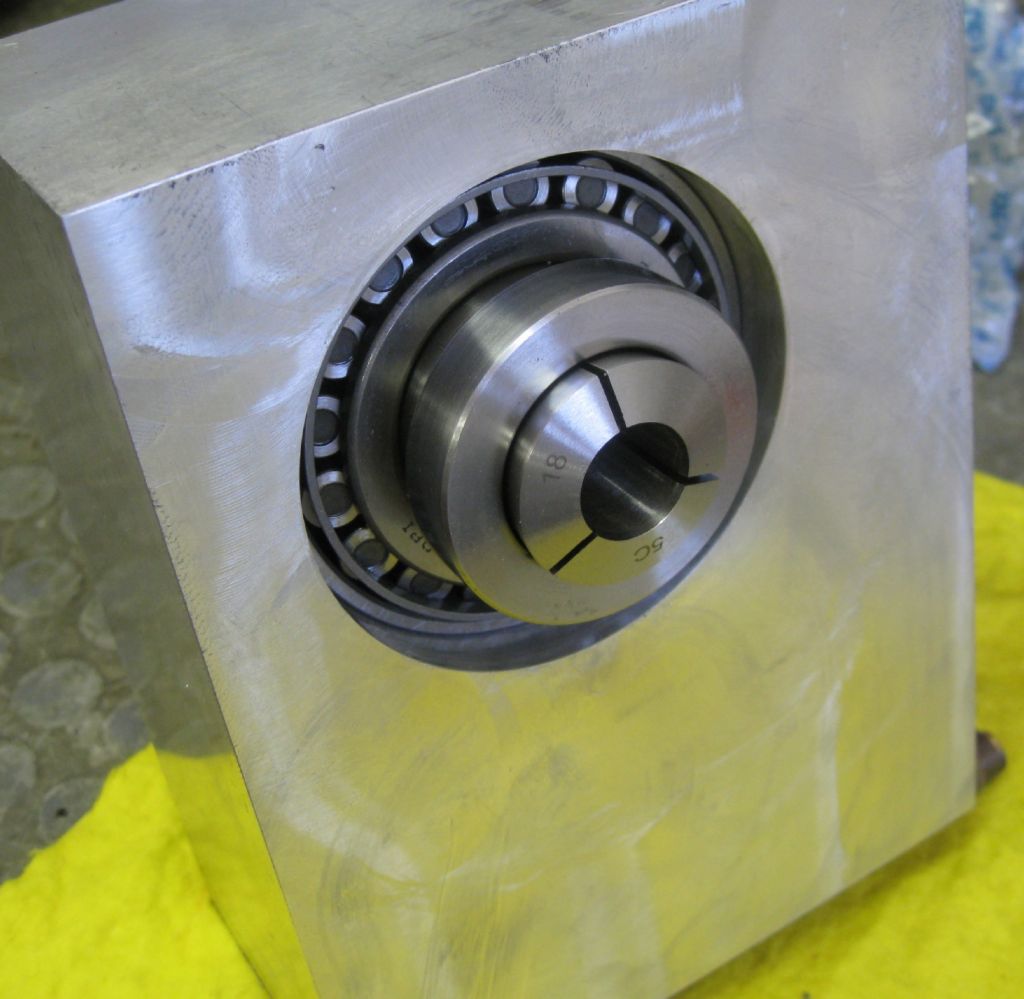
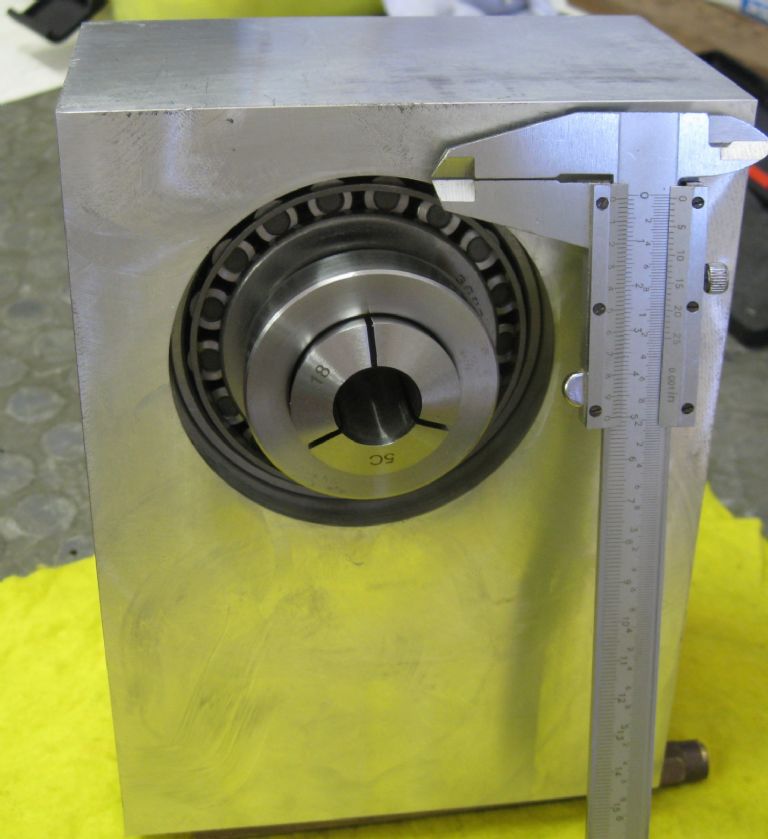
          Bearings and spindle test fit:

          bearing_spindle test fit.jpg

          bearing_spindle test fit2.jpg

          Next up – Labyrinth seals…then the bed – in the shaper and more such fun..

          More to come..

          Joe

          #505529
          Ian Johnson 1
          Participant
            @ianjohnson1

            Excellent work Joe, I'll be following your progress on this build so keep the photos and info coming please. It's amazing what you can find hidden in a lump of Caterpillar scrap, and 4-5000 rpm is pretty fast for a lathe spindle, it'll be fun to watch it make something at that speed!

            IanJ

            #505539
            Pete.
            Participant
              @pete-2

              Following this too, looking very interesting!

              #505540
              Grindstone Cowboy
              Participant
                @grindstonecowboy

                Colour me impressed, as they say. Very nice work. Looking forward to the next installment.

                #505547
                Martin Connelly
                Participant
                  @martinconnelly55370

                  I would be a bit concerned with the encoder being on the motor shaft and not on the spindle. Any slip or effective diameter mismatch on the belt drive will cause issues with things like screw cutting. The fact that you mentioned the encoder on the motor makes me think this is a turning process you are intending to do.

                  Martin C

                  #505549
                  Kiwi Bloke
                  Participant
                    @kiwibloke62605

                    Nice to see what a well-sorted FB-2 can do… in the right hands.


                    Posted by Joseph Noci 1 on 05/11/2020 21:55:20:

                    Now the Headstock…

                    The boss was made from a hard steel, polished, and 'just' fits in the inner bored hole – it is a real bugger to get the block down on it – cannot be slipped over even a little skew…


                    You know the old gauge-maker's trick of making a relief groove a little way along the gauge (=boss) – where the leading edge of the skewed block would try to dig in, as it binds? Gives it somewhere to go, and the leading ring of the gauge, now safely in the block, now helps align the block as it passes over the gauge diameter immediately following the groove, thereby avoiding buggery. [Hope this makes sense – it's late: nurse is getting ready to tuck me into bed…]

                    Distance between bearings looks a bit mean, and drive belt between bearings might be preferable – albeit less convenient?

                    Edited By Kiwi Bloke on 06/11/2020 08:56:45

                    Edited By Kiwi Bloke on 06/11/2020 09:01:36

                    #505550
                    Ady1
                    Participant
                      @ady1

                      Always a pleasure to watch your projects unfold Joe, all the more because you're located somewhere in the Namibian tundra

                      #505552
                      John Haine
                      Participant
                        @johnhaine32865

                        Nice project Joe. You have probably though about this, but a precise electrical index on the cross slide so that it can be set to a calibrated position with every tool makes life so much easier. I favour a hard contact rather than a toggling microswitch or proximity sensor – you want micron precision. Then every time you switch the controller on, you zero the cross slide machine coordinate to the index, and can then turn precise diameters using pre-stored tool offsets. It is much easier to design the index in rather than add it later!

                        Another useful option would be an in-built setter for the Z axis to allow you to set the tool to the end of the stock. I have a device based on electrical contact between the tool and stock that does this which requires slipping a sensor over the stock and making temporary connections to the toolpost and spindle, but the sensor could be built in to the headstock. Happy to provide more details if you PM me.

                        #505559
                        Joseph Noci 1
                        Participant
                          @josephnoci1
                          Posted by Martin Connelly on 06/11/2020 08:22:46:

                          I would be a bit concerned with the encoder being on the motor shaft and not on the spindle. Any slip or effective diameter mismatch on the belt drive will cause issues with things like screw cutting. The fact that you mentioned the encoder on the motor makes me think this is a turning process you are intending to do.

                          Martin C

                          Martin,

                          You are quite correct – stupid idea – the remnant was still in my mind as I had thought of using toothed belts and pulleys originally, but decided against as that imparts unwanted vibration to the setup when run fast – ditched the idea but not the encoder location..I think that idea was flawed anyway, as even the toothed belts do move on the pulley when reversing, albeit slightly.

                          Kiwi – Bloke..

                          You know the old gauge-maker's trick of making a relief groove a little way along the gauge (=boss) – where the leading edge of the skewed block would try to dig in, as it binds?

                          No, I don't – please explain – I am keen to understand that – it seems like it can be a big help! It might not be evident in my photo, but that 'ridge' about 1/3 way down from the top surface of the gauge is the snug fit – the part above and below is 5-6 hundredths of a mm less, and then the 'ridge' is domed, like a torus with the peak diameter being the snug fit – gives some skew leniency, but not much!

                          Distance between bearings looks a bit mean, and drive belt between bearings might be preferable – albeit less convenient?

                          When you say 'mean' , do you mean close/narrow? The bearings are 40mm apart – that is narrow, but the bearing is also 90mm OD, so lots support in twist – also , its a 5C collet system, so there wont be any 100mm diameter workpiece in this lathe.. The headstock will be oil filled, bearings must run in oil for the speed, so belt down the center is hugely complicated..and I hope not needed!

                          John Haine,

                          Ok, now you have me going… I need to know a lot more about what you have said – it sounds very worth while, esp as I am making my best effort to make a very rigid, fast, and as accurate as possible a machine.. I can PM you, but would you mind if we discussed it here rather? Other folk may be interested and could learn something as well? And maybe it promotes further good ideas from participants as well!

                          The intent with this lathe is to make it a slant bed, with a tool changer, etc…So from the first rendered view I posted, the tool will sit on the cross slide table, away from the viewer – where is the better place for a hard contact reference? away from the viewer, ie, the rear of the cross slide?

                          Regarding Z reference to stock end – I am experimenting with a very low-impedance measuring device – basically an ohm-meter, with one contact on the headstock and one on the tool changer, which will then give some indeterminate reading ( 0.1ohm to 10ohm, who knows..-not important) and then detects the drop in resistance when the reference tool tip touches the stock. The ohm-meter is not conventional – its a synchronous detector looking at detection of a differential sinusoidal signal level, etc..capable of resolving a 2 milliohm change, between 10milliohms and 5 ohms.

                          Another thing I am looking at is a 27 hour day…( or more , if possible..)

                          Thank you to all for the kind comments – keep them coming – may help me make fewer stupid mistakes!

                          Joe

                          #505571
                          John Haine
                          Participant
                            @johnhaine32865

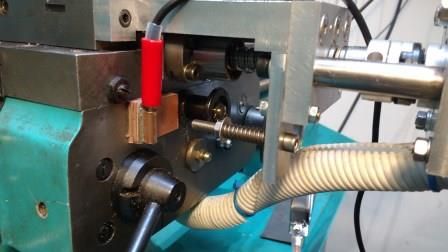
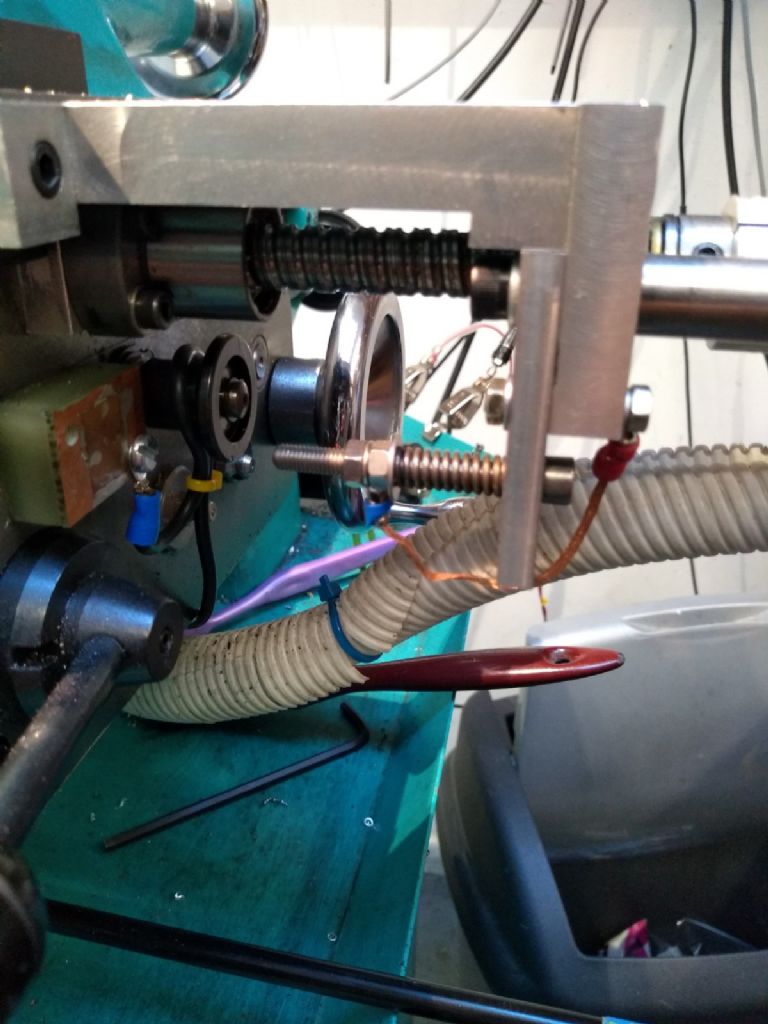
                            My contact is a small shim of beryllium copper soldered to the to face of a bit of PCB and mounted on the face of the apron underneath the slide. There's a bracket on the slide attached to the screw bearing plate that carries a spring-loaded stainless steel screw that connects the shim to ground on contact. It has been slightly improved since this picture:

                            pic_5_cmp.jpg

                            I'll try to get a better one. I do need to re-make the contact pad but it has worked flawlessly for a couple of years. On your slant-bed design the end of the slide away from the axis would be best just to keep the swarf away.

                            I basically use the same sensing method as you are proposing but I felt (and measurements confirm) that resistance measurements aren't reliable. My method is to connect the chuck and the toolpost to a current supply that runs about 2 amps between them. When the tool doesn't contact the stock, that current runs through the headstock bearings, the bed, carriage, and back to the toolpost. When the tool is in contact, a significant proportion of the current runs through the stock and the tool – typically about 50% (since the path is quite short). The current can be DC or AC.

                            The implementation I have on my lathe uses 50 Hz AC and senses the current flow using a current transformer slipped over the stock. This drives a full-wave rectifier using a CA3140, the output of which goes to another 3140 as a comparator, giving a logic level to the controller probe input. The probing speed has to be quite low because the sampling rate is only effectively 50 Hz but this isn't a real limit at my speed of working. I use this system for both "end of stock finding" and also via a known-diameter tool setter that fits in the h/s taper for setting up the tool offsets. My Mach 3 has macros for doing both of these, as well as a button macro for "find stock end" on the Manual screen. When I get another photo of the index "switch" I'll get a couple of the tool setter and sensor.

                            I also had a project student 2 years ago who looked at implementing the sensor using a ring core (the same as a current transformer would use), but with a small gap in it and a hall effect device. This worked very well, IIRC needing about 1 amp drive and responding much faster. The HED was a Honeywell continuous-time device with analogue output, with a single op-amp/comparator chip to get enough sensitivity. I haven't actually implemented this on a machine yet (though he tested it on a manual mill).

                            Both methods could be implemented as original fit on a machine, by building the sensor into the front of the headstock and providing slip rings (or just using the bearings) to carry the excitation current.

                            Just to add – the reason for using current sensing rather than resistance is that the current varies from zero before contact to ~1 amp on contact, whereas resistance as you say varies by a small fraction of a small value – so current change is orders of magnitude more significant.

                            Edited By John Haine on 06/11/2020 12:06:35

                            #505588
                            John Haine
                            Participant
                              @johnhaine32865

                              More photos.

                              img_20201106_121002578.jpg

                              Xslide home switch. Permanentt connection from contact block to controller (black wire). Earth braid to contact screw, which has rounded contact end. You can just see the BeCu shim on the copper surface of the PCB.

                              img_20201106_121247986.jpg

                              Setup for setting tool offset using current sensing. Tool setter in MT4 taper has two reference diameters at the end. The larger one is ~20mm diameter, smaller ~6mm. Once side of supply via 4mm banana plug to tool setter, the other via big clip on the tool holder jack screw. The 20mm is used for external tools, the 6mm for boring tools (entered as -6 mm as the tool approaches it in the + X direction. You can see the black resin block in which the current transformer toroid is potted with a hole in the so it slips over the work of the setter.

                              img_20201106_121320243.jpg

                              This is the sensor. Started as an RS components current transformer with a core in a plastic surround. I removed that case, made a little cardboard box lined with Mylar tape with a slightly greased mandrel in the middle, set the core with a screened lead soldered to the wires in the box, and poured in potting resin. Then removed the cardboard when set and pressed out the mandrel.

                              #505590
                              mgnbuk
                              Participant
                                @mgnbuk

                                Timing belts are backlash free & the standard drive used for spindle encoders on smaller industrial CNC lathes. Larger lathes tend to use gearing inside the headstock, as the timing belt pulleys get to be too large diameter on larger spindles.

                                Nigel B.

                                #505599
                                Ian P
                                Participant
                                  @ianp
                                  Posted by mgnbuk on 06/11/2020 13:34:44:

                                  Timing belts are backlash free & the standard drive used for spindle encoders on smaller industrial CNC lathes. Larger lathes tend to use gearing inside the headstock, as the timing belt pulleys get to be too large diameter on larger spindles.

                                  Nigel B.

                                  I presume you are referring her to belt driving the encoder only?

                                  A timing belt will have very low backlash especially as the encoder will have little inertia.

                                  Ian P

                                  #505656
                                  mgnbuk
                                  Participant
                                    @mgnbuk

                                    I presume you are referring her to belt driving the encoder only?

                                    A timing belt will have very low backlash especially as the encoder will have little inertia.

                                    This particular discussion was about the spindle encoder, but timing belts are also a standard axis drive solution.

                                    They were the default method for fitting servo motors at my last employment (CNC machine tool rebuild & retrofit) & are widely used by OEMs – we have recently sold a large CNC DS&G lathe at work that had a 40Nm Z axis drive & 20Nm X axis drive that used timing belts . We used standard commercial HTD and Powergrip belts & pulleys, both of which are zero backlash.

                                    They were not used for spindle drives due to noise – high speed timing belts using wide belts to transmit high power can be incredibly noisy due to the air being trapped in the pulley grooves. A colleague specified a timing belt for a spindle drive on one occasion which was so noisy at top speed that ear defenders were required. This was very quickly changed to a 3 x B section vee belt alternative solution at the customer's request, which was almost silent.

                                    Nigel B.

                                    #505658
                                    Joseph Noci 1
                                    Participant
                                      @josephnoci1

                                      John, Thanks for all the photo's re homing/zero and tool setting sensors.

                                      I am going to see how best to design in at this stage – maybe it ends up simpler that way!

                                      The synchronous detector is worth pursuing – Basically a low level sine wave applied, say, to the tool and a sample of the same applied to a mixer. The second mixer input is from the contact point, ie, the setter in the chuck, and the signal then demodulated and detected for change – this is extended with a lock-in amplifier and can be very sensitive – reliable detection of contact can be with signals below AC mains noise , and other EMC, by 20dB or more…I am using an Analogue devices chip ADA2200 to trial and it looks good! If it works out, it means you can apply the excitation signal and sense point anywhere on any machine, without any electrical isolation of sensor, etc.

                                      We will see..!

                                      Now fighting Labyrinth seals – not easy getting the geometry correct, and even less easy machining the small and narrow tongues and grooves without CNC..

                                      Joe

                                      #505747
                                      Kiwi Bloke
                                      Participant
                                        @kiwibloke62605

                                        Joe, I've PM'd you.

                                        #507529
                                        Joseph Noci 1
                                        Participant
                                          @josephnoci1

                                          Some Progress on the lathe – Headstock is mostly done. Oil plug and breather hole still to do, and then pulley and collet closer..

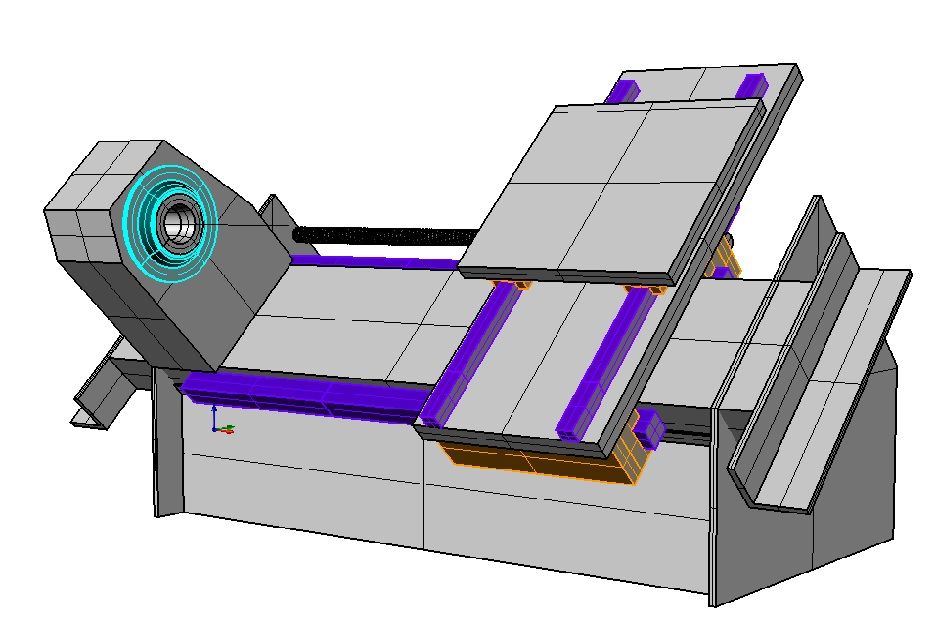
                                          The Lathe Concept slowly solidifying as well:

                                          cnc_lathe slant 1.jpg

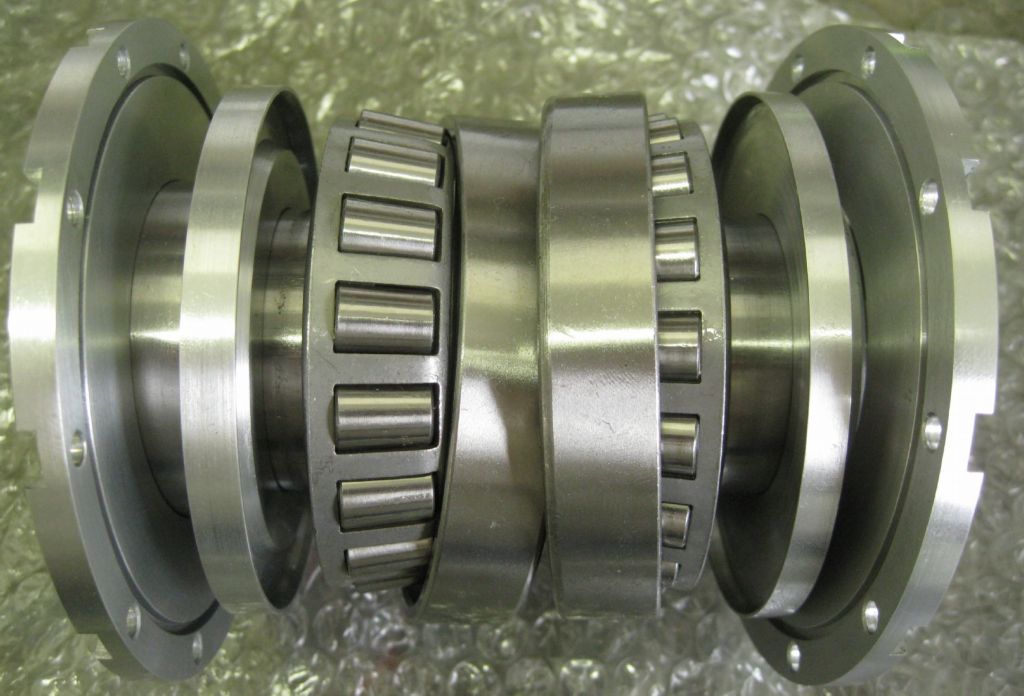
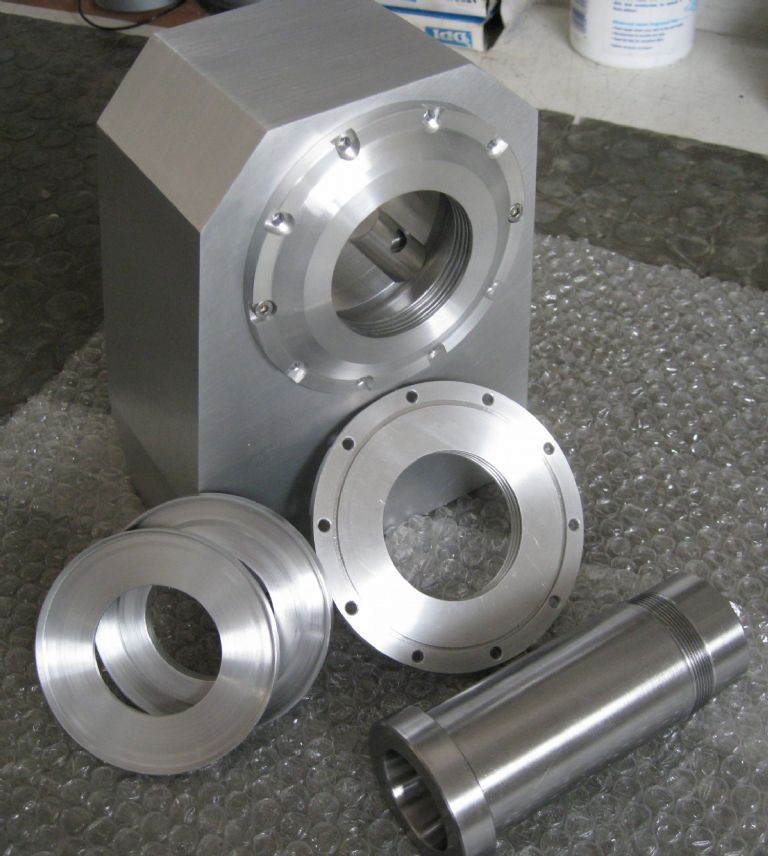
                                          Exploded spindle with oil flinger rings and face flanges

                                          exploded spindle.jpg

                                          Milling the headstock:

                                          milling headstock.jpg

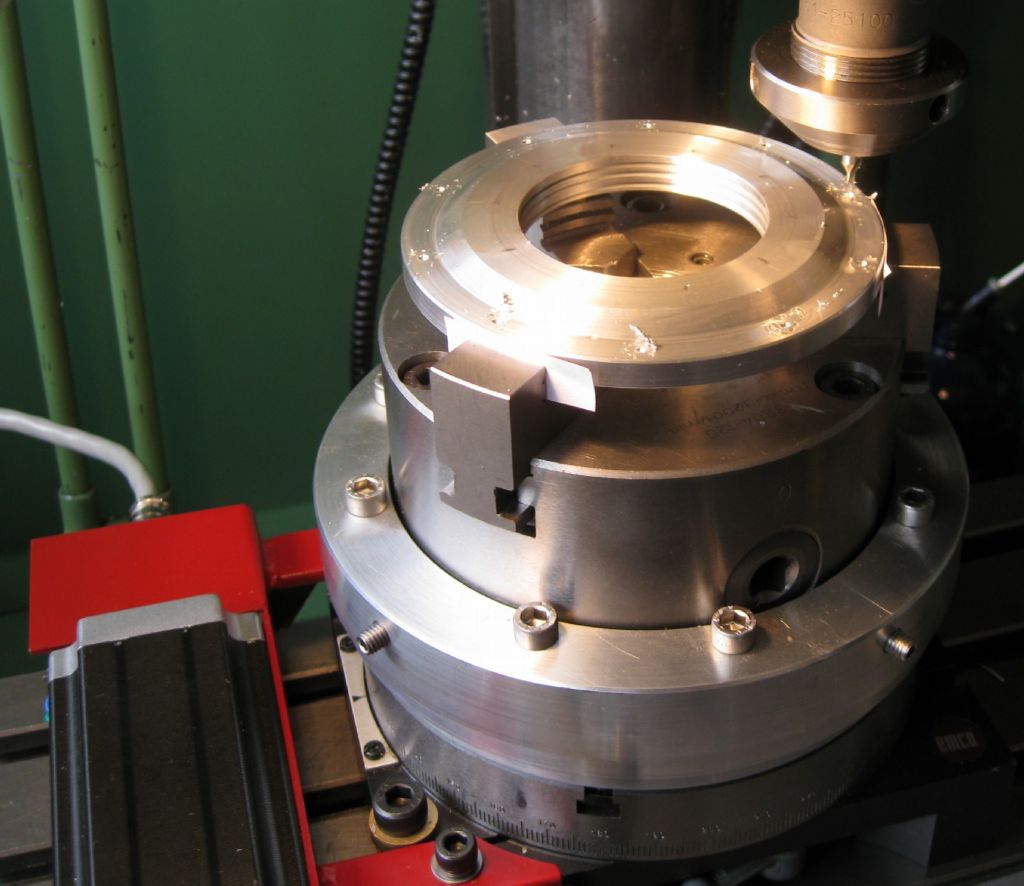
                                          Drilling / Milling out the Face Flanges on the Automated Rotary table

                                          spotting spindle flange.jpg

                                          Headstock parts ; Spindle, flingers and face flange ( seen from O ring oil seal side, below)

                                          headstock parts1.jpg

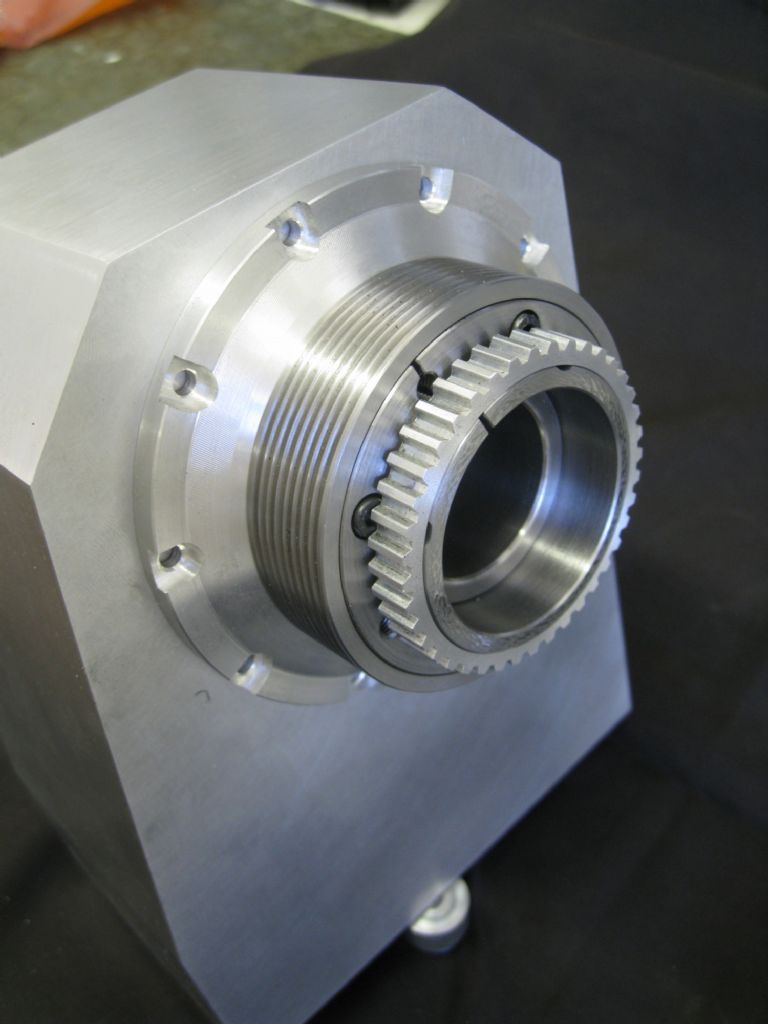
                                          milling headstock.jpg

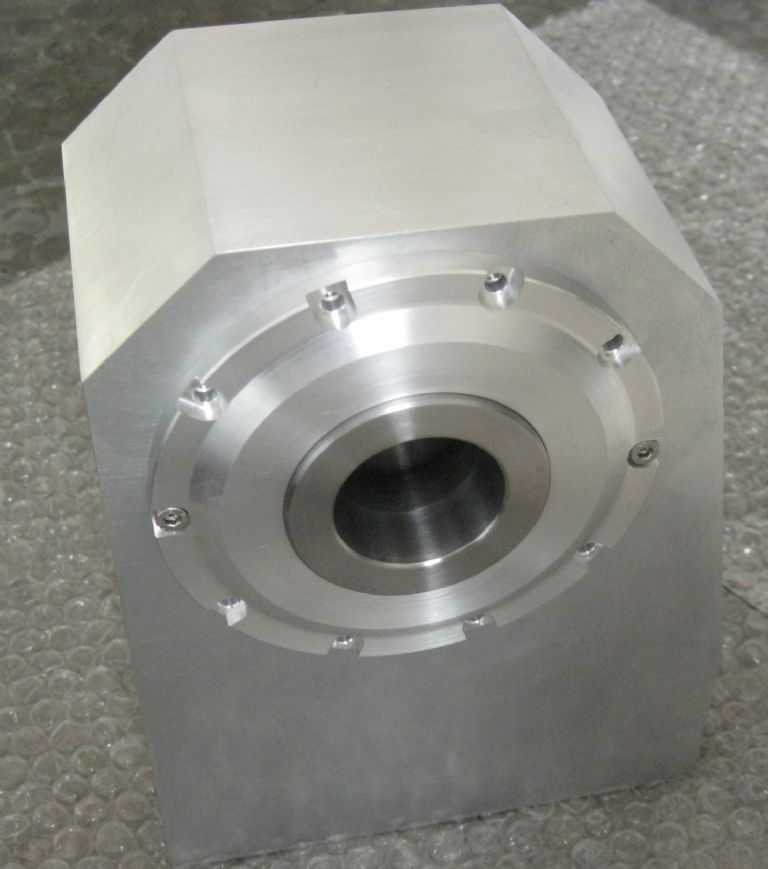
                                          Assembled Headstock, collet end.

                                          headstock collet end.jpg

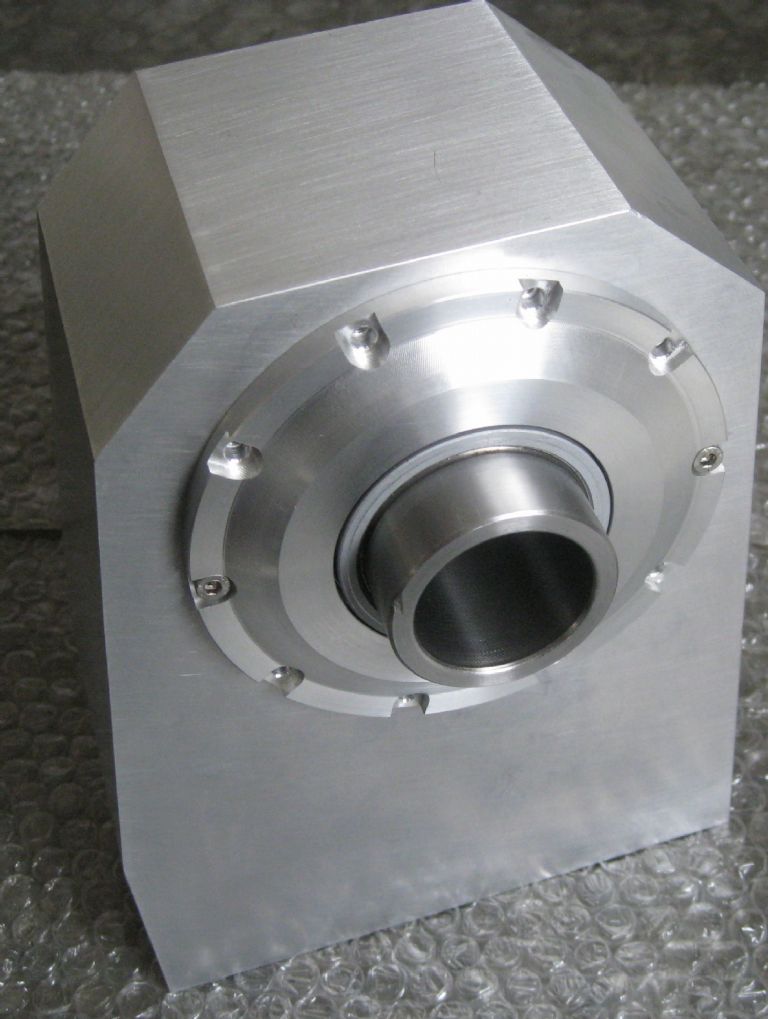
                                          Test assembly Headstock, drive end.

                                          headstock drive end.jpg

                                          More in a few weeks..

                                          Joe

                                          #512584
                                          Joseph Noci 1
                                          Participant
                                            @josephnoci1

                                            Some progress again

                                            Mostly focusing on the Headstock at the moment – It defines a number of downstream dimensions and implementation choices, so better get it done…

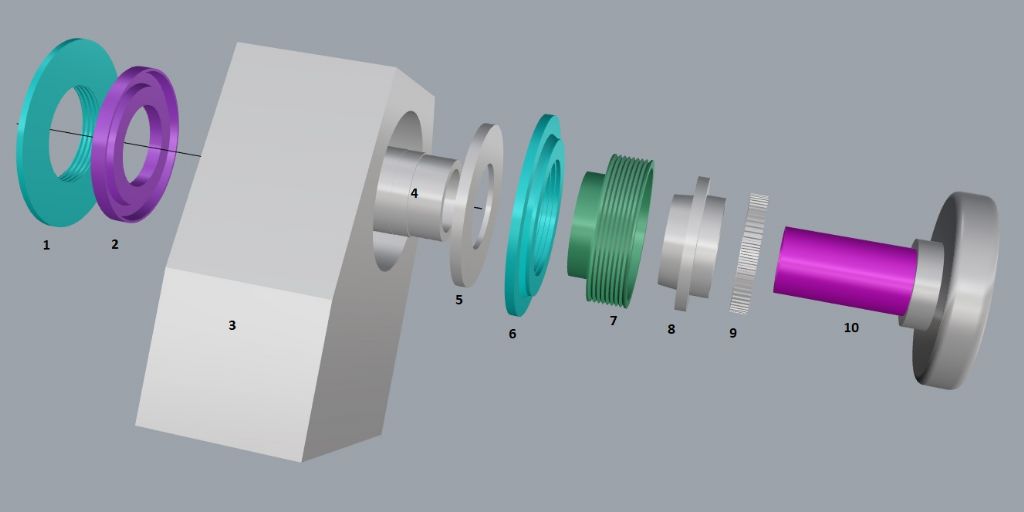
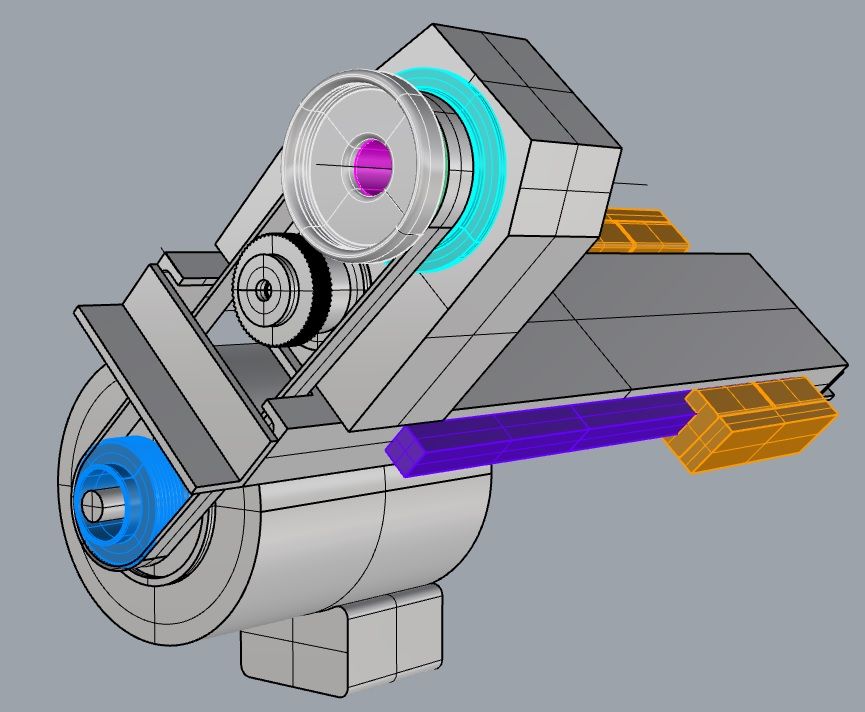
                                            Here is the Headstock model: ( I have not shown all threads, holes, screws, etc – they are turned off)exploded headstock model.jpg

                                            1 and 6 – End labyrinth oil seal covers.

                                            3 Headstock body, with spindle (4) inside.

                                            2 and 5 – end oil spinners.

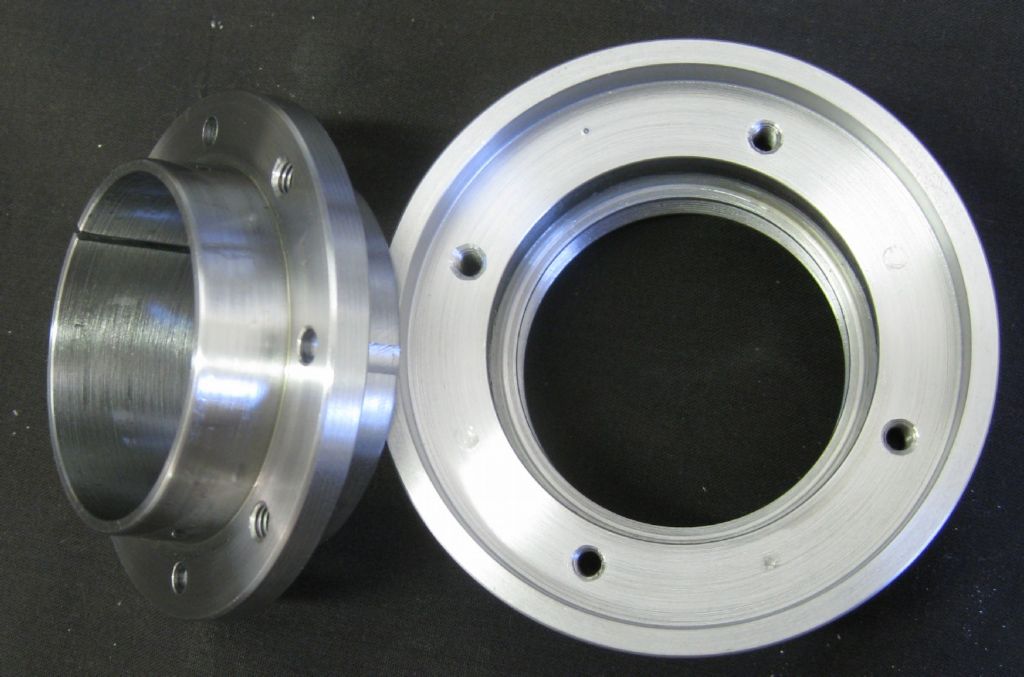
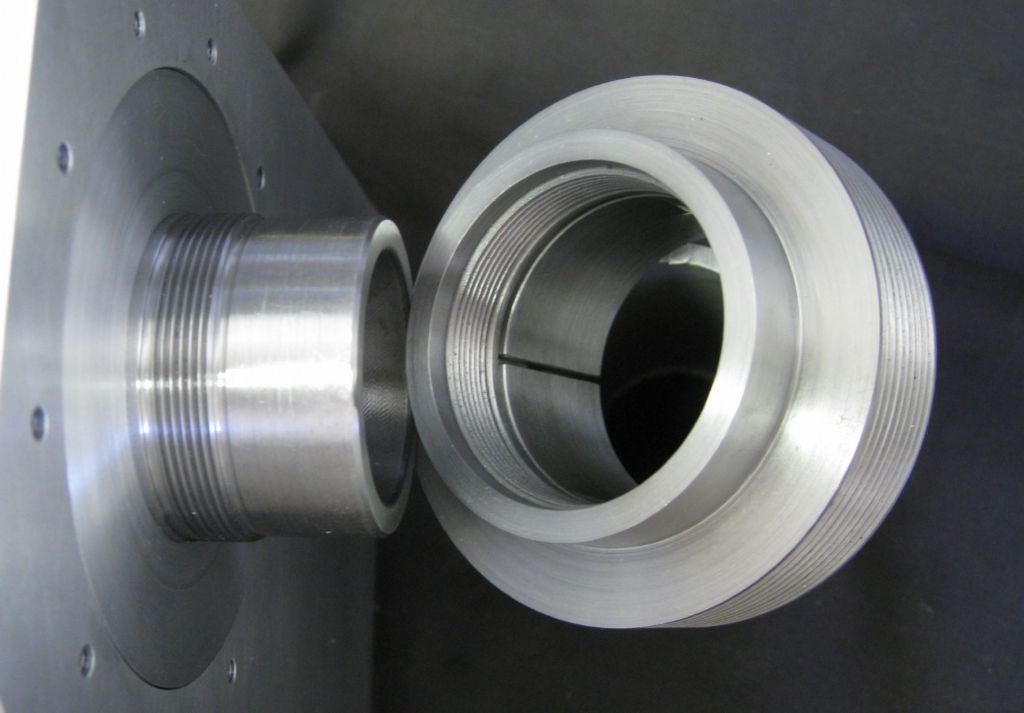
                                            7 – Spindle/ Bearing preload 'nut', combined with 20mm Sheave pulley

                                            8 – Taperlock for item 7

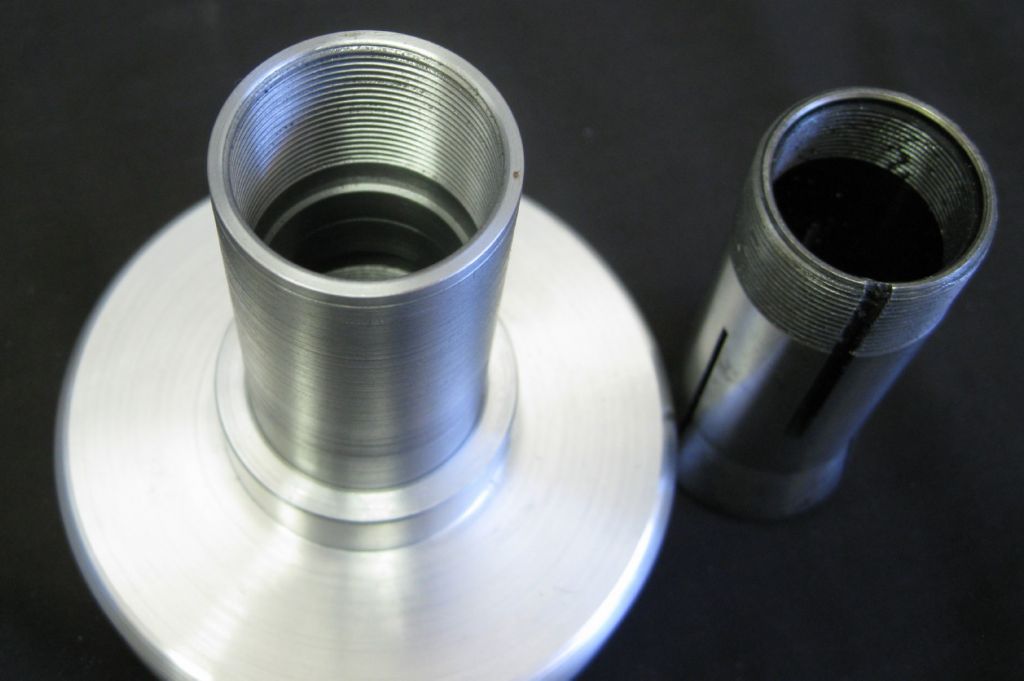
                                            9 – Toothed pulley for spindle encoder drive belt

                                            10 – 5C Collet closer.


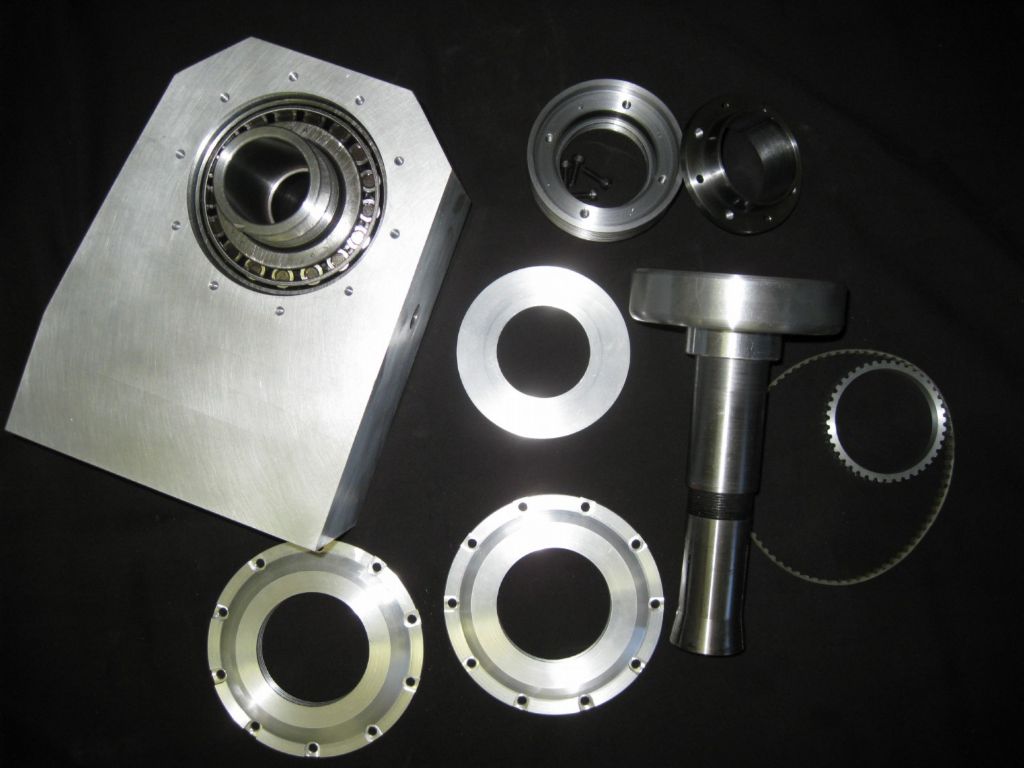
                                            And here are photos as made.

                                            misc parts.jpg


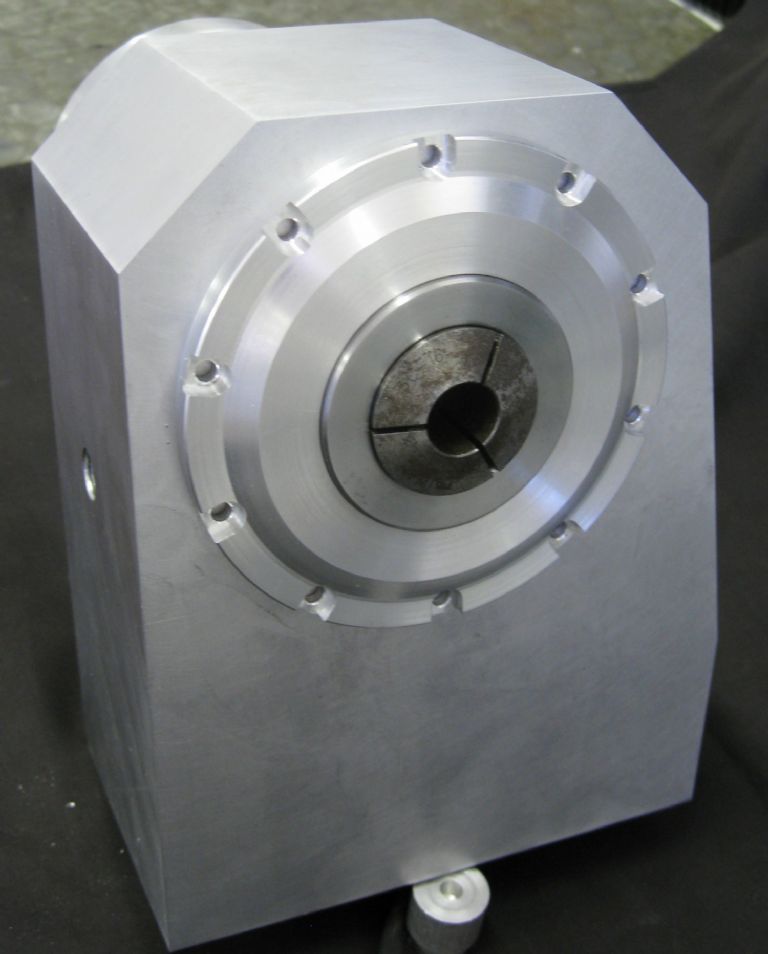
                                            Business end of Headstock, with a crappy collet in place..Center height is 150mm

                                            headstock collet end.jpg

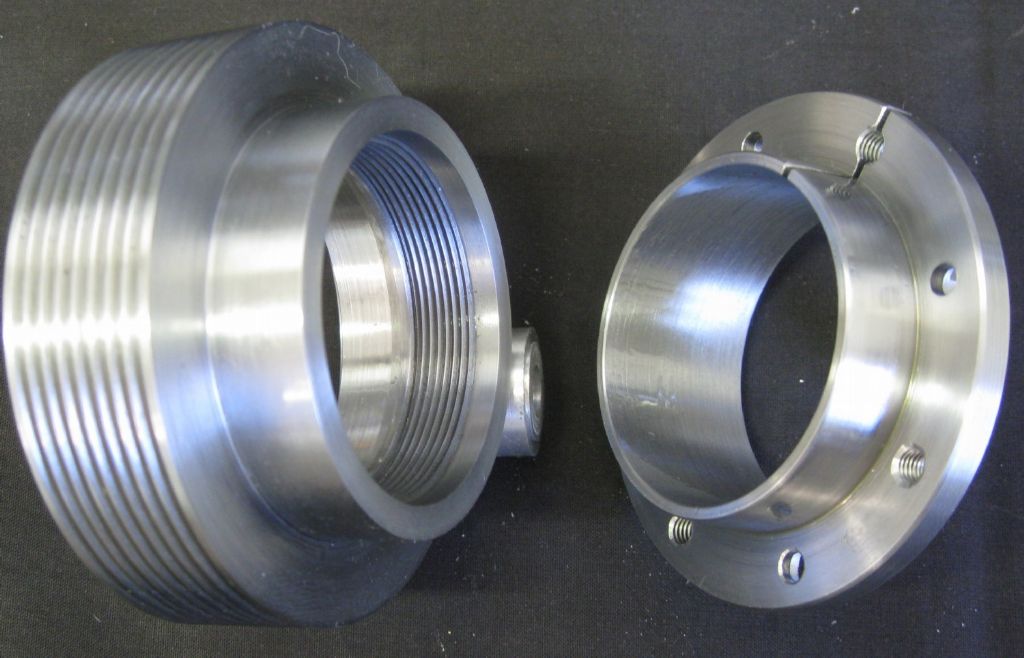
                                            The Pre-load 'nut' / Drive pulley with taper lock. Matl – Mild Steel

                                            drive pulley.jpg


                                            drive pulley2.jpg

                                            Where the pulley goes…

                                            drive pulley_spidle1.jpg

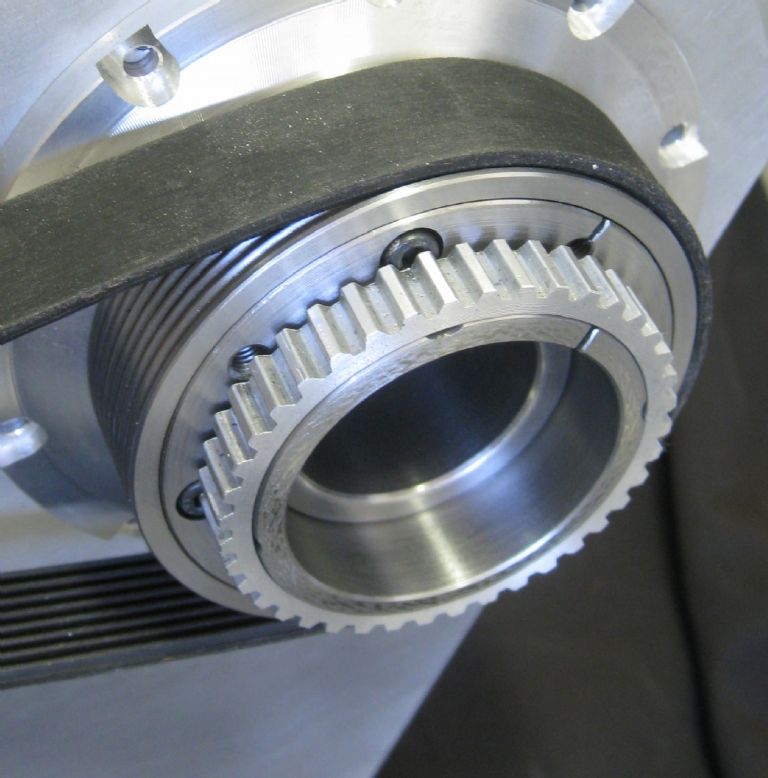
                                            Pulley fitted with taperlock and encoder drive pulley in place. Sheave Pulley is 80mm diameter.

                                            taper lock pulley and encoder drive pulley.jpg


                                            Drive belt fitting

                                            taper lock pulley and encoder drive pulley1.jjpg.jpg

                                            Collet and Closer ( Handwheel is 102mm diameter, Through hole is 28mm) Closer Matl – mild steel, handwheel Al

                                            collet and closer.jpg


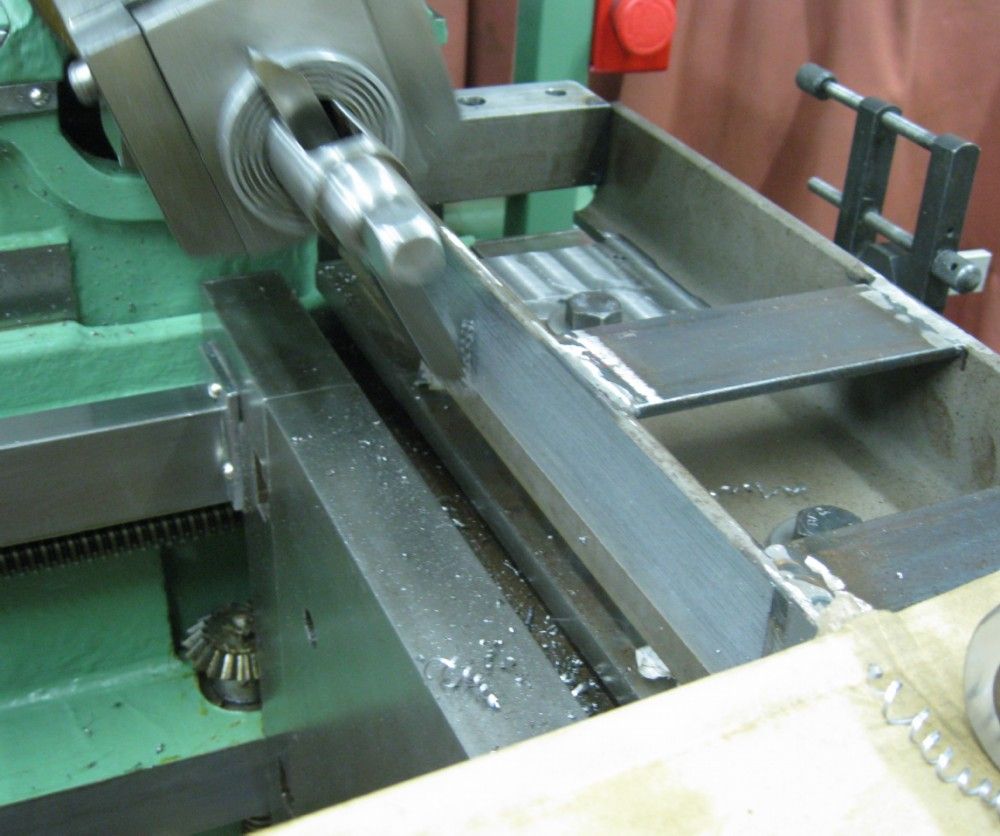
                                            Next is to start on the bed – That is a big problem – the bed is 700mm long ( 'active length' = 580mm) and cannot be flattened on my mill – the mill is too small. Likewise, too long for my 14" shaper….Maybe a nail file…

                                            Joe


                                            Edited By Joseph Noci 1 on 09/12/2020 17:30:10

                                            Edited By Joseph Noci 1 on 09/12/2020 17:34:05

                                            #515204
                                            Joseph Noci 1
                                            Participant
                                              @josephnoci1

                                              Another Installment…

                                              encoder headstock render.jpg

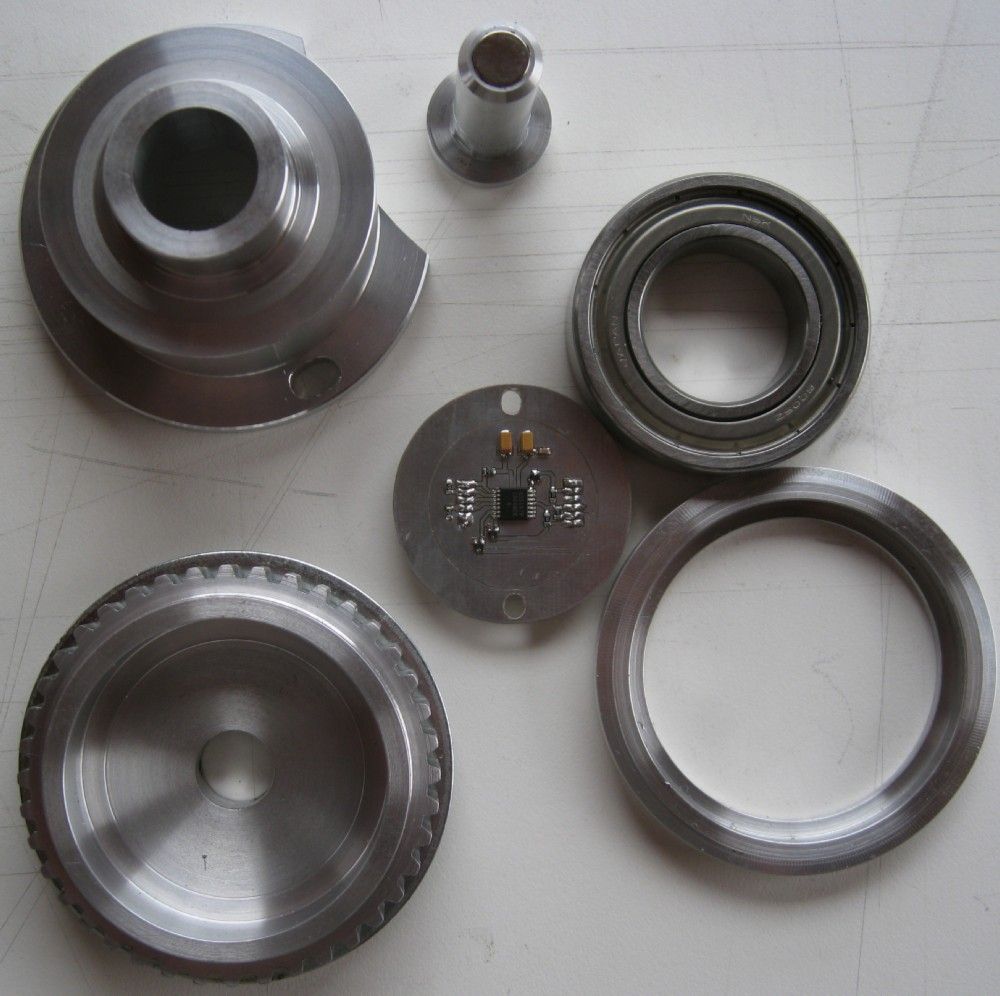
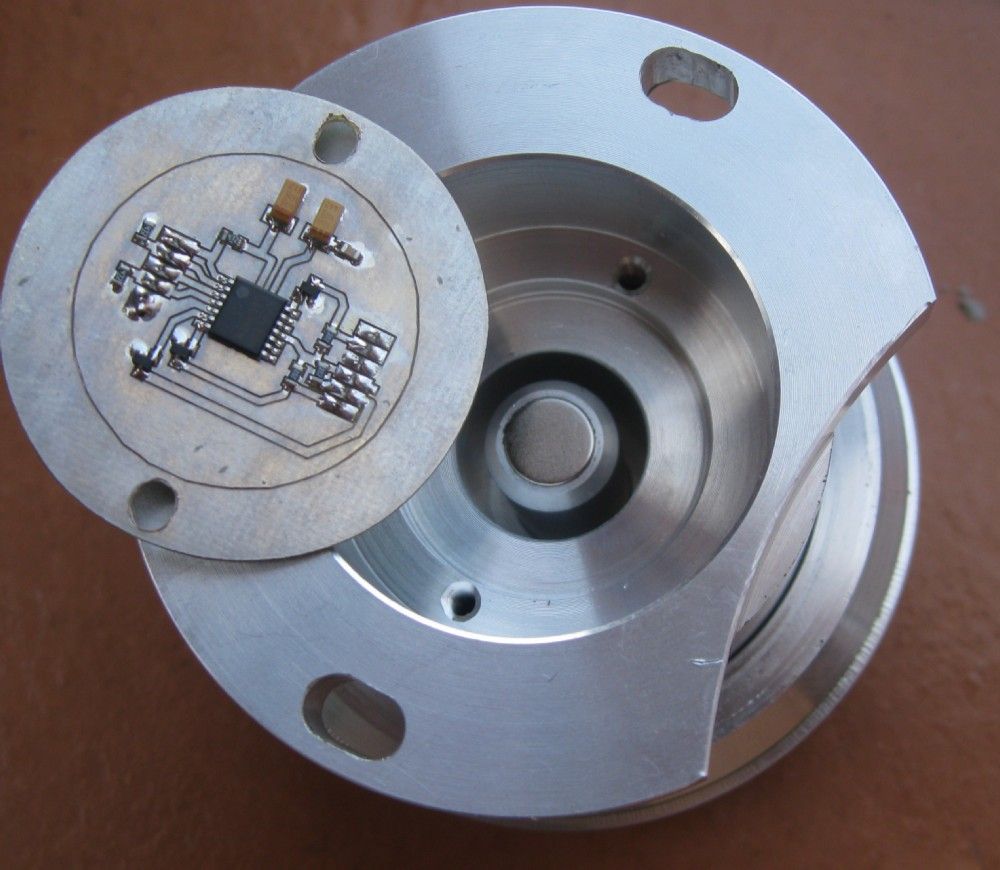
                                              Completed the ABZ Spindle Encoder assembly – using a magnetic encoder chip. The encoder is sat between the spindle drive belt, below the spindle assy in the above render.

                                              Below the encoder parts – the toothed pully is 60mm diameter for scale reference.

                                              encoder parts.jpg

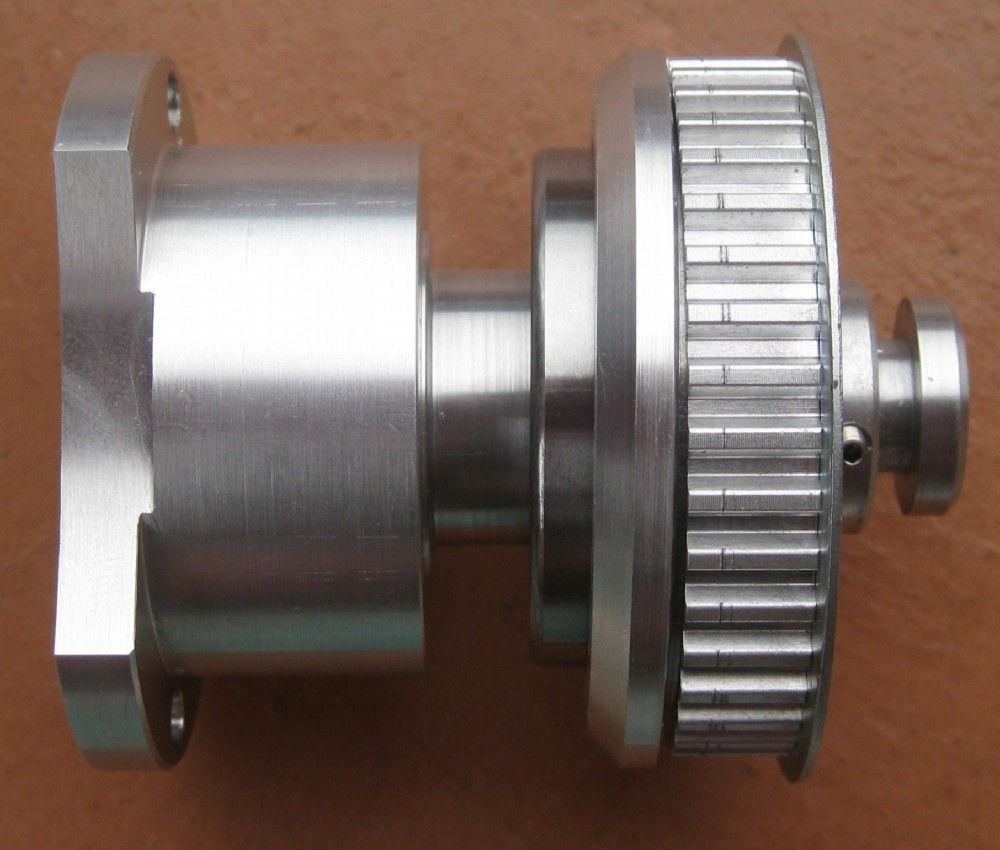
                                              Encoder partly assembled to test for fit before locktite of bearing.

                                              encoder part assembled.jpg

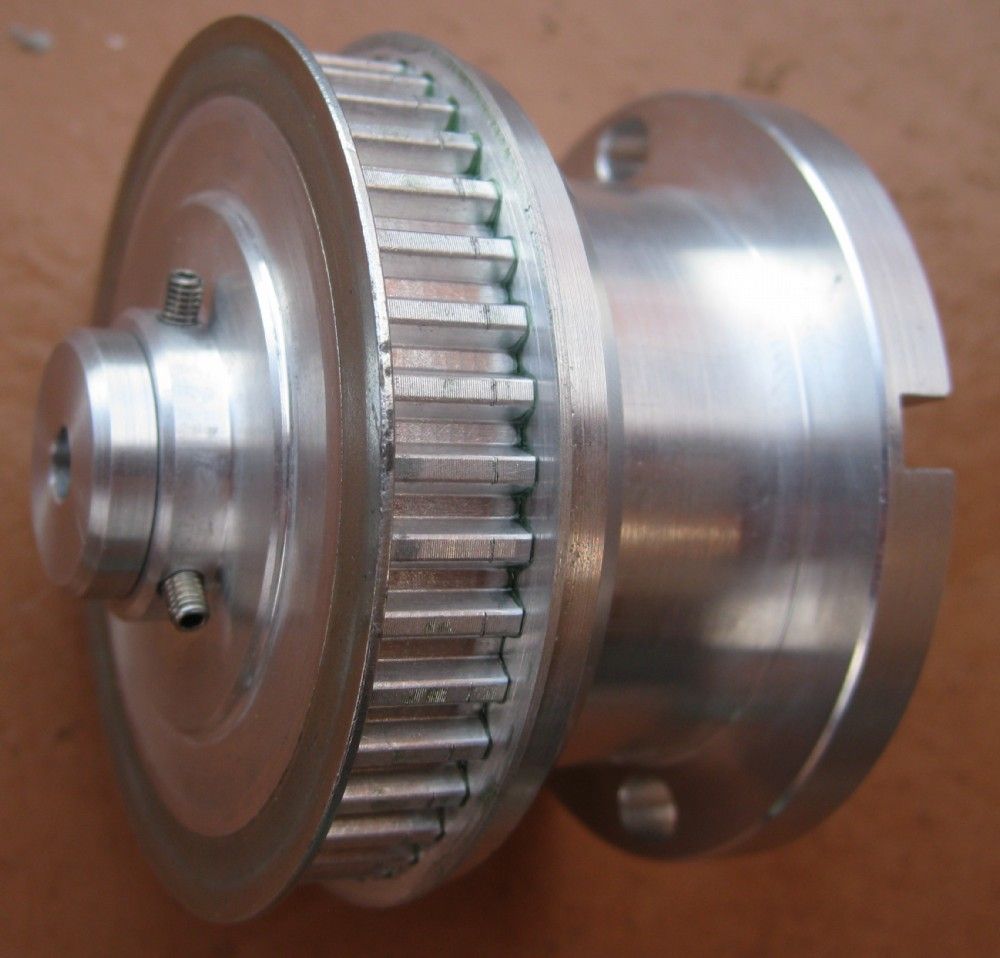
                                              Assembled Encoder – magnet shaft held in place with 3xM3 grub screws.

                                              A similar pulley on the spindle shaft drives the pulley on the encoder in a 1:1 ratio.

                                              encoder assembled.jpg

                                              Encoder chip on PCB, sits flipped in the cavity shown, chip over the magnet seen in the cavity.

                                              Encoder gives 1024PPR, or 4096 edges, with an index.

                                              encoder magnet end.jpg

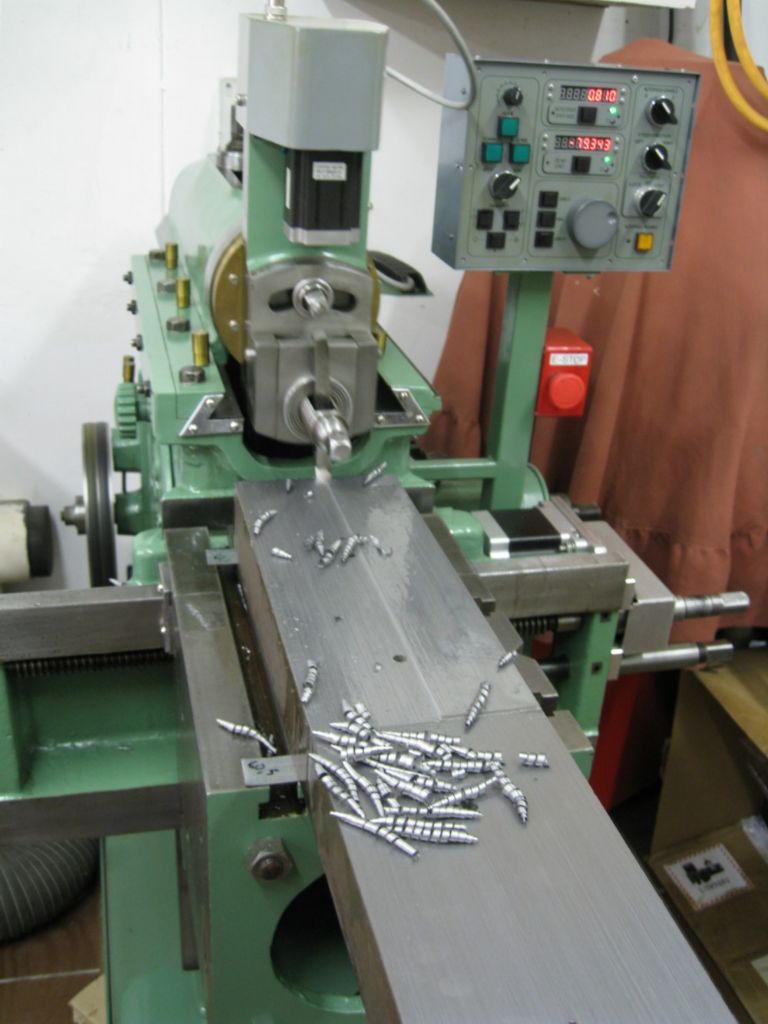
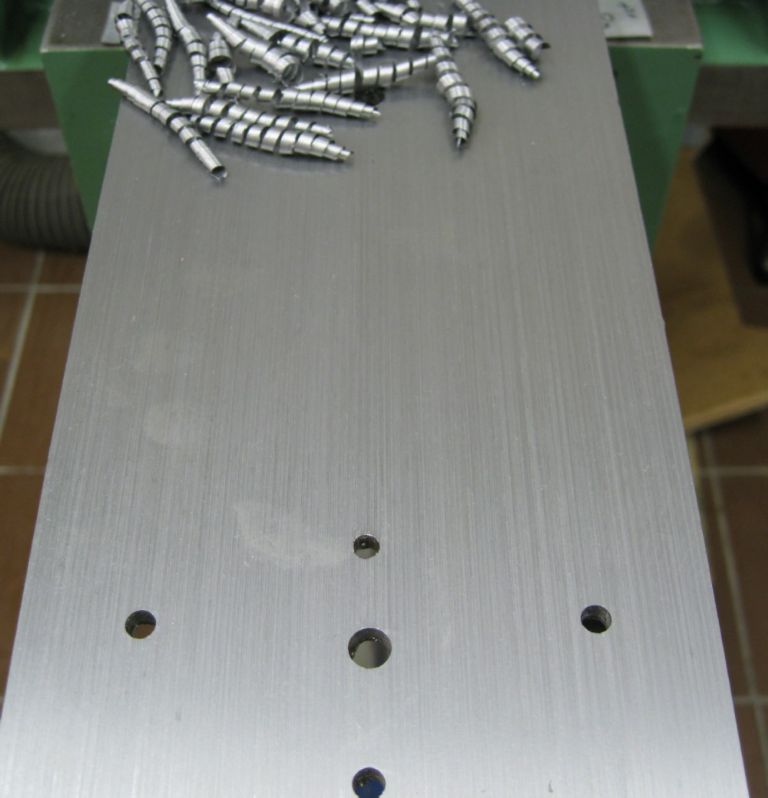
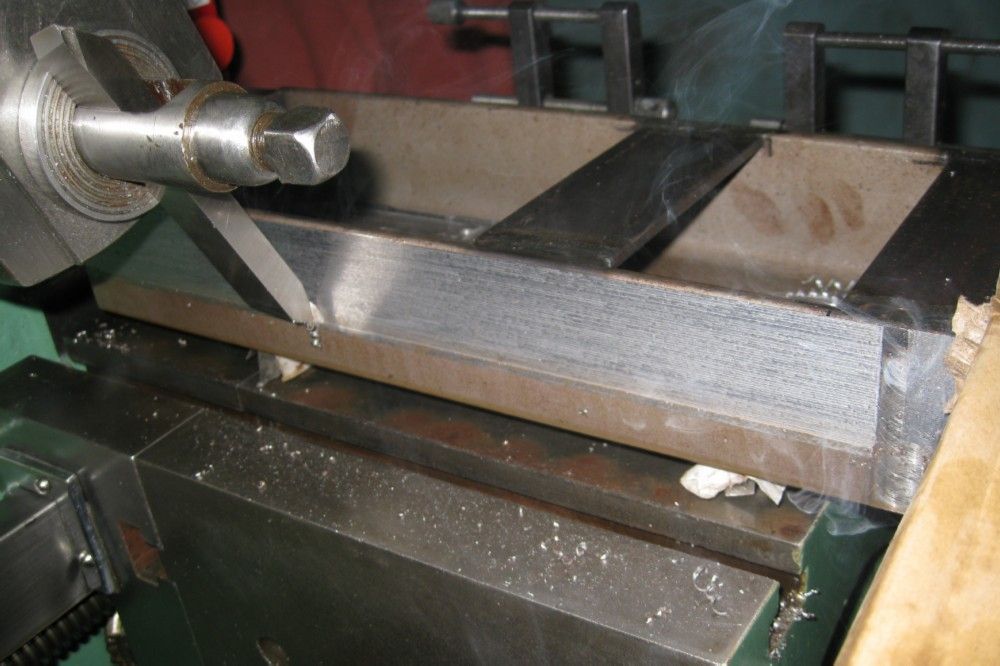
                                              Next up, the actual Lathe bed – bed is quite long, too long for my small Emco mill, and longer than the shaper stroke, so it was done in 2 halves on the shaper – that was interesting, to ensure ram alignment to the 1st half done…Judicious use of the dial gauge on the shaper Ram over its full stroke paid off – the finished bed has just been checked by a local Line-Boring company, on a granite table, and it would seem we are better than 0.01mm in width across the bed, and the sides are parallel to better than 0.01mm ! Blueing the bed flat top on the granite table showed contact over what looks like more than 95% of the flat surface. Some photos of the bed to follow in the next installment!

                                              Flattening the bed top:

                                              lathe bed processing1.jpg

                                              lathe bed processing2.jpg

                                              And then the sides:

                                              lathe bed processingsides1.jpg

                                              lathe bed processingsides2.jpg

                                              Next up, the finished bed, and the bed base and mounting starts..

                                              Joe

                                              #515213
                                              Michael Gilligan
                                              Participant
                                                @michaelgilligan61133

                                                Wow !!

                                                … I can say no more.

                                                MichaelG.

                                                #515261
                                                Joseph Noci 1
                                                Participant
                                                  @josephnoci1

                                                  Not sure if I should start splitting the posts – would like to keep the build history in one place, but as I am visually vociferous the post becomes rather large…Will do what is suggested…

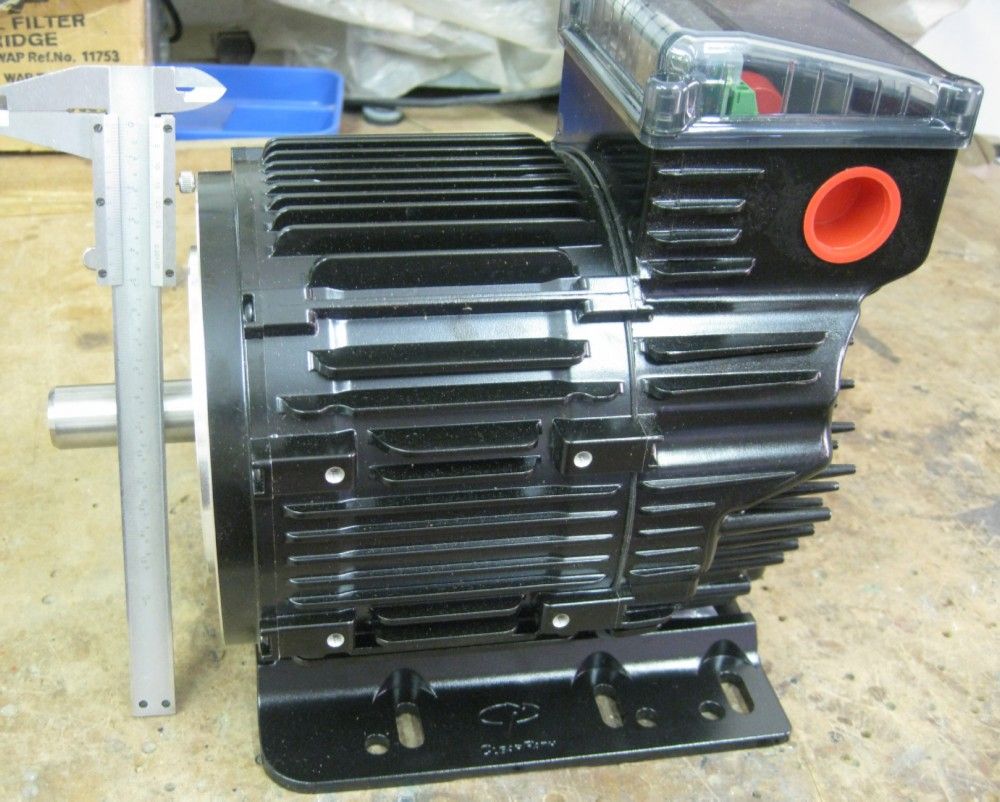
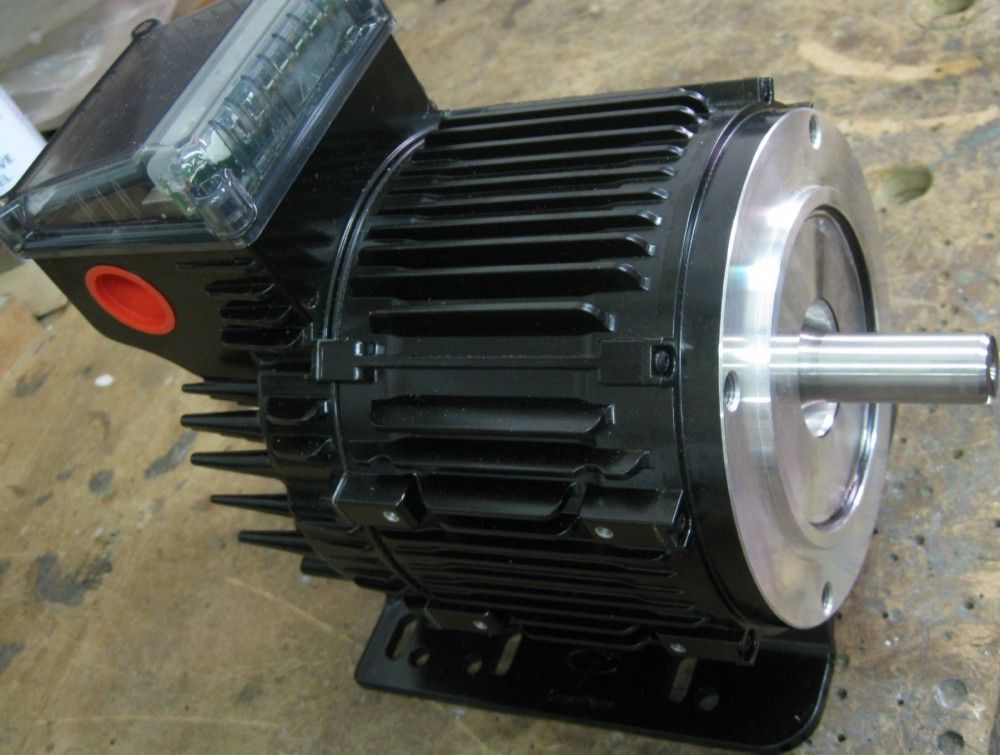
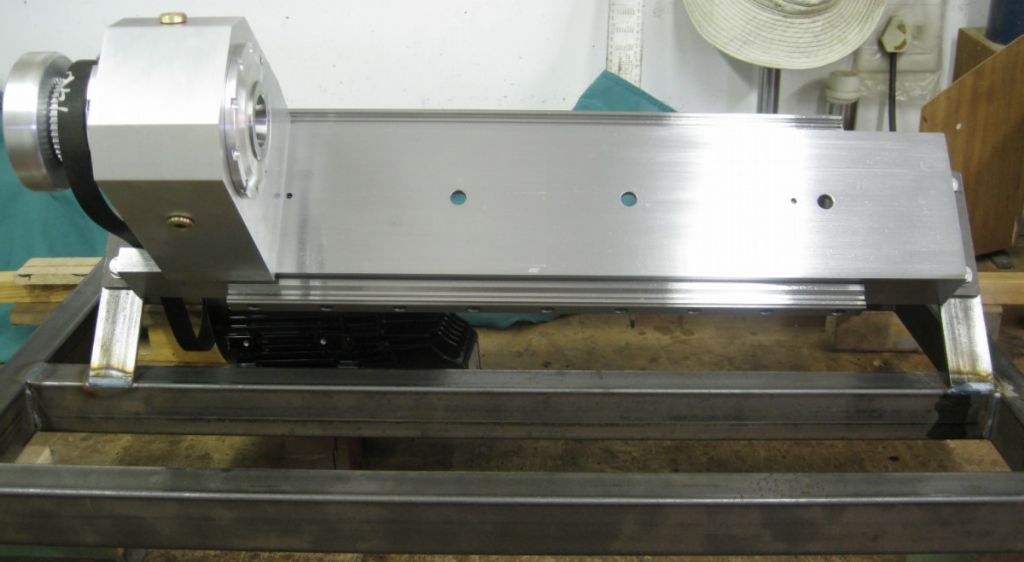
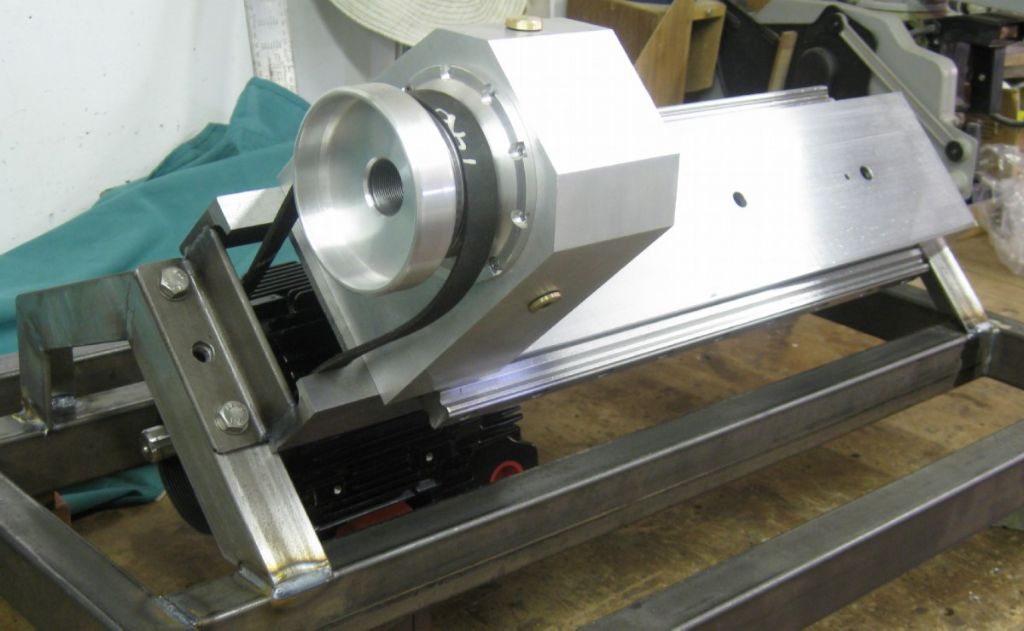
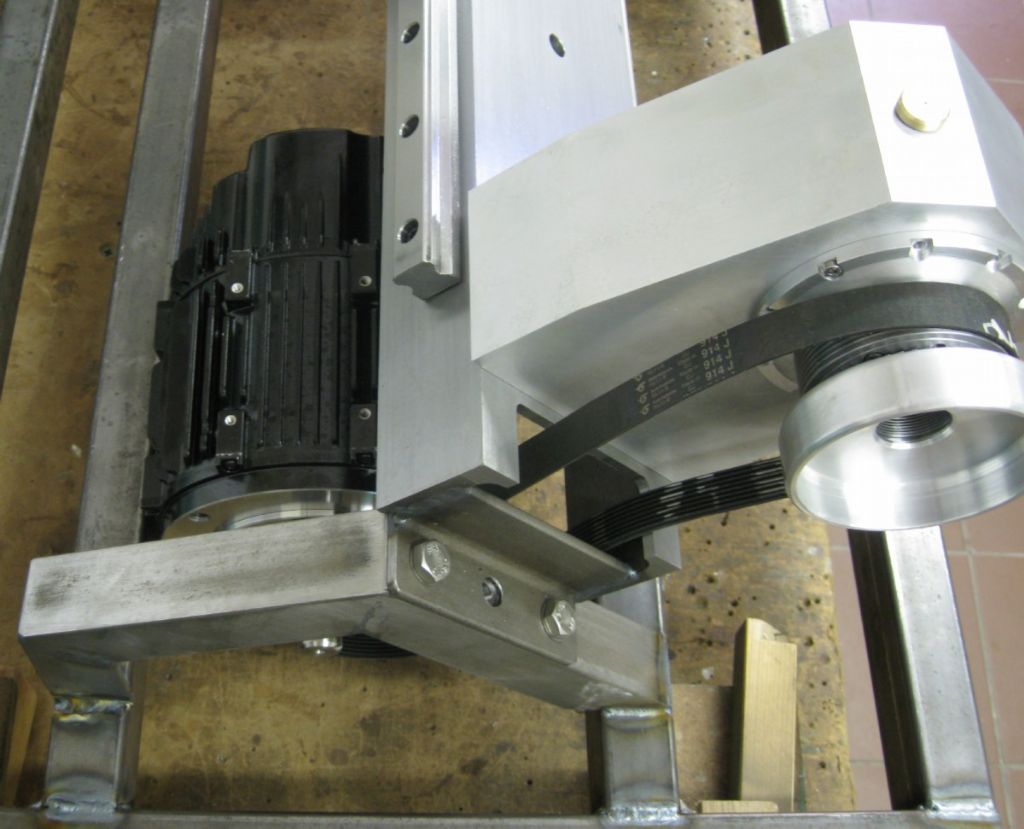
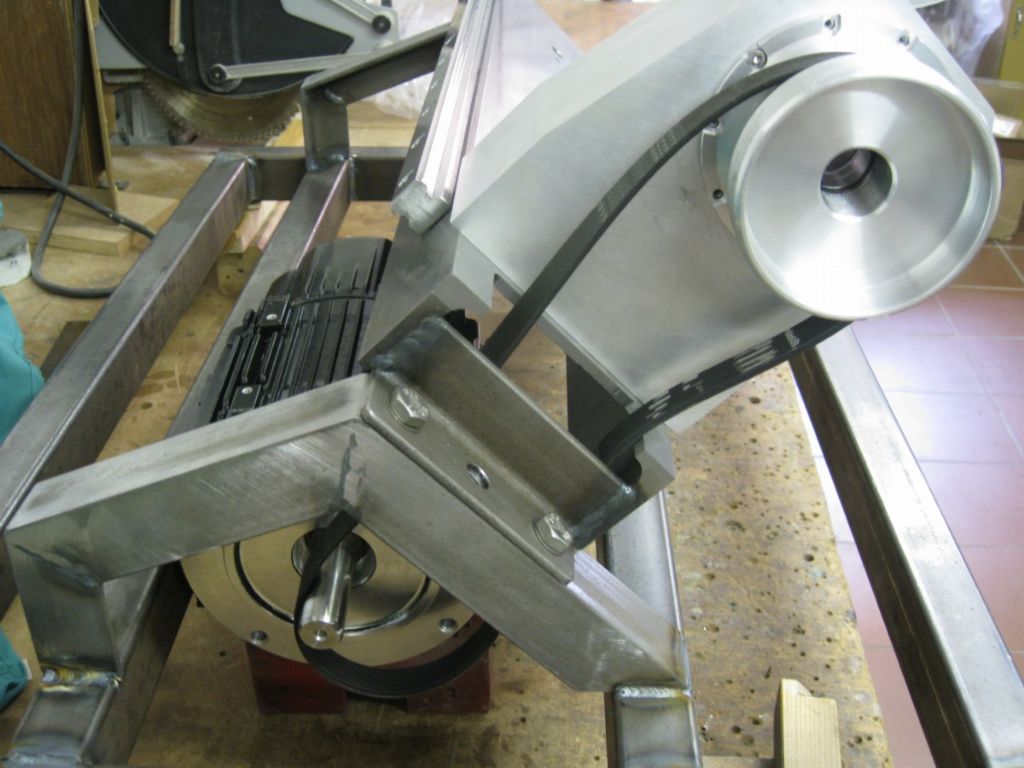
                                                  The Lathe bed turned out well, and the base framework is also started – The exercise now being to get the spindle motor positioned with regard to the drive belt, spindle, and motor tilt mechanism. The latter required as the motor will be fitted with a dual sheave pulley, one of 120mm OD and the step below , 80mm OD, giving max spindle RPM of 4000RPM and 2700RPM resp. I am hoping ( torque calcs indicate it is possible) that I will get away with just the 120mm pulley, and still have enough torque at low RPM's – sort of around 20RPM for some 'heavy' cuts.


                                                  spindle motor2.jpg

                                                  spindle motor1.jpg

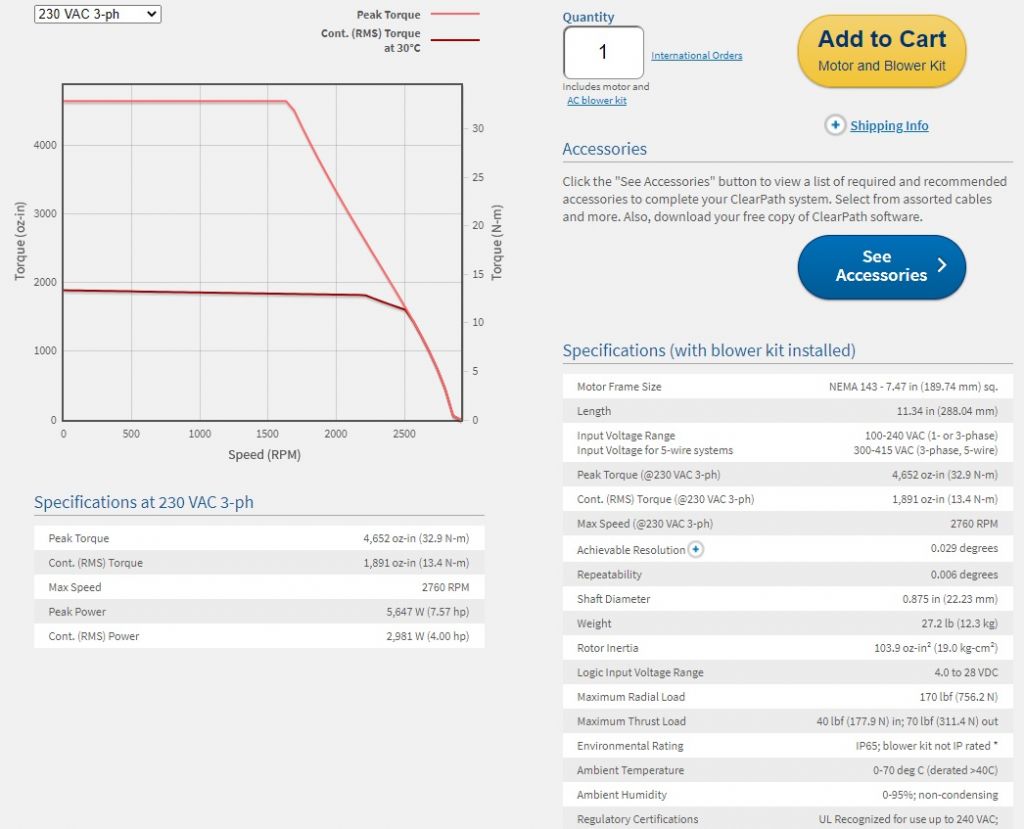
                                                  the Motor specs 1PH and 3PH:

                                                  motor@230vac 1ph.jpg

                                                  motor@230vac 3ph.jpg

                                                  In the event that the smaller pulley is needed, the motor needs to be able to pivot to take up the belt slack, and the motor must slide back 20mm, to line the 80mm pulley up with the spindle pulley – this all to be a one lever movement exercise…

                                                  The motor is big for the lathe – 1.7KW @ 220VAC 1PH, and 2.9KW @ 230VAC 3PH.

                                                  It is a rather special motor – permanent Magnet rotor, and is actually a very high power closed loop 'stepper motor' dead silent in operation, no noise, no step feeling, etc. It is in essence a AC servo motor, driven by step and direction input. It is a closed loop control, with a 32000 count encoder.

                                                  The reason for using this motor is that it has full torque from 0 RPM and maintains the torque well up the RPM curve, esp if fed with 3Phase. In addition to driving the spindle for conventional turning, it serves as the lathe's C axis, with rotational position control capability to within 0.08 degrees, allowing use of live-tooling in the lathe to 'mill' the workpiece in the chuck ( Hex heads, High pitch 'threads' and anything else…) Holding torque is very high, so medium milling should be possible, and low speed toque is high, allowing full 'power' at low rpm's.

                                                  Below – The bed trial fitted to the base framework –

                                                  lots of effort went into straightening out the base frame after welding, all checked on a granite table..

                                                  The Lathe bed is as flat as the proverbial pancake, and once the base frame was straight, the lathe bed side supports were bolted to the bed, and then the side supports tacked onto the base frame. The welds were then tackled in short steps, alternating left/right and obliquely to help prevent the base frame from distorting. It Worked!

                                                  See how nice the bed shaped up!

                                                  The slides are 25mm square – nice and beefy..

                                                  bed_1 front.jpg


                                                  bed_oblique 1.jpg


                                                  belt 1.jpg


                                                  belt 2.jpg


                                                  Lots to do before the next post, so that may be in a good few weeks time!

                                                  Joe


                                                  Edited By Joseph Noci 1 on 24/12/2020 13:44:09

                                                  #515444
                                                  Neil Lickfold
                                                  Participant
                                                    @neillickfold44316

                                                    Are you using any wavy bearing springs in your spindle pack at all? Or any spacers between the bearings?

                                                    A very nice project. Be interesting to watch the progress. Thanks for sharing what you are doing.
                                                    #515457
                                                    Joseph Noci 1
                                                    Participant
                                                      @josephnoci1
                                                      Posted by Michael Gilligan on 23/12/2020 20:46:39:

                                                      Wow !!

                                                      … I can say no more.

                                                      MichaelG.

                                                      But you should, Michael! At least criticise a little – How else do I know where I am deluded in my doings??

                                                      Joe

                                                    Viewing 25 posts - 1 through 25 (of 173 total)
                                                    • Please log in to reply to this topic. Registering is free and easy using the links on the menu at the top of this page.

                                                    Advert

                                                    Latest Replies

                                                    Viewing 25 topics - 1 through 25 (of 25 total)
                                                    Viewing 25 topics - 1 through 25 (of 25 total)

                                                    View full reply list.

                                                    Advert