Chester Super Lux advice
Chester Super Lux advice
Home › Forums › Manual machine tools › Chester Super Lux advice
- This topic has 174 replies, 22 voices, and was last updated 4 January 2025 at 16:47 by
 Taf_Pembs.
-
AuthorPosts
-
26 April 2023 at 21:29 #642728
 Taf_PembsParticipant@taf_pembs
Cheers folks, with a bit of luck and a fair wind there will be some progress soon.
I hope so as I have a fair few jobs I need it for, my fixed steady for the lathe has a broken clamp and I need that for another job.
It's becoming a bit like British Rail … and I'm sure we all know that catch phrase!
 27 May 2023 at 21:11 #646709
 Taf_PembsParticipant@taf_pembs
Evening all..!
Well.. after lots of saving and reduction in the beer intake for said reason.. its here!!

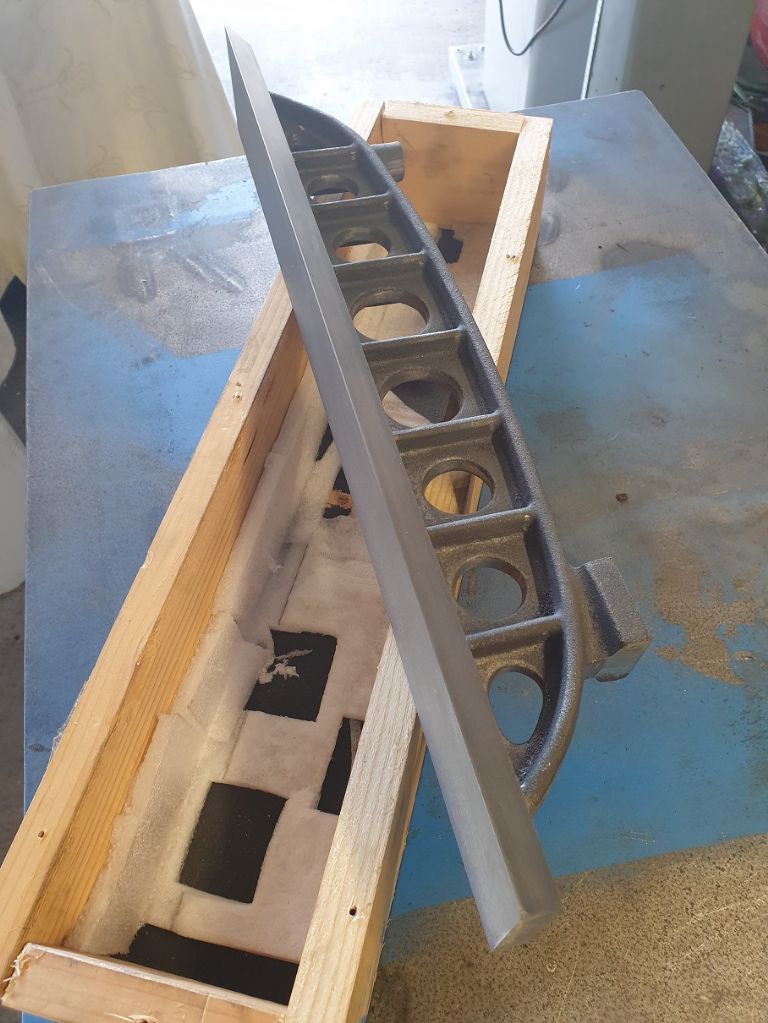
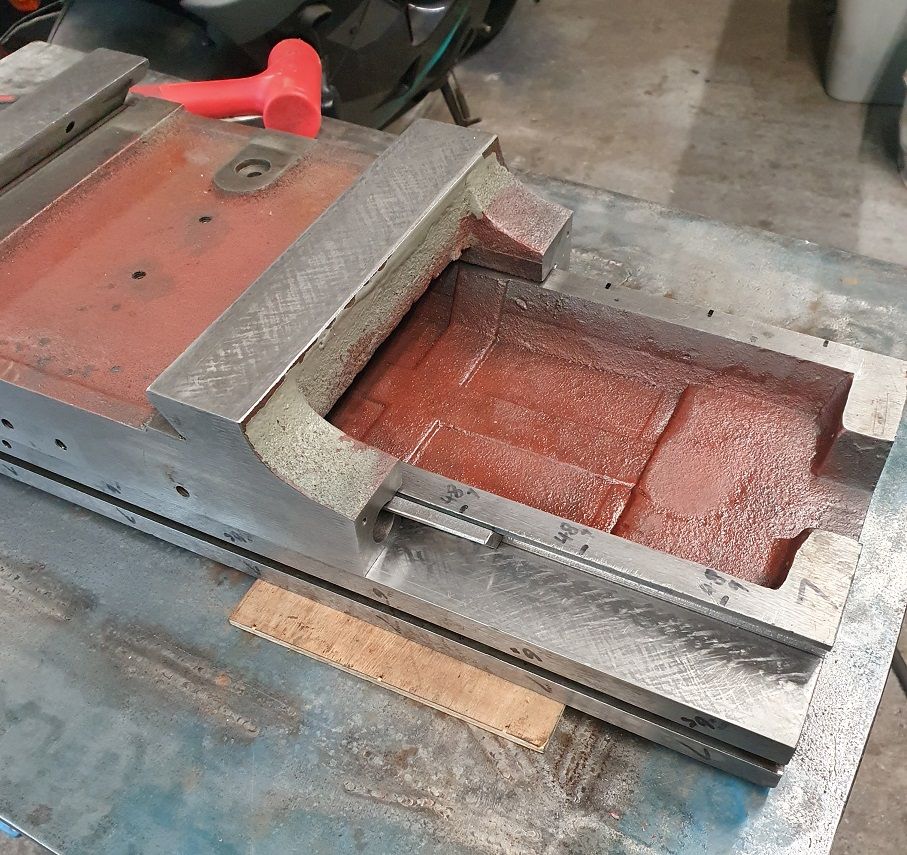
A wonderful 20" long piece of cast iron art created by Mr Clive Lamb (Thank you Clive) of HR Lamb & Sons Machinery (No affiliation or discount, just good service) .. and what a fine piece it is..
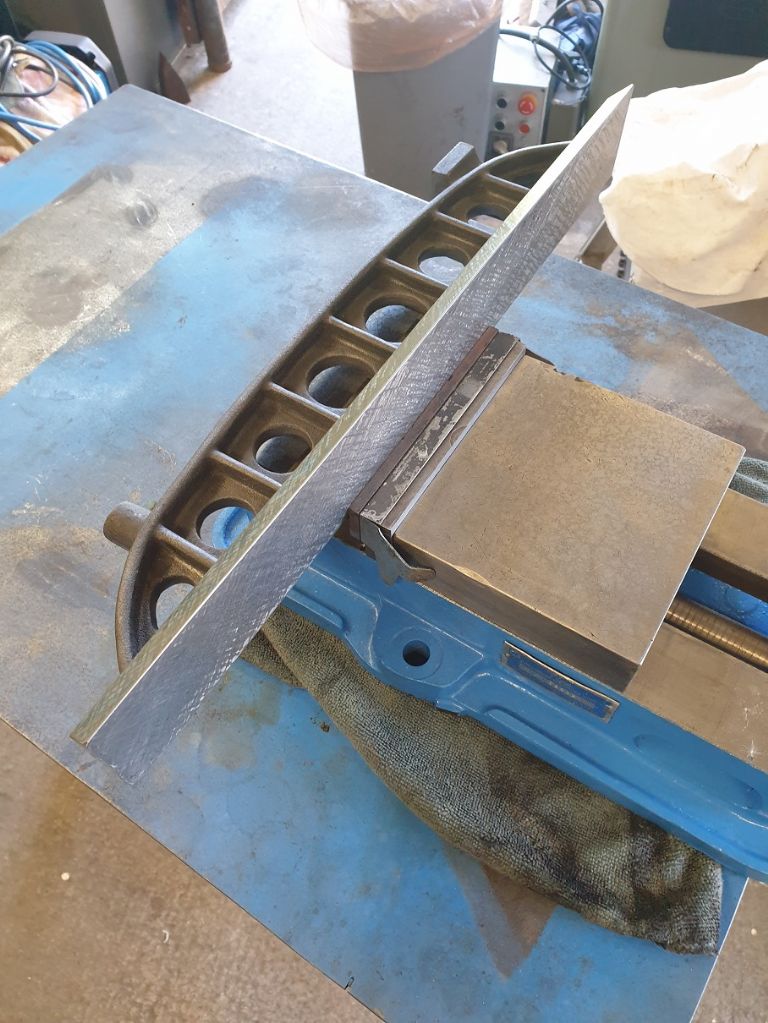
A part finished 20 incher that I have now milled the ends (Cheers Mr J!) and started scraping .. however, it seems my old small steel hand scraper has passed it's hardened end (if it had such a thing) as it needs to have the cutting edge dressed with a stone after only a few scrapes as it starts gouging and scratching rather than scraping. It was pretty short to start with and hence very uncomfortable.
So I've also ordered a Rennsteig scraper with carbide insert (Amazon of all places for 42 quid!).
I've roughed it in – which really only took a few passes – and will wait for the proper scraper to finish it.
Oh and picked up a proper Kurt D6* in decent condition for a proper win on the bay of stuff.. dam handy to hold it while scraping. (Bit big for the mill mind but will come in handy and couldn't say no at the price.. sorry about the paint colour, it was all I had on the shelf !! )
So the project can continue! British Rail's got nothing on me… getting there indeed..

These dovetails don't stand a chance !
Now for a celebratory beer..
 28 May 2023 at 19:45 #646789
Pete Rimmer
Participant@peterimmer30576I have several of his pieces the iron is a joy to scrape and as you say the quality is right up there.
What are you using for a reference Taf?
29 May 2023 at 00:06 #646801 Taf_PembsParticipant@taf_pembs
Evening Pete..
Yes, it is a fine piece, need to make a box for it though.. more to add to the to do list!
I've an 18" square granite plate, fine for the flat diagonally but need to offset each end an inch for the bevel.. seems to be working fine.
I found that using some Wilko cheap yellow oil artists paint mixed with a bit of way oil to use as a contrast makes life so much easier .. works a treat!
 29 May 2023 at 10:10 #646831
Pete Rimmer
Participant@peterimmer30576You shouldn't use an unqualified plate as a master for scraping a reference piece like a straight edge. I mean it'll get you fairly close but you would not believe how fast you can wear a dip in a granite. At the very least, print it in both diagonal directions and compare the results. If they are not exactly the same, the plate is worn. Even if they are, the plate might still be worn but you will likely see a difference.
Shame you aren't closer to Kent I could lend you a good straight edge as a reference or even lap your plate to grade 0 for you.
29 May 2023 at 10:30 #646835 Alan JacksonParticipant@alanjackson47790
Hi Taf,
Thank you for recording your struggle to get this mill as good as it will be when finished, Very interesting to see your solutions to the problems. Its going to be a great machine when finished

Alan
30 May 2023 at 22:13 #647065 Taf_PembsParticipant@taf_pembs
Cheers Alan, but I'm not counting any of those little brown feathered egg laying critters just yet.. I hope it ends up as a decent reasonably accurate machine.. the proof as they say will be in the cutting!
It's mostly a learning curve for my to see if I can do it and more so how well I can do it.. it keeps me busy and exercises the grey matter somewhat (and the patience!).
Hi Pete,
The plate is a new Dasqua 18 x 18 x 3 1/2.. it was listed as an A grade (the 'calibration sheet' enclosed with it said AA but that looked like one of those generic copies..) but for what I paid for it I suspect either is very doubtful .. however, there is a very tiny chip in the surface near a corner (slightly larger than a match head and a couple of thou deep that may suggest it is a second from another manufacturer. .. it was what I can afford and my expectation was way surpassed by what variation I can measure around it.
I have swept it with an indicator as shown by Don Bailey of Suburban Tool Inc and the most variation I can show is about 3 tenths so it cant be that bad, more than good enough for what I'm trying to achieve or able to scrape as I'm still trying to teach myself.
I have been alternating the printing, swapping ends and diagonals but there is a little bit to go yet before enough coverage to get a proper indication. The new scraper should be with me tomorrow so may get a bit done tomorrow evening.
As for the offer of a decent straight edge, that is extremely generous of you! I wish I was closer, then there would be a decent master to reference.. Cheers for the offer though, really appreciated

 9 June 2023 at 20:31 #648009
 Taf_PembsParticipant@taf_pembs
Evening all!
Well … after far less scraping than I was expecting the camelback is all tickety boo .. well, it's as good as the surface plate anyhow!
The main reason I went to the expense of getting it was for the dovetails but before I started on them I thought I'd check the column ways to see how bad … or good my scraping had turned out on them using the dubious method of printing form the saddle and stepping it either way by a small amount and bringing the new section into plane with the first scraped section … to my utter surprise it was incredibly good.!
There was 1 small area that was a fraction low on both ways at an equal point on the column but I already knew this from dong it before but decided to wait for the camelback to confirm it in case it was my method.
Utterly shocked that such a haphazard method actually worked.
As for the dovetails, my method of using the ground bar and the feeler gauges was just showing way too much error and despite the measurements being repeatable and fitting the saddle and gib pretty much confirmed what I was measuring by going seriously tight in places I wasn't convinced.
Turns out, it was right.. the dovetails on the column are more banana shaped than a banana!
Only contact at the extreme ends of the straight edge, such a small area that I could only go off where the blue was missing from the straight edge, I couldn't even see it on the dovetail.. best book another trip to the optician.
Going to need some significant scraping to get true but having a proper straight edge and a proper scraper is making it relatively painless (other than the wrist but small bouts is manageable).
See how much I can do over the weekend.. smurfing time!
Cheers..
 14 June 2023 at 22:59 #648550
 Taf_PembsParticipant@taf_pembs
So.. back to it..
Managed to spend a few hours over the last week trying to wear out my new carbide scraper.
Eventually got some success.. the primary dovetail on the column is now straight and showing good contact to the straight edge.. happy enough but still cant believe that it could be that far out of true and still have fresh 'scraping' marks!
Once happy I gave the saddle dovetail a quick roughing to the straight edge then blued up the ways and the 1 dovetail and tried the saddle for fit.. remarkably had full print on both flats and some contact of the dovetail.. very happy..
So repeated this just blueing the dovetail in order to scrape the saddle dovetail to match.
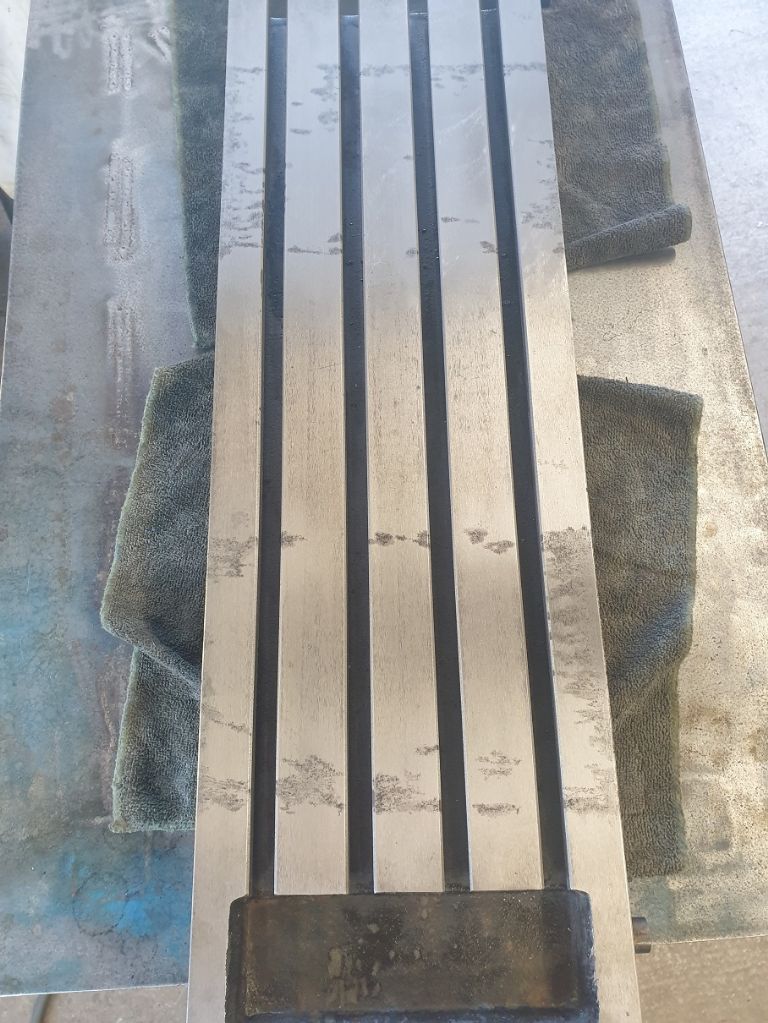
Here is fitting and print after a couple of rounds..
I didn't bother with more scraping pics, more than enough of them already, just the method I'm using.. and any comments regarding this are most welcome – good or bad it's all school, I'm just trying to work it out as I go..
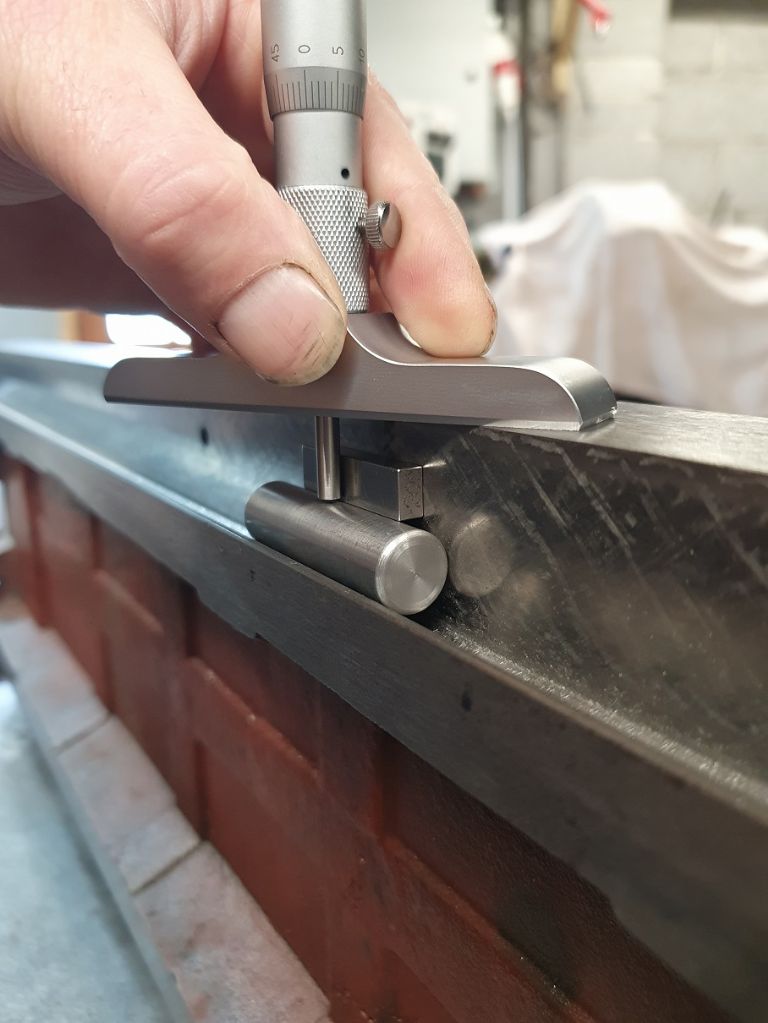
Once happy with a decent print on the saddle I set about measuring across the dovetails on the column for parallel and bananaring .. a 1/2 inch pin either side to get contact at the mid point of the dovetail and measure across – repeat every 2 ish inches up the ways.
I was a bit worried about how far out it would be but to my surprise it wasn't that bad.
I had already done a tiny bit of rough scraping on this side using the ground bar & feeler gauges mentioned earlier and during that it didn't seem anywhere near as far out as the main (non Gib) side.
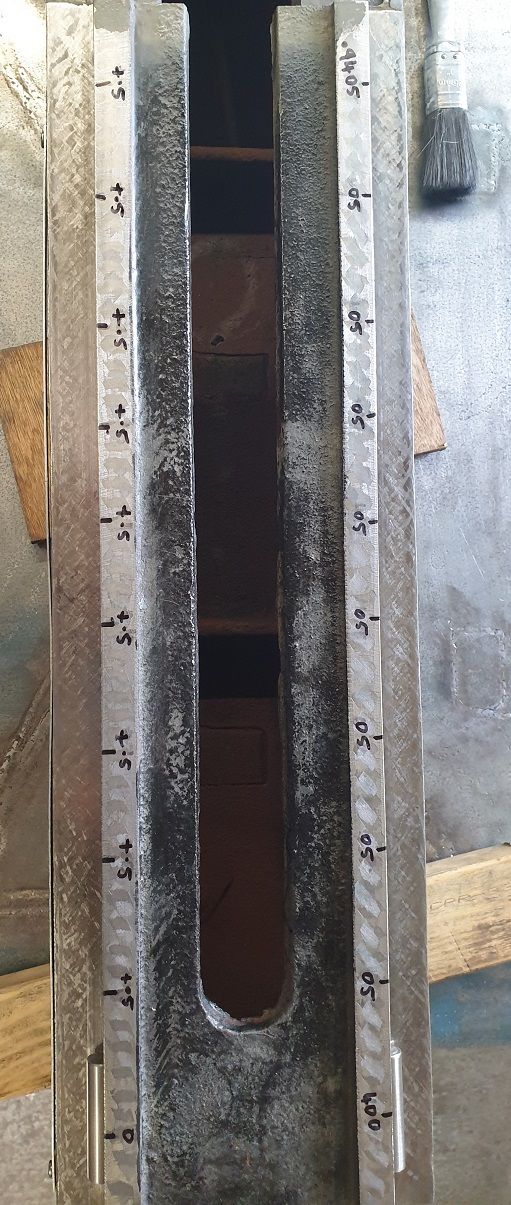
From top to bottom (in thou) using smallest as 0 it was aprox .. 0, +0.5, +1 +2 +2.5 +1 +2 +2.5 +1.5 +1 +0.5 so not that bad (forgot to photo the numbers!)
The straight edge showed the 2 higher spots nicely. So there's next job.
I dread to think how big a shim I am going to have to fit to the back of the gib, it was way too loose and out of adjustment before I started .. anyone got some spare 1/4 inch think brass bar stock?


Edited By Taf_Pembs on 14/06/2023 23:00:09
20 June 2023 at 00:25 #649059 Taf_PembsParticipant@taf_pembs
Evenin' all..!
Managed to get a few more hours in over the weekend. Finished the column dovetails, they now have decent contact to the straight edge and then set to finishing the saddle to get a decent print on that from the dovetail.
Here is a pic of the column measuring just prior to finishing, the top end (bottom in photo) was my 0.0 and all the way down the rest of it is + 1/2 a thou so didn't take much from there, got it bob on just by chasing contact points so very happy with that..
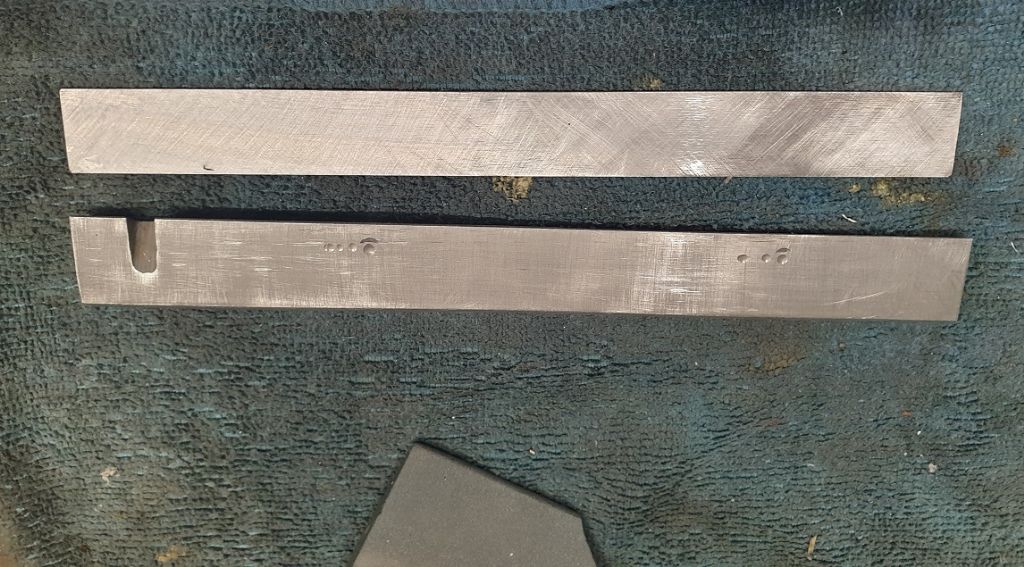
Time to get going on the gib and fitment of that. On the surface plate the gib had a very slight bow so just using some gentle pressure in the bench vice and some shims in appropriate places managed to press that so it had no rock or 'tap' on the surface plate.
I then did a little rough scraping to get the friction face a little better prior to trying a test fit to see just how thick a shim it is going to need.
Firstly I had to make 2 new gib retaining screws as there was only 1 in it (the top one and that was too short), fitted on top of the gib rather than in it's slot so I made new ones, a fair bit longer so they could be fitted properly and give it full adjustment.
I had to make the screws out of 2 old flange head bolts as that's what I had to hand so there is a slight step in the head of them but they work fine.
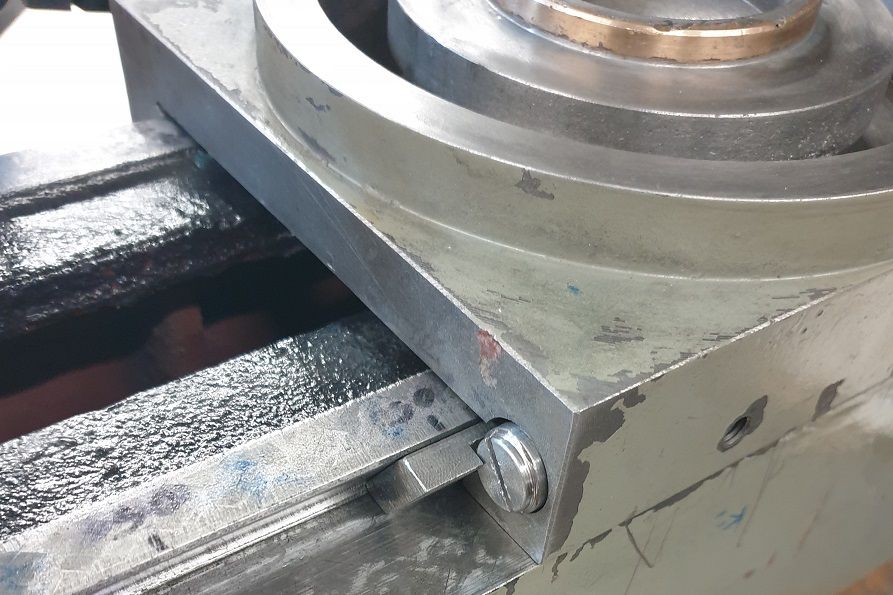
Fitted the gib at it's most retracted position and set up the indicator… getting nervous now as it was bad before I started scraping!
With the gib in this position at the top it is about 1mm shy of poking out of the bottom.
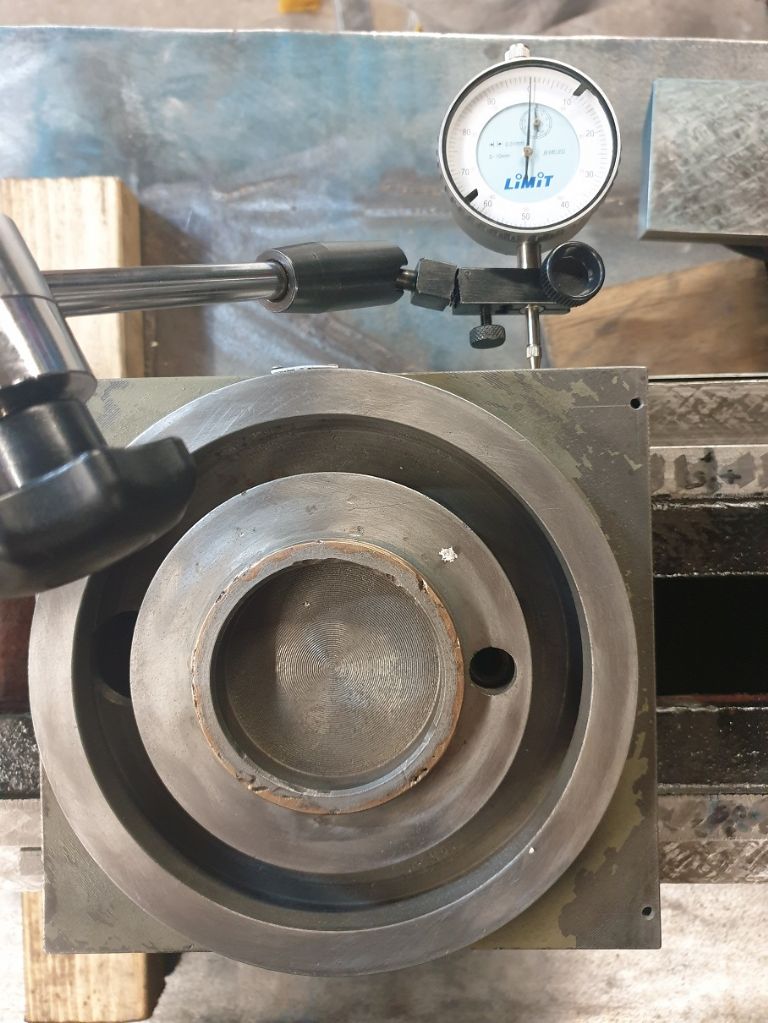
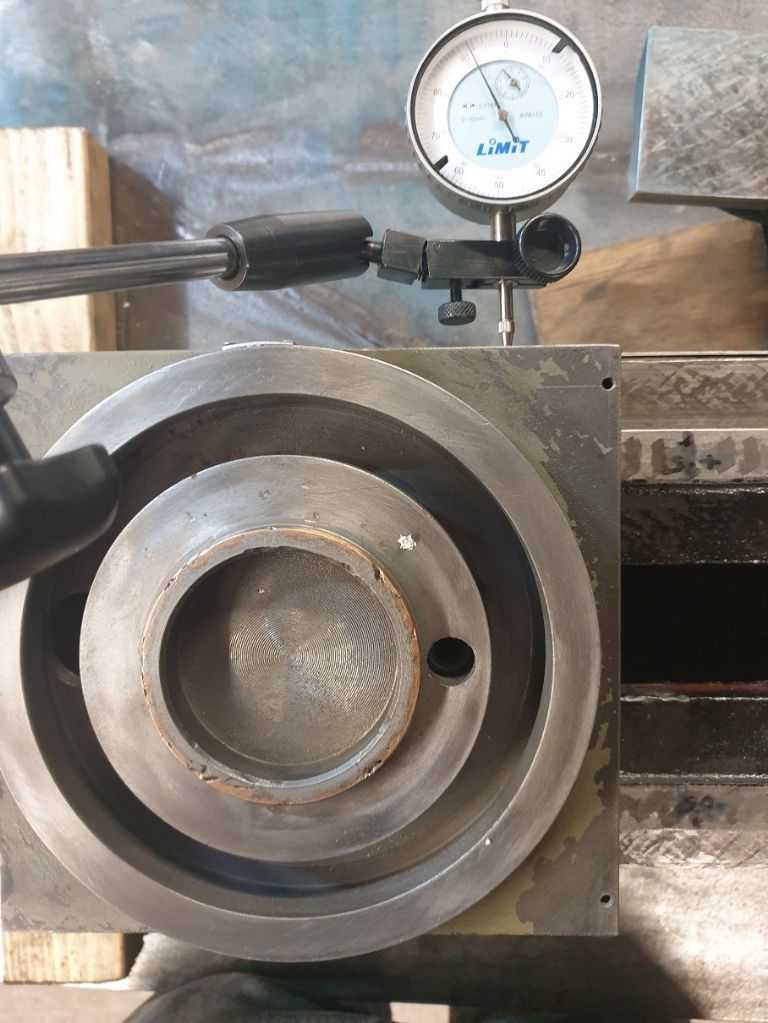
Here are the measurements, first 1 is reference..
Measurement at bottom of saddle.. 0.92mm
And at top of saddle… 0.94mm
So 0.02mm difference between each end, however I could get this to vary a little just by touching the gib with a screwdriver as it's so loose it was difficult to get it to sit right.
I've ordered a 1mm thick length of ground flat gauge stock and some of that black loctite 480 to bond it.
I think by the time I've scraped the gib that will hopefully be about right. Fingers crossed!
Once I've got all the fits good, I'll go over the ways with my new scraper to try to create some better oil retention pockets rather than the rough hatchings that are there now.
The end of the column is now in sight I think, its been a testing experience!
Cheers..
 26 June 2023 at 18:50 #650081
 Taf_PembsParticipant@taf_pembs
So.. Column saddle gib..
The shim stock arrived from Zoro the other day then today there was another delivery from Zoro.. a 10" cubed box full of air and a tiny tube of Loctite 480.. Surely a jiffy bag would have been OK?! Ah well..
After some faffing around with the back side of the gib to get it decently flat to keep the glue thickness to a minimum I then used an old coarse stone to scratch as much as possible, then the same with the now cut to length shim stock.
Lots of cleaning then head scratching of how to hold it in position while clamping it without is sliding out of position..
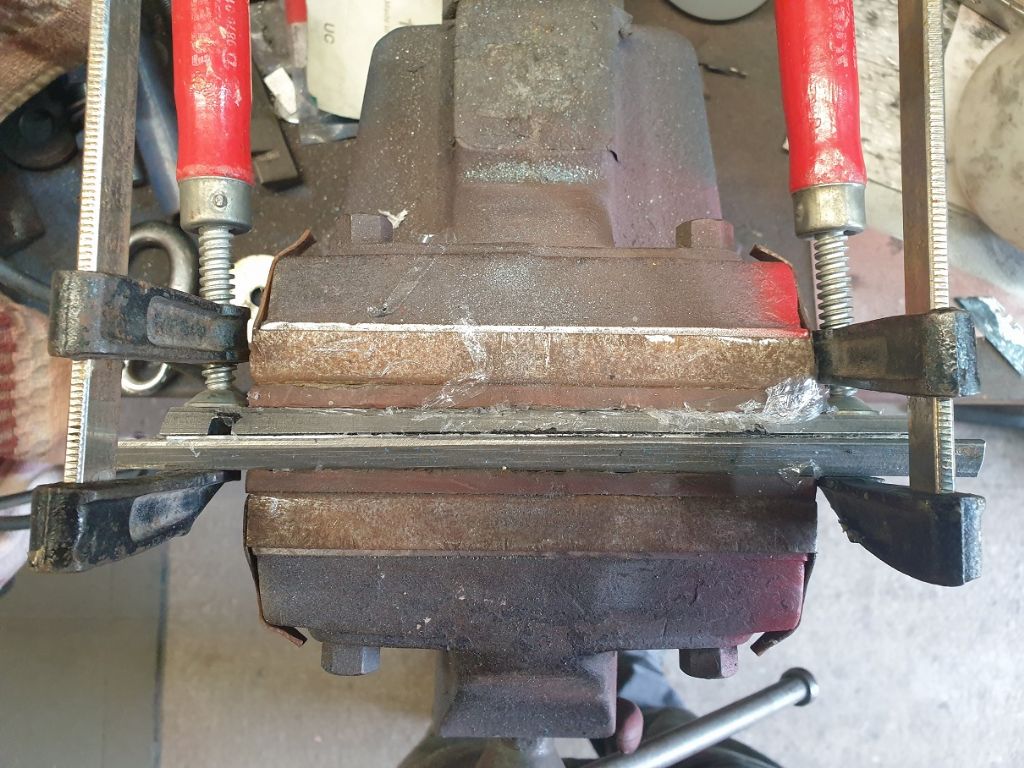
After an awful lot of messing and failed attempts .. Clingfilm ! I did a test fit, wrapped it tight in a bit of clingfilm and it stayed in perfect position – tidy job – so I gave it some of the loctite 480, very gently spread it even with a stanley blade, put together and wrapped tight in clingfilm.
Worked a treat so using one of the other gibs in order to basically get 2 parallel faces I then carefully clamped it in the vice with soft jaws and used a couple of clamps to pinch the ends .. hopefully even enough pressure across the whole thing.
I then cut away the clingfilm so air can get to the glue for curing.
It says to leave 24 hours for it to cure through so we'll see how she is tomorrow evening..
Fingers crossed!
 30 June 2023 at 19:31 #650509
 Taf_PembsParticipant@taf_pembs
Evenin' all..!
Well I am going to have something of a celebratory beer this evening..!!
With much anticipation I took the gib out of the vice & clamps, cleaned the excess glue and clingfilm off it and remarkably it was really good, it was even still nice and straight.. bonus!
I slid it into the saddle and the adjusting screw slot was about 1 inch away from the top of the saddle so only a bit of scraping to get it pretty close.
I did a couple of rounds of basic scraping just to get an idea if it needed it's angle correcting a little after scraping the dovetails and it did but not by much.
So it set to it pretty harshly to take a bit of material off and allow it to insert into the saddle a little further. Once it was a better fit and the screw slot about 1/4 inch out of the top of the saddle I then scraped it to a decent contact coverage. It now sits lovely, the bottom of the gib is still about 10mm shy of sticking out of the bottom but I think will be OK and allow a bit of bedding in.
So I gave the saddle ways a quick go over with the new scraper just to give it a slightly better finish for oil retention then gave the column ways and the saddle a light coating of way oil, fitted and adjusted the gib and took a deep breath ready to see how good or bad it was .. I thought it was good enough but this was the moment of the large lady breaking into song..
I could adjust the gib easily up against the lower stop screw and just tweak until I could not detect any play at all in the saddle.. then .. amazingly it slid perfectly the full length of the column, I could not detect (by hand) any change in the effort to move it up or down, and it was easy to slide.. even with the gib adjusted fairly snug!
I put an indicator on in the same way as above when I was measuring for the shim thickness and I presume due to the oil film keeping any play under control, with a fair bit of effort I could only just about make the needle twitch let alone move, no matter where I had the saddle on the column..
I'm still struggling to believe how it feels but I am over the moon with the result of this.. makes all the effort worth it. A very very happy Taf.!
Now I've just got the heavy bits to do .. just waiting for the steelwork to put my baby gantry hoist up so I can continue. Should be here early next week.

 19 July 2023 at 20:02 #652923
 Taf_PembsParticipant@taf_pembs
Evenin' all..!
So … the column was so successful I was wondering what was going to make up for that..
It got it's own back.. or should I say – how could I be so stupid with only 1 brain, surely to be this dull I should need 2!
While spending so much time on everything else, I had been storing the table upside down (just how it got carried) on 2 thin plywood packers on an aluminium 'hop up' stand under a sheet.
I was convinced that prior to packing it away I treated all the surfaces to a coating of sticky corrosion guard goo. Well, I did.. but only the underside not the table top.

The wood it was on was obviously damp…
I had quite a shock when I turned the thing over … what was a pristine table top now had 2 wood shaped crusty rust patches. I've cleaned it off but the staining is pretty nasty.
What a muppet..
Ah well.. onwards and upwards..
I'm now in the middle of measuring the base and table dovetails for parallel
And then before doing anything with them I'm reassemble the saddle and table and re measure for any angular discrepancy between X & Y.
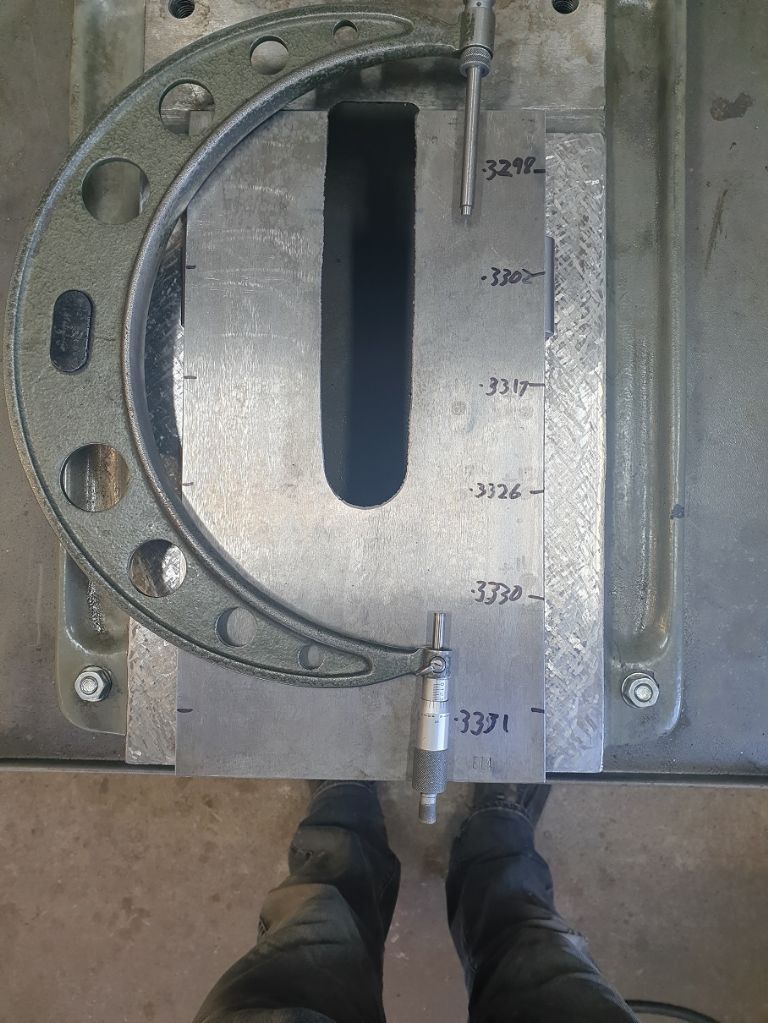
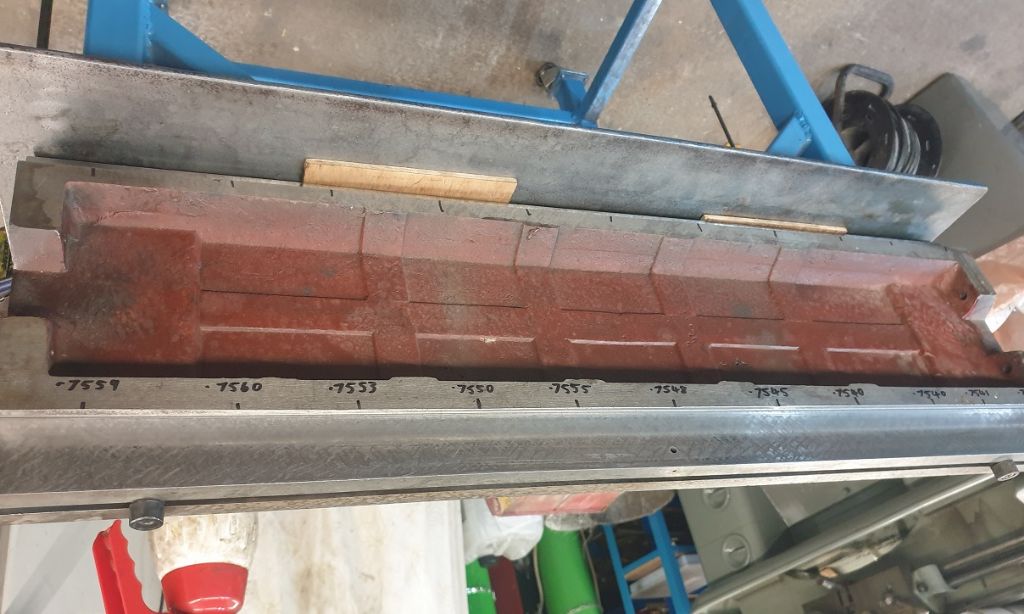
As you can see from the pic above there is about a 3 thou taper on the base ways and if I remember correctly that is about what the error was when I measured before starting all this so hopefully there will be nothing on the table.. Time will tell!
Anyway, I've got an hour or 2 now so going to get on with a bit..
 20 July 2023 at 09:57 #652964
 Taf_PembsParticipant@taf_pembs
Still wiping the tears I had a slight change of plan..
Spent a bit more time last night measuring the table dovetails for parallel before going any further.
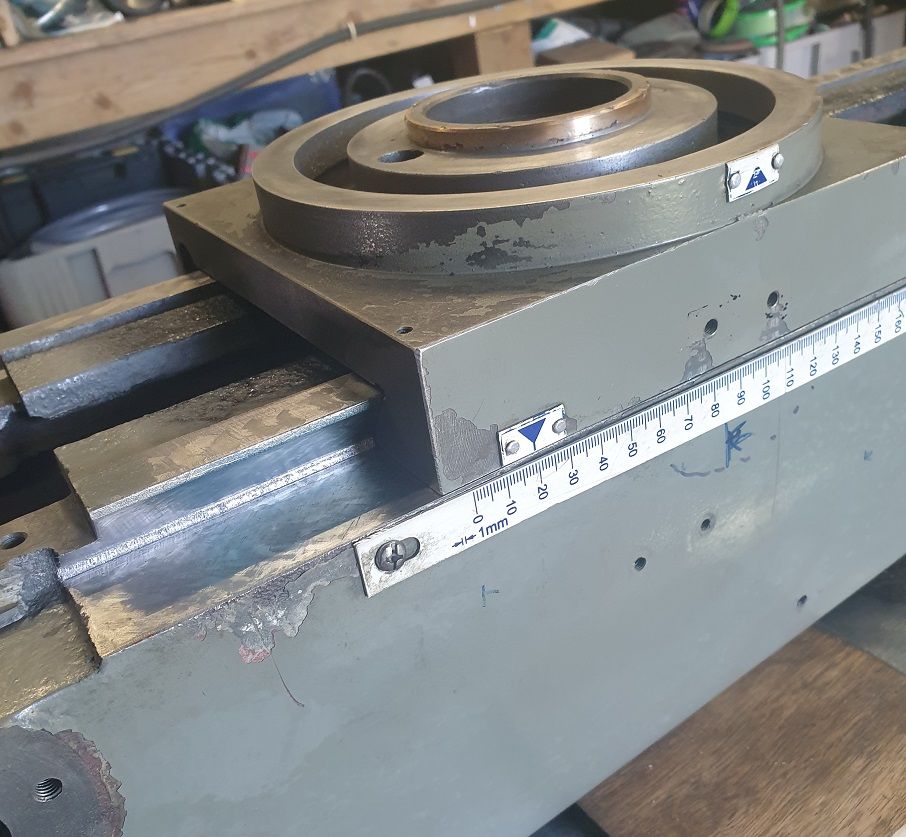
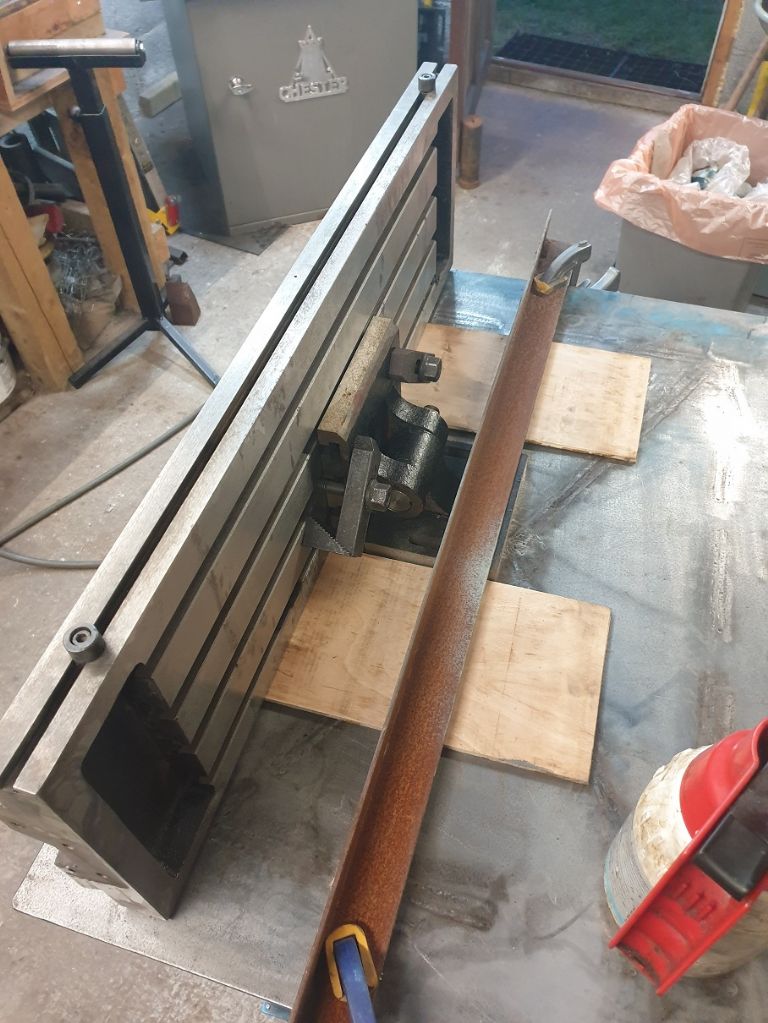
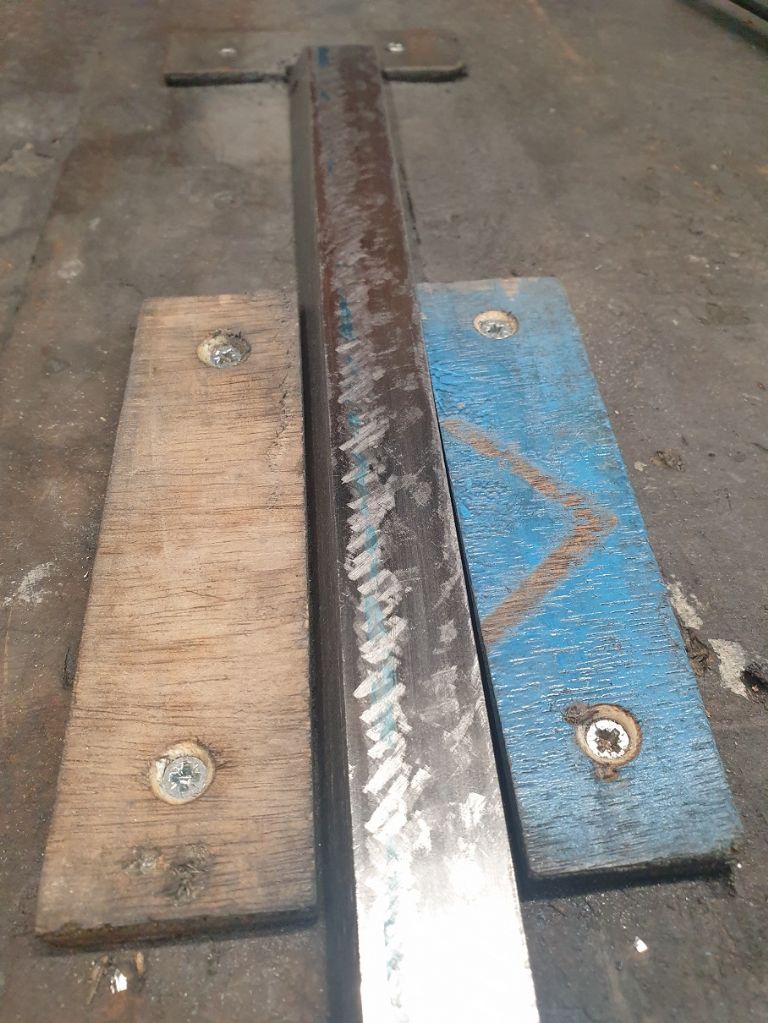
There is barely 2 thou of variation as per the upside down pic below (note to self – must write the right way up!) so I thought I would get these dovetails decent before re assembling.
This way there are only the base dovetails to mess with to true up any angular difference between X & Y ( I really hope it is out by the same as the taper in the base!!).
I did decide to secure the table on it's side to make scraping the dovetails easier, pretty sure I would have had very sore legs / feet if I tried to scrape it in the pic above!
Best of all.. the steel has arrived for me to start the gantry hoist.. just need fixings and to make some unistrut trolley's now.. may be a while..!

Edited By Taf_Pembs on 20/07/2023 09:58:42
Edited By Taf_Pembs on 20/07/2023 09:59:31
22 July 2023 at 19:35 #653280 Taf_PembsParticipant@taf_pembs
A little further progress..
I realised after re reading the above that I got it completely wrong in the post above, taking the taper out of the base ways would have no effect on any angular difference between X & Y, It was the table ways I meant to say.. too many painkillers .. I'm sure plenty of folk had a giggle and a tut anyway

After a fair amount of measuring then some very rough scraping of the table dovetails to to just get them roughly parallel, and going by the measurements of the Angular difference between X & Y I reassembled the saddle and table, no screws just sliding back and for with the gibs adjusted as best as they would and took another measurement to make sure I was gong in the right direction.
Set up was my small ish granite square on the table, trammed true to X then moving the gauge to Y to check..
There is only 6 1/2 inch of the square that I can measure but according to the gauge there is now only 0.015mm so just over half a thou.. Another shock as I am still only roughing in!
Having said that, not the easiest of measurements as the Gib fit's are shocking, I had to spend an hour on the table gib just to get it somewhere near for test fit and the saddle gib was like a banana.. as previous I managed to press it straight a tiny bit at a time.. They are both close enough now so will just need a shim on the back of each then scraping as the surface of them look like they were machined then taken to with a ball peen hammer!
Another little bit of progress..
 21 August 2023 at 23:40 #657400
 Taf_PembsParticipant@taf_pembs
Evenin all..
Well unfortunately no more work on the mill, this whole being 1 and a bit handed is causing some real issues in the workshop.
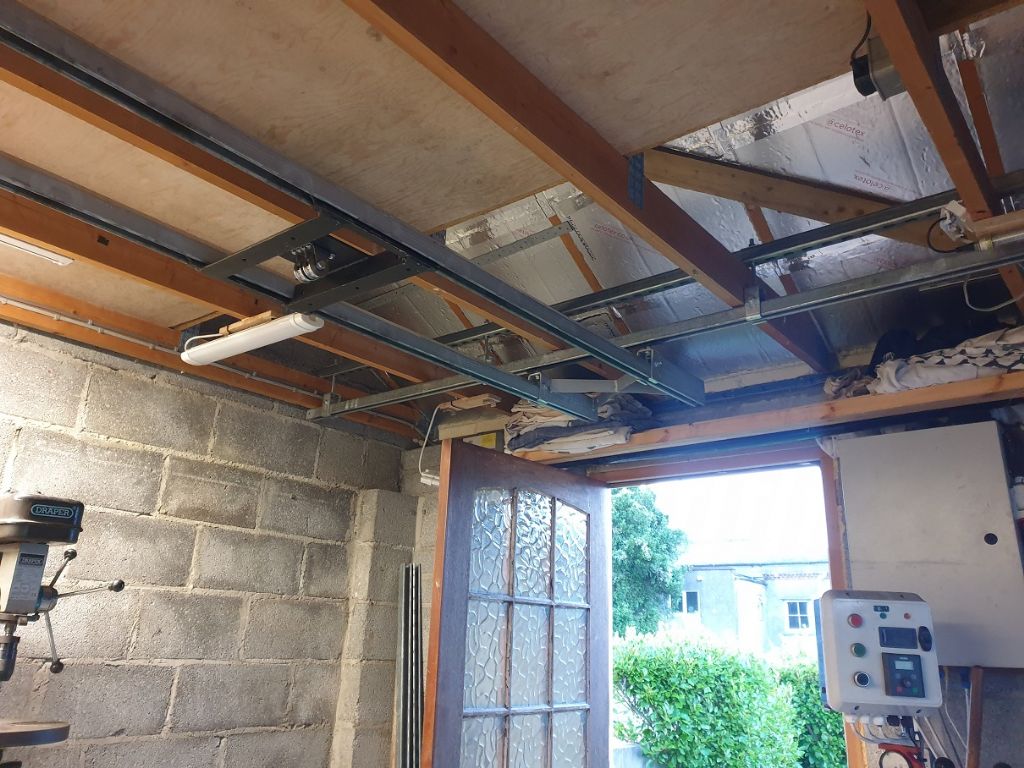
I've had to get the unistrut gantry hoist up and going in order to move around the bigger bits of the mill before I can really continue.
I have to admit to really missing my dominant hand .. with a bit of luck they will be able to fix it soon .. if I ever get another appointment that is.
The hoist was going really well .. slowly but well .. until I found a few issues.
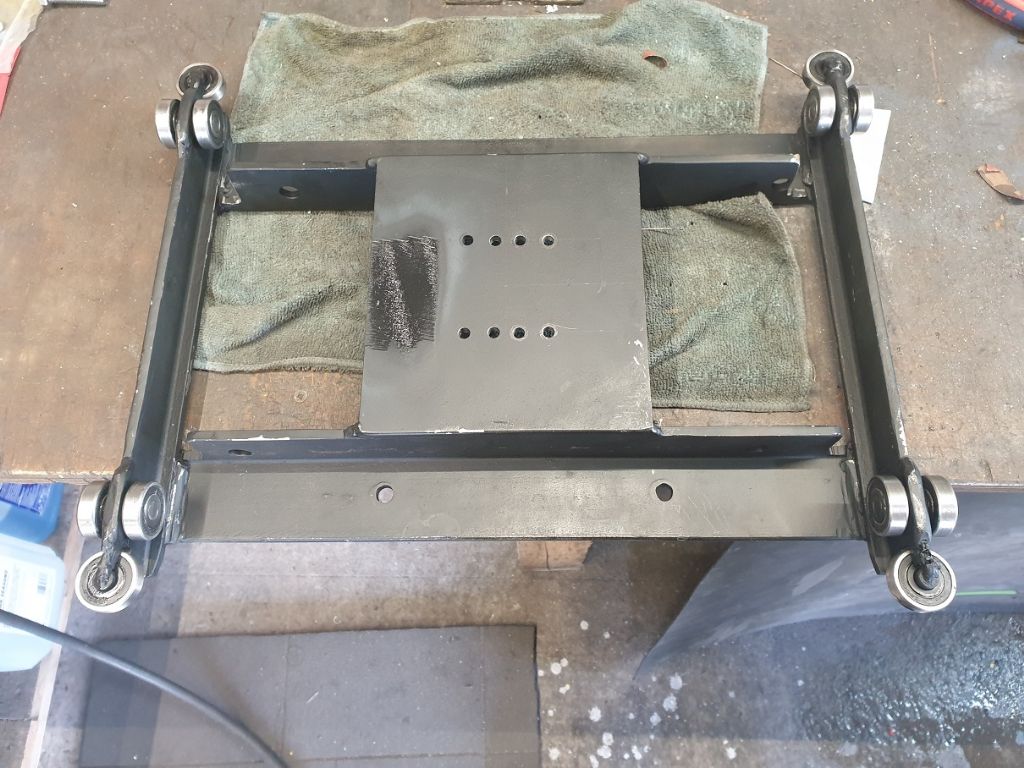
1, standard 6200 bearings don't run too well in unistrut owing to the sharper edges on the bearings wanting to bight into the side of the channel all the time (the megabucks unistrut dolly's I've seen have quite rounded edges . so had to strip it all down again and add side guide bearings to stop it jamming as I'd already fitted the bearings and that was easier than stripping and trying to grind a radius on the outer edges of all the bearings.. I'll know next time!
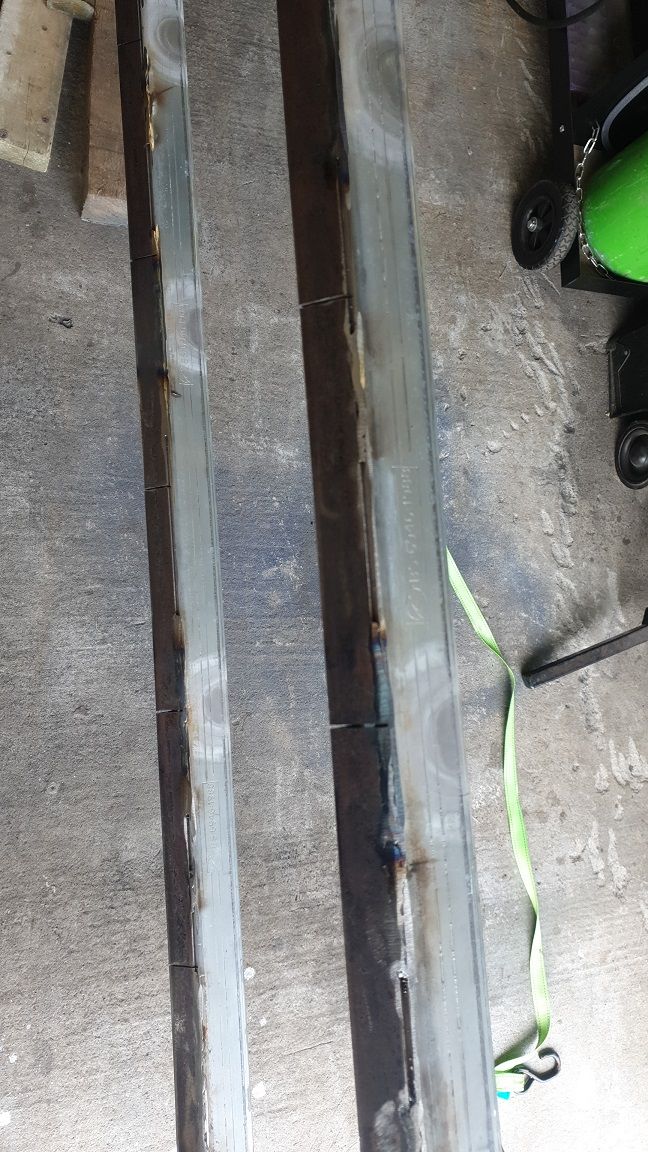
2 I really underestimated just how far steel will pull when welded!
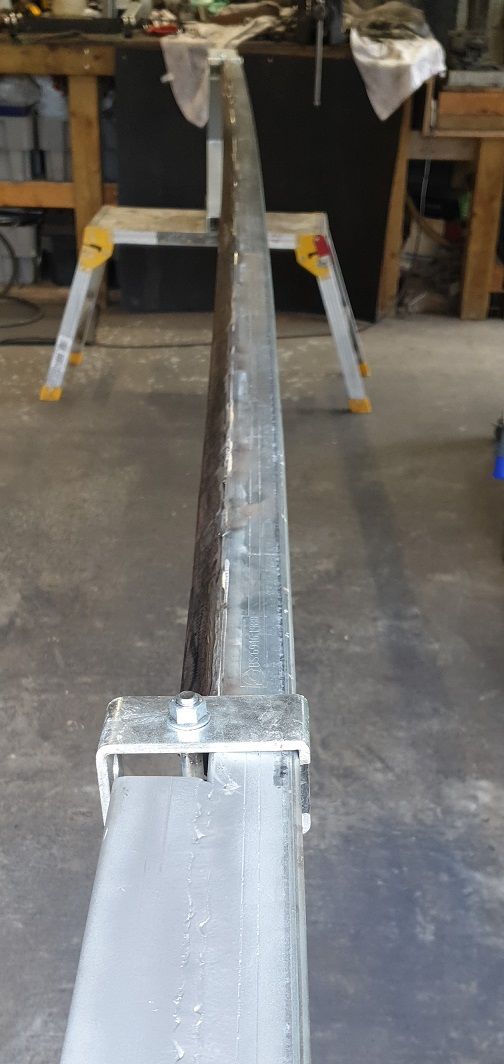
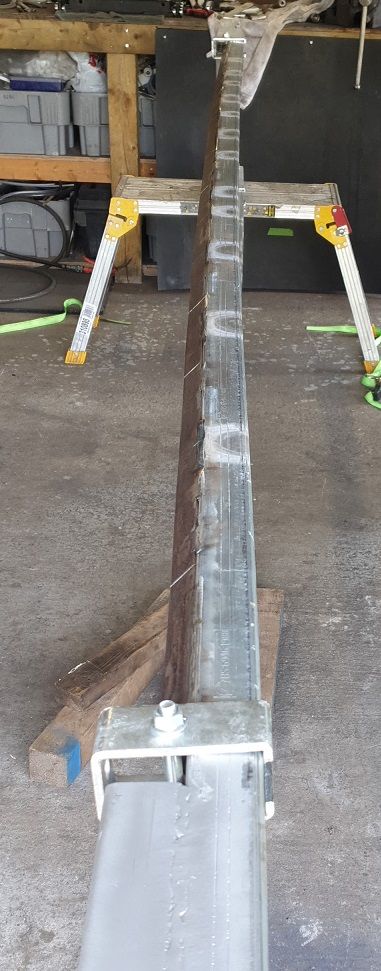
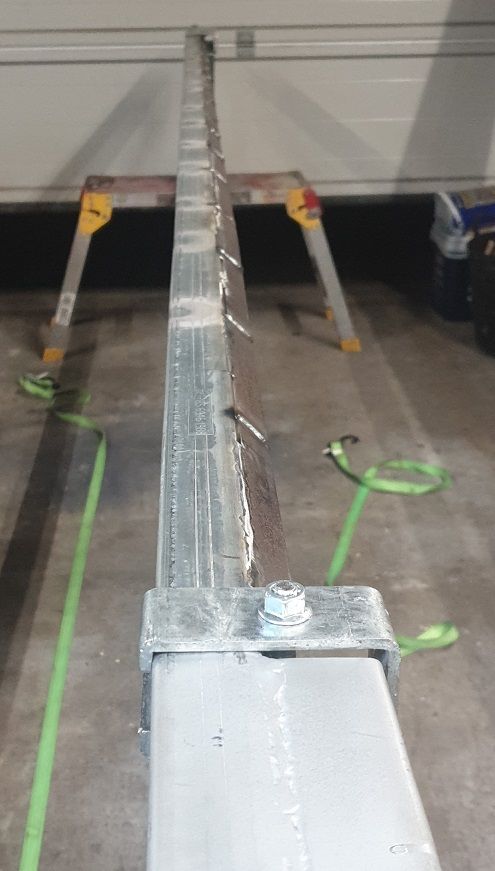
There is just shy of 4 metres between the longitudinal channels so there was a fair amount of flex in the 2 cross channels that the trolley runs in when lifting anything.
I had a just enough lightweight inch angle out the back so I thought that welded to the back side of the unistrut channel on it's 2 edges to form a triangle would give a decent amount of stiffness.
I pre bowed the cross channels by about 2 inches and put some tension on it thinking when welded it would pull back to about straight and set to stitching it (ok, way over the top stitching!)..
Oh Dear.. oops.
So only thing for it was to cut a series of slits in the angle and spot heat the under side of the channel to try and shrink it back. It worked really well but needed lots of slits to get it to go the other way so it would pull back when I re welded the cuts back up.
Tacked up the top of the cuts, let it cool then bit by bit welded the cuts fully..
Remarkable success!
Not perfect but dam near good enough for a hoist!
The down side was the binding issue was not much worse so the channel needed a bit of fettling where it had shrunk a bit much on the underside.
Fitted the side guide bearings to the trolley so they were about 1/2 a mm ish proud of the running bearings and everything slips and slides like a good un..
Way overkill with the steel I know but its what I had..

The small holes are for the upper rollers for the rope pulley.
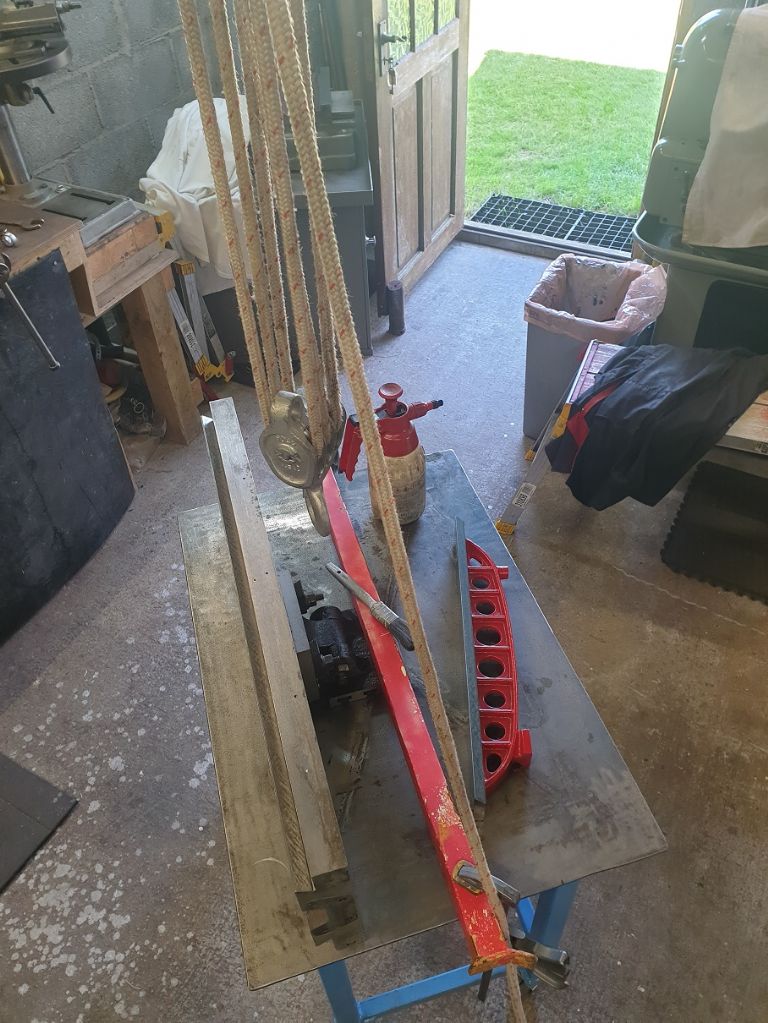
And here it is back assembled .. again.
Although you have to get very creative with lots of ratchet straps and rope to get the dam thing up and down with only 1 working hand hence a couple of weeks..
The down side.. despite everything being sheeted over the entire workshop is utterly covered in grinding dust. It's going to take a week or 2 of cleaning, particularly the lathe etc before I can do anything. It has got everywhere..

Might be able to get some progress then..!
 21 August 2023 at 23:41 #657401
 Taf_PembsParticipant@taf_pembs
Forgot to add, it will comfortably lift well over 100kg.. Not bad!
 22 August 2023 at 07:20 #657411
 David George 1Participant@davidgeorge1
nice to see your progress please keep updating this to see what can be done eavan with a bad hand.
David
12 September 2023 at 22:22 #659972 Taf_PembsParticipant@taf_pembs
Evenin' All..! Hope all are well..
Been a while.. a fair bit of other stuff going on has slowed things up some what as well as a really rough dose of Covid (thought it was full on Man Flu at first, was easily as bad!).
Anyway, thanks to the now fully functional gantry hoist I have been able to get on with a bit. (Should have built it years ago!)
I fettled the dovetails a little more and other than it being about 2 thou narrower right at the outer extremities (not sure why, only scraped there to give some sort of oil retention pattern) the table dovetails are within just over half a thou parallel so well pleased with that, I'm not going to take any more off for the sake of just over a thou at the last inch of each end, really not worth it (and would probably mess up how good it is now knowing me!).
So I've now started on the Gib. With the amount of scraping needed to get the dovetails parallel the dovetail angle has changed a little.
The good news on this front was that the gig sine of the saddle seems to be pretty much the only surface on the thing that was machined true! Did a check print with the camel back and there was near as dam it full coverage. Not only that, the corresponding back side of the gib when placed on the surface plate was also extremely good, not only was it flat it only needed a couple of scraped to get full contact – I suppose something had to go right!
The friction face on the other hand took a few hours of scraping to get anything like a reasonable starting point print prior to blueing up the table dovetail and inserting to see just how far it was out.
Fitting the gib with the table dovetail blued gave a decent contact line but it's taking a fair bit of material removal to get back to decent contact.
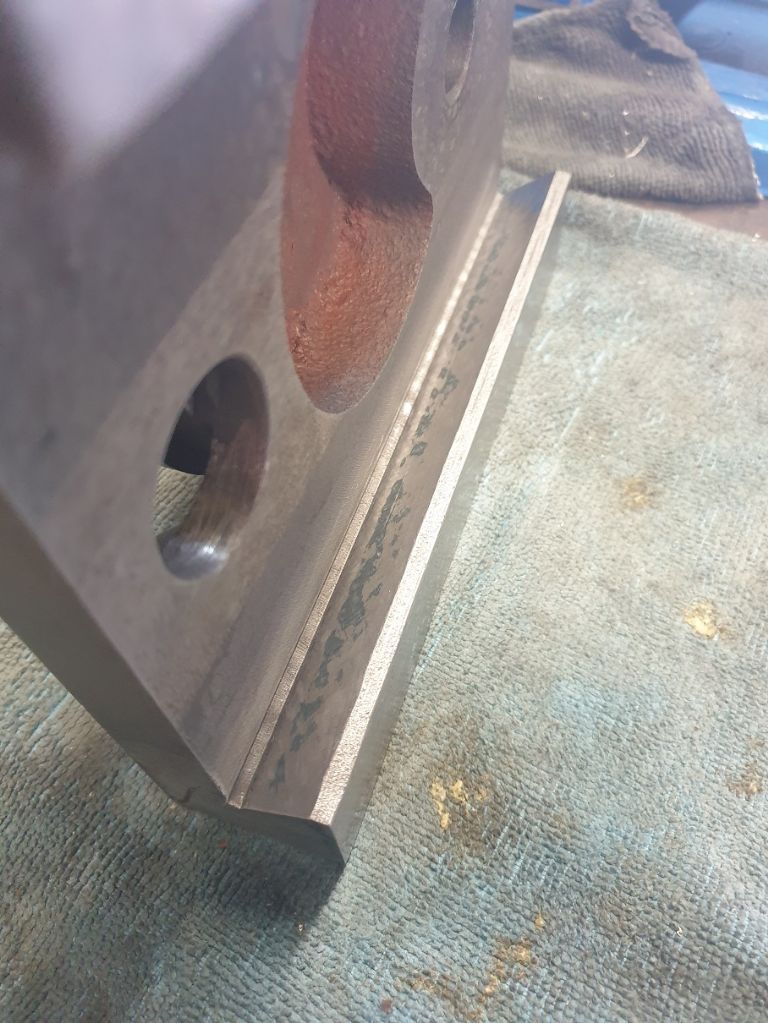
Here is after about an hour of scraping..
It's smooth as after each scraping I'm attacking it fairly hard with a thin silicon carbide slip stone to aid with getting some material off. Being a really thin one means I can just apply some pressure to the area needed but of course the surrounding area also get rubbed a little. Once it get closer then it's back to ally oxide just to deburr.
Haven't got a current photo but its about 50 – 60% contact now.
Once that is done then I can measure up for how thick a shim it is going to need – that Loctite 480 worked brilliant on the column gib so it will have the same treatment.
Then re assemble with the lead screws and take a proper measurement of 'squareness' in relation to the Y travel before starting on the base dovetails … and they are going to need a lot of scraping as they are as near to straight and parallel as 2 sides of a roundabout.
Getting there..!
Jobs to do then as far as my brain can get round –
Assemble and finalise the plan for trueing up the column – probably epoxy it as stated earlier in the thread thanks to some sound advise (Cheers!) as that is way to far off to scrape and I don't think I would have the patience to strip and reassemble it for each measurement!
Gear Head.. re check it's mounting face to quill parallelism after all the boring and liner fitting malarkey although I'm hoping that my set up was good enough for that to still be good. Other than that, all is pretty good but I will need to acquire a boring head and get it back on the lathe saddle to open out the sockets for the quill pinion shaft then I can make up some adjustable eccentric bushings to remove the vast amount backlash between it and the quill rack. No point in doing all that work to get a dam near perfect fitting quill if you cant control it properly I suppose.
I don't think there is too much else to be honest but no doubt something will crop up..
I might actually get to use the thing then.. first job will be to try to fly cut the base of a piece of aluminium plate I was working on that set off all this in the first place – it simply would not do it !
Cheers for now..
 16 September 2023 at 03:53 #660223
Pete
Participant@pete41194I've just spent a very enjoyable couple of hrs slowly going through the whole thread and studying your pictures Taf. Very well done considering your lack of a proper straight and dovetail edge to start with. One wonders just how worn out some of the machine tools they used were to get parts that non parallel and out of square as much as they were. Whatever they used to clamp that column down to machine it must have flexed the casting to get that much of a hollow in it after it was released from the clamps or vises. I suspect there dovetail cutters have been resharpened many times and very inaccurately to end up with that 53 degree angle. Or maybe that factory was using a tool & cutter grinder they built themselves? I also think your whole thread is a great object lesson about not assuming anything with some of these off shore machine tools unless you've personally checked for exactly what you have.


 2 October 2023 at 20:04 #662515
 Taf_PembsParticipant@taf_pembs
Cheers Pete, I am really enjoying doing it and learning a huge amount.
Yes, it has constantly amazed me that something that was showing almost no signs of wear could be so far out.. no wonder the previous owner was selling it!
Getting the camel back was without doubt the thing that has allowed me to continue with it.
Anyway, if things go to plan I am about to attempt to embed a couple of very short video clips of where I'm at with the table.. don't hold your breath though I've got to work out how to do it yet..

 2 October 2023 at 20:48 #662521
 Taf_PembsParticipant@taf_pembs
Well good evening all..!
Been a while, this knackered wrist lark is really not helping and been a bit side tracked as it seems it has now cost me my job – they wont pass me fit to go to sea and that is an integral part of my job.. but that's a whole other kettle of fish.. at least they have to give me 3 months notice so will get the turkey out of it.
Anyway .. the table..
From the start of doing the table I wanted to get the dovetails parallel / true to the front face of the table – as I believe it should be – to aid with quicker set up etc.. It was a fair bit out but I did try to focus the scraping to try to bring it back in. I got a little carried away and ended up forgetting to keep checking .. Oh the joys of inexperience..
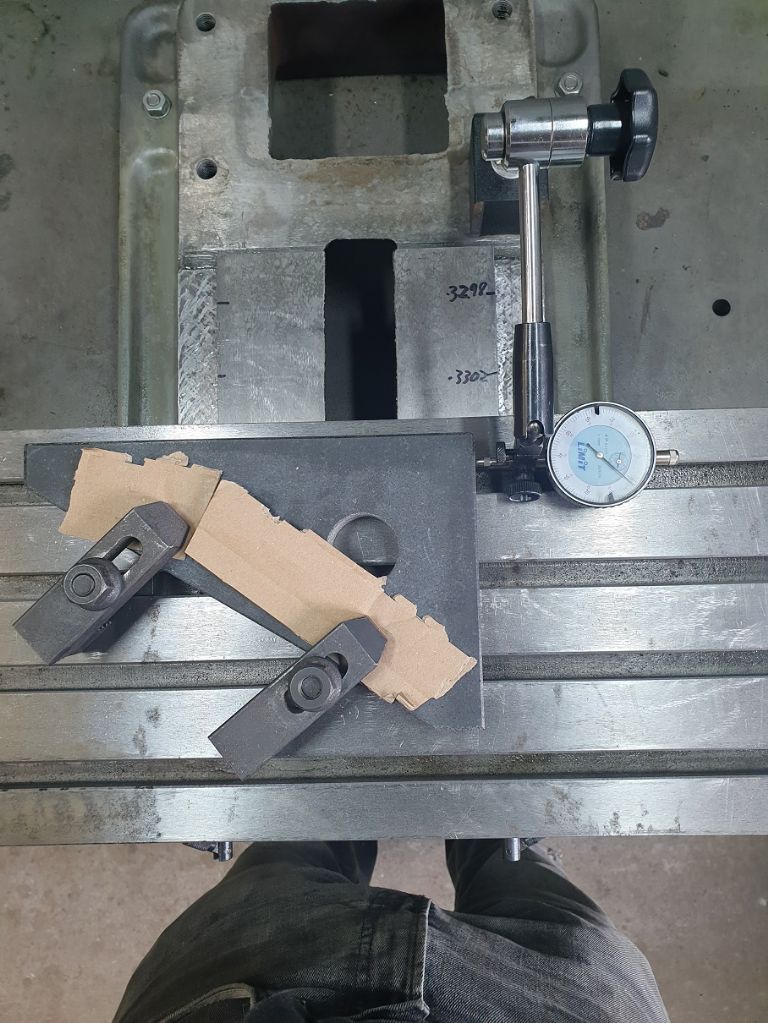
Anyway, when I got the dovetails pretty dam close to parallel was when I realised I hadn't checked progress against the table edge so what better way than to set the saddle on the upside down table and use an indicator to check it.
Ok.. here goes the video attempt.. (sorry if it's wrong settings, I'll try to sort it if it is..)
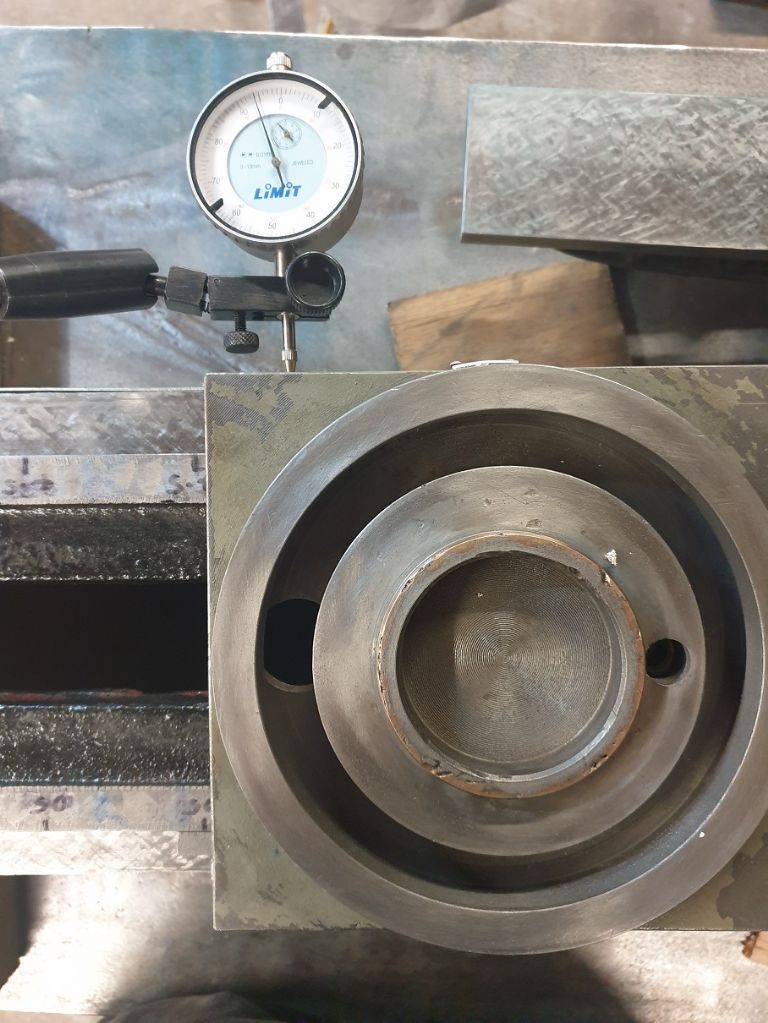
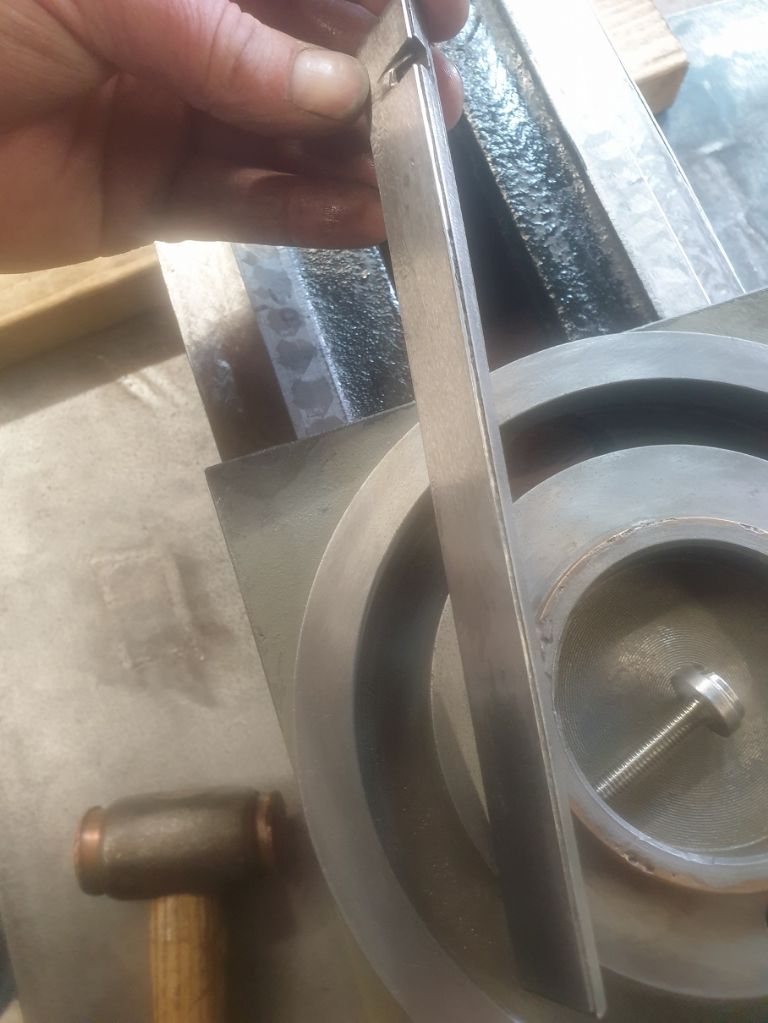
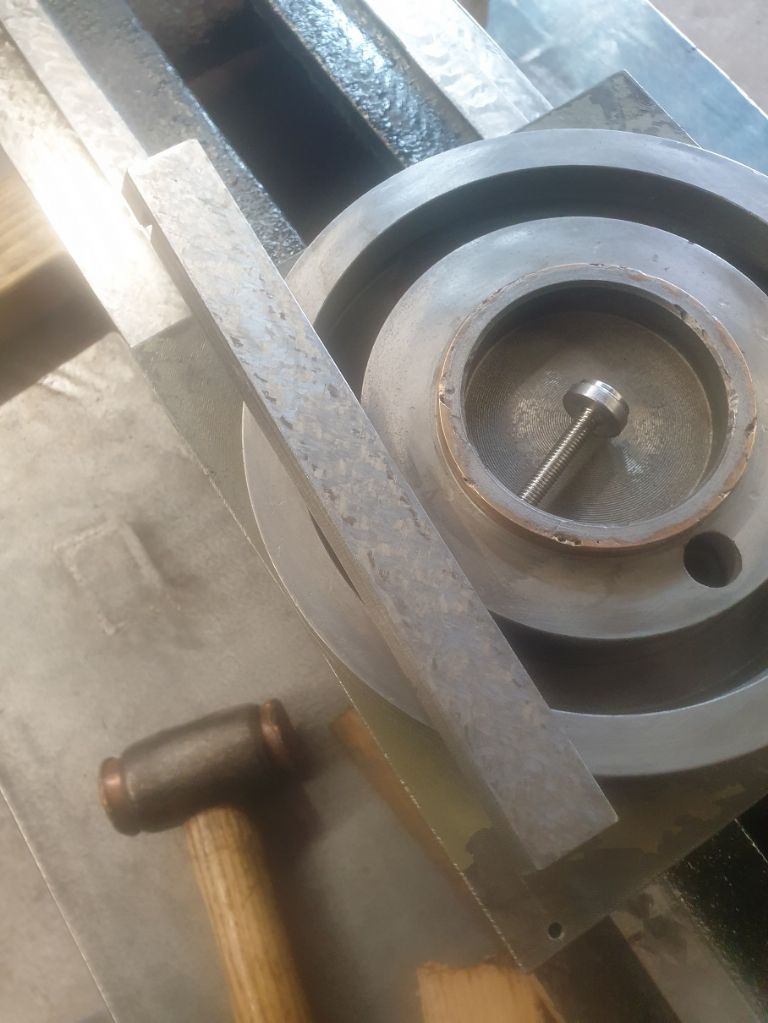
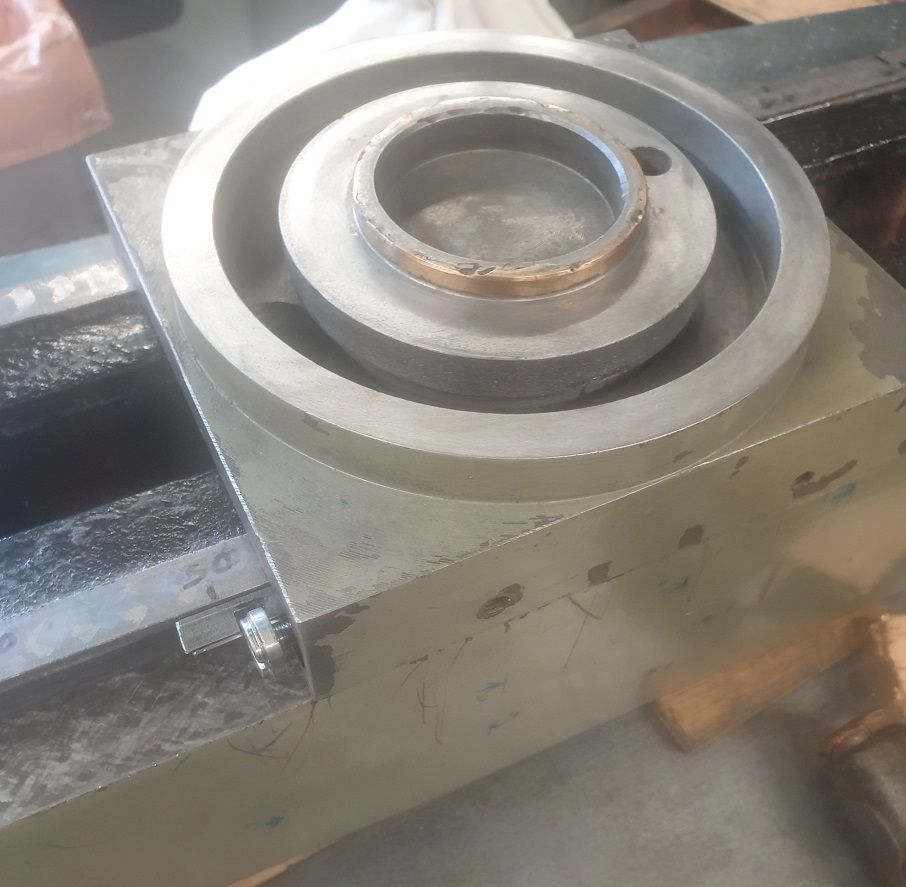
Well.. If that worked then you should see a 0.06 deviation.. Phew..!!!!!Well chuffed with that if I do say so my self.. this was measuring against the rear edge of the table so I swapped the indicator to the front edge and re checked.To my utter amazement they actually made something right!The front edge showed exactly the same error (obviously decreasing rather than increasing).Just to confirm it, out came the depth mic and pins etc and mapped from the front edge to the dovetail and it agreed bob on with the indicator reading.That'll do I though (as the ad says)But .. well it's already in bits.. 2 thou surly cant take that much effort..?With scraper in hand off I went again..Ok, really wasn't that bad but obviously once the main one was done and brought flat according to the straight edge then the other dovetail needed bringing back parallel and flat.. then the saddle needed dressing back to proper contact area and of course the gib.Ah well, it gave me something to do in the evenings instead of going to the pub.. my other favourite pass time. Ta Daaaa!Less than 0.01mm .. now that makes all the effort worth it..!I'm just waiting for some 0.7mm shim steel to turn up to back the gib with then I can properly test fit it and dress it if needed, not the best to scrape it according to its pattern when about a quarter of it is hanging out the end of the saddle –
Then it's back to where I was before, re assemble the table on the base to measure the 'squareness' of X to Y and set to the base dovetails.
Right .. back to it..
Cheers folks..
 2 October 2023 at 20:49 #662522
 Taf_PembsParticipant@taf_pembs
OMG it worked !!!!
3 October 2023 at 02:27 #662552Pete
Participant@pete41194As far into this as your getting Taf, I'd highly recommend doing a search on Youtube for a channel under the name of Jan Sverre Haugjord and go back through some of his past videos. He's got some about scraping a mill much like yours. Sometimes getting another perspective for how to measure and do the three dimensional checks and in the correct order is very helpful. He's taken quite a few scraping classes and knows what he's doing. It's actually quite impressive about the number of machines he's rebuilt back to new or better. For information about scraping and machine tool alignment, it's about the best YT channel I know of.
Scraping a single surface to a high level of accuracy isn't that hard, scraping to get parallelism or machine parts and maintaining the three dimensional alignments takes a different thought process and is multiple times harder. And with a worn but when new a high quality machine, or even a brand new off shore one. The main thing to remember is to trust that nothing might be as it should unless you verify that yourself.
I once bought a brand new off shore 10" x 22" lathe. The very first center drill I tried using with it instantly snapped the drill tip off. Not only was the tail stock bore not on the same elevation as the head stocks center line, it was pointing uphill by about .009" over 2" on the tail stock quill. Add the length of a larger drill chuck and the length of any drill protruding past the chuck jaws, and that fragile drill tip was at least 15-18 thou too high. How that much misalignment was allowed to happen in what would be a production setting and even for a fairly low priced lathe I've yet to figure out. And that was only one of a few other problems I found. After that experiencef, I don't blindly trust anything unless I can verify the manufacturers claims stated or other wise. Although there are some items that are well outside what most of us have available. Vertex rotary tables usually get ok to good reviews on most forums. What I could check on mine definitely showed the table flatness and run out numbers for it's Morse Taper on the included certificate of accuracy not adding up. That to me leaves it's worm and worm wheel accuracy that I can't easily check to be highly suspect.
I think I was a lot more impressed with some of what I have when I understood a whole lot less.
 4 October 2023 at 12:28 #662825
 Taf_PembsParticipant@taf_pembsPosted by Pete on 03/10/2023 02:27:45:
As far into this as your getting Taf, I'd highly recommend doing a search on Youtube for a channel under the name of Jan Sverre Haugjord and go back through some of his past videos. He's got some about scraping a mill much like yours.
Hi Pete, Cheers for that..
I've found Jan's channel and yes, he has a air few videos on pretty much the same model.. along with a LOT of Myford stuff! Some good content there
Going through them bit by bit..


-
AuthorPosts
- Please log in to reply to this topic. Registering is free and easy using the links on the menu at the top of this page.
Latest Replies
Home › Forums › Manual machine tools › Topics
-
- Topic
- Voices
- Posts
- Last Post
-
-
Starrett and other tool manufacturer wood boxes
Started by:
Ian Owen NZ in: Workshop Tools and Tooling
- 10
- 13
-
6 July 2025 at 13:34
 Mark Easingwood
-
Pragotron Slave Clock
Started by:
renardiere7 in: Clocks and Scientific Instruments
- 5
- 8
-
6 July 2025 at 13:26
renardiere7
-
Boiler Design – issue 4765
1
2
…
7
8
Started by:
Charles Lamont in: Model Engineer & Workshop
- 26
- 180
-
6 July 2025 at 13:05
 lezsmith
-
Colchester Chipmaster Clutch question
Started by:
Peter_H in: Manual machine tools
- 4
- 7
-
6 July 2025 at 10:47
Peter_H
-
Sanjay’s Banjo Engine
Started by:
 JasonB
in: Stationary engines
- 3
- 7
-
6 July 2025 at 09:58
 JasonB
-
In memoriam: Peter Neal
Started by:
jamesn in: The Tea Room
- 1
- 1
-
6 July 2025 at 09:53
jamesn
-
Wickseed power hacksaw 8” information
Started by:
simonkeeligan@me.com in: Beginners questions
- 2
- 2
-
6 July 2025 at 07:44
 Nicholas Farr
-
M type top slide conversion??
Started by:
jimmyjaffa in: Beginners questions
- 7
- 13
-
6 July 2025 at 06:55
 JasonB
-
Bentley BR2 Rotary Aero Engine
Started by:
notlobgp14 in: Miscellaneous models
- 4
- 8
-
5 July 2025 at 22:46
notlobgp14
-
New member
Started by:
nige1 in: Introduce Yourself – New members start here!
- 3
- 6
-
5 July 2025 at 22:41
notlobgp14
-
Starrett micrometer.
Started by:
Graeme Seed in: Workshop Tools and Tooling
- 7
- 14
-
5 July 2025 at 21:30
 peak4
peak4
-
Twin Engineering’s heavy mill/drill quill removal
Started by:
Martin of Wick in: Manual machine tools
- 11
- 25
-
5 July 2025 at 21:10
Martin of Wick
-
Dial test indicator vs Dial indicator
Started by:
martian in: Workshop Tools and Tooling
- 17
- 25
-
5 July 2025 at 20:19
martian
-
Speed camera
1
2
3
Started by:
 David George 1
in: The Tea Room
- 23
- 60
-
5 July 2025 at 19:40
John Haine
-
Any ideas how to repair this?
Started by:
Ian Parkin in: Related Hobbies including Vehicle Restoration
- 11
- 14
-
5 July 2025 at 15:36
Pete Rimmer
-
Chucking Money Away!
Started by:
Chris Crew in: The Tea Room
- 6
- 8
-
5 July 2025 at 12:55
Chris Crew
-
2 Machine lights
Started by:
modeng2000 in: Workshop Tools and Tooling
- 2
- 8
-
5 July 2025 at 11:58
Dalboy
-
Boxford lathe & vertical mill VFD conversion help with start stop
Started by:
Andrew Schofield in: Beginners questions
- 8
- 10
-
5 July 2025 at 11:39
Clive Brown 1
-
1965 Colchester Chipmaster
Started by:
andyplant in: Introduce Yourself – New members start here!
- 6
- 10
-
5 July 2025 at 11:09
Rod Renshaw
-
What Did You Do Today 2025
1
2
…
6
7
Started by:
 JasonB
in: The Tea Room
- 33
- 175
-
5 July 2025 at 09:26
Nick Wheeler
-
Amadeal AMABL210E Review – Any Requests?
1
2
Started by:
 JasonB
in: Model Engineer & Workshop
- 16
- 39
-
5 July 2025 at 05:49
Diogenes
-
ML10 backgear
Started by:
alexander1 in: Manual machine tools
- 3
- 5
-
5 July 2025 at 00:11
 Bazyle
-
The Perpetual Demise of the Model engineer
Started by:
Luker in: Model engineering club news
- 13
- 25
-
4 July 2025 at 17:06
 JasonB
-
Advice moving 3x machines
Started by:
choochoo_baloo in: Workshop Techniques
- 5
- 5
-
4 July 2025 at 15:46
 Bazyle
-
Black plastic to replicate Bakelite
Started by:
Craig Brown in: Materials
- 8
- 9
-
4 July 2025 at 15:35
 nj111
nj111
-
Starrett and other tool manufacturer wood boxes
-
Latest Issue
Newsletter Sign-up
Latest Replies


