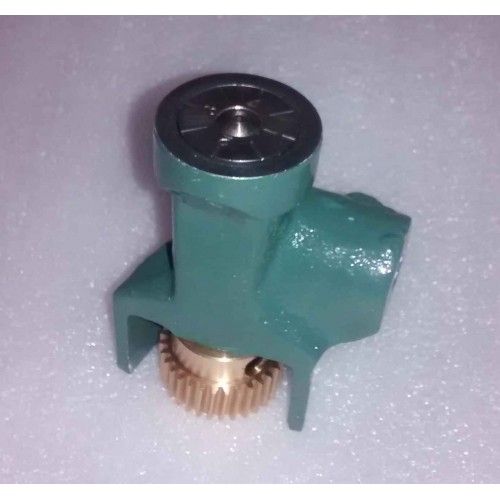
My Boxford lathe has a screw cutting gear box but does not have a thread dial indicator. These indicators look to be as rare as hen's teeth and rather expensive. Looking at photos of the indicator the only issue I would have in making an indicator would be machining the gear wheel that engages with the lathe lead screw. Could anybody give me some tips as where to start and what equipment would be required to produce a suitable gear wheel.
Mine has 32 teeth and the OD is 1 7/16" x 1/2" wide, as near as I can measure with a ruler and my head upside down.
The teeth are angled to match the screw helix angle, with a concave profile to wrap around the screw. However, I suspect that the tooth form is not very critical
My Boxford lathe has a screw cutting gear box but does not have a thread dial indicator. These indicators look to be as rare as hen's teeth and rather expensive. Looking at photos of the indicator the only issue I would have in making an indicator would be machining the gear wheel that engages with the lathe lead screw. Could anybody give me some tips as where to start and what equipment would be required to produce a suitable gear wheel.
Is it a metric lathe? Thread Dial Indicators match well to turn per inch thread systems, but not to pitch thread system like metric. For that reason metric lathes don't always come with a TDI. Instead, the cutter is reversed out without disengaging the half-nut, and the cutter never loses sync with previous cuts. The same system works on Imperial lathes.
The advantage of a TDI is speed, because, after a cut, the half nuts can be disengaged so the carriage can be manually reversed as fast as the operator can manage. Then there's a delay while he waits for the TDI to align, at which point he engages the half-nuts for the next cut. It can go wrong, misreading the TDI or by catching the half-nut slightly early or late. I'm not sure the metric method is that much slower in practice, but it depends on the thread being cut.
The first problem cutting a gear, is deciding how many teeth are needed! This depends on the lead-screw pitch.
After that, the gear need not be particularly wonderful : just 'good enough' to engage without damaging the lead-screw. Not much power is absorbed turning a dial, so the teeth just have to fit well enough to turn it. They're usually made of brass, but I think aluminium or plastic would be adequate.
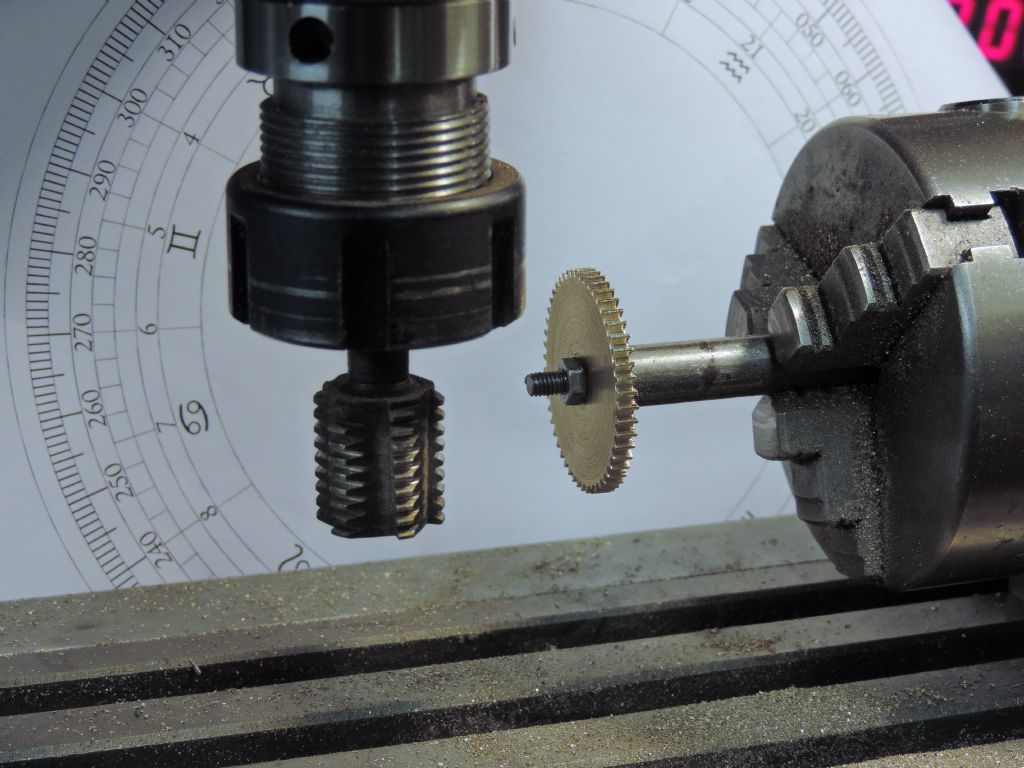
Easiest way is to buy one! Next easiest is a 3D printer. After that, I'm a fan of rack cutting, which is described here. This example was made by Neil:
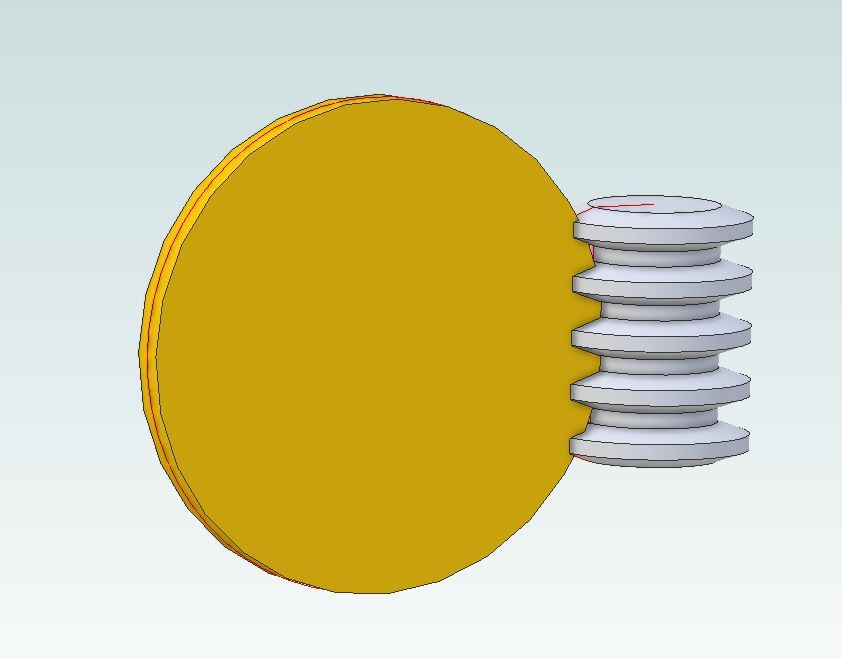
The cutter is made by turning a thread of the required pitch, and then grooving it to provide cutting edges and reliefs. This image from Jason shows the how the gear teeth are developed, several teeth each pass, and they are involutes.
Indeed, the tooth form is not critical. It is not transmitting power etc so there is basically no load on it other than to rotate the spindle of the indicator. If you have the set up to do gear cutting, you should try to angle the gear teeth to match the helix angle of the thread on the lead screw. Otherwise, you can cut a disc of brass about 1/8" thick or even less and mark out and carefully file the teeth on it.
It can be even simpler than that. First understand the principles behind it and what it is doing and realise itis just an indicator that requires no physical strength. Then you should be able to understand that you can make one by cutting a piece of cardboard to have 'teeth' and pencil in the divisions around the top, rotating on a drawing pin.
The luxury version is made of plastic sheet!
More seriously there is a design on Thingiverse for 3D printing. Well done ACE3DJ for providing that as it even includes metric. If you are having to ask someone to do the printing you could just ask for the gears and make the rest out of wood/plastic/whatever.
the thin brass method is ok tfor the gear the teeth do not need to be of a gear form,nor be helical, a series of pointed pins would work . thats ok for imperial leadscrews, now if its a metric leadscrew ,its a bit different ,from my experience with an all metric Colchester triumph 71/2 in centre height. this lathe has a set of pick off gearwheels for the thread indicator,there were either 4 or 5 gears cant remember the exact number, each gear could only work on certain pitches so to cover a full range of metric pitches a series of gears was required. the actual gears were thin brass about 3 or 4 mm thick looked a bit frail on such a large lathe but they work well as there is no load ,only a small amout of friction to be overcome.
Bazyle I found that item by ACE3DJ whilst searching the net. I have no idea when it comes to 3D printing but a friend has one. He said that I would require and "STI file" Is that file included on the web site ?
He said that I would require and "STI file" Is that file included on the web site ?
If you go to the tab on the Thingiverse page called "Thing Files" the STL files for the various components can be found there. The particular variations you required can be download for import to the 3D printer "slicer" software to be printed.
I have printed a few Myford related parts from Thingiverse & all have worked as described, so I would not expect that your friend would have any problems..
There was a Popular Mechanics article to build a thread dial indicator. It was in the May 1952 edition. pdf page 208. You can download a copy for free from:
What a brilliant font of knowledge this site is. Many thanks for all the info. I printed out that Popular Mechanics article. It came out one before I was born !
There was a Popular Mechanics article to build a thread dial indicator. It was in the May 1952 edition. pdf page 208. You can download a copy for free from:
Their picture of the gear looks like it is not a true worm gear but a much easier to make straight-cut helical gear, so quite do-able, if you have a dividing head. LINK
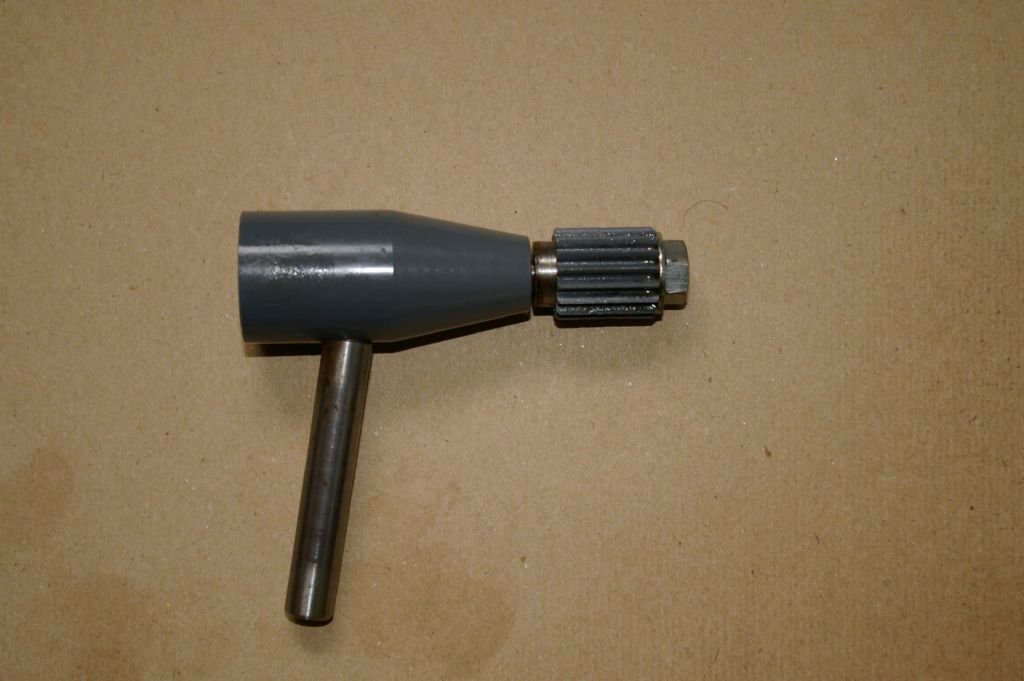
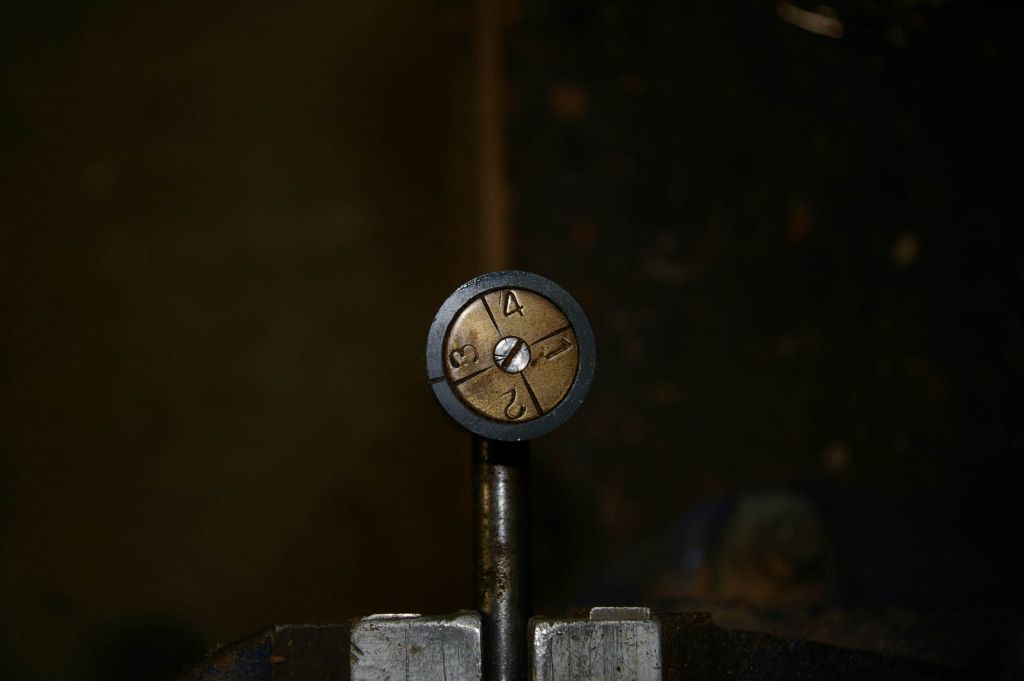
I made a TDI for my Boxford about 10 years ago. Here is a picture of it.
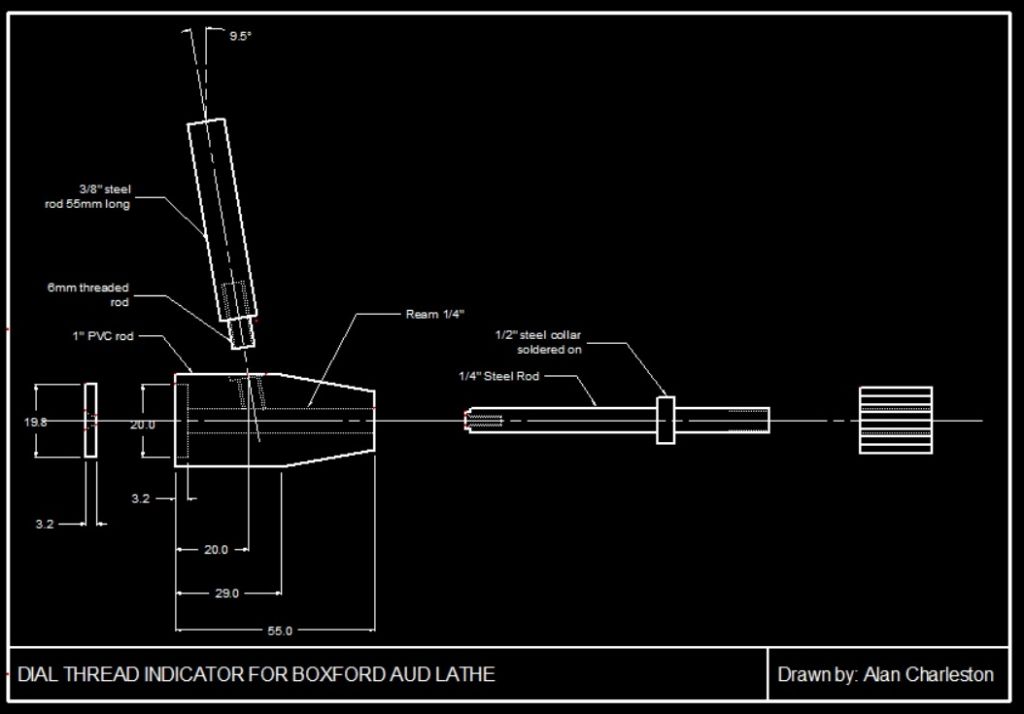
It was only supposed to be a prototype so I made it from PVC. It worked so well however that I have used it ever since. I didn't know what the correct gear form should be, so I actually made the 16 tooth gear using a module 1 gear cutter. The OD of it is 17.8 mm which was chosen to mesh correctly with the lead screw and is in fact pretty close to the 18.0 mm required for a module 1 gear. As the gear was also made from PVC, I wasn't worried about damaging the lead screw with an incorrect gear profile. The indicator works well.
When I made it I started to do a set of drawings for it but never finished them. This is a far as I got.
As you can see, rather than angling the teeth on the gear to follow the lead screw thread, I angled the supporting shaft.
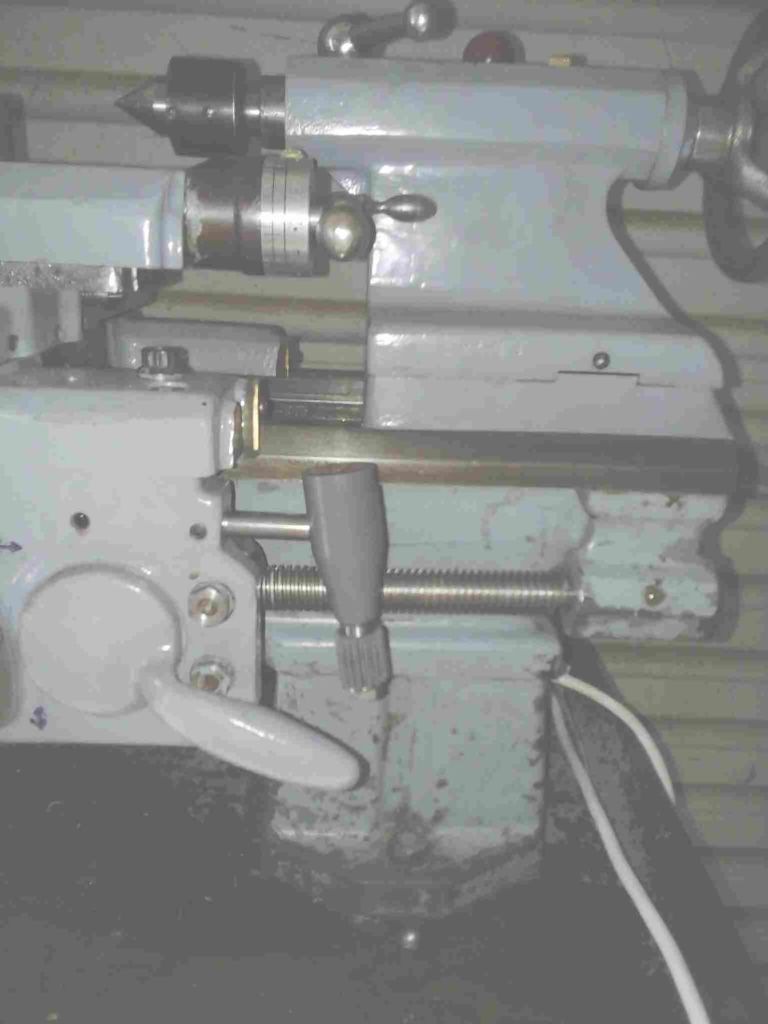
Here it is on the lathe.
If there is any interest, I can finish the drawings and post them here.
Thanks to Dave I now know how to cut a gear with the correct profile so, although the current set up works OK I'll probably cut a new gear for it.