Ball ended handle – how to

Advert

Ball ended handle – how to

Home Forums Workshop Tools and Tooling Ball ended handle – how to

Viewing 25 posts - 1 through 25 (of 27 total)
  • Author
    Posts
  • #20037
    Jim Beagley
    Participant
      @jimbeagley46363

      How to machine a ball ended handle

      Advert
      #509041
      Jim Beagley
      Participant
        @jimbeagley46363

        Hi all.
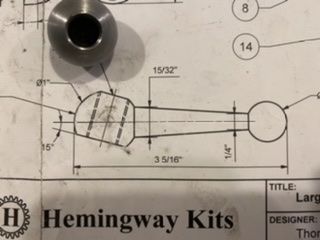
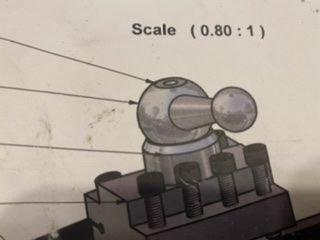
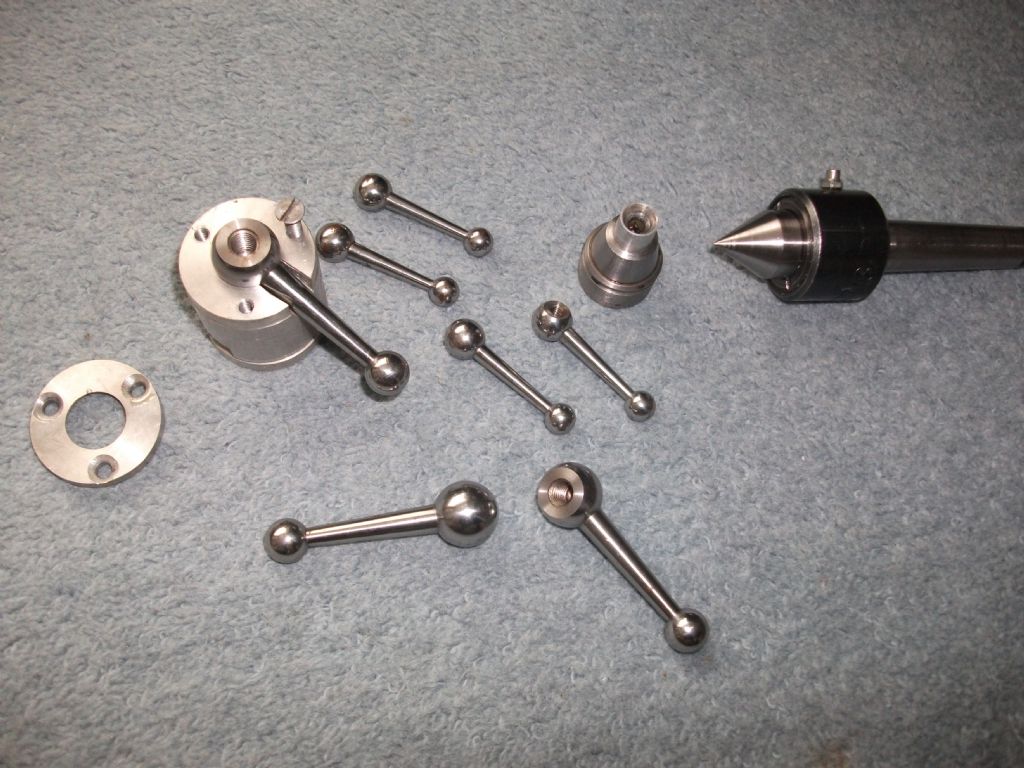
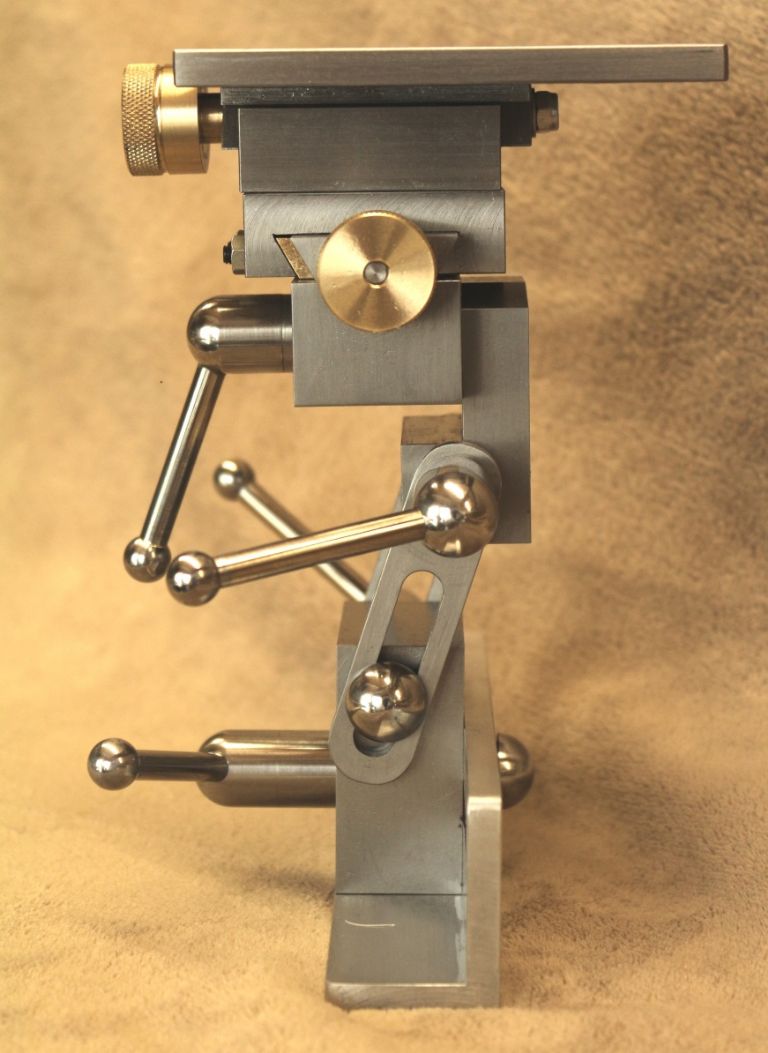
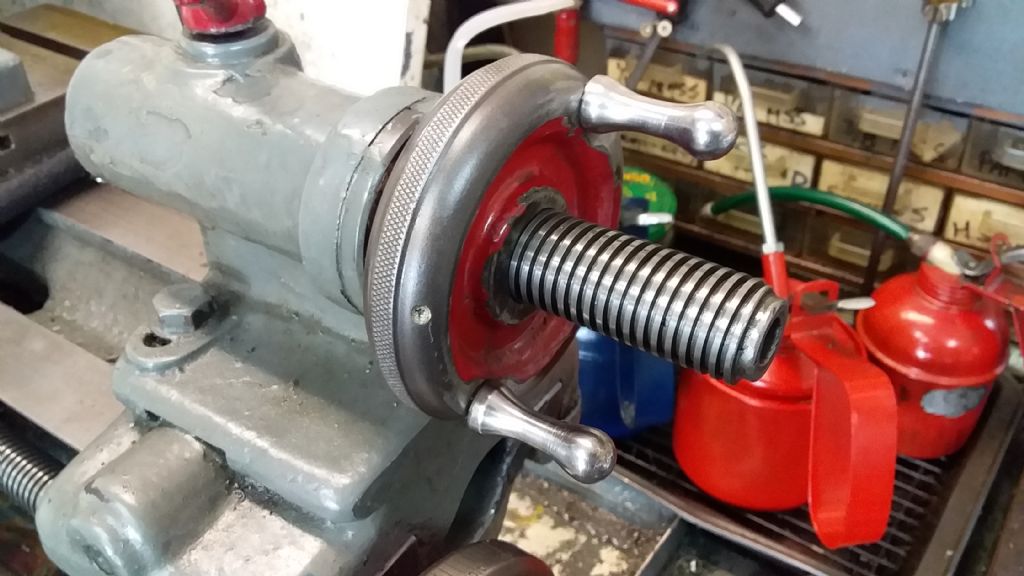
        Ive recently made a Hemingway rear toolpost and it calls for a ball ended handle for the lock.
        As a result, I’ve now recently finished a Hemingway ball turning attachment which works.

        So on to the question: how do I machine the tapered handle with a ball at each end? Maybe three parts? Maybe 2? Maybe 1?

        Looking for some guidance.
        Thanks all

        22fd39d1-ba44-44bf-955b-f9d2457a92e1.jpeg
        6110b649-a8be-4922-8cdd-2de24c6fd91e.jpeg

        #509048
        JasonB
        Moderator
          @jasonb

          First you need to make a ball turner as so starts the slippery slope.

          If you use a ball turner to form balls on either end of a length of round bar that makes it easy to hold. You can then hold buy one ball in a collet or split bush and support the other with a female ctr in the tailstock to turn the central taper. It would probably be best to drill and thread the hole before that while you have the plain shank in the middle to hold. Finally screw the large end onto a threaded arbor to turn the top and bottom faces flat.

          #509052
          Jim Beagley
          Participant
            @jimbeagley46363

            I’ve got the ball turner Jason – see my post and the lovely ball in the photo

            So reading your response, I note that I don’t have a collet chuck, female centre. Bugger!

            I supposed I can make a slot Bush easily enough.

            So I’m thinking these steps.
            Turn small ball.
            Turn centre section to max diameter.
            Drill and tap hole using centre section on Blocks.
            Turn Taper?
            Turn big ball using female centre in small ball.
            Face big ball using arbours.

            Sound about right?

            Edited By Jim Beagley on 21/11/2020 20:20:15

            #509054
            DC31k
            Participant
              @dc31k

              Both GHT and DH Chaddock cover this in great detail in their books.

              Use a split collet to hold it.

              #509057
              JasonB
              Moderator
                @jasonb

                I would leave ctr section to max dia of the large ball or slightly over then hold by that to do both balls

                #509068
                Jeff Dayman
                Participant
                  @jeffdayman43397

                  I know many on here think that making this sort of handle is a rite of passage for master toolmakers, and they are entitled to that opinion. For me, ball ended handles are unpleasant to use and a time consuming pain in the neck to make. Far better use of time to make a simple cylindrical hub, with a hole for a lever drilled at the desired angle. Weld or silver solder in an angled rod for a lever with a threaded end, and fit a thread-on tapered or cylindrical or flat handle. (Flat faced and cylindrical tapered handles for things operated and tightened with the fingers often during the day are far more comfortable than balls.) Job done, let the model making continue……

                  Again just my $0.02 worth.

                  I have spent much of my working life designing tool components for plastics related machinery, and custom toolroom accessories. If I had ever designed any with the time wasting uncomfortable to use double ball handles I assure you I would get two reprimands – one from the toolroom foreman for wasting machining time, and the second from toolmakers with sore fingers and thumbs from using the bloody things. Pretty, but a really bad handle design. You can Google Misumi, McMaster Carr, Jergens, Essentra etc to see some excellent commercial tooling handle designs. Many have been offered for years and years. Link to some very pleasant to use and cheap ones is below.

                  https://www.mcmaster.com/handles/handles/comfort-grip-adjustable-handles/

                  Edited By Jeff Dayman on 21/11/2020 21:22:51

                  #509072
                  Jim Beagley
                  Participant
                    @jimbeagley46363

                    Hi Jeff.
                    I suppose I agree with you to an extent.
                    For me, the kits are some of my first real engineering, so it’s the challenge more than anything.
                    I’m self taught, and my work leads a lot of scope for improvement but thats what I aim for.
                    Ive never made a ball, so I made a ball turning attachment.
                    Now I want to learn to use it Perhaps eventually il make a governor for my S-50 that takes balls!

                    Im not familiar with GHT or DH Chaddock mentioned by DC31K, nor do I own their books, so that wasn’t much practical help I’m afraid.

                    Cheers for all the suggestions thus far
                    Jim

                    #509082
                    Anonymous

                      If I was going to make the part I'd use a hydraulic copy attachment:

                      hydraulic copy unit.jpg

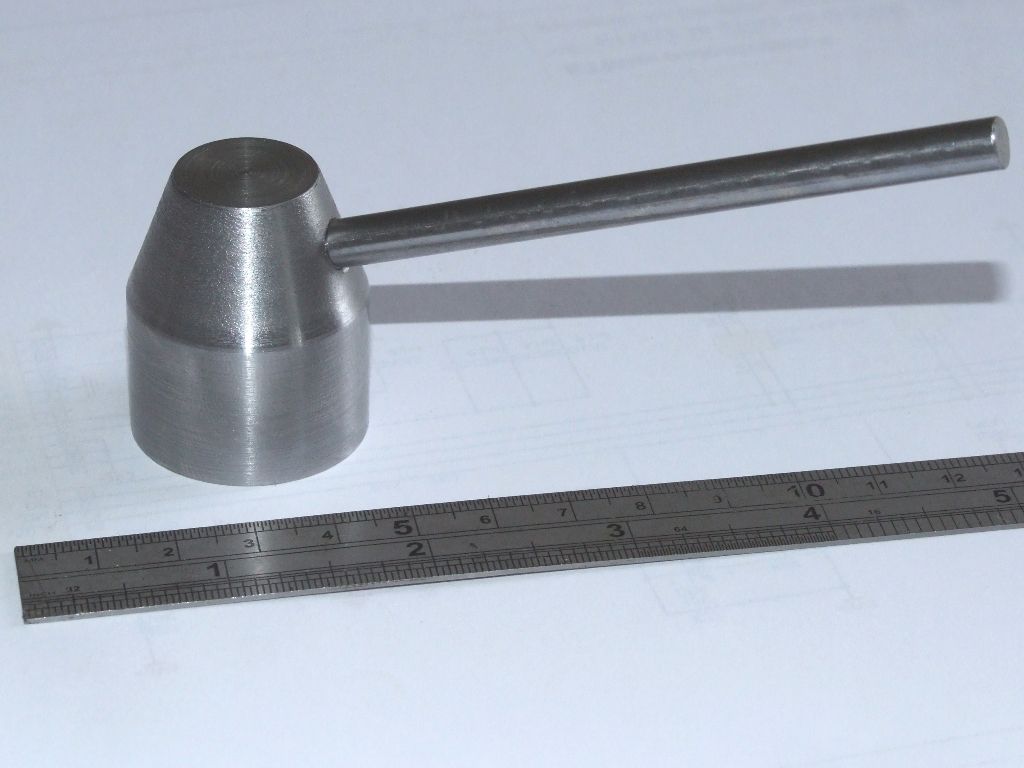
                      But I agree with Jeff, change the design to something simpler. I made this in less than 10 minutes to demonstrate to a forum member how to make something with nowt more than a rule when dimensions are not important:

                      handle.jpg

                      In industry I would think that ball handles are frowned on as one can get caught up in them and it's difficult to disentangle oneself.

                      Andrew

                      #509100
                      Hopper
                      Participant
                        @hopper

                        I've made a number of these ball handles for various toolposts and a teeny one for the Versatile Dividing Head, simply because they look the part on my vintage Drummond and Myford lathes. The later styles as above are easier but stand out like the dog's proverbials as non-original. Besides, the ball handles are fun to make. And I have have no problems using them, not doing 8 hour shifts of production repetition work etc. .

                        My method needed no special split collets or the like and went, from sketchy memory, something like this:

                        Start with a blank the diameter of the large ball, and the length of the finished handle plus a few thou or 20 for finishing.

                        Turn one end of the blank down to the diameter of the small ball for about an inch or so along the length.

                        With a parting tool, cut a groove to the diameter of the small end of the taper section (plus a few thou for finishing) right where the edge of the small ball will be. (You can probably skip this step if you work carefully in the next step and measure as you go but I like to know where to stop the ball turning tool at.)

                        Use ball turning tool to create small ball until it meets the groove.

                        Turn the shank down to the larger diameter of the taper section along its full length to where the large ball will start. IE for a 1" diameter ball, end your cut 1" from the end of the blank, plus a few thou for finishing. You may need a female centre to steady the other end.

                        Flip the job around in the chuck, gripping it by the freshly turned down but still parallel shank section, and use ball turning tool to create the second, larger ball.

                        Holding the larger ball in the chuck (with protective shim wrapped around ball), and the small ball in a female centre, turn the taper on the shank, adjusting the topslide angle until you get the right cut from small to large ball. Use a round-nosed tool to make a nice blending radius where shank meets balls. Blend with file if necessary. Polish with emery cloth.

                        Hold the large ball in the chuck with the arm facing outwards. Put the ball in the very front of the jaws and angle the arm backwards so small ball sits on chuck face. Face the large ball to desired diameter, drill and tap ball. (This works best on a larger chuck for larger handles to get sufficient angle on the handle. My Drummond has a 5" three jaw that is perfect for Myford sized toolpost handles etc)

                        Job's good. Enjoy.

                        PS, I made my own female centre by removing the point from a regular revolving centre and turning up my own female tip to fit into the ball bearing in the centre body. Just used a boring bar to cut the female conical face (60 deg included angle) into a piece of 3/4" bar then turned the step, face and the spigot diameter to fit the bearing all in one setting to ensure concentricity and parted it off. You could turn the stepped spigot end first, plus a cleanup cut on the OD then flip it around in the 4 jaw and set to run true before cutting the conical face if you prefer.

                        Lots o' fun! And I;m sure there are many other ways to skin this same cat.


                        Edited By Hopper on 22/11/2020 01:41:13

                        #509102
                        Thor 🇳🇴
                        Participant
                          @thor

                          Hi Jim,

                          Here is a description on how to make ball-handles from Steve's workshop that you may find helpful. And here is another, and a third.

                          Thor

                          #509128
                          Adrian 2
                          Participant
                            @adrian2

                            Hello Jim,

                            Thor's option one worked well for me . I tapped and counter bored the small ball allowing the tapered shaft to enter the ball, creating a truly undetectable joint. This avoids the need to machine a shouldered joint which may not be truly concentric and give the 'one piece illusion away'.

                            One thing which doesn't get mentioned much is the need to allow for the swing of the ball turner to avoid conflict with the chuck.

                            I made one for my tool post, it's a pleasure to use. You will enjoy making it. Ball turning can become addictive.

                            Adrian.

                            #509136
                            John P
                            Participant
                              @johnp77052

                              Hi
                              It only needs some simple tooling to hold the ball handles
                              to turn the tapered section between the balls ,the sequence
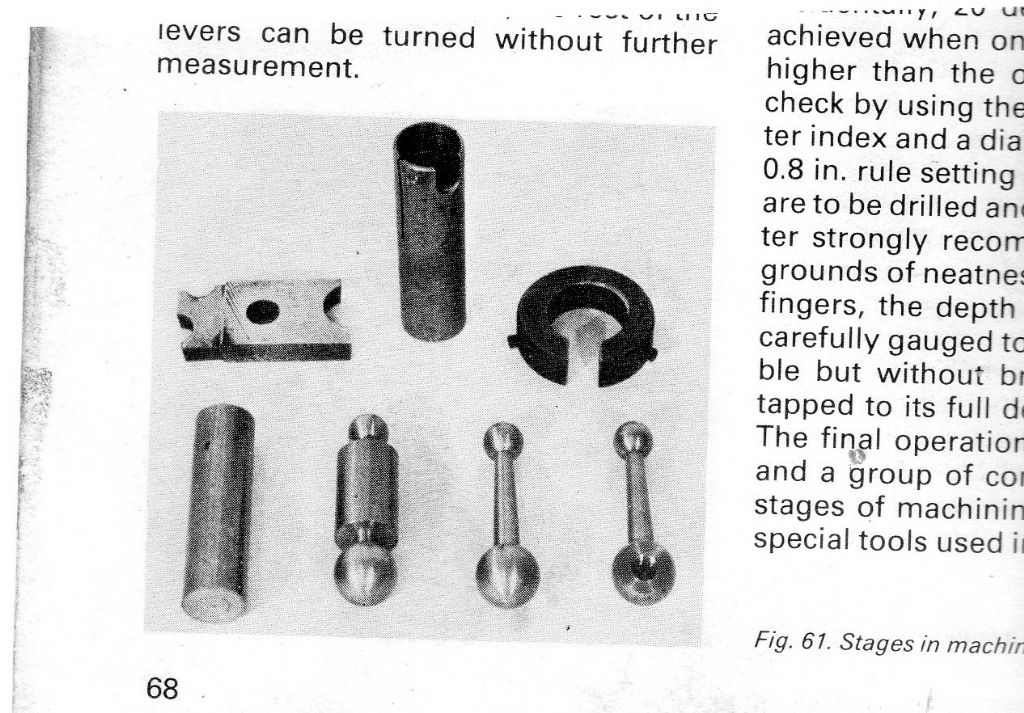
                              for making these is shown in the Quorn book the photo is seen here.
                              I made an extension for the revolving centre that fits over the nose and
                              has an aluminium working surface a similar cone is fitted and machined
                              in the chuck ,a driver to hold on the cut ball end can be made from a ring
                              and two screws with aluminium cones on.
                              The sequence shown in the photo starts with a plain bar ,the 2 ball ends
                              turned, fitted between the center supports the topslide set over
                              to the required angle to turn to the ball ends.
                              Seen here in the next photo this double ended clamp is held in the chuck.
                              A spacer between the chuck face and ball is used to set the angle
                              the large end can have the flat seating turned then drilled and tapped.

                              John

                              quorn ball handles.jpg

                              quorn tooling.jpg

                              #509143
                              DMB
                              Participant
                                @dmb

                                Wot a load of balls. Sorry, couldn't resist it.

                                I recently had a need to make some handles for Harold Halls t n c grinding jig. His design is just like Andrew Johnston's above, except that HH adds a short length of larger dia. bar to the outer end in lieu of the small ball in the ballsup design. The smart way of doing that is to drill the larger dia. bar only part way thro., enough to hold on to the smaller dia., leaving say 2mm blind section before the part off. Reverse in 3 jaw, face smooth round off sharp corner,drill very small dia. hole thro. to bigger drilled hole. Super glue larger dia. on to the end of the smaller dia. and air/excess glue exudes thro. very small hole. Simples! when having made parts without very small hole and find close fit precludes escape of air/glue.

                                In passing, may I congratulate HH upon his meticulous drawings; not quite completed my jig yet but not found a single error. They are a delight to use. Pity same couldn't be said of many loco. designs

                                DMB

                                #509146
                                pgk pgk
                                Participant
                                  @pgkpgk17461

                                  I'd have probably taken the lazy route of making the part up out of three pieces.. drill/tap a spare chunk to fit on a piece of bar.. 3-jaw chuck and make the ball, remove and replace with larger chunk for the larger ball and then make up the tapered centre section, threading one end first before tapering and threading the other end…assemble with threadlock.
                                  It also allows for making a mess and having to repeat a componentdevil

                                  pgk

                                  #509147
                                  Nick Wheeler
                                  Participant
                                    @nickwheeler

                                    I don't see the visual appeal of ball handles, and having read descriptions of the work involved certainly won't be making any.

                                    I have made a couple of handles like Andrew showed, which match the ones on my modern machines, and only take a few minutes turning for the base, and none for the handle which is simply a piece of stock rod loctited in place.

                                    If building a machine that needed a lot of handles I'd buy THESE or something similar

                                    #509149
                                    Douglas Johnston
                                    Participant
                                      @douglasjohnston98463

                                      When I built my Quorn grinder many years ago I spent ages making the ball handles. It was a great exercise and the end result was a joy to look at. Over the next few years, however, I replaced most of them with commercial adjustable handles which were much easier to use. I think it is a case of style over substance when it comes to ball handles.

                                      Doug

                                      #509154
                                      Rik Shaw
                                      Participant
                                        @rikshaw

                                        The last lot of ball ended handles I made were from silver steel rod and ball bearings thus:

                                        Cut silver steel to length and thread as required at one end. The other end was first faced in the lathe and then dished with a ball end slot drill roughly the same diameter as the ball bearing.

                                        Now take a tiny piece of silver solder and hammer it flat to produce a small “flake”. Place the flake on a piece of softwood and give it a whack or two with a hammer driven ball bearing. The aim is to produce a small dish. Pickle the silver steel hollow, ball bearing and solder “dish” in something like very warm / hot lemon juice for a half hour, dry all.

                                        Next, grip silver steel rod in vice jaws vertically with the hollowed out end uppermost. Put a tiny amount of flux in the upward facing hollow and place dished flake on top. Apply a little more flux on top and gently push the ball bearing down on the lot.

                                        I used a fine nozzle on my propane torch to heat it up. Try sitting down while you do it with your eyes level with the ball. Watch carefully and remove heat source when the ball moves slightly into its bed of molten silver solder.

                                        Cool and polish – job done.

                                        Others may do it differently, with paste for instance, but not having any I did it my waynote

                                        Rik

                                        side001small.jpg

                                        With due acknowledgment to Harold Hall and his design at : Grind Rest, Advanced (homews.co.uk)

                                        Edited By Rik Shaw on 22/11/2020 11:40:56

                                        #509158
                                        Evan Lewis
                                        Participant
                                          @evanlewis60038

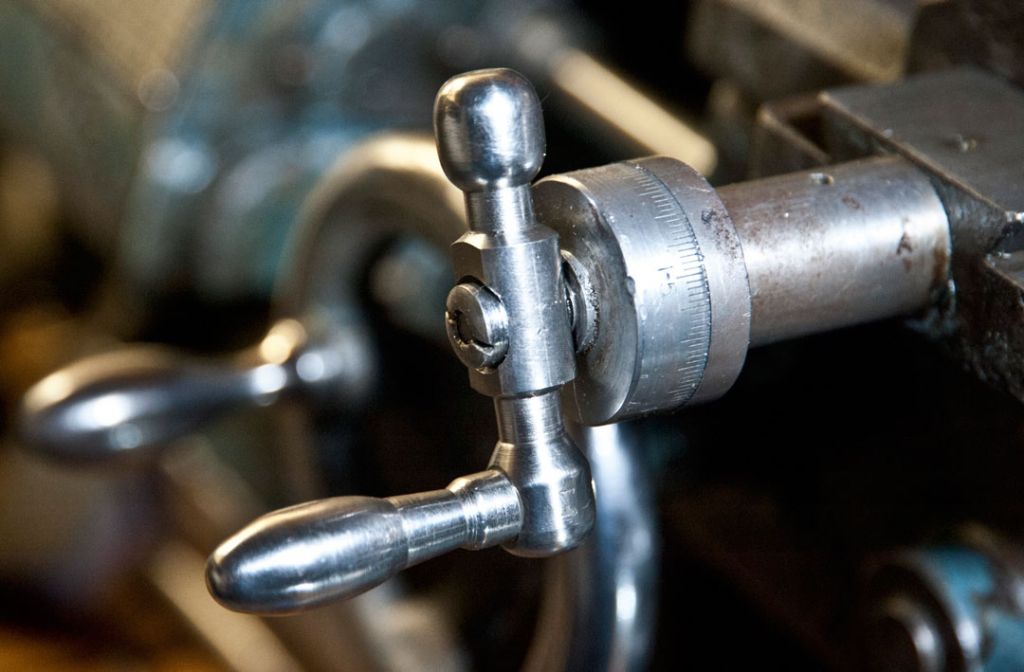
                                          ael_5698-cross-sode-handle-replacement.jpg

                                          The first turning job I ever did when I inherited this lathe was to make a new cross-slide handle from stainless steel. The firs lathe project in 55 years. The plan was just make something that works. It doesn't have to look authentic.

                                          I like the way it feels but it is not balanced. Unless the gib adjustments are tight the handle drops down to the lowest point due to gravity. So that's what the balls are for. I knew there was a reason we have balls! Gravity. So now I am thinking I have to make a bigger ball, like the song "I like big balls". Maybe if I made it from solid gold it would be heavier.

                                          #509219
                                          Neil Wyatt
                                          Moderator
                                            @neilwyatt

                                            I was going to mention the GHT approach with form tools and fixtures, but John Pace has covered this.

                                            Neil

                                            #509225
                                            Jim Beagley
                                            Participant
                                              @jimbeagley46363

                                              Thanks so much to everyone who has contributed.

                                              Who would have guessed that my problem with my balls would have garnered so much interest.
                                              I shall now attempt to digest all the information and make my choice.

                                              Hopefully I can report back soon with a lovely set of shiny balls which will soon be swapped out for something modern I’m sure my wife will let me put my old balls on the mantelpiece as an object for discussion when the vicar calls for tea .

                                              Cheers all

                                              Jim

                                              #509238
                                              Swarf, Mostly!
                                              Participant
                                                @swarfmostly

                                                Hi there, all,

                                                I hope I may be forgiven for a slightly off-topic post. Well, it is to do with handles.

                                                In the background of Evan Lewis' post you can see what I describe as a 'tear-drop handle'. Somewhere on the Internet there is a video of one of these being turned using a form tool so arranged that only part of the tool is in contact at any time. If I remember correctly, the top-slide (aka 'compound' ) is set at a slight angle to the cross-slide and is mechanically driven. Again if I remember correctly, the technique is named as 'skiving' (until I found this video I thought that was the process for producing a thin sheet of leather, such as is used to surface a bureau writing flap) .

                                                I found this video fascinating but my recent searches for it have been unsuccessful!!!

                                                Maybe one of the members here is familiar with either the video or the machining technique or both?

                                                Best regards,

                                                Swarf, Mostly!

                                                Edited By Swarf, Mostly! on 22/11/2020 17:40:22

                                                #509242
                                                Gordon A
                                                Participant
                                                  @gordona

                                                  A simple cheating method for the small end ball is to seek out an old style computer mouse (with the ball that picks up fluff and stops the device working until you remove the ball to blow out the detritus).

                                                  If the mouse is no longer needed, carefully peel away the rubbery plastic coating from the ball to reveal a metal ball of about 2cm diameter inside. Hold the metal ball in a chuck and face off to the diameter of the small end of the handle and drill and tap a blind hole to suit a thread on the lever. The ball may be slightly rough but this can be cleaned up with a fine file/abrasive whilst being turned on a piece of appropriately threaded rod in the lathe. Then just screw onto the handle and the joint is barely visible.

                                                  Alternatively for a quicker job drill a blind hole in the ball and push onto a matching short parallel turned spigot on the tapered handle with a dab of adhesive if required.

                                                  Both ways work as I've tried them.

                                                  #509276
                                                  Swarf, Mostly!
                                                  Participant
                                                    @swarfmostly

                                                    Hi there, all,

                                                    I thought I'd better have another search and, this time I found the thread. It's on the Mad Modders web-site, here:

                                                    Skiving Tool

                                                    The thread is dated 2014. The problem is that the videos are all unavailable. He showed the process in use for a three-ball handle as well as the tear-drop type. (So my previous post wasn't all that off-topic after all! )

                                                    If anyone is interested in the process, there are some still photos there that are interesting.

                                                    Best regards,

                                                    Swarf, Mostly!

                                                    #509364
                                                    Hopper
                                                    Participant
                                                      @hopper
                                                      Posted by Swarf, Mostly! on 22/11/2020 20:42:06:

                                                      Hi there, all,

                                                      I thought I'd better have another search and, this time I found the thread. It's on the Mad Modders web-site, here:

                                                      Skiving Tool

                                                      The thread is dated 2014. The problem is that the videos are all unavailable. He showed the process in use for a three-ball handle as well as the tear-drop type. (So my previous post wasn't all that off-topic after all! )

                                                      If anyone is interested in the process, there are some still photos there that are interesting.

                                                      Best regards,

                                                      Swarf, Mostly!

                                                      Ive made a couple of those "teardrop" shaped handles to add to the tailstock handwheel on my Drummond.

                                                      I did it with a normal ball turning tool. Set the tool bit to protrude forward of the pivot point to turn the concave curve then set it in the normal manner to do the convex. .

                                                      Without the videos Im still not sure how his skiving tool works exactly. .

                                                      But here's my ball-turned examples:

                                                      drummond tailstock handle.jpg

                                                      Also. note the indexing hole (with dab of white paint) drilled in the handwheel rim by a previous owner back about WW2. Really handy. You know one turn of the handlwheel equals 1/8" movement so easy as pie to count the turns for whatever depth of hole you want to drill. 8 turns = 1" down to 1/8 of a turn = 1/64". No DRO needed. Those old guys were brilliant. But they had a stronger grip than me. Drilling holes without those two handles I added was a real chore and getting harder every year as my grip gets weaker.


                                                      Edited By Hopper on 23/11/2020 11:48:04

                                                      Edited By Hopper on 23/11/2020 11:49:36

                                                      Edited By Hopper on 23/11/2020 11:55:59

                                                    Viewing 25 posts - 1 through 25 (of 27 total)
                                                    • Please log in to reply to this topic. Registering is free and easy using the links on the menu at the top of this page.

                                                    Advert

                                                    Latest Replies

                                                    Viewing 25 topics - 1 through 25 (of 25 total)
                                                    Viewing 25 topics - 1 through 25 (of 25 total)

                                                    View full reply list.

                                                    Advert

                                                    Newsletter Sign-up