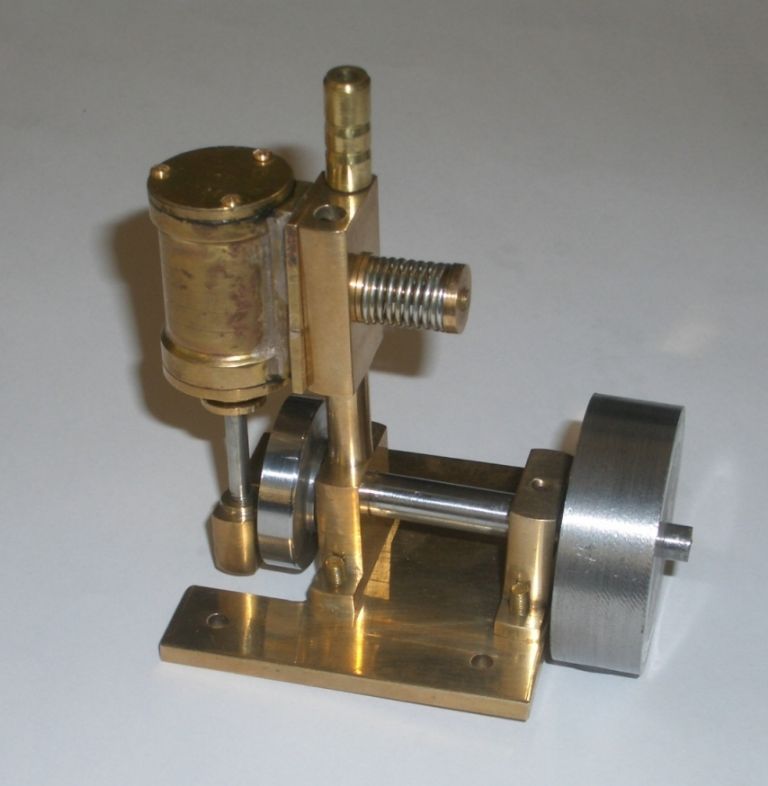
From the photograph it looks very well made and the soldering looks very neat too, so if this is your first go at model engineering it cannot be you first go at machining surely….. I think almost everyone made an oscillator as their first engine so welcome to the fold .
Be nice to see photographs of your mill engine before and when completed.
Thanks for the kind words. The last time I touched a lathe was back in the 70’s , at high school. I am a draftsman (CAD), in the town planning sphere.
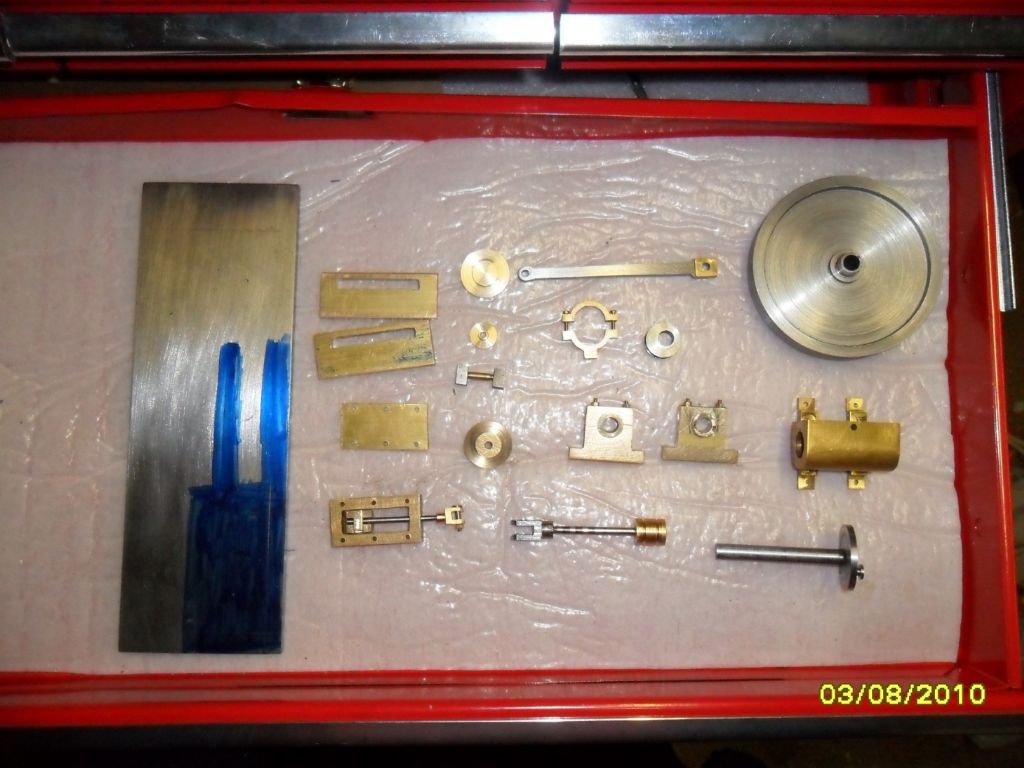
What you havn’t seen is the other two cylinders etc. However as I enjoy most types of creative hobby I can soft solder – but this was the first silver solder job.
I will create a new thread for the Mill engine, although here is Western Australia it’s very cold at the moment so not much shed work being done.
A nice neat piece of workmanship Peter, as Rob so ably says welcome to the fold.
I remember my first oscilator – the cylinder was from a brass end cap usualy fitted to heavy duty electric cable . Made in the engineers shop on board the rig North Star this was before my first lathe and was a cut and file job including the flywheel. Simple yes, crude – even more so but it did work you obviously know the feeling Though not part of the engineering side on the rig I spent many an hour enjoying myself in that shop. The chief engineer Jack Buglass was a great mentor and was a great one for inovation.
Good luck with the mill engine keep us informed of progress
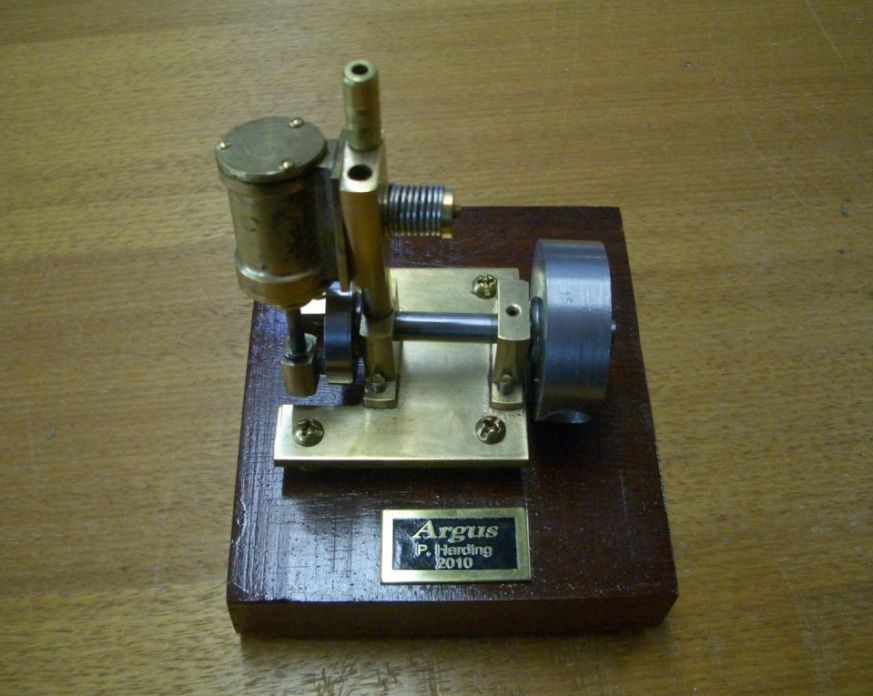
I intend to mount this engine onto a Jarra board and add a nameplate with the name of the design, name of builder and year finished. I was at an exhibition a few months ago and was amazed at the number of models shown with no details. Something like this –
Here’s a photo of the finished and mounted engine, complete with etched name plate. The name plate was done by a guy in Queensland and I think he made a great job of it.
Hello there Pete. Re the 10 Ba tap, two questions. Is it in a blind hole? What is the base plate made if? If the base plate is Brass or bronze, get some Ferric Chloride solution –the stuff used to etch printed circuits-. Build up a little dam with wax and put a drop of Ferric Chloride into the hole and leave it overnight. Wash and repeat the dose until the tap is gone (4 or 5 days). If the base is aluminium make a small trepanning saw and cut away the metal surrounding the broken tap. Plug the hole and start again.
Many years ago on my second engine (Stuart 10V) I broke off an M2 tap in the cast iron base. The etching idea was out, since of course the tap and the iron are much the same stuff, barring the amount of carbon.. So I made a very rudimentary spark erosion setup and eroded away the core of the tap with a copper wire electrode. When I say rudimentary, the jiggling up and down of the electrode was done by me moving the quill up and down repeatedly. However, the voltage involved is nicely into the lethal range, so if you want to try this sort of thing you need to have some idea about how to keep yourself safe.
So it can be done, and I can tell you more if you are OK with that sort of stuff.
I do not agree with Richards suggestion regarding ferric chloride. In etching printed circuits the ferric chloride dissolves the copper which is not what you want. If the base is aluminium electrolysis might work. If the aluminium is made the anode then it will become anodised but the steel tap should dissolve. I suggest using a small cathode positioned close to the hole with the broken tap. You would use dilute sulphuric acid as the electrolyte. Whichever method you decide to use I suggest doing a test on some scrap material first.
Unfortunately the base is Mild Steel so would probably etch at a similar speed to the tap.
John – contact me via the ‘message member’ and I’ll give you my email. I have been playing with electronics since around age 8 and while I have a respect for HV I know how to handle it.
Let’s not encourage those with ‘Darwin Award’ tendensies!
Nice work again Pete, a pity about the tap but all is not lost yet
I think that Dick may have the Ferric Chloride solution wrong as this will etch the brass – the technique however is an old one but the chemical should be a solution of Alum.
The other tip is valid – make a small cutter from silver steel ie this would be like making a counterbore without the centre pin. The hole up the middle sholud just clear 10BA and deep enough to go over the the length of the (broken part) tap. The OD needs to be as small as you can get away with without the cutting edges becoming too fragile but don’t be too worried about this as the hole is easilly filled.
In use you need to set the baseplate up again with the tool exactly over the tapped hole and then, gently, make short plunges to remove the metal around the tap removing frequently to clear the chips . Providing you have centred the cutter accurately this will work very well albeit rather slowly.
The teeth on the cutter need not be anything special, filing them on is adequate and harden and temper in the usual way. Personally I wouldn’t temper it but that’s up to you.
Once you are deep enough for the tap to loosen drill right through the plate. then drill through again with the next size drill to give a uniform hole right through but do not debur the top face.You can if desired counter bore the lower face then make a small plug, shouldered to fit the CB or straight, about 2mm longer than the plate is thick and either a tight fit in the hole or use loctite. With the plug pushed from the bottom face through about a mm peen the ends gently just enough to swell them in the hole. Mill and finish file the surplus off level. If you do his right there will be very little evidence, if any, on the top face of this having been done – that’s why you don’t debur the hole.
Now the really difficult part – set it up re – drill and re-tap that 10 ba hole without shaking
Welcome to the world of Model Engineering – breaking a 10BA tap is the TRUE baptism
If it is a carbon steel tap you could try heating that corner of the baseplate red hot for a few minutes and letting it cool slowly. You should then be able to force the tap out with a punch if its a through hole. Then polish the base clean again!
For future reference use a larger drill – you only need 60% of the thread form to get 90% of the strength, but this reduces the force needed to turn the tap hugely. Dip the tap in cutting oil before using it, and with small taps make a little guide out of an offcut that is flat on the end and drilled square to take the tap and hold it steady without twisting.
The Ferric Chloride solution will work in bronze, brass and gun metal. It also works in Spherical cast iron. Back to lower level school chemistry (or ‘stinks’ as we called it)! The reason it will work is that in brass etc the alloy has a lower (less reactive) position in the electro chemical series than iron. The hard steel of the tap reacts with the Ferric Chloride in the same way that the ‘Wasting Anode’ protects your central heating system. What you are really doing is making a battery where the iron is the wasting anode and gets eaten away (dissolved). In cast iron, the carbon in the matrix protects the iron in the casting so that the broken tap is dissolved preferentially. It can also work in mild steel where the materials in the tap tip the reaction towards the harder material –the tap-. Do not try it if you are using free cutting mild – think how badly this rusts-.
In an ‘etching bath’ dissolving copper on a printed circuit a different reaction is occurring.