Hi Drewt
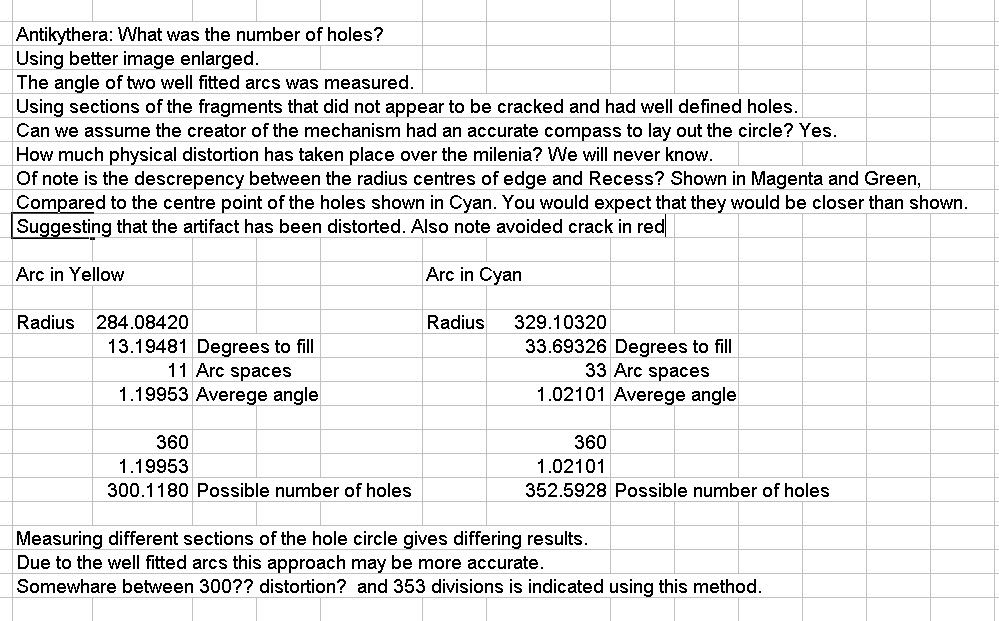
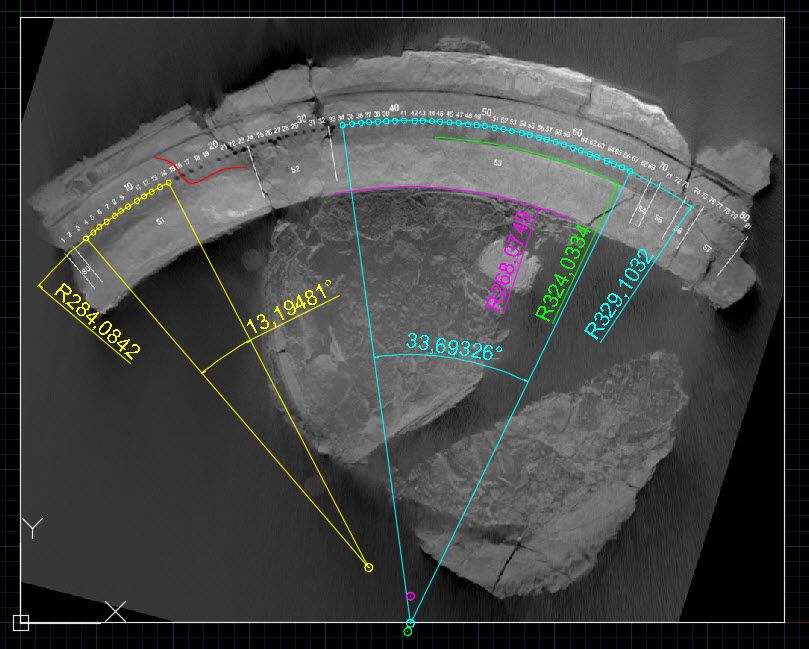
I should have made it clear in the last post I made that all the arcs placed with the three point method were positioned on the end circle centres. The two "feature" arcs were positioned entirely by eye.
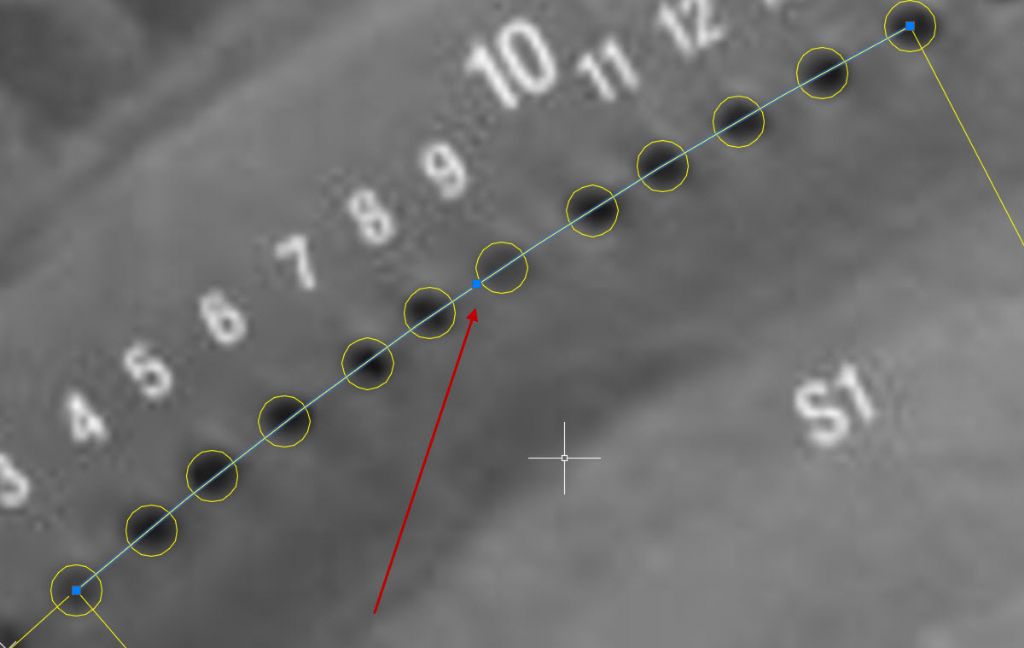
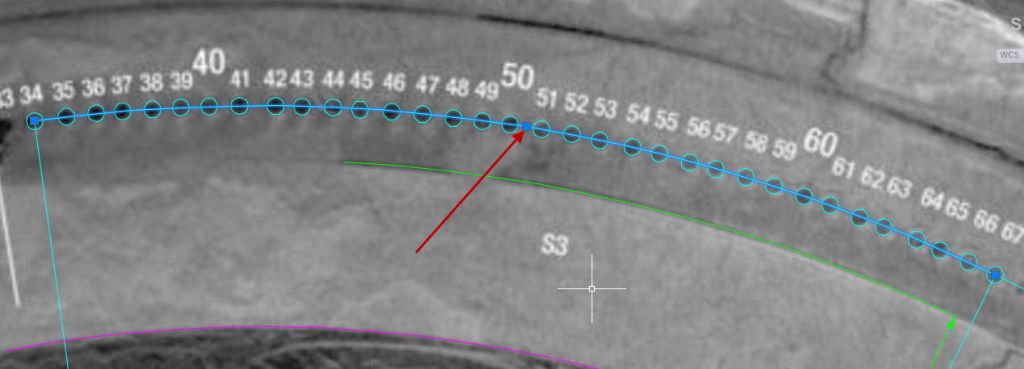
The centre of the hole(s) arc was positioned by eye as seen below. I tried to visually pick the visual average centre of all the holes.
The circles around the holes were also positioned by eye, prior to placing the arc. Reviewing the placement used it looks about right, Improving it would not significantly affect the placement of the arcs. and the the all important radius that assists us in calculating the number of holes.
I am surprised how much the the centres of the hole arcs and the two feature arcs deviate in the tests. There is significant error, they should line up better, assuming the creator had a half decent compass. It is clear the device was created by master craftsman. They would have had high quality compasses and tools.
For me that only leaves distortion, the centres should align a lot more accurately. was this distortion physical? The result of unknown forces over time? Or could it be possible that the X-ray scanning methods introduced error. I know the imaging was done in slices, were they truly planar to the mechanism? Could there be some form of spherical distortion of the scanning beam?
I would really like to know more about the scanning method. what was the accuracy and linearity obtained particularly over the entire area of the objects. The fine detail is good but that is not all we need.
See enlarged images below


Edited By John McNamara on 16/11/2021 13:42:14
Edited By John McNamara on 16/11/2021 13:43:29
david bennett 8.


