Another workholding problem

Advert

Another workholding problem

Home Forums Workshop Techniques Another workholding problem

Viewing 18 posts - 1 through 18 (of 18 total)
  • Author
    Posts
  • #575845
    Buffer
    Participant
      @buffer

      Hi

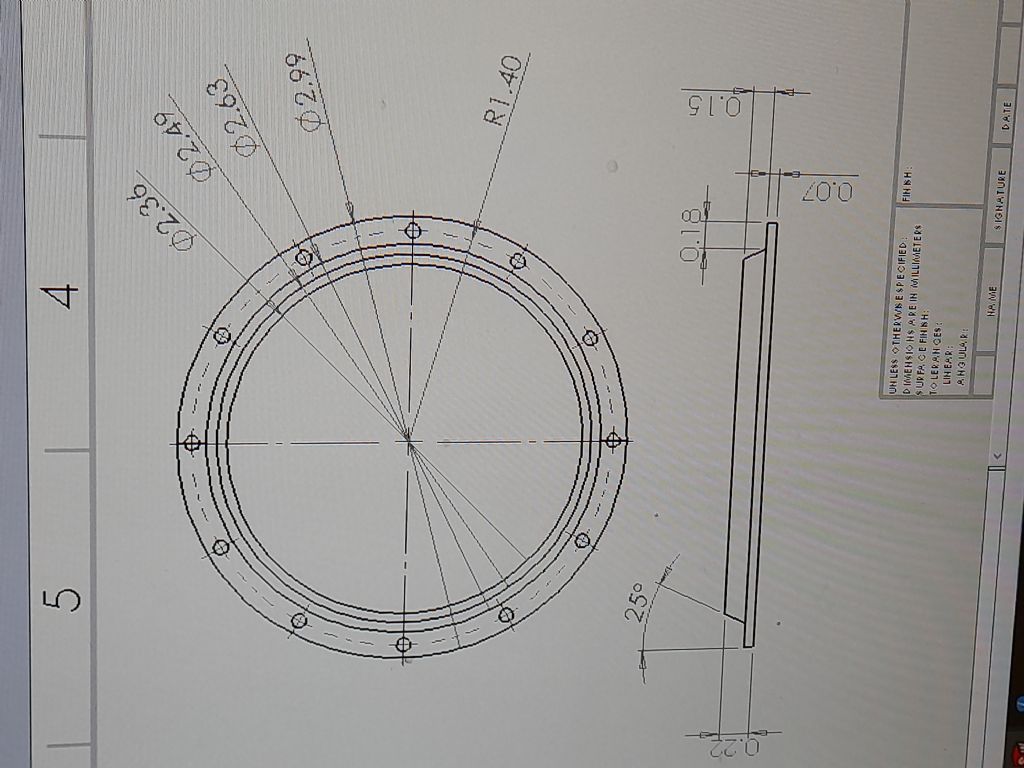
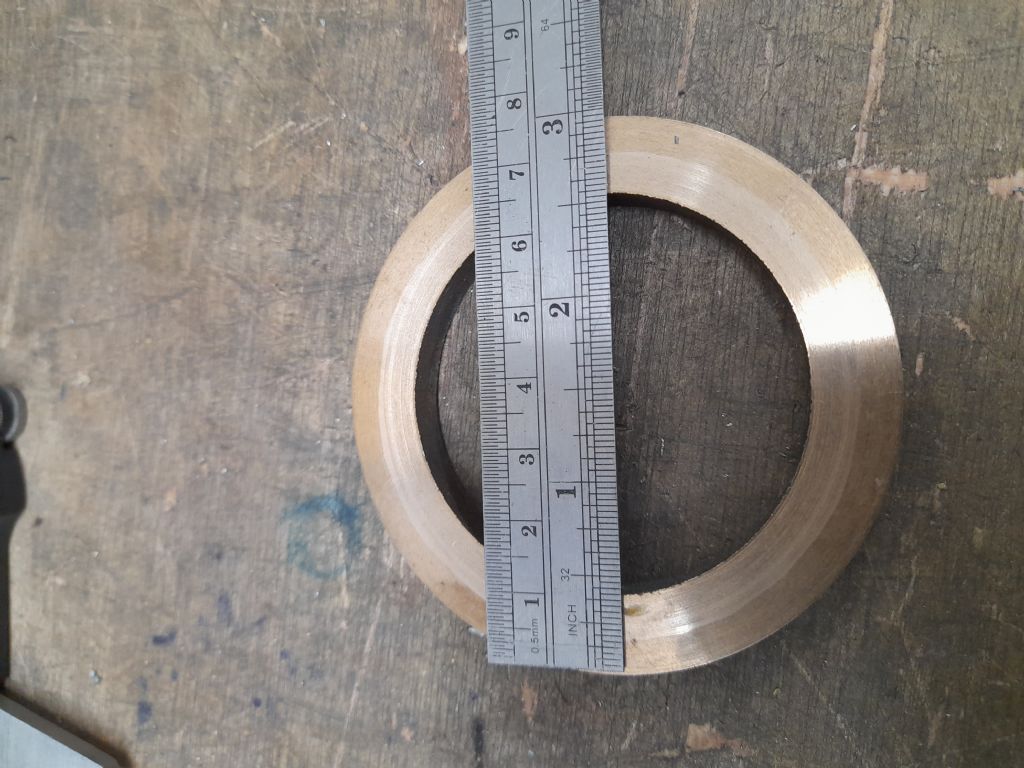
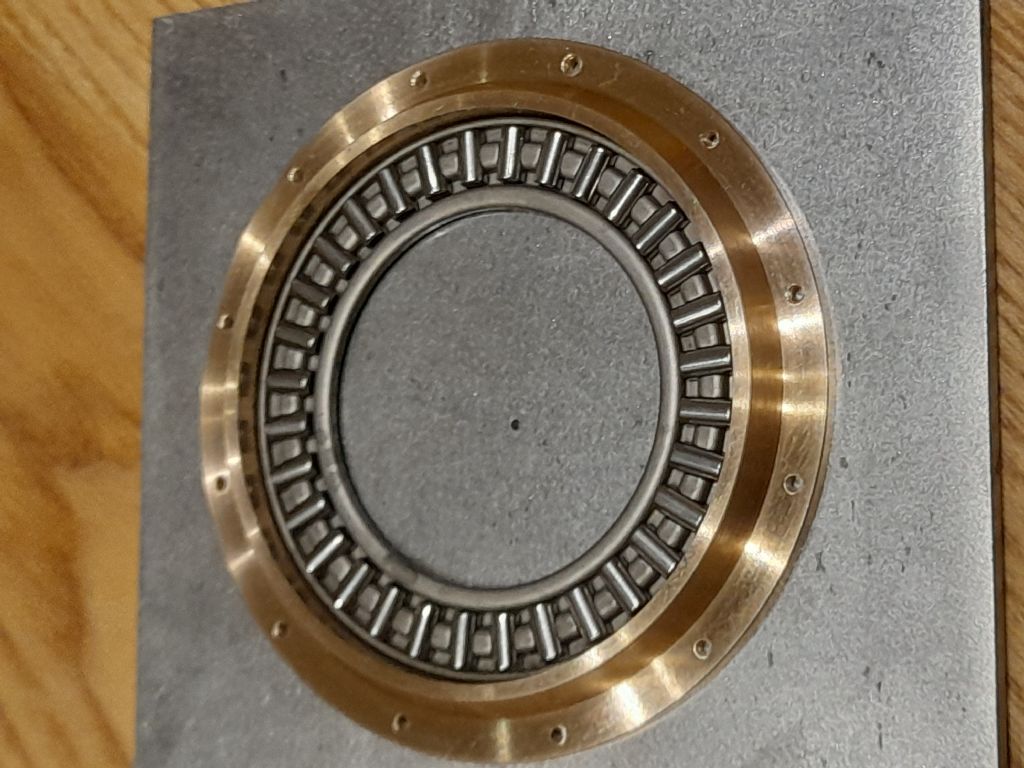
      I need to make this part shown in the drawing below and whilst I have never made a part like this before I would have machined it and then parted it off of a bar. However I happen to have this ring of gunmetal that is big enough to have the part in it but is only 0.3 inch thick. Question is how do I hold this and machine it to get the part out? I can only think of machining the bore then trying to hold it on the bore and get it squared up somehow then do the outside. I have all the usual lathe tooling etc.

      Any ideas would be great as I only have the one piece and don't want to mess it up if I can avoid it.

      Thanks in advance.

      By the way off to work in a bit so wont be able to respond until at least 7pm.

      20211219_103103.jpg

      20211219_102230.jpg

      Advert
      #16338
      Buffer
      Participant
        @buffer
        #575855
        Martin W
        Participant
          @martinw

          Any merit in gluing it to a sacrificial substrate, mounting substrate on the faceplate, center workpiece and level, turn the profile you want and then remove finished article from the substrate. This process has been discussed on this forum more than once I believe.

          HTH

          Martin

          #575864
          Emgee
          Participant
            @emgee

            Buffer

            As Martin suggests for finish turning but to get there many other methods may suit, my method as follows.

            1.Mount the blank in a 3 jaw chuck and face the surface, only remove enough to clean up.
            2.Turn job around and face other side, Drill, bore and ream a 1" hole through the part.
            3.Fit a known accuracy 1" mandrel to the lathe and secure the blank with a large diam turned washer and nut.
            4.Turn OD to 2.990" diameter.
            5.Turn the 2.630" diameter to leave .070" thick outer flange.
            6.Use the topslide set to suit the 25 deg angled cut and turn the taper.
            7.Face off where possible to leave .022" thickness to part.
            8.Remove job from mandrel and mark out and drill the holes shown in the flange.
            9.Fix the part via the holes in the flange to a piece of ply/MDF bolted to a faceplate and faced/bored to suit the flange diameter to prevent movement.

            If no faceplate available:
            If absolute concentricity is not required hold the work by the flange OD in a 3j SC chuck and bore to 2.360" diameter, don't overtighten the jaws or the diameter will be distorted.

            Alternatively for good concentricity of the bore use a 4jIND chuck but risk of distortion still present.

            Emgee

            #575870
            Michael Gilligan
            Participant
              @michaelgilligan61133
              Posted by Buffer on 19/12/2021 11:04:59:

              Hi

              I need to make this part shown in the drawing below and whilst I have never made a part like this before I would have machined it and then parted it off of a bar. However I happen to have this ring of gunmetal that is big enough to have the part in it but is only 0.3 inch thick. […]

              20211219_103103.jpg

              .

              dont know

              I do hope that inches are specified somewhere on that drawing ^^^

              if not, then you have an interesting ‘watchmaking’ job ahead of you

              … and plenty of spare material.

              MichaelG.

              #575875
              Clive Brown 1
              Participant
                @clivebrown1

                Emgee, the blank is a ring, no material for a 1" hole.

                I'd consider holding the blank concentric on the OD, bore 2.36" and face.

                Turn a stub of, say, 3" dia material, (steel, LA?? ). to 2.36+" dia for 0.2"+ length.

                Mount on the mandrel. Heating or loctite / super-glue will provide secure fit.

                #575880
                Martin Connelly
                Participant
                  @martinconnelly55370

                  Hold the OD with a 3 jaw chuck. Machine the inside bore undersize and leaving a lip. You can then use this inside lip to clamp the part to a faceplate or other flat plate. Machine the outside features and the holes. Then use the outside lip to hold it on a suitable plate to bore out the centre to size.

                  Martin C

                  #575894
                  Emgee
                  Participant
                    @emgee
                    Posted by Clive Brown 1 on 19/12/2021 14:40:37:

                    Emgee, the blank is a ring, no material for a 1" hole.

                    Hi Clive

                    Yes I missed that, should have read it twice and seen the 2nd picture.!!!!!

                    Emgee

                    #575896
                    Phil Whitley
                    Participant
                      @philwhitley94135

                      Drill the holes first and bolt it to a faceplate?

                      #575907
                      Howard Lewis
                      Participant
                        @howardlewis46836

                        I was going to suggest machining rear face, and bore b before drilling the bolt holes.

                        Then turn up a plate, If worst comes to worst, drill and tap the Faceplate.to match the ring of bolt holes in the W I P.

                        Bolt W I P to plate.

                        Clock bore to centralise (Clearance on bolt holes should allow this. )

                        Machine front face,and taper.

                        As J S would have said "Job's a good 'un"

                        Howard

                        #575918
                        Michael Gilligan
                        Participant
                          @michaelgilligan61133

                          Aside from the units of measure … another thing surprises me a little:

                          Only one of the circles is specified by its Radius

                          … this is the circle that we would typically reference as a Pitch Circle Diameter.

                          MichaelG.

                          .

                          If it’s your drawing, Buffer … No criticism intended !

                          #575939
                          Buffer
                          Participant
                            @buffer

                            Thanks guys for all your help with this. I knew a bit of brainstorming would come up with solutions and you've all been most kind taking the trouble to help.

                            I have had a good read through and they all seem like good ideas, however I don't fancy drilling into my faceplate when there is another idea. So I am going to do what Clive Brown has suggested and slide it over a mandrel with a bit of loctite then break it off with a bit of heat. In the past I have glued bits together to save on waste and then turn up finished components. Once I broke the loctite bond by taking too deep a cut and getting it too hot, so I don't know why I didn't think of this. It just proves to me yet again how hard it is to think clearly and generate options when you jump to conclusions.

                            Thanks everyone, I will try and do it tomorrow and post a picture if the kiddies don't play up.

                            Michael yes my solidworks drawings are a bit poor but for some reason that one just came out like that and I couldn't be bothered trying to change it. And as it wasn't meant to be seen by anyone I thought sod it it'll do.

                            Buffer.

                            #575940
                            Michael Gilligan
                            Participant
                              @michaelgilligan61133
                              Posted by Buffer on 19/12/2021 20:43:24:

                              […]

                              I couldn't be bothered trying to change it. And as it wasn't meant to be seen by anyone I thought sod it it'll do.

                              Buffer.

                              .

                              Good attitude yes

                              MichaelG.

                              #576091
                              Buffer
                              Participant
                                @buffer

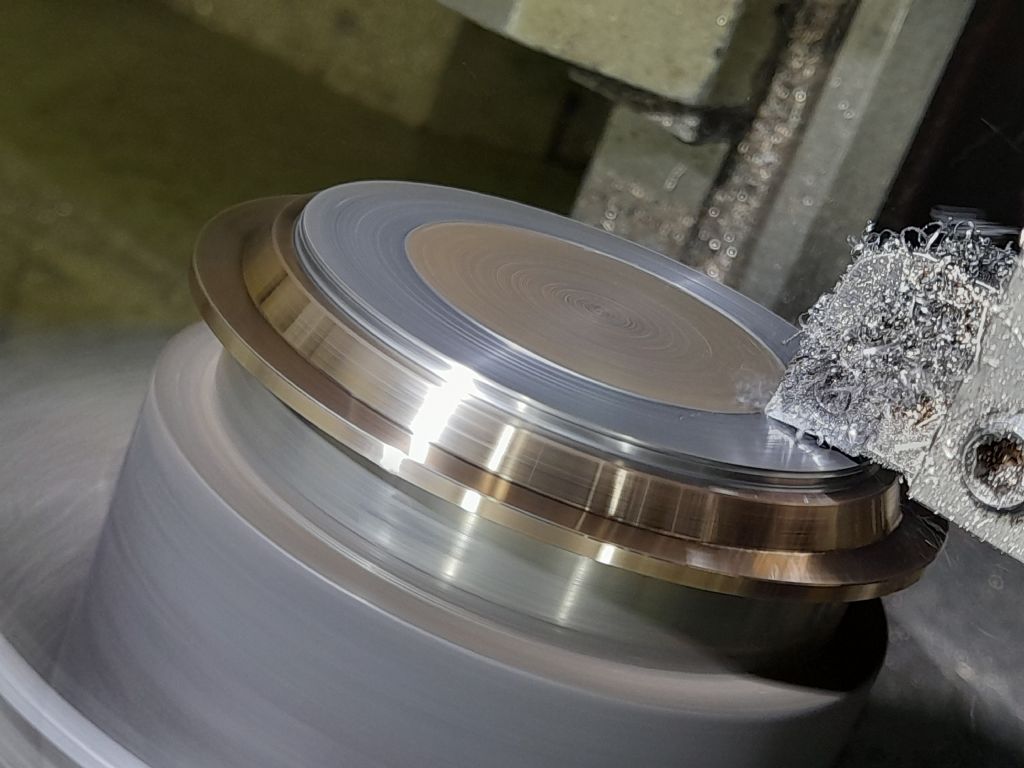
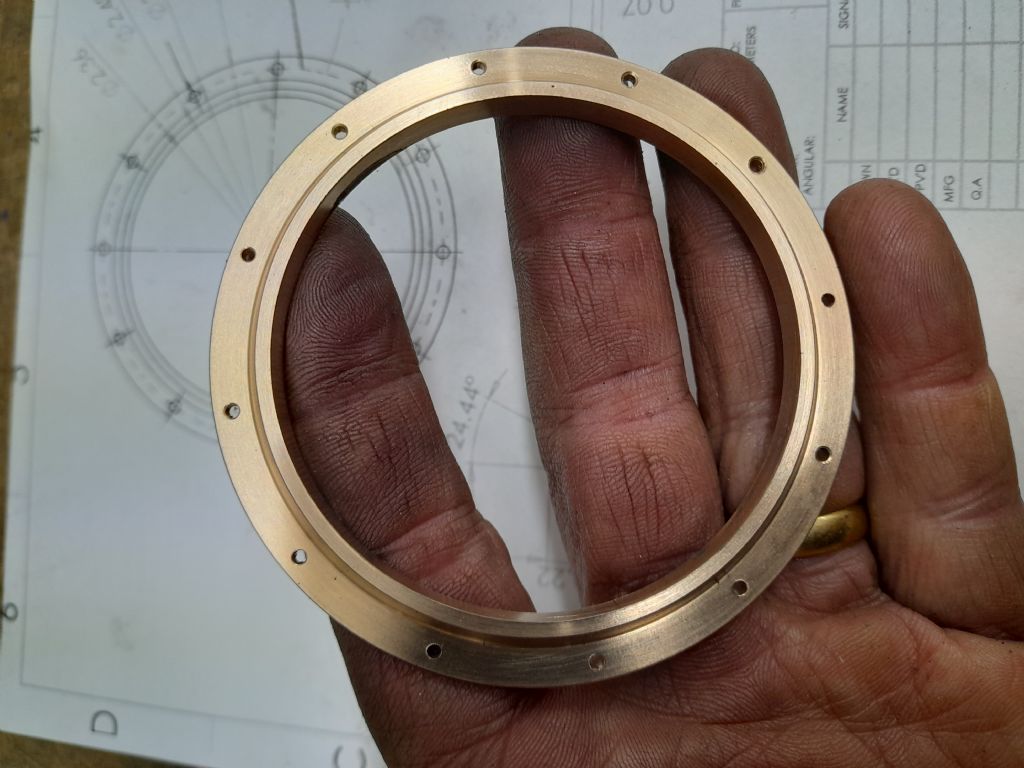
                                All done.20211220_203157.jpg

                                20211220_214631.jpg

                                20211220_215419.jpg

                                #576098
                                Emgee
                                Participant
                                  @emgee

                                  Buffer

                                  Nice job, very crisp machining.

                                  Emgee

                                  #576209
                                  Michael Gilligan
                                  Participant
                                    @michaelgilligan61133

                                    Good morning, Buffer

                                    Having just looked at another thread : **LINK**

                                    I feel obliged to withdraw my comment about your pitch circle

                                    The drawings on that thread also show Pitch Circle Radius, in a scheme that is otherwise predominated by diameters.

                                    MichaelG.

                                    Edited By Michael Gilligan on 22/12/2021 08:16:23

                                    #576210
                                    JasonB
                                    Moderator
                                      @jasonb

                                      Turned out well, if it were me I'd have used the soft jaws which are ideal for thin work and being they grip over a large part of the circumference less likely to distort or mark the part.

                                      #576441
                                      John Reese
                                      Participant
                                        @johnreese12848

                                        If you are set up for 5C collets you can use a5C pot chuck.

                                      Viewing 18 posts - 1 through 18 (of 18 total)
                                      • Please log in to reply to this topic. Registering is free and easy using the links on the menu at the top of this page.

                                      Advert

                                      Latest Replies

                                      Home Forums Workshop Techniques Topics

                                      Viewing 25 topics - 1 through 25 (of 25 total)
                                      Viewing 25 topics - 1 through 25 (of 25 total)

                                      View full reply list.

                                      Advert

                                      Newsletter Sign-up