Alibre – A First Attempt

Advert

Alibre – A First Attempt

Home Forums CAD – Technical drawing & design Alibre – A First Attempt

Viewing 25 posts - 26 through 50 (of 295 total)
  • Author
    Posts
  • #642588
    blowlamp
    Participant
      @blowlamp

      We need to start setting some homework for you, Nigel.

      Martin.

      Advert
      #642602
      Nigel Graham 2
      Participant
        @nigelgraham2

        Homework? Eek!

        .

        Lee – I found the mouse that came with the computer, but it's an odd thing with just a wheel and no obvious buttons. Whatever it's meant to do, it didn't work with Alibre.

        .

        John – Thank you for that. I had in fact found that function but is turned off and I am advised this may be due to the edition of Alibre.

        .

        Jason, I assume there was a photo there but this is what I saw once it had found its way to my PC:

        Quote:

        " la-1004577655320%7ccrid:587868959751%7cnw:….. [lots more computerese] ….Cw2AQAvD_BwE&gclsrc=aw.ds"

        End of quote.

        White to move and mate in two….

        Had you lifted it from a mail-order catalogue so held a link to an order system? It worried my computer enough to put in Spam, and I've giben only a partial quote for safety.

        .

        I was planning to go mouse-hunting tomorrow but I've some metal on order and don't know yet when to expect it, so the digital rodent might need wait.

        #642605
        lee webster
        Participant
          @leewebster72680

          Hi Nigel,

          Most modern mices(!) don't have "buttons" as such, each side of the main body, at the end by the wheel, is a button. The mouse on each of my three computers have no visible buttons. The only mouse with visible buttons is my Atari ST mouse. Try pressing the body of the mouse each side of the wheel, it should click. I believe that Windows has a built in method of testing the mouse button click, and the wheel. Look in control panel.

          Having working buttons should speed up drawing.

          #642606
          David Jupp
          Participant
            @davidjupp51506

            Nigel – if the mouse has USB connection it should just work. If it has a PS/2 connector (small round multi-pin thing) then it MUST be plugged in before the computer is switched on, otherwise it won't be recognised by the computer.

            The mouse interaction options that John highlighted should work in Atom3D – though you probably don't need to change any settings. It's the keyboard shortcuts editor that isn't available in Atom3D.

            #642616
            blowlamp
            Participant
              @blowlamp

              Making a chamfered nut (no threads!), using the Boolean Intersect tool. You can't use the Chamfer tool directly to get the right shape.

              Martin.

              #642623
              JasonB
              Moderator
                @jasonb

                Nigel it was a link to the mouse at Argos which obviously opened OK for Lee. Search for Logi M220 Mouse. Try this link to Currys but it is only £14 at Argos

                As Lee says most mice you just apply pressure to the area either side of the wheel rather than an obvious button.

                It would probably be better to set Nigel any Homework in Alibre rather than confuse him more with other programs that may have features or ways of working that Atom does not. Boolean is not included with Atom3D only Pro & Expert

                Edited By JasonB on 26/04/2023 08:40:10

                #642624
                Michael Gilligan
                Participant
                  @michaelgilligan61133
                  Posted by Nigel Graham 2 on 25/04/2023 21:44:13:

                  ..

                  Jason, I assume there was a photo there but this is what I saw once it had found its way to my PC:

                  Quote:

                  " la-1004577655320%7ccrid:587868959751%7cnw:….. [lots more computerese] ….Cw2AQAvD_BwE&gclsrc=aw.ds"

                  End of quote.

                  .

                  .

                  Don’t worry, Nigel

                  Here is a cleaned-up version of Jason’s link: **LINK**

                  https://www.argos.co.uk/product/8240374

                  … all the other #### is just tracking how he arrived at that page

                  MichaelG.

                  #642628
                  JasonB
                  Moderator
                    @jasonb

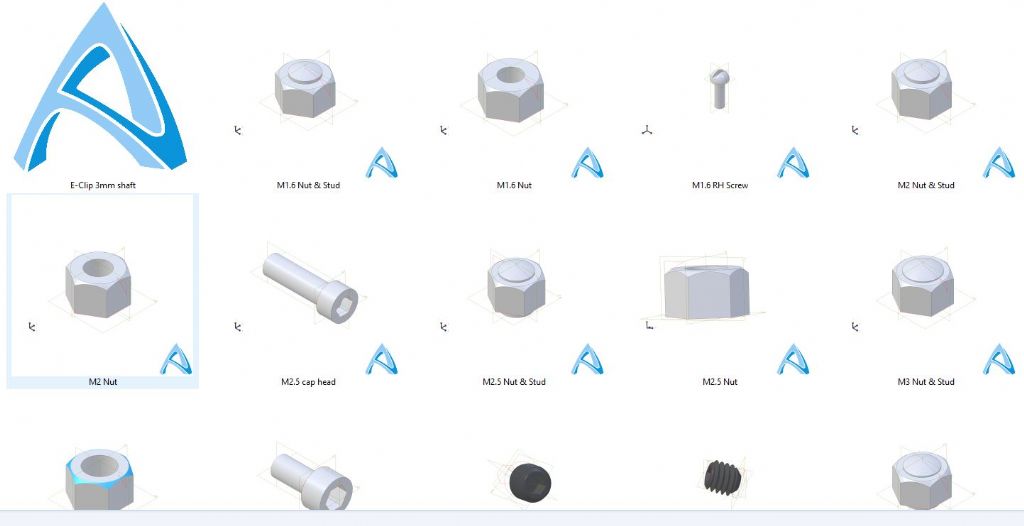
                    Well if modelling a nut is Nigel's homework then this is how I would do it in Alibre, no need for booleans, just a simple "Revoled cut" that can be mirrored if you want double chamfered nuts but I expect his steam wagon needs single chamfer.W orth watching both videos Nigel to see how simple it is with Alibre.

                    Although I seldom model an engine with the fixings all in the assembly it can be useful to include them for things like renderings so once you have drawn one nut you can simply edit it and then "save as" a different size. Then add short studs and again save as nut & stud etc. If you save all these in a file called "fixings" you can easily find and insert them when needed rather than hunt around or go looking for missing nuts
                     
                    fixings.jpg

                    Edited By JasonB on 26/04/2023 07:49:53

                    #642636
                    Ches Green UK
                    Participant
                      @chesgreenuk

                      All these useful homeworks, instructions etc are making it very tempting for me to take the plunge into Alibre Atom 3D, especially as there is a group of experienced users here giving their time.

                      But….plenty other stuff on my plate at the moment….decisions. Anyway, thanks for starting the thread Nigel.

                      Ches.

                      #642722
                      blowlamp
                      Participant
                        @blowlamp

                        Great video, Jason – you have an excellent grasp of Nigel's Nuts.

                        MoI doesn't have a dedicated Revolved Cut tool, but it gets the same results from the tools it has.

                        You say Atom doesn't have Boolean function, so how does it combine or subtract solids from one another?

                        I'll post my videos in a separate thread, so as not to hijack this one.


                        Martin.


                        Edited By blowlamp on 26/04/2023 20:25:37

                        #642740
                        Nigel Graham 2
                        Participant
                          @nigelgraham2

                          Jason –

                          I don't design and make nuts. I buy 'em! My model-engineering is nowhere near the Ron Jarvis / Cherry Hill / Doug Hewson level! Besides my wagon is accumulating a mixture of BSW, BSF, BA and ISO-M fastenings.
                          .

                          'Revolved Cut'? Don't talk to me about 'Revolved Cuts'……

                          I started on that scribing-block (the ex-MEW series one) having loaded the tutorial using it.

                          First thing, I made two simple "New Part" blanks: one called "New Part – Inch", the other "~ Metric".

                          Starting from the latter, I soon made the 'Scribing-block Base' and used [Save As] with that name to keep it safe.

                          '

                          The next part is the column, whose tapered end is to be generated by a Revolved Cut.

                          It was a complete failure. I created the basic rod easily enough, from my little template, but then it all went to rats. Planes, view-angles, making that Project tool pick up the edge it wants, making that construction triangle…. Nothing worked.

                          At one point I closed the file without saving it, and started again, but it still all found those rodents.

                          My final attempt had me looking down at a bar standing at a curious angle, with the triangle draped randomly across it at even dafter compound angle, all totally at odds with what's meant to happen. On a previous attempt it had been floating in space a long way from the column.

                          .

                          I gave up, and closed the lot without saving the column drawing.

                          I'd started well, had grasped some of Alibre's simpler principles and tools fairly quickly, but……

                          .

                          Ches –

                          Thank you for the compliment – I hope you have better luck with 3D CAD than I do!
                          .

                          #642742
                          Ady1
                          Participant
                            @ady1

                            Until you set up your master working interfaces for metric and Imperial and get a decent mouse you're pretty much up the creek without a paddle

                            Tapered stuff is easier if you draw 2 circles, one at at each end and use the loft command, but you can use revolve-cut

                            Use the box viewer in the top right corner to manipulate your 3D view about

                            Edited By Ady1 on 26/04/2023 23:38:41

                            #642747
                            Nigel Graham 2
                            Participant
                              @nigelgraham2

                              Thank you. I'd set the basic drawing format correctly. That's not a problem. Even if I'd not I think it would have defaulted to millimetres, so the tutorial would still work.

                              I admit the pointer I have is not good for rotating anything, even with the aid of all those little boxes and that co-ordinates menu. I was not trying to rotate the image by the cursor though.

                              I've not advanced to finding how to draw a circle round a cylinder a set distance from its end. Everything I've seen so far has been working on surfaces and 'nodes'.

                              However I was trying to follow a set exercise designed to show you a definite set of methods, and I don't want to risk wandering off along paths I don't know, even deeper into the clag.

                              Yes you can use "revolve cut". That was the problem! Well, you can. I can't. It is exactly what the document showed, step-by-step, but I could not make it work at all!

                              #642748
                              Ady1
                              Participant
                                @ady1

                                Try practicing with a simple example, we're only taking a chunk out of the top

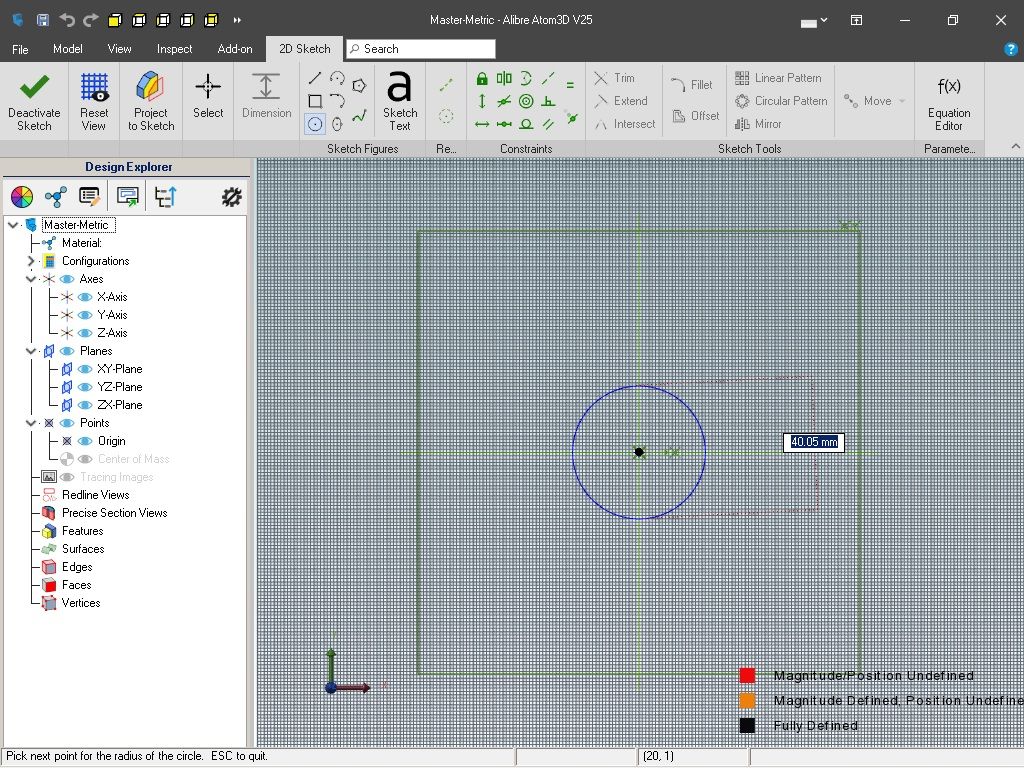
                                Draw a simple cylinder slap bang in the middle 40mm

                                cylinder1.jpg

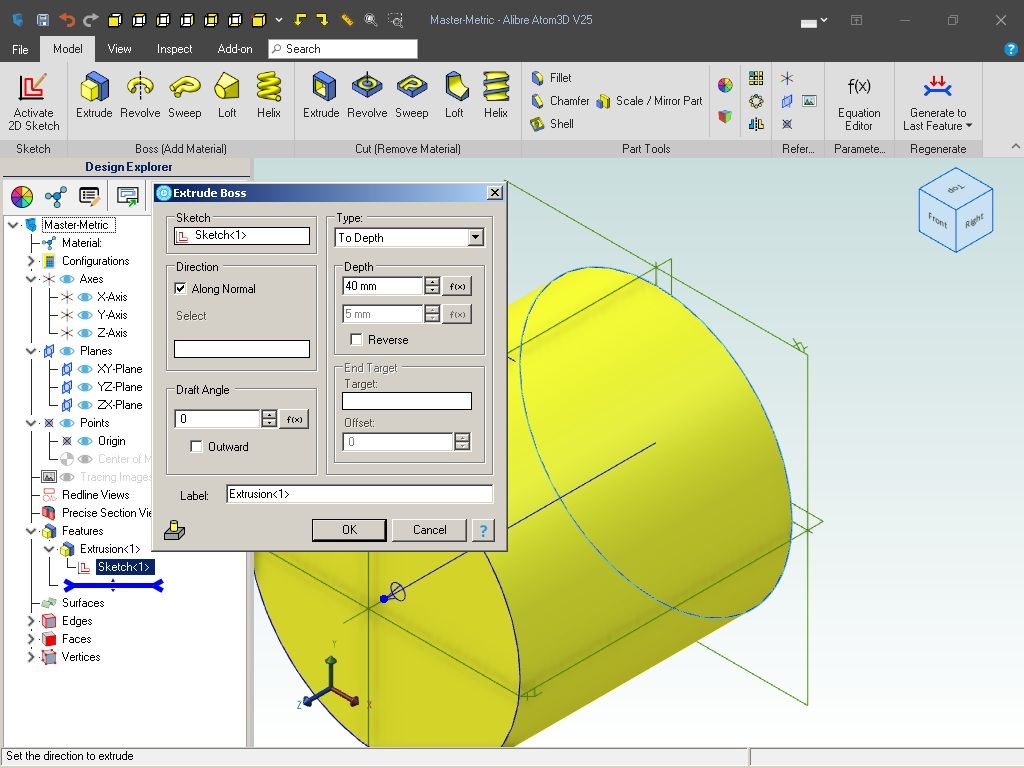
                                exit 2d and extrude boss to 40mm

                                cylinder2.jpg

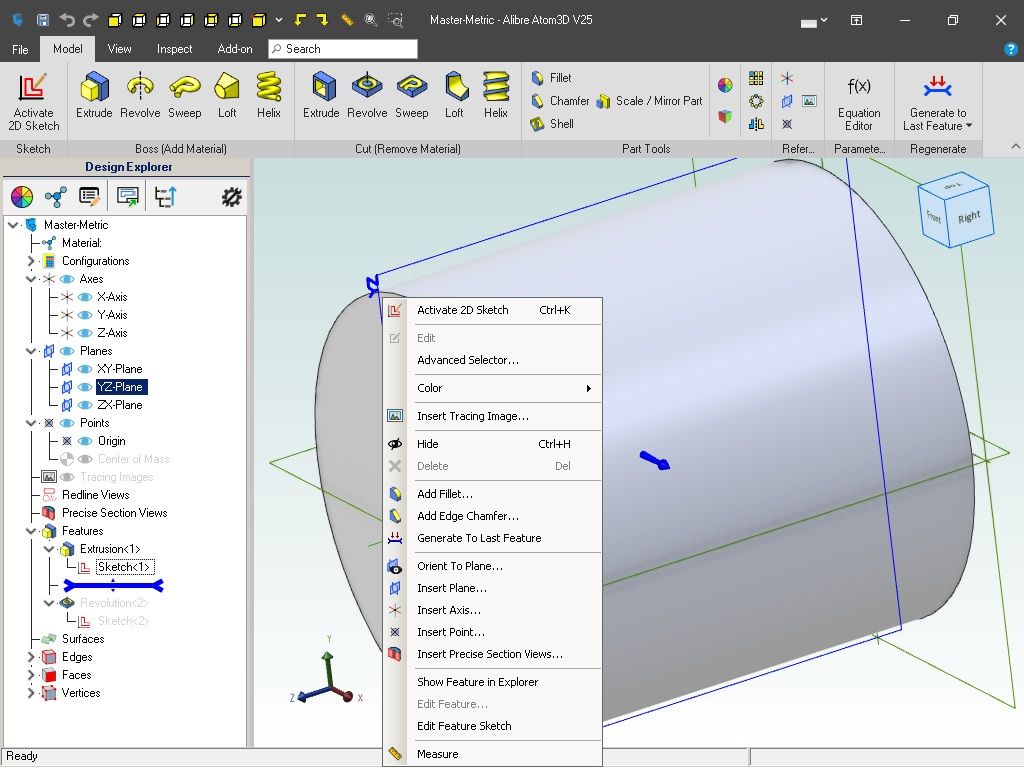
                                Highlight the plane that cuts it in half (goes blue), right click and click "activate 2d sketch"

                                cylinder3.jpg

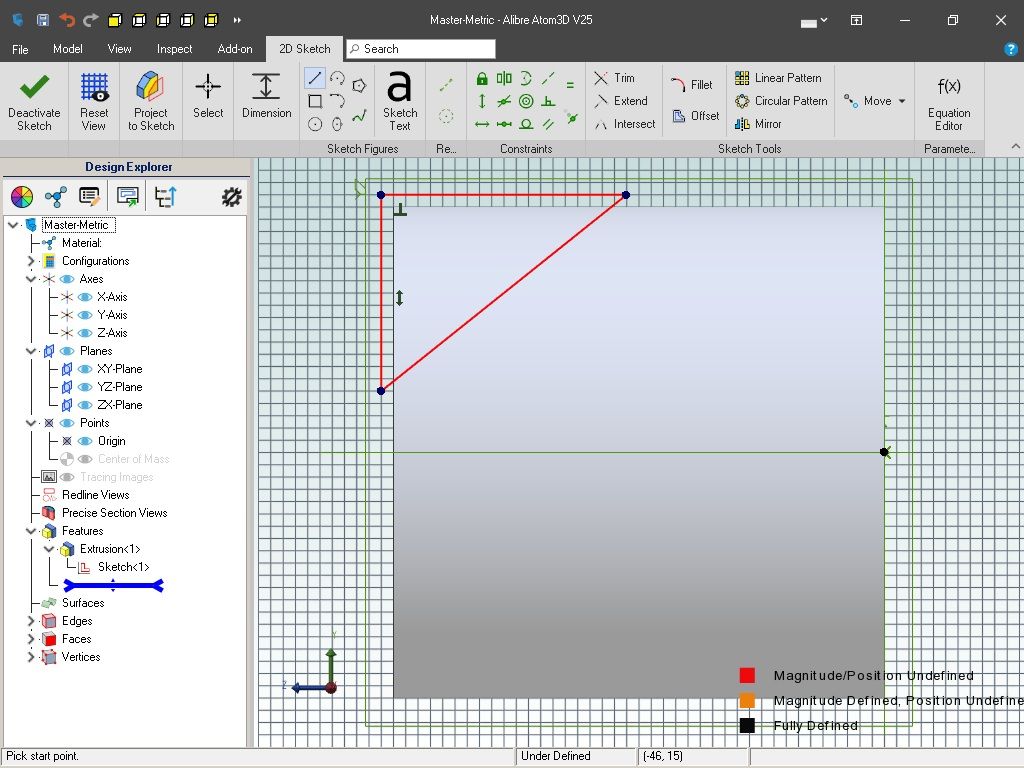
                                This is the view down the middle

                                Draw any old triangle you like


                                cylinder4.jpg

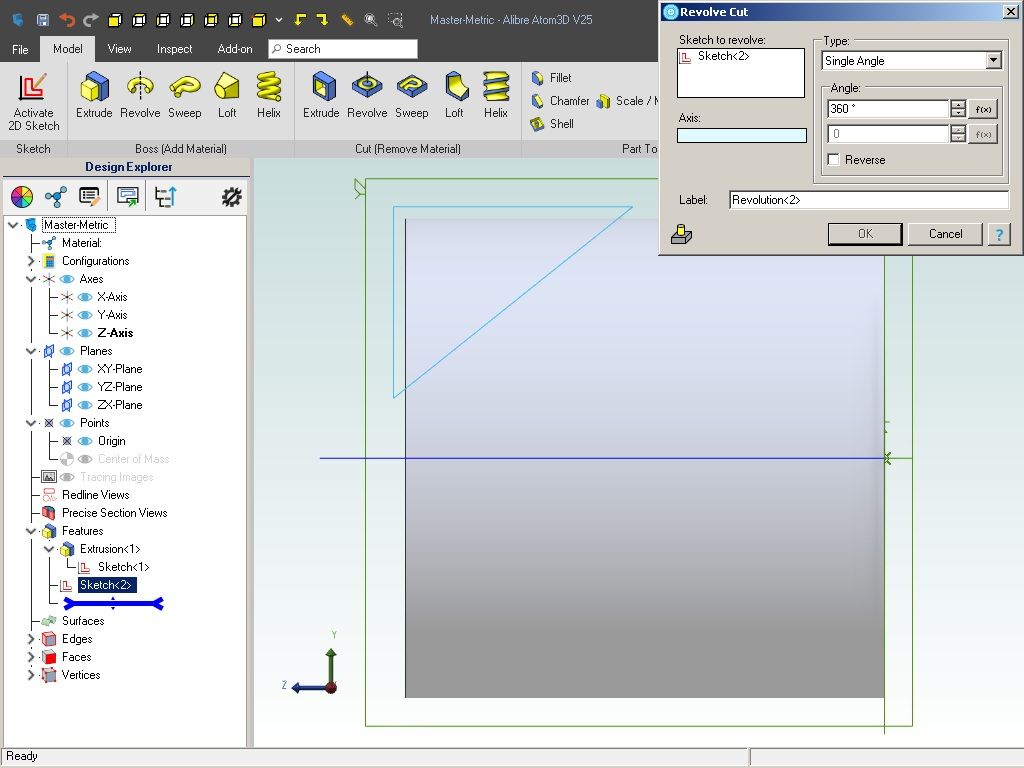
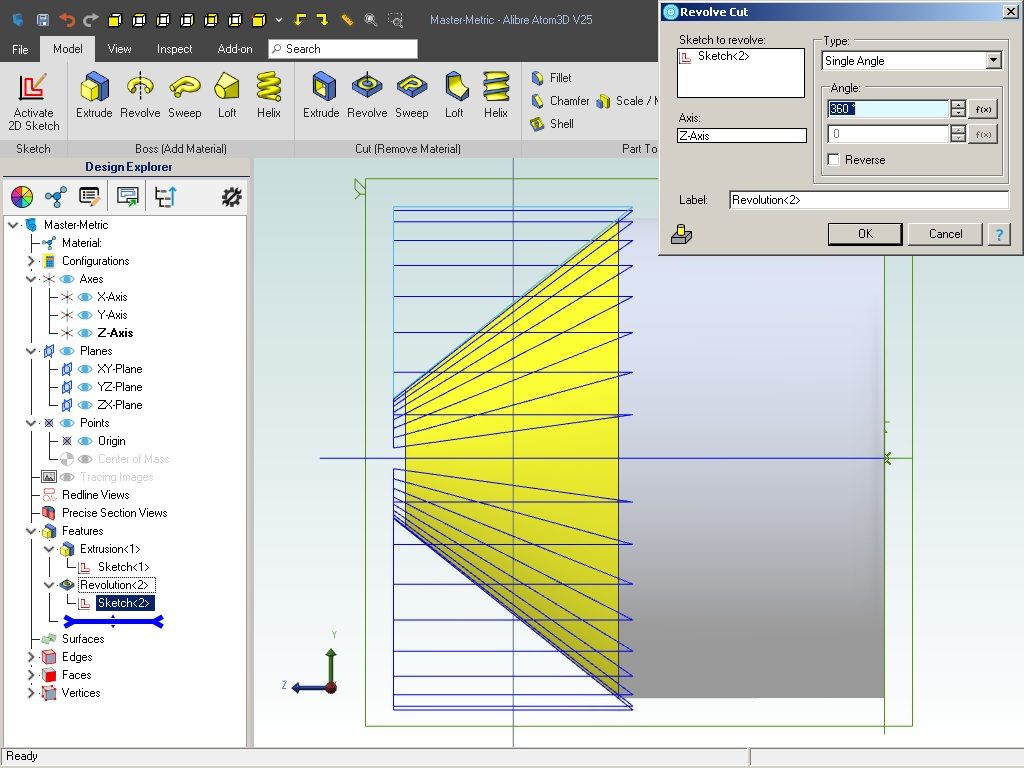
                                Come out of 2d sketch and click revolve cut

                                The box has your triangle (sketch2) and is asking for the axis that rotates the sketch via the blue highlighted box

                                cylinder5.jpg

                                Click on the axis going through the cylinder from left to right and it shows you the realtime cut

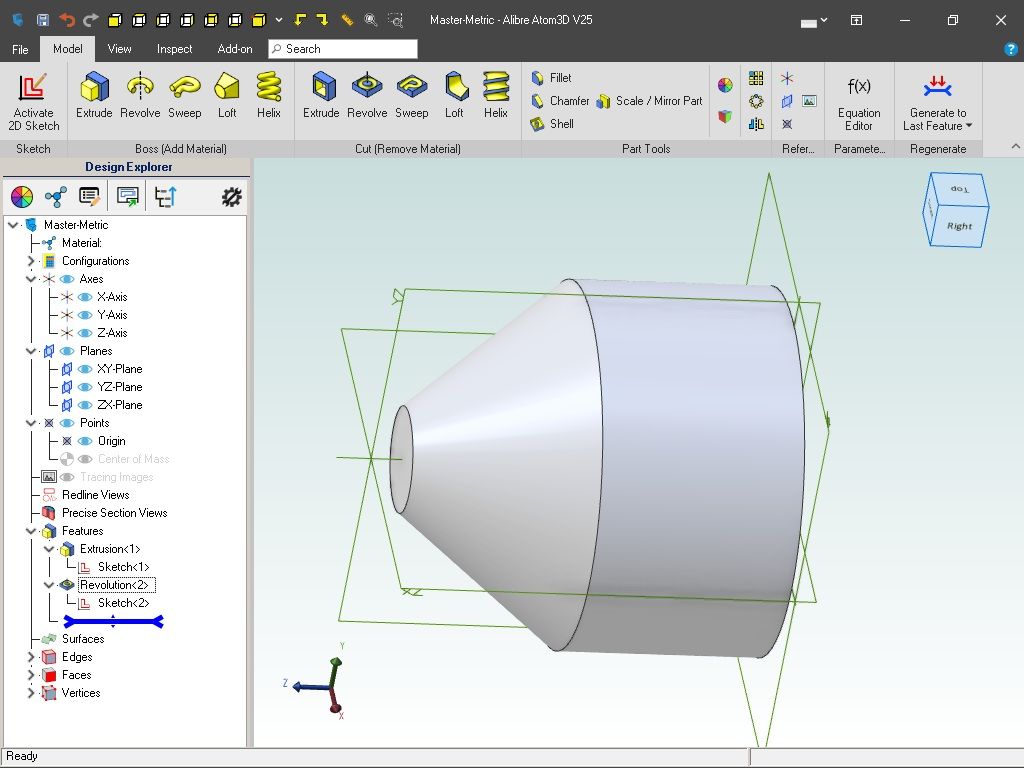
                                cylinder6.jpg

                                click ok and you will be returned to the 3d view

                                cylinder7.jpg


                                Edited By Ady1 on 27/04/2023 02:53:51

                                #642755
                                David Jupp
                                Participant
                                  @davidjupp51506

                                  The exercise was at least in part written to get the reader to use most of the tools offered by Atom3D. That means that some of the features may not have been produced by the most obvious method, and certainly not by the only method.

                                  For almost all end targets, there is more than one possible route to achieve it.

                                  If you can't get a revolve cut to work for you in this case, consider using a 3D Chamfer instead – then go back to revolve cuts on another occasion. It doesn't help anyone if you end up getting frustrated. Taking a break from the screen can often be beneficial.

                                  Describing these whings unambiguously in text (even with accompanying pictures) isn't simple. Having someone show you this live, so you can stop, rewind, ask for clarification, is much better. Until a certain degree of familiarity with the toolset is built up, description that seems 'obvious' to many, may not make much sense to a new user.

                                  #642756
                                  JasonB
                                  Moderator
                                    @jasonb
                                    Posted by blowlamp on 26/04/2023 20:24:31:

                                    Jason – You say Atom doesn't have Boolean function, so how does it combine or subtract solids from one another?

                                    It probably does use a Boolean in the background, DavidJ can confirm but for most things there are two sets of tools. The Boss (add material) tools which form solids from the initial 2D sketch and a similar set of Cut (remove material) tools that do the negative by removing the extruded profile.

                                    tools.jpg

                                    If I had wanted I could have first done a solid hexagon and then sketched a 2D circle on the mid plane or one end and then cut that circle out by extruding the negative right through the part. Had it been a bolt then I would have used the boss to extrude a solid cylinder to form the shank. In part modelling all these boss and cut operations become one part with no need to tell the machine to join them all together.

                                    The hole through the hex stock could be done as a Boolean subtract but the simple cut tools tend to make it a simple process for people to pick up. Also if you think of the triangular or circle sketch as your cutting tool and the cut icon as what you would do when the machine the revolving cut mimics the action of the lathe or the extrude the action of the drill so easy to think of the process of machining the same as creating teh features on the part.

                                    I hardly ever use the Boolean tools in my version, only really get used to remove a complex shape from another.

                                    #642758
                                    JasonB
                                    Moderator
                                      @jasonb

                                      Nigel, I know you are not keen on videos but this is the column done as it is described in the article.

                                      It is not so much the subject but the methods you should be concentrating on so whether it is a standard nut or a custom made part makes little difference. Maybe once you have worked through the series you could post a photo or rough pencil sketch of a part or two from your wagon that could be used as an example to walk you though.

                                      #642765
                                      Ady1
                                      Participant
                                        @ady1
                                        Posted by David Jupp on 27/04/2023 08:57:50:

                                        If you can't get a revolve cut to work for you in this case, consider using a 3D Chamfer instead – then go back to revolve cuts on another occasion. It doesn't help anyone if you end up getting frustrated. Taking a break from the screen can often be beneficial.

                                        I avoid chamfer because it can cause issues and blow up the software, the numbers/calculations do weird things that the software can't handle

                                        Simple Papercut stuff only for beginners IMO, (and middle range dudes like me too)

                                        I would only start chamfering once my final drawing was complete and safely saved

                                        If I really want a "chamfer" I draw a triangle with an arc hypotenuse and extrude cut, it's far more stable

                                        #642769
                                        JasonB
                                        Moderator
                                          @jasonb

                                          I've not found chamfer to cause any hick-ups in the 10years or so I've had Alibre. if chamfer or fillet is not going to work it tends to just show the OK tab in red.

                                          #642770
                                          Ches Green UK
                                          Participant
                                            @chesgreenuk

                                            I've just watched Jason's 'Nigel's Nuts' video through properly this time.

                                            I think I understood what was happening… it seems that CAD is more akin to machining the part than drafting it. That kinda makes CAD a bit easier to grasp, at least for me.

                                            Jason, what particular version of Alibre did you use on the above video… Alibre Atom 3D, Alibre Design or Alibre Workshop? I'm hoping it was Atom 3D

                                            Thanks,

                                            Ches

                                            #642775
                                            SillyOldDuffer
                                            Moderator
                                              @sillyoldduffer
                                              Posted by Nigel Graham 2 on 27/04/2023 00:55:20:

                                              I admit the pointer I have is not good for rotating anything, even with the aid of all those little boxes and that co-ordinates menu. I was not trying to rotate the image by the cursor though.

                                              At the early stage of learning it's important to avoid unnecessary complications. The simplest way or rotating a CAD model is with a three-button mouse, where the middle button is a scroll-wheel. Much more natural than the other rotate methods, which exist for advanced purposes learners don't need, and are likely to become a toxic diversion. Avoid! Wait for the new mouse to arrive, and start by learning to use it properly. Don't drive it like a 2-button mouse – find out what middle button and scroll do. More learning.

                                              When lessons go wrong, and they always do, it's important to go back and identify the misunderstanding. Ploughing on regardless doesn't work – faulty foundations can cause all manner of bizarre havoc later. When CAD tools stop working as normal, it's likely that the model was broken by an inexperienced operator at an earlier stage. Part of the learning is discovering what not to do! Backtrack step by step through the history until the model behaves again, and, having found where it went wrong, look closely at the faulty step – why? If necessary because small mistakes made early on are hard to find, start again from scratch. Don't try and patch a failure unless the reason is understood, a skill that has to be developed. Follow the instructions exactly, and make a note of anything suspicious in them. Instructions are hard to write, so don't be surprised if bits are missing, ambiguous or wrong.

                                              Last point, compared with my rate of learning Nigel races ahead. Even simple tools like Sketch & Extrude take time to learn properly – perhaps a full week doing nothing else. Took me a couple of months to learn the basics before I tackled revolve-cut in FreeCAD. My secret was patience, persistence, and practising the basics until they're mastered. Don't hop around or assume completing a few exercises mean the tools used are fully understood – that's rarely true. Most exercises are designed to demonstrate principles rather than provide complete instruction, and the principle they show has to be practised in different contexts.

                                              I found CAD like learning to ride a bike. Impossible at first to balance, steer, pedal, change gear, and work the brakes without falling off. Suddenly all comes together with a click, and away you go.

                                              Keep trying, the start was very promising.

                                              Dave

                                              #642777
                                              Ady1
                                              Participant
                                                @ady1

                                                Jason:

                                                Once you start doing arty-design type stuff where the edges merge and curves need adjusting it can start getting processor intensive and if it falls over it can't always undo, it just hangs. So I just stick with blockwork. It may be my crappy computer but I just got a decent 4GB graphics card and the issue remained

                                                I'm doing an MG42 as an exercise to build my skills, the square nose part merging into the muzzle as part of the shaped sheet metalwork has given me a lot of hassle for example

                                                ches:

                                                You can download Alibre Design and the Atom Licence will work on it if you do buy it

                                                I have found the Atom downloads don't actually work for me

                                                Alibre Design seems to be the reliable workhorse core program, plus if you want to upgrade from Atom it's just a case of your $1000 key unlocking software you already know will work

                                                Edited By Ady1 on 27/04/2023 10:48:12

                                                #642778
                                                JasonB
                                                Moderator
                                                  @jasonb

                                                  Ches, I have Alibre Professional BUT all the features I used to do the nut and the scribing block column are included in Atom3D, just my icons at the top are arranged slightly differently

                                                  #642781
                                                  Gary Wooding
                                                  Participant
                                                    @garywooding25363

                                                    S.O.D is quite right. All CAD systems require persistence and considerable time in order to become to be productive. It's so tempting to give up, but the rewards far outweigh the learning time.

                                                    Personally, I found Fusion 360 easier to learn than Alibre – it just seemed more logical, but it's not a good idea to change horses in midstream.

                                                    Edited to correct a spelling error.

                                                    Edited By Gary Wooding on 27/04/2023 10:45:30

                                                    #642786
                                                    Nigel Graham 2
                                                    Participant
                                                      @nigelgraham2

                                                      Thank you but I'm a bit confused by some comments. It was making the taper, which has to match the tapered hole in the Base I'd drawn so far, that baffled me. Not chamfers.

                                                      Also as Dave warns, I was trying to follow the instructions carefully, not trying to find other ways that might well work but only if you know what you are doing and am certain they won't cause difficulties later in the same project.

                                                      .

                                                      I think it was on the previous page but someone likens the Alibre part drawing process to the physical part making. The Tutorial introduces itself by making that point. Though sometimes I've wished I had a Putting On tool for my lathe!

                                                      '

                                                      Jason

                                                      I've just viewed the video, noting where I had things starting to go wrong. It was around trying to select the edge for making the taper, and in building the Revolve Cut triangle.

                                                      I think I had somehow put two drawing elements on parallel but different planes, and at one stage, viewing the image from a different angle showed the triangle was really off in the wilderness.

                                                    Viewing 25 posts - 26 through 50 (of 295 total)
                                                    • Please log in to reply to this topic. Registering is free and easy using the links on the menu at the top of this page.

                                                    Advert

                                                    Latest Replies

                                                    Viewing 25 topics - 1 through 25 (of 25 total)
                                                    Viewing 25 topics - 1 through 25 (of 25 total)

                                                    View full reply list.

                                                    Advert

                                                    Newsletter Sign-up