Albion Gearbox 3 speed gearbox dismantling.

Advert

Albion Gearbox 3 speed gearbox dismantling.

Home Forums General Questions Albion Gearbox 3 speed gearbox dismantling.

Viewing 18 posts - 1 through 18 (of 18 total)
  • Author
    Posts
  • #192822
    Peter Bell
    Participant
      @peterbell11509

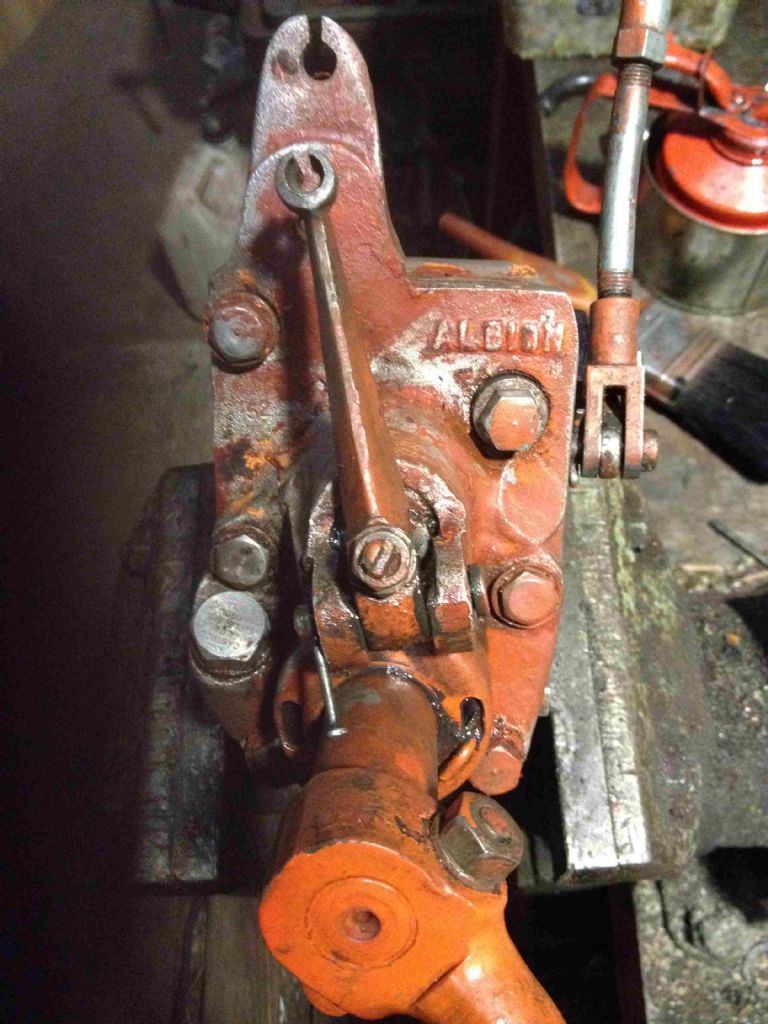
      Seeing the pics of the BSA C15 made me wonder if anyone with some motorcycle knowledge can help with the dismantling of an Albion 3 speed gearbox fitted to a friends Wrigley Autotruck?

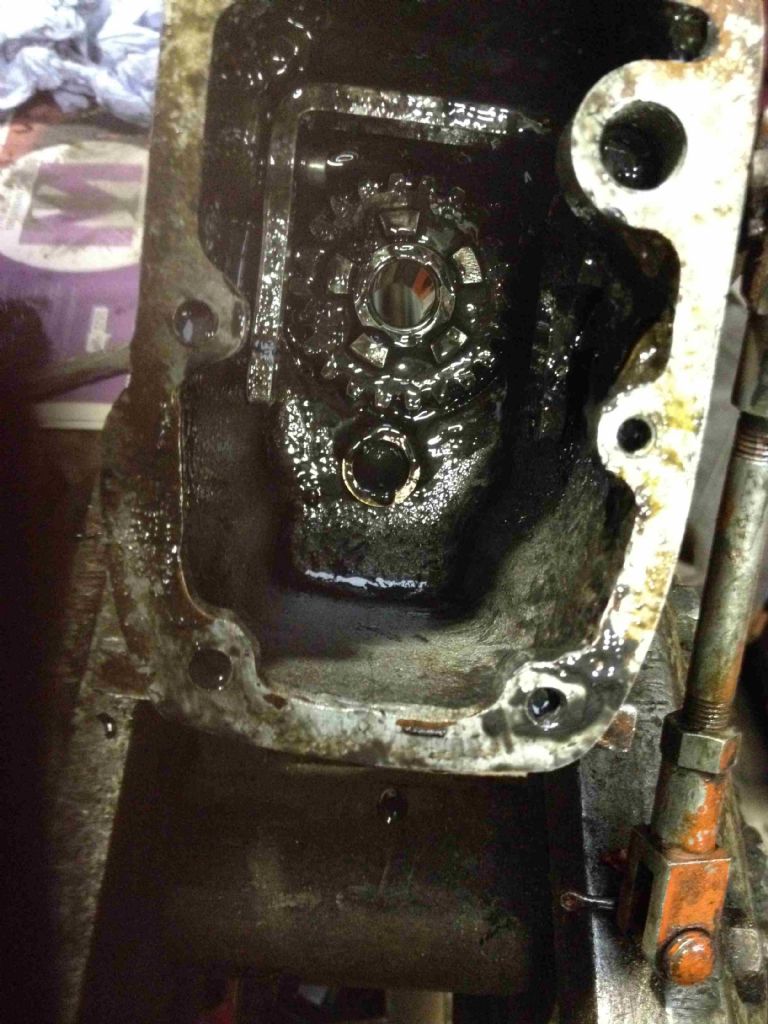
      The gearbox leaks oil (didnt they all!) from the input shaft. Looking at some catalogues online and think like there is a felt seal fitted.

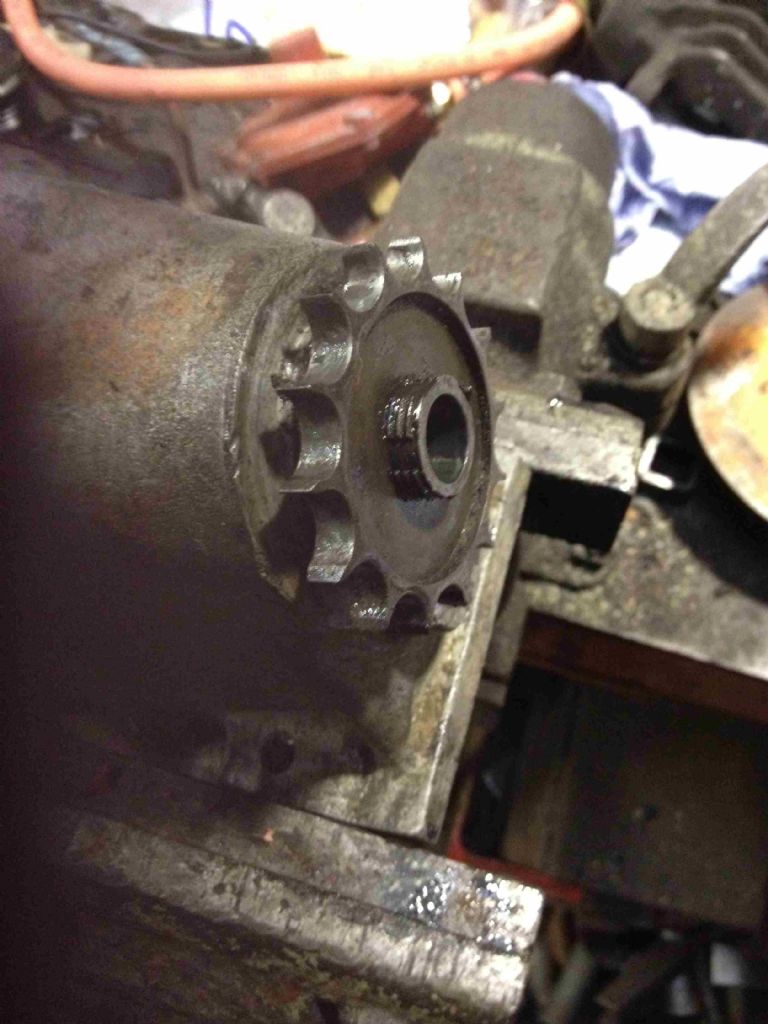
      However I cannot get the input sprocket off to find the seal. Not sure if its screwed onto the shaft or just a good fit on the shaft? Tried using chain wrapped around the sprocket as a chain wrench with the gear jammed stationary with a screwdriver but no luck. Bit wary of forcing too much in case I damage something.

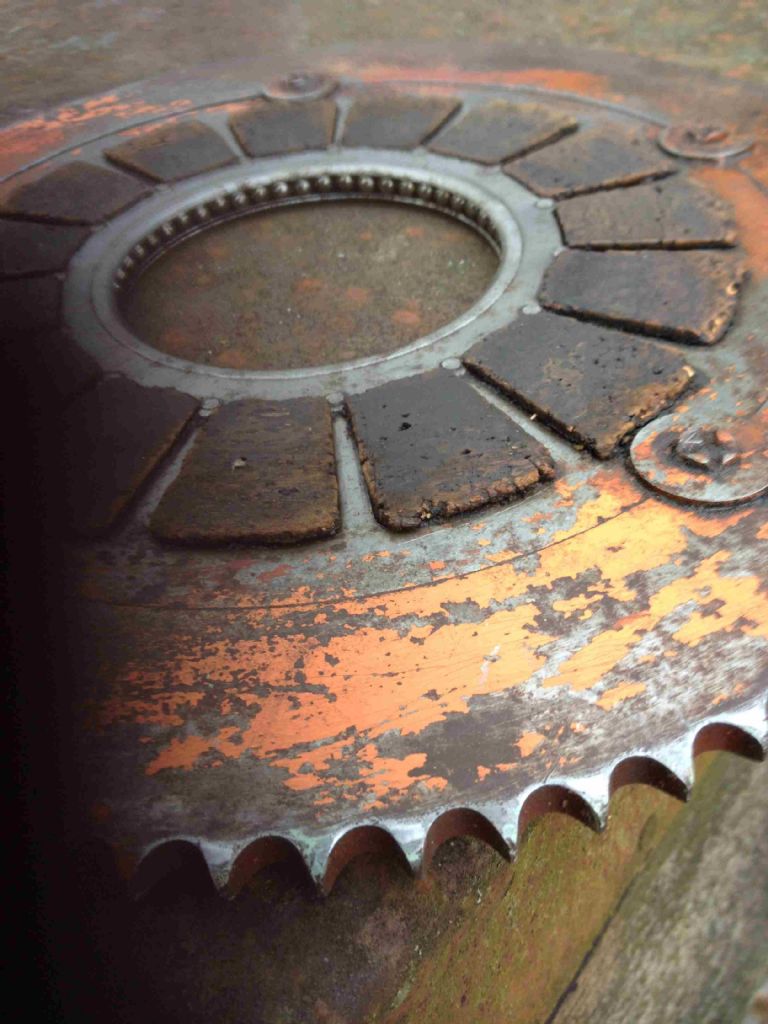
      Also think the clutch corks are worn? Anyone relined a clutch with corks this shape?

      Thanks Peter

      wrigley-1 .jpg

      wrigley-2 .jpg

      wrigley-3 .jpg

      wrigley-4 .jpg

      Advert
      #23928
      Peter Bell
      Participant
        @peterbell11509
        #192828
        oldvelo
        Participant
          @oldvelo

          Hi Peter

          The problem looks familiar with the sprocket. It will have "Fretted" on the splines and is NOT screwed on and there will be a burr thrown up on the shaft.

          Will you be re using the sprocket Then a protective plug on the end of the shaft and a hydraulic puller should tear it off with some repair to the shaft.

          My limited Knowledge is that this is "Fluid Gear Grease" box with a mix of grease and heavy oil and some leaks were to be expected.

          Modern Gear grease is far superior performance and almost no leaking.

          Sure the clutch corks are worn but will be serviceable for a while.

          A fiddly job to fabricate cork for the clutch with a Sharp knife and sand paper block to get them to fit.

          Then soak the plate and corks in water and assemble the clutch using the spring pressure to clamp them.

          When dried out dismantle Then true up the face of the corks. Lathe and tool post grinder comes to mind.

          Eric

          #192831
          WorkshopPete
          Participant
            @workshoppete

            Hi Peter

            Looks like it is retained by a nut with tab washer so its probably just keyed to the shaft on a taper with a woodruff key you should be able to see the end of the keyway. Taper can be a real bugger to separate and can take some separating. Sorry not able to help with clutch corks.

            Peter

            #192832
            Jesse Hancock 1
            Participant
              @jessehancock1

              To get you started google albion three speed gear box and see if you can find your model. I just did and there's loads of detailed exploded drawings on line. The corks look okay to me but gently scratch your finger nail over the corks to see if they are burnt/carbonated. If they are burnt you'll have to get hold of a motor cycle repair shop and see if they stock corks. Or you could carefully cut them out of cork floor tiles and sand them down if too thick. Let me know if you have any luck.

              The sprocket looks ready to come off to me. Perhaps a wash in diesel and wriggle it off in your hand Eric may be right about ridges. I've tapped them out using two spanners across a couple of bits of wood but I don't want to advocate bad practice.

              Edited By Jesse Hancock 1 on 08/06/2015 22:13:43

              Edited By Jesse Hancock 1 on 08/06/2015 22:15:19

              #192833
              John Stevenson 1
              Participant
                @johnstevenson1

                Eric is spot on.

                Sprocket is splined on, so follow Eric's instructions.

                #192848
                Gordon W
                Participant
                  @gordonw

                  Yes sprocket should just slide off, may be held by wear burrs or crud, the big nut is already off. By my standards the clutch plate looks good. I have a very similar g/box on my Bonsa 3 wheel truck except it is 3 speed and reverse. Clutch cork or better is sold on a few online shops.

                  #192855
                  Peter Bell
                  Participant
                    @peterbell11509

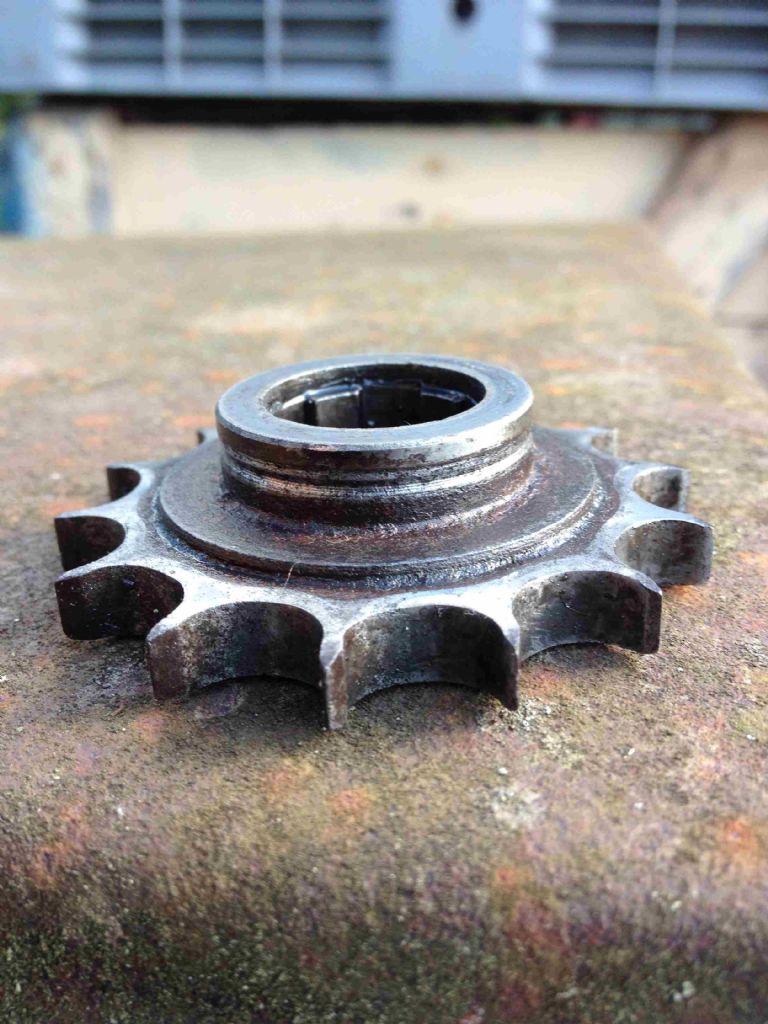
                    Thanks everyone, sprocket now off. I was expecting a plate sprocket but its a lot deeper, took a copper drift to tap it through the bearing, nothing wrong with the shaft or sprocket just a perfect fit. There is a rubber seal to replace but the sprocket which is dead hard is grooved where the seal runs so I intend filling the groove with Loctite 3471 which I have in stock.

                    Looked at the clutch plate again and based on the advice reckon its ok. It was plastered in grease which didnt help.

                    Peter

                    sprocket.jpg

                    #192856
                    Gordon W
                    Participant
                      @gordonw

                      Re the groove in sprocket- You could try JB weld, can't remember what grade but works well for that job. Also sleeves are available, very thin steel, all sorts of sizes, just slip on. Afraid I have not used them for years so can't recommend anyone.

                      #192862
                      Hopper
                      Participant
                        @hopper

                        With the wear on those teeth, plus the groove, a new sprocket might be in order. As Albions were used on many motorbikes, including Ariels in my experience, something suitable might be available through the vintage bike suppliers.

                        #192865
                        Ian S C
                        Participant
                          @iansc

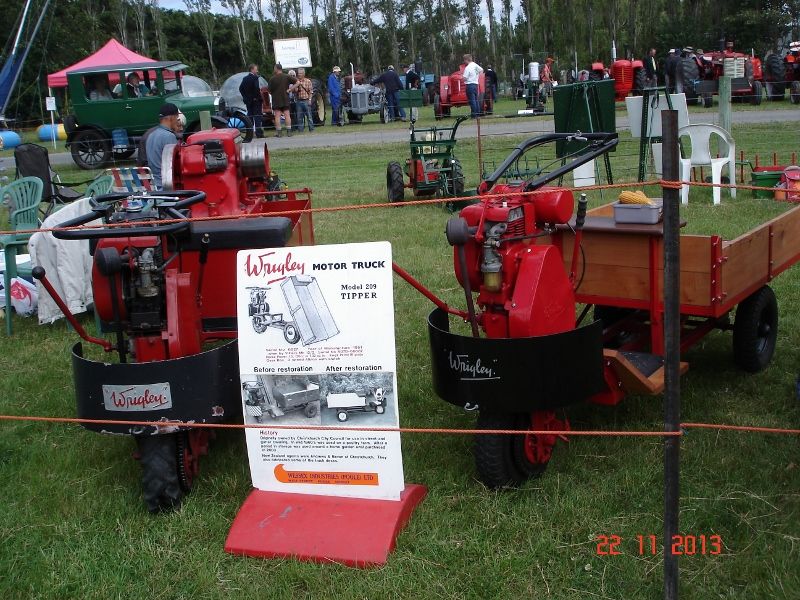
                          Can't help with the repares, but here's a couple fron NZ, 2014 Cortney A&P Show. Ian S Cdsc00733 (800x600).jpg

                          #192869
                          Peter Bell
                          Participant
                            @peterbell11509

                            Thanks, his truck looks just like that. Cannot find much info on the 3 speed box, most of the info I have found is for larger boxes. Yes a replacement gear would be idea but nothing available as far as I can see.

                            A new 5/8" plate wheel springs to mind as being cheap and readily machinable/available but the internal spline is a bit of a challenge. 5 splines and measures 0.750"

                            #192870
                            John Stevenson 1
                            Participant
                              @johnstevenson1

                              Dead easy, do these all the while.

                              Turn the seal wear off and shrink a new stainless ring on.

                              Turn the teeth off plus a bit more and shrink a new plate wheel on. For what this is doing, no need to harden the plate wheel.

                              Simples.

                              #192872
                              Peter Bell
                              Participant
                                @peterbell11509

                                Thanks thats the conclusion coming to. It all glass hard at present so suppose just softem to machine? How about tacking the new plate wheel to whats left?

                                #192873
                                Gordon W
                                Participant
                                  @gordonw

                                  Not usually very hard, maybe a cheap brazed carbide to get under the skin ? can't just tack on the side, chain line will be out.

                                  #192888
                                  Peter Bell
                                  Participant
                                    @peterbell11509

                                    Yes it would go on a mandral to machine and there seems a natural line on the back to machine off to.

                                    Never used a shrink fit as John S suggests. If I bore the new plate wheel to 36mm what allowance whould I leave for the shrink fit? and what temp do I take the wheel up to?

                                    Thanks Peter

                                    #192896
                                    Howard Lewis
                                    Participant
                                      @howardlewis46836

                                      If you turn up a mandrel so that the bore of the sprocket is a really snug fit, using tungsten carbide tip, (brazed or replaceable, you should be able to turn down the O D of the sprocket where the seal used to run.

                                      Before you do this, decide what diameter you want to use, and Google "Speedisleeve". A Speedisleeve is stainless steel sleeve prepared as a track on which a rubber lipseal will run, with a built in "break off" groove near the flanged end.

                                      So the diameter to which the sprocket is turned, based on the I D Speedisleeve that you choose to replicate the original seal diameter, pre wear).

                                      The Speedisleeve comes with a fitting dolly, (you may wish to use Loctite, to make certain that it stays in place)

                                      You tap the sleeve into place and then break off the flange against which the dolly seated. If you are worried about the rough edge, break the rough edge with a fine stone, or diamond hone, taking care not damage any of the seal running surface.

                                      You then have a nice new, beautifully prepared, surface on which the new lipseal is to run.. AND it will provide a better, lower friction seal, (and probably last longer than the original felts). BUT, DO lubricate the sleeve before you bring it into contact with the seal.

                                      This assumes that you can fit a lipseal instead of the felt seal. (You might need to turn up a housing and bolt it into place in place of the felt seal housing, unless you can find a suitably sized lipseal. If push comes to shove, you could turn up a sleeve with OD to match the felt housing, and the ID to suit the lipseal.

                                      To insult your intelligence, the seal is fitted with the lip and garter spring facing towards the gearbox, so that you see the flat face of the seal after assembly.

                                      If using a lipseal not possible, still use the sleeve to reclaim the seal diameter and fit new felt or ropeseal, but again, lubricate before fitting the sprocket and start up. If a ropeseal, soak in oil for 24 hours before fitting, and then burnish into position with a clean round bar.

                                      Howard

                                      #192906
                                      Bob Brown 1
                                      Participant
                                        @bobbrown1

                                        As I understood it "Speedisleeve" did not require any machining they are just fitted over the shaft see **LINK**

                                        Bob

                                      Viewing 18 posts - 1 through 18 (of 18 total)
                                      • Please log in to reply to this topic. Registering is free and easy using the links on the menu at the top of this page.

                                      Advert

                                      Latest Replies

                                      Home Forums General Questions Topics

                                      Viewing 25 topics - 1 through 25 (of 25 total)
                                      Viewing 25 topics - 1 through 25 (of 25 total)

                                      View full reply list.

                                      Advert

                                      Newsletter Sign-up