75mm x 2000mm Belt Linisher Build Thread

Advert

75mm x 2000mm Belt Linisher Build Thread

Home Forums Work In Progress and completed items 75mm x 2000mm Belt Linisher Build Thread

Viewing 25 posts - 1 through 25 (of 49 total)
  • Author
    Posts
  • #31365
    Martin King 2
    Participant
      @martinking2
      Advert
      #549488
      Martin King 2
      Participant
        @martinking2

        Hi All,

        Well here goes!

        I have a need for a fairly powerful belt linisher and they are very expensive. There are loads of different build threads available on the 'Net and YouTube. I looked through and came across this one by Phil Vandelay in Germany. It seemed a well engineered project that allowed horizontal and vertical use, probably a bit over engineered truth be told.

        Link to first video here:

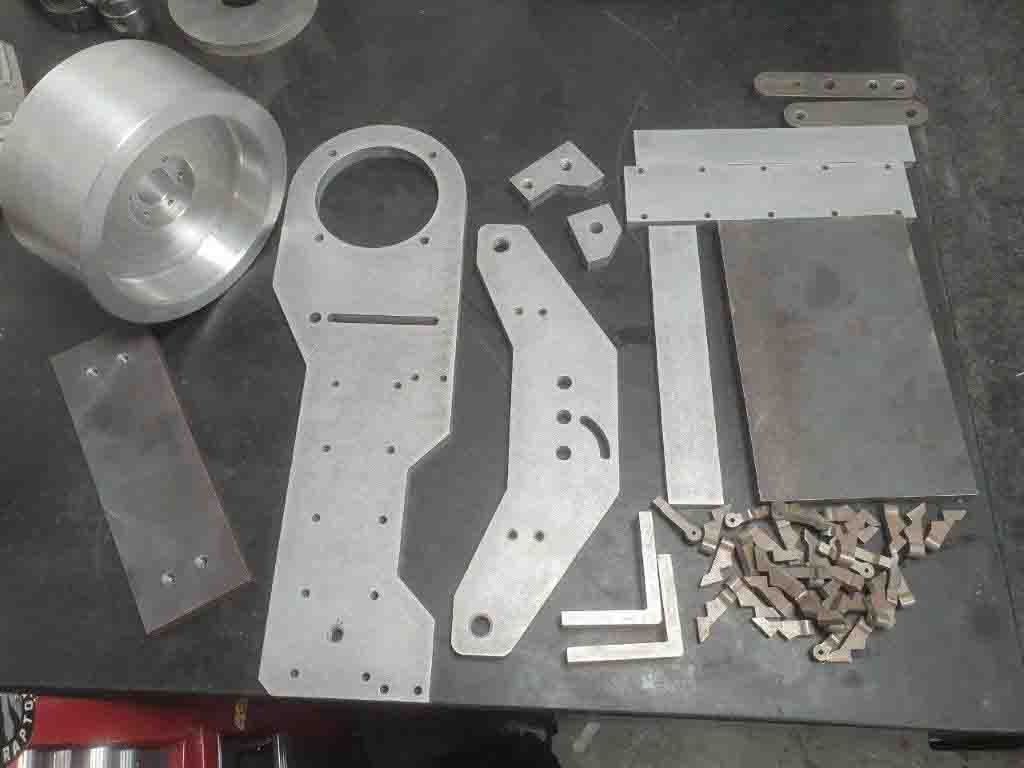
        After looking at the series of three videos several times and realizing that there was no way that I could cut the very thick 15mm materials with what I have available i decided to get the larger parts water jet cut. The large drive pulley would also be too large for my Myford so I decided to get that machined also.

        I coughed up the dosh for the plans and was delighted to see how comprehensive they were.

        I pick up the water jetted parts on Monday morning so will start the project when a few more bits including the motor have been sourced.

        Here are the parts awaiting pick up:

        wjettedparts.jpg

        I will try and remember to take photos as I (slowly) progress, quite looking forward to this as it will stretch my skills to the limit!

        Cheers, Martin

        #549522
        Martin King 2
        Participant
          @martinking2

          Just realized that the link above is to the THIRD video of 3 NOT the first. Duh!

          Martin

          #551235
          Martin King 2
          Participant
            @martinking2

            Hi All,

            Have made a start on this project and thought that I would do some of the more simple parts first to get my head round working accurately.

            First thing was that my Warco 4" DH1 vice was going to be way too small for some of the operations. I have a new 6" vice from some previous auction buys so mounted that up and trammed it as best as I could.

            Then realised that these parts will often need the same datum and to save having to keep edge finding all the time i made up a vice stop from some scrap material which has worked out well.

            I spent some time practising using the DRO in incremental mode with a pencil in the chuck to (TRY) and avoid costly mistakes later on! Kept checking that the absolute reference had not moved between operations.

            linisher 1.jpg

            The moving jaw surface is handy for jotting down memos etc!

            The water jetted material has a 0.5mm allowance for tidying up on some parts at my request; this was found to be spot on and only a quick light cut with a face mill was needed so far. The holes that were water cut proved perfect and ready for the relevant reamer with no extra drilling out needed.

            Some of the M6 threaded holes are quite deep (30mm) and I took great care when power tapping, clearing the swarf very often. I found that the tap would slip sometimes in the drill chuck being of hardened steel.

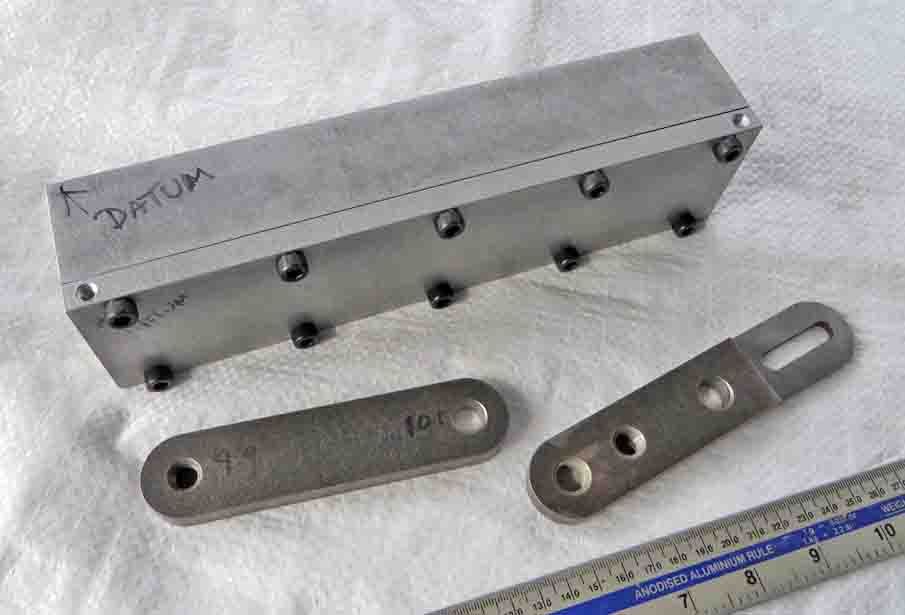
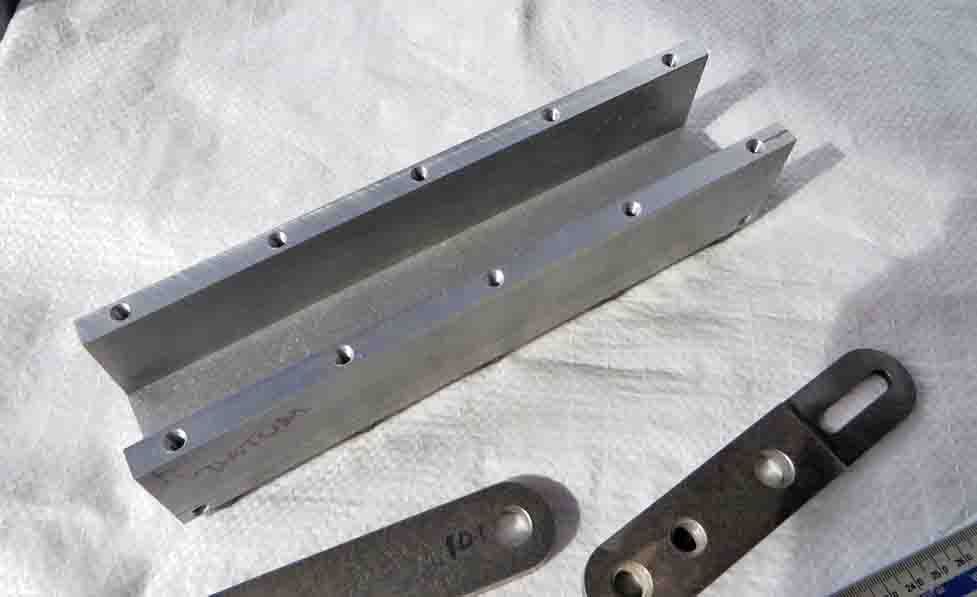
            Here are the finished parts so far and to my utter amazement all fitted together very well!

            linisher 2.jpg

            linisher 3.jpg

            Next job is to ream and counterbore all the holes in the largest main frame part and check the above sub assembly for fit.

            More later!

            Cheers, Martin

            #551259
            Micky T
            Participant
              @mickyt

              Looks very interesting I look forward to your progress thumbs up

              MickyT

              #552111
              Martin King 2
              Participant
                @martinking2

                Hi All,

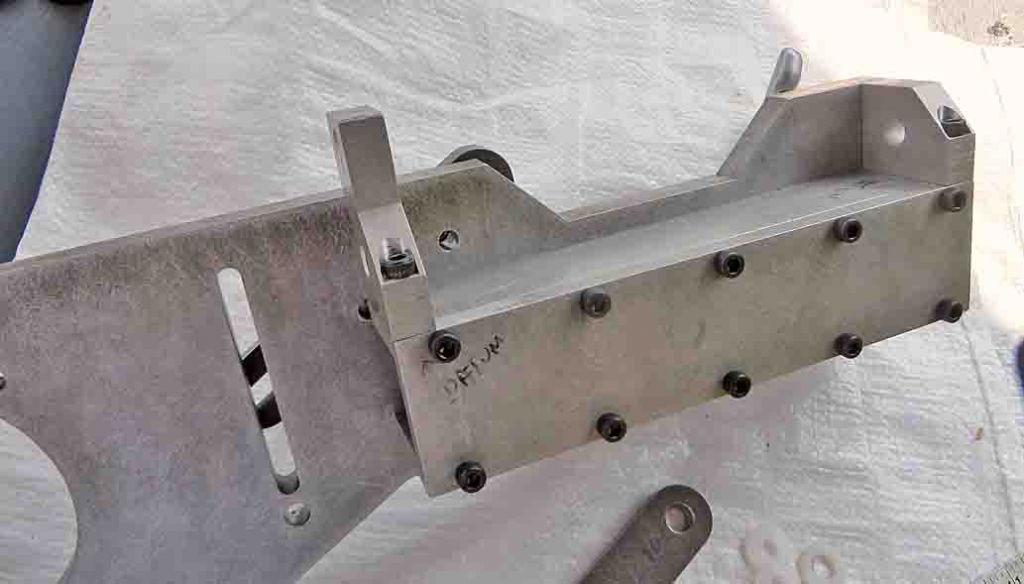
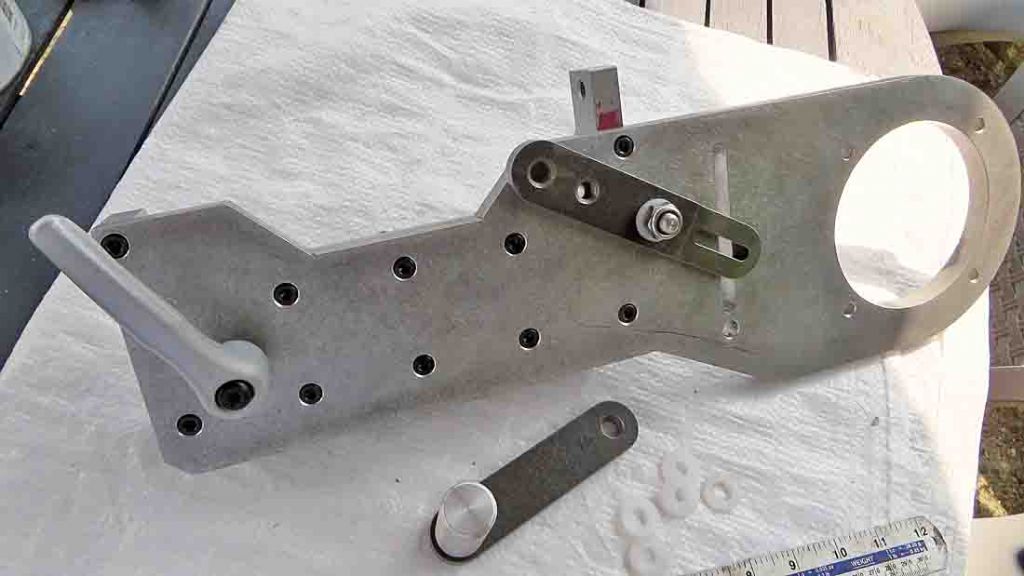
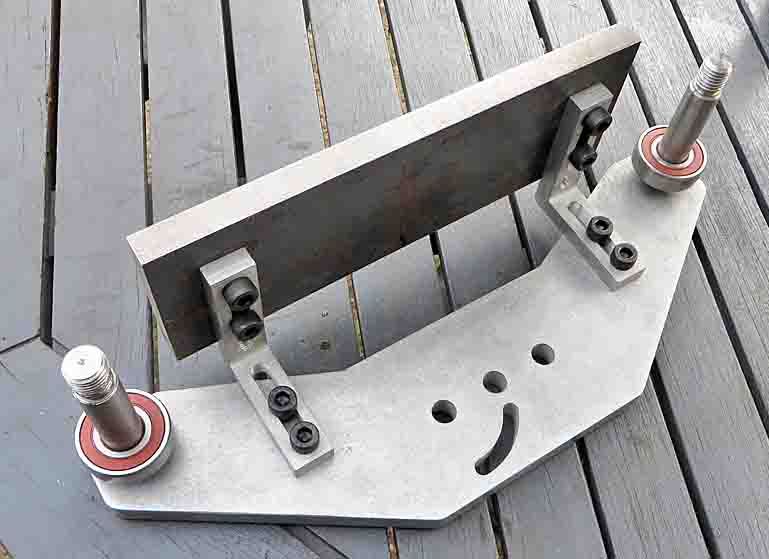
                Some progress made, just received a very nice counterbore kit from Arc so have done the main frame part which allowed a trial fit of the box section already made. This went together well but the small buttress like parts needed some slight fitting with a file as there was not enough "wiggle room" for a couple of the bolts.

                linisher 5.jpg

                There appears to be a slight error in the plans which show an M10 bolt to go in an M12 hole that is already tapped so will cut down an M12 to fit, no big deal.

                I had a length of UHMW plastic rod which is perfect for the plastic washers needed.

                The very nice locking levers have arrived from WDS just waiting for the gas strut now. The nearest size fit I can find is a whopping 700N, (180N needed) but WDS assure me that the strut is adjustable via a valve. I presume that this will be a "suck it and see" type operation!

                linisher 4.jpg

                Knocked up a ribbed lever handle from some scrap alloy and cut up an old M10 screw for the thread.

                Next job is to tackle the extension arm that carries the adjustable tracking pulley, quite a big chunk of 40×20 steel with heavy chamfers. I think it best to make that first and then do the slot it slides in to fit OR should I do it the other way round?

                One irritation was that I tried to make the tiny 38mm long x 12mm axle that carries the extension lever. The piece I picked was stainless and machined OK but when I came to die cut the two ends for M10 there was no way I could hold it tight enough either in the 3 jaw or collet chuck. VERY hard work, kept stalling the Myford in back gear and made a right mess. I tried finishing it by hand but ended up binning it and remade in a bit of EN1A. Much easier!

                I think in retrospect that I should have made a female thread in a larger bit of stock to hold the workpiece before attempting the second thread?

                Onward and upward, Cheers, Martin

                #552295
                Martin King 2
                Participant
                  @martinking2

                  Hi All,

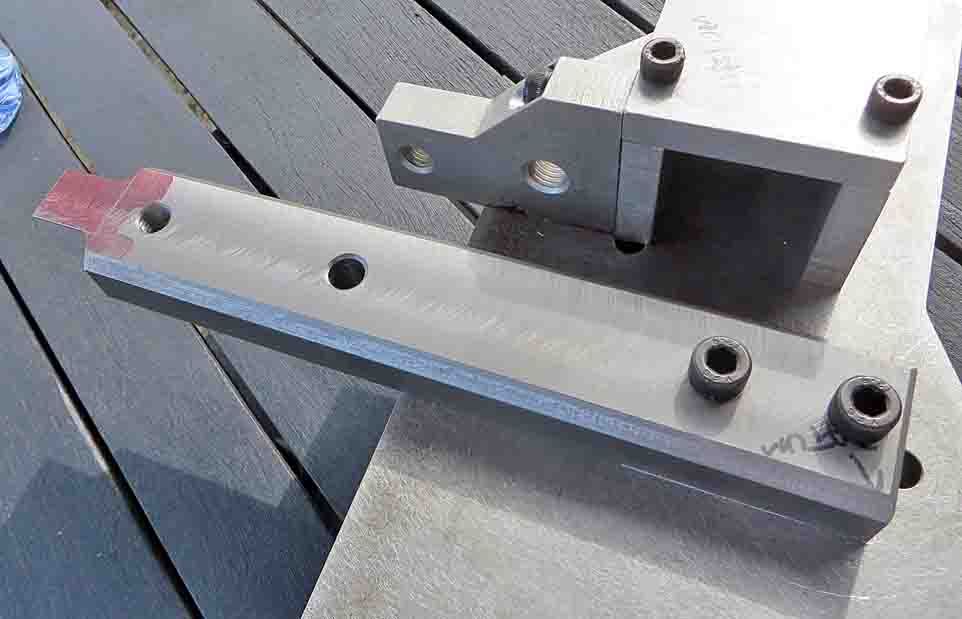
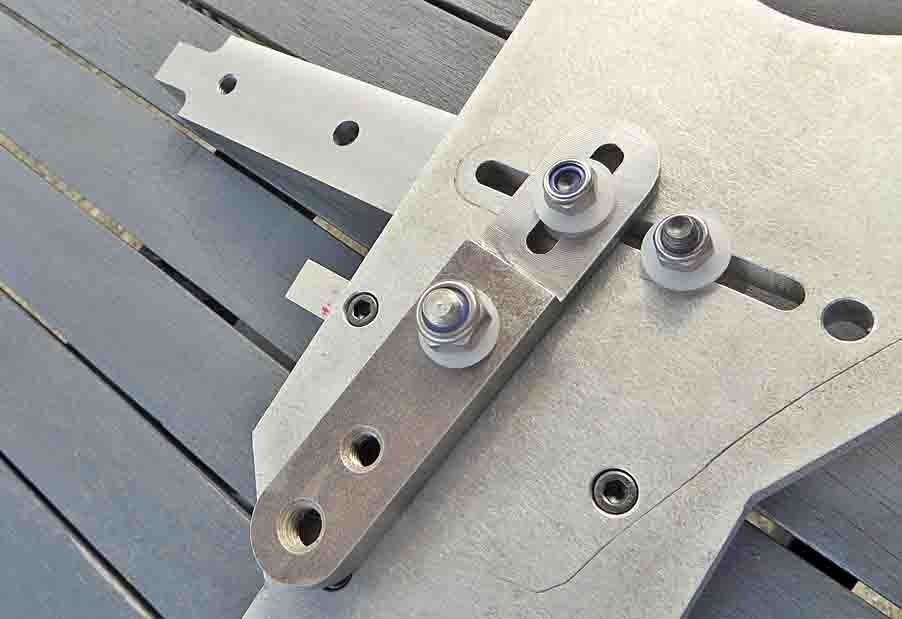
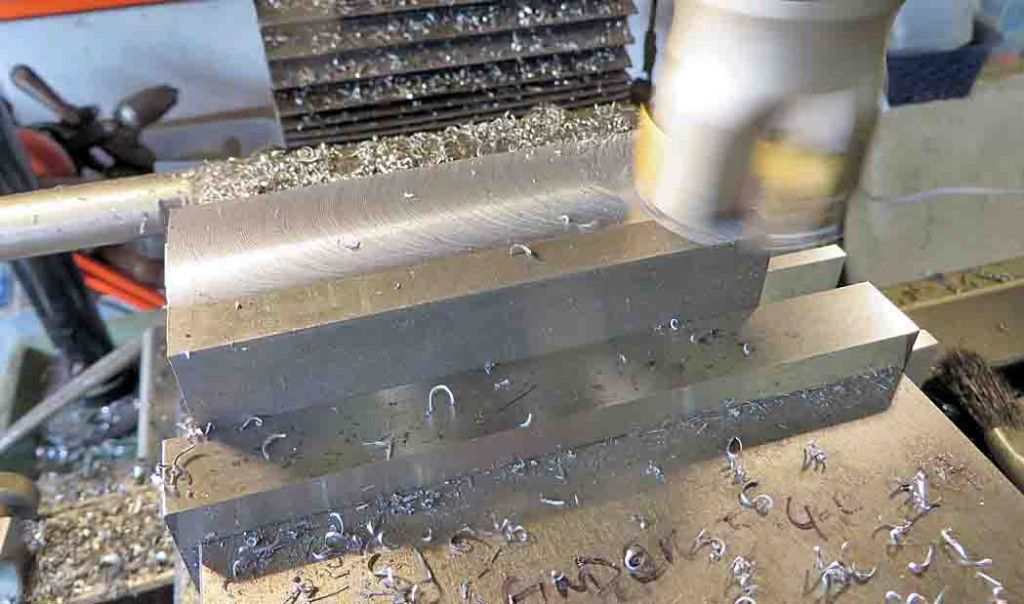
                  Pressed on a bit today and made a start on the 40x20x240 bar that will be the belt tensioning lever and carry the belt tracking pulley.

                  linisher 7.jpg

                  I thought I would do this first so that I can bolt it in position as shown top allow the slot that it runs in to be marked out to fit exactly. Just as well as the stock needed some squaring up and is a tad undersize to the drawing so it would have been a bit sloppy had I done the slot first.

                  Very impressed with a new 12mm roughing mill from Arc, it went through the stock like butter even with quite a heavy cut.

                  It seems to go up and down OK so that's a good sign!

                  linisher 6.jpg

                  The 10mm hole to the left is for the locking spring plunger.

                  Cheers, Martin

                  #552296
                  Vic
                  Participant
                    @vic

                    Looking good so far. Thanks for the write up and pictures, very interesting. wink

                    #552458
                    Martin King 2
                    Participant
                      @martinking2

                      Hi All,

                      Finished off the belt extension bar today:

                      linisher 9.jpg

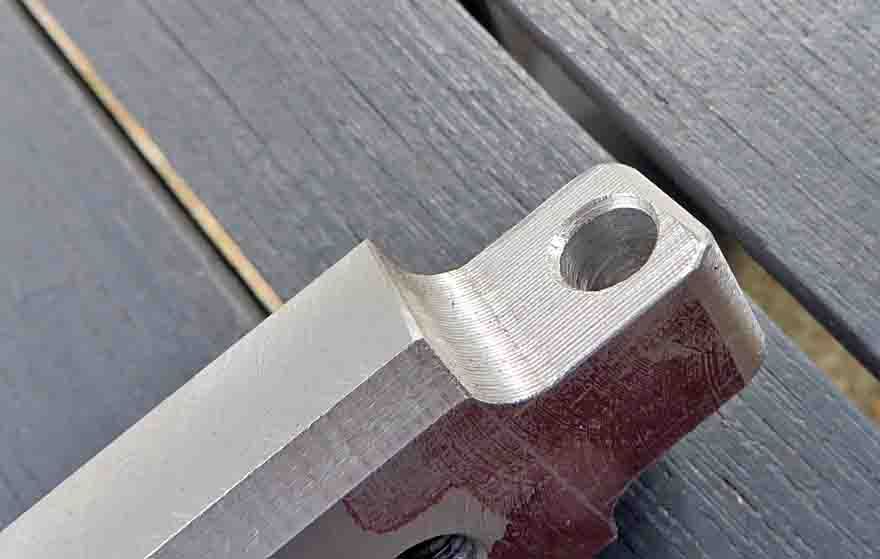
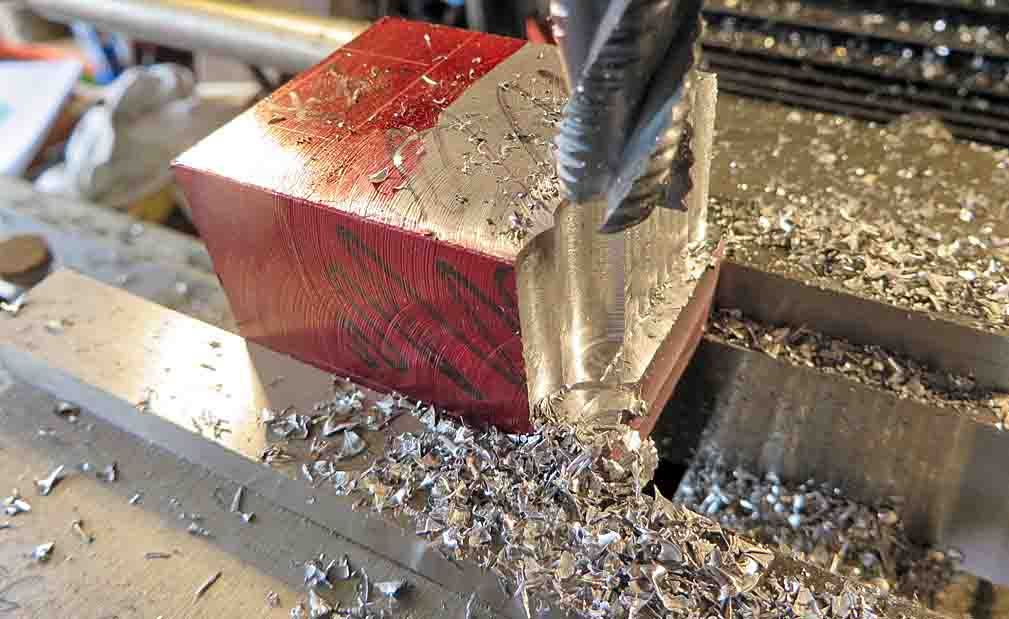
                      Cut a chunk of 40×40 BMS from the bar that will be the main extension bar carrying the table.

                      This will make the bracket for the adjustable tracking pulley that fits onto the top of the part above..

                      Used my new ALDI bandsaw in anger for the first time and very pleased with it indeed; as long as you go gently and let the weight of the saw do the work it cuts BMS like butter and a very straight cut.

                      Cleaned up with a shell mill; for some reason this new vice is way more accurate than the smaller one I have always used before. Being much bigger helps I guess?

                      linisher 8.jpg

                      Managed to use the band saw to cut the part to length but could only just hold it safely.

                      There is no way that I can come up with to hold it safely in either my Kennedy or Aldi saw to remove the bulk of the waste as below. Using the Roughing mill with small plunge cuts seems to worrk but will take some time, no way I am doing it by hand!

                      linisher 10.jpg

                      Is there a better way to do this? Perhaps the shell mill? Not sure.

                      Had enough for today so time for a cuppa and then do the days EBay listings, we are clearing out a lot of our older stuff at our local car boot at Yeovil tomorrow so no shop time!

                      Cheers, Martin

                      #552507
                      Martin King 2
                      Participant
                        @martinking2

                        Hi, Any thoughts on the best way to hog this material out in the above photo? Keep on with the roughing mill or try the shell mill?

                        Cheers, Martin

                        #552525
                        Nick Wheeler
                        Participant
                          @nickwheeler
                          Posted by Martin King 2 on 04/07/2021 09:03:37:

                          Hi, Any thoughts on the best way to hog this material out in the above photo? Keep on with the roughing mill or try the shell mill?

                          Cheers, Martin

                          Hacksaw

                          #552535
                          Vic
                          Participant
                            @vic

                            If I need to chop a lump from a big bar I drill it then use a hacksaw. I have seen folks drill at 90° as well before sawing.
                            I joined the Belt Grinder group on FB, some nice looking machines on there.

                            #552585
                            Martin King 2
                            Participant
                              @martinking2

                              Hi Vic & Nicholas,

                              I find hack sawing by hand very hurtful to my wrist and hand so that's a no go I am afraid. Will continue with the roughing mill and perhaps give the shell mill a try also.

                              Cheers, Martin

                              #552592
                              Nick Wheeler
                              Participant
                                @nickwheeler
                                Posted by Martin King 2 on 04/07/2021 17:27:25:

                                Hi Vic & Nicholas,

                                I find hack sawing by hand very hurtful to my wrist and hand so that's a no go I am afraid. Will continue with the roughing mill and perhaps give the shell mill a try also.

                                Cheers, Martin

                                Fair enough.

                                I find cranking the mill table to and fro dozens of times to be just as bad, and much slower. Mine is an X2 Mini Mill, so I saw off as many parts as I can to save time, effort and cutters

                                #552597
                                Steviegtr
                                Participant
                                  @steviegtr

                                  Grab a cup of coffee , get comfy & use a face cutter or a fly cutter.

                                  Steve.

                                  #553251
                                  Martin King 2
                                  Participant
                                    @martinking2

                                    Hi All,

                                    In the end I took Steviegtr's advice and sat down while the facemiil chewed out the stock, took a while but no dramas.

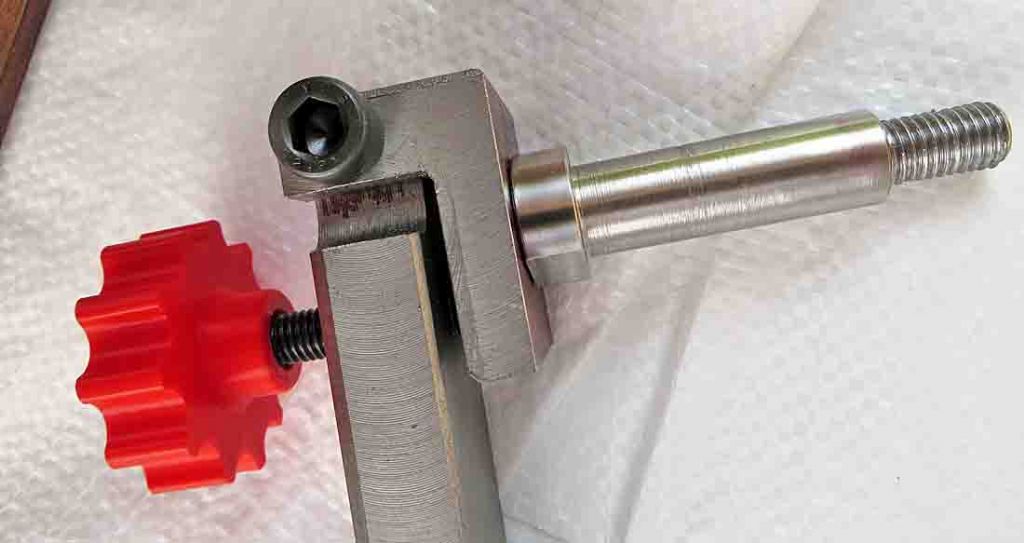
                                    Put the threaded holes in and made a start on the tracking pulley axle which is 25mm stainless. This was not a pain free exercise, a lot of messing about to find the best speed and feed. Finally I used a round nose HSS tool to do most of the stock removal and a new carbide insert to finish off. That said it can be seen that the finish is not great, partly because I had to put the finished surface in the 3 jaw to turn down the end thread to 11.8mm. SHOULD have done this at the same time as the main turning! Naturally this spun in the jaws causing surface damage.sad The bearings seem to fit very well with minimal play. nice easy sliding fit.

                                    Practiced the M12 threading on some scrap to find that I had accidentally used a crappy carbon steel die which was hopeless. Switched to a new HSS die and even that was hard going so reduced the diameter to 11.65mm which was much easier going.

                                    Printed up a knob for the tracking adjuster and turned down and knurled the head of a M10 cap screw to fit with superglue, seems good.

                                    Next job is the slot for this assembly to slide in. Waiting for some stock to arrive as I misread the drawing and have nothing big enough! I am certainly making plenty of errors on this as I go along but nothing has had to be scrapped…YET!

                                    Here it is so far:

                                    linisher 12.jpg

                                    Cheers, Martin

                                    #553365
                                    Martin King 2
                                    Participant
                                      @martinking2

                                      Sorry, I was not clear in the above, the aluminium stock I am waiting for is for the tracking pulley 95mm diameter and 85mmm long. Goes on the axle just made.

                                      Cheers, Martin

                                      #554319
                                      Martin King 2
                                      Participant
                                        @martinking2

                                        Hi All,

                                        A small hiccup in the ongoing saga!

                                        The spring plungers just arrived from WDS along with the gas strut. Sadly I did not notice when ordering them that they are M10 x1 (Metric Fine) whereas the pre tapped holes from the water jetters are M10 Coarse.

                                        What might be the best way around this please?

                                        Will be getting on with this project next week, starting on the tracking and idler pullies.

                                        Cheers, Martin

                                        #554377
                                        DiogenesII
                                        Participant
                                          @diogenesii

                                          Helicoil type thread insert? ..M10x1 inserts are easily available and use a 10.3mm 'tapping' drill, which will take out the 'old' thread completely – the kits usually come with about a dozen wire inserts, a tap drill, a tap, and the key / tool(s) to fit them with.

                                          They are easy to fit, work well (providing one follows the instructions), and are cheapish – I think M10x1 is one of the more expensive (rare!) sizes but £15 – £20 for a kit.. ..you'll find them on the 'net / local engineering supplier

                                          Helicoil drill sizes

                                          Edited By DiogenesII on 16/07/2021 22:29:47

                                          #554389
                                          Pete.
                                          Participant
                                            @pete-2

                                            Martin,

                                            maybe a top hat Bush tapped to m10 fine, clear the hole to 12mm with a slotting end Mill, counterbore say 3mm deep with a 14mm slotting end Mill, then loctite the Bush in place facing the force being put on it so it isn't just relying on loctite.

                                            Suitable retaining loctite obviously.

                                            #554457
                                            Robert Butler
                                            Participant
                                              @robertbutler92161

                                              M10 Coarse appears to be the required thread not M10 fine. Can an M10 Coarse Helicoil be used, without researching the topic I can see no reason why not.

                                              Robert Butler

                                              #554463
                                              Vic
                                              Participant
                                                @vic

                                                I find threading anything over 8mm a bit of a chore Martin. The last thread I cut was M6 and the finish on steel was rubbish so I bought a new Die. Looking good so far, keep going. wink

                                                #554472
                                                Martin King 2
                                                Participant
                                                  @martinking2

                                                  Hi All,

                                                  Thanks for the interest!

                                                  I have gone the route of drilling and tapping the holes M12 and loctiting in a piece pf pre drilled M12 Cap Screw which I will open up to M10 x1 (Fine) to take the plunger. Have centre popped the underside edges to make really sure it does not move.

                                                  The bolt material is pretty hard so if the tapping proves a problem I will go the "top hat" route as suggested.

                                                  Why I did not think of a helicoil I do not know! Maybe because I have never actually used one!

                                                  I knew this project would be a good learning experience and so it is turning out!

                                                  Cheers, Martin (KBO)

                                                  #563464
                                                  Martin King 2
                                                  Participant
                                                    @martinking2

                                                    HiAll,

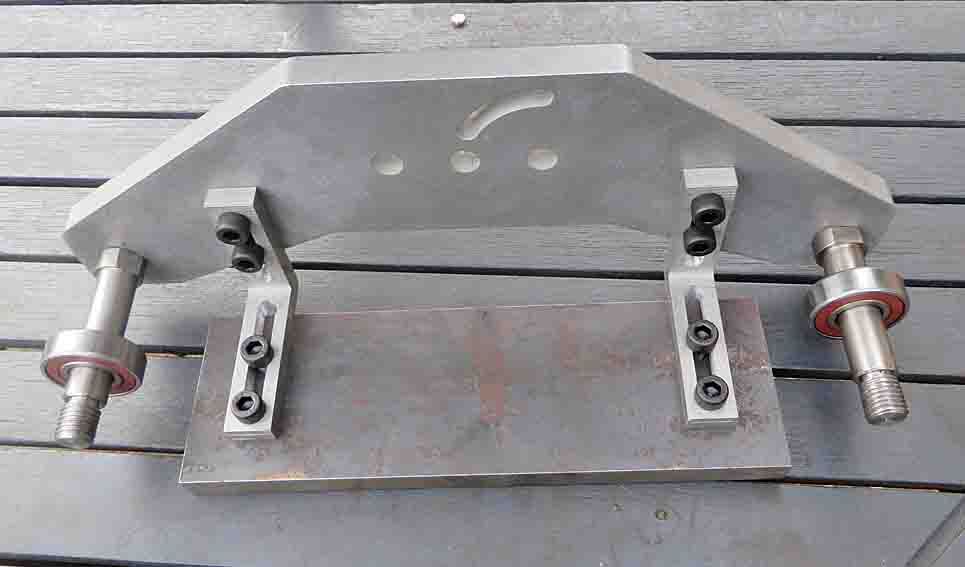
                                                    Been busy away from this project for a while but have just done these pieces:

                                                    linisher 13.jpg

                                                    linisher 14.jpg

                                                    Made the axles from 25mm 304 stainless which was hard work, finally got the speed and feed about right (600rpm) to get a good finish. Got to "nearly there" then finished off with emery cloth for a nice fit on the bearings.

                                                    The M16 threads were hard work and had to use a diameter of 15.5mm in order to get the die to cut OK in low speed and back gear. Constant fwd & rev a bit at a time.

                                                    The stainless seems to work harden if you are not pretty aggressive with the cuts.

                                                    The threads are no oil painting for sure but they will be OK!

                                                    Slots in the brackets were a breeze in aluminium after the SS! Will round off the corners later on. It would be nice to have a linisher to do it on! smiley

                                                    Next job is the pullies.

                                                    Cheers, Martin

                                                    #564233
                                                    Martin King 2
                                                    Participant
                                                      @martinking2

                                                      Hi All,

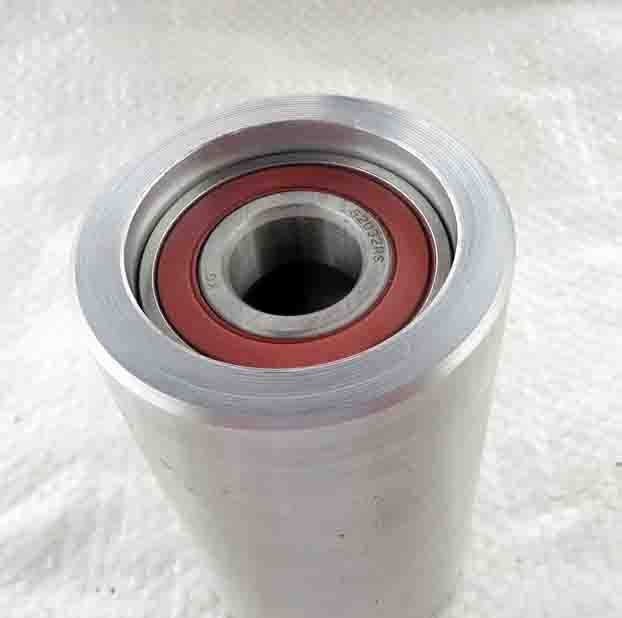
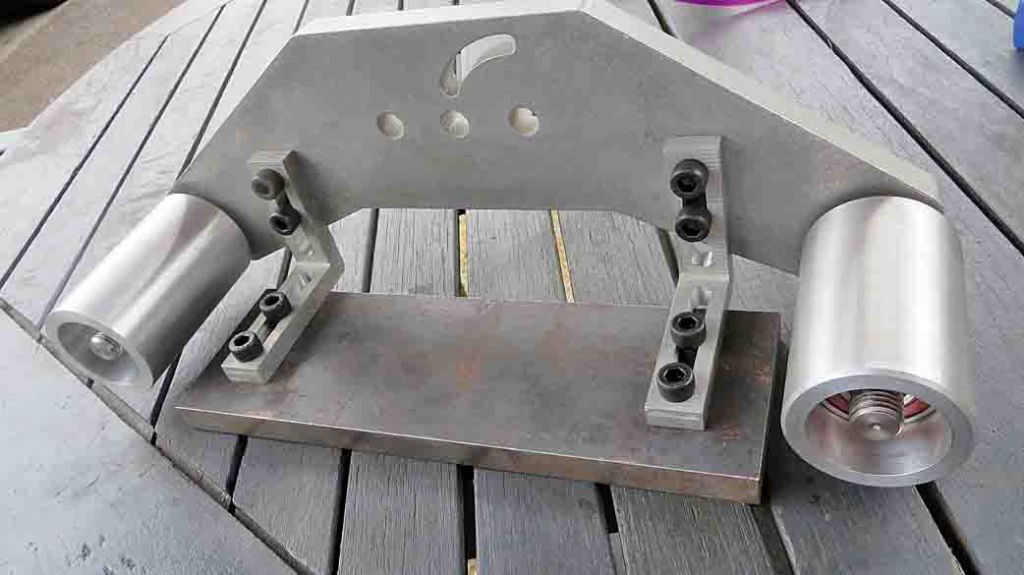
                                                      Finished the two platen pullies with pressed in bearings, fairly easy this one!

                                                      linisher 16.jpg

                                                      linisher 15.jpg

                                                    Viewing 25 posts - 1 through 25 (of 49 total)
                                                    • Please log in to reply to this topic. Registering is free and easy using the links on the menu at the top of this page.

                                                    Advert

                                                    Latest Replies

                                                    Viewing 25 topics - 1 through 25 (of 25 total)
                                                    Viewing 25 topics - 1 through 25 (of 25 total)

                                                    View full reply list.

                                                    Advert

                                                    Newsletter Sign-up