4 jaw chuck axial allignment

Advert

4 jaw chuck axial allignment

Home Forums Workshop Techniques 4 jaw chuck axial allignment

Viewing 25 posts - 1 through 25 (of 30 total)
  • Author
    Posts
  • #16106
    Martin of Wick
    Participant
      @martinofwick
      Advert
      #424711
      Martin of Wick
      Participant
        @martinofwick

        How is one supposed to set either stock for machining, or work undergoing second operations to run to a true axis within the 4 jaw chuck?

        Radial setting – no problem I can set up to les than half a thou TIR, on a point but move the DTI out or back along the work and the run-out can quite literally go 'off the clock' especially when working with 4 or 5 inch stock.

        There must be a way to set up for a true axis but I can find no reference to this problem in my meagre stock of literature. It is causing me some stress at the moment as no amount of nudging, thumping, hammering of the work piece or praying and swearing seems to be helping me set the work to run true down the axis. When I set zero TIR adjacent to the chuck the tailstock end goes out of true. If I clock in the tailstock end, I find the chuck end is now off centre. OOOF!

        I thought that one of the great benefits of the 4 jaw was the ability to clock in a repeat setting – but how is that achieved without some reliable way to get the axis running true?

        I clearly have a major learning gap here, so would be very interested to learn what approach others have used.

        #424714
        Pete Rimmer
        Participant
          @peterimmer30576

          Start with a faced-off part and use a dial gauge on the face to check it every time you clock it in radially. Or keep the faced-off face against the chuck and keep it there with a dead blow when dialling in the OD.

          #424718
          not done it yet
          Participant
            @notdoneityet

            And in addition to PR, use a centre on the original if replacing it in the same orientation. Turning between centres is the ultimate, I suppose.

            #424720
            John P
            Participant
              @johnp77052

              The jaw faces are not parallel to the lathe axis use a pencil grinder held in the top slide and regrind each jaw face in turn in situ not under power, you will need to apply an inward load to the jaw to stabilize .Not much needs to be ground off mark with a felt tip pen to see the grinding along the jaw length.

              John

              #424721
              Michael Gilligan
              Participant
                @michaelgilligan61133
                Posted by Martin of Wick on 17/08/2019 18:31:26:

                How is one supposed to set either stock for machining, or work undergoing second operations to run to a true axis within the 4 jaw chuck?

                [ … ].

                There must be a way to set up for a true axis but I can find no reference to this problem in my meagre stock of literature.

                [ … ]

                .

                I regret to say that you are probably describing a defect of your chuck.

                In a perfect world, the gripping faces of all four jaws would be parrallel to the lathe axis, and would remain so at every setting.

                Clearly, we do not live in a perfect world and some chucks are further from perfection than others.

                To the best of my knowledge, there is no 'adjustment' available to overcome your difficulty … 'though you might consider grinding the jaws in-situ, to effect a general improvement.

                MichaelG.

                .

                Edit: John has described the grinding process.


                Edited By Michael Gilligan on 17/08/2019 19:41:13

                #424722
                Peter Tucker
                Participant
                  @petertucker86088

                  Hi Martin,

                  Did you make sure the mating faces between the chuck and lathe spindle were scrupulously clean before you assembled them, tiny particle of swarf can throw your chuck out.

                  If the mating faces between chuck and spindle are clean check that the face of the spindle is running true.

                  If the lath/chuck is old/secondhand the chuck jaws may be out of alignment ( knackered).

                  Hope this helps.

                  Peter.

                  #424723
                  JasonB
                  Moderator
                    @jasonb

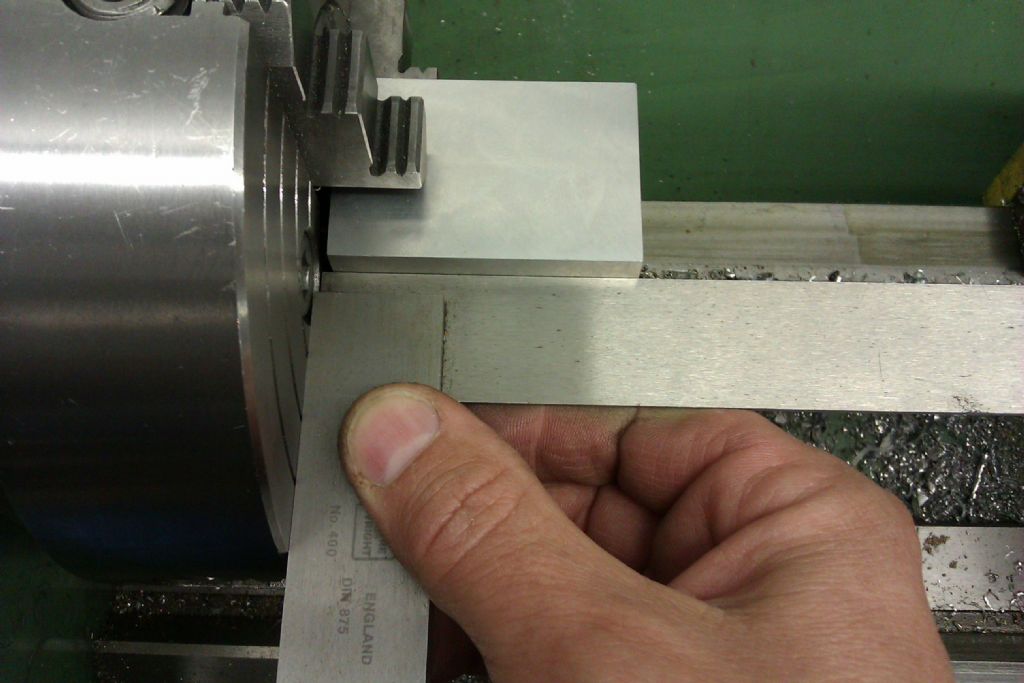
                    Provided your chuck face is true then this can help. useful when putting stock that is sawn on both ends into the 4-jaw.

                    Firefly46

                    #424727
                    Clive Brown 1
                    Participant
                      @clivebrown1

                      I think you're asking a lot for many 4-jaw chucks, especially well used ones.

                      Can you arrange your machining sequence to drill an accurate centre hole in what will be the RH end of the workpiece? This might need a reasonably sized bore through the mandrel.

                      If so, grip the LH end in the 4-jaw, with not too much jaw engagement and adjust to run true while the RH end is centred by a tailstock mounted centre, preferably a live centre.

                      #424735
                      duncan webster 1
                      Participant
                        @duncanwebster1

                        use a small length of engagement, set true near the chuck, then move the dti to the far end and set it true by tapping it with a lead weight, then go back to the chuck end, repeat till you get fed up

                        #424743
                        old mart
                        Participant
                          @oldmart

                          If your chuck is on a backplate, separate them and check the face of the plate. Double check the cleanliness of the fitting to the lathe spindle before any skimming of the faceplate. 

                          Before doing anything, remove the jaws and check that the face of the chuck body is true with a dti.

                          Edited By old mart on 17/08/2019 21:09:03

                          #424766
                          Mikelkie
                          Participant
                            @mikelkie
                            Posted by duncan webster on 17/08/2019 20:44:37:

                            use a small length of engagement, set true near the chuck, then move the dti to the far end and set it true by tapping it with a lead weight, then go back to the chuck end, repeat till you get fed up

                            I like your last six wordslaugh

                            #424770
                            Mick B1
                            Participant
                              @mickb1
                              Posted by Mikelkie on 17/08/2019 22:20:46:

                              Posted by duncan webster on 17/08/2019 20:44:37:

                              use a small length of engagement, set true near the chuck, then move the dti to the far end and set it true by tapping it with a lead weight, then go back to the chuck end, repeat till you get fed up

                              I like your last six wordslaugh

                              Exactly.

                              Or why not run a clock along the inside of the chuck jaws and see if they're parallel to the carriage motion? My guess is they'll be well out.

                              #424772
                              Michael Gilligan
                              Participant
                                @michaelgilligan61133
                                Posted by Mick B1 on 17/08/2019 22:46:28:

                                .

                                Or why not run a clock along the inside of the chuck jaws and see if they're parallel to the carriage motion? My guess is they'll be well out.

                                .

                                Because the jaws will not be in their 'clamped' alignment when they are accessible to be clocked.

                                That's O.K. if all the error is in the actual jaws … but I bet some of it is sloppy fit of the jaws in their slots.

                                MichaelG.

                                #424773
                                Martin of Wick
                                Participant
                                  @martinofwick

                                  Thanks for all the feedback and some very good advice.

                                  I didn't want to blame the tools, so was kind of in denial about the possibility of the chuck being bad ( 4 jaw came with new machine and had been unused until recently so had assumed it would be as good as the 3 jaw).

                                  Subsequent to MG's and other posts I had a bit of an investigation. Checking jaws 2 by 2 clamped on some silver steel showed beyond any shadow of a doubt the jaws were absolutely diabolical. Not only was the grip wobbly and insecure in the plane of the pair of jaws, but clocking the steel bar showed 20-25 thou off axis over 3 inches for one pair and the other pair could be set at almost any position you like, none of which gave a true axis.

                                  Checking against a backlit straight edge was utterly disheartening – some jaws were convex, some hollowed, others had uneven teeth (serrated jaws). A new chuck!! If you wanted to make one as bad as this it would actually be quite hard work Doh!.

                                  Other parameters like spindle TIR checked out at half a thou and half thou wobble on the spindle plate mounting which is bit disappointing but probably OK for a CML. Slightly concerned, for as I recall there was almost undetectable run out when I unboxed the new machine 18 months ago and it has been fitted with angular contact bearings.

                                  So replaced what is now a large heavy paperweight with the original 3 jaw that I had recently spurned for having a totally outrageous 1.5 thou TIR and an axial drift of half a thou over 6 inches. Incidentally, both chucks are from the same 'no name' manufacturer (orbiting stars brand from the logo!).

                                  A new chuck is called for I think. I quite like the idea of attempting to re-grind but is a bit of a scary prospect, although difficult to see how any remedial action could make this specimen any worse..

                                  At the moment all I would like to do is throw the chuck at the head of person that QA'd it. Interestingly, the gaudy check sheet that came with the chuck gives expected parameters for run out on the various planes and axis, but has no data for a chucked test bar (like the 3 Jaw has). Why is that I wonder!!!

                                  Thanks again to all for your help.

                                  #424775
                                  Michael Gilligan
                                  Participant
                                    @michaelgilligan61133

                                    Deepest sympathy, Martin

                                    One perfectly practical thing you could do with the 'paperweight' is ditch the jaws and screws, and use it as a tee-slotted faceplate.

                                    … Then you could make some 'dogs' to fit the slots [which is, of course, what the independent 4-jaw chuck evolved from]

                                    Meanwhile, it's probably time for some sleep.

                                    MichaelG.

                                    #424780
                                    Vasantha Abey
                                    Participant
                                      @vasanthaabey64724

                                      Dear ,

                                      It may be your headstock is misaligned by a few 1/00 degree, ie not 90 degree to the bedways.

                                      You can adjust this by removing all the jaws from the chuck, fix a dial gauge to touch the chuck face, let the gauge start reading a max of 10 thous after touching. This will make sure the dial gauge tip but will not unnecessarily get stuck on the circular grooves on the chuck faces when you move your cross slide forward and backwards. These grooves help one to center the jaws quickly by observing those line relative to the jaw end position.

                                      if your chuck face is not perpendicular to the bed you will find a variation on the dial reading.

                                      loosen the bolts that clamp the Head stock to the bed, give a smart tap on the head and it will move a few thou till you get the reading constant. Tighten the bolts and you are on. Your problem could be this.

                                      with love from Sri Lanka, a 75 year guy.

                                      #424786
                                      Neil Lickfold
                                      Participant
                                        @neillickfold44316

                                        Using a finger type DTI can help in setting the swash of the part on the side of the jaws if it has a flange to reference from. If it is a piece that has flat sides, then running an indicator up and down the length is the only way to check it is running true. You have to spend Serious money on a 4 jaw chuck that can hold flat stock true to the run of the chuck. Another option is to use sacrificial pads that are used to hold the part. Then it can be held and as you indicate the length, tap it true at the free end. It can take some time to set up some jobs and not that long with others. Having more than 1 indicator can be helpful, as well as 2 keys for the 4jaw chuck.

                                        Neil

                                        #424790
                                        Brian G
                                        Participant
                                          @briang
                                          Posted by duncan webster on 17/08/2019 20:44:37:

                                          use a small length of engagement, set true near the chuck, then move the dti to the far end and set it true by tapping it with a lead weight, then go back to the chuck end, repeat till you get fed up

                                          I've done this using a soft-faced hammer before drilling a centre on a long workpiece, but wonder if it would be easier just to make a bump centring tool (basically a knurling tool fitted with a roller bearing instead of a knurl).

                                          Brian

                                          #424792
                                          JasonB
                                          Moderator
                                            @jasonb

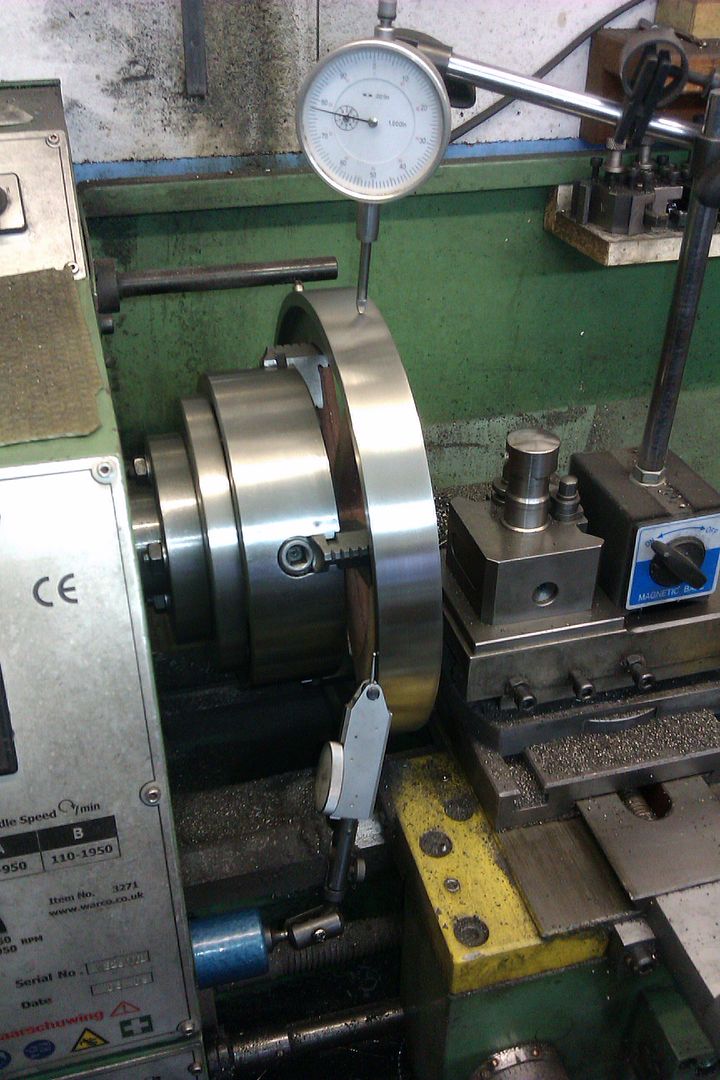
                                            As Nick says more than one dti or dti and square as I showed above may be needed. Although good jaws help it makes little difference how true the faces are if you are trying to hold a cast part as the surface you are gripping is unlikely to be true to the parts axis. Same applies to short large diameter work where you will need to clock it for wobble as well as eccentricity, eg large flywheels. This is where Dubcan's tap-test-tap-etc come in.

                                            See how little jaw contact there is on the uneven cast inside of the rim, would not make any difference with the jaws you have or true one sin cases like this.

                                            #424796
                                            Michael Gilligan
                                            Participant
                                              @michaelgilligan61133
                                              Posted by JasonB on 18/08/2019 07:59:42:

                                              [ … ]

                                              See how little jaw contact there is on the uneven cast inside of the rim, would not make any difference with the jaws you have or true one sin cases like this.

                                              .

                                              Jason,

                                              Your example shows the chuck holding a 'short' workpiece … which is perfectly reasonable, but does not address the issue that Martin described in his opening post

                                              [quote]

                                              Radial setting – no problem I can set up to les than half a thou TIR, on a point but move the DTI out or back along the work and the run-out can quite literally go 'off the clock' especially when working with 4 or 5 inch stock.

                                              [/quote]

                                              Do you consider it over-ambitious for him to want to work on a five inch length of [modest diameter] material ?

                                              MichaelG.

                                              #424811
                                              Tony Pratt 1
                                              Participant
                                                @tonypratt1
                                                Posted by duncan webster on 17/08/2019 20:44:37:

                                                use a small length of engagement, set true near the chuck, then move the dti to the far end and set it true by tapping it with a lead weight, then go back to the chuck end, repeat till you get fed up

                                                I'm afraid that is the way to do it, I use copper packing also between jaws & work piece, it's a real pain but in the real world chucks don't always perform as you would like them to.

                                                Tony

                                                #424815
                                                Michael Gilligan
                                                Participant
                                                  @michaelgilligan61133

                                                  Martin,

                                                  I may be wrong, but I don't think you have told us the size of the chuck

                                                  All the discussion has therefore been made on the basis of our assumptions.

                                                  … Could you please confirm ?

                                                  MichaelG.

                                                  #424817
                                                  Martin of Wick
                                                  Participant
                                                    @martinofwick

                                                    These are all really useful tips that I will keep in mind for the future, but for any of them to succeed, I think you need to have some degree of parallelism in the jaws to start with!

                                                    Using a bump centre to attempt to address the issue was quite entertaining. With the jaws set semi tight the topslide and toolpost would flex and twist in the most alarming manner. Slackening off the jaws to allow the work piece to move would get the axis OK at the bump, but everywhere else on the bar would be out of true.

                                                    I am certainly not an uber-perfectionist (slipshod and cavalier would be a better description), so could have lived with 4 or 5 thou axial drift over 4 inches, but not 30 thou!

                                                    I had been using the 4 jaw in an attempt to be a little more rigorous in my approach and working on short pieces, all seemed to be going OK . The issues only became apparent when working on the spindle for the lathe handwheel, a longer piece that needed internal and external concentricity on re-chucking to drill, thread from both ends etc.

                                                    Same problems showed up when mounting 3 inches of 45mm steel bar to skim a piece for the clamp fitting – and even setting the working end to true, the chuck end would precess and it would go out of centre with the lightest skim.

                                                    Thing is, until you examine the jaws in detail, the chuck looks quite good – the jaws are a good fit in the slots and the movement is smooth. It is just that the jaw faces have not been ground properly. If the chuck had been second hand, I would have attributed the problem to someone having attempted a bit of casual, freehand jaw grinding for personal amusement. That is how bad the clamping surface of the jaws are. Strange as the 3 jaw chuck from the same manufacturer was outstandingly good.

                                                    I shall give the vendors a call on Monday to see if they can help.

                                                    #424976
                                                    Pete Rimmer
                                                    Participant
                                                      @peterimmer30576

                                                      What are you using as a gauge? Simply touching two opposing jaws together and observing the light gap should tell you if they are parallel or not.

                                                    Viewing 25 posts - 1 through 25 (of 30 total)
                                                    • Please log in to reply to this topic. Registering is free and easy using the links on the menu at the top of this page.

                                                    Advert

                                                    Latest Replies

                                                    Home Forums Workshop Techniques Topics

                                                    Viewing 25 topics - 1 through 25 (of 25 total)
                                                    Viewing 25 topics - 1 through 25 (of 25 total)

                                                    View full reply list.

                                                    Advert

                                                    Newsletter Sign-up