Yesterday I stared a reel of filament off e+Bay, only £11 because it is 'baby blue', but ideal for a job I'm doing.
I think the results are 'almost perfect prints', without close examination they look like injection moulded parts, no stringing or distortion. But they aren't to challenging, now printing some parts with large overhanging pipes, taht will be the real test.
@Andy, I wonder what is causing that rough surface texture in some places and not others. Try measuring your filament, if it's oversize it may be over-extruding.
Thanks Neil, I'll have a look – am using up stock ABS from CEL but they admit theirs is not the best, ColorFABB is higher grade and I see from CEL website they are offering techABS low shrinkage now – ever changing!
When I acquire a Polysher I'll change filament accordingly – may be a couple of months away yet
Started having an intractable problem over the last week, gradually getting worse… patches of over extrusion, typically on small sections near big ones, or after complex bits of outer skin.
I think I have found the issue, my 0.4 nozzle is worn to at least 0.6mm! I'm sure it hasn't lasted as long as the previous one.
Not sure of the 'mechanism' but it will be interesting to see if a replacement nozzle improves things.
The only way to flatten the top surface is to reduce the layer thickness.
Now you've tempted me to try 0.06mm!
I read an online test of using hot air to smooth PLA, so I tried it with my rework gun. Don't do it on 'engineering' objects, it might suit 'artistic' subjects.
If the nozzles wear so quickly, would it be possible to make replacements from something harder, or from steel that can be heat treated to maximise hardness? (Am assuming that it will not matter too much if the nozzle is brittle since it is unlikely to suffer any impacts)?
The benchy printed almost OK, lovely finish with ~2-thou steps, but I got two missed steps in X which is really annoying and a bit confusing. It is the first benchy where I can read the text on the stern.
Funnily enough this PLA cost me £22 for two reels and it seems to be the best yet! Branded 'Surreal'.
I did a seven hour print the day before with no glitches.
Printed using Makerbots high setting. Visibly a much poorer print but the surfaces do look & feel a lot smoother. The hull where it's close to the bed is the worse, is this down to the heated bed? Will it help to speed up the axis or turn down the heat settings?
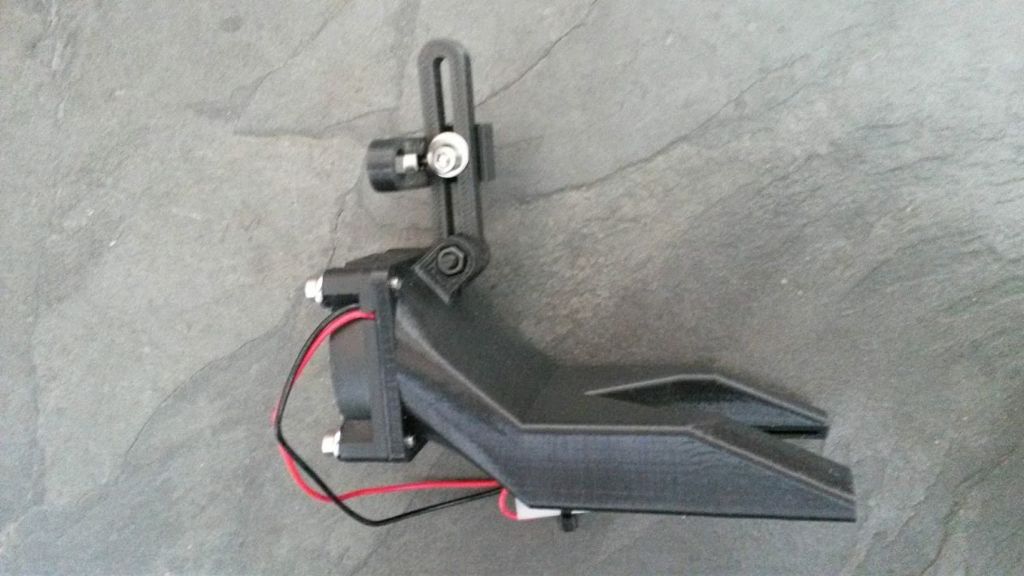
This was my latest test print, it's a print cooling fan duct and mounting brackets in Nylon for a 40mm fan to replace the PLA ducts which melted and their fans which I used in a throat heatsink cooling systemfor printing Nylon.
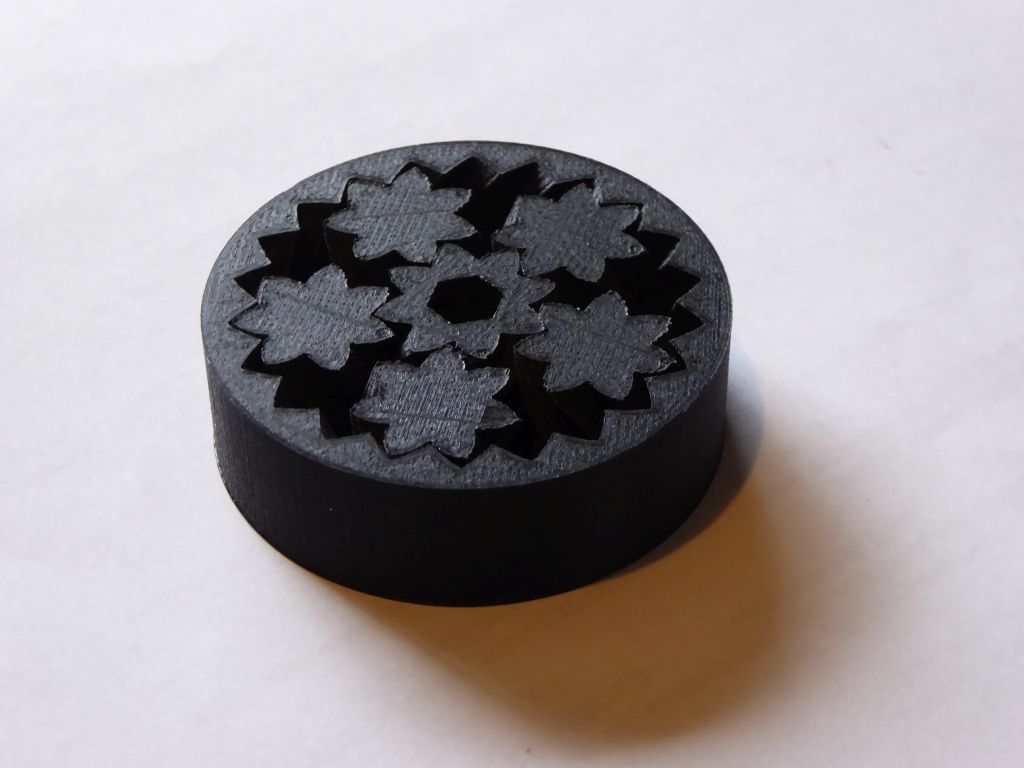
I've found this to be a very good test of a 3D printer.
It's printed in one go and all the gears rotate. It cannot be disassembled. Although all printers can print it, on some it ends up frozen and cannot be rotated.
I got the STL from Here and printed this one with an Ultimaker2.
Gary,
A printer must initially be calibrated to ensure all axes move exactly the distances called in the G-Code, once this is done one may move on to a test cube or similar and adjust temperature, % extrusion, speed, and all settings EXCEPT STEPS to get the neatest possible print, then you measure the neat cube and this will give you a Variance (much like a tool compensation in CNC) which will be the same for all or most parts using the same material, nozzle, printer and settings, you apply this to your models, not your printer.
For the above reasons your test print will only tell you if the test print has been modelled suitably for the printer you are using, nothing more
Still finding x-axis errors, then I noticed the hot-end assembly was no longer rigidly fixed, it looks like the bracket has 'relaxed' a tiny bit. Wedged as a temporary bodge it's churning out a tall part that includes a dovetail wedge and it's got the best, straightest edges I had so far, clearly there must have been a tiny amount of play from the start. Next time it's apart I will add some permanent packing.