Centfugal pump build

Advert

Centfugal pump build

Home Forums Miscellaneous models Centfugal pump build

  • This topic has 16 replies, 1 voice, and was last updated 13 May 2019 at 19:52 by Cringle,model,engineering.
Viewing 17 posts - 1 through 17 (of 17 total)
  • Author
    Posts
  • #4295
    Cringle,model,engineering
    Participant
      @cringlemodelengineering

      Making the cringle pump

      Advert
      #407341
      Cringle,model,engineering
      Participant
        @cringlemodelengineering

        Hi, this is my first real post here but i have been reading the forums for a few years now so thought it time a added somthing.

        This is a project i compleated a while ago now, but just recent found the pics of making it again. The pics dont cover everything but still may interest some people.

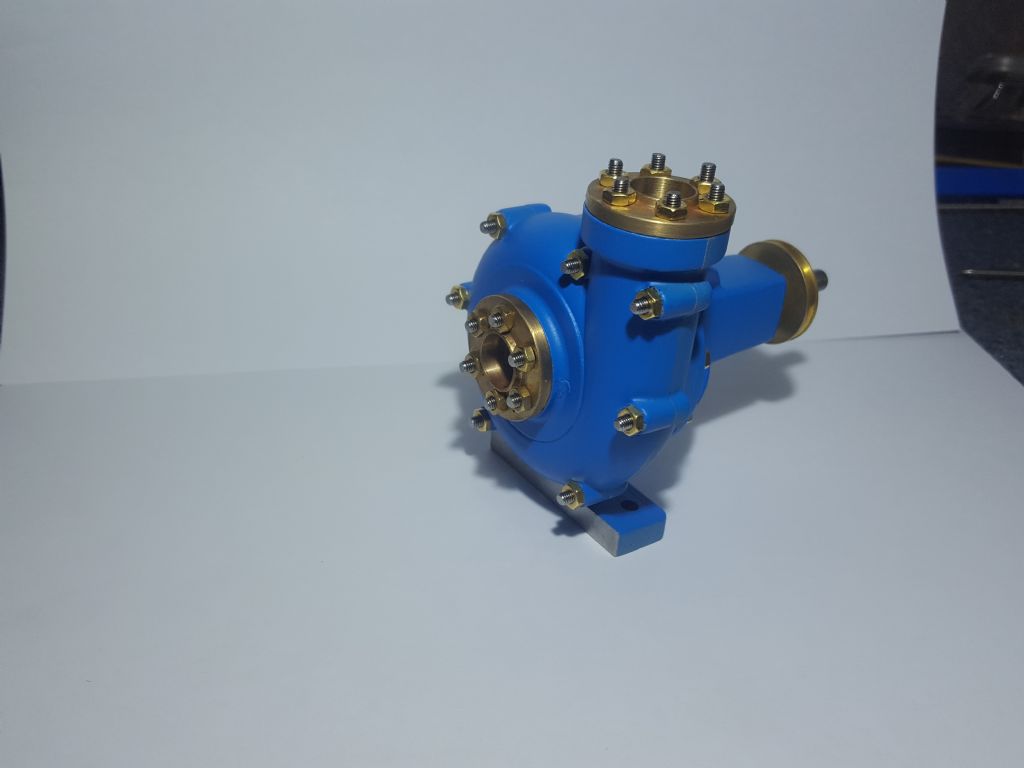
        Like most i had a small steam engine and wanyed to use it to power somthing usefull and so i designed my own pump. This is no exact replica of any sort but designed from my experiance of working on various different full size pumps and work as maintenance and assembly and casting process of industrial pumps.

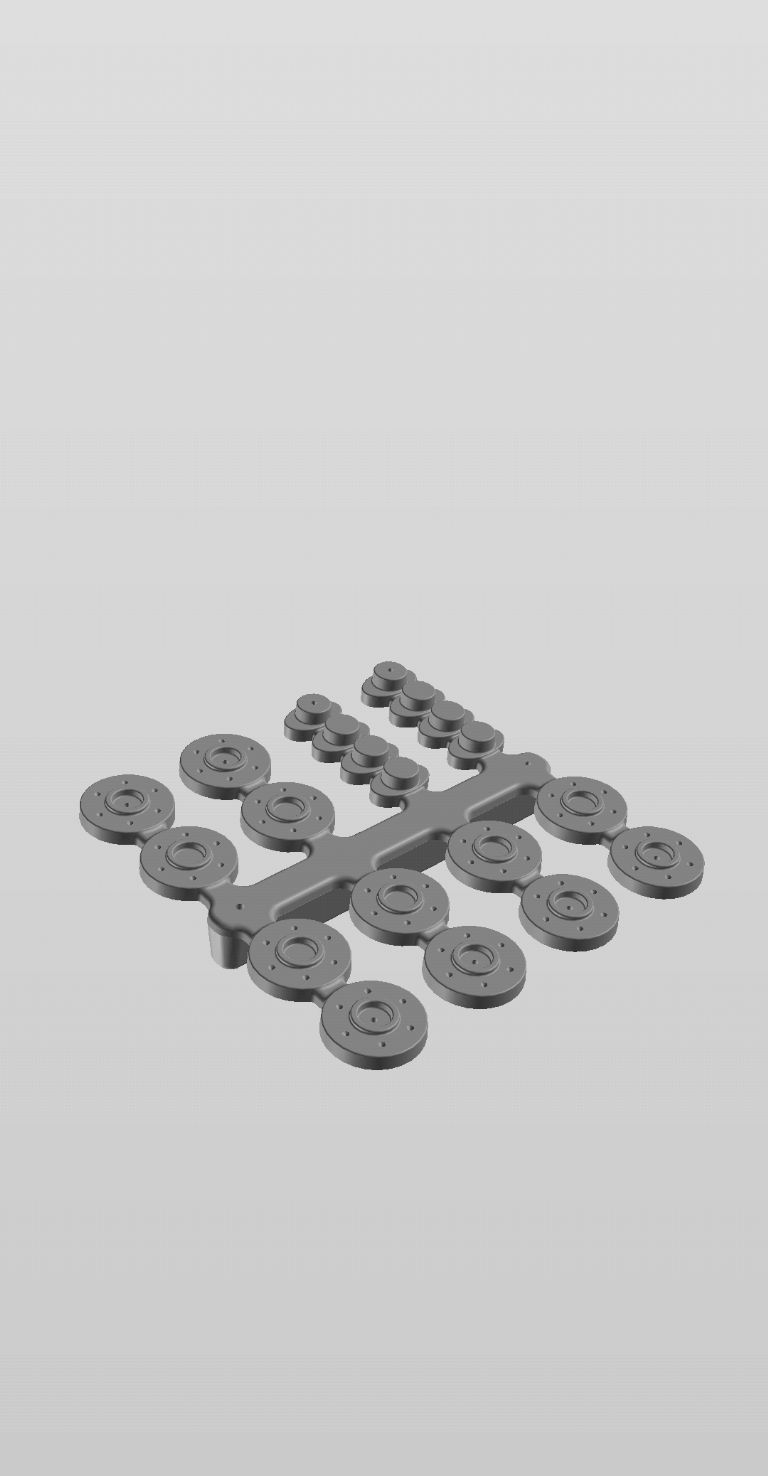
        The design is a classic snail shell type pump. I used fusion 360 to first make disign it in 3d then i make the pattern parts using a 3d printer, il add pics and details.

        #407342
        Cringle,model,engineering
        Participant
          @cringlemodelengineering

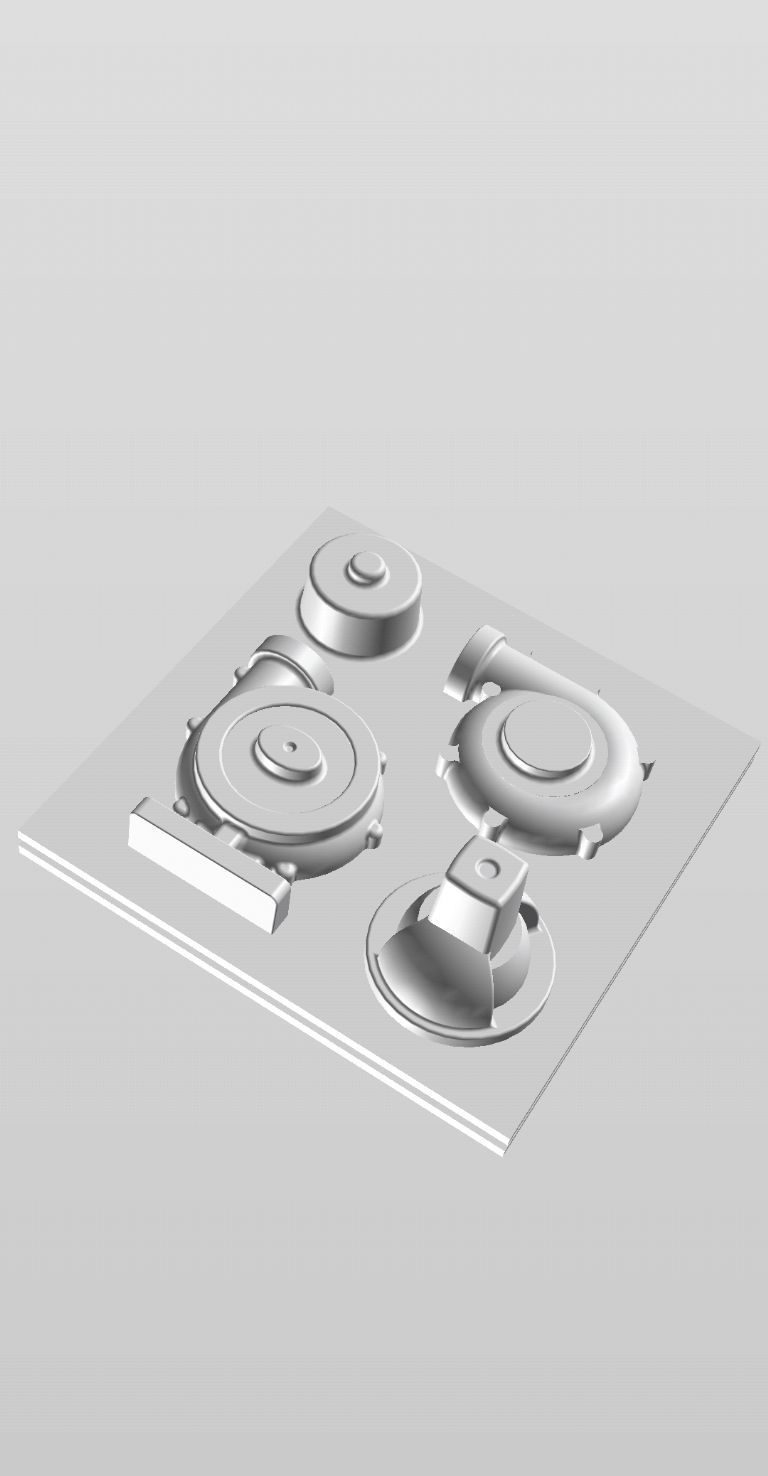
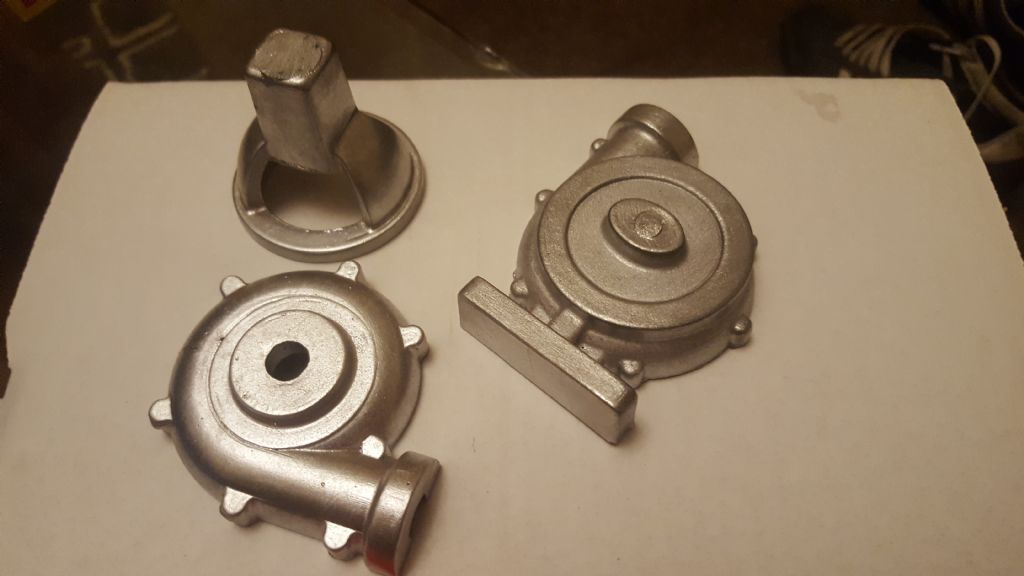
          The patterns are all designed with fusion using the pump parts and adding draft and extra material for machining. They take many days to finish with just lots of boring painting and sanding to a fine smooth finish so not realy much to see there.

          20180111_225510.jpg

          Here is a photo of the pump pattern with the three main components of the pump.

          Edited By cringle on 01/05/2019 15:16:10

          #407343
          Cringle,model,engineering
          Participant
            @cringlemodelengineering

            mobile upload 2019-05-01 14-01-41.jpg

            #407345
            Cringle,model,engineering
            Participant
              @cringlemodelengineering

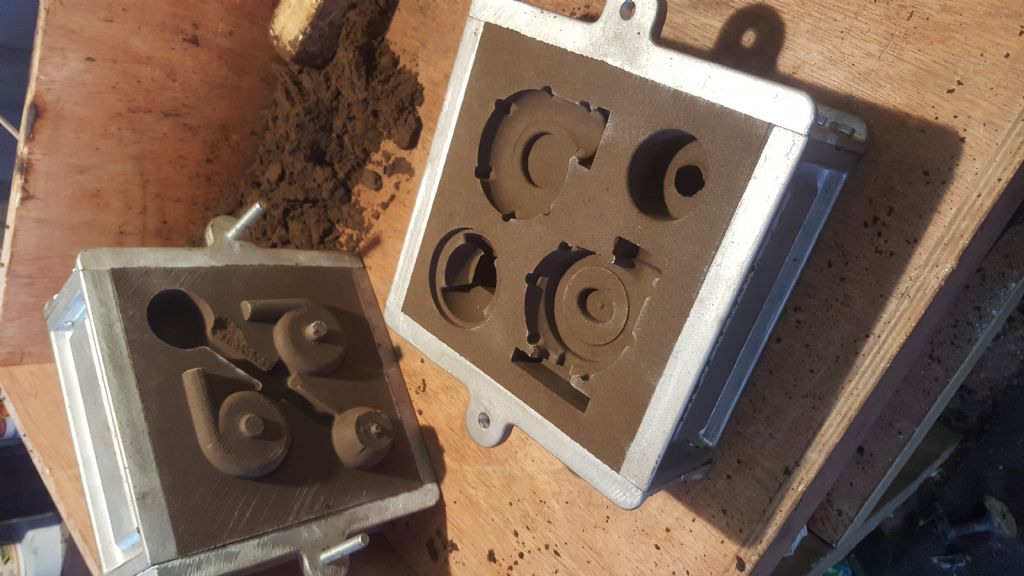
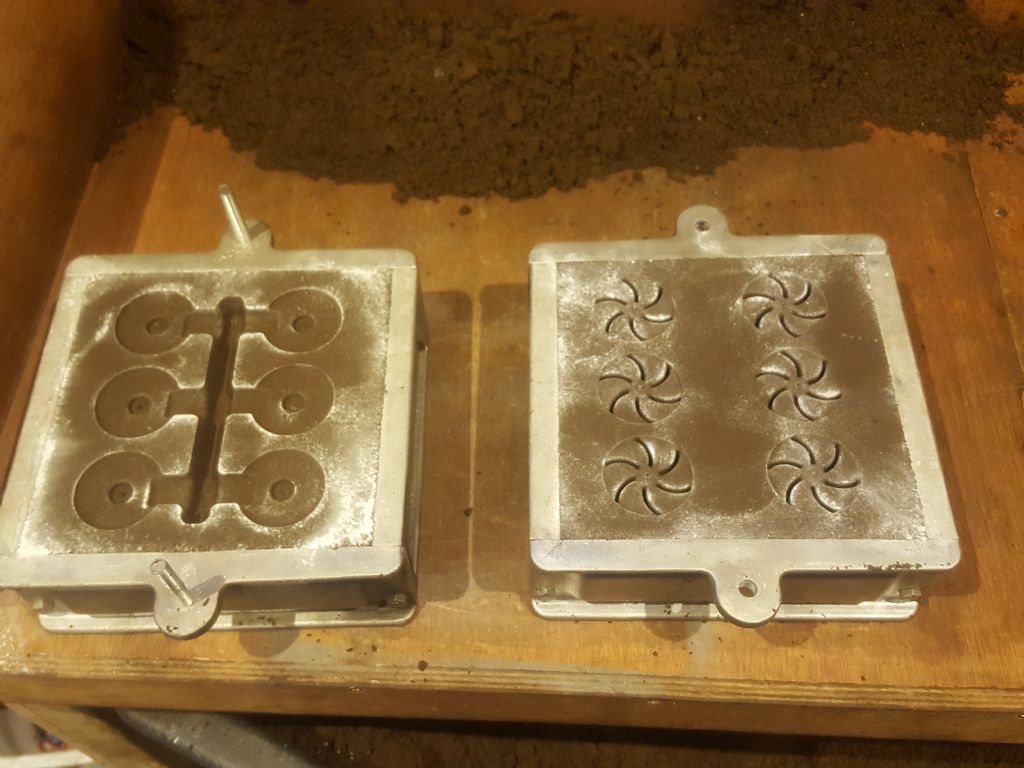
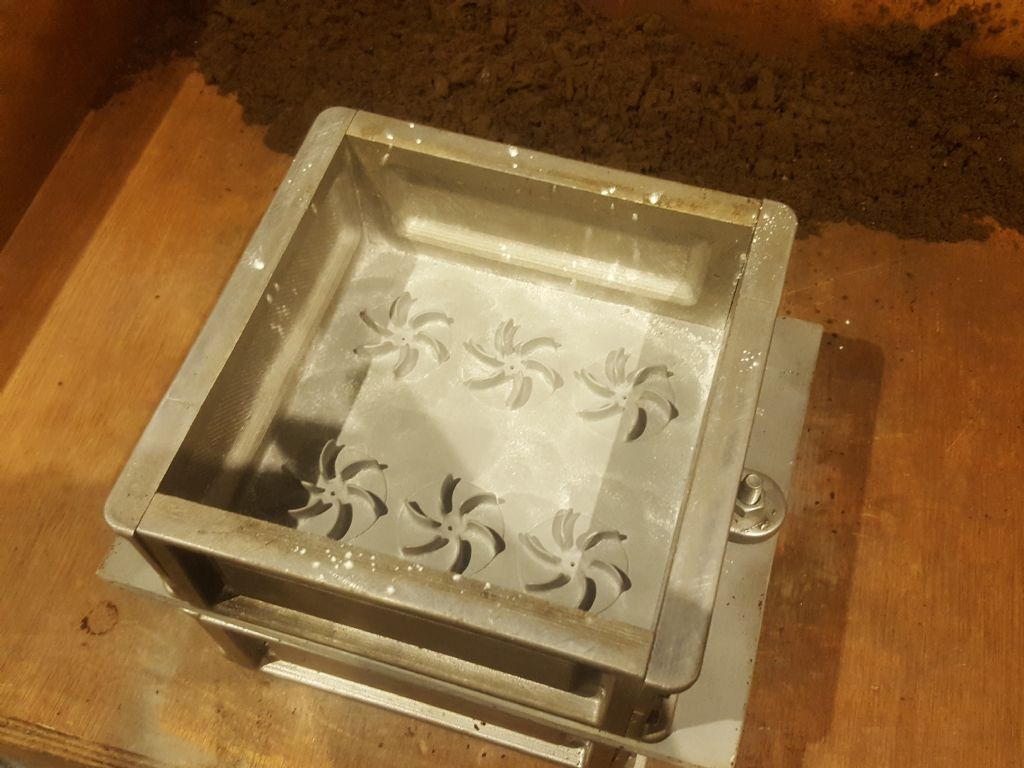
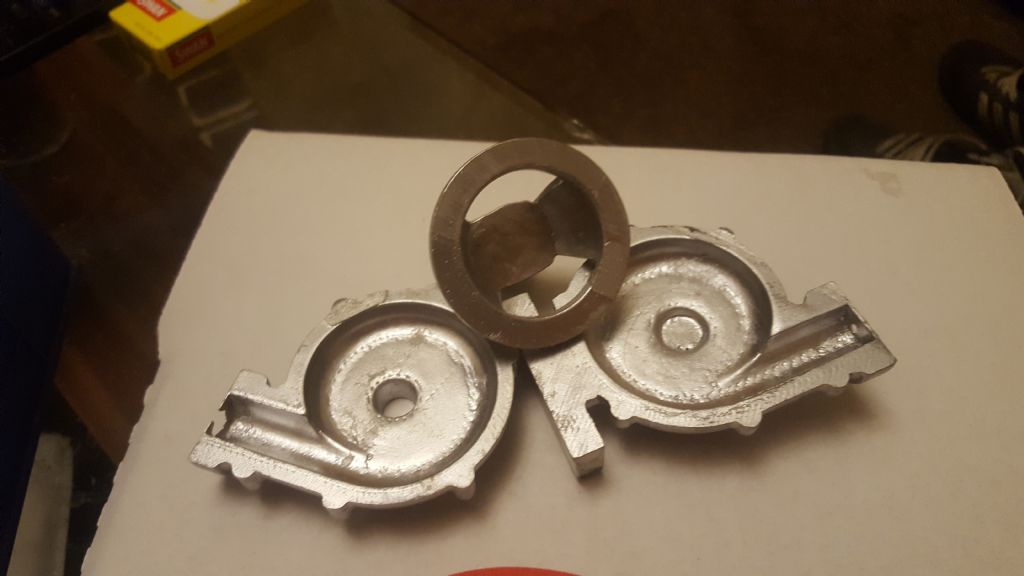
              I then use the patterns to make a sand mold and then remove the pattern and add a sprue and vent acordingly.

              My furnace is a very simple type very simular to any other home made furnace so nothing to realy see there.

              Here is a photo of the finished sand mold with the flask open. I use petrobond sand as it gives a much nicer finish and dosnt dry out when not in use. You can see some sand broke off but this is only the gating system and not part of the finished castings so still usable.

              #407347
              Cringle,model,engineering
              Participant
                @cringlemodelengineering

                20170906_105226.jpg

                #407348
                Cringle,model,engineering
                Participant
                  @cringlemodelengineering

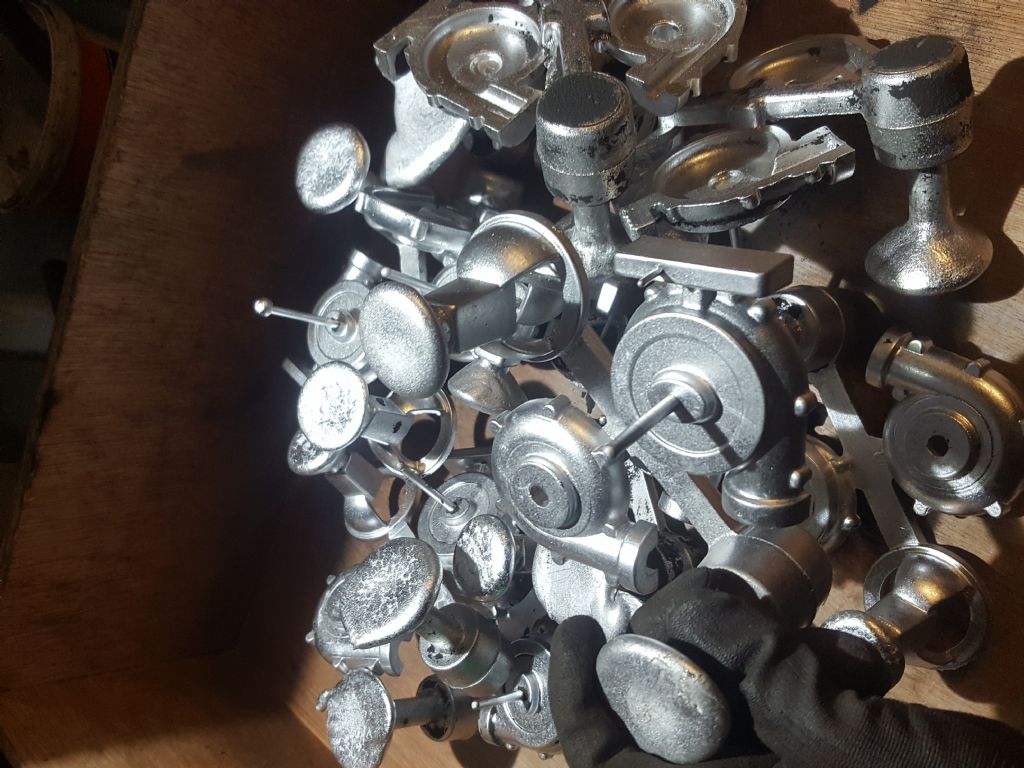
                  After a day breaking down alloy wheels and casting!

                  #407349
                  Cringle,model,engineering
                  Participant
                    @cringlemodelengineering

                    20171110_155906.jpg

                    #407350
                    Cringle,model,engineering
                    Participant
                      @cringlemodelengineering

                      Here i have a pic of the brass parts patterns.mobile upload 2019-05-01 13-57-44.jpg

                      #407351
                      Cringle,model,engineering
                      Participant
                        @cringlemodelengineering

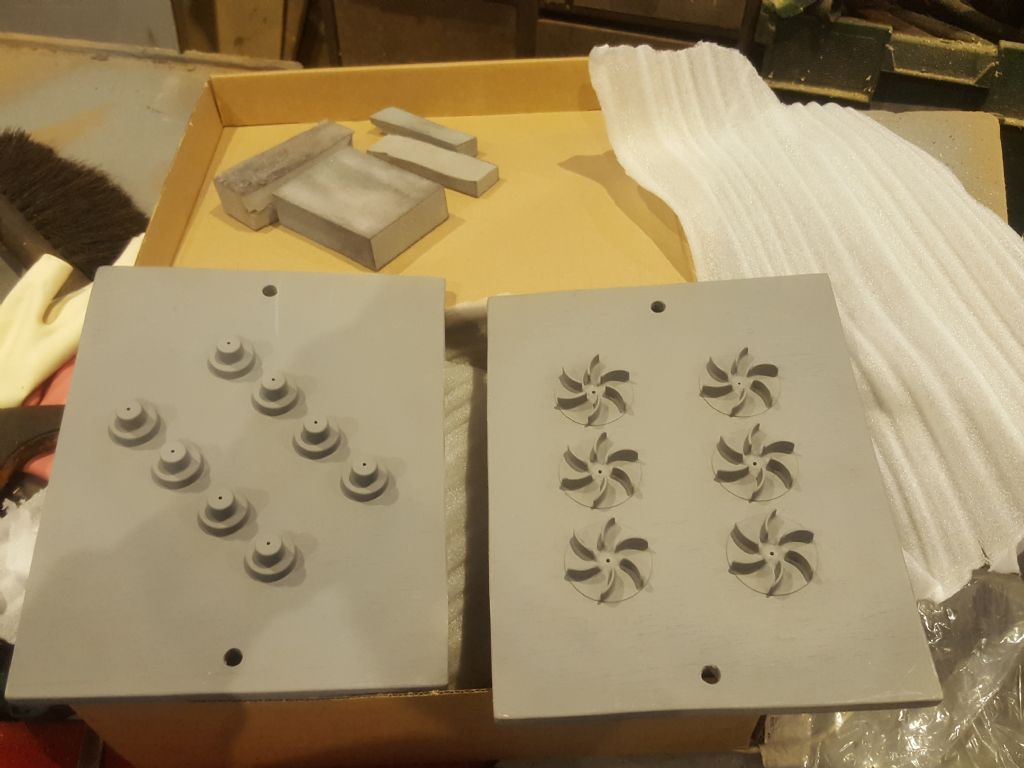
                        20180104_132043.jpg20180104_135220.jpgAnd some of the finished match plate patterns, with a view how they are used with the casting flasks.

                        20180104_125818.jpg

                        #407352
                        Cringle,model,engineering
                        Participant
                          @cringlemodelengineering

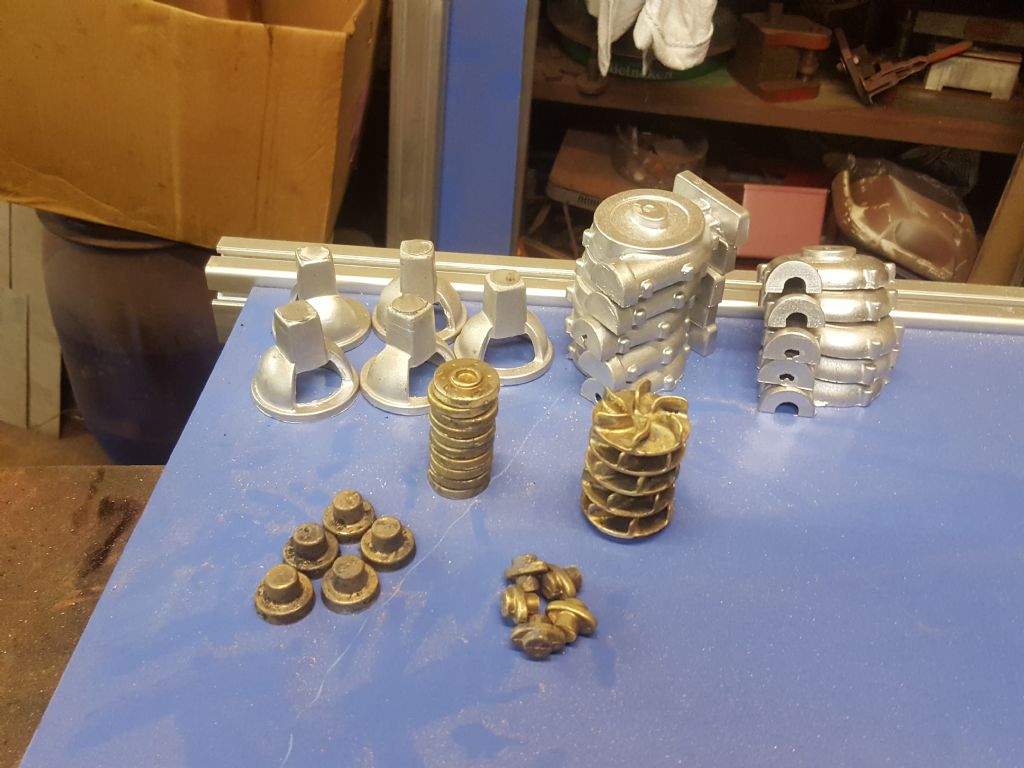
                          20180109_161200.jpg20171022_155540-1.jpgAnd after another day casting and fettling the parts..20171022_155505-1.jpg

                          #407420
                          Cringle,model,engineering
                          Participant
                            @cringlemodelengineering

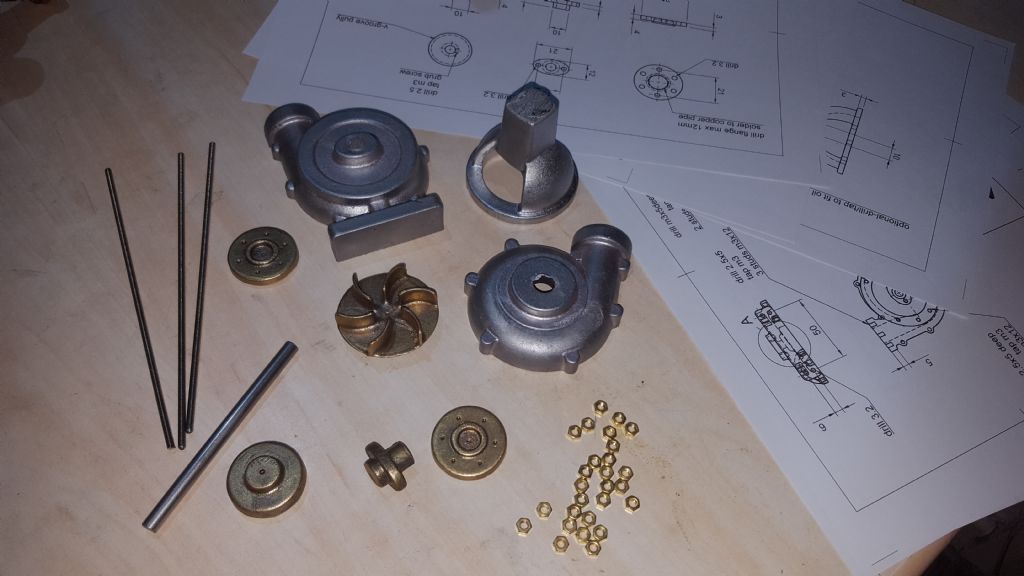
                            20171003_192352.jpgAll the castings finished and a few days spent making the drawings using fusion 360 and waitiing for the postman to deliver the bar stock and fittings.

                            20180110_231441.jpg

                            #407422
                            Cringle,model,engineering
                            Participant
                              @cringlemodelengineering

                              The front and rear shell were first machined in a simular way. Both first mounted in the three jaw chuck to trim up the joining faces. Then monted on the 7inch face plate to machine the front cover flange and the gland bore and trimmed to fit the bell housing (sorry not many pics taken of the machining)

                              20170829_193523.jpg

                              #407424
                              Cringle,model,engineering
                              Participant
                                @cringlemodelengineering

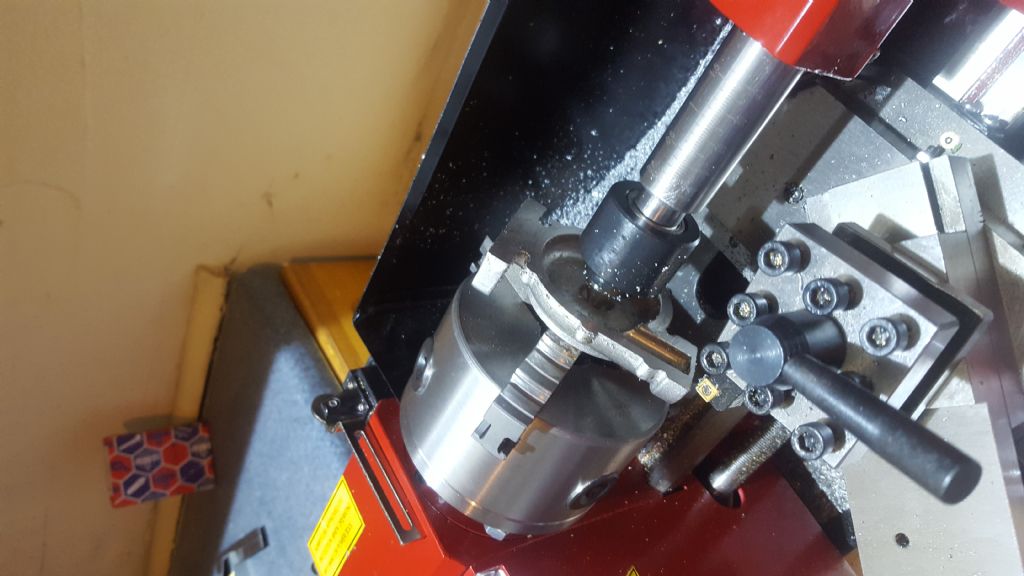
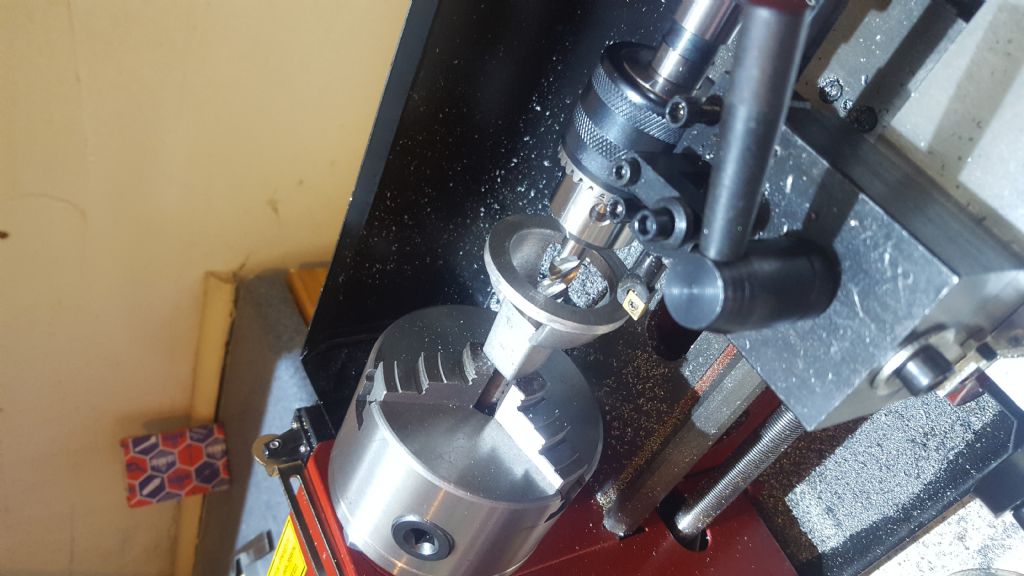
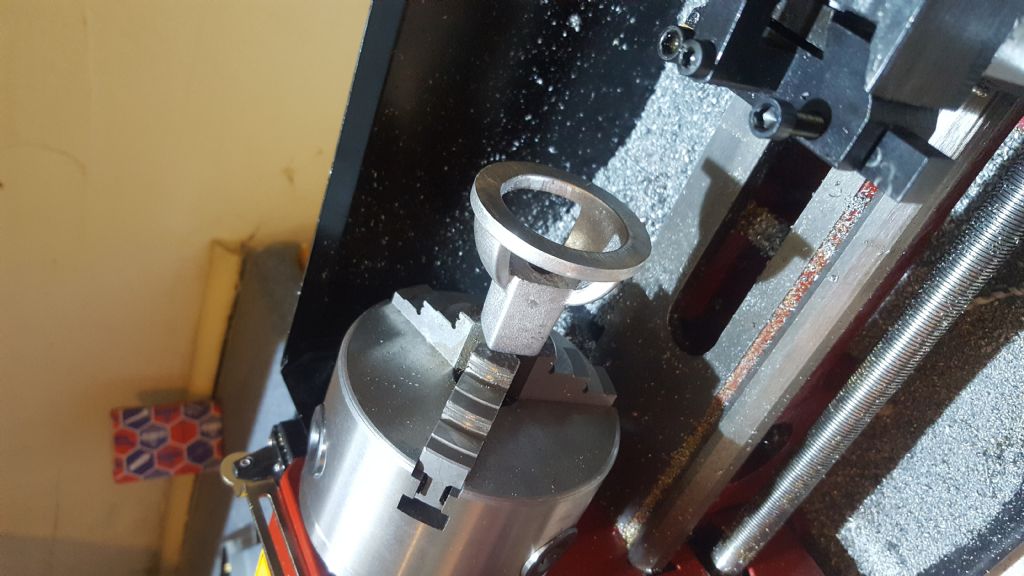
                                The bell housing is a awkward part to machine, it was first mounted in the 3 jaw and drilled through at 8mm. Then super glued onto a piece of 8mm bar stock. And then held in the 3jaw using the bar stock to machine the joining flange and cut the bore for the inner bearing, i used a 10mm milling cutter to start the bore then used a small boring bar to open up the 12mm bore for the bearing.

                                I then drilled the holes for the the studs and fitted the bell housing to the rear cover, mounted on the surface place and machined the outer bearing bore.

                                20170831_142935.jpg20170830_222038.jpg

                                Edited By cringle on 01/05/2019 23:50:00

                                #407426
                                Cringle,model,engineering
                                Participant
                                  @cringlemodelengineering

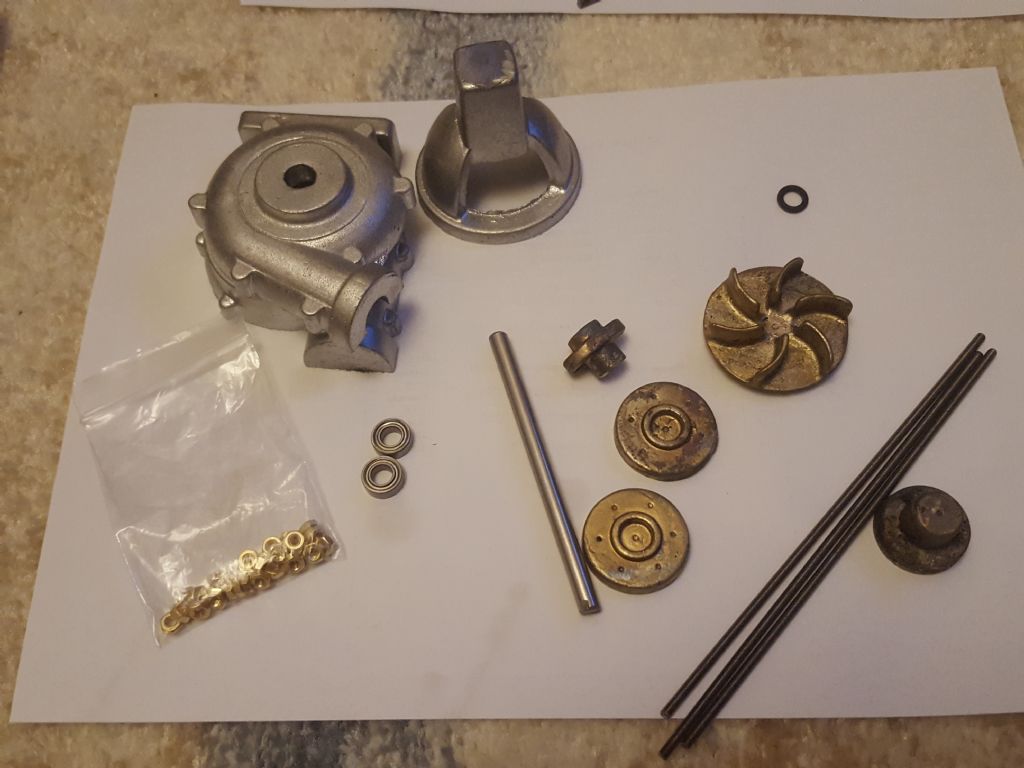
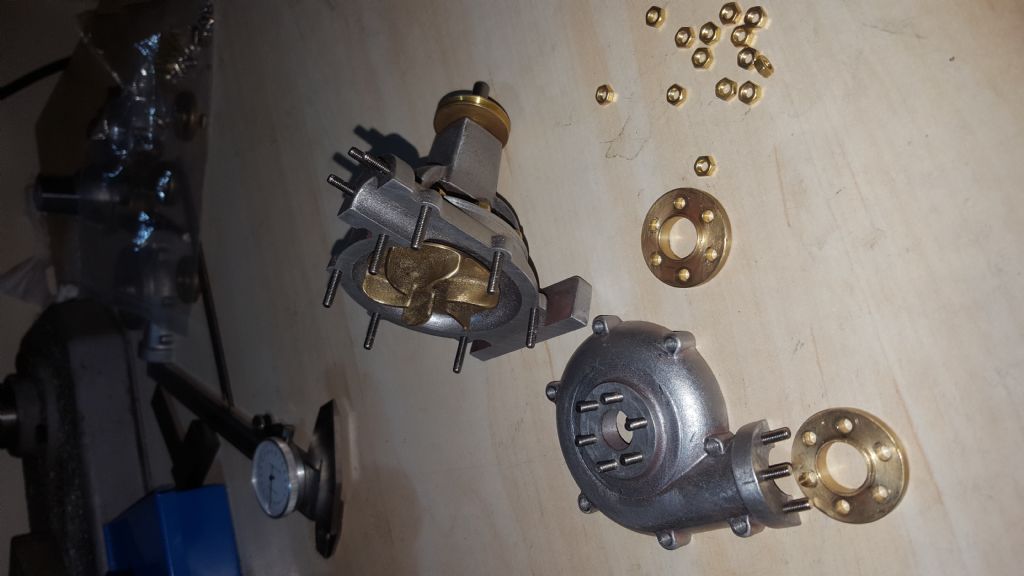
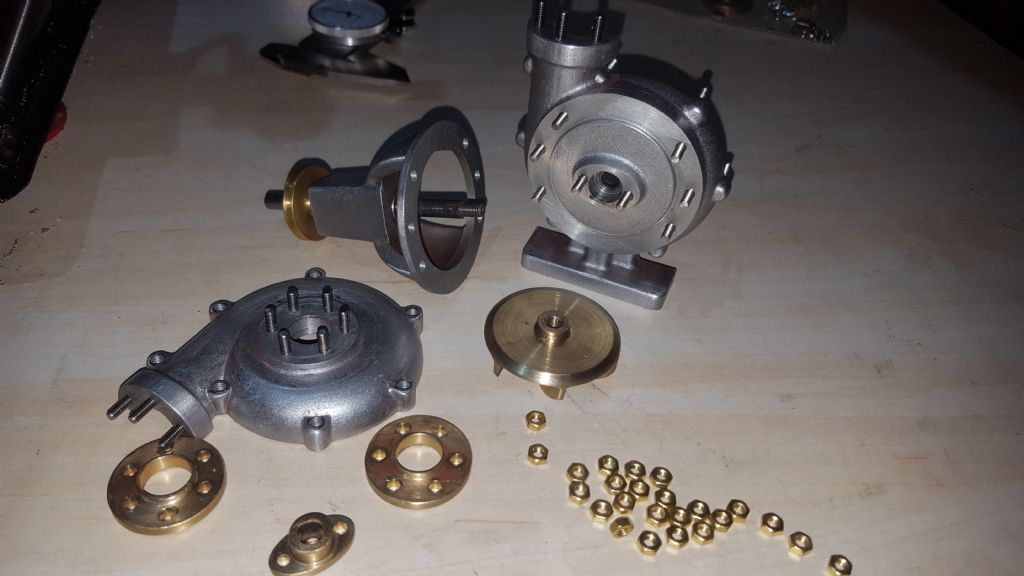
                                  20171003_193433.jpgAll the parts machined now sorry again not that many pics to show but mostly basic turning of the brass parts and shaft, and the top flange was cut to size when the front and rear shell were joined . This was done with a primitive milling set up on the mini lathe. here are all the parts finished and ready to fit after lots of little studs were made from 3mm stainles threaded rod.

                                  20171003_193728.jpg

                                  #409132
                                  Cringle,model,engineering
                                  Participant
                                    @cringlemodelengineering

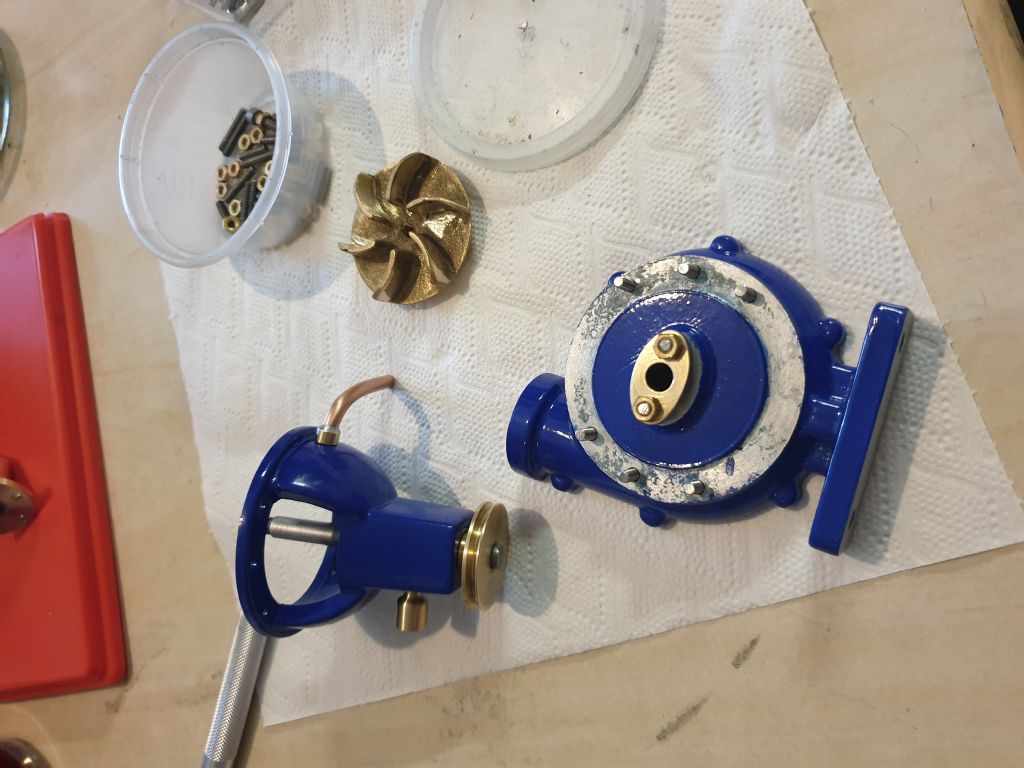
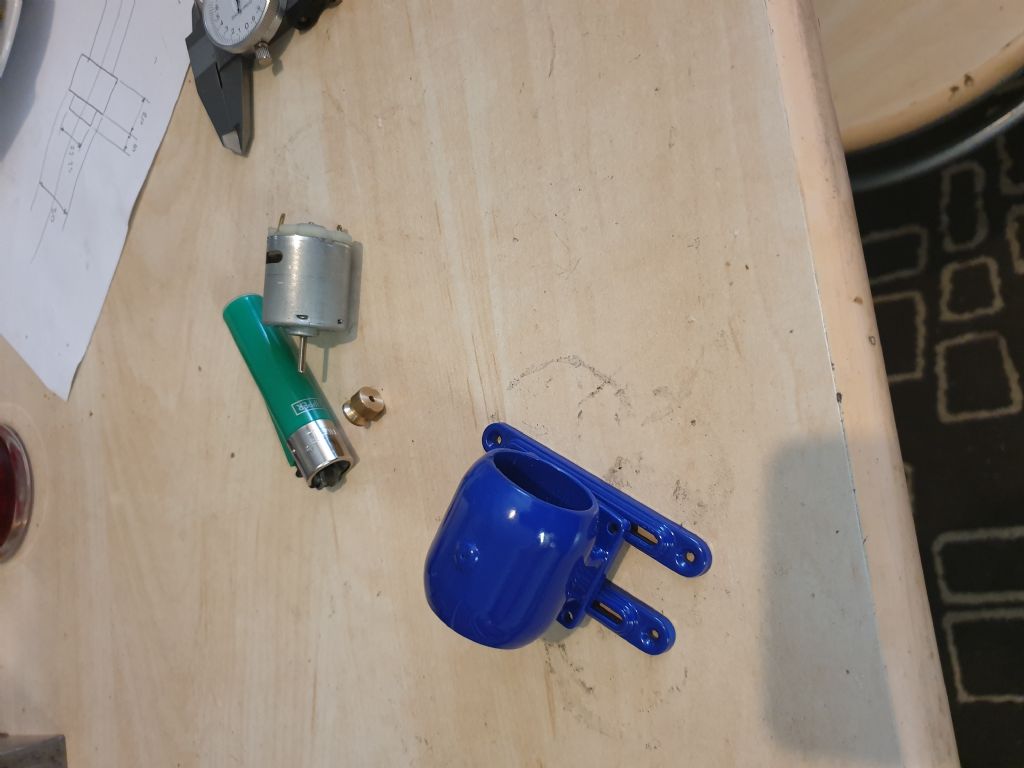
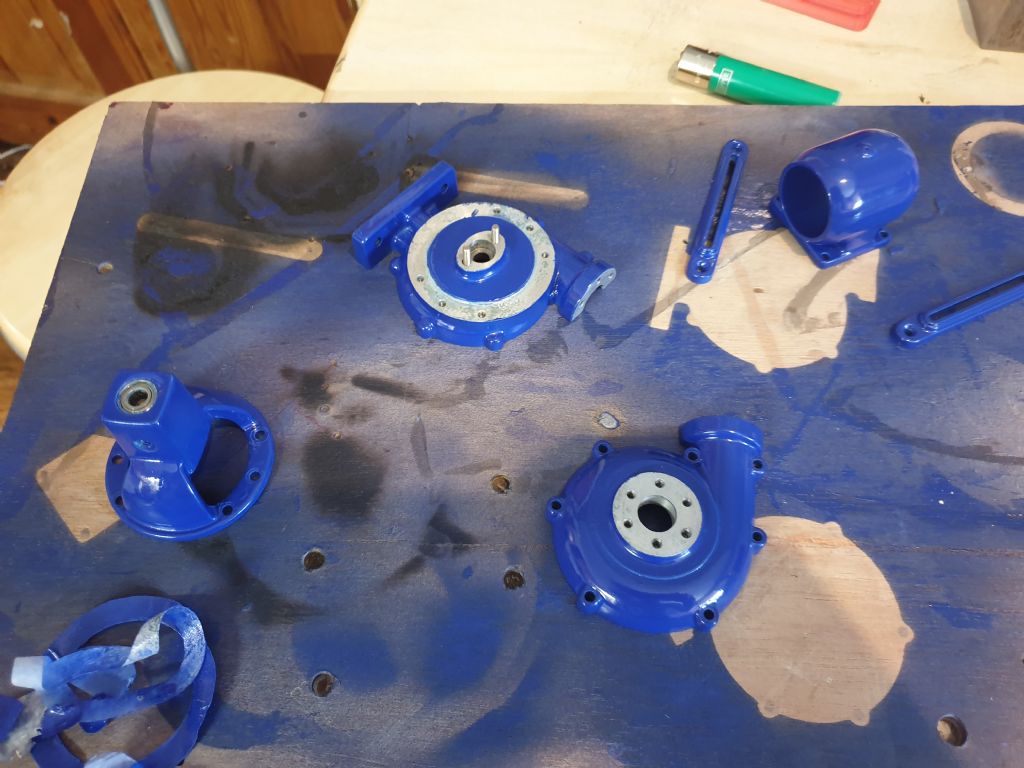
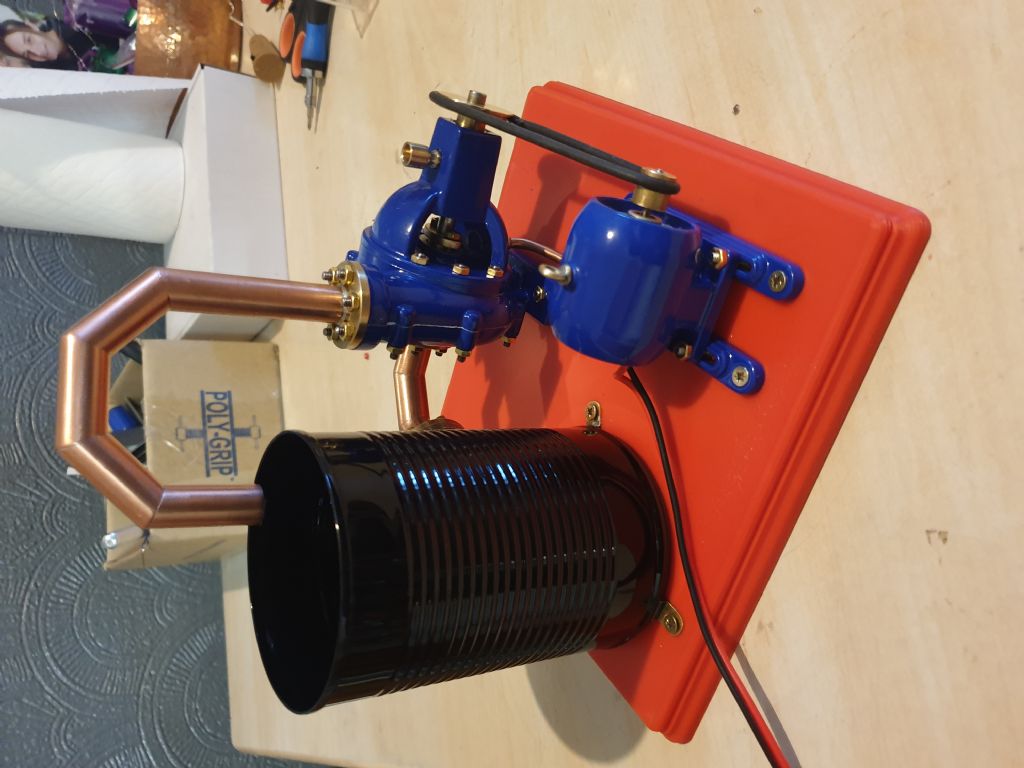
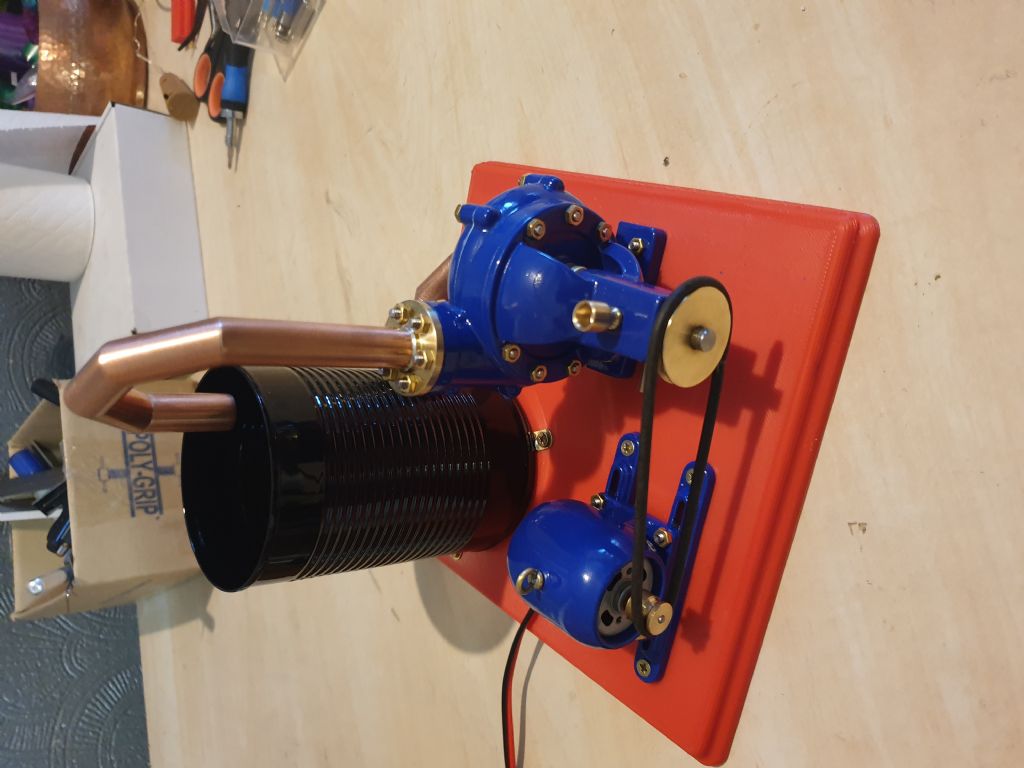
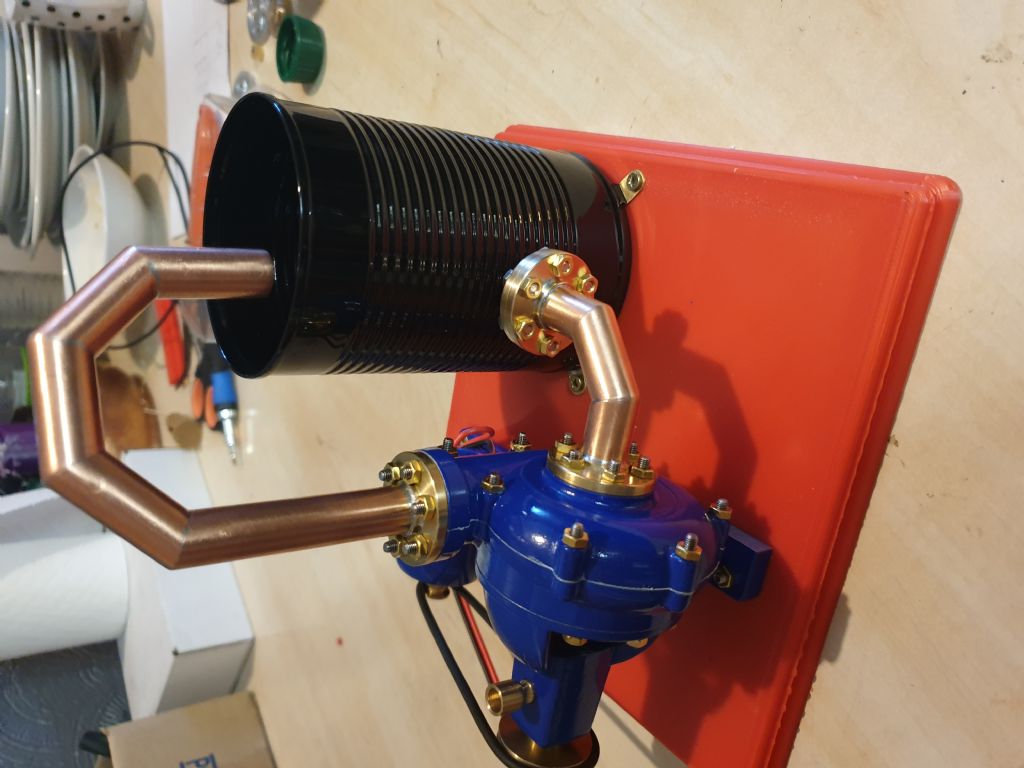
                                    The model will be run by a small electric motor for display purpose, thus is just the cheep comon dc motors suplied in most small toys and cars and was i think less than a pound on ebay. I 3d printed the motor shroud and rails then sand and paint to make the motor look more suitable. 20190513_152628.jpg20190513_150855.jpgFinaly getting close to finishing this model now. All the parts have been painted and all the brass bits polished. I also made a brass oil cup and a small copper pipe for the gland drain.

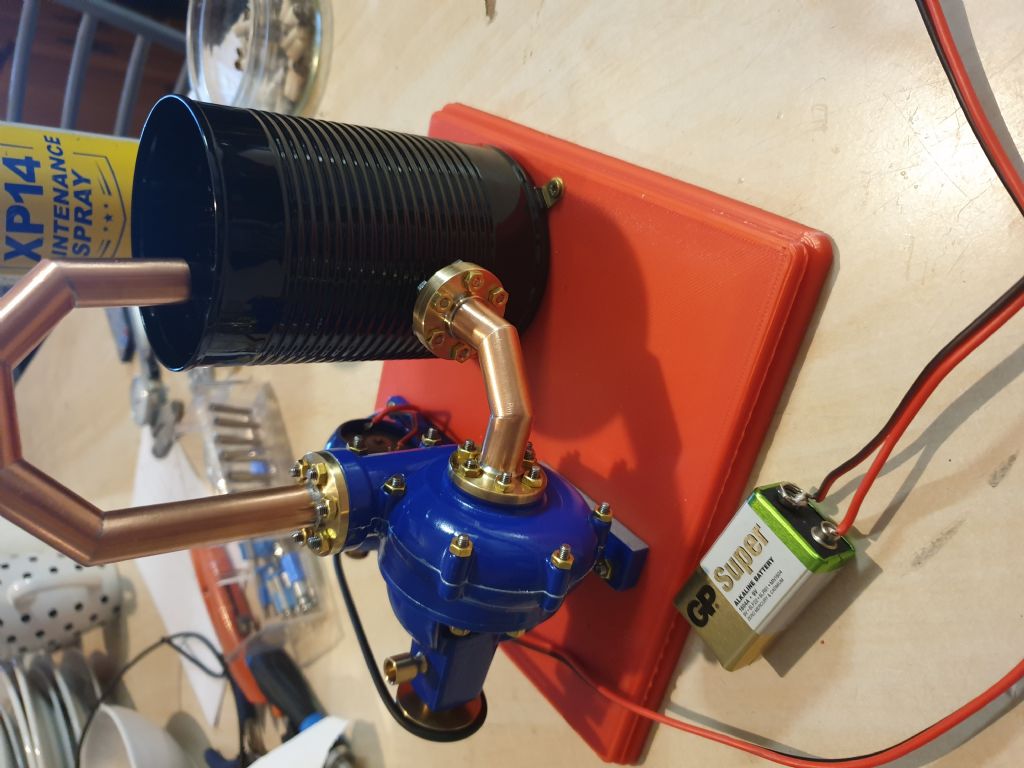
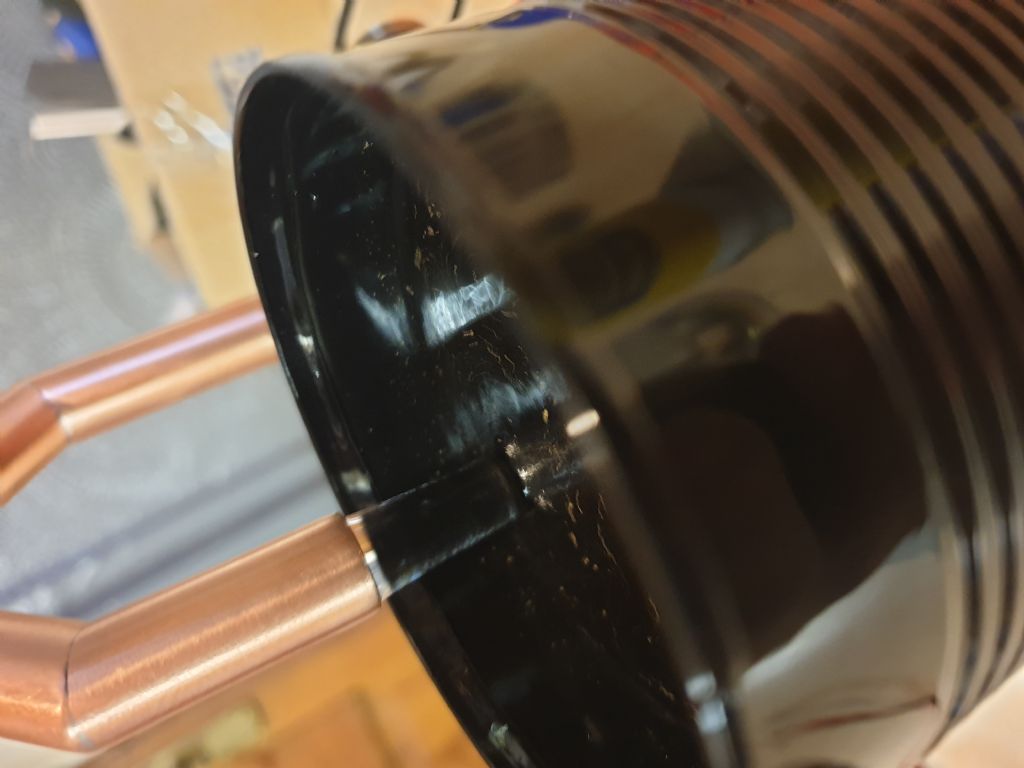
                                    I made two more pipe flanges and copper pipes for the pump. I have a pipe bender but was not happy with the bends so dicided to cut and solder the bends, this was done using a 3d printed miter block for the angles and lots of time cleaning up the solder. The water tank is just a tin can with the pipe and flange soldered to it and some small brass brackets to mount it.20190513_150753.jpg

                                    Edited By cringle on 13/05/2019 19:45:09

                                    #409134
                                    Cringle,model,engineering
                                    Participant
                                      @cringlemodelengineering

                                      20190513_190921.jpg20190513_190909.jpg20190513_190201.jpg20190513_190156.jpgGot all the bits made now and 3d printed a base plate. I have mounted and tested everything and it works realy well. It runs very silent and works great from just a tired old 9volt battery. I would guess the pump is only spinning around 300 rpm and so would be great for running direct from a flywheel on a steam plant.

                                      The base is tempory and will be used as a patrern to cast a alloy base the same amd thats all for this ome feels good to actually finish somthing.. nearly.20190513_190151.jpg

                                    Viewing 17 posts - 1 through 17 (of 17 total)
                                    • Please log in to reply to this topic. Registering is free and easy using the links on the menu at the top of this page.

                                    Advert

                                    Latest Replies

                                    Home Forums Miscellaneous models Topics

                                    Viewing 25 topics - 1 through 25 (of 25 total)
                                    Viewing 25 topics - 1 through 25 (of 25 total)

                                    View full reply list.

                                    Advert

                                    Newsletter Sign-up