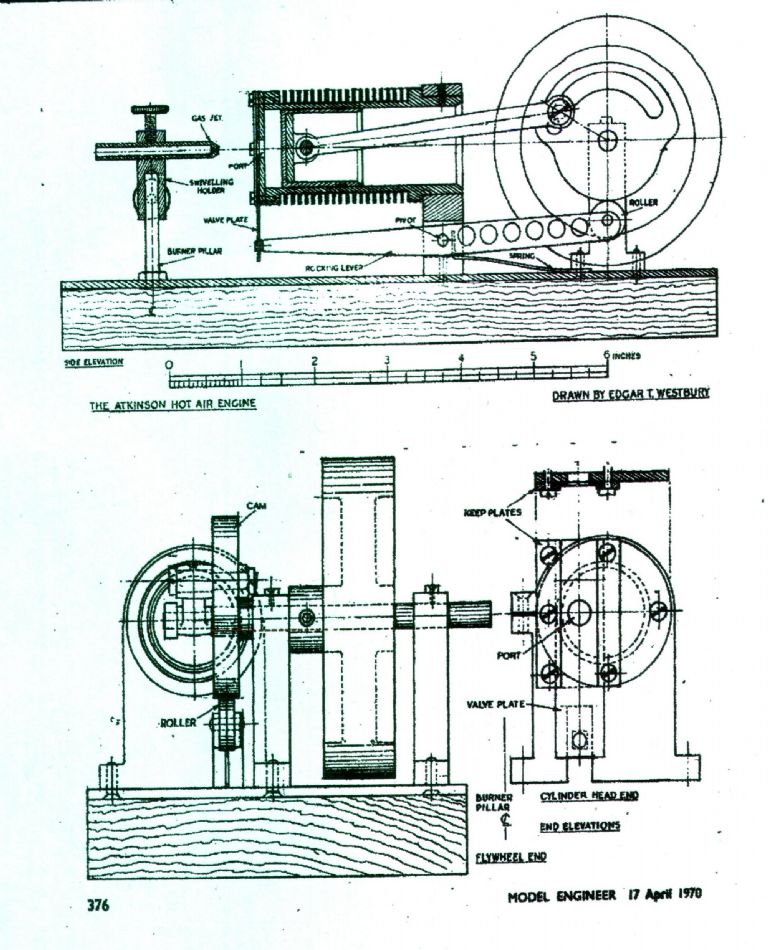
Has anybody built the flame eater “Nick”?

Advert

Has anybody built the flame eater “Nick”?

Home Forums Miscellaneous models Has anybody built the flame eater “Nick”?

Viewing 25 posts - 1 through 25 (of 246 total)
  • Author
    Posts
  • #4258
    Brian John
    Participant
      @brianjohn93961

      This is another pre-milled kit from Bengs

      Advert
      #231315
      Brian John
      Participant
        @brianjohn93961

        I am planning my next project (when I get my tailstock in working order). I was thinking of building another Stirling engine but I do not think ''John'' has English instructions.

        **LINK**

        This may not be too much of a problem as the ''Laura'' Stirling engine had very good plans/diagrams and the English instructions were very limited in that they do not tell you how to make the parts. It is assumed that the builder already knows how to do that.

        The flame eater ''Nick'' looks interesting and it has English instructions. The base is also pre-milled which is useful because I do not have a router. Has anybody built this engine before ? Do you have any hints about the build ? Are flame eater engines any more difficult to get going than Stirling engines ?

        **LINK**


        Edited By Brian John on 23/03/2016 13:13:23

        #231333
        Vic
        Participant
          @vic

          I can't help but have you seen this site, lots of nice engines and the drawings/instructions are very good.

          **LINK**

          #231334
          Jeff Dayman
          Participant
            @jeffdayman43397

            Have not built Nick but years ago built one called "Poppin" serialised in a US magazine.

            I did get it to run but I made 3 different cylinders and 8 different pistons before it would run. Also had ongoing problems with the shim steel valve losing its' temper due to exposure to the burner, and also shifting poition on the valve rod. I had about 15 years experience in metal model making when I built that engine, and many years more than that fixing / rebuilding car and motorcycle engines for road and track use. I was no novice, and had a hell of a time with it.

            As piston/ cylinder fit are absolutely critical with vacuum / flame lickers and the valve issues just about drove me crazy I can not recommend these as a beginner engine. However maybe being a Bengs kit some of these issues may have been ironed out, especially if piston and cylinder come pre-fitted. If not, you may have grave difficulties.

            Why not try a gauge 1 loco or a small steam tractor for next project? probably a lot less heartache for you getting a steam device built and running rather than Stirling or vacuum engines. There is one simple loco I have seen plans for called "cracker" that many beginners have made successfully. Rudy Kouhoupt's 3/4" scale steam tractor is not too complex either. JD

            #231344
            Neil Wyatt
            Moderator
              @neilwyatt

              Hmm, that cheers me up… being half way through a Poppin…

              Neil

              #231345
              Tim Chambers
              Participant
                @timchambers76147

                "As piston/ cylinder fit are absolutely critical with vacuum / flame lickers."

                Well that must make me an absolutely jammy sod then, because my scratch built flame licker runs like a treat and I cannot say that it is built with any great precision.

                #231409
                Brian John
                Participant
                  @brianjohn93961

                  Vic : thank you for that link. I have not seen that site before. I will have a close look at their machines and prices before I order anything else.

                  #231599
                  Ian S C
                  Participant
                    @iansc

                    Brian, they probably are harder to get going than Stirling Engines, my score is 2 out of 3 going, the one that doesn't go is the one designed by Jan Ridders, the first one was an indistinct drawing in an old Model Engineer, and the other one is the same, scaled up.

                    I built it to the drawing, but last year I made a new cylinder head with a central slot 1/4" high x 3/8" wide.

                    Ian S C

                    Vacuum Engine

                    Edited By Ian S C on 25/03/2016 09:13:07

                    #231603
                    Vic
                    Participant
                      @vic
                      Posted by Brian John on 24/03/2016 07:52:54:

                      Vic : thank you for that link. I have not seen that site before. I will have a close look at their machines and prices before I order anything else.

                      Jan Ridders doesn't sell kits but he will let you have a set of plans if you email him. Lots of folks have built his designs.

                      #231605
                      Brian John
                      Participant
                        @brianjohn93961

                        Ian : that was my gut feeling on the matter too ie. a flame licker is more difficult to get running. Although they are interesting and unusual. At this stage I am leaning towards the ''John'' Stirling engine even though it has no English instructions.

                        #231606
                        JasonB
                        Moderator
                          @jasonb

                          You should be able to translate it online like the LeGrande one you made before.

                          #238662
                          Brian John
                          Participant
                            @brianjohn93961

                            I bought the Nick flame eater kit. It arrived on Friday and I have been looking through the instructions before starting anything. They say that the most difficult part is the cylinder (part #20) : ''the cylinder bore should be drilled first and reamed or turned to size…..then turn the cooling fins''

                            I would have turned the cooling fins first as then the work piece can be supported between centres. Any thoughts on that ?

                            ''Then turn the cooling fins, but do not yet overwind lengthwise''

                            What does that mean ?

                            flame eater plans 1.jpg


                            Edited By Brian John on 14/05/2016 17:35:14

                            #238667
                            Brian H
                            Participant
                              @brianh50089

                              I built a Poppin many years ago to run on lighter gas. It worked very well and still does. My 10 year old son also built one (must admit with a bit of help) and that also worked.

                              #238687
                              duncan webster 1
                              Participant
                                @duncanwebster1

                                I've no idea what overwinding means, but I'd stay clear of reaming the bore, I'd bore it and then lap it to fit the piston using a lead lap

                                #238912
                                Brian John
                                Participant
                                  @brianjohn93961

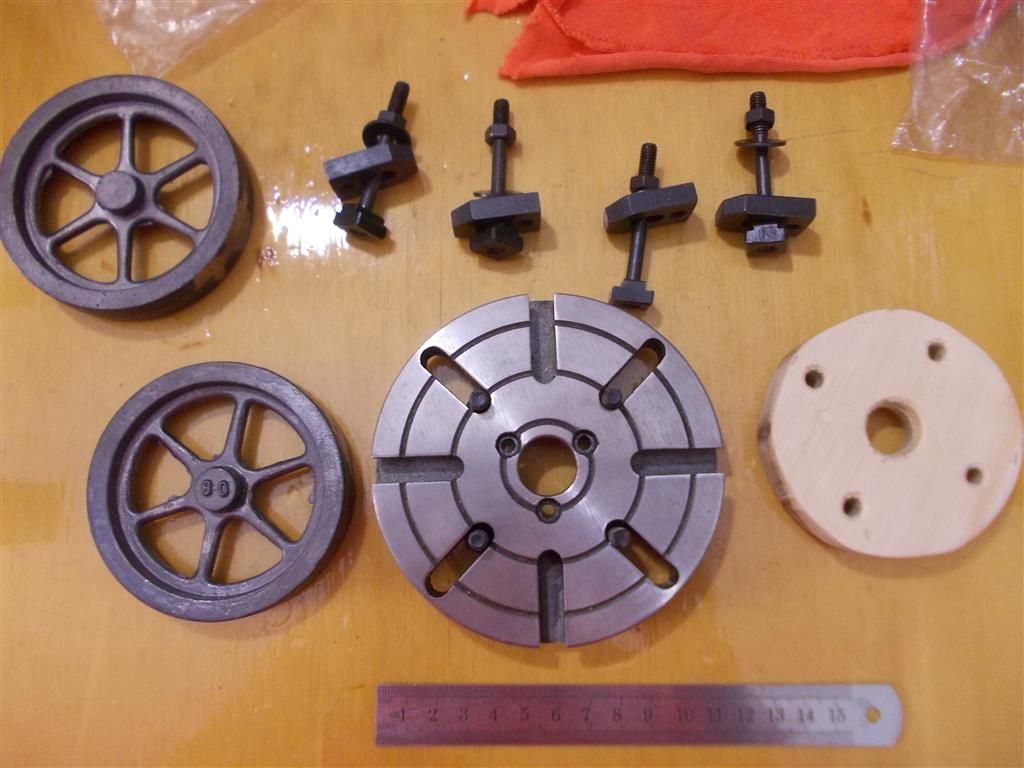
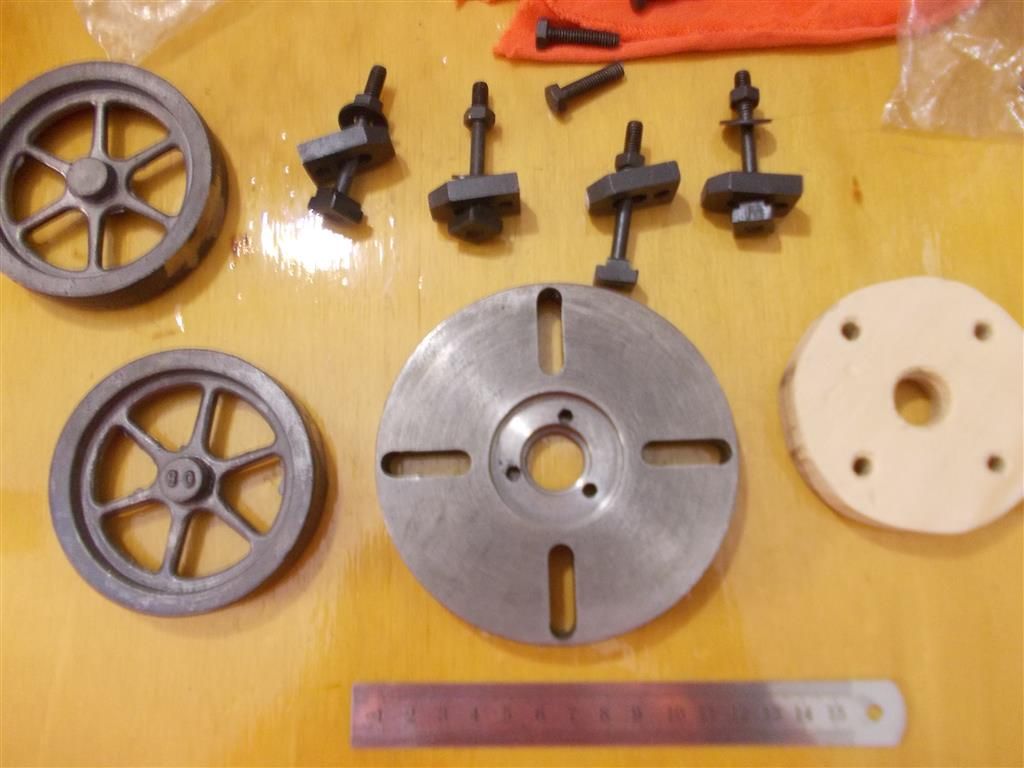
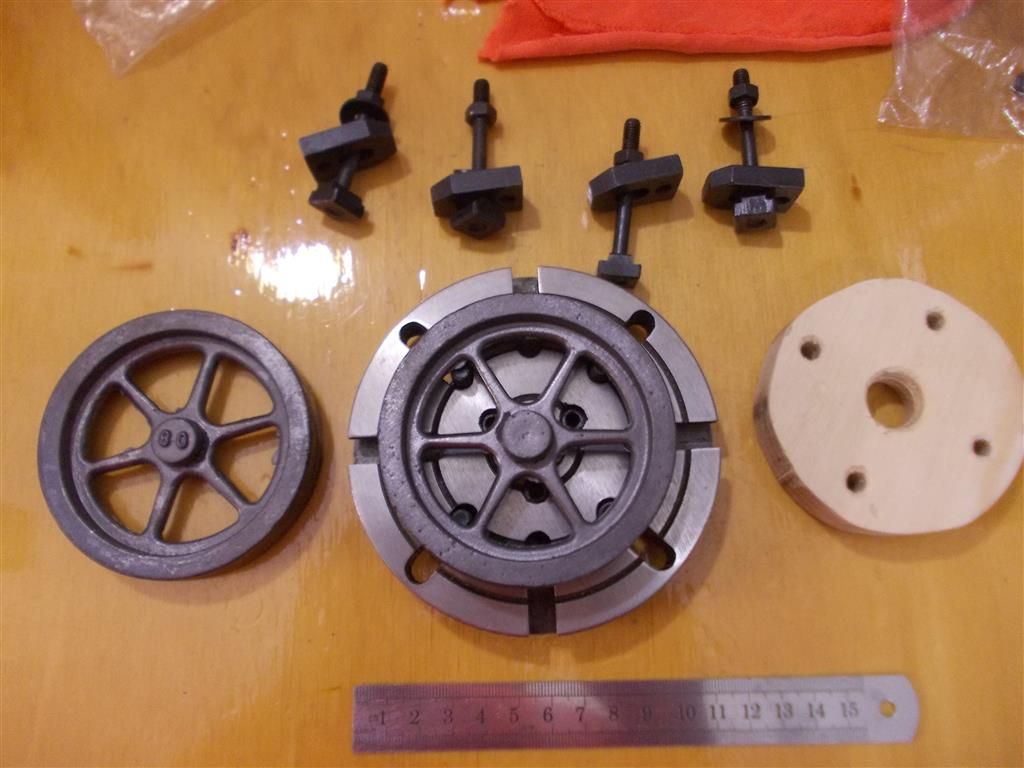
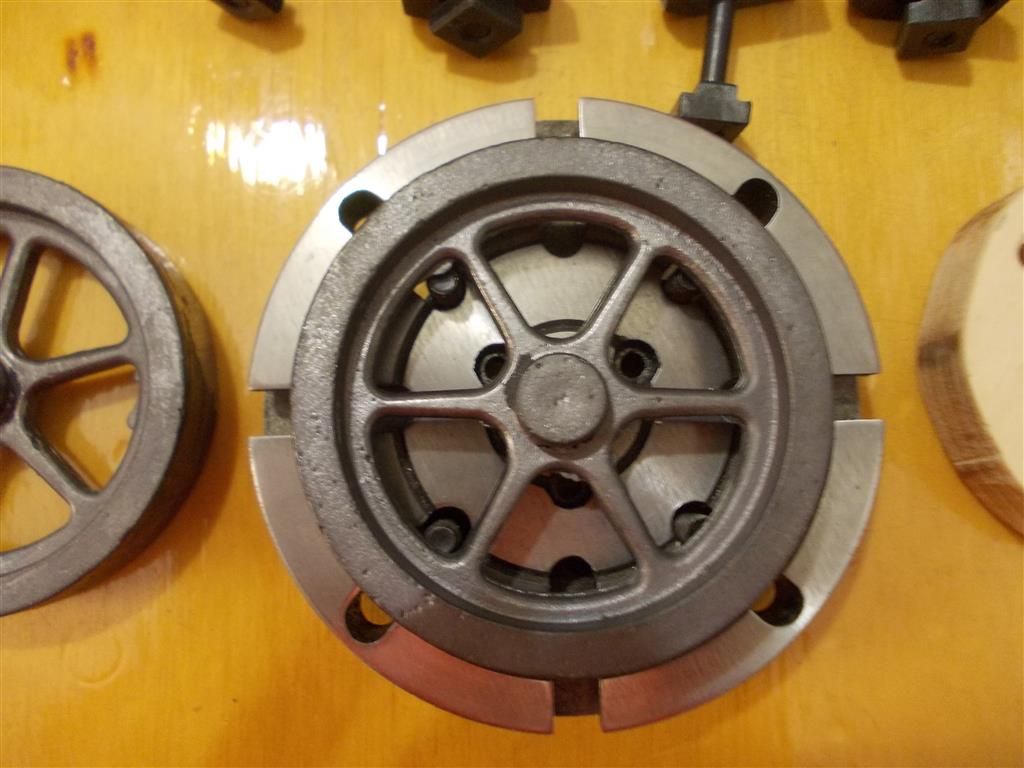
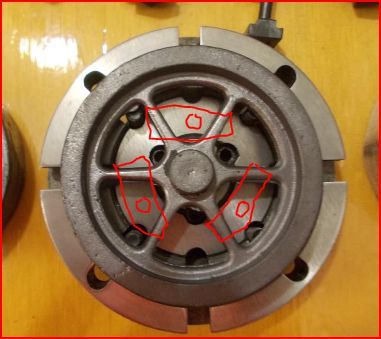
                                  I have cleaned up the cast iron flywheels with the angle grinder today (lots of casting flash) and I am trying to work out how to attach them to the face plate prior to being machined. I have never used the face plate before, having machined all my previous flywheels using a steel mandrel. I cannot work out how to bolt the flywheels to the face plate ; the flywheels do not seem quite big enough to get the bolts through any of the provided slots and holes.

                                  I may have to use the face plate to get the centre holes drilled and then switch over to a mandrel to finish machining the edges and outer surfaces. I am hoping not to have to do that : I have found cast iron  to be more difficult to machine with a mandrel then brass or aluminium as it vibrates a lot more causing chatter.

                                  flywheel 1.jpg

                                  flywheel 2.jpg

                                  flywheel 3.jpg

                                  flywheel 4.jpg


                                  Edited By Brian John on 16/05/2016 12:11:27

                                  #238925
                                  steamdave
                                  Participant
                                    @steamdave

                                    One way of holding the flywheel would be to screw a piece of MDF which is larger than the flywheel diameter to the faceplate. Make a central hole to clear the boss if it protrudes beyond the height of the rim. Use 3 bridge clamps over pairs of spokes screwed into the MDF. Before the clamps are tight, juggle the casting so that the inside of the rim runs as true as possible then tighten up for machining.

                                    Now you will be able to machine the edge and one side of the rim, and clean up the boss and make the central hole. After that, you can hold the wheel on your mandrel or in the 4 jaw chuck to clean up the other side of the rim and finish off the boss.

                                    Dave
                                    The Emerald Isle

                                    #238933
                                    JasonB
                                    Moderator
                                      @jasonb

                                      Another option would be to drill and tap some additional holes in the faceplate to suit your clamp threads. Then just span across two spokes with a clamping plate.

                                      bj flywheel.jpg

                                      #239045
                                      Brian John
                                      Participant
                                        @brianjohn93961

                                        1. Okay, I will drill and tap for M5 (tap drill = 4.2mm). What is the face plate likely to be made of and how difficult will it be to drill and tap ?

                                        2. How thick should the timber or MDF board be on which the face plate rests ie. how far from the face plate should the closest edge of the flywheel be ?

                                        Edited By Brian John on 17/05/2016 13:46:22

                                        #239070
                                        JasonB
                                        Moderator
                                          @jasonb

                                          1. probaly cast iron so shoud drill & tap OK, mine did.

                                          2. does not need to be much just something to let the tool run out into, 6mm would do.

                                          #239172
                                          Ian S C
                                          Participant
                                            @iansc

                                            I,v got 8 full sheets of 3 mm MDF, so I use that, but cardboard, maybe more than 1 layer is quite ok between the FW and the faceplate.
                                            Ian S C

                                            #239187
                                            bricky
                                            Participant
                                              @bricky

                                              Be careful that you don't overtighten the clamps as to much will break the spokes.

                                              Frank

                                              #239211
                                              Brian John
                                              Participant
                                                @brianjohn93961

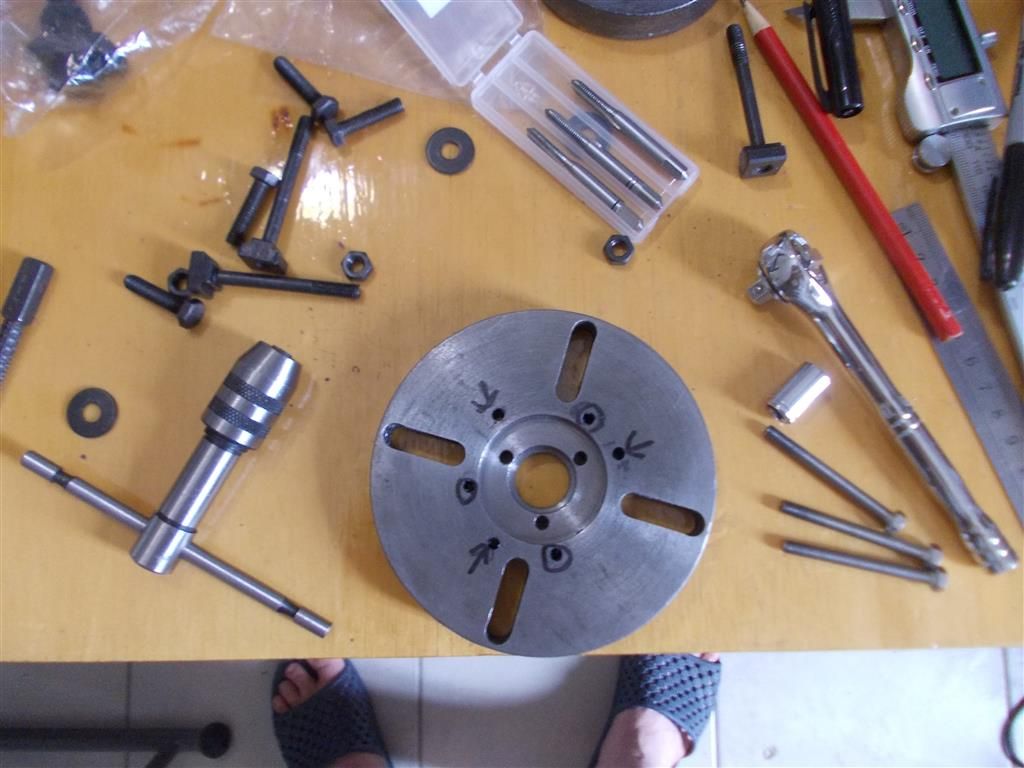
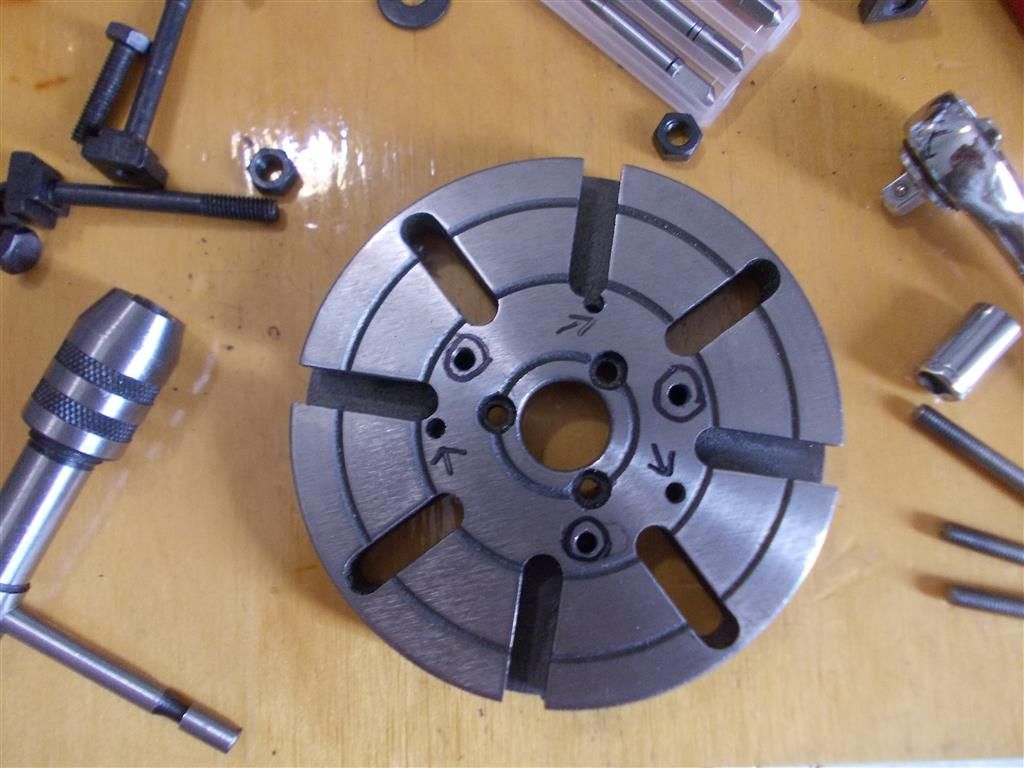
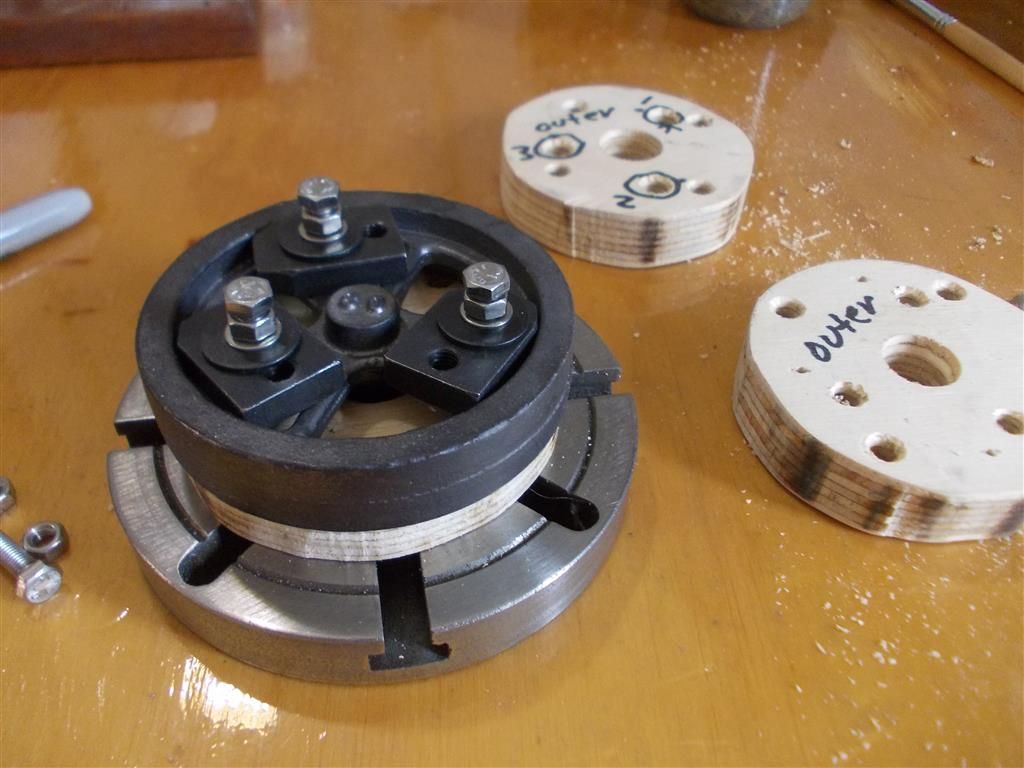
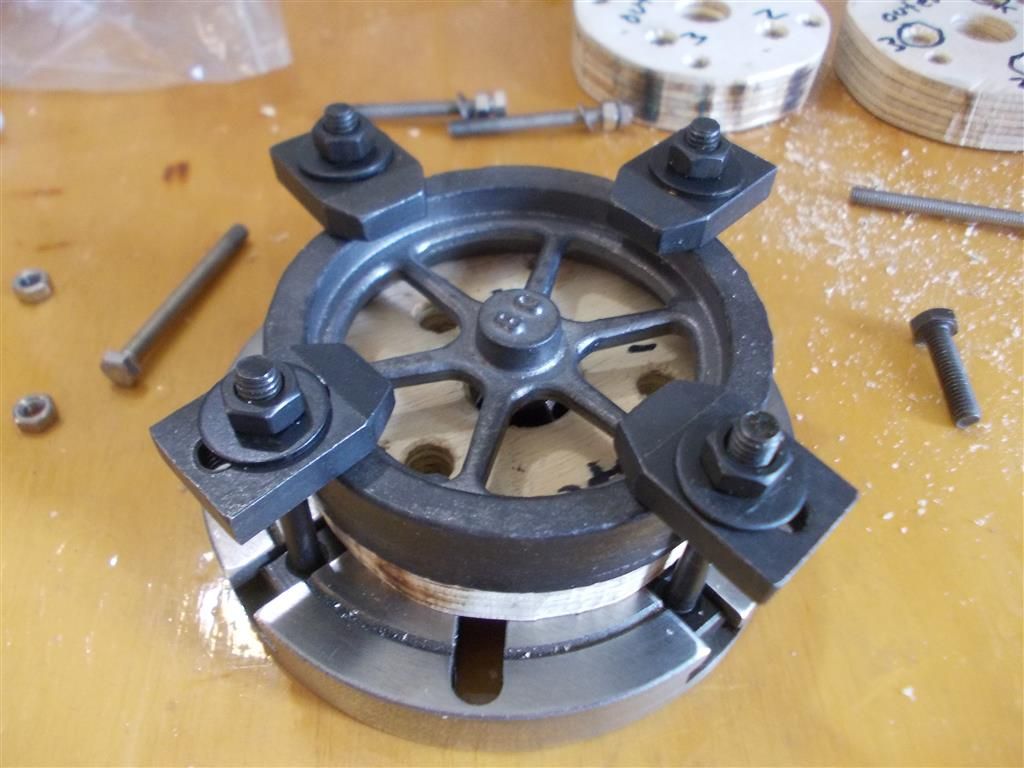
                                                I have drilled and tapped the face plate for M5. I made a mistake by drilling from the back in the first instance (holes with arrows). I was trying to avoid the recess on the back of the plate but I forgot about the recesses on the front. So I ended up drilling through the edges of some of those front recesses…not good for tapping. I drilled a second set of holes from the front ( holes with circles) and these were finally in the correct place for tapping. I used plenty of tap magic and there were no problems tapping into the cast iron face plate.

                                                I am still a bit confused how to go about this. There is not a lot of room once the clamping plates are added to the centres (photo 3) so I am not sure I can take a facing cut off the hub doing it this way. I may have to put the clamps on the outside (photo 4) and take a facing cut across the hub then drill/ream the centre hole that way. But having done that, I am not certain of maintaining concentricity when I remove the outer clamps. I may then have to use the mandrel to finish the outer surface and the rims.

                                                I think it is a case of not being able to see the forest for the trees ! 

                                                faceplate 1.jpg

                                                faceplate 2.jpg

                                                faceplate 4.jpg

                                                faceplate 5.jpg


                                                Edited By Brian John on 18/05/2016 14:33:24

                                                #239215
                                                JasonB
                                                Moderator
                                                  @jasonb

                                                  With care you should just be able to face teh edge and stop the tool before it hits the clamp plates.

                                                  Alternative would be to make some smaller and/or thinner clamping plates, may even find that just those large washers will do without the plates.

                                                  #239293
                                                  Brian John
                                                  Participant
                                                    @brianjohn93961

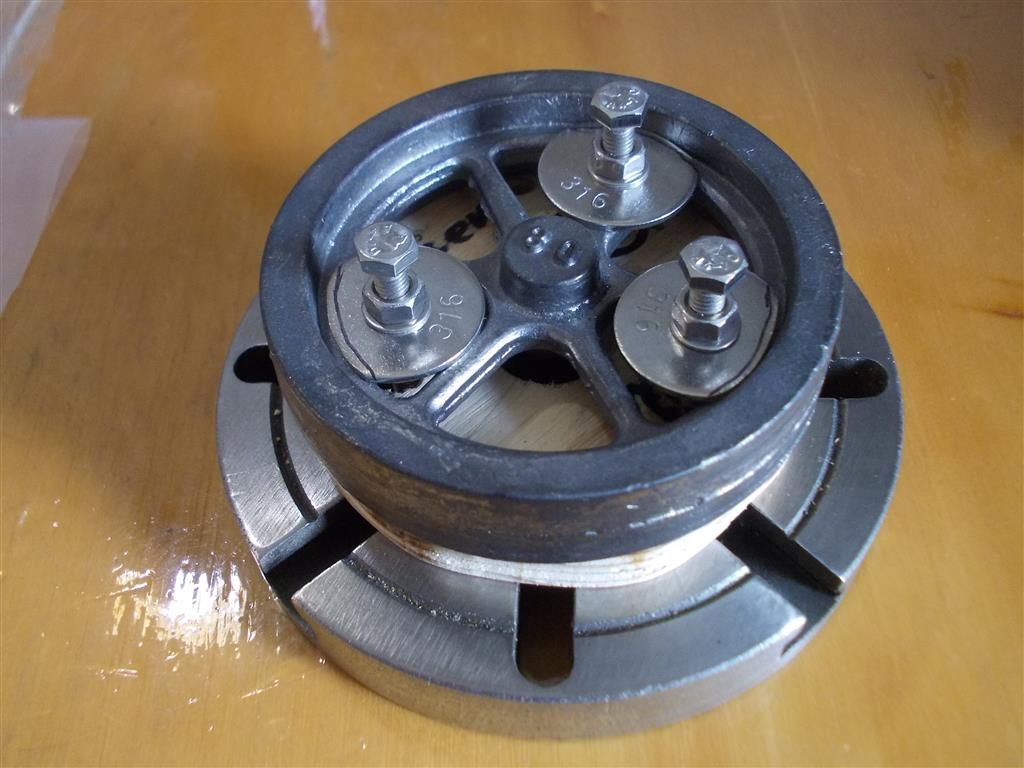
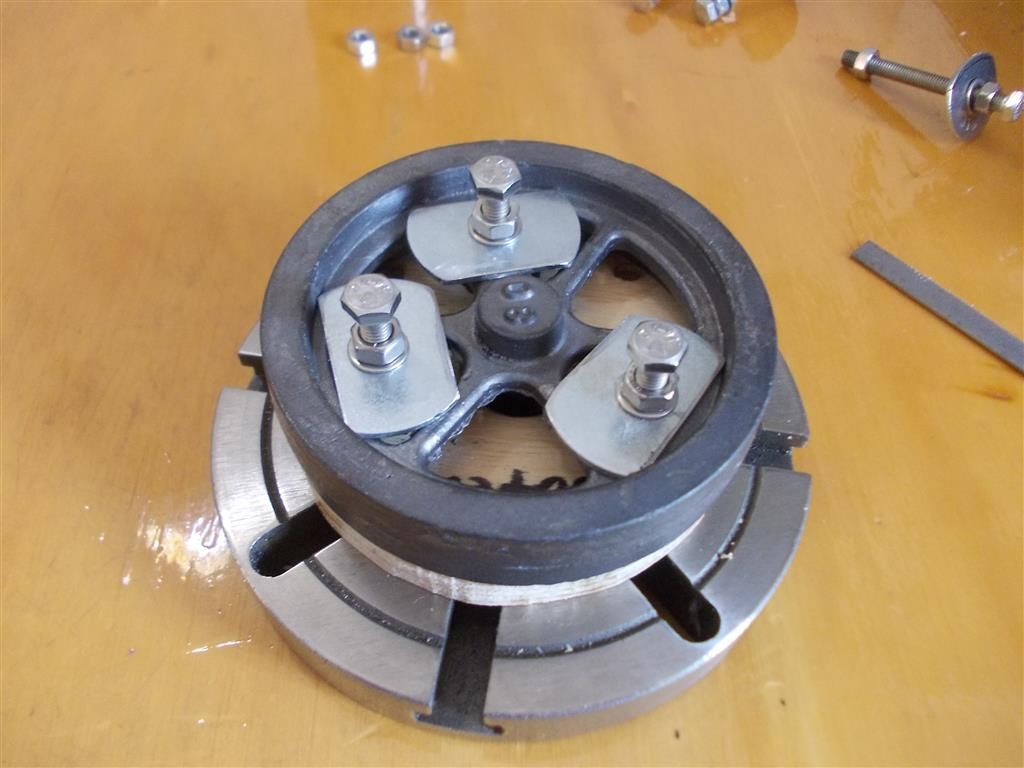
                                                    I made up some clamping plates from 25mm M5 washers today by shaping them on the bench grinder (photo 1). I did not think they quite covered the spokes enough so I used some 31mm washers and cut some tangents off them with the angle grinder ( photo 2). That seems to be a better fit and I hope to give the face plate a tryout on the lathe tomorrow.

                                                    faceplate 6.jpg

                                                    faceplate 7.jpg

                                                    #239332
                                                    JasonB
                                                    Moderator
                                                      @jasonb

                                                      That should do the job.

                                                    Viewing 25 posts - 1 through 25 (of 246 total)
                                                    • Please log in to reply to this topic. Registering is free and easy using the links on the menu at the top of this page.

                                                    Advert

                                                    Latest Replies

                                                    Home Forums Miscellaneous models Topics

                                                    Viewing 25 topics - 1 through 25 (of 25 total)
                                                    Viewing 25 topics - 1 through 25 (of 25 total)

                                                    View full reply list.

                                                    Advert

                                                    Newsletter Sign-up