Sanderson Beam

Advert

Sanderson Beam

Home Forums Stationary engines Sanderson Beam

Viewing 14 posts - 1 through 14 (of 14 total)
  • Author
    Posts
  • #590819
    John Purdy
    Participant
      @johnpurdy78347

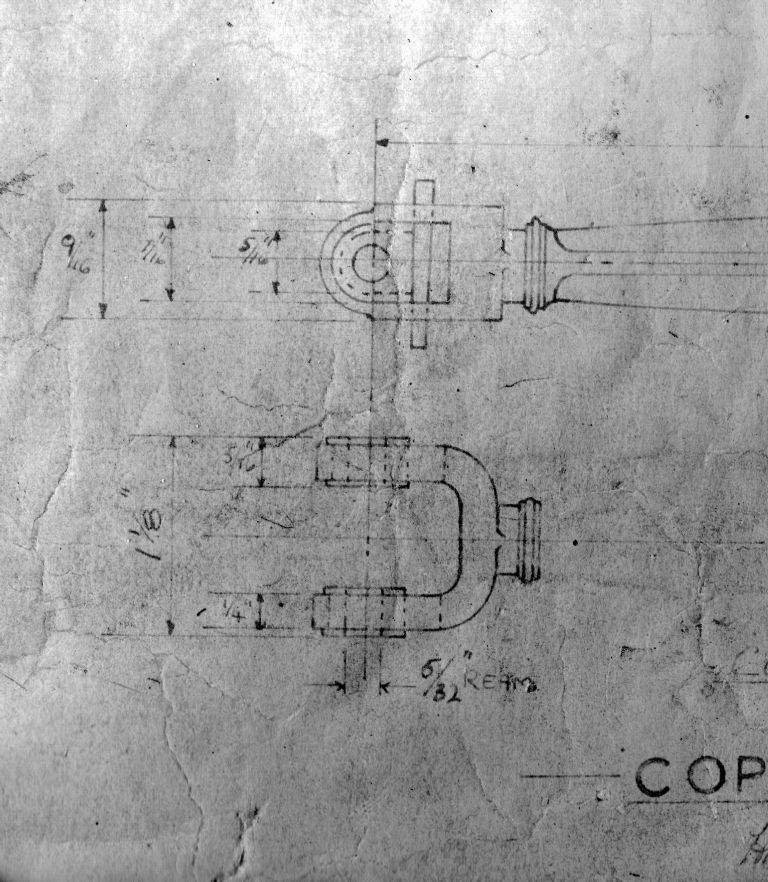
      Having finished the Stuart beam engine I've decided its time to finish the Sanderson beam engine. Its only been 42 years since I started it! Starting with the con rod I find that the casting is slightly over 1/8" too short to make to the drawing dimensions. After some head scratching and many calculations I have come come up with a length between bearings that I think will work and just fit within the as cast length. Now the next problem is, there appears to be a number of errors/discrepancies on the plans for the little end of the con rod. The plans show the bearings as being 5/16" wide but the journal in the beam pin for the bearings only 1/4" wide. If the bearings were 1/4" wide with the arms on the fork 3/16" wide (vice 1/4" wide as shown ) which is how the drawing scales (not always a safe idea! ) then it would fit. Also, as drawn, the bearings appear to be impossible to fit into to slots in the fork end. The slot is 5/16" wide but the bearing halves have a 7/16" wide flange on each side. The top semi-circular half can be put in sideways and rotated into position, but the square bottom half can't be fitted. I have a couple of ideas for a solution, but what have others done?
      Another discrepancy is the bore on the pump rod bearings is shown as 3/16", but the pin journals are 5/32" dia.
      The plans I have are original Clarkson's dye-line, dated 18/10/69 and are well faded, having been exposed to sunlight for too long.
      I'd be curious to know if these errors show up on the current plans.

      John

      Advert
      #3486
      John Purdy
      Participant
        @johnpurdy78347
        #593804
        Steve R
        Participant
          @steverichardson2

          Hi John,

          I have plans dated december 1998 from blackgates (that I got from the when they were still talking to me).

          The journal on the bean pin on my drawing is 5/16 wide, same as the width of the bearings with flange. total length on pin is 1-1/4.

          Not sure if I am following your description for the rest. The small end bearings have a flange width/diameter of 3/8. these are also then split so split width is 3/16. and bottom square half is 5/32. the slot on the fork is 3/16 so should fit in.

          cheers

          #593892
          John Purdy
          Participant
            @johnpurdy78347

            Steve
            Thanks for your reply.

            I have finished the pump rod but made the bearing bores 5/32" to be the same as the pin as drawn. Seemed like a better idea than a 3/16" bore as shown, as that would leave only a 1/32" wall in the bearing. (Note he cotters are still over length and will be shortened on final assembly when the bearings are run in. )

            pump rod.jpg

            Below is a snippet of the drawing of the little end of the con rod (not too clear as I said the drawing is well faded ). The drawing appears to show the slot as being stepped, 5/16" wide where the bearing is and 7/16" wide down to the bottom of the slot. As shown the bearing is 7/16" across the flanges but the depth of the square bottom half of the bearing is greater than the length of the 7/16" width of the slot, so how is it to fit in? How does this drawing compare with your newer one?

            little end.jpg

            John

            #593919
            Steve R
            Participant
              @steverichardson2

              Hi John,

              Is that the only drawing of the split bearings you have?

              The dimension I have provided are the ones you are after.The small end bearings have a flange width of 3/8 on my drawing.

              Also sure that the bearings for the pump rod are drawn as 5/32 as you have made it.

              Cheers

              #594020
              John Purdy
              Participant
                @johnpurdy78347

                Steve

                Yes, that is the only drawing of the con rod little end and its bearings that is on the plans. Sounds like these dimensions have been changed. It would be interesting to see how these are shown on the current plans.

                As for the pump rod bearings the plans show the beam pin journals as 5/32" dia. but the bore of the split bearing as 3/16" dia. which obviously doesn't work. I opted to make the bore 5/32" to match the beam pin journals for the reason given above.

                John

                #594034
                Roderick Jenkins
                Participant
                  @roderickjenkins93242

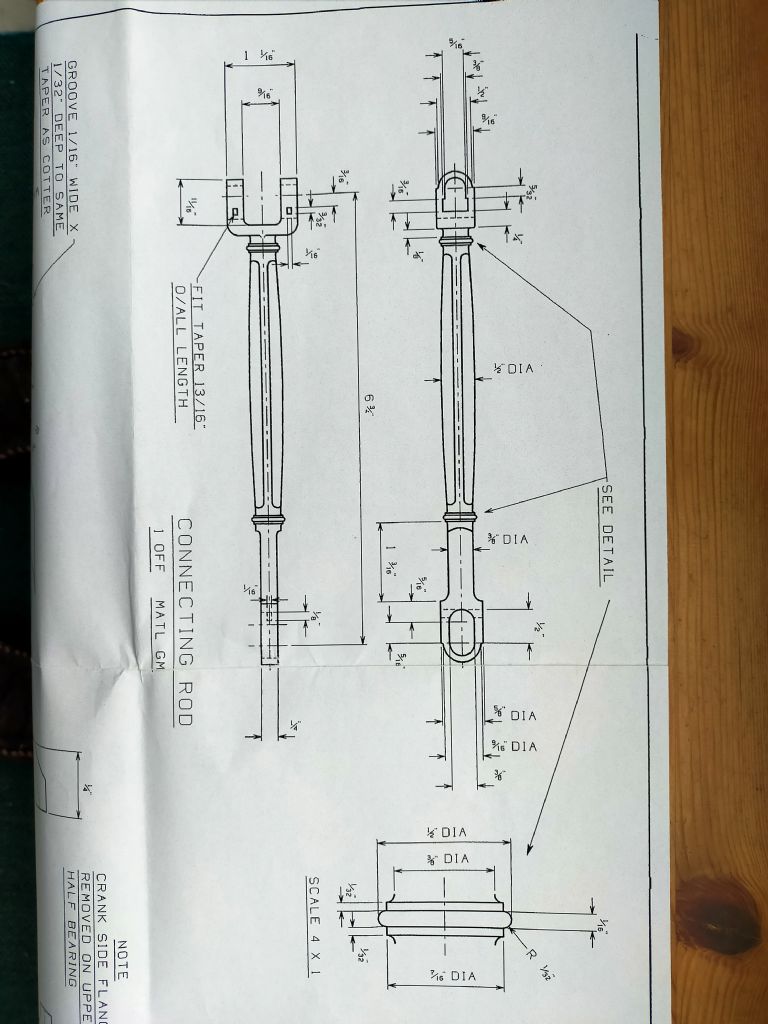
                  Here's the relevant bit of the current drawing:

                  img20220411182704.jpg

                  Rod

                  #594045
                  David Caunt
                  Participant
                    @davidcaunt67674

                    John,

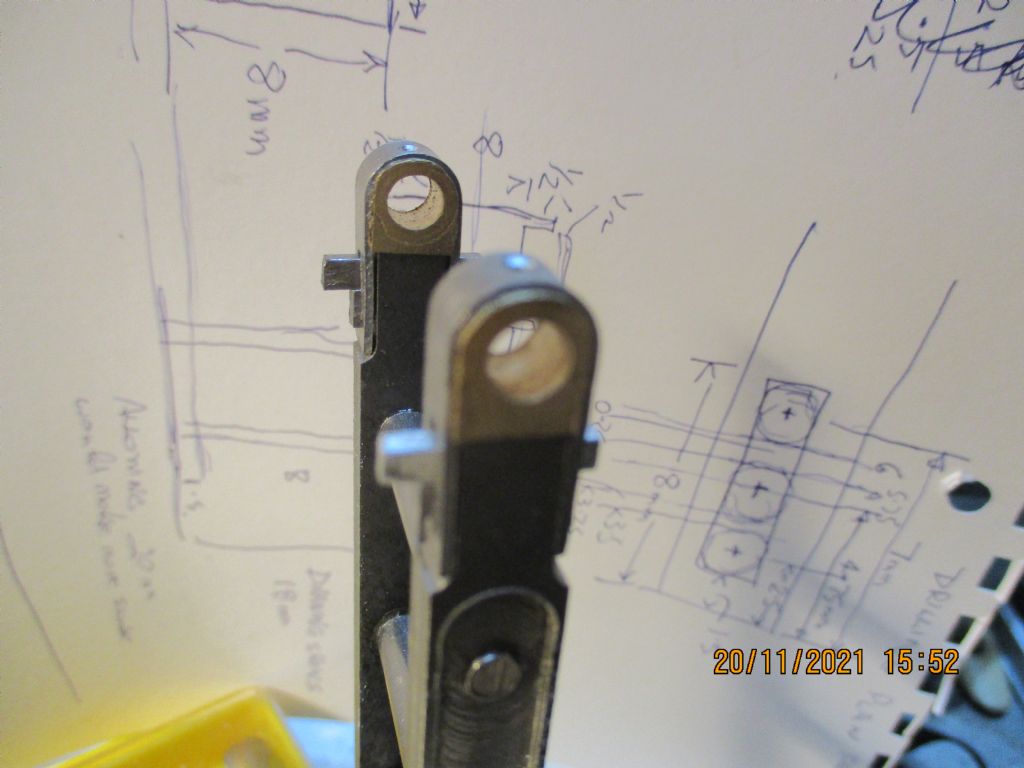
                    This is what the straps and cotters look like on my Half beam. Is there something not showing on your drawing as it looks as though there are no straps and the cotters do nothing.

                    bearing straps fitted.jpg

                    All 5 bearings on the engine are like this.

                    Edited By David Caunt on 11/04/2022 20:54:29

                    #594073
                    John Purdy
                    Participant
                      @johnpurdy78347

                      Rod
                          Thanks for the pertinent section of the current plans. It looks like the basic dimensions of the slot are the same as my plans but a lot of other dimensions are given which makes it much clearer. Currently the slot in my rod is 5/16" wide for the whole length so I will have to mill/file out the bottom 3/16" to 7/16" wide. This will allow the 5/32" deep bottom half of the bearing to be inserted and slid up to mate with the top half.
                          I also see there is a note at the bottom left of the your image that says to remove the inner flange on the top half of the bearings. I would think that it could be put in at 90 degrees and then rotated and slid into position, so is there a reason given for why the flange is to be removed?
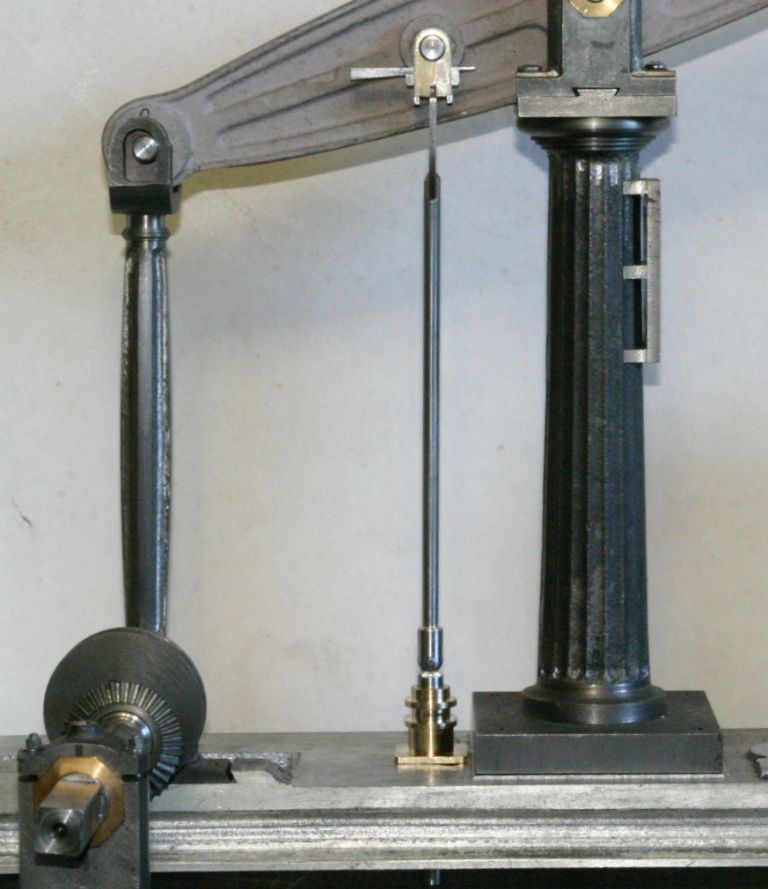
                          Did a trial assembly of the beam, pump rod and pump body and found that with the rod made to 6" between bearing centre and pin at the bottom as per the drawing, it is just too long, with the end of the rod hitting the top of the pump body. So back to the torch to un-solder the end, cut 3/16" off the rod and re-solder it back on. Fits much better now as can be seen it the picture.
                      John

                      pump rod 2.jpg

                      Edited By John Purdy on 12/04/2022 02:17:59

                      Edited By John Purdy on 12/04/2022 02:31:21

                      #594074
                      John Purdy
                      Participant
                        @johnpurdy78347

                        David

                        On Clarkson's model of the Sanderson beam engine the straps, gibs and cotters on both the big and little ends of the con rod are only simulated. The ends of the rod being a closed slot to simulate the strap and the split bearings held in by single tapered cotters. Not sure why he designed it that way as the bearings on the pump rod and the connecting links between piston rod crosshead and beam use proper straps, gibs and cotters.

                        John

                        #598209
                        John Purdy
                        Participant
                          @johnpurdy78347

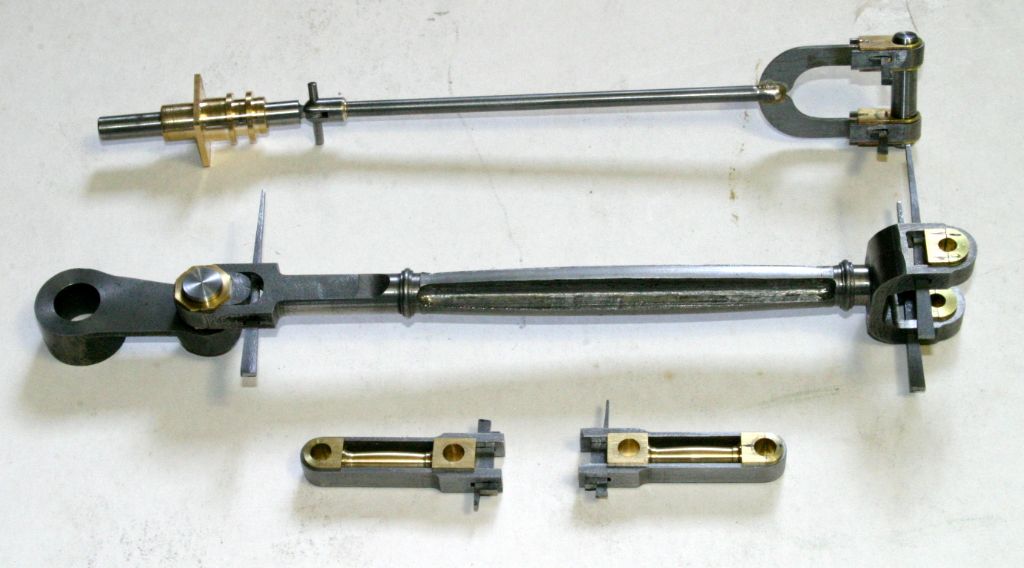
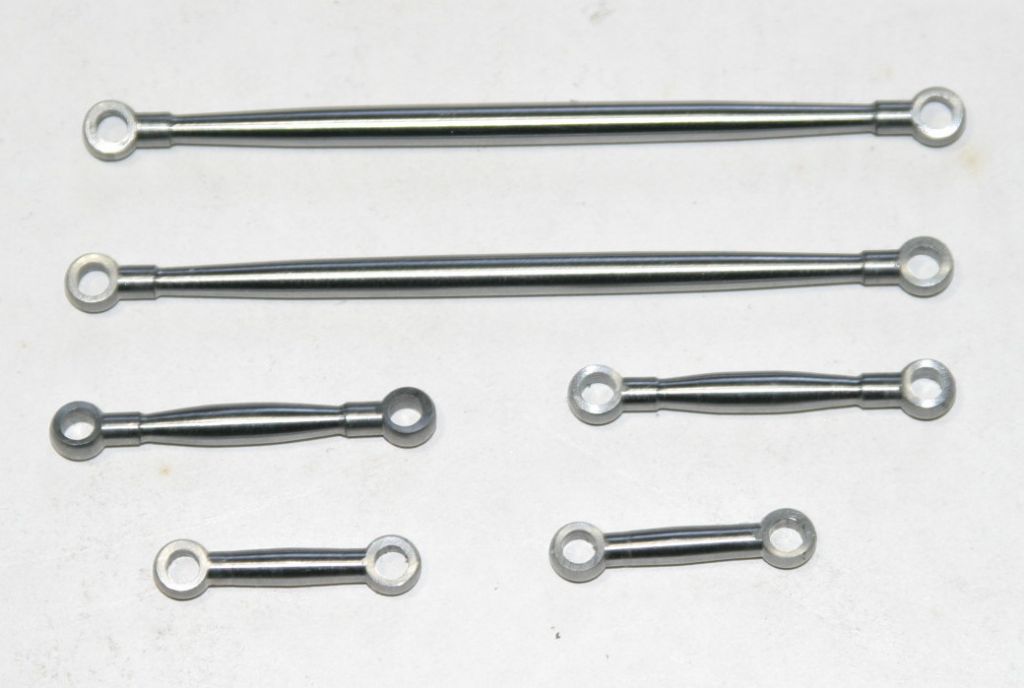
                          Finally finished the con rod, pump rod and the strap links connecting the piston rod to the beam. So it's time to stop procrastinating and tackle the parallel motion links.

                          links.jpg

                          The plans show the links with 7/32" dia. spherical ends thinned down to 1/8" thick and the body fish bellied 5/32" in the middle and 3/32" at each end with a short parallel section 1/8" dia before the spherical end. Question is how to make then. If the centre section is turned first then how to hold it to turn the ends seeing as how the there is nothing parallel to hold. If the ends are turned first then how to hold it to turn the fish bellied centre section?

                          After considerable head scratching I came up with this idea. Starting with 1/4" dia. rod, drill and ream the two 1/8" end holes using coordinates in the mill, spaced .109" in from each end. Use a form tool to turn the spherical ends and the short 1/8" parallel section. Now the centre section can be turned by holding the left hand end in a specially made jig on the end of a piece of 1/2" square material held in the 4 jaw with the right hand end supported in a small female live centre in the tail stock.

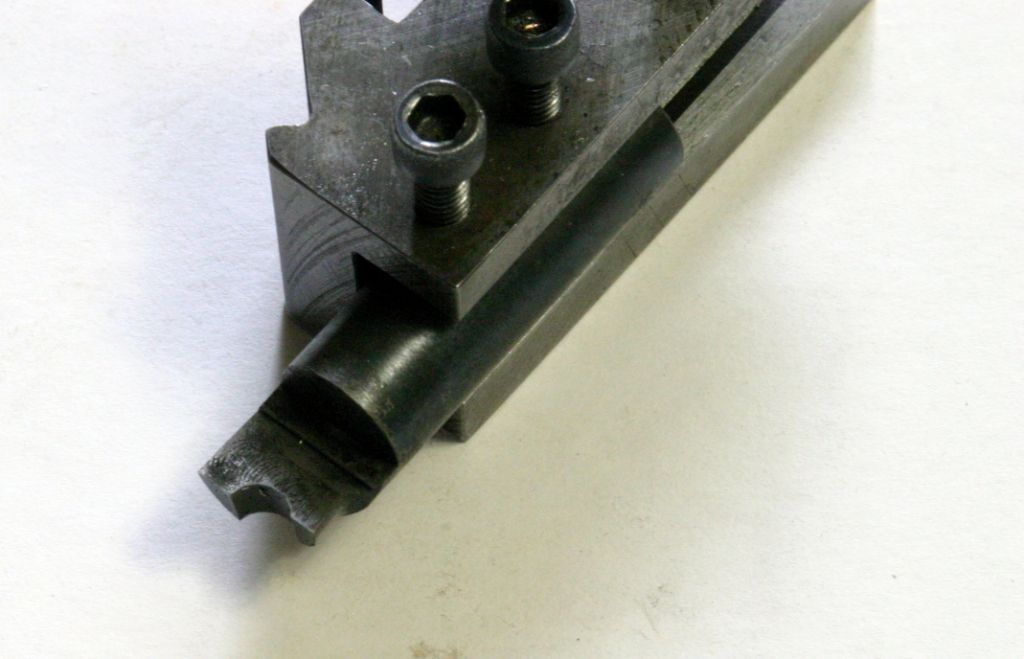
                          The form tool to turn the spherical ends of the links was made from a piece of 1/2" W1 drill rod. Held in a 5C collet in a collet block and set at a 3 deg. angle in the vice the end was milled down to half dia. This gives some back rake to the cutting edge. The collet block was then re-positioned at a 7 deg. angle to give the front clearance and a 7/32" end mill was used to angle the front edge and then, on the centre line, plunge down for a further .109" to form the half circle cutting edge for the ball. The ear, on what would be the chuck side when used, was milled back to leave it .047" from the centre of the 7/32" dia. ball to form the 1/8" dia. collar.

                          form.jpg

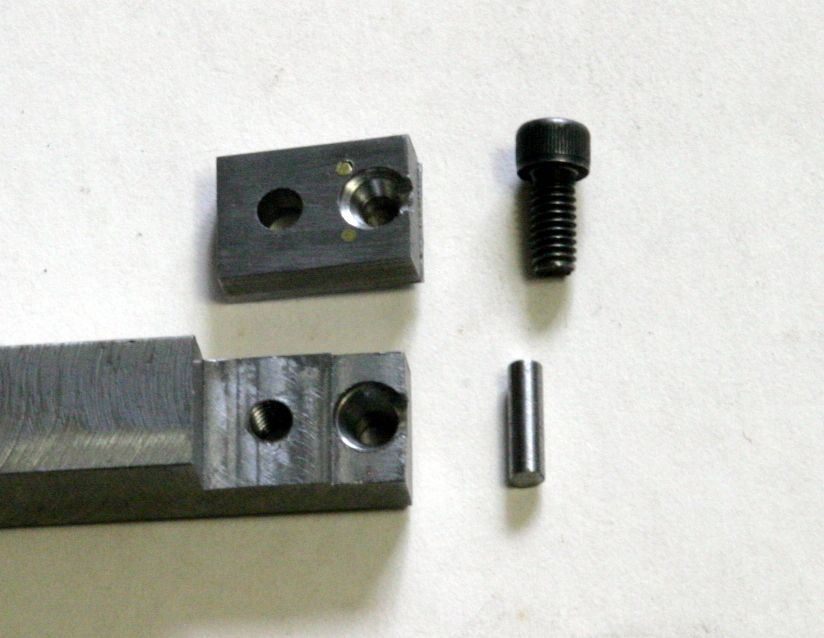
                          The jig to hold the end of the link in the 4 jaw was made from a piece of 1/2" square steel from the scrap box with the end milled down to 1/4" for 11/16". Dimples were made in it and the cover, 1/8" in from the end, with a 1/4" 90 deg. spotting drill followed by a #3 (1/4" ) centre drill. The depth was adjusted so the link longitudinal centre line was on the centre line of the 1/2" bar. An 1/8" end mill was used to cut a slot .060" deep on the centre line into the dimples to provide clearance for the 1/8"dia. collar on the link. The central hole was drilled through and reamed 1/8". The two pieces were clamped together with an 1/8" rod through the central holes for alignment and drilled and tapped for an 8-32 screw to clamp them together. The pin is an easy fit in the 1/8" holes in the jig and link to provide some clearance for alignment and to provide a positive drive. It is retained from falling (flying ) out by thin sheet strips riveted to outsides of the two pieces.

                          links2.jpg

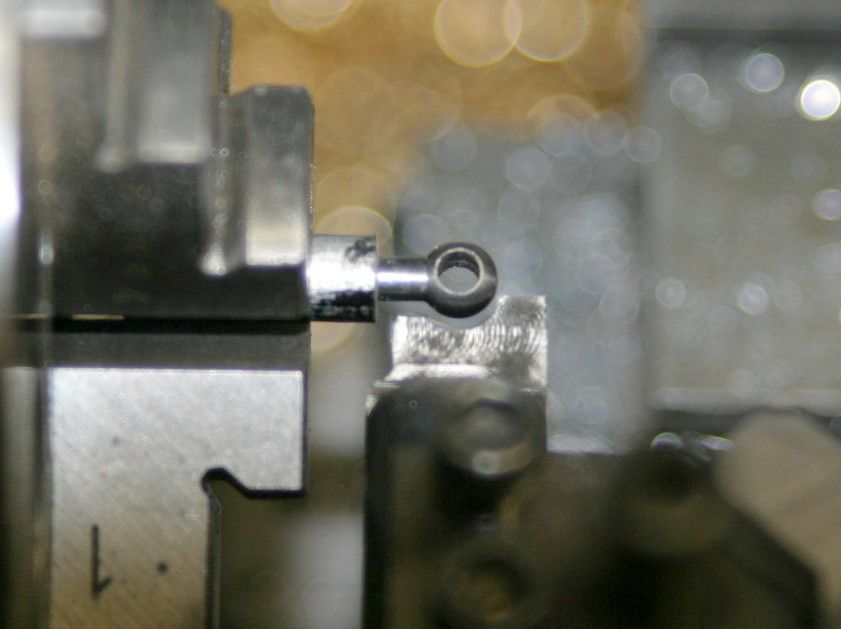
                          One eye turned on the end of an embryo link with the form tool.

                          links3.jpg

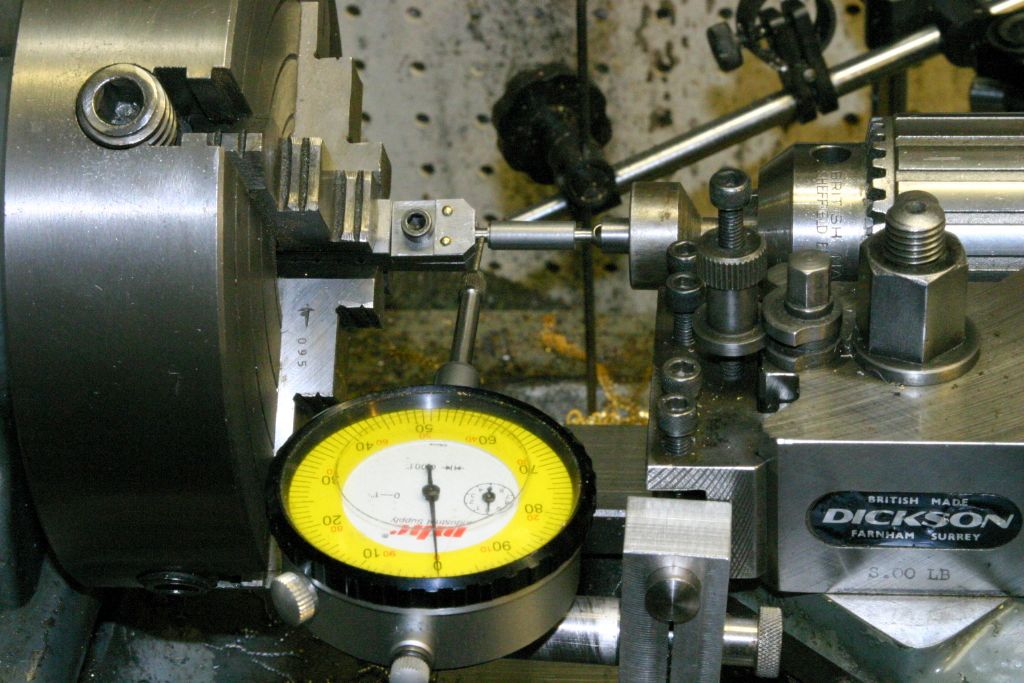
                          Using a dial indicator on the 1/8" dia. collar to centre the link held in the jig in the 4 jaw. The other end supported by a small female live centre in the tail stock. The female live centre held in the drill chuck is a Unimat live centre modified by disassembling and pressing the male centre out of the bearing and pressing in a home made small female centre .

                          links4.jpg

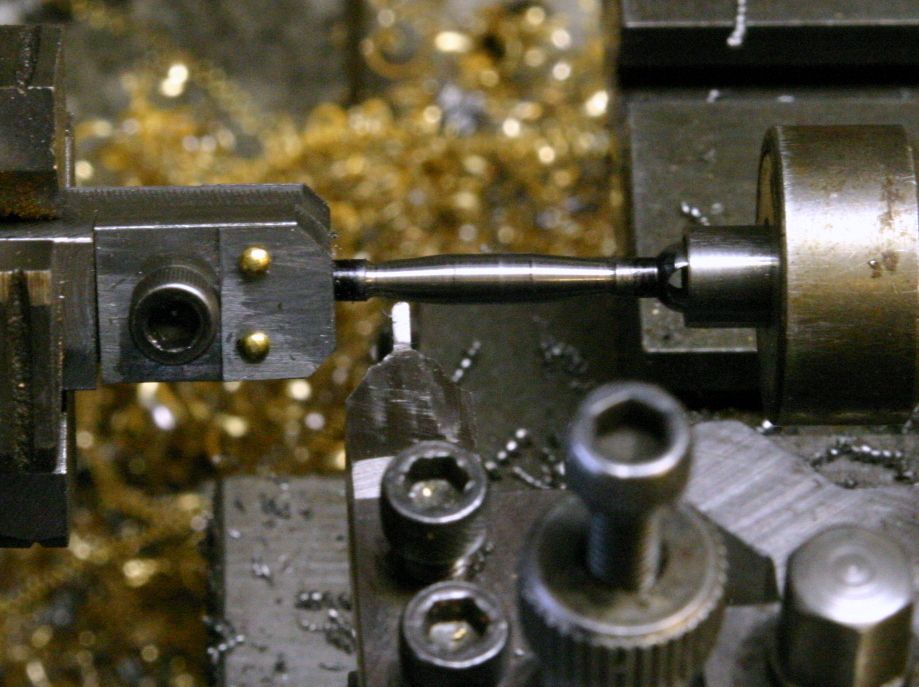
                          The centre fish belly roughing out finished. Just needs some work with a fine file to blend the flats together and polishing with some fine abrasive cloth.

                          links5.jpg

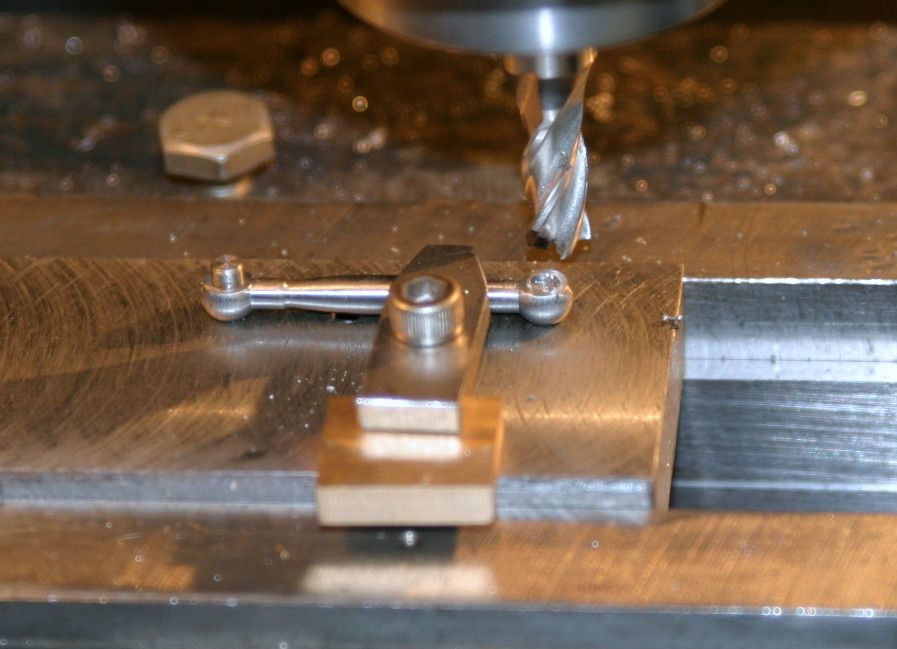
                          The jig set up in the mill for machining the eyes down to 1/8" thick. The jig isn't my idea, it's from Tubal Cain's write up in ME of the "Mary" beam engine. The clamp is my addition and is done up just finger tight to prevent the possibly of the link moving up under the milling forces.

                          links6.jpg

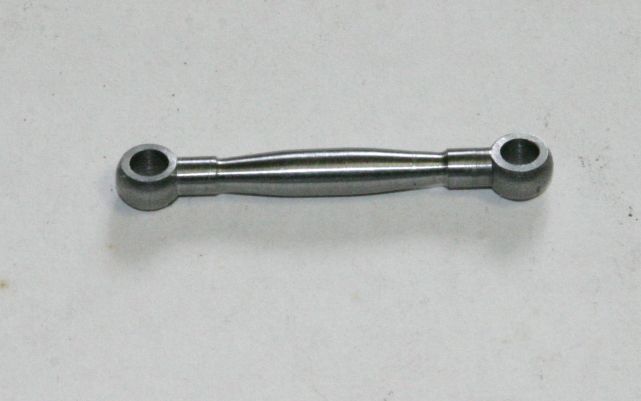
                          A finished link. Only 7 more to go!

                          links7.jpg


                          Edited By John Purdy on 14/05/2022 02:22:13

                          Edited By John Purdy on 14/05/2022 02:29:34

                          #600136
                          John Purdy
                          Participant
                            @johnpurdy78347

                            The links are finished but I've run into another problem.

                            links8.jpg

                            There is a cast bracket fastened between the column and the cylinder that supports the pivots for the free end of the parallel motion drag links. To determine the position of this pivot I bent up a piece of sheet metal and clamped it in position where the cast bracket will be, then scribed lines on it in the position of the pivot. As can be seen in the pic below, the casting for the bracket that has the pivots for the drag links is not high nor long enough, the scribed cross showing the position of the pivot is well above and to the right of the casting. What to do with it???

                            John

                            link bracket.jpg

                            #600143
                            Ramon Wilson
                            Participant
                              @ramonwilson3

                              Superb results on those links John – fish bellied parts are never the easiest to get symmetrical yes

                              I think I'd be inclined to make the support bracket from scratch machining it from solid to match the new found positioning rather than try to modify the casting to suit – or at least a combination of both.

                              Great work – always liked the Sanderson design

                              Tug

                              #600331
                              John Purdy
                              Participant
                                @johnpurdy78347

                                Tug

                                Thanks for your kind reply. Here's a picture of the bracket in its almost finished state. The slot in the top is to clear the beam when the piston is at BDC.

                                As I see it the options I have are to hack a new one out of solid (that's a lot of work! ), mill the current "ears" off then silver solder two new longer ones on, or mill them off and fasten the new ones on with countersunk screws and JB Weld ( there's not really an stress on them ).

                                I'm tempted to go the silver solder route, but I've tried silver soldering one other of these castings that had a problem and no matter what I did the solder wouldn't wet the cast iron. I've silver soldered cast iron a number of times before with no problems but here it just balled up and rolled off. I might try it and if it doesn't work I can always revert to the "screw and glue" method.

                                John

                                bracket.jpg

                              Viewing 14 posts - 1 through 14 (of 14 total)
                              • Please log in to reply to this topic. Registering is free and easy using the links on the menu at the top of this page.

                              Advert

                              Latest Replies

                              Home Forums Stationary engines Topics

                              Viewing 25 topics - 1 through 25 (of 25 total)
                              Viewing 25 topics - 1 through 25 (of 25 total)

                              View full reply list.

                              Advert

                              Newsletter Sign-up