Java Mallet in 5 inch with compound steam action

Advert

Java Mallet in 5 inch with compound steam action

Home Forums Work In Progress and completed items Java Mallet in 5 inch with compound steam action

Viewing 6 posts - 1 through 6 (of 6 total)
  • Author
    Posts
  • #578121
    Werner Schleidt
    Participant
      @wernerschleidt45161

      Hello all,

      i want to tell the story about my Java Mallet a small 5 inch gauge locomotive with compound action.

      But first a safe and steamy year for all model engineers.

      In 2006 I decided to built a small loomotive which is more complex and I had to develop new skills and experience. In the Frankfurt Narrow Gauge Museum I saw a coplete restored Orenstein and Koppel Compound Locomotive. This was taken back from Java from the Prebolungo Sugar Mill. I gave this project a go . The guys from the musseum made a super job for restoring and they had a nice .pdf with informations. In there is a good drawing for to calculate the size of the loco. My borders are the transport in the car and i have to take her over two stairs into the basement. I want to transport her as my other locos with a sack barrow and so the lenght was fixed to come trought the door. With this borders I made a sketch how the loco have his size and shape.

      I ordered from Maxitrak a ruby boiler. And gave the project a go.

      In a Video I collect over the years many takes about my driving tests in my garden and on several club tracks.

      At the start i never believed that the optimization last so long.

      Unfortunatly i have only German text in the video, because at that time i had no idea that i share this video.

      I made some explanations in english coresponding to the time in the video.

      0 to 1:45 building

      1:45 to 4:18 first driving with all cylinders under full pressure

      4:18 to 7:00 optimization of the blast Nozzle it was driveable with unbelievable coal consumption

      7:01 to 7:52 change to compound action

      7:52 to 12:40 now with a double petticoat

      With this was permanent driving possible. The longest run was at the track of the DMC Zürich with 23 Km distance it starts at 11 am and ended at 5 pm. The limit was the driver he was not able to sit anymore.

      I add later additional steps and I hope it is not boring for you.

      part one

      Werner

      Advert
      #31389
      Werner Schleidt
      Participant
        @wernerschleidt45161
        #578123
        Former Member
        Participant
          @formermember12892

          [This posting has been removed]

          #578130
          Werner Schleidt
          Participant
            @wernerschleidt45161

            The loco cylinders have a bore of 24 mm and 30mm stroke. Under the setup of of full pressure for all cylinders the boiler was not able to come over 4 bar during permanent driving. The coal consumption was extraordinary high, compared to a ruby . All people who saw my tests said oh very good ,but in real world it was bad. The same experts say you can never have a compound action in such a small loco.

            After i saw this coal consumtion i tried the compound setup. The start procedure was more difficult to get the water out of the cylinder, but the driving and coal consumption was much better. After all steps in optimization my son and i drove my ruby and the mallet and we have both the subjectiv feeling that the mallet have less coal and water consumption as the ruby.

            I had talks to the locomotive driver of the original and both say , the mallet is very difficult to drive and what they say was similar to my experience. The bigest problem is the start procedure. The start have to be in full pressure setup and then after some wheel turns switched to compound action. If the loco is cold it last much longer.

            One of the importants step was to understand how the blast nozzle and the front setup was to be tunned.

            Another step was to understand how it is possible to bring the high pressure steam to the low pressure cylinders.

            will be continued


            Edited By Werner Schleidt on 02/01/2022 17:19:25

            #578138
            Werner Schleidt
            Participant
              @wernerschleidt45161

              In a small mallet configuration the temperature loss is a big problem. At temperatures below 16° C there were fountaines like a gysir coming out of the chimney . So decide to built a steam re heater. At this loco the two frame setups run independent from each other. So it is necessary to have a small compound collector.

              The idea came up to bring it in contact with the boiler to reduce temperature loss of the exhaust steam of the high pressure cylinders. This was a big step forward the loco was now driveable down to 12 °C in a good performance.

              After several years of optimization I decide to give her paint in the hot summer of 2018. So I disassembeled all for painting.

              Before I assembeled all I made a new compound collector in the way that it have the same volume but with more contact area to the boiler near the firebox. This was not so easy because the room is very limited.
              The second thing was that i combined in one housing both oil pumps at the rear chassis. This was easier to mantain and filling the oil. I simplified the start valve and add a pressure gauges to the high pressure cylinder and the low pressure cylinders. But as it is normal in such cases after re asssembling I had some trouble to get the same performance as before. After some runs at our club I found that the valve setup was not correct.
              After adjustment it was much better.
              With the experience of my electronic cylinder indicator system i found that
              the exentric was not quite correct. so i made new ones with more travel.
              In addition i made new drive and coupling levers with easy to change bushings for wear corection if necessary.
              will be continued
              #578190
              Werner Schleidt
              Participant
                @wernerschleidt45161

                On my test ride I had another issue after assembling all again I found that my fire burns not so good as I had it in mind. A few years ago I bought the book "The Fire Burns Much Better" and in the last pages there were for models a multi jet nozzle with the words " that have a better performance".

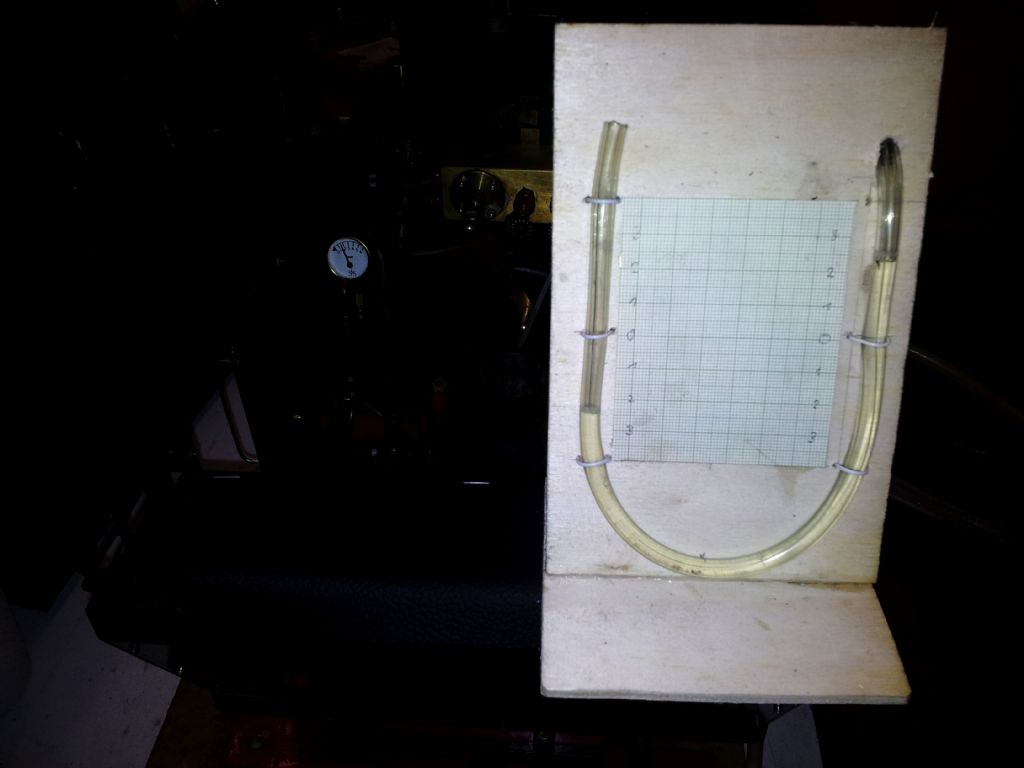
                I decided to measure the different steps in the development of a new front end configuration. At first i build a simple u shape low pressure gauge from wood and clear plastic hose. This was filled with water. One end is open the other end is running trough the fire hole and the smoke pipe into the smpke chamber. The smoke chamber had a clamped in rubber sealing for the smoke pipes. Only the measuring hose came in. The test run with air pressure in my basement. So I was able to compare the different nozzle and had readings at the scale of the U Pipe gauge. And I made electronic measurements too.

                20211029_100822b.jpg

                This is an exampel reading under test with 1.5 bar air pressure. I made several tests, helping blower alone, then with the running engine and both.

                So it was easy to compare the different nozzle setups. Without the test both water parts in the gauge have the same height. In the shown picture there is a low pressure from about 4.5 mbar.

                20000101_042756.jpg

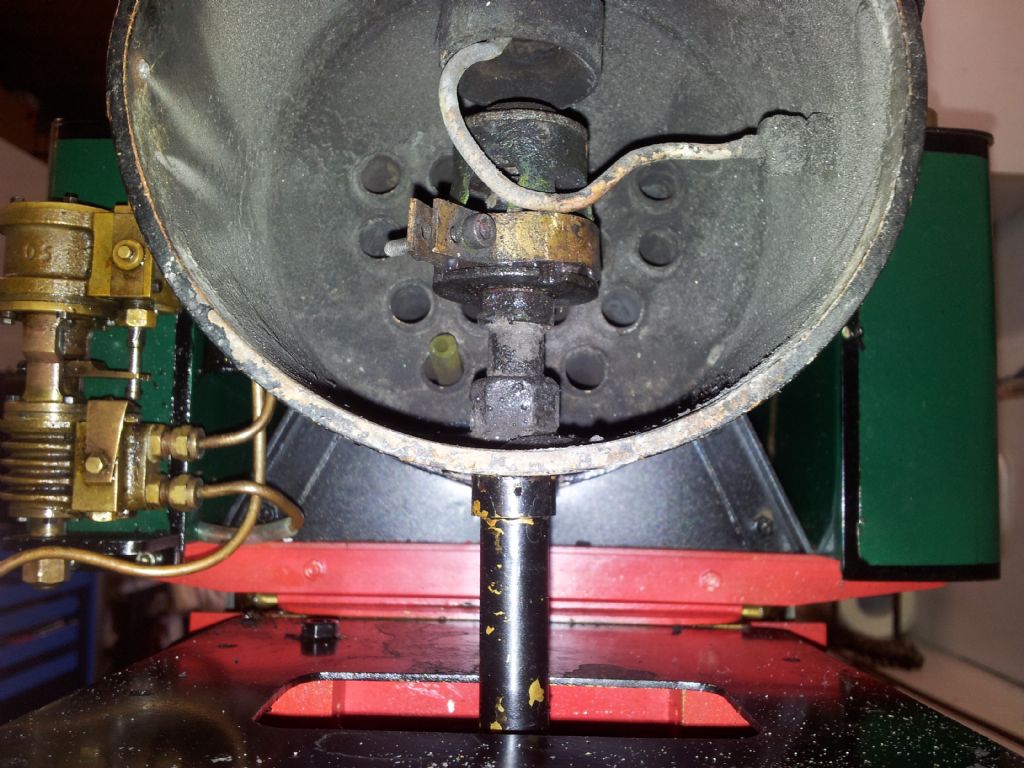
                this was the initial setup with a nozzle of 2.5 mm bore hole

                20210930_131143.jpg

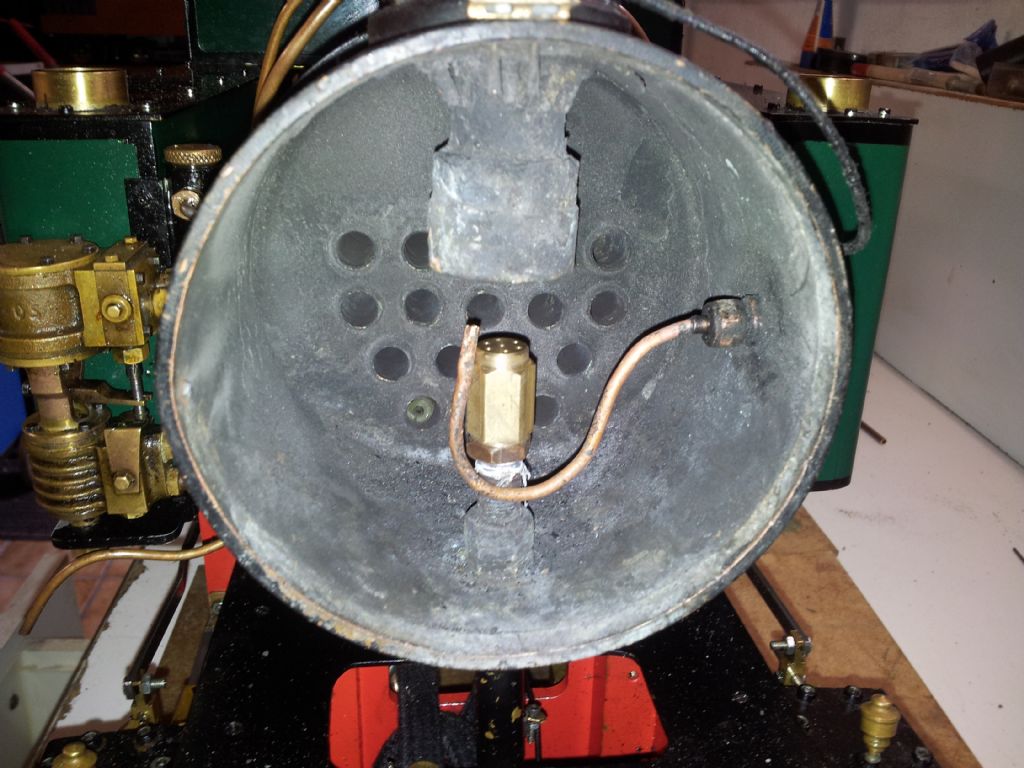
                new setup with the multijet nozzle.

                The initial nozzle had an area of 4.9 mm² the new one 6.64 mm² . I made several tests and I playing with the optimal height setup and so on. The first step was 7 * 1.1 mm bore straigth. this had a better low pressure reading as before. Then i made nozzle where the outside jets have inclination 2° and 5° to the outside.

                The last one was in my tests the best one , so I made test rides under steam with this setup. This nozzle have 35 % more area for steam in the nozzle and therefore less back pressure for the steam engine.

                The test at my garden track was very good so we decide to go to another club track.

                We drove at that day nearly 15 Km with a good test result. The temperature was about 12°C and this was in former times not so good . In the most time during driving the steam out of the chimney is very hot and not noticeable as steam . That showed an improved draught.
                 
                After this sucsess I made a new nozzle with 7*1.2 mm 5° outside and this was another big step forward. The engine had a much lower back pressure as before and runs remarkable better. this nozzle had slightly better low pressure redings at the test setup but 66% increased nozzle area.
                 
                For my 2 cylinder engine I will try the same this year in practise. We will sse what the outcome is.
                 

                Werner

                Edited By Werner Schleidt on 03/01/2022 08:08:20

              Viewing 6 posts - 1 through 6 (of 6 total)
              • Please log in to reply to this topic. Registering is free and easy using the links on the menu at the top of this page.

              Advert

              Latest Replies

              Viewing 25 topics - 1 through 25 (of 25 total)
              Viewing 25 topics - 1 through 25 (of 25 total)

              View full reply list.

              Advert

              Newsletter Sign-up