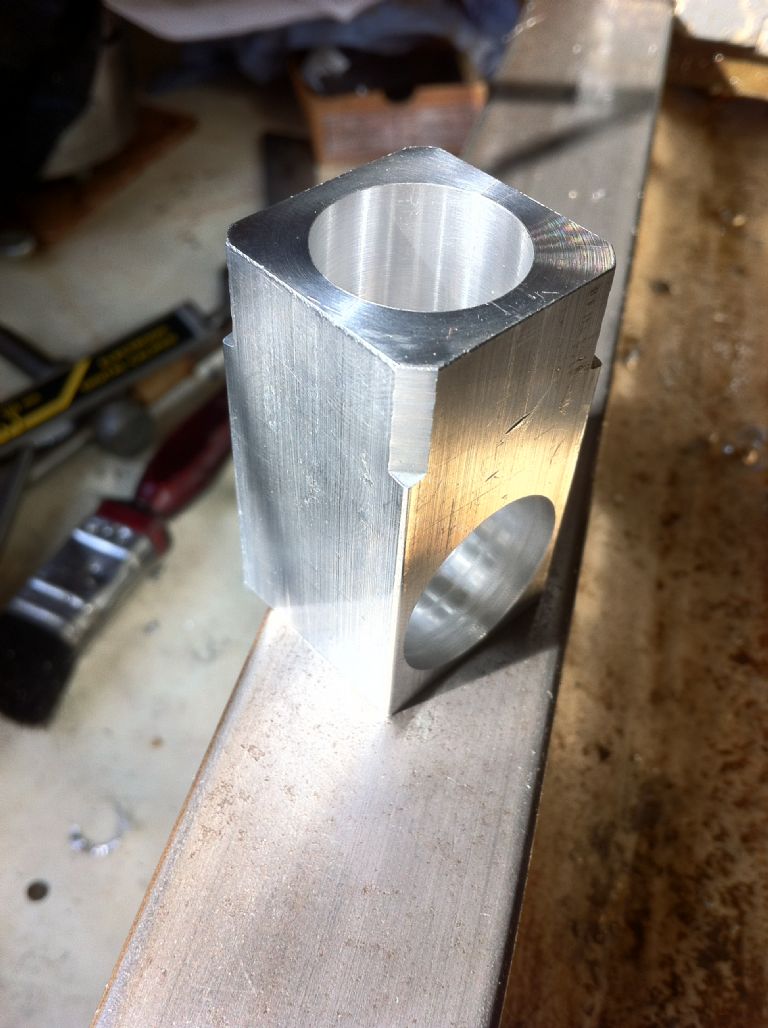
Well, finally after an astonishing amount of learning and spending, I began my first ever project. It took so much just to begin turning chips that I think I will start a blog or a webpage to further document it for anyone else wishing to start right from the beginning like myself (I'm of the age that metalwork was never taught in school).
So I purchased a lathe (Myford Super 7), and then needed a 4 jaw chuck (Burnerd 34M).
I decided to go with HSS and bought a viciously cheap £20 grinder from B&Q – you get what you pay for, the wheels will be broken and used for dressing/deglazing but they got me going although they wobble like a dodgy car wheel trim on the motorway, epoxy cement centres so no way to get them running true, I just about dressed the cutting edge. – I have just this morning received a pair of Norton Abrasives wheels.
So I began the painfully long process of grinding a right hand turning tool on this cheap grinder, I just about nailed it free hand no need for a jig or fancy grinding rest. I went for general clearance/rake/relief angles of 10° all over with no back rake (just side) and a very small corner radius. I honed it free hand first with a credit card size 1000 grit diamond file and then with a 1" long piece of 3/8 triangle india stone, that used to be about 5" long till I dropped it…….. whoooops =(
For the boring I didn't buy any round tool steel (I thought I had an old drill bit I could use but was mistaken!), so I just used a braised carbide tipped boring bar that came randomly with something else, it did the job nicely but needed touching up on the diamond file before first use as it was ripping rather than cutting and gumming up – once touched up it bored all the holes out from 7/16 to their final size (0.89" and 0.75" without a single issue.
I slipped up on the final finishing pass while boring the bottom end out to 0.890" I ramped the speed up to around 1000rpm, and it went through a wobble as it spun up (held eccentrically in the 4 jaw) – I knew there and then in the back of my mind I should stop and change back but eager to crack on, I went for it, and the resonance made a mess, its a shame, but it is bang on size.
The external radius that is turned down the top 1/2" is also leaving a resonant pattern, I think this may be as my top and cross slide are so loose. The weight of the unbalanced handle turns the screw and moves the slide if I don't hold on to them – I don't know if this is normal – maybe I need new feed nuts, I know the gibs need a little adjustment on the cross slide – the saddle was locked.
I'm working in imperial as the drawing, my lathe, and my stock are all imperial, once I'm more familiar with things I'm sure I'll jump between the two.
Overall, I'm happy and have a usable part on size and correctly positioned. I think once the mill's trammed I'll square up a piece of stock (rather than using bruised 1" square bar) and check the spindle alignment and various gib adjustments and give it another go. I expected to bump in to a few issues and then redo it, it was good practice but for my "first" project which will go proudly on display I don't think I'd be happy with bruised bar stock.
I'm pleased as punch, I made it yesterday morning and I'm still smiling, really enjoyed it, it is the sum of a lot of reading and learning, and spending of course…..
A picture to add to my thousand words 

Edited By Russ B on 08/09/2014 11:34:56
Dullnote.


 without a single issue.


