Milling Advice

Advert

Milling Advice

Home Forums General Questions Milling Advice

Viewing 25 posts - 1 through 25 (of 28 total)
  • Author
    Posts
  • #29382
    Justin Thyme
    Participant
      @justinthyme24678
      Advert
      #660690
      Justin Thyme
      Participant
        @justinthyme24678

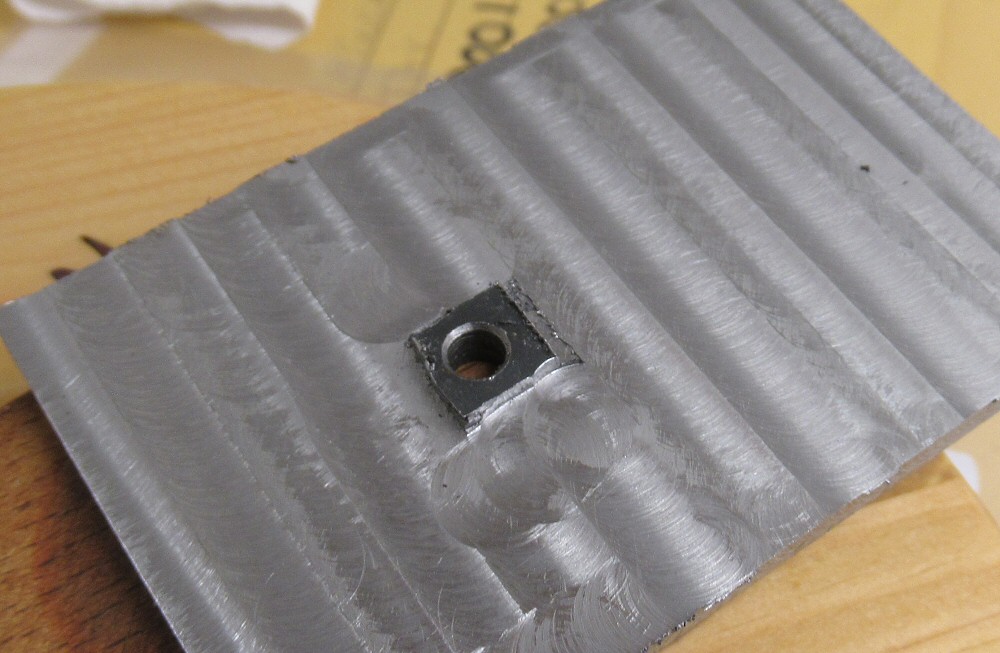
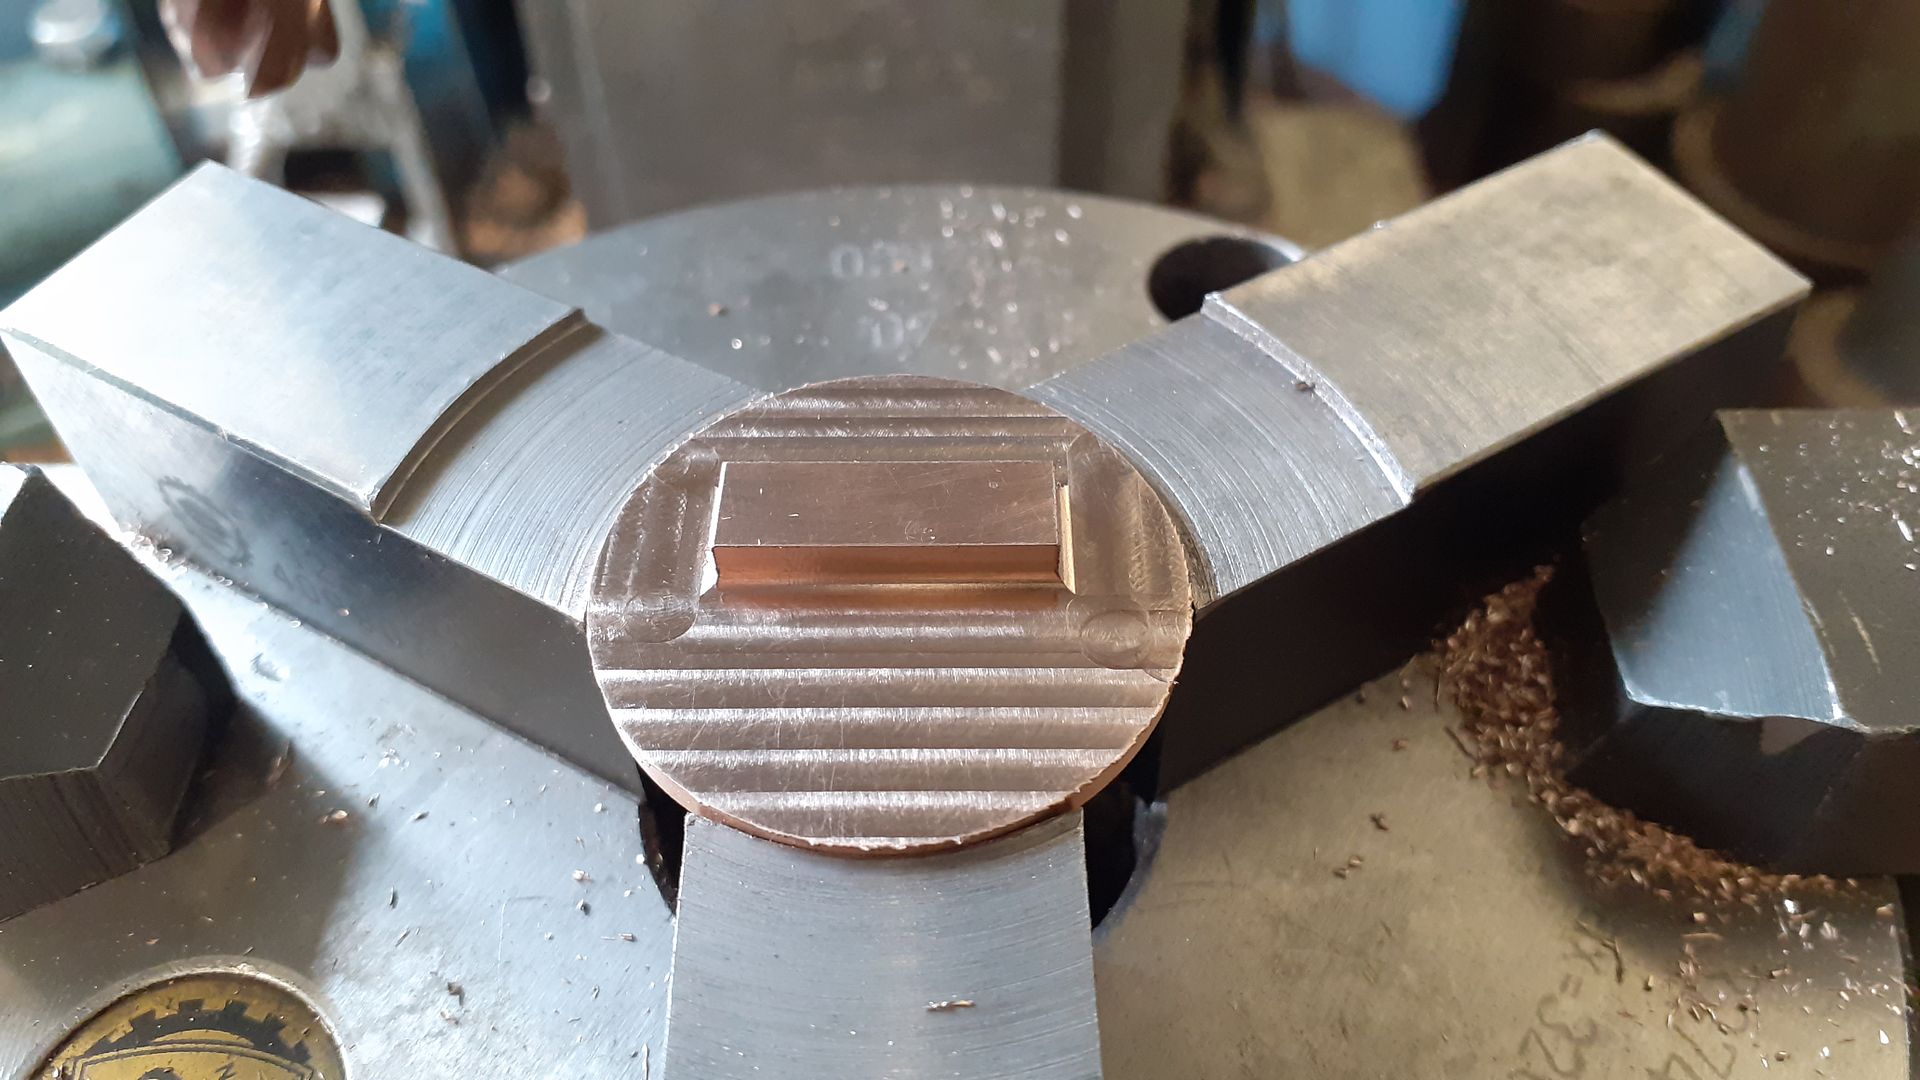
        Could anyone offer some advice on how to improve the finish, it isn't too rough, you couldn't peel tatties with it but I would have hoped for a better finish (i still thing it will polish up ok with some wet and dry)

        speed 2000 rpm, 10mm 4 flute, used cutting oil.

        #660691
        Benedict White
        Participant
          @benedictwhite51126

          You ill get the up/down lines you have, that is the nature of a mill.

          I note that you have an island in the middle. If you did not have that island you could skim the top with a fly cutter or if you have a face mill wider than the part use that.

          Are there ridges between the lines? If so your mill might not be trammed, if it isn't I did a video of tramming my Naerok mill.

          #660692
          Benedict White
          Participant
            @benedictwhite51126

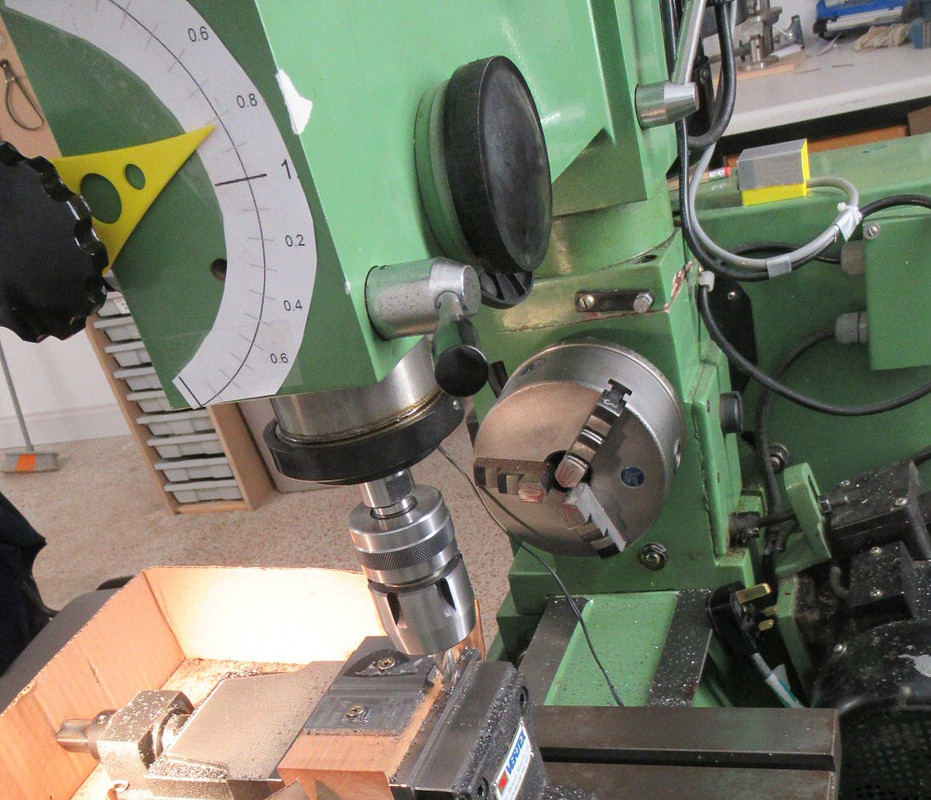
            Also, lock the quill. If you don't it will move under load.

            #660695
            JasonB
            Moderator
              @jasonb

              Check the tran and nod as the ridges are often due to the cutter leaning sideways. Lock evey way that is not moving but I suspect it is about a sgood as you will get with that combi machine.

              Also half the speed if that was with a HSS cutter you may not blunt it as fast then. You want a speed of no more that 30m/min, at 2000rpm you were doing 62m/min (200ft/min)

              #660696
              Justin Thyme
              Participant
                @justinthyme24678

                I think it is a tungstan carbide cutter, but will check    (how would I know, I don't see how all those flutes could be?)

                Yes the quill is locked. but I was not locking the x axis hen moving the Y. would that make a difference ?


                not sure waht you mean about ridges between the lines – it is mainly visual, although I can feel a roughness with my fingernail.


                Edited By Justin Thyme on 20/09/2023 09:36:41

                #660702
                Benedict White
                Participant
                  @benedictwhite51126

                  The quill lock is the important thing. Other locks other than the one you are moving can help in some circumstances (stopping sideways drift) but if there are no ridges, that is what a milled finish looks like, though I can't comment on how rough it is without holding it.

                  #660704
                  JasonB
                  Moderator
                    @jasonb

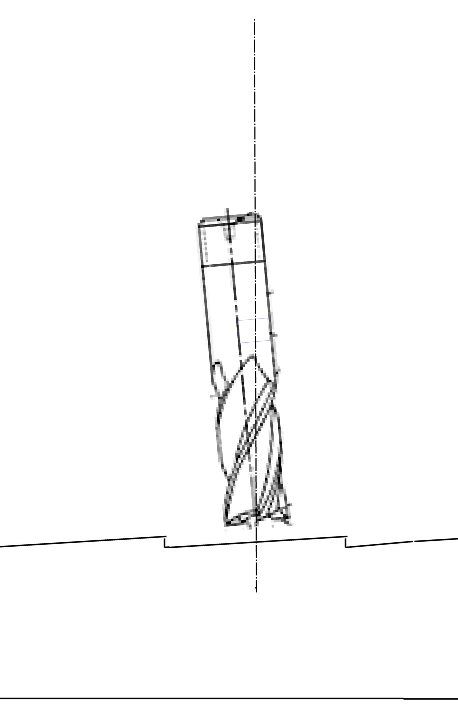
                    If it is just visual than the mill is OK but often if tram is out eg the spindle is not vertical above the work you can get a saw tooth effect, even if very small you can usually feel it with a finger nail, this is an exaggerated sketch.

                    tram.jpg

                    Just noticed you have the work screwed to a block of wood. This will likely be allowing the work to be pushed away from the cutter as the setup is not totally rigid and that won't be doing anything to help the finish.

                    #660705
                    Justin Thyme
                    Participant
                      @justinthyme24678

                      What about depth of cut? I used 0.2mm for each pass, is this about right?

                      And on the subject of depth, this machine does not seem to give any real means of adjust depth accurately – hence the print out and dial that I have stuck on the end

                      #660706
                      JasonB
                      Moderator
                        @jasonb

                        0.2mm is a bit shallow and will tend to just wear the very corners of the cutter, What was the total depth you wanted to remove?

                        #660710
                        Mike Hurley
                        Participant
                          @mikehurley60381

                          Unless working with toolroom quality equipment, you must accept that often the results you get with hobby machines will often be only 'adequate' . You are probably doing all the right things anyway – sharp tools , suitable speed / feed etc etc and you still won't get that 'mirror' like finish we would all like.

                          The roughness you feel with your fingernail can be caused by many things ( such as suggested above ) or the material itself – some steels simply will not finish well no matter what!

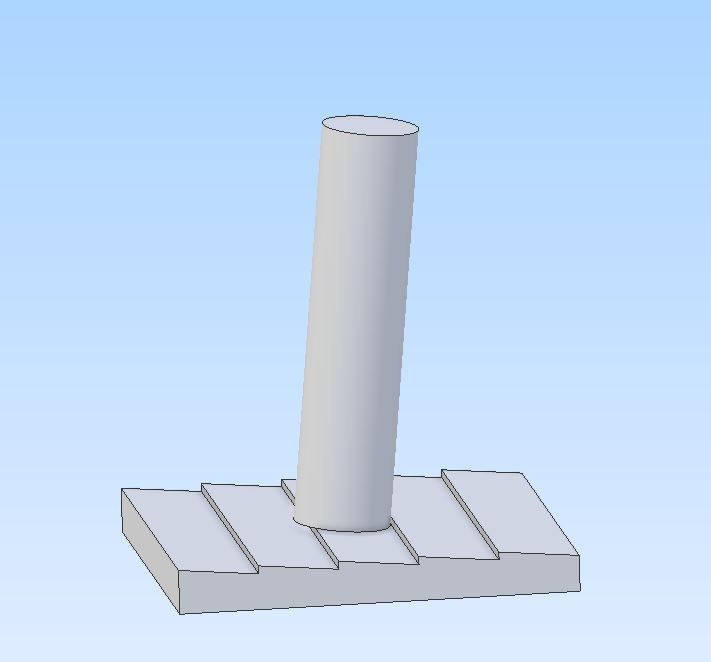
                          As for ridges, this is normally as a result of the cutting face not being absolutely level and every pass on the Y axis creates a sort of slightly angled path with each adjacent cut creating a minute step. See diagram below (Obviously VERY exaggerated ) of a work section to try and show the principle. This is normally a result of the head to table alignment. Hope that clarifies things a bit.

                          regards Mike

                          ridges.jpg


                          Jason beat me to it !


                          Edited By Mike Hurley on 20/09/2023 10:16:54

                          #660714
                          Andrew Skinner
                          Participant
                            @andrewskinner94774

                            This is more question than answer, but I read somewhere that you can stone the sharp corners of the endmill to improve the finish, obviously keeping that one just for facing cuts. Is this advisable? I haven’t tried it.

                            #660716
                            Benedict White
                            Participant
                              @benedictwhite51126

                              Jason and Mike, you have forgotten the other issue you can get with inadequate tram, where the tool cuts at 90 degrees to the one implied in your diagrams where you get a dip in the middle.

                              In any case, here is a link of me checking and adjusting the tram on my Naerok mill:

                              Naerok Round Column Mill Drill Initial setup and first cut

                              #660717
                              Justin Thyme
                              Participant
                                @justinthyme24678
                                Posted by JasonB on 20/09/2023 10:09:59:

                                0.2mm is a bit shallow and will tend to just wear the very corners of the cutter, What was the total depth you wanted to remove?

                                it is a wedge shape, so 0.5 off one end and 2.5 off the other. at 0.2mm it seems to cut with consummate ease. at 0.3mm there seemed to be a bit of viabration, it all seemed a little less happy.

                                #660718
                                Anonymous
                                  Posted by Andrew Skinner on 20/09/2023 10:34:06:

                                  …I read somewhere that you can stone the sharp corners of the endmill to improve the finish, obviously keeping that one just for facing cuts. Is this advisable?

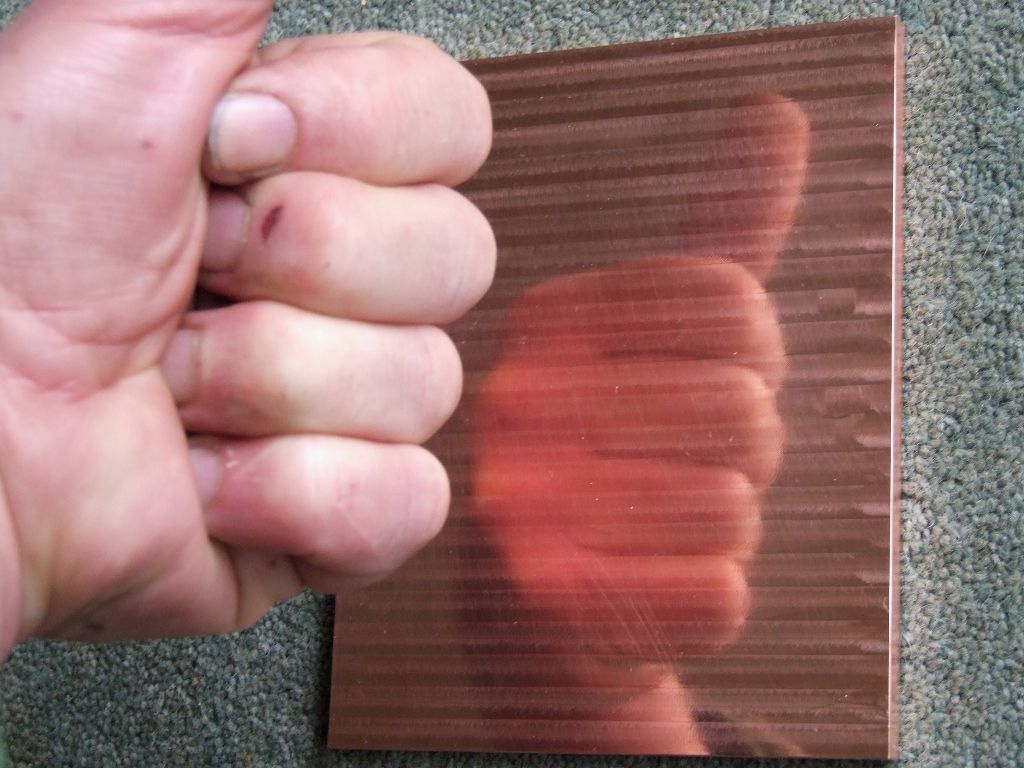
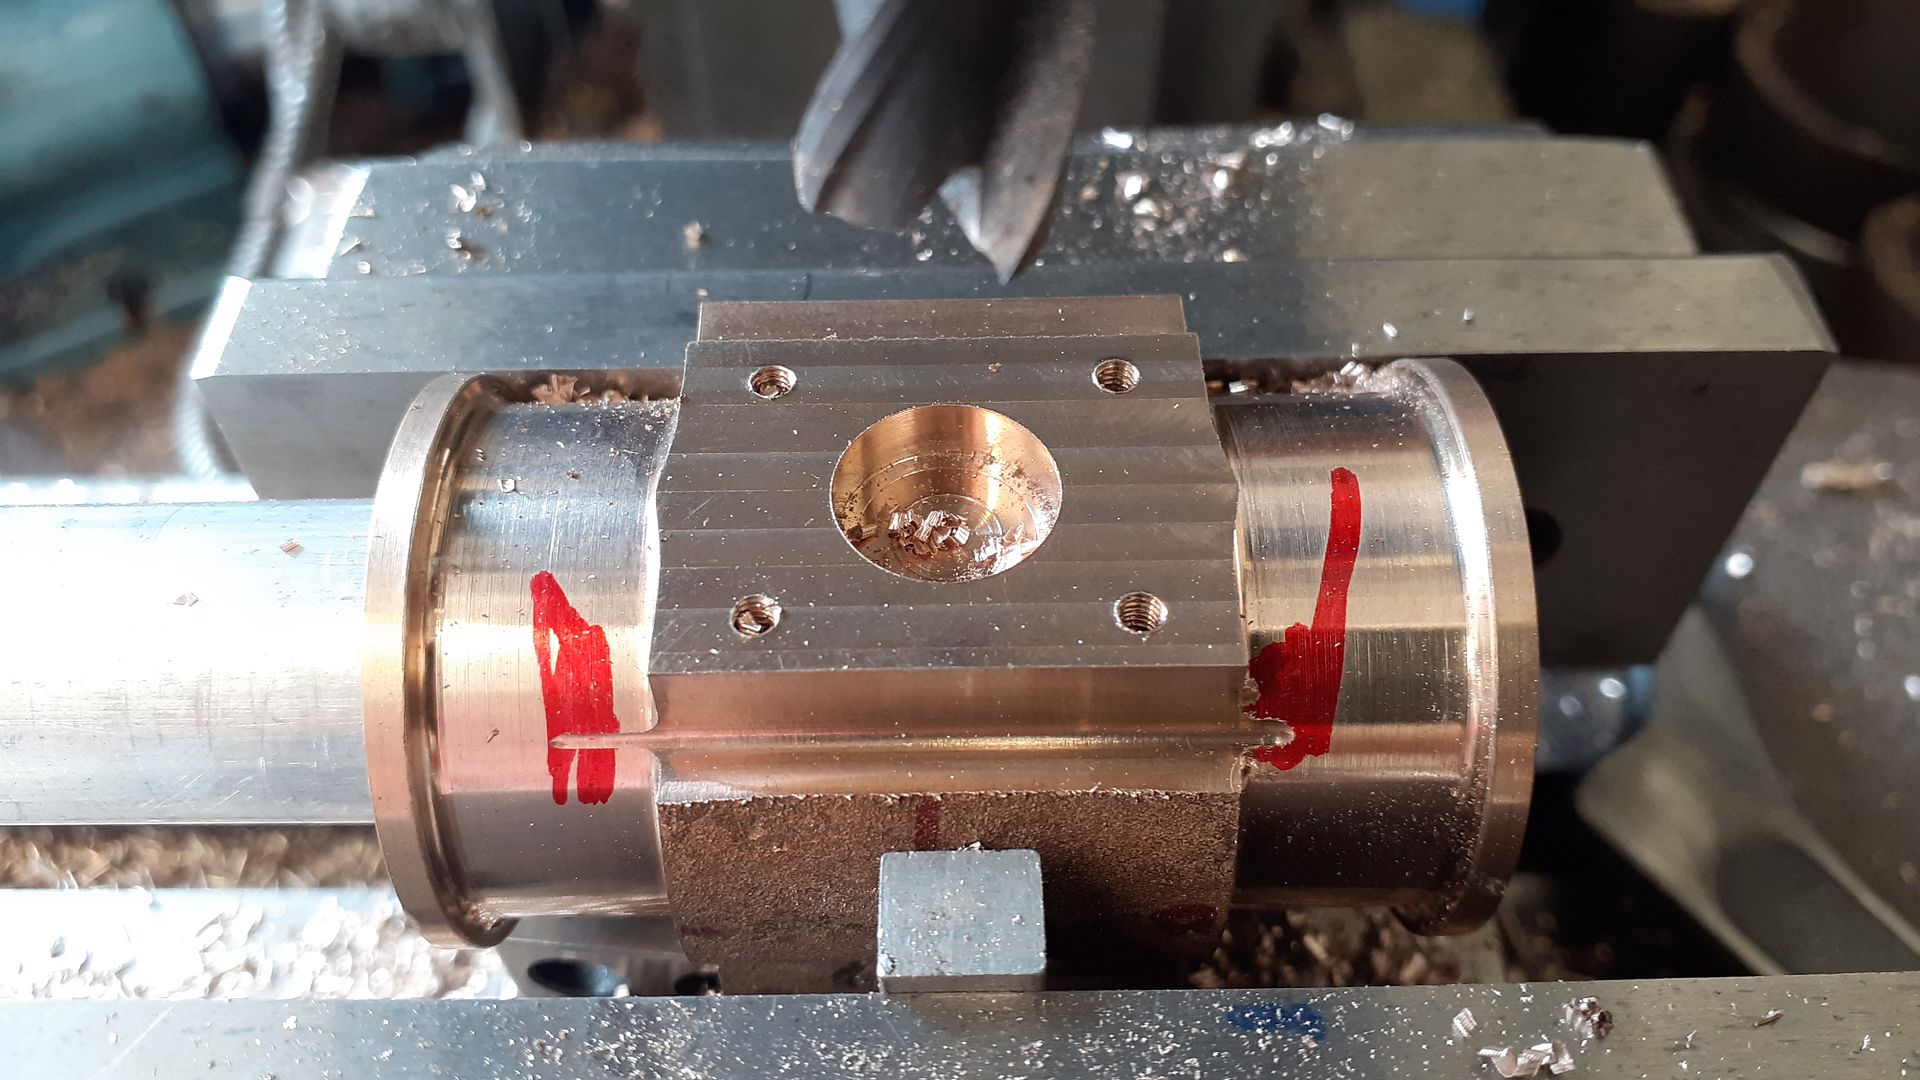
                                  It's an old school trick that should work, although I haven't tried it. The modern equivalent is a cutter with a radius (less than 1mm) ground on the corners. These cutters are expensive, circa £45 for a 10mm diameter one. I reserve them for final cuts when I need a good finish and a flat surface. I used one to finish the valve chest faces on my traction engine cylinders. This shows the sort of finish that can be achieved:

                                  mirror finish.jpg

                                  The part is a heat spreader, in copper, for an experimental high power inverter using silicon carbide power devices.

                                  Andrew

                                  #660721
                                  JasonB
                                  Moderator
                                    @jasonb

                                    Andrew must be buying his cutters from an upmarket supplier, 10mm carbide with 1.0mm radius can be had for just over £20 from the likes of APT and they work for me, even cheaper from other sources. I use them a lot when I want internal fullets to replicate castings and sometimes for flat surfaces

                                    As for the depth of cut question it sounds like the cutter is past its best or the machine not that able. maybe try 0.5mm and less stepover between passes combined with the slower speed and rigidly mounting the work.

                                    Edited By JasonB on 20/09/2023 11:23:15

                                    #660723
                                    Benedict White
                                    Participant
                                      @benedictwhite51126

                                      Thanks for the buying tip, I had not checked if APT did anything other than inserts Jason.

                                      #660724
                                      Anonymous
                                        Posted by JasonB on 20/09/2023 11:19:58:

                                        Andrew must be buying his cutters from an upmarket supplier…

                                        My standard cutters are the YG K2 range from Cutwel, they last very well despite being driven hard.

                                        Andrew

                                        #660725
                                        Andrew Skinner
                                        Participant
                                          @andrewskinner94774
                                          Posted by Andrew Johnston on 20/09/2023 11:07:09:

                                          Posted by Andrew Skinner on 20/09/2023 10:34:06:

                                          …I read somewhere that you can stone the sharp corners of the endmill to improve the finish, obviously keeping that one just for facing cuts. Is this advisable?

                                          It's an old school trick that should work, although I haven't tried it. The modern equivalent is a cutter with a radius (less than 1mm) ground on the corners. These cutters are expensive, circa £45 for a 10mm diameter one. I reserve them for final cuts when I need a good finish and a flat surface. I used one to finish the valve chest faces on my traction engine cylinders.

                                          Andrew

                                          Thanks, I’ll try that. I inherited lots of Clarkson cutters with my TS mill, many with chipped edges so might as well grind them off and use for facing.

                                          #660763
                                          Chris Mate
                                          Participant
                                            @chrismate31303

                                            So far till further experiments I got the best milling finish with a Walter 6x insert shoulder mill with the head roughtly tilting 2 degrees left accidently. I then mill conventional milling using the X-Axis from right far to left, then I go back without adjusting the Y-axis on same pathe instead of going horizontally…I then adjust the Y-Axis on, and repeat.
                                            It seemed to smooth out the cut on the backwards milling on same track.

                                            Recently I went and adjust the head 0-Degrees in relation to bed, however this was a digital level meterbox, so not accurate enough.

                                            I was thinking of getting one of those Zero setters to follow one insert placement in 180 degrees on bed, which will reflect the adjustment from actual cutter insert perspective and adjust head accordingly, not sure which method will relate to best results.

                                            #661147
                                            Pete
                                            Participant
                                              @pete41194

                                              If you still have enough material left Justin, you could still fly cut that surface even with the raised area just by working to known coordinates from each part edge and using the hand wheel divisions. Trying to sand and polish all that out is going to take a very long time.

                                              I consider end mills as a material removal tool much like a drill is. For larger and flat areas and whenever possible before I bought my face mills, I'd then use a fly cutter as that's what they were always intended for as a tool to remove tool marks while roughing the part out. But I should also mention they are certainly not intended for nor should they ever be used to make large depths of cut. Yes the tool itself can do so, our mill spindle bearings and splines will get damaged after enough of that. Decent face mills can do both roughing and finishing. And the difference between them and a fly cutter, as long as you have at least 2 cutting teeth removing material at the same time during the full rotation, the cutting forces are then loaded against one side of the spindle splines. So they can take those larger depths of cut to the limits of what your mill can do. Just like a two tooth slot mill, it's still a good practice to slow a face mills entry and exit points at each end of the part. But it's the intermittent cutting loads a single tooth cutter produces that starts hammering those spindle splines and bearings to an early death. Watch any Youtube video where there taking large depths of cut with a fly cutter and you can plainly hear that high speed hammering effect if you know what to listen for.

                                              I've set my mill up with a fair amount of tooling to also precision machine hardwoods to closely match metal parts when I need that option. As a test, I spent an extra hour or so one day and got the head on my BP clone trammed in to within .0001" over a 9" circle. Very time consuming, tough and frustrating to accomplish. I then used what's really a 3 tooth 3" diameter face mill for wood. Mine were sold by Wagner in the U.S. at one time and called a Safe T Planer that was originally designed for drill press use. There light years better on a mill and the wood locked in a vise. I made one clean up cut and then a fine finishing pass of .005" depth. Even with that light depth of cut on wood with a Bridgeport clone in almost brand new condition and properly adjusted, there was still clear evidence of the tool taking probably a couple of 10ths off the back side of it's rotation. It's the stack up up all the tiny deflections and clearances within the whole assembly that prevent a clean cut with no back cutting. And the harder the material your cutting and duller the tool, the deeper those back cuts will be. Yes tilting the head a tiny amount can eliminate those back cutting swirls or even slight grooves if chip gets between a tooth and the part face. But your part faces then aren't flat, there slightly dished. That may or may not matter in some cases. While I still get some of that back cutting with my face mills, most times it's happening on a much less used and sharper portion of the cutting tips. If I speed the rotation up a bit and slow the feed rate for those light finishing cuts to dimension. Most times those face mills will still provide a more than acceptable surface finish. I even use my fly cutters sometimes, the sanding and polishing hours they've saved trying to remove any minor tool marks still make them a worth while tool to have.

                                              #661151
                                              Paul Lousick
                                              Participant
                                                @paullousick59116

                                                Justin, There is a lot of stick out from the end of the mill spindle to the end of the cutter which will allow it to deflect. What type of tool holder are you using. It looks more like a drill chuck which are not rigid enough for milling.

                                                #661153
                                                JasonB
                                                Moderator
                                                  @jasonb

                                                  Its a collet chuck, popular from China before ER became the main choice. Uses a similar style collet I use done when I first got my X3 without problem and do still use it on the odd occasion as the nut is smaller dia.

                                                  #661158
                                                  John ATTLEE
                                                  Participant
                                                    @johnattlee20632

                                                    Justin, it looks as if the plate is secured to a wooden block by wood screws which I would have thought is nowhere near rigid enough. I can understand why you have done it that way. Others might be able to suggest how to mill a relative large (relative to its thickness) plate. I would clamp it in multiple places but expect it not to be completely flat. Perhaps soldering it to a heavier plate /block or using a suitable adhesive that would come apart with heat. Both techniques would have a parallelism problem wrt to its base.

                                                    John

                                                    #661172
                                                    SillyOldDuffer
                                                    Moderator
                                                      @sillyoldduffer
                                                      Posted by Andrew Johnston on 20/09/2023 11:07:09:

                                                      Posted by Andrew Skinner on 20/09/2023 10:34:06:

                                                      …I read somewhere that you can stone the sharp corners of the endmill to improve the finish, obviously keeping that one just for facing cuts. Is this advisable?

                                                      It's an old school trick that should work, although I haven't tried it. The modern equivalent is a cutter with a radius (less than 1mm) ground on the corners. These cutters are expensive, circa £45 for a 10mm diameter one. I reserve them for final cuts when I need a good finish and a flat surface. I used one to finish the valve chest faces on my traction engine cylinders. This shows the sort of finish that can be achieved:

                                                      mirror finish.jpg

                                                      Nothing wrong with stoning HSS lathe tools because they are easily reground, at least by experienced operators with a good eye. And stoning twist-drills for a special purpose is respectable too. But the idea of stoning a milling cutter upsets me! To my mind the sharp corner edges of a milling cutter are its most precious asset, to be cosseted as long as possible. When they're damaged the cutter loses much of it's utility, and needs to be replaced or sharpened, both a bit painful!

                                                      If finish on a large scale was important, I'd prefer Andrew's approach – buy a cutter designed for the job.

                                                      Of course being an amateur, I buy inexpensive cutters, use them for roughing out everything from squishy Aluminium to chilled cast-iron, then expect them to produce a mirror finish from fine cuts, and I'm certain they're rubbish unless they last at least 30 years. My mill's not very rigid either!

                                                      My first question is, how bad is the problem and does it need to be fixed. Andrew Skinner's photo is visually flawed, but could be acceptably flat (mostly).

                                                      Flatness can be established by shining a light on the back of a straight-edge and looking for light escaping between the work and the edge. Also possible to detect tiny ridges by feel – fingertips and nails are remarkably sensitive to surfaces.

                                                      Milling cutters almost always leave characteristic marks. They're obvious in Andrew J's excellent copper plate example, which is probably very flat and has classy finish with strong mirror effect. The example is as good as can be expected from a well-adjusted stiff milling machine, set up correctly with an appropriate cutter, and driven by a skilled operator.

                                                      The remaining milling marks are unavoidably tiny. If a better finish is needed, change technique. Usually polishing with a succession of ever finer emery paper, and then buffing.

                                                      When milling I try cut in parallel straight lines because changing course leaves deep marks. Also use the largest diameter cutter available. Fly-cutters generally produce a better finish than other types but are slow. And an HSS fly-cutter can be stoned without upsetting me!

                                                      Dave

                                                    Viewing 25 posts - 1 through 25 (of 28 total)
                                                    • Please log in to reply to this topic. Registering is free and easy using the links on the menu at the top of this page.

                                                    Advert

                                                    Latest Replies

                                                    Home Forums General Questions Topics

                                                    Viewing 25 topics - 1 through 25 (of 25 total)
                                                    Viewing 25 topics - 1 through 25 (of 25 total)

                                                    View full reply list.

                                                    Advert

                                                    Newsletter Sign-up