Alyn RLE Last and First
Alyn RLE Last and First
Home › Forums › I/C Engines › Alyn RLE Last and First
- This topic has 43 replies, 13 voices, and was last updated 13 August 2024 at 06:57 by
derek hall 1.
-
AuthorPosts
-
22 July 2023 at 19:28 #653276
 JasonBModerator@jasonb
In a departure from my usual practice of not posting a build thread until an engine has at least been test run I'm going to make an exception with this one. Graham Corry of Alyn Foundry & Sons has announced this week that there will be a new batch of castings being done for his popular "RLE" design of hit and miss engines. For those that don't follow Alyn's Facebook page and who may want to secure a casting set then make contact via this e-mail address and you can check the price and place your deposit. alynfoundry103@gmail.com. Hopefully most of this thread should be complete and act as a guide to anyone who decides to order an RLE.
I got most of a set of castings for this engine a couple of months ago which Graham managed to cobble together from his last few remaining castings with the exception of the flywheels which will be getting cast along with the new batch of kits so that will likely make this the last supplied with castings from the old foundry and no doubt rammed up by Graham himself.
This will also be the first engine to be built to a new set of drawings as the original set leave a bit to be desired in this day and age. They will also be in metric which will hopefully attract some of the newcomers into the hobby who have been brought up with the metric system and have tooling and machines based on that system rather than Bananas.
The new drawings set will also take into account the newer carb design and show modified rocker arm, rocker bracket, cam and head details to suit it's straight vertical pipe entry. It will show the MOD gears, metric fixings, O ring for the piston and a fuel tank (No Baccy tins from now on) as well as optional square push rod and governor balance weight designs. Lastly there will be details of a cart with hopefully the addition of cast cart wheels and axle brackets and a spoke mounted pulley casting that will be available as extras.
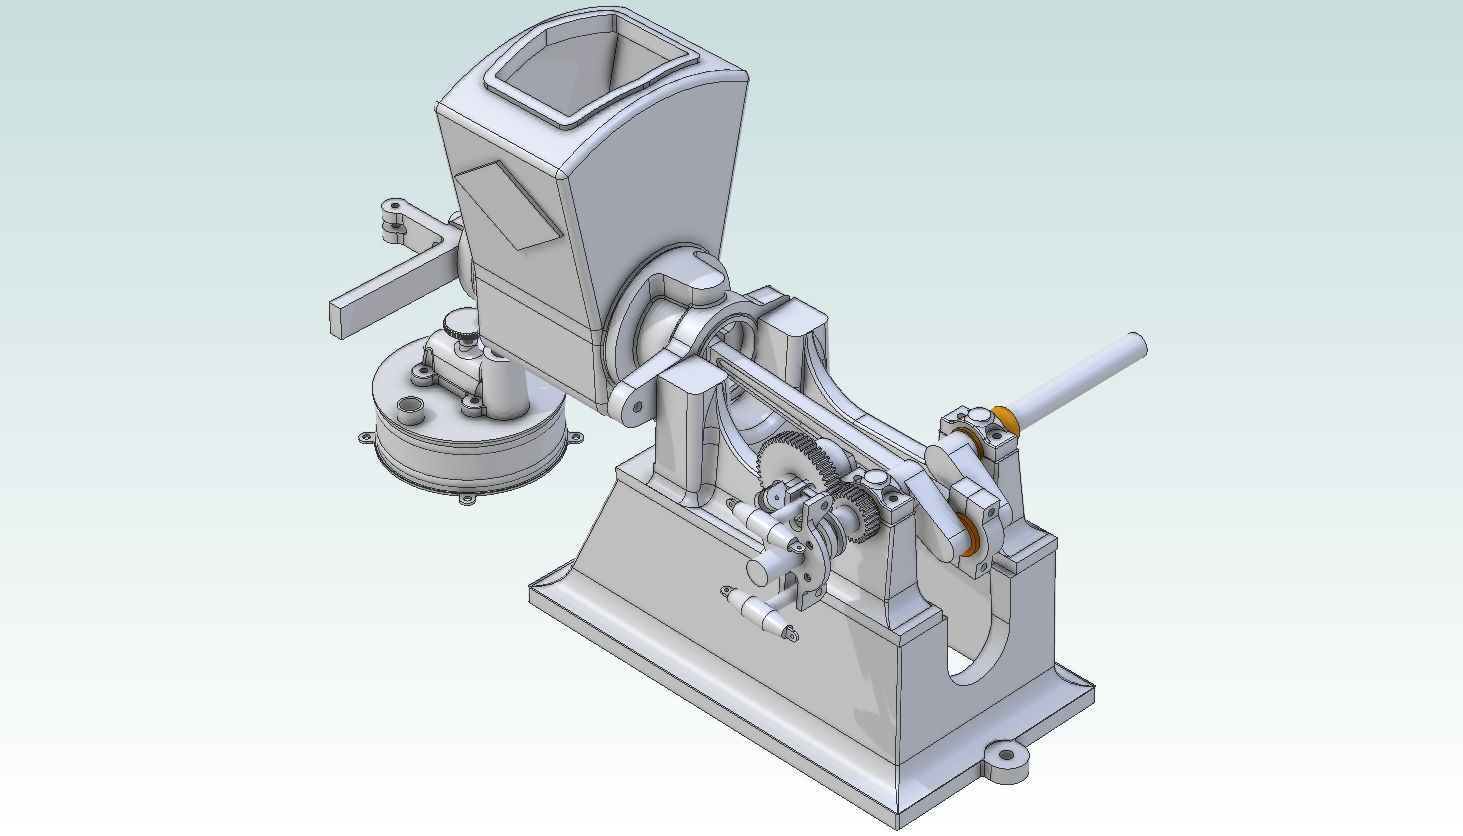
I have been modelling the engine as work progresses making adjustments to suit how the castings machine up as I go, this is the state of play so far.

That's enough of the intro, time for some swarf

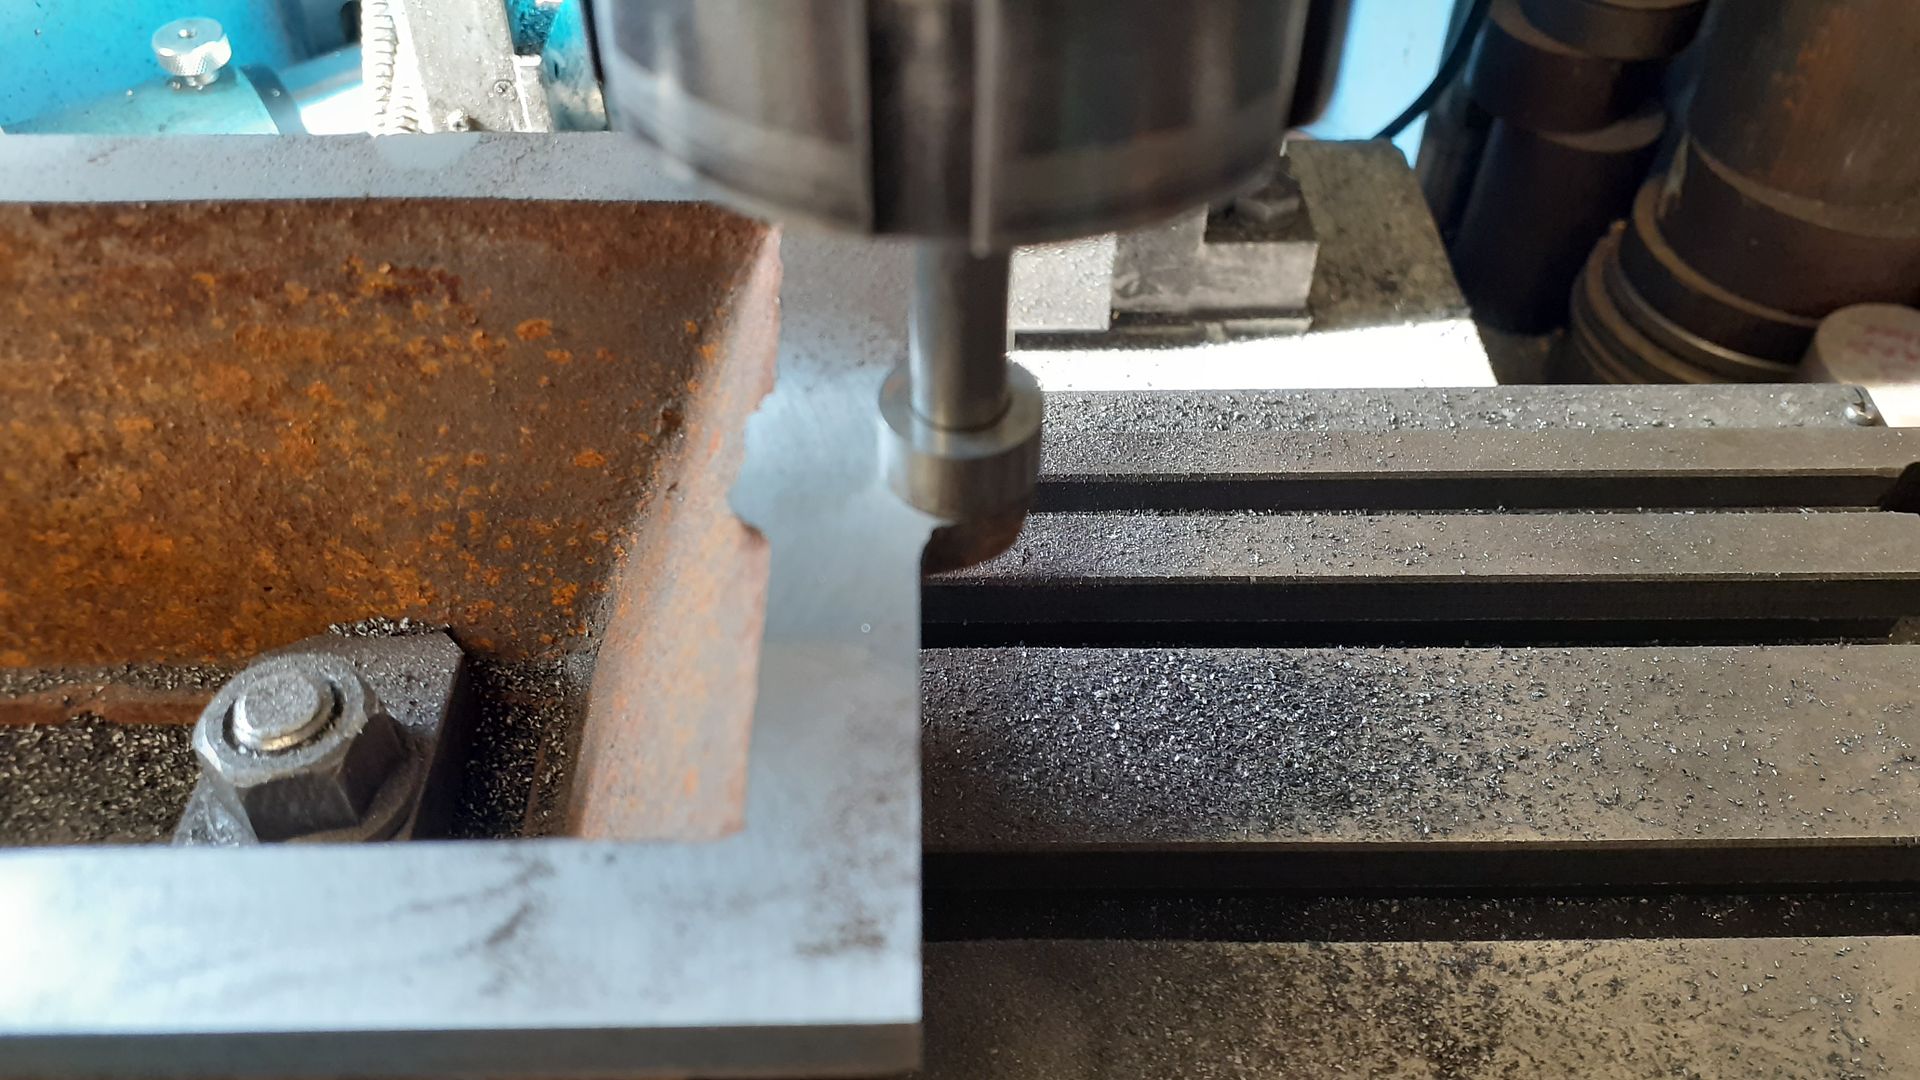
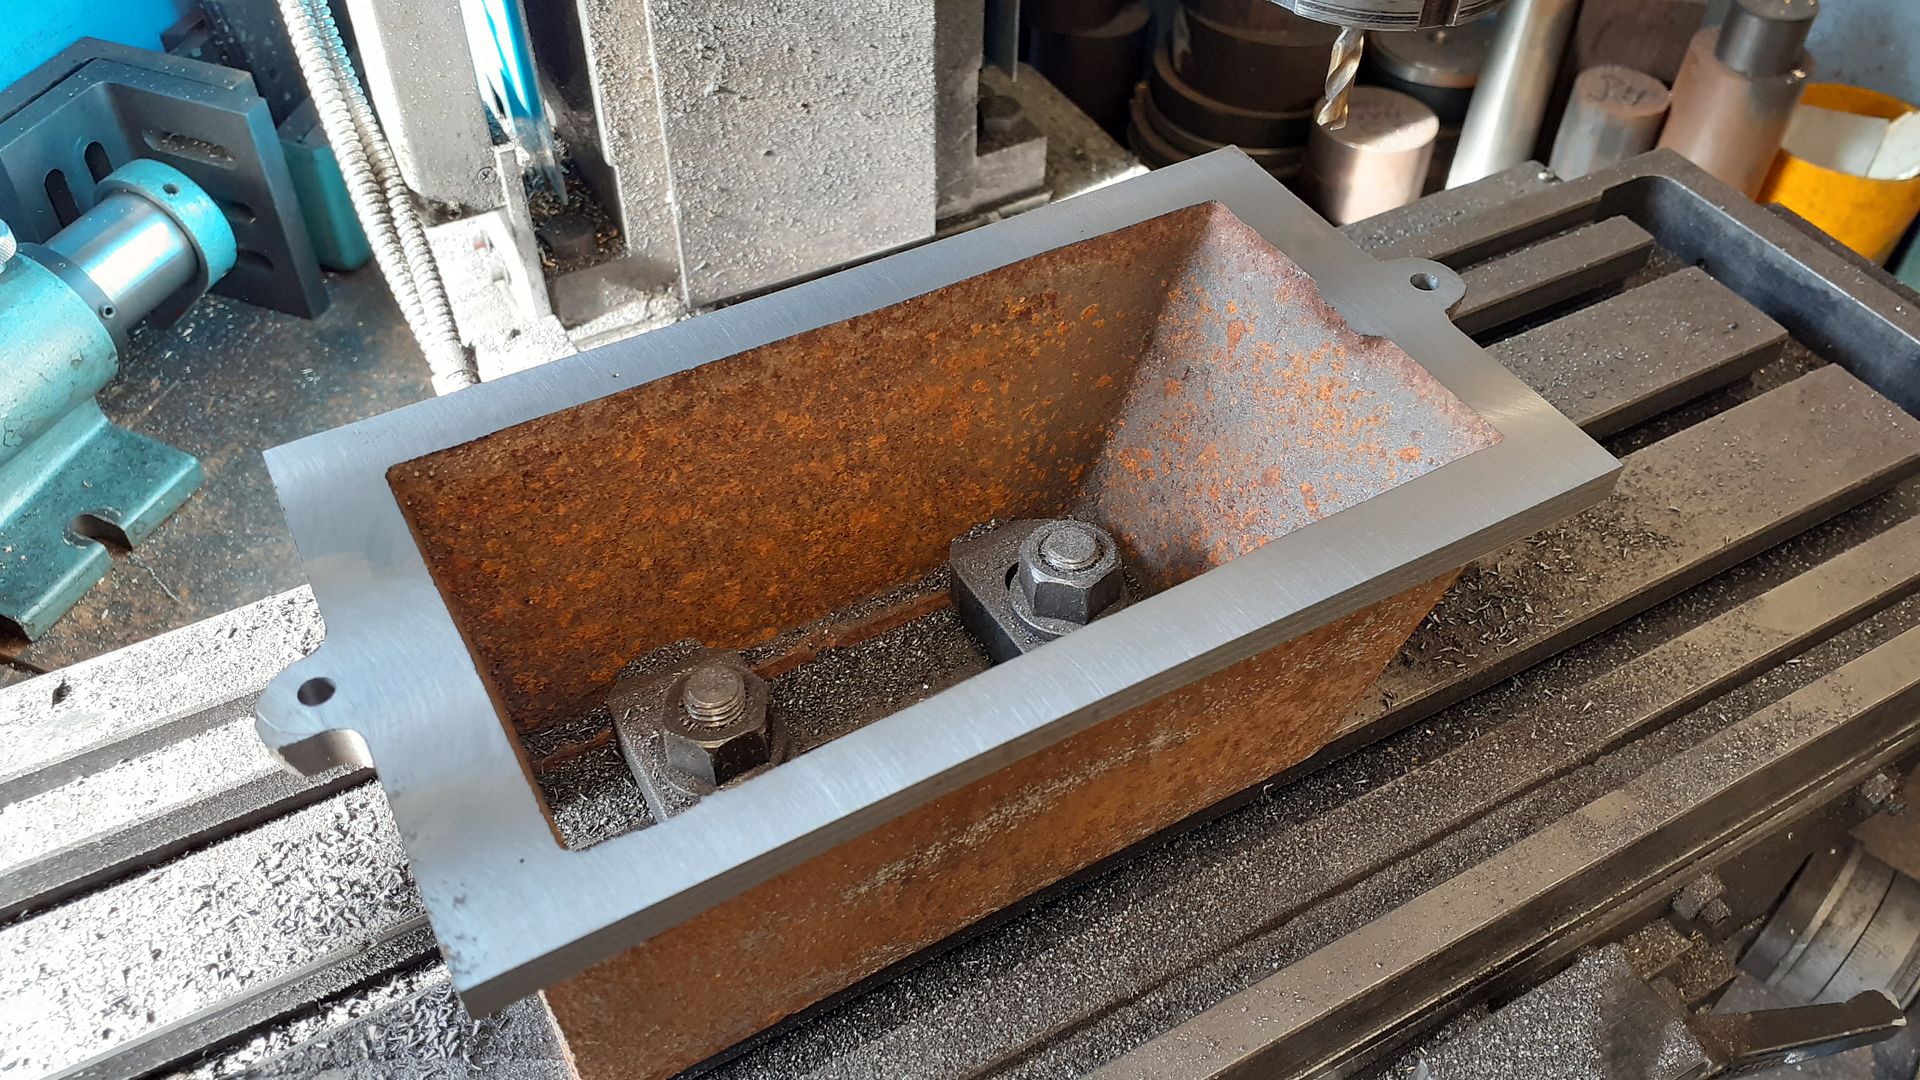
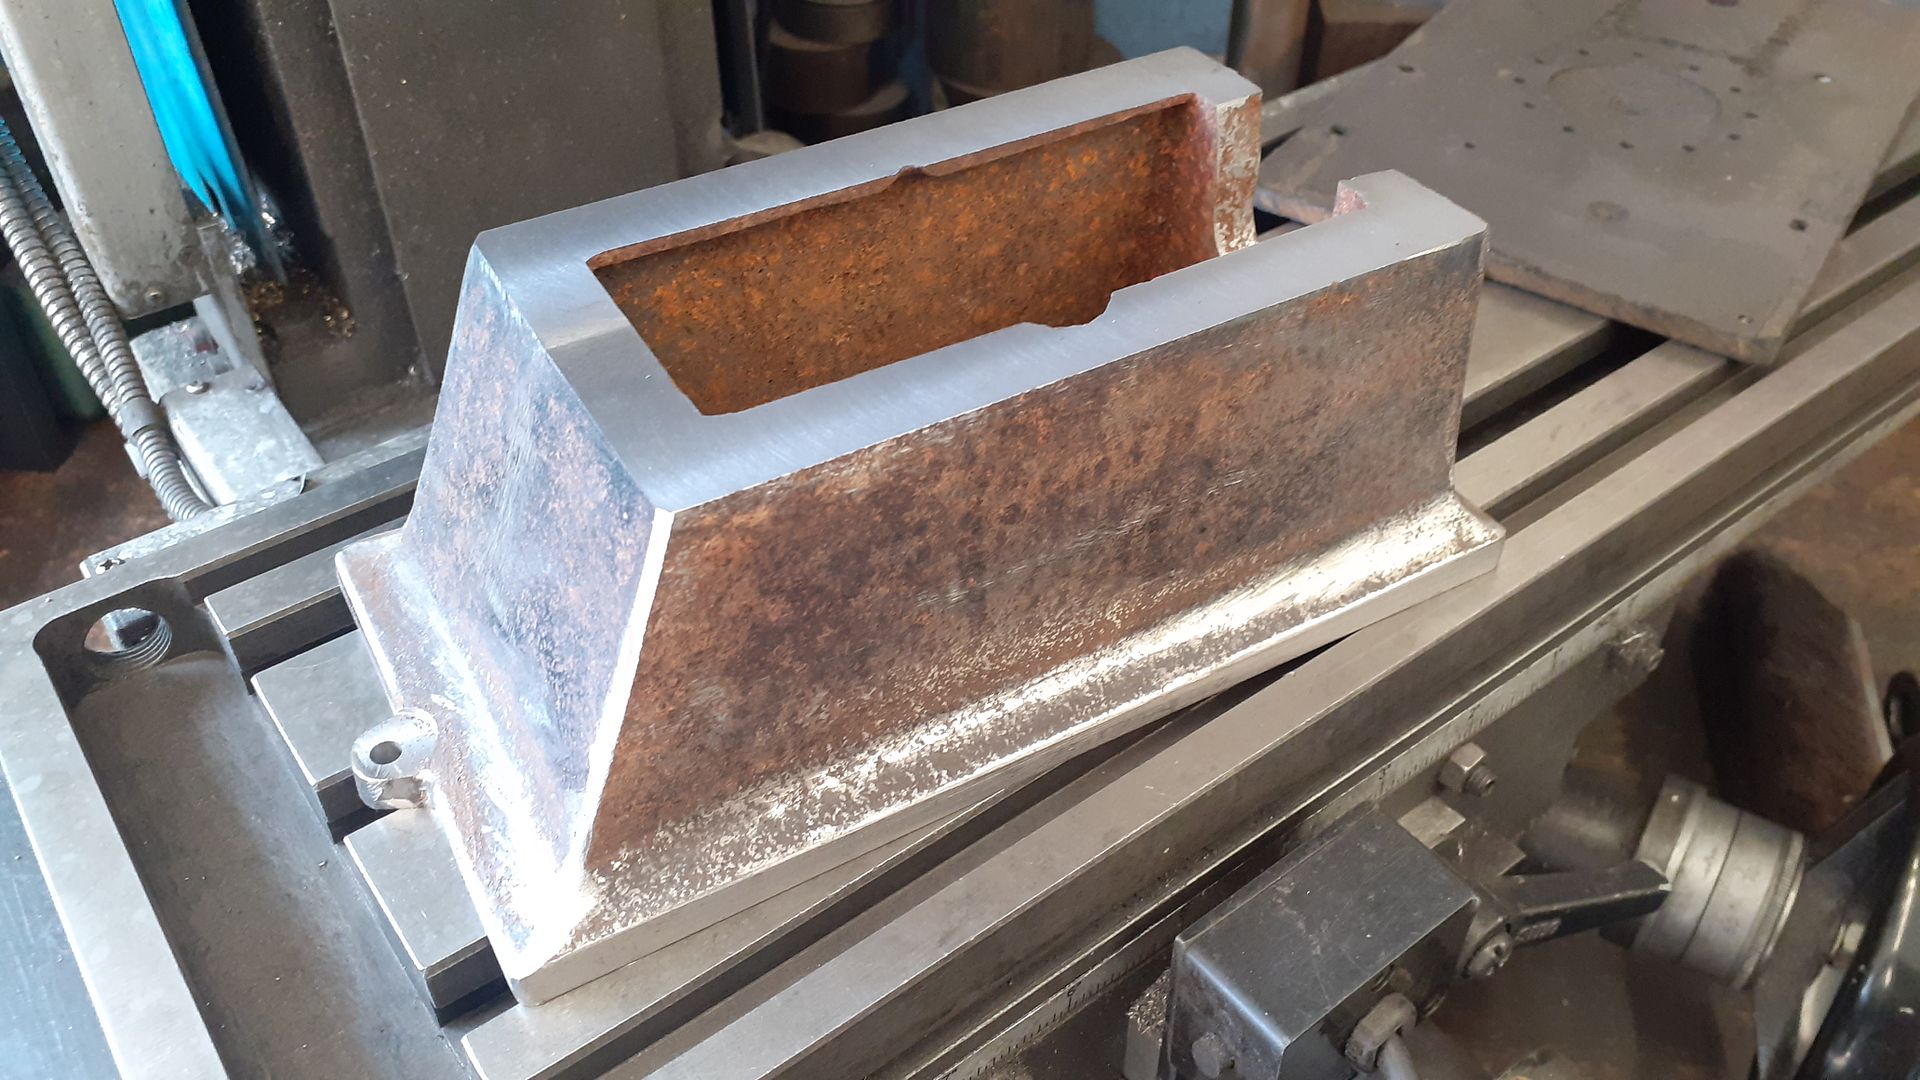
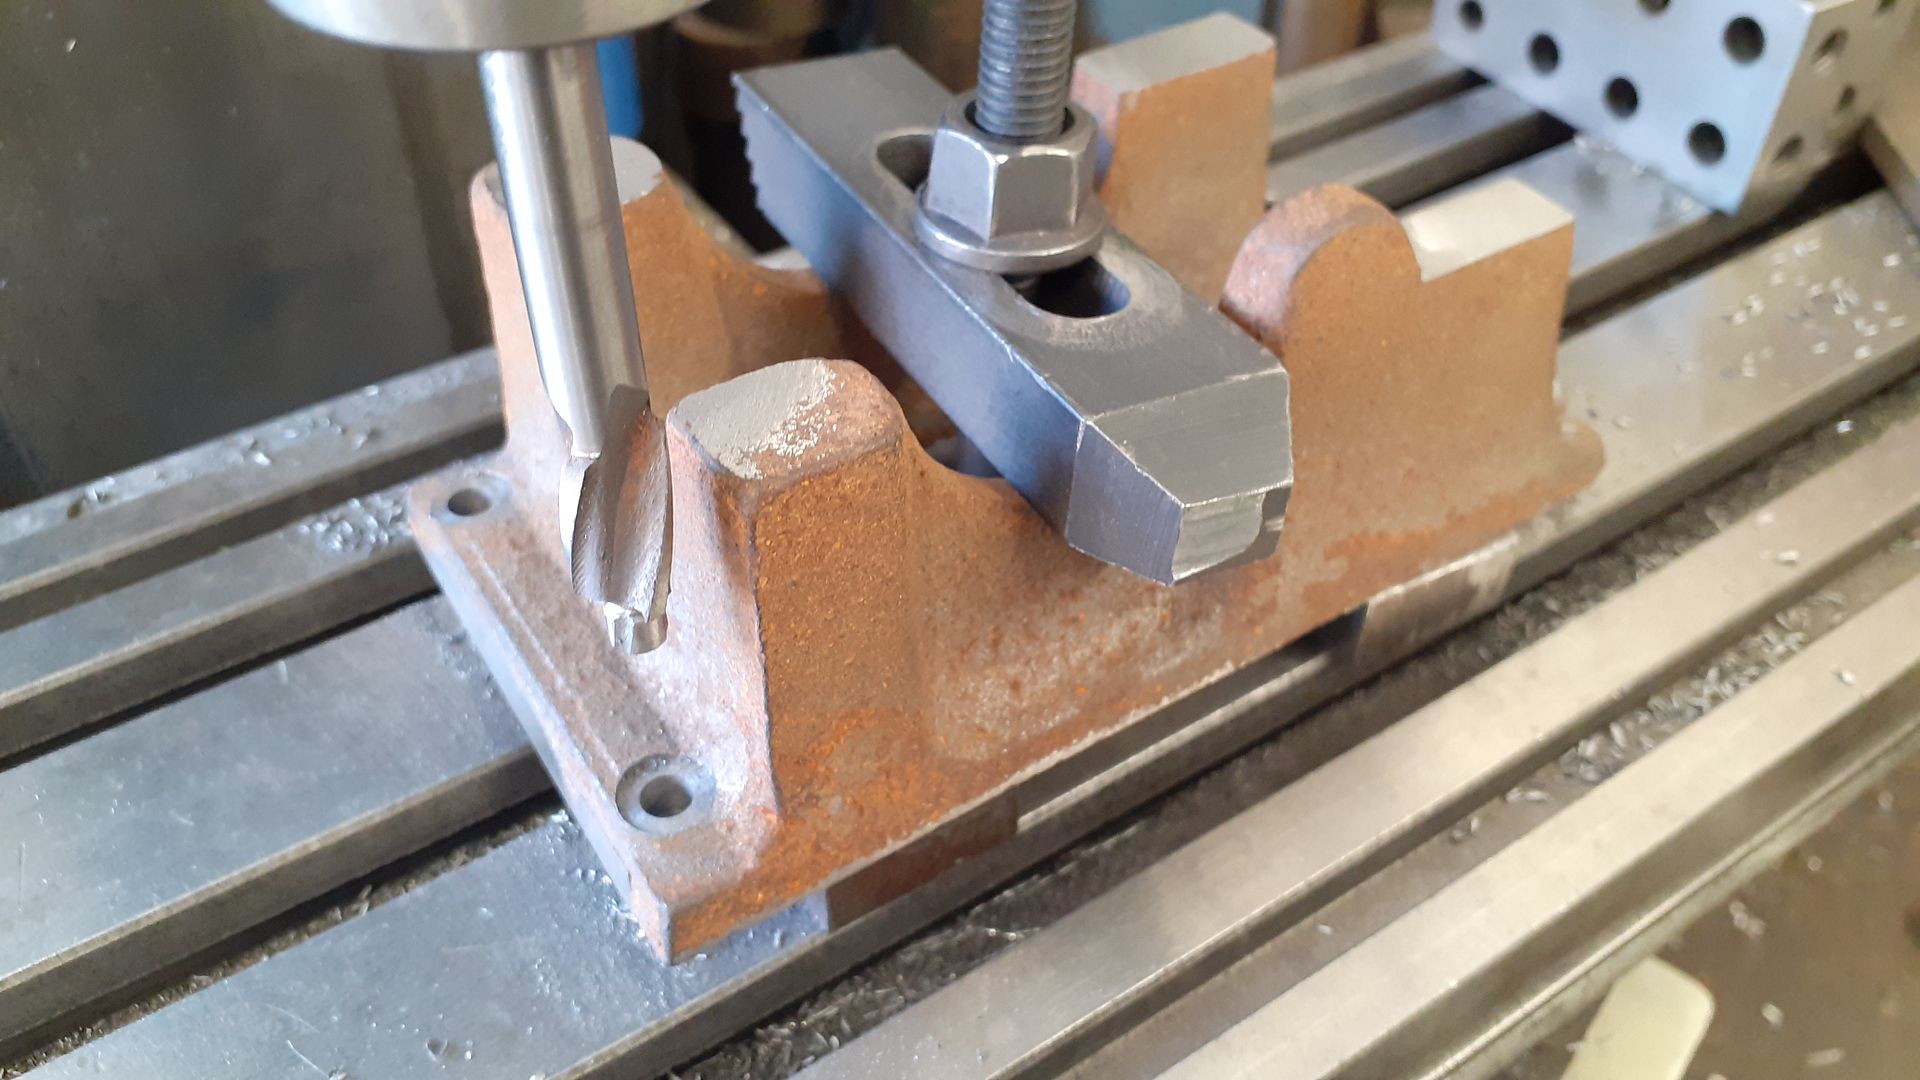
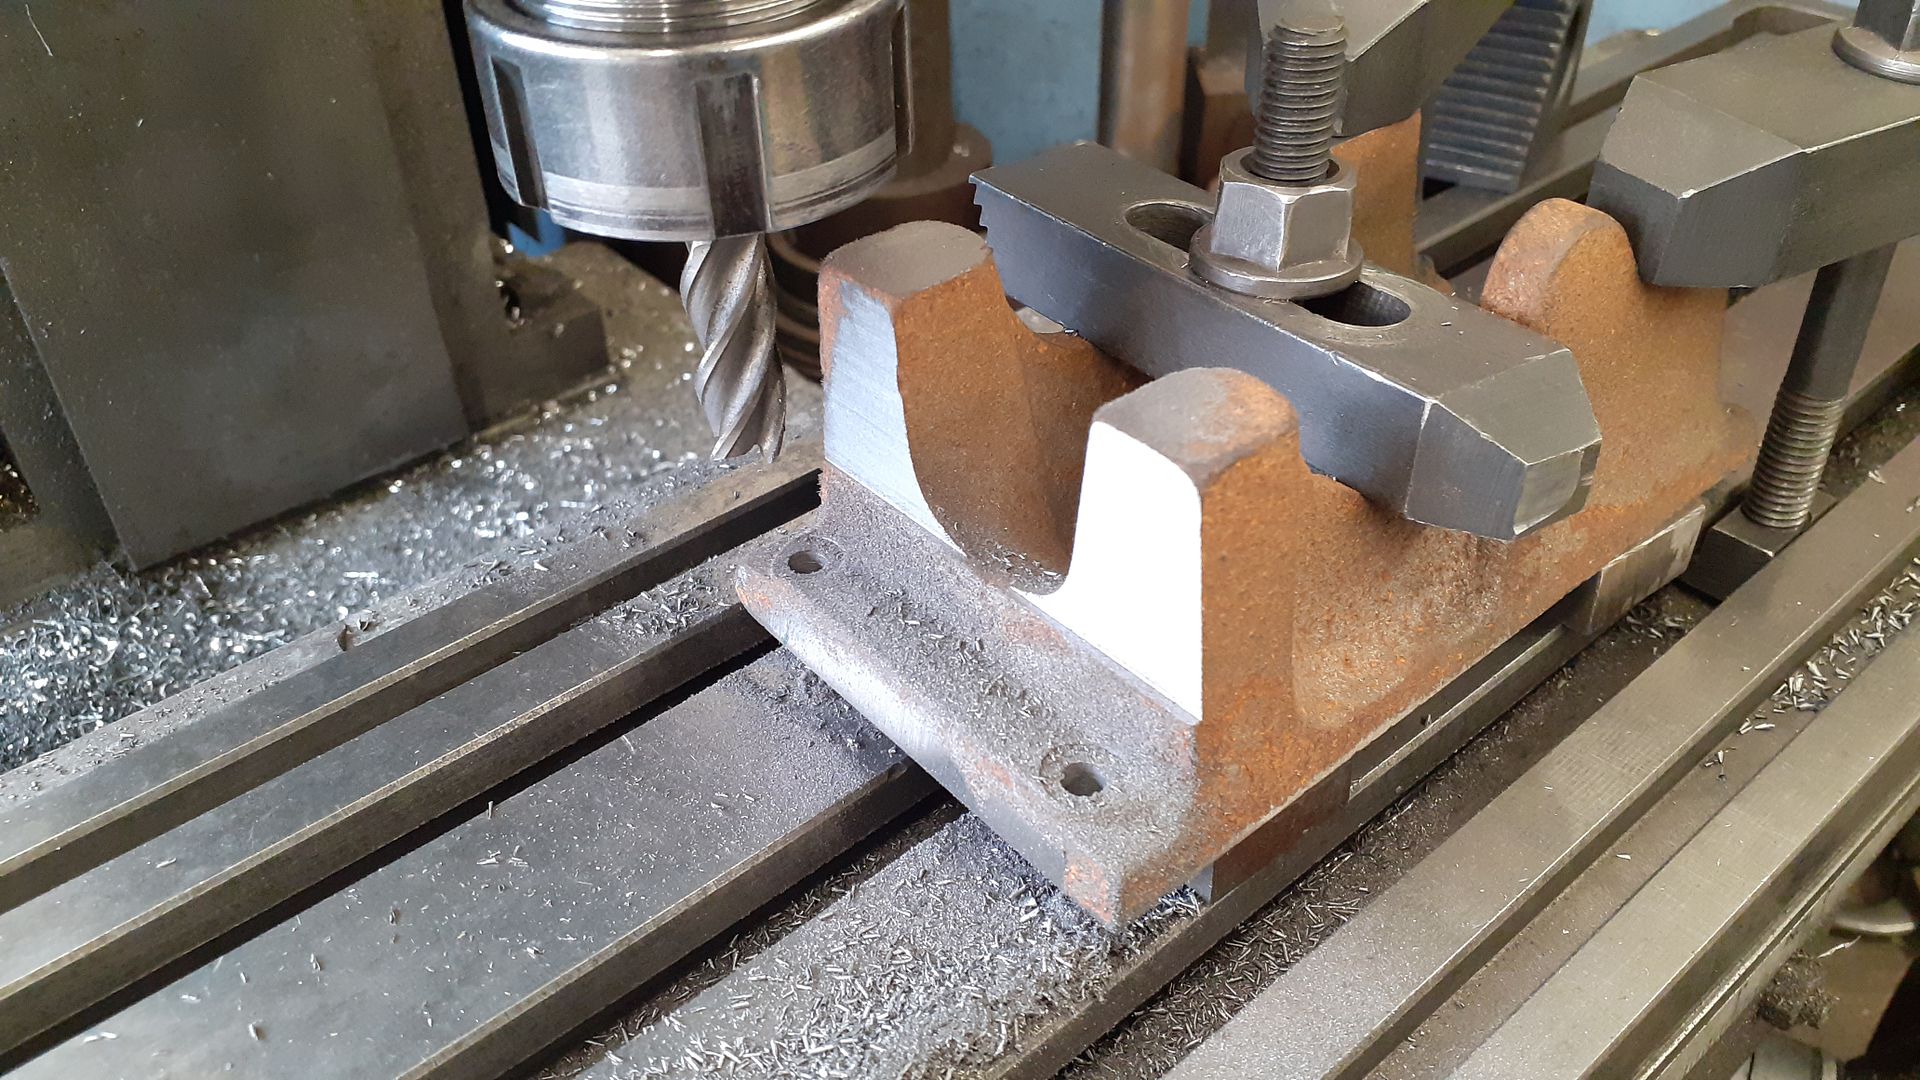
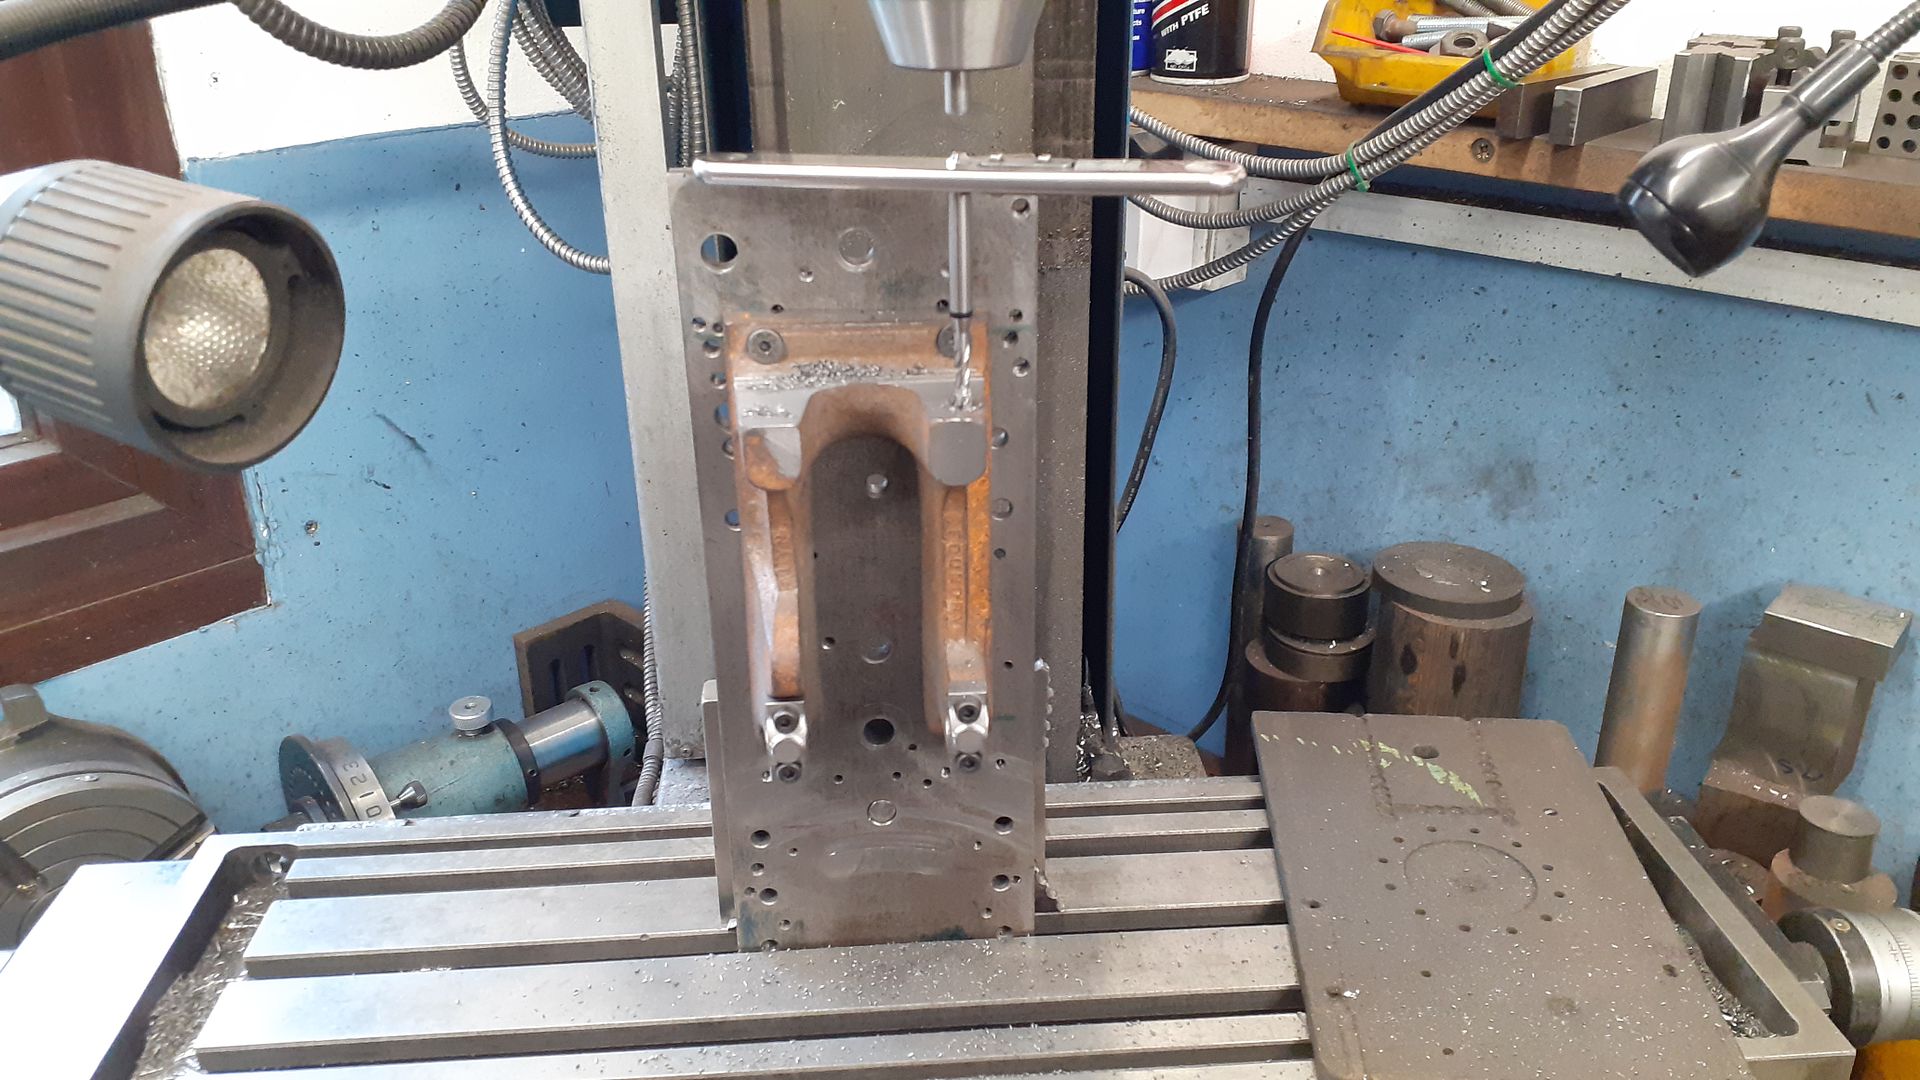
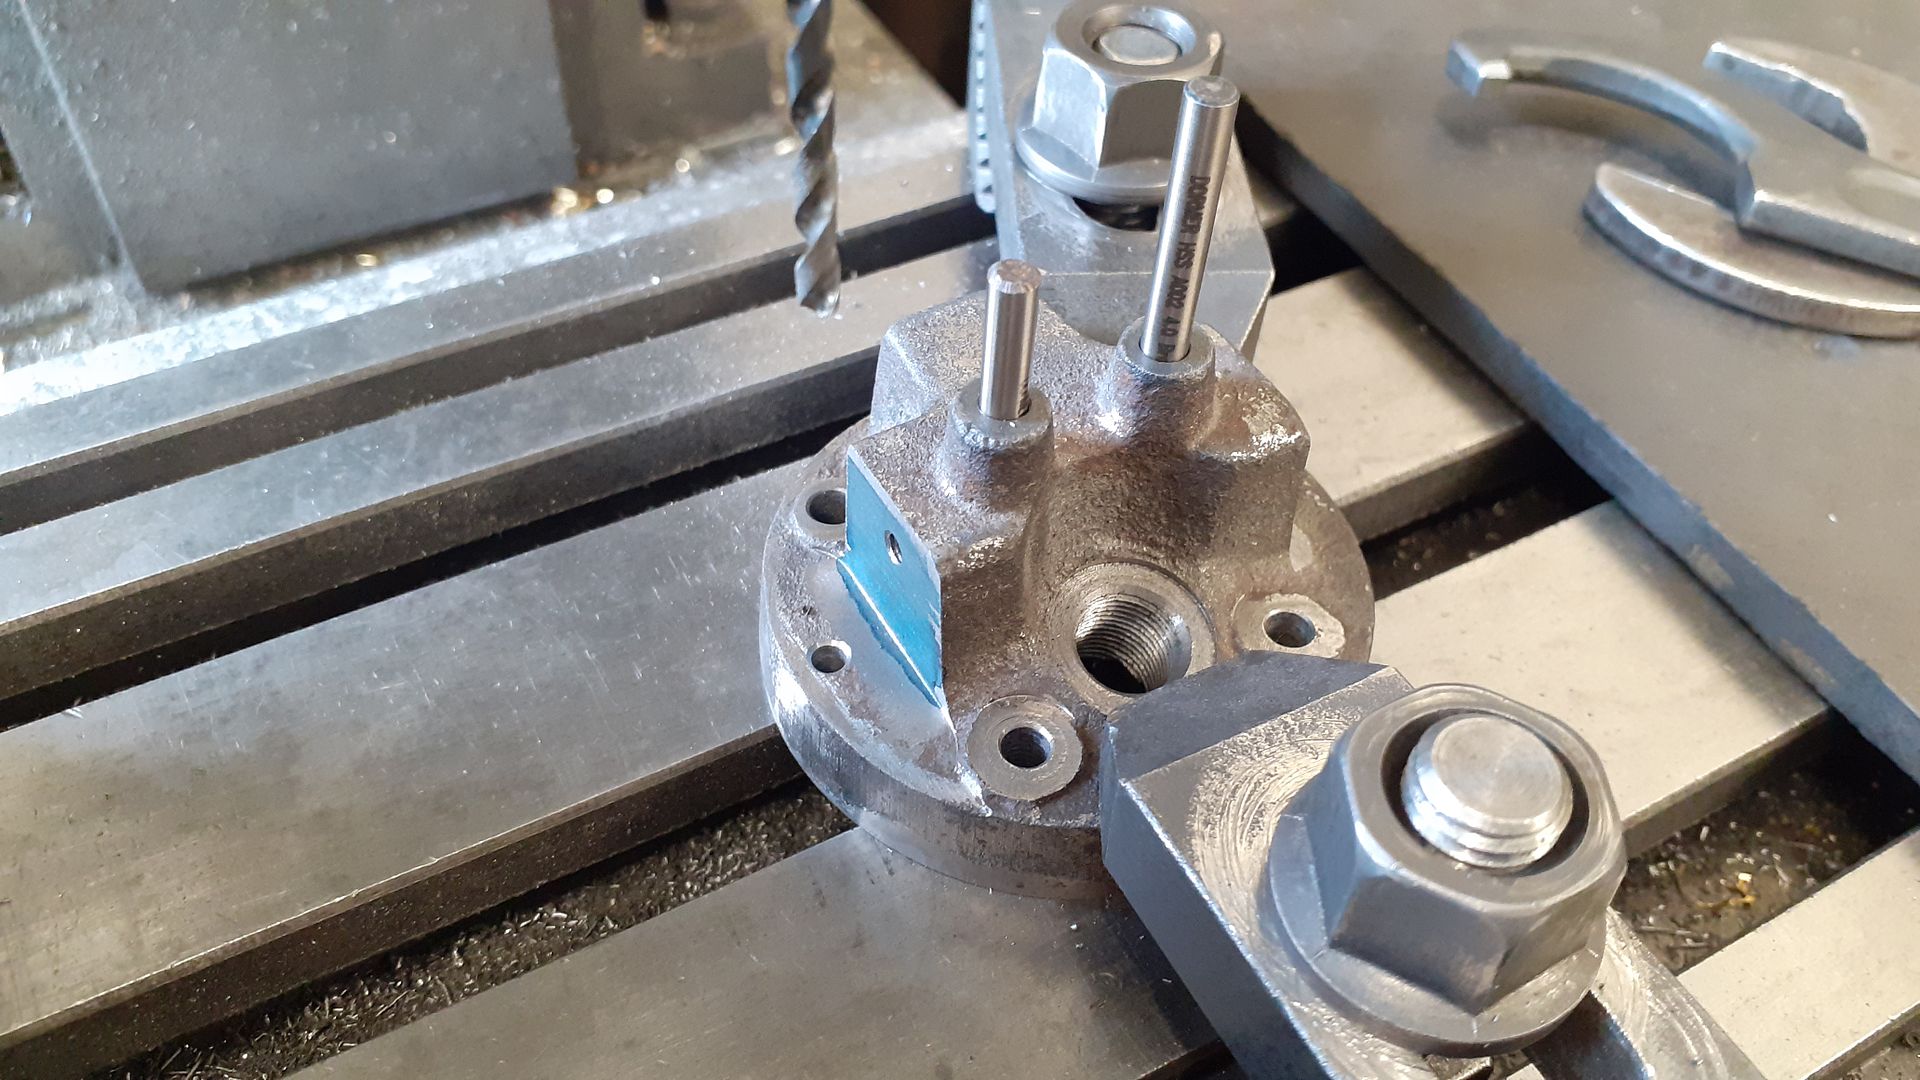
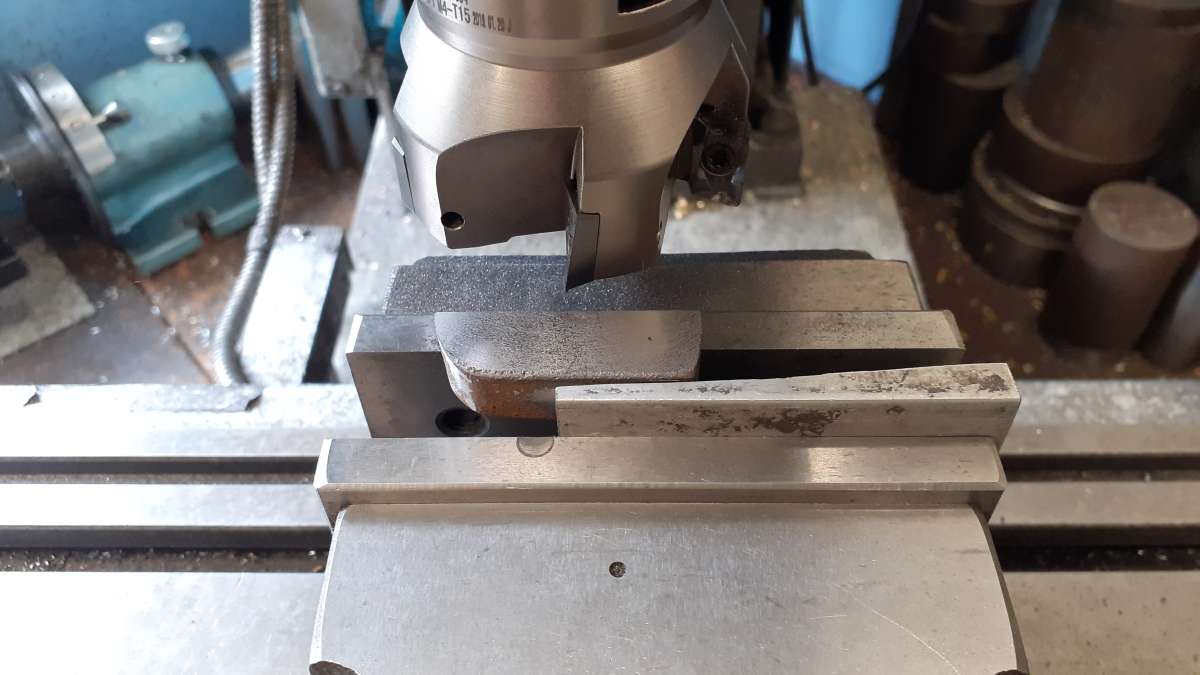
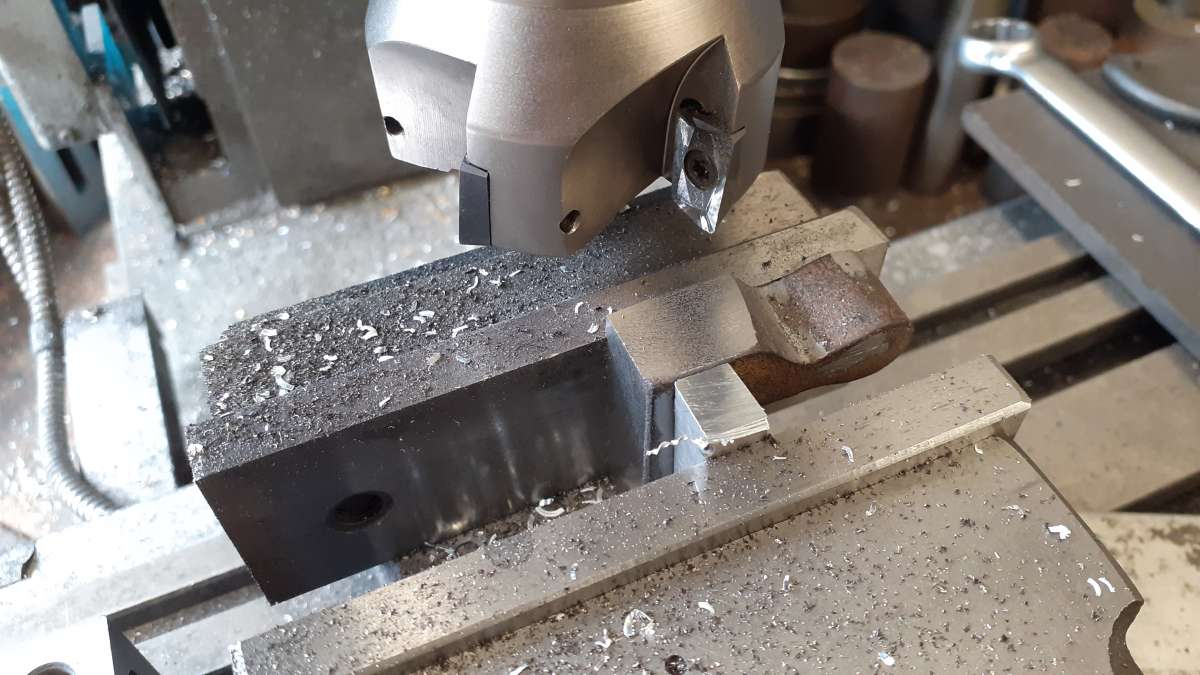
Starting with the base casting after a light fettling it was shimmed up on the mill table to get the sides tapering equally and the bottom flange milled flat using an insert facemill. While still held in position by the two clamps on the inside a round disc was held in the mill spindle to help best locate the centre of the two cast bosses.

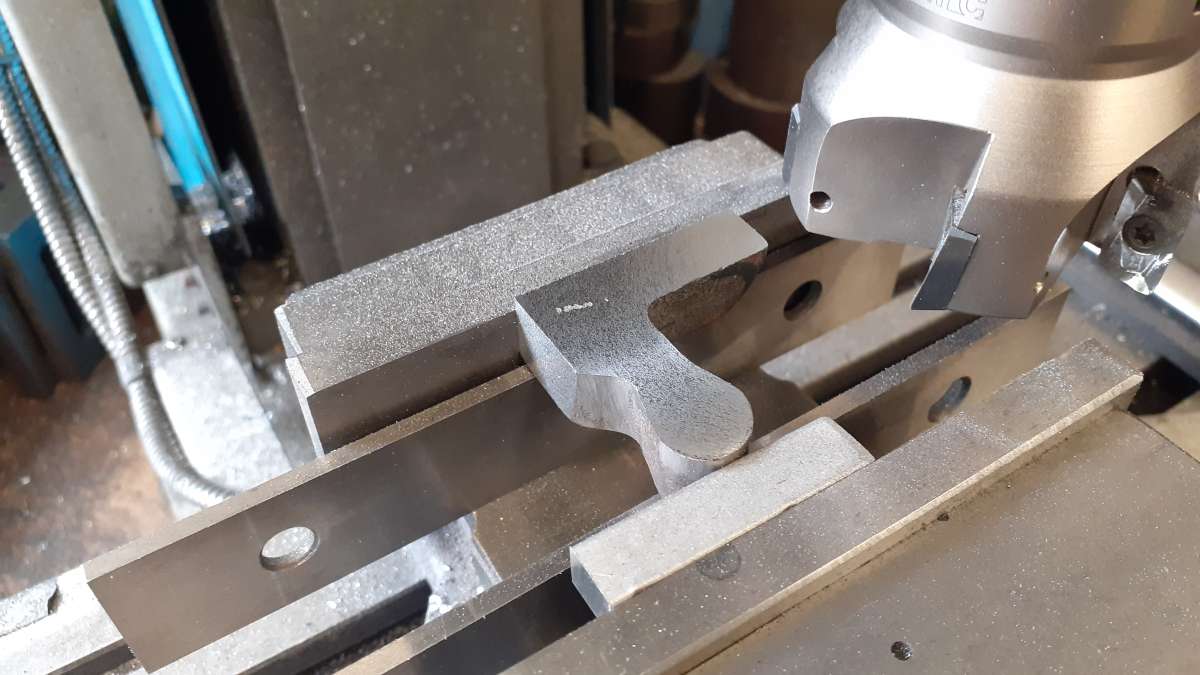
After spotting and drilling for the hold down holes I ran around the edge to just clean up the flange so it was straight enough to use as a reference surface, you may also be able to see that I have milled the internal fillets to the left boss stopping at a scribed line that was done around the disc at the time of locating it which can be used as a guide to trim the bosses to a more attractive shape.

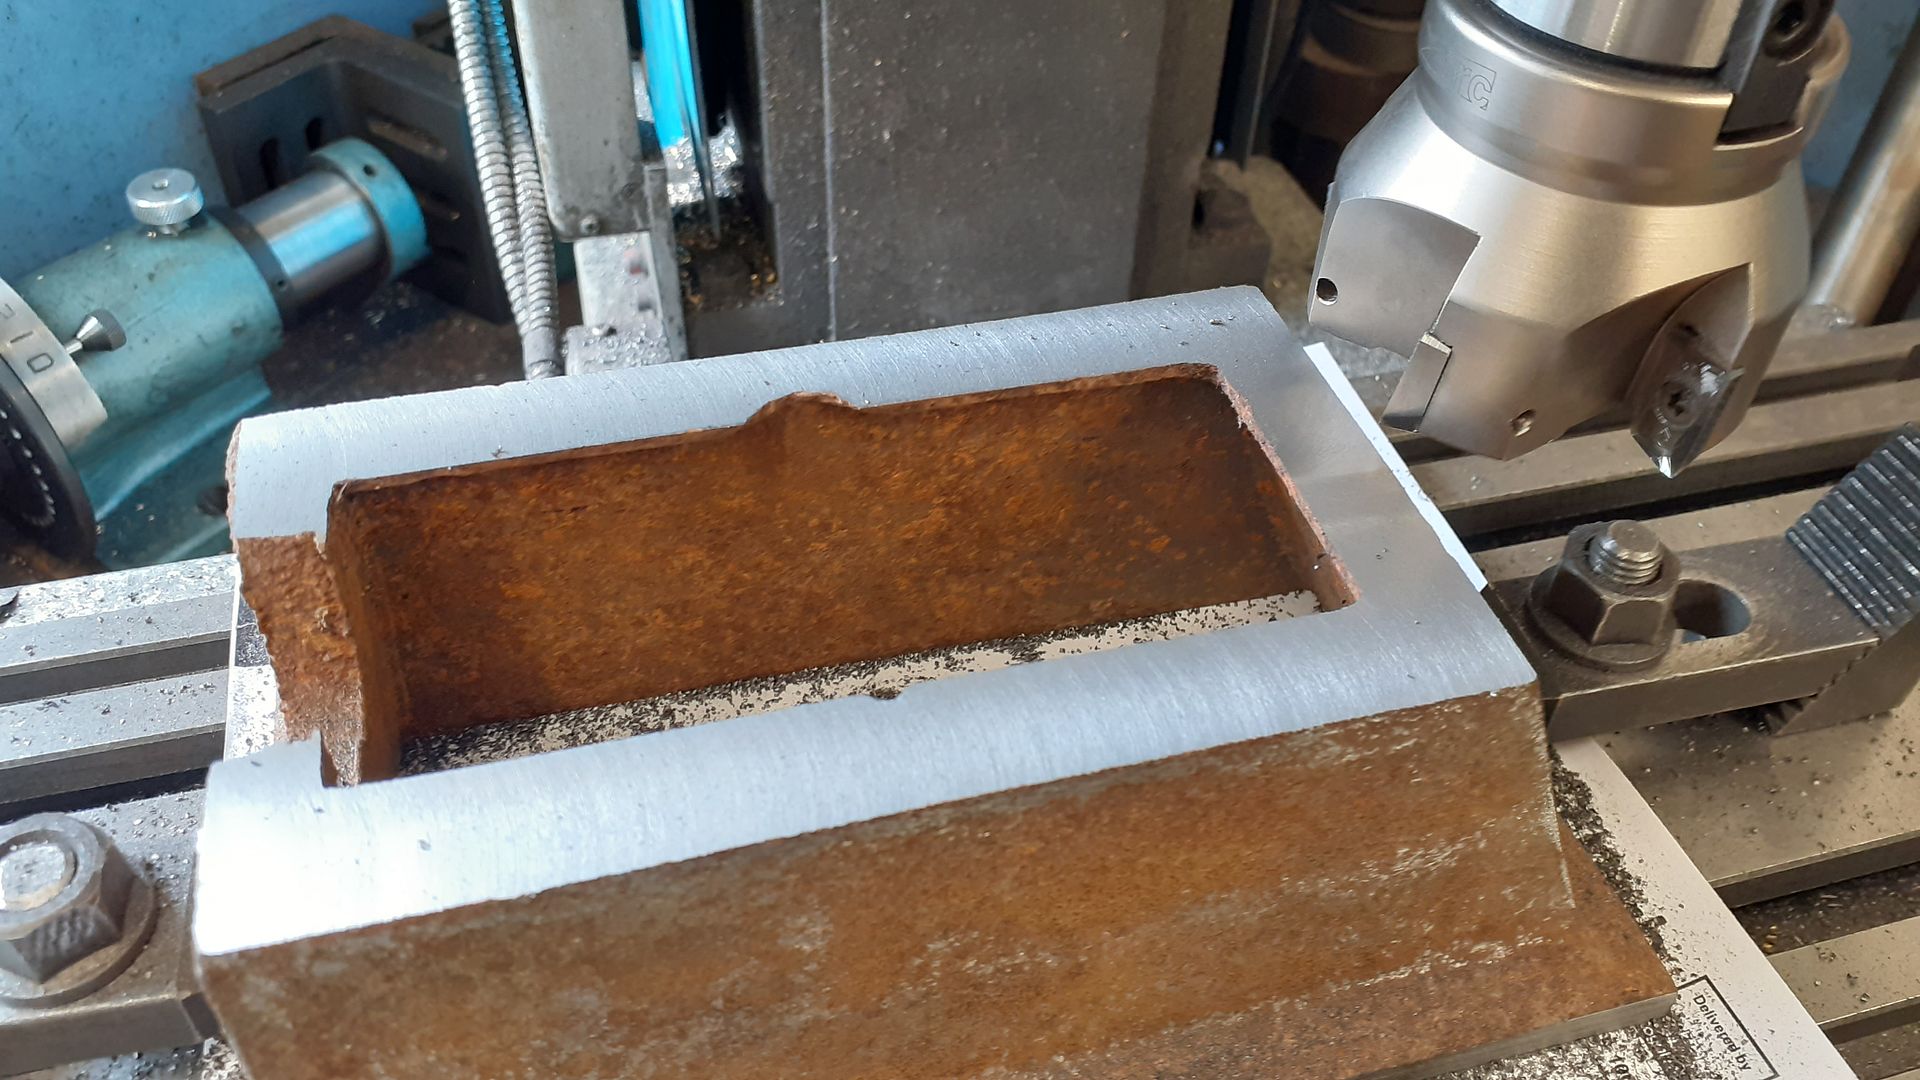
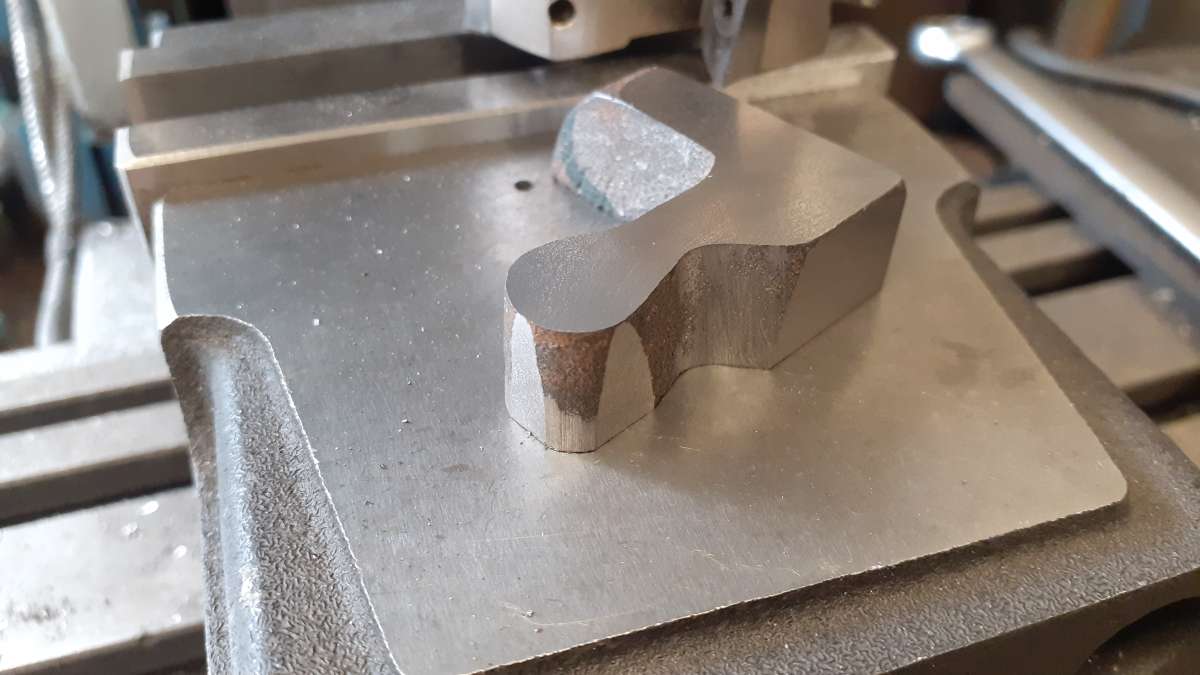
Now that the base had a flat bottom it could be clamped to the mill table, the skimmed flange edge set true and the upper surface machined again with the facemill. You may notice I am using polished inserts intended for aluminium and non ferrous on this cast iron part as I find the sharper inserts put a lot less strain on the lower powered and less rigid benchtop mills than the standard inserts do. The carbide will also cope a lot better should there be any hard areas in the castings which was not a problem with these specially coated Welsh products.


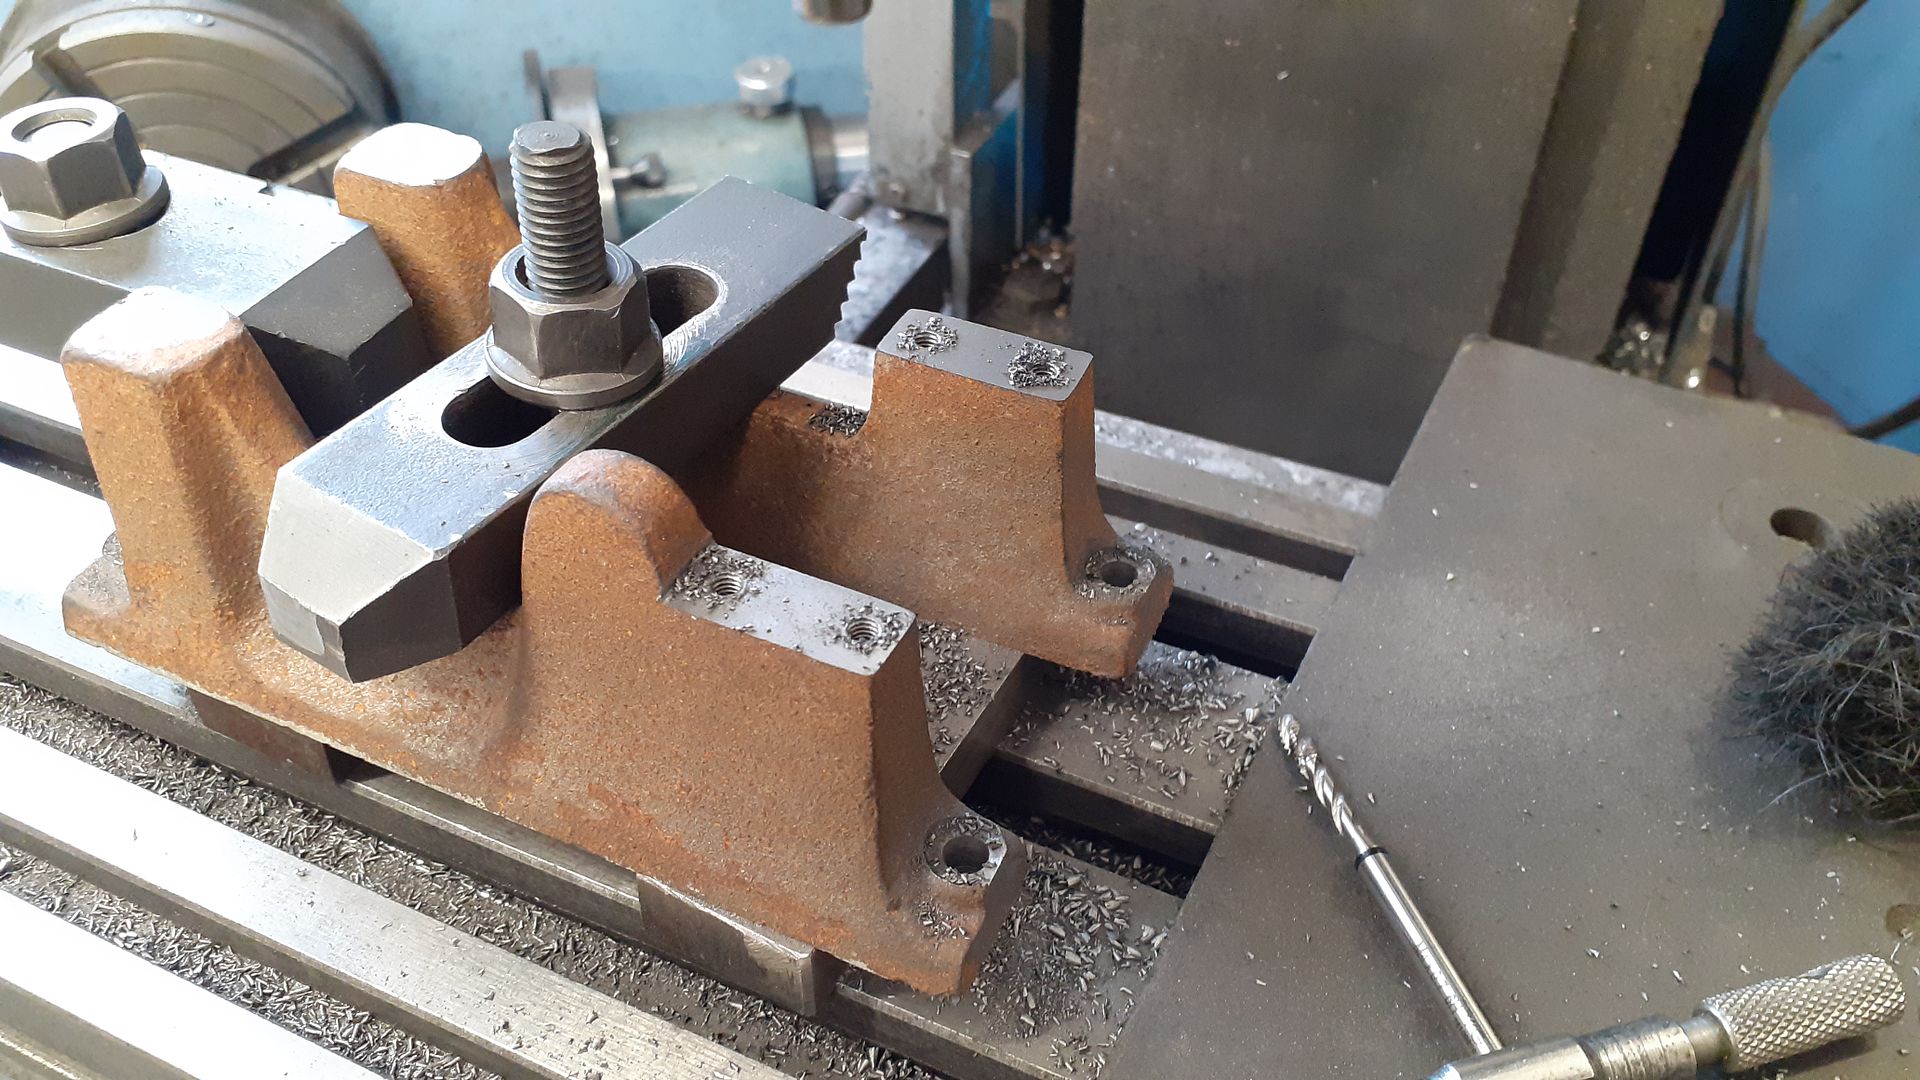
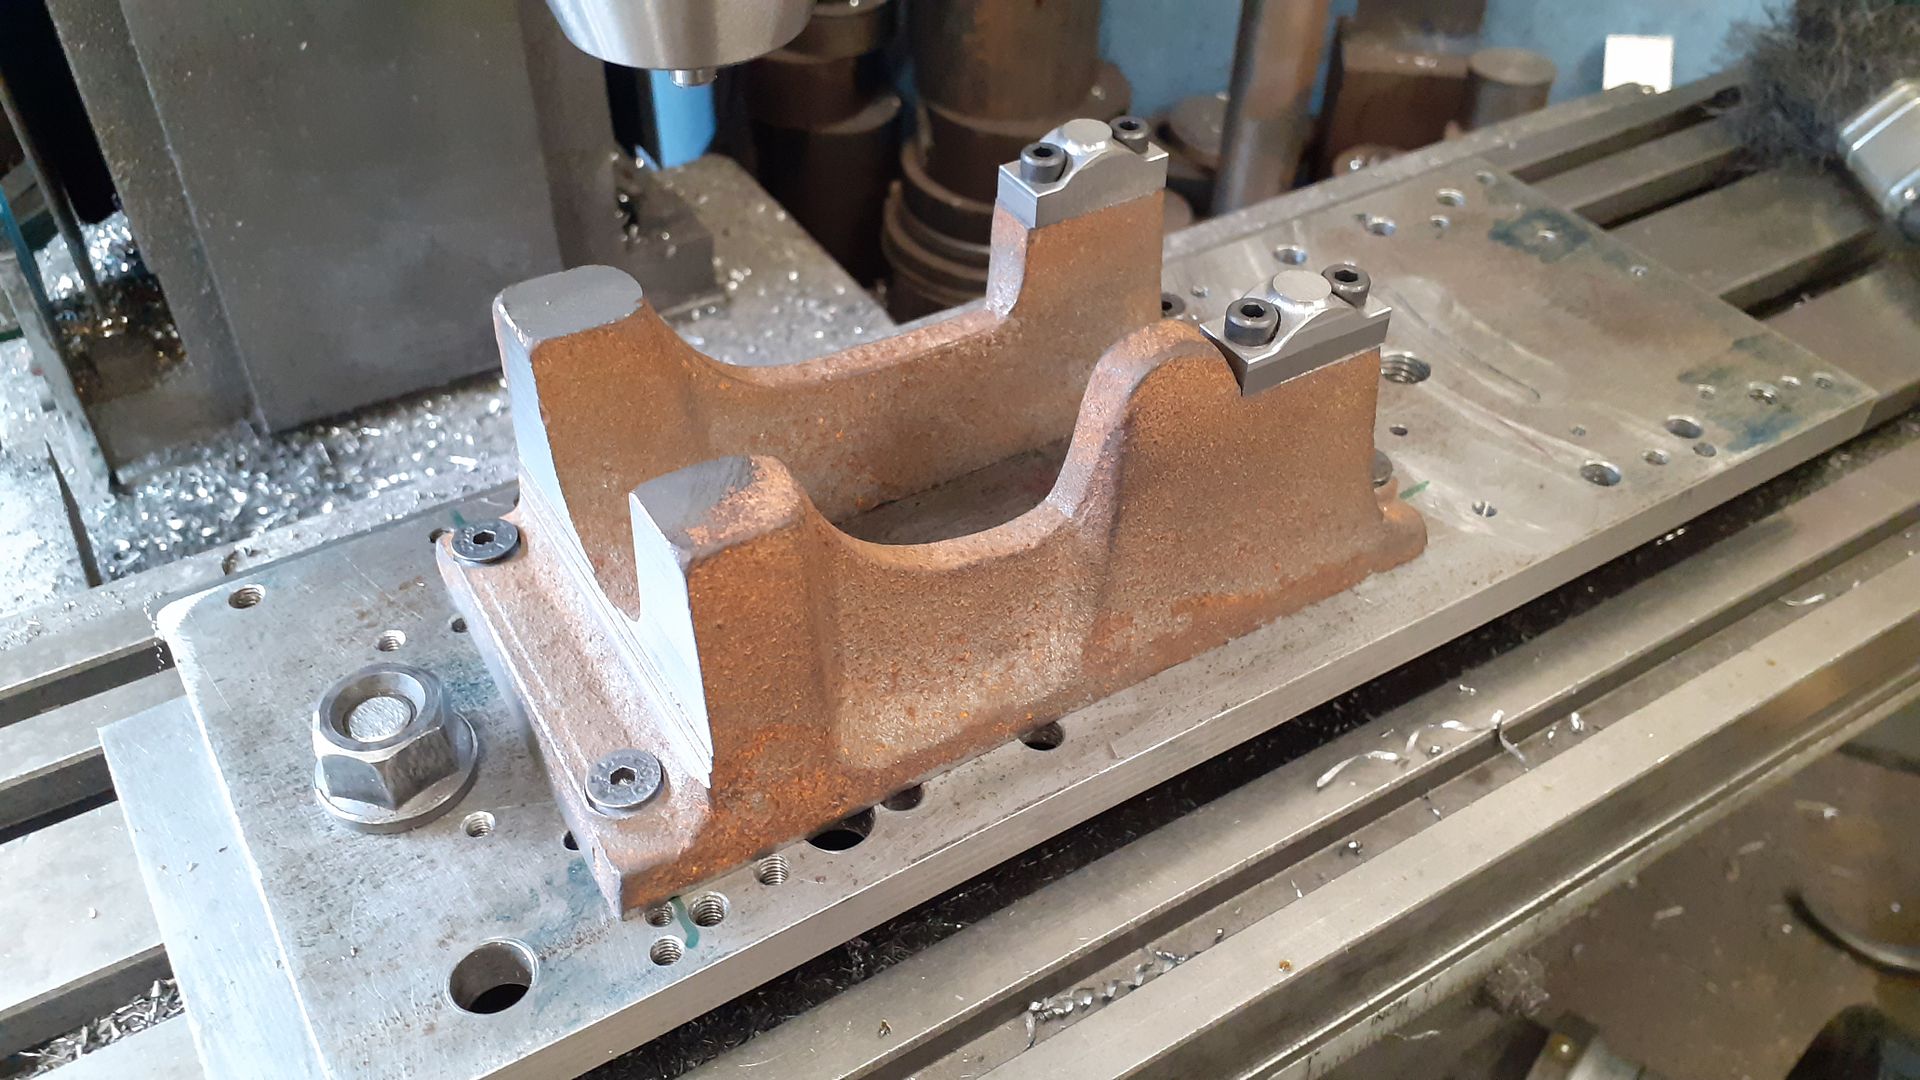
I left out drilling and tapping the four holes to mount the crankcase until I had machined that but they could be put in now working to the sizes on the new drawing. A bit more fettling of the surfaces and clean up of the corners was done as well as spot facing the two mounting bosses before moving on to the next part.

Edited By JasonB on 22/07/2023 19:30:02
22 July 2023 at 19:28 #2662 JasonBModerator@jasonb
Build thread of an Alyn Foundry RLE Hit & Miss Engine
22 July 2023 at 20:10 #653288 garyParticipant@gary44937
well done jason looking forward to following this.
22 July 2023 at 20:38 #653291Ches Green UK
Participant@chesgreenukI'll follow also.
Looks interesting and good to hear a company can see an acceptable profit in keeping this casting set in production.
Ches
23 July 2023 at 06:55 #653313 JasonBModerator@jasonb
Thanks for the interest
I suppose they are lucky that the RLE was their most popular design and easily outsold the other engines before health and foundry problems caused production to stop. So the market was there and still is, infact there has been a steady demand over the last few years for very small batches of other engines and now that the missing RLE working patterns have been replaced this one is available again.
I don't think they will be making enough to retire yet but run as Graham used to as a complement to a proper job it will be a steady bit of extra income
23 July 2023 at 07:58 #653315Ches Green UK
Participant@chesgreenukJason,
Thanks for the insight in to Alyn Foundry & Sons (http://www.alynfoundry.co.uk/).
It's quite interesting how the economics of running a small/medium sized Model business stacks up. And it does look like they have some new products coming through.
I suspect that one the higher profit margin areas for such companies would be the add-ons eg Stuart Models do a wide range of extras to supplement a build.
Ches
23 July 2023 at 10:10 #653329 JasonBModerator@jasonb
The old web site is in need of an update, those shown in the "coming soon" arrived over 20years ago. Though the Hornsby could not be got to run well enough to be offered for sale and so far the IF Allman ha sonly had 3 sets of castings done buy borrowing the patterns and getting the casting done ourselves but it is one that hopefully will become available in the not too distant future and is a nice engine.
The e-mail on the website should still work but better to use the one I posted or contact Graham through Alyn's Facebook page
My Alyn I F Allman engine
23 July 2023 at 10:51 #653336 MichaelRParticipant@michaelr
Jason, Nice to see the RLE castings being available again, the RLE was the first IC engine I made, a ideal engine for the beginner.
Looking forward to your build thread.
MichaelR
23 July 2023 at 14:13 #653388Mike Hurley
Participant@mikehurley60381Coincidentally I was looking around for a new project. Have done steam & hot air but never an ic engine, so I think I'll be giving this a go!
Jason's postings are always clear and detailed so I can safely rely on the build log to avoid most of the 101 cock-ups I'd normally make.
Look forward to getting stuck in
Regards Mike
23 July 2023 at 16:01 #653401not done it yet
Participant@notdoneityetI’m guessing this is primarily a promotional thread by JB, due to the order of reporting progress?
I am sure there are a lot out there, that would like to know the cost of the kit?
I am expecting, from the tone of the introduction, that the kit cost was waived?
Am I too cynical, or am I correct in my appraisal? I, for one, think not. Still better than posting videis of chinese toys being unboxed, by posters paid in kind.
23 July 2023 at 16:30 #653403 JasonBModerator@jasonb
It's the next engine I'm building so the next one to get written up. As said brought forward a bit in an aid to help those who may purchase a kit if they get the castings before I finish mine and want to get started.
Costings and details on how to order were posted last week on The Alyn Facebook page or you can make contact by the e-mail I provided. On the odd occasion that untouched casting sets have come up over the years they have fetched a premium price so the new kits should be a good buy for many who have been wanting one..
I did not pay for the kit in money, got it in return for helping out with pattern making etc, the Allman above I did pay for as I have done with others in their range. If I really costed out my CAD, CAM and CNC time I would say they got the better deal. Although I had mentioned to Graham several times that he should get the RLE available again even if just on the small one off basis he has been using I did not know they were going to release it until the FB post so was already well on my way with it and would have posted the build in due course.
There are members of this and other forums who have also done their part in getting the models available again, as the FB post mentions another member here has provided the transport to get the patterns to the foundry. I think I may also have posted here about a pattern I drew up for him. We are a like minded bunch who are happy to help each other out and have a liking for these models.
Edited By JasonB on 23/07/2023 16:32:21
23 July 2023 at 16:54 #653411 JasonBModerator@jasonb
Good to have you along Mike. It's not a bad introduction to the world of Hit & Miss engines and quite a straightforward build. Hopefully the thread will guide you through it and feel free to ask any questions here or of Graham on FB as he has a number under his belt having made quite a few to commission over the years and there are a lot of other group members who have also made them.
23 July 2023 at 18:06 #653427Dougie Swan
Participant@dougieswan43463Go Jason
I for one will be following along
Dougie
25 July 2023 at 19:48 #653699 JasonBModerator@jasonb
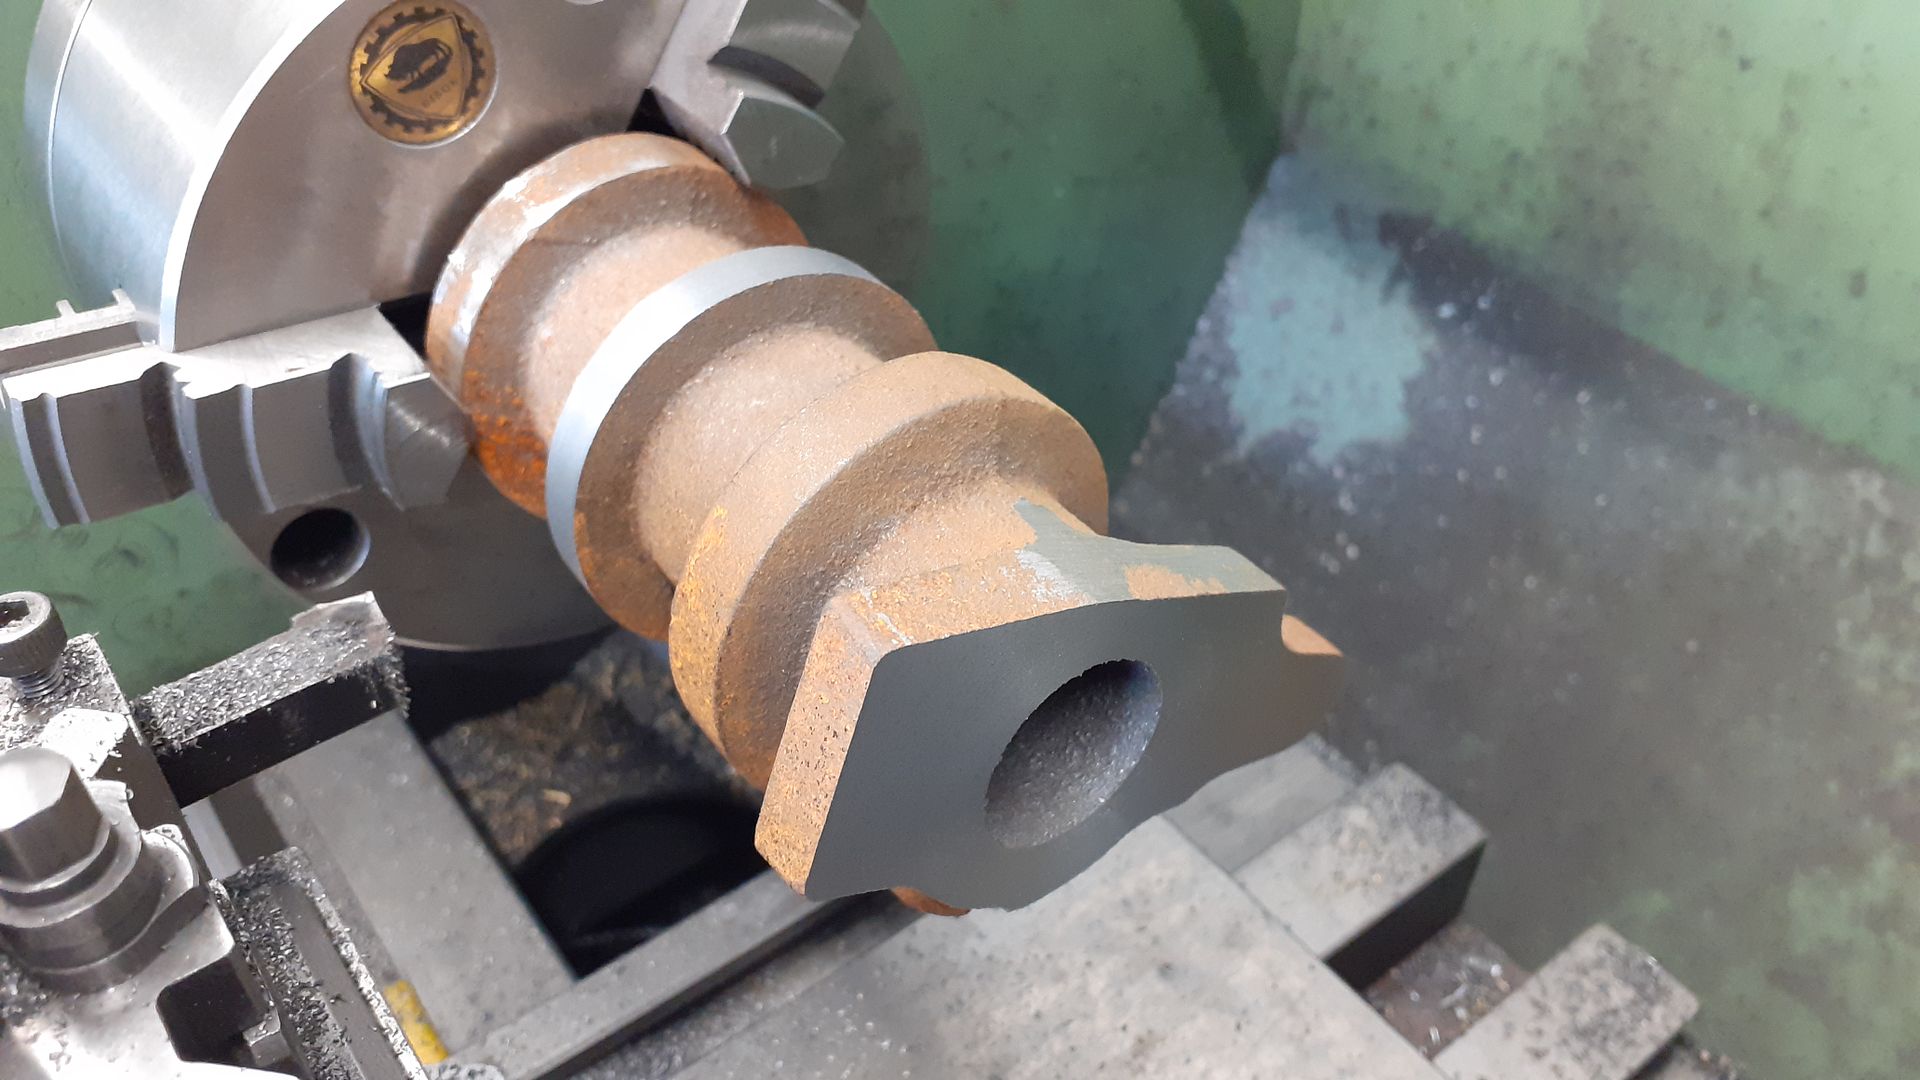
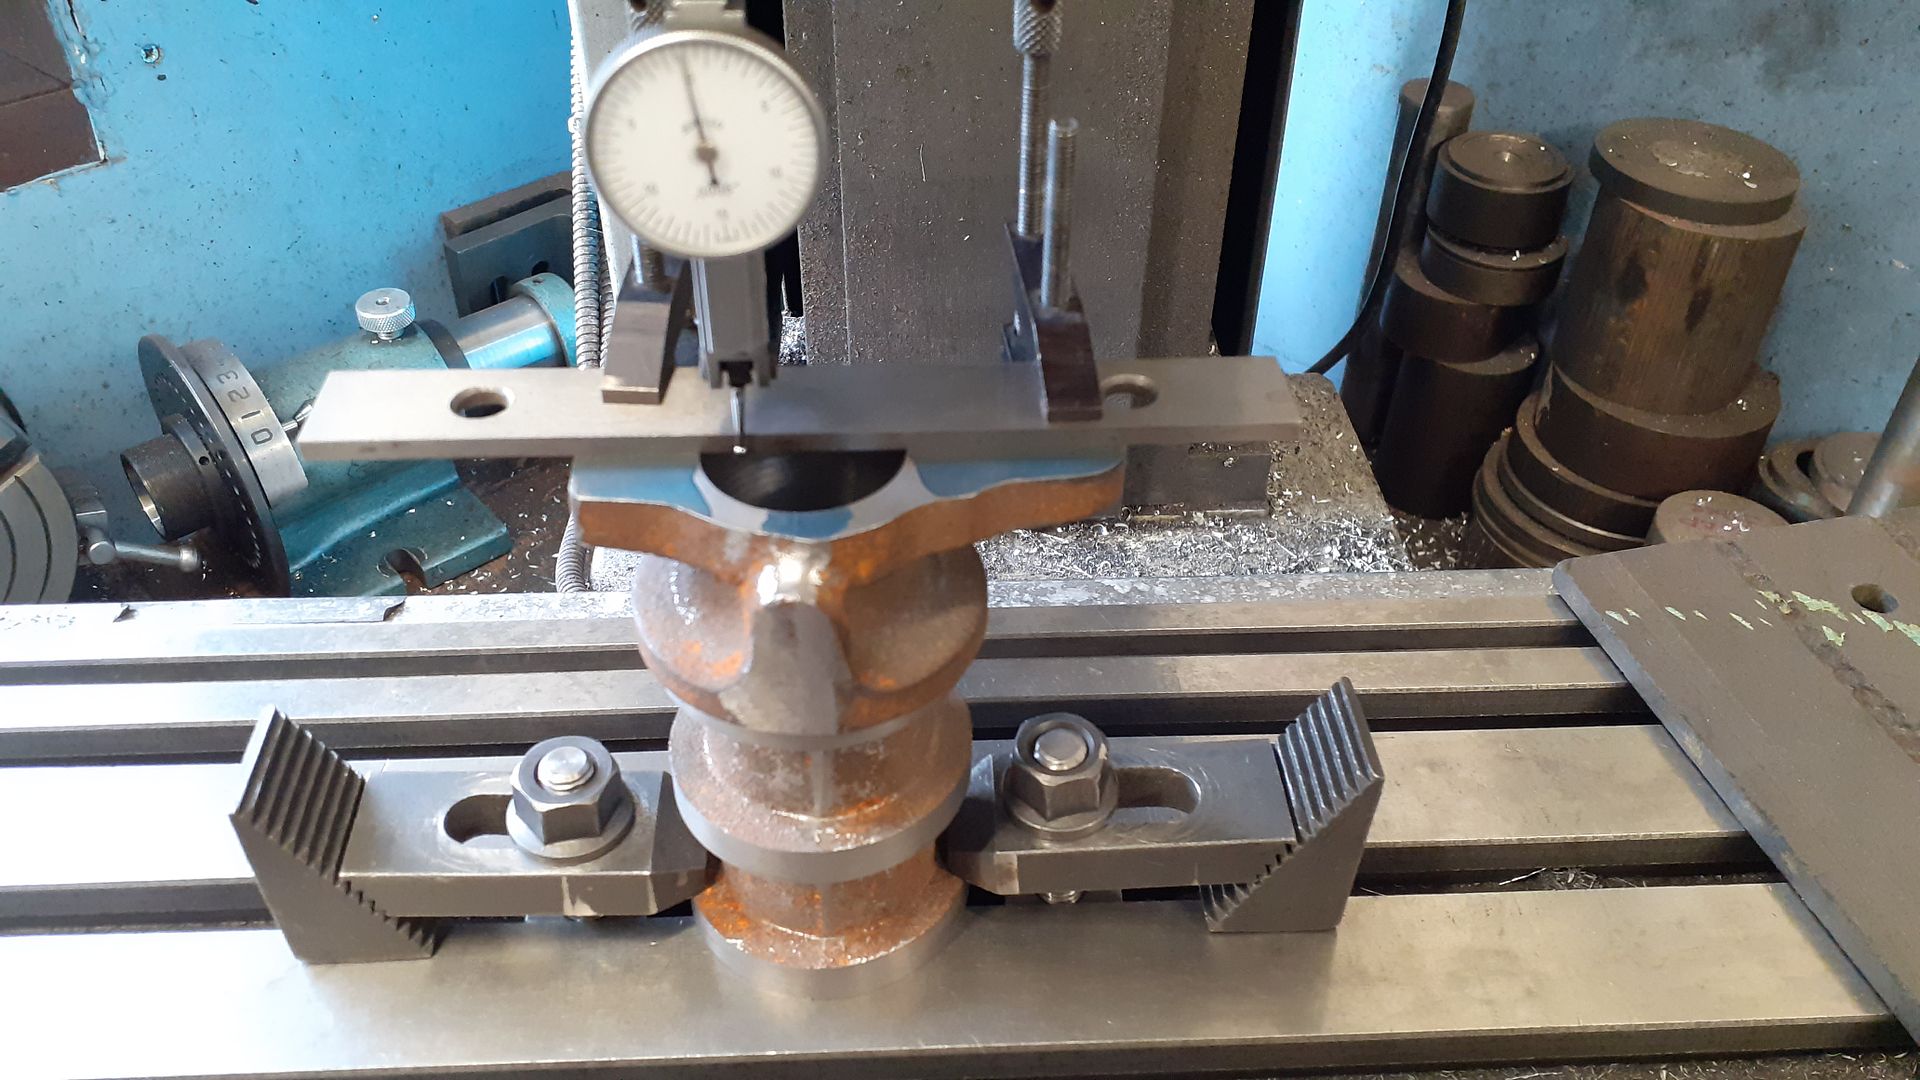
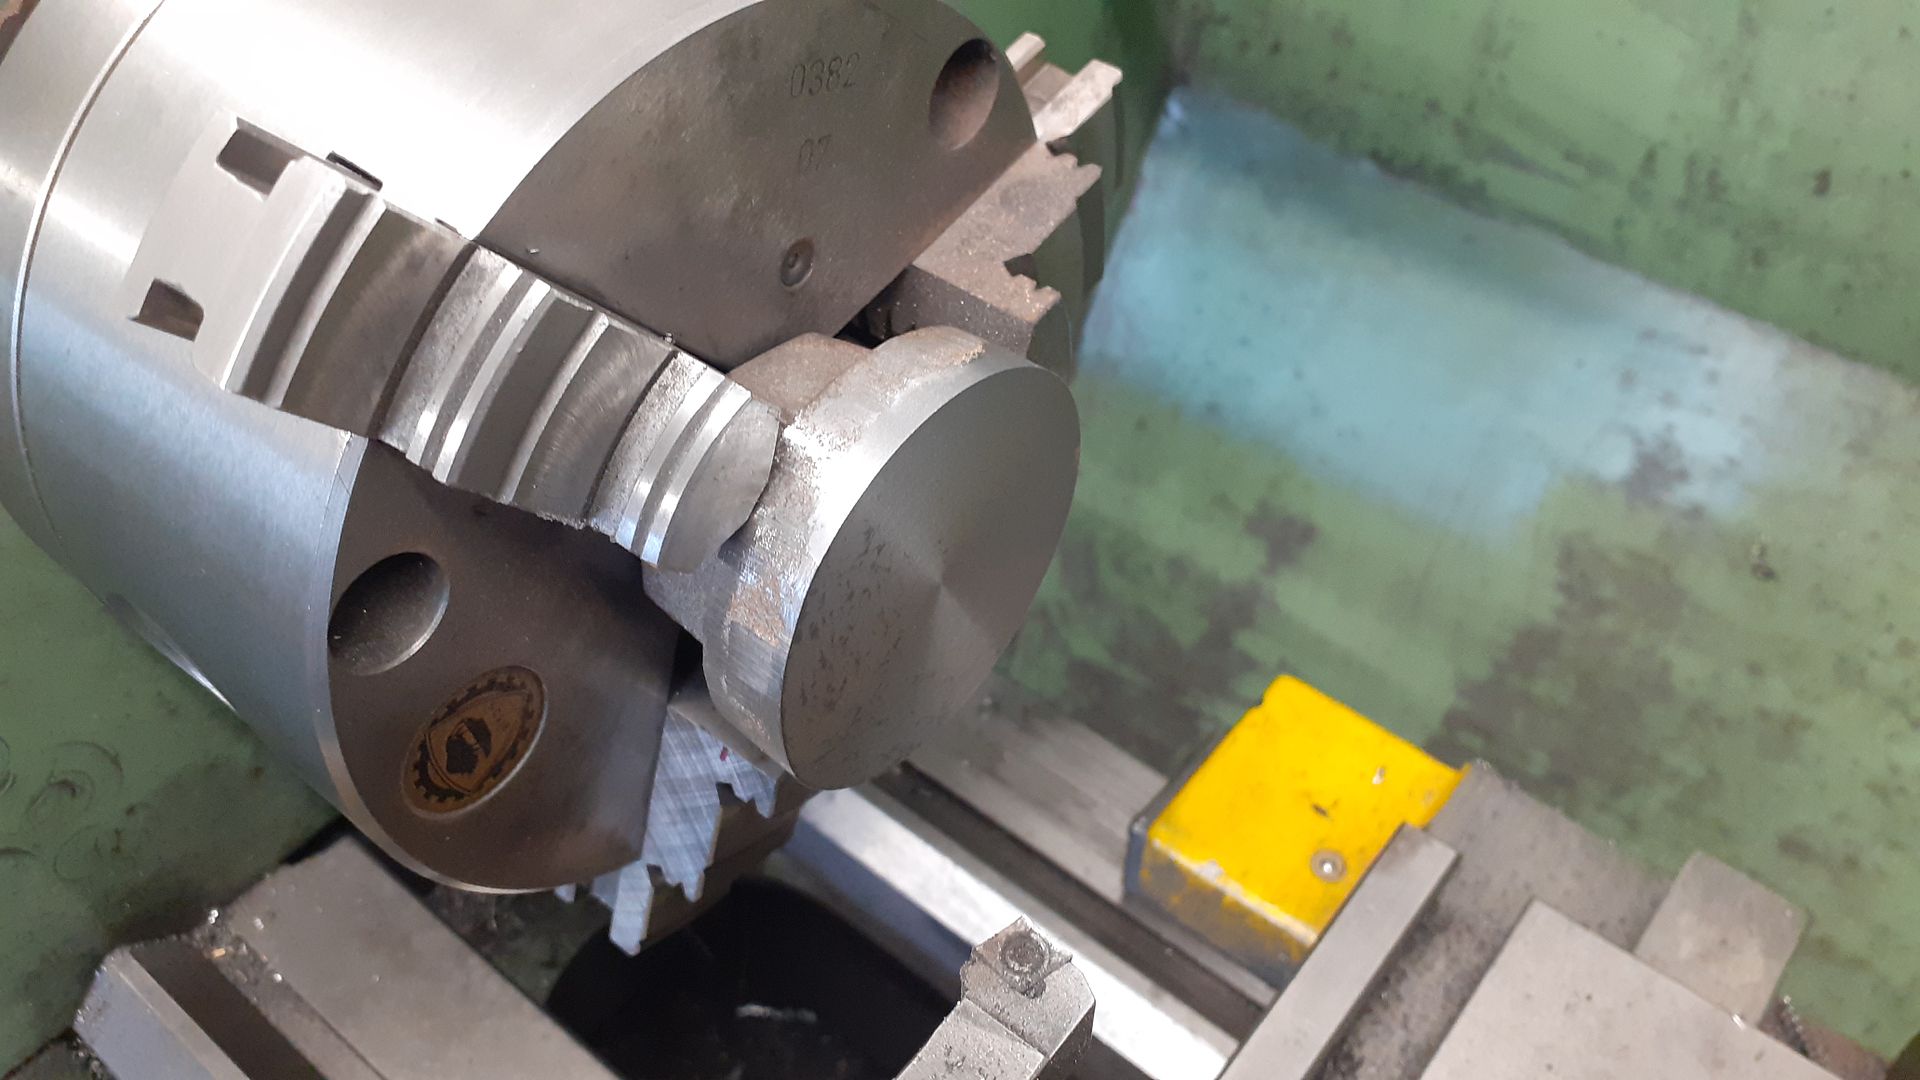
The cylinder casting was given a light fettle so I could take a few measurements and have reasonable surfaces to hold before being put into the 3-jaw and set so the three "rings" ran as true as possible. I then took a couple of light passes across the end to clean remove the draft angle and leave a clean surface. While in the chuck I also just cleaned up the middle ring to give me something to clock true and also run a steady on if I felt the need for one.

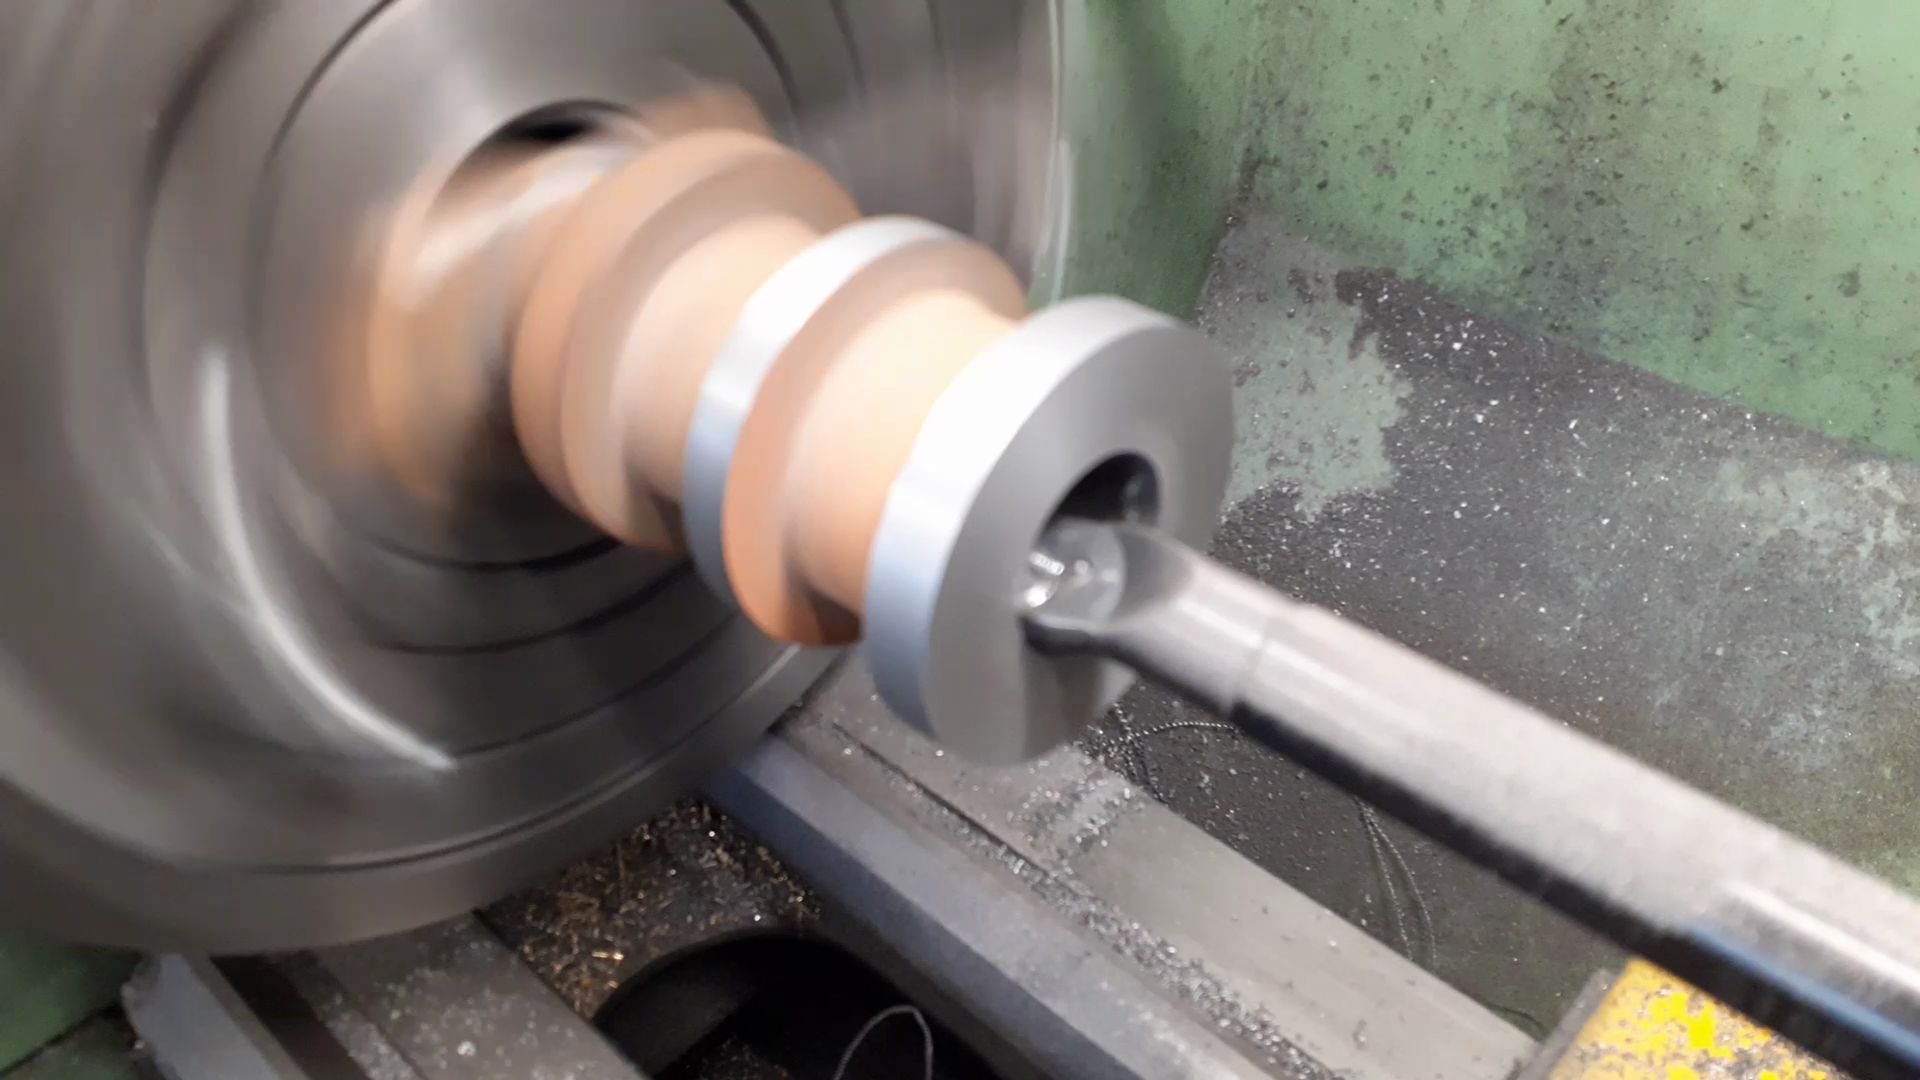
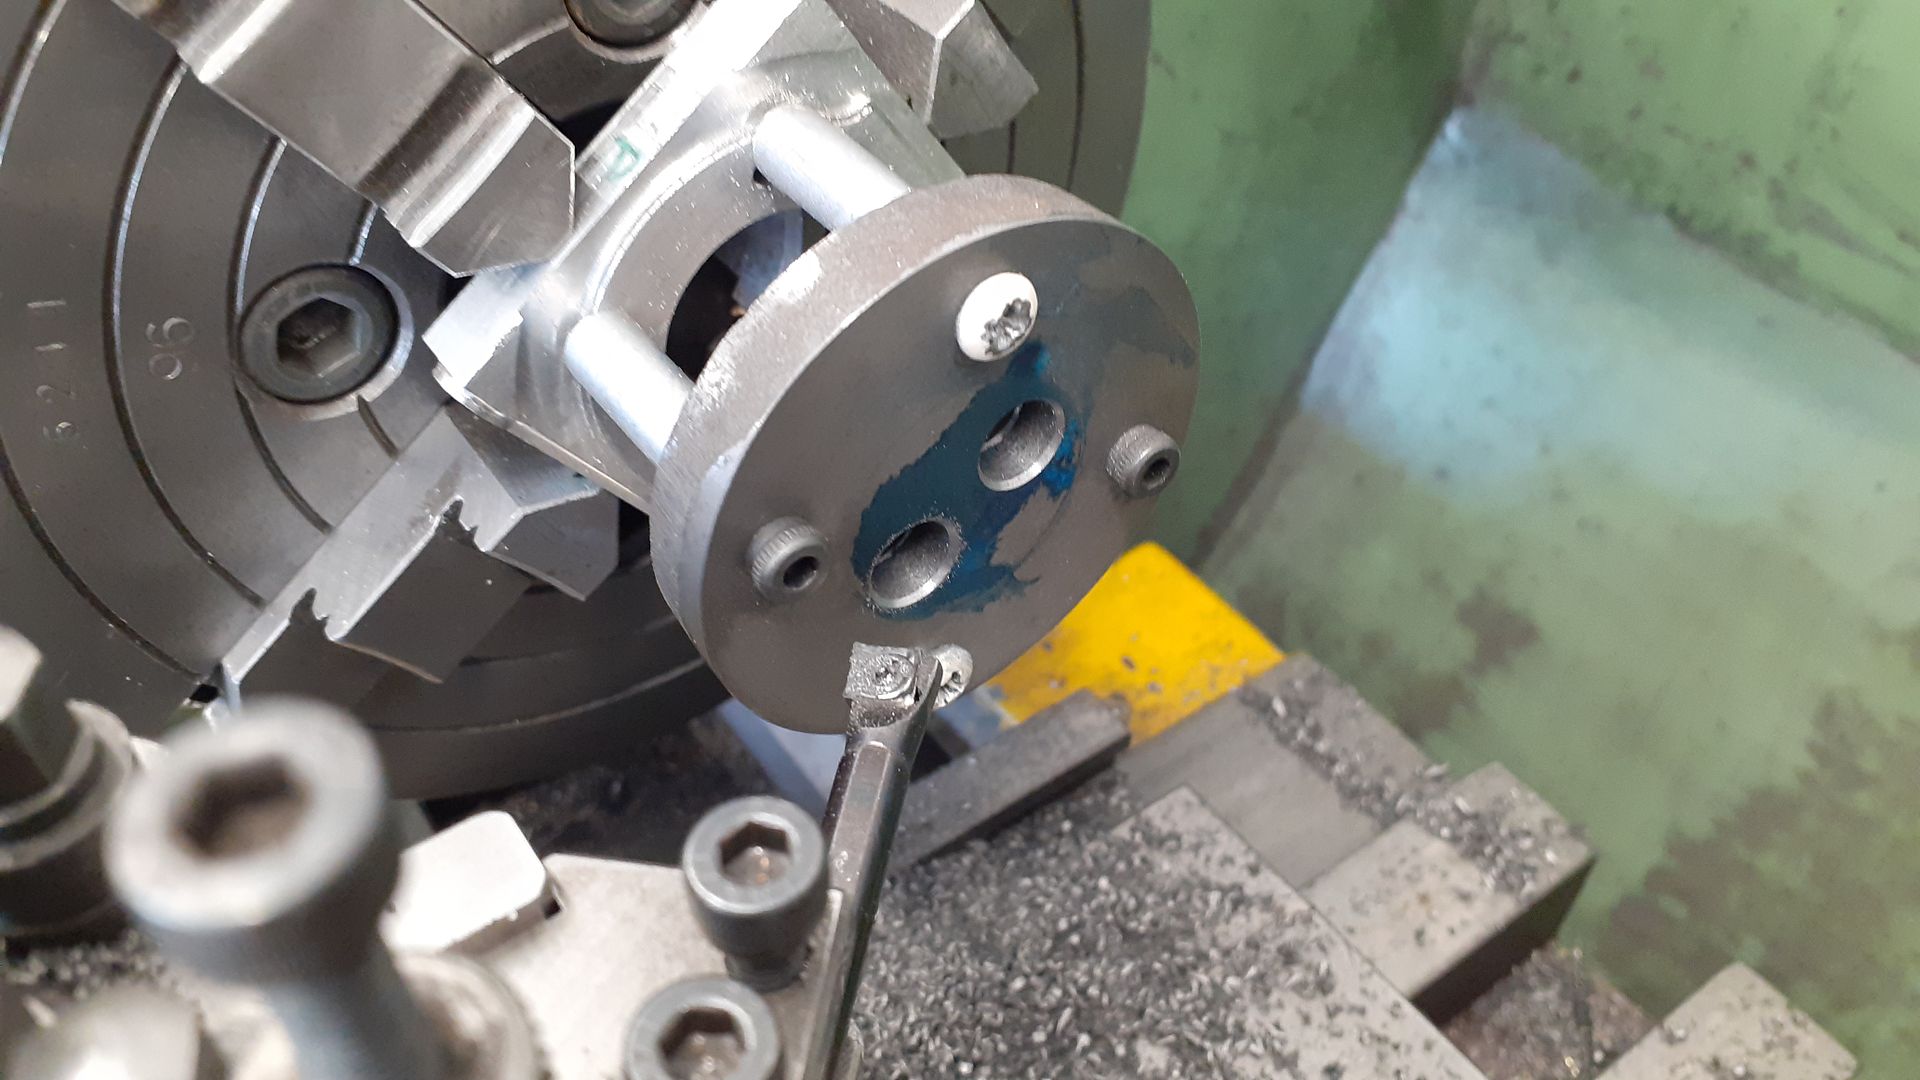
I've seen a lot of people use the 4-jaw and a steady to do the boring of the cylinder but I opted to clamp the freshly machined end to the faceplate, tapping the casting until the central ring ran true. The end was cleaned up both on the face and OD and then I used a 16mm boring bar with CCGT insert to bore to the required 33mm.
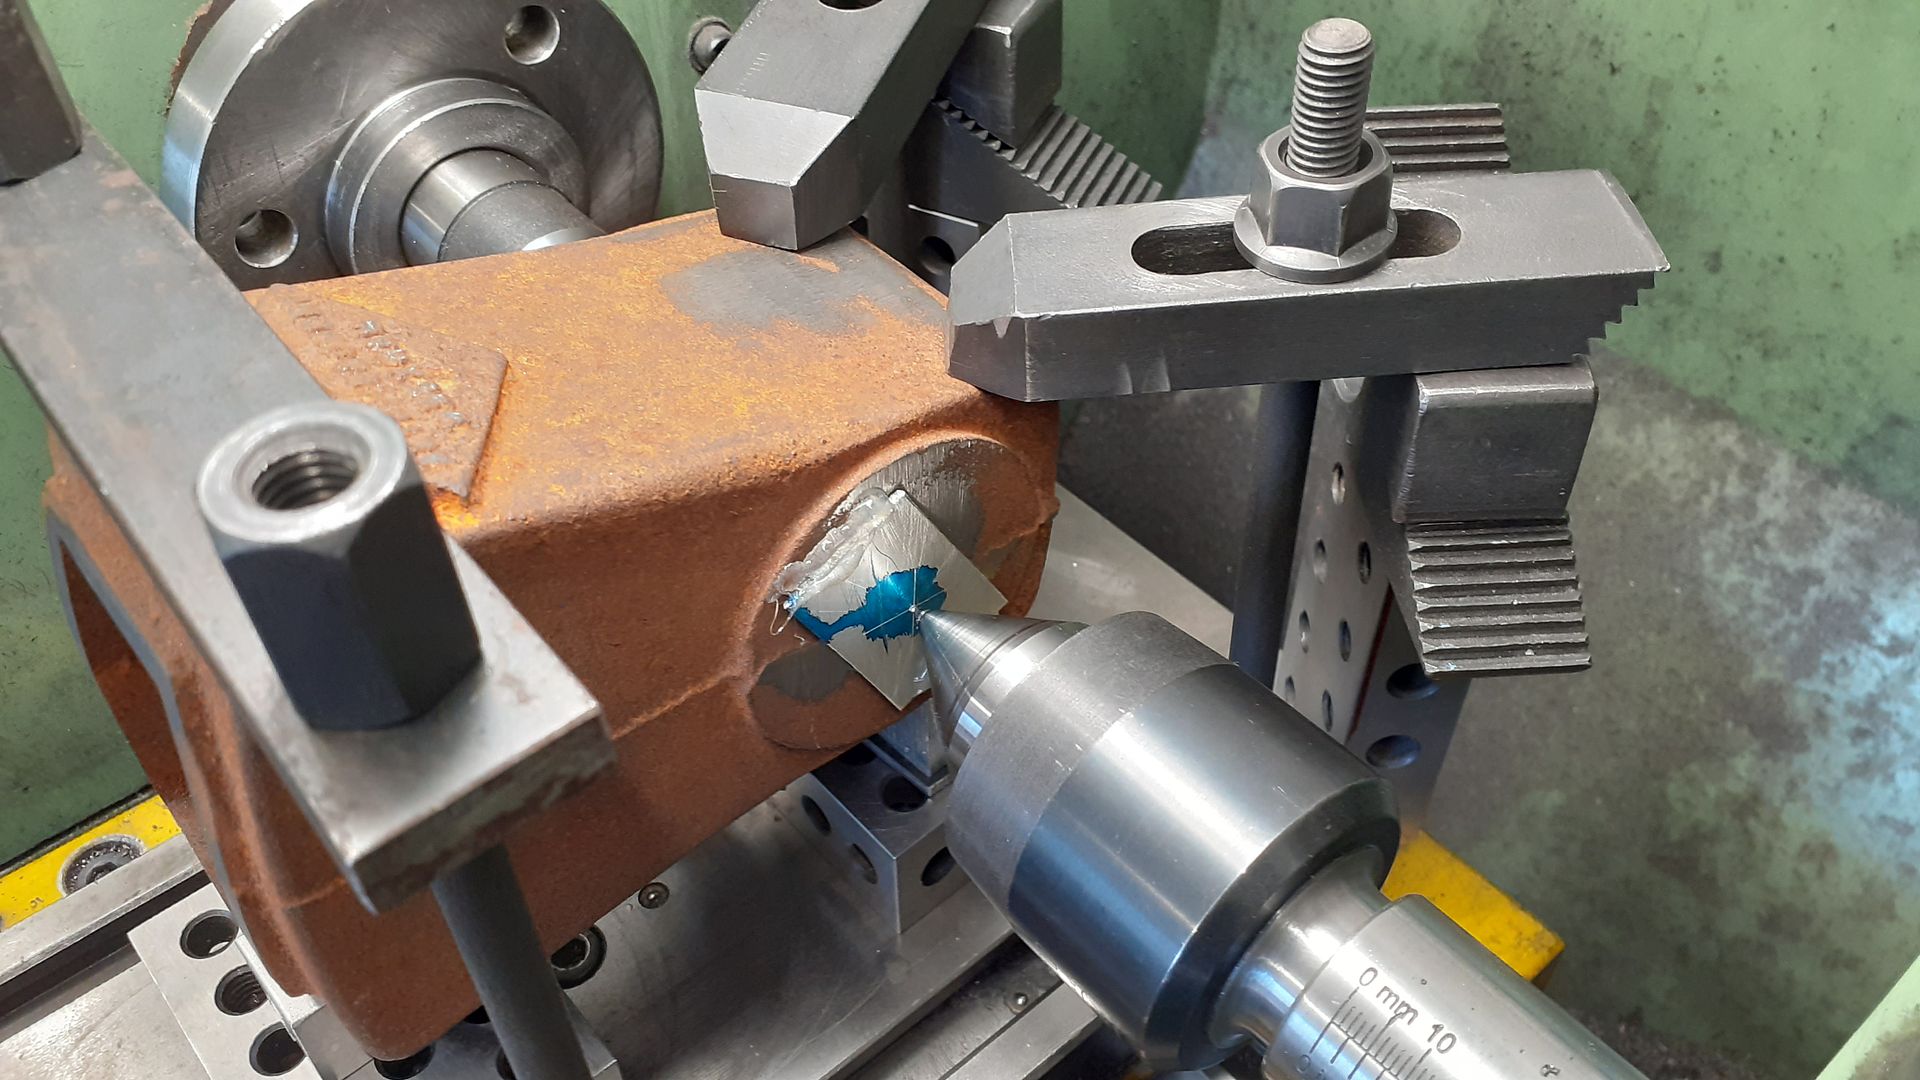
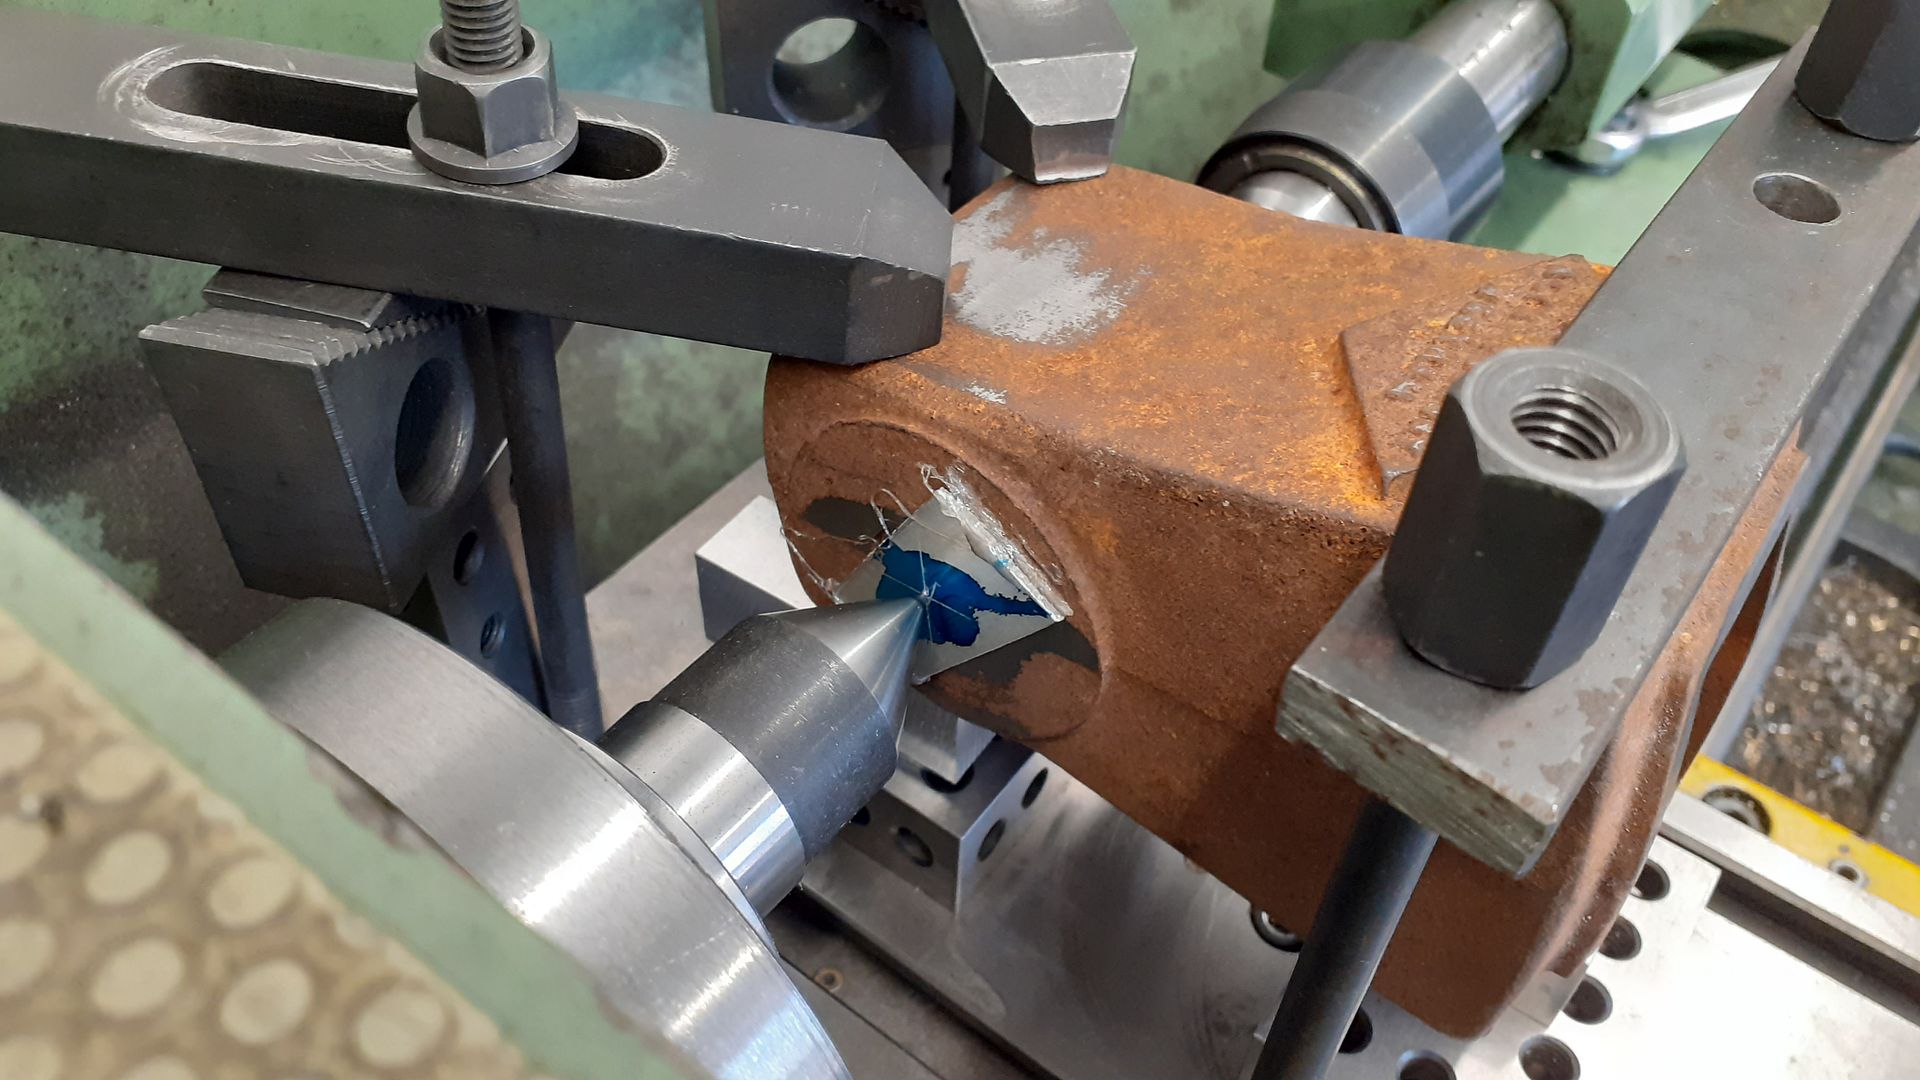
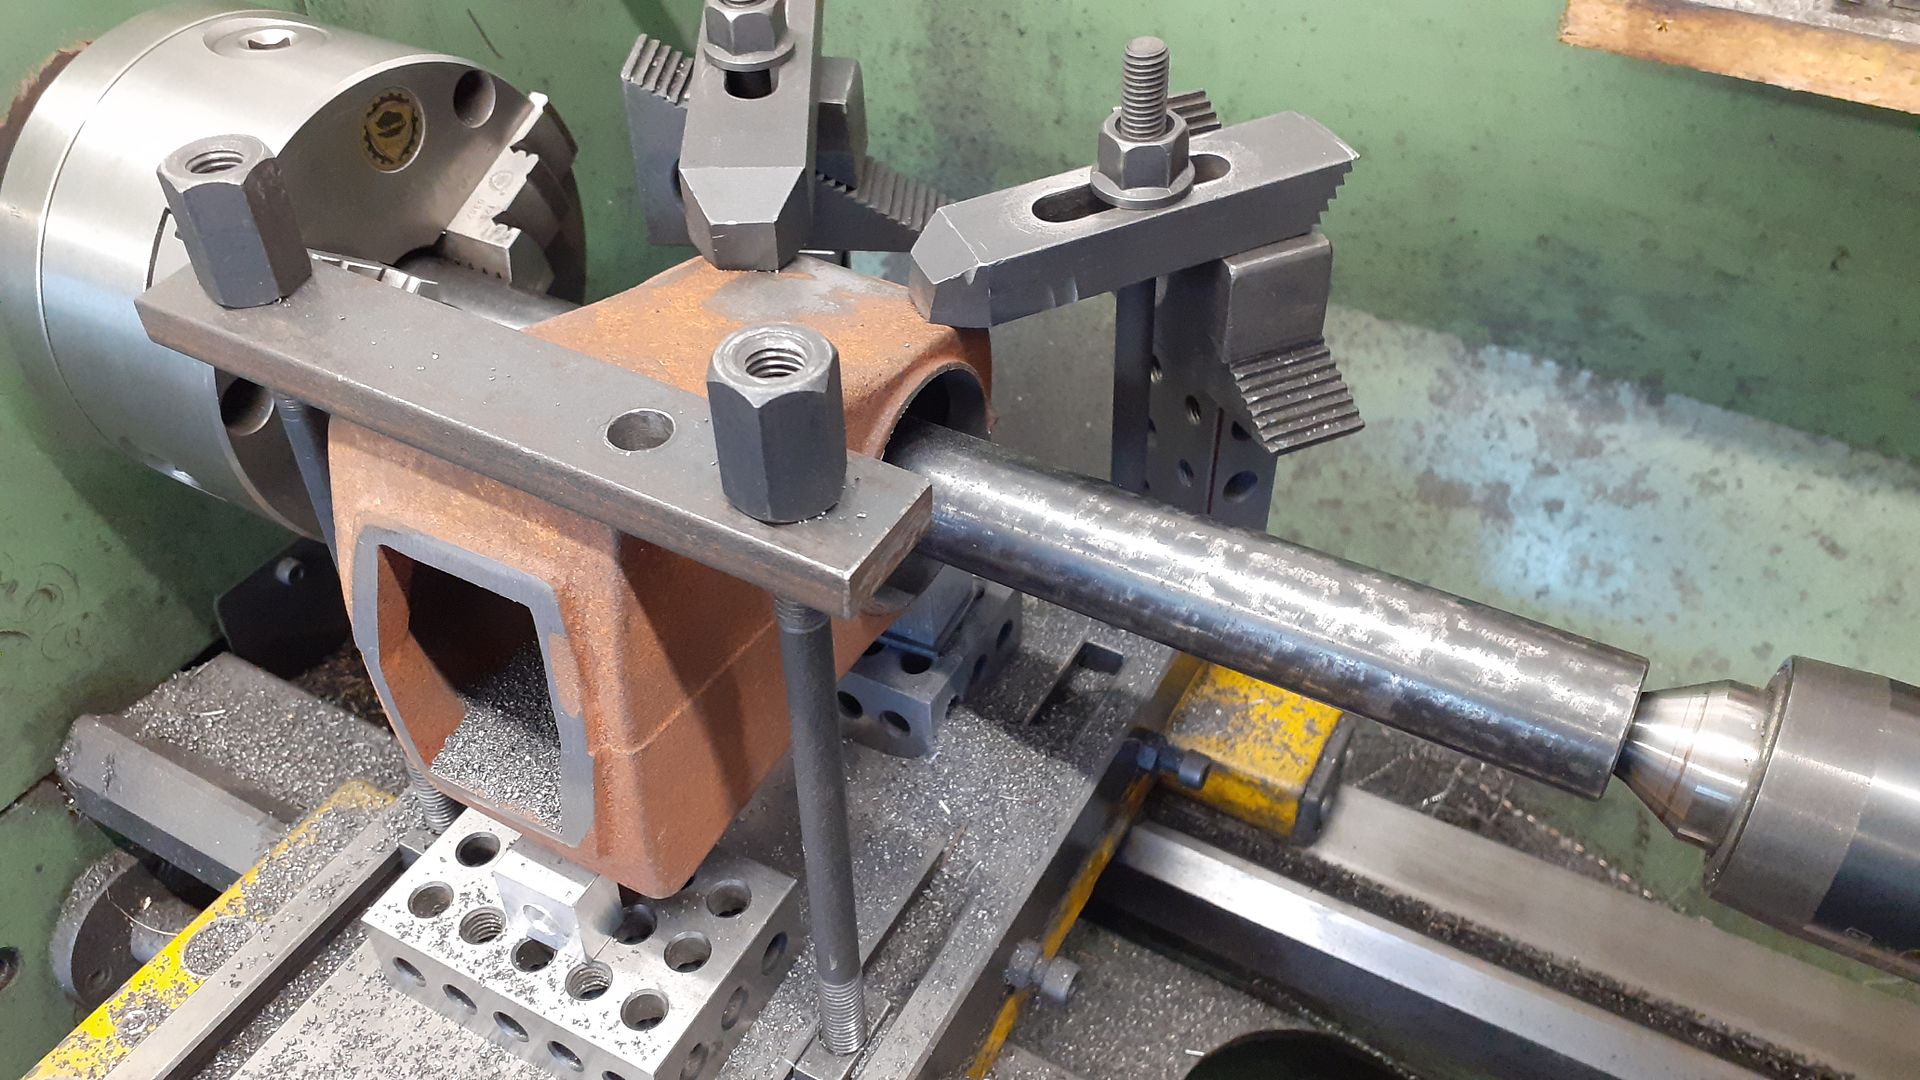
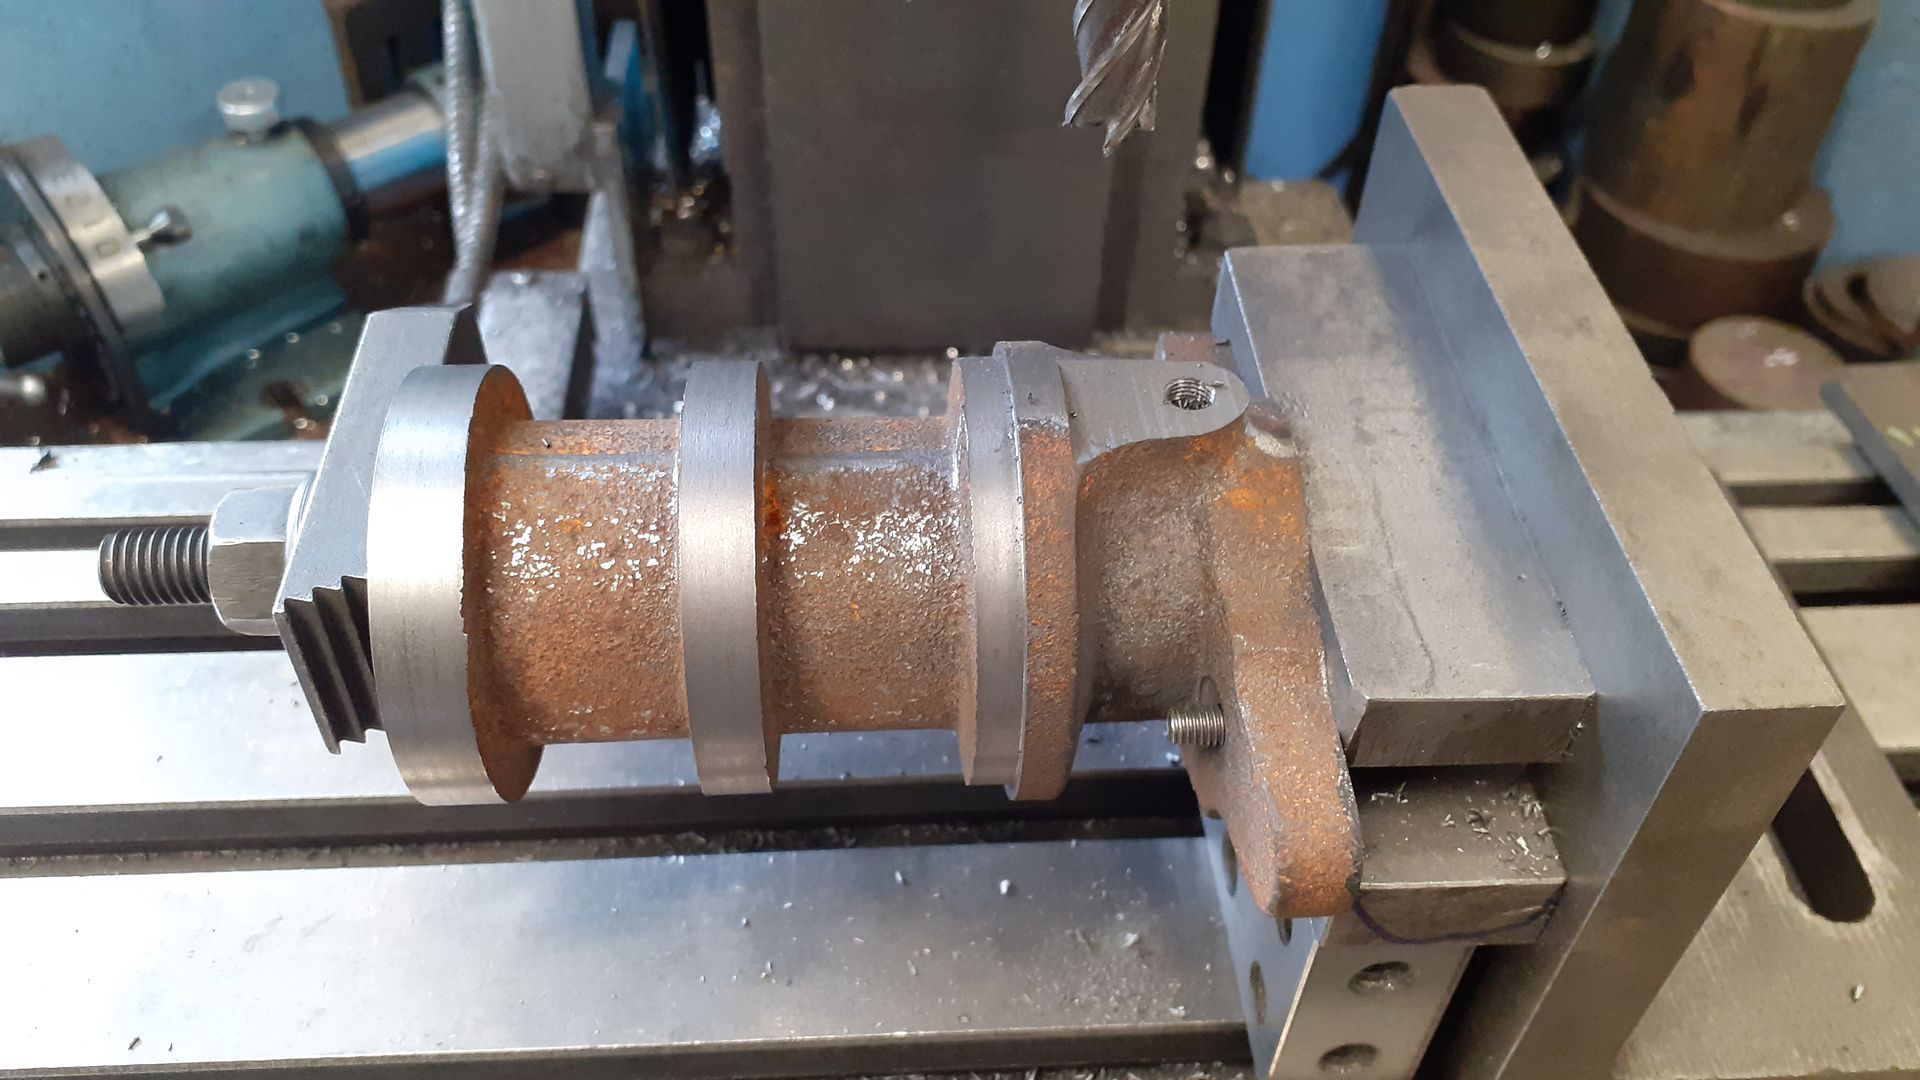
I did not do any more work on the cylinder but left it fixed to the faceplate while I made a start on the hopper. Again after a bit of a fettle and some measuring up I hot glued a couple of pieces of scrap aluminium to each end and marked out the centre of the bosses. The casting was then packed up and clamped to the lathe's cross slide and the position adjusted so the marks lined up with head and tailstock ctrs. I find this type of setup preferable to having an unbalanced lump in the 4-jaw and the between ctrs boring bar that will be used doe snot flex as much as a toolpost mounted one can do so you get a straighter bore. Not the ideal clamp positions but it was solid enough.


Initial cuts to enlarge the cored hole were done with a boring head. Then I switched a 28mm between ctrs bar, well actually between chuck and tailstock bar to take the hopper ends out to the required 54mm dia. Once this had been done I changed to a tool with it's cutting edge at 90deg to the bar's axis to face off the boss that will face towards the crank.

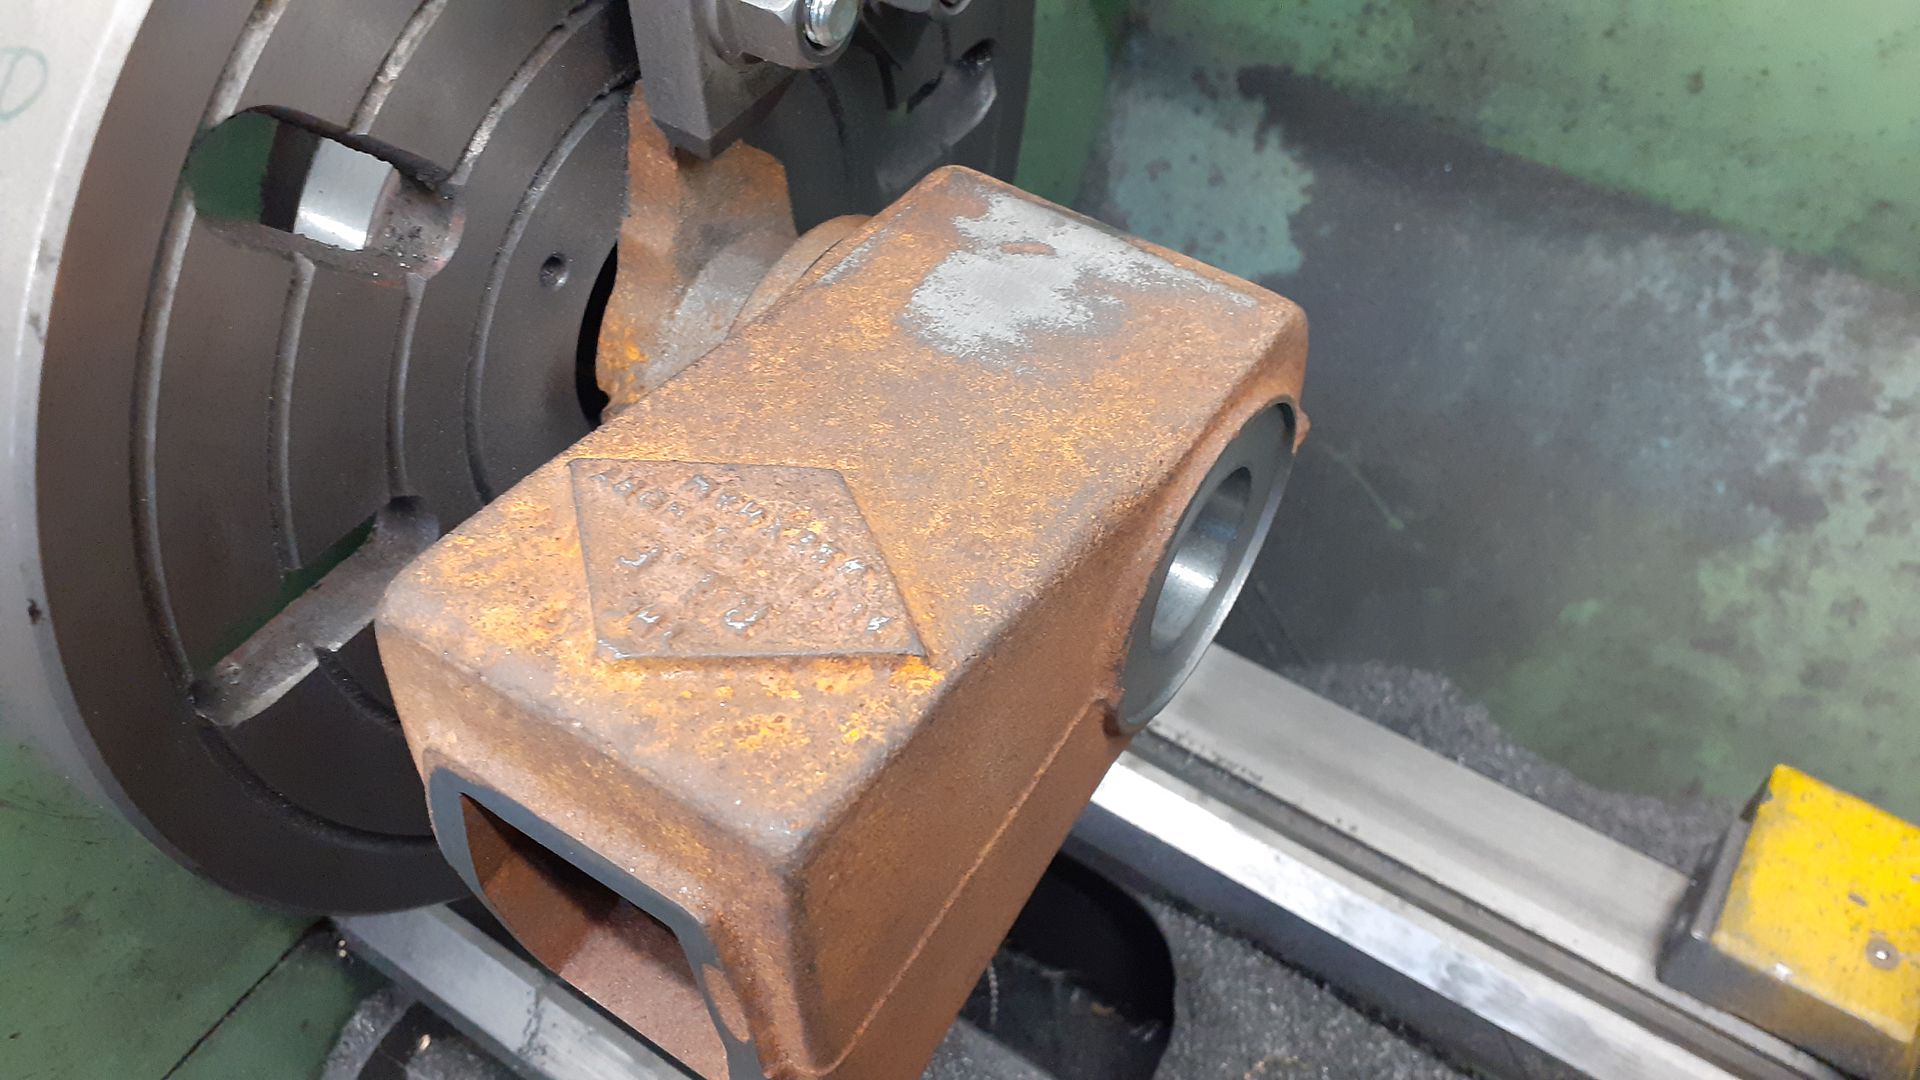
Now that I had a known bore I used the hopper as a gauge to get the final size of the cylinder, seems about right as it stays horizontal without swinging down but can be pushed on by hand.

I'll leave bonding the two together until a bit more work has been done.
Quick video of some of the operations described above.
Edited By JasonB on 25/07/2023 19:49:21
26 July 2023 at 07:53 #653735Ches Green UK
Participant@chesgreenukJason,
Thank you for another detailed post plus excellent pics. So much going on there, it takes me a while to absorb it all.
I hot glued a couple of pieces of scrap aluminium to each end and marked out the centre of the bosses.
I had never thought of using hot glue for this kind of application. I do have a hot glue gun that, when I first got it, I glued a couple of test samples together (,,,cleaned bits of plastic) and left them out in the weather for weeks. Then tried tearing them apart…almost impossible. So it's good stuff, hot glue.
Ches
26 July 2023 at 12:07 #653771 JasonBModerator@jasonb
The old books and articles tend to suggest making a hardwood plug to drive into the ends of the cored holes.
Apart from being a lot quicker and easier the big advantage is that the plates can just be gently prized off without risk of disturbing the work. I tend to hold the plate down on the surface and just put a couple of beads of glue along opposite sides much like a weld rather than putting glue on the casting and pressing the plate into it.
30 July 2023 at 19:02 #654452 JasonBModerator@jasonb
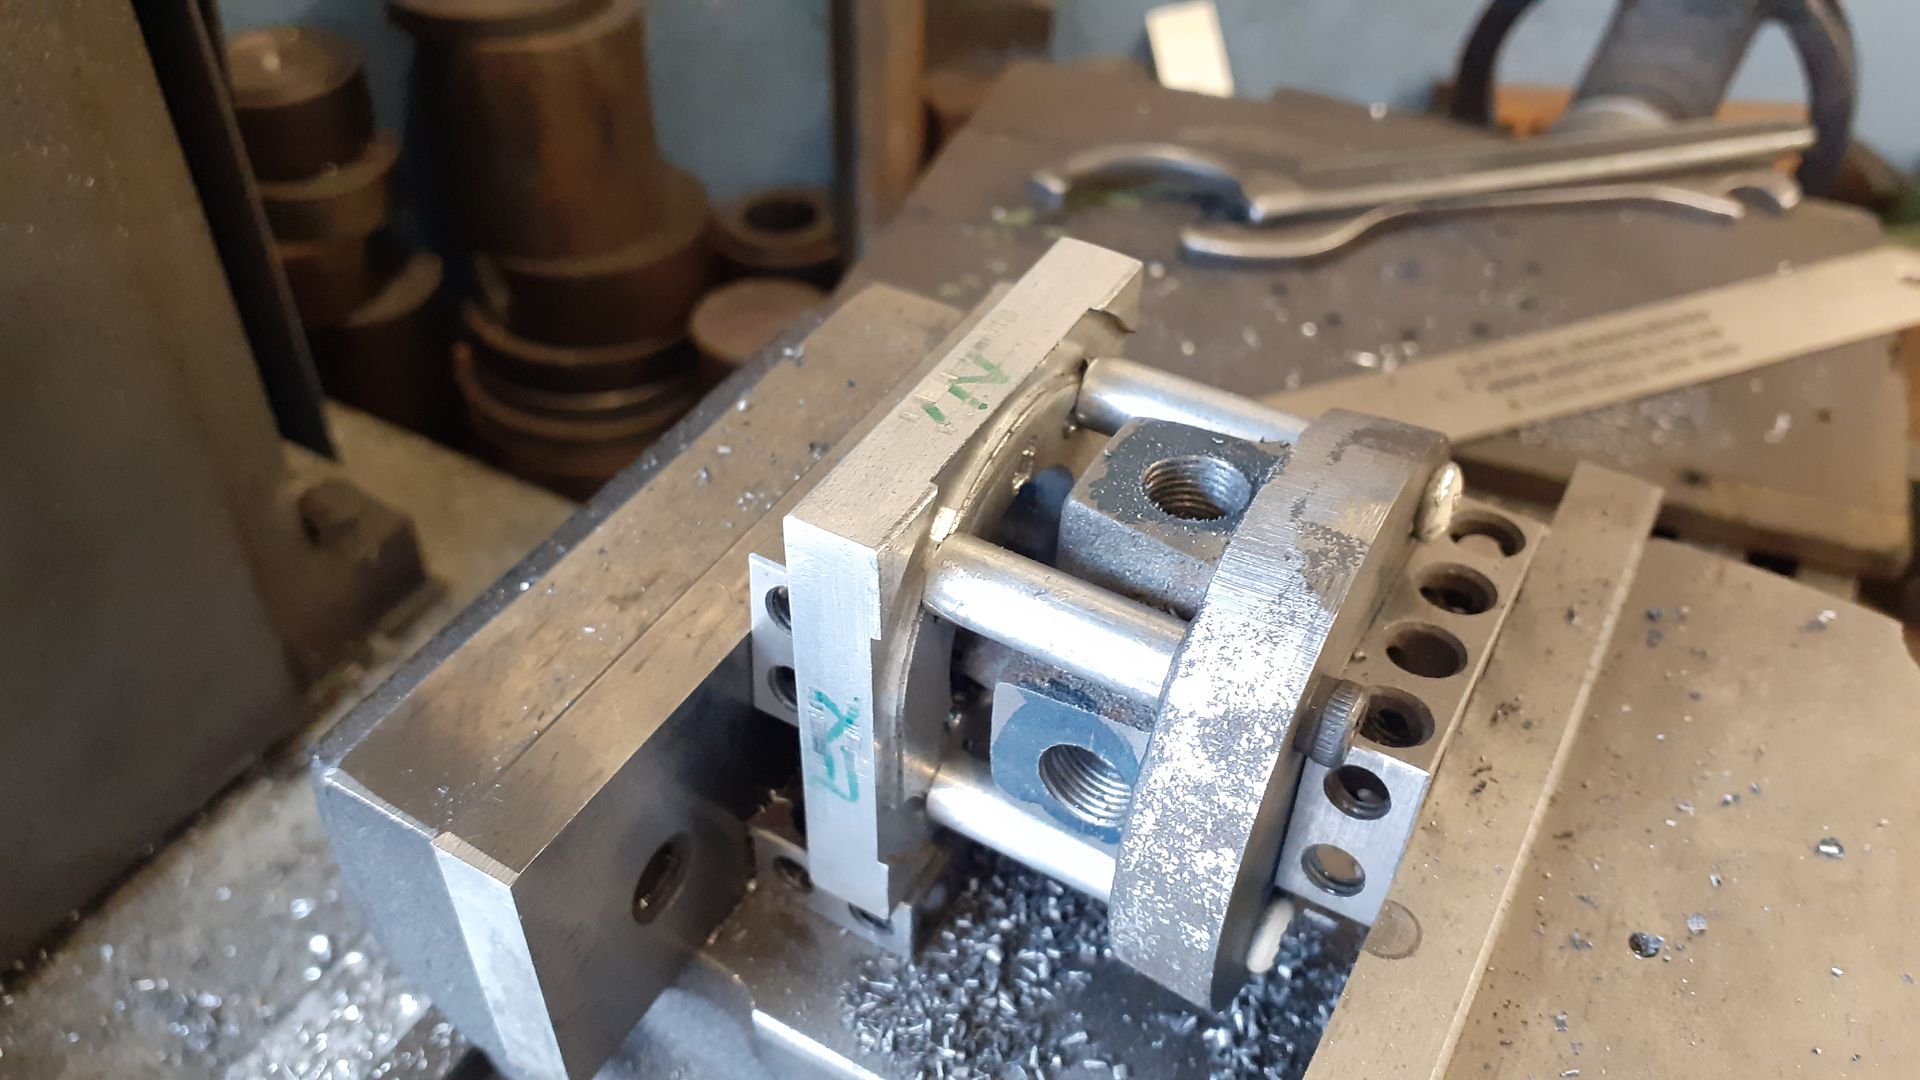
Before machining the main crankcase casting of the RLE it is worth getting the bearing caps ready. These are supplied as one so after a skim cut to flatten the bottom and then the ends with the now flat bottom against the vice fixed jaw the casting can be cut in two. Well actually you can cut it into three as there is plenty of length and it's quicker to saw away a waste piece than turn it into chips.
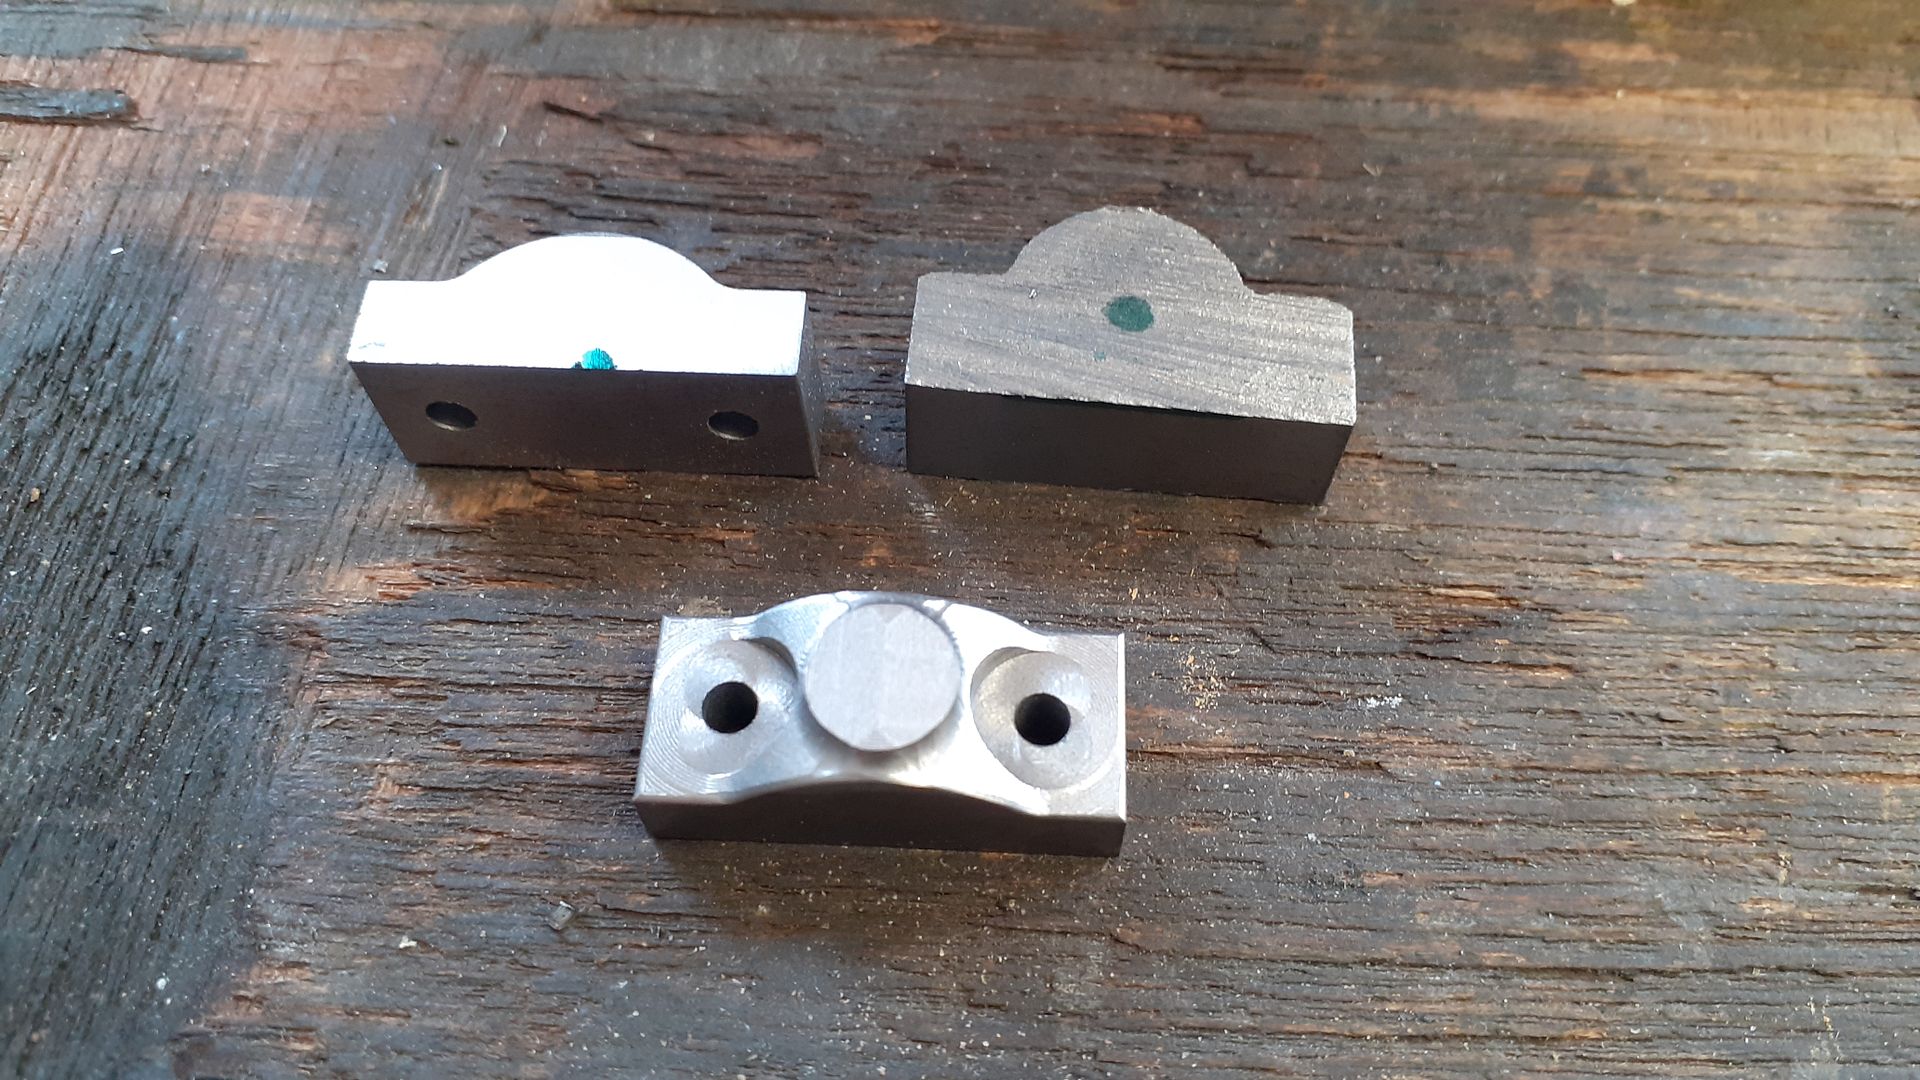
I can see how Graham made the pattern many moons ago simply by gluing a piece of half round timber moulding onto a flat piece and adding a bit of draft around the edges. This gives the profile shown top right in the following photo and if we assume the radius of the "hump" is where the green sharpie mark is then most of the material needs to come off the bottom which combined with a bit of flattening of the hump results in the section shown top left. I went a bit further and used the excess height of the hump to provide enough material to form a boss that can later be drilled and tapped for an oil pot – middle bottom. Clearance hole scan be drilled and spot faced so the caps are ready for when they are needed.

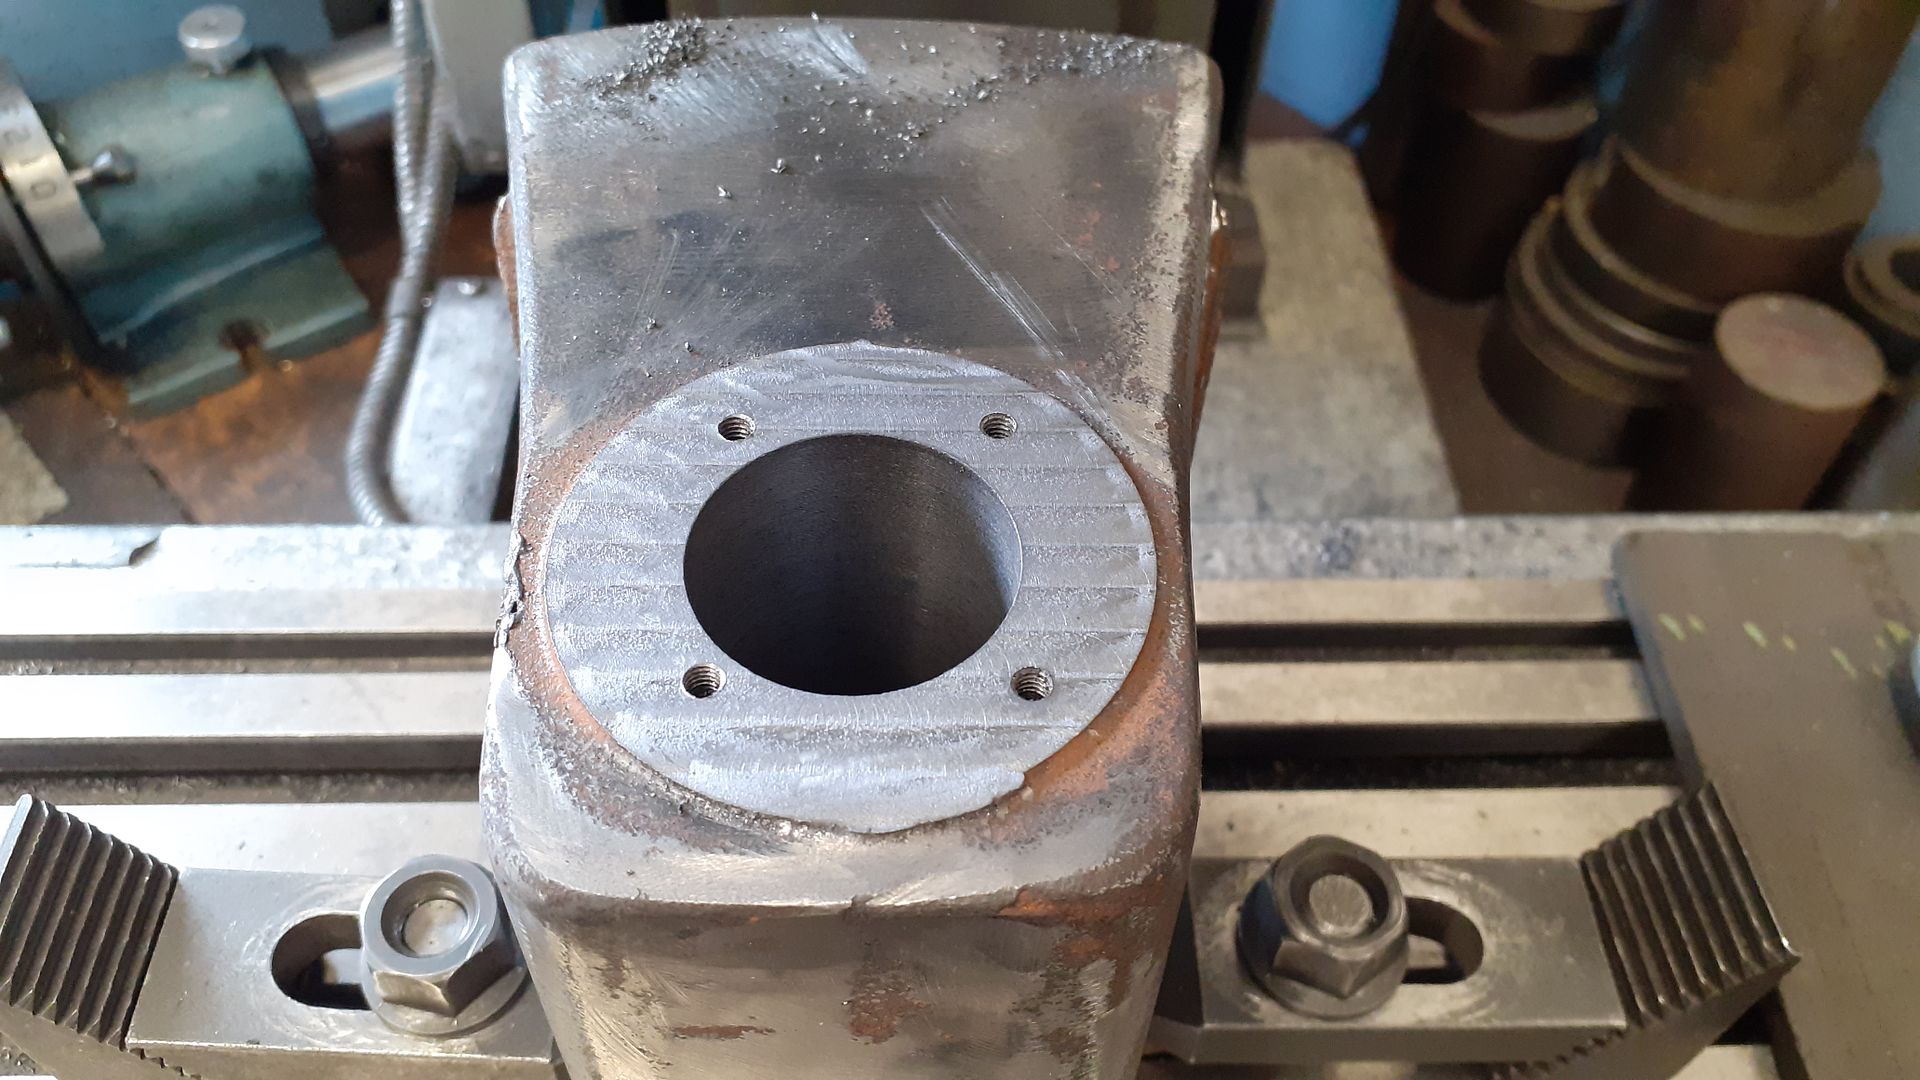
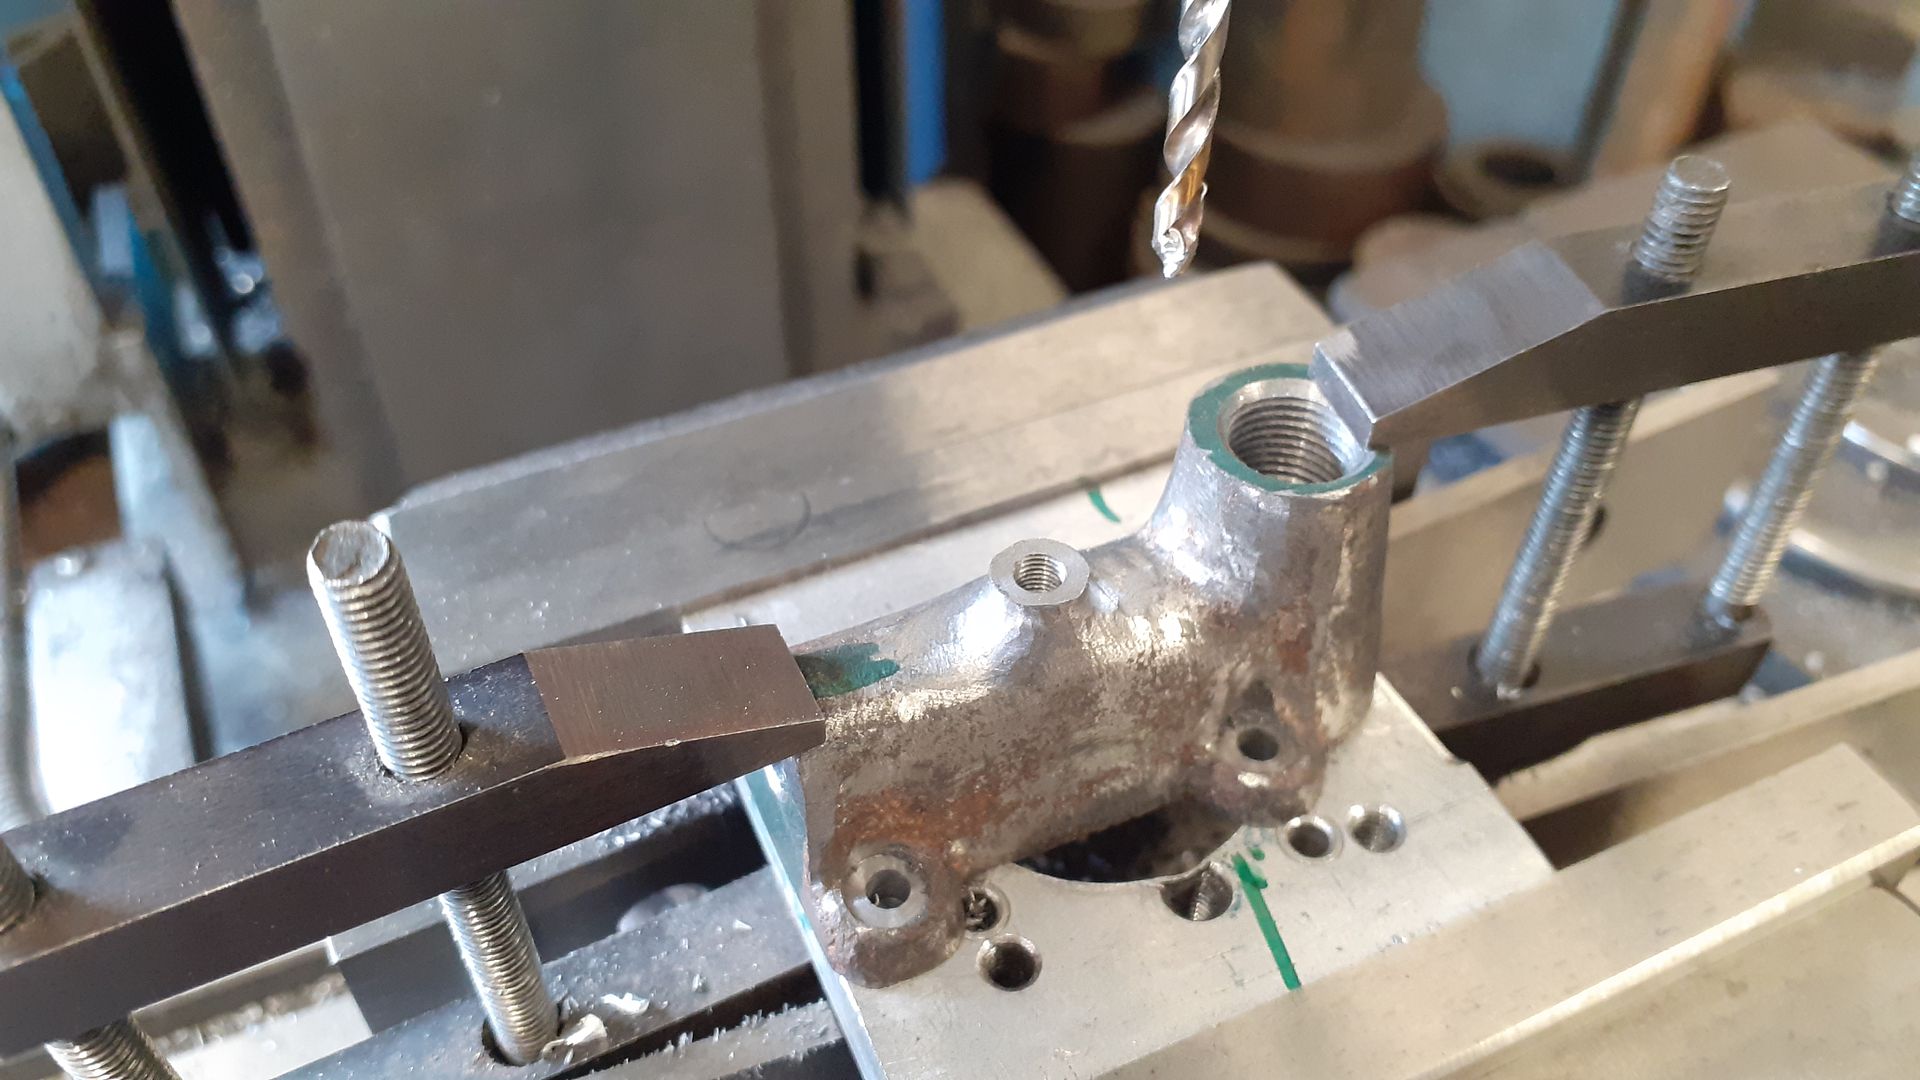
The crankcase was shimmed up on the mill table to get it to sit nice and level and not be distorted by clamping pressure and the facemill used to flatten it's bottom. Now that I had a solid surface it could be set up on the table with some parallel packing below and set to get the best centre line of the casting in line with the mill's X-axis. I started out buy locating the four hold down bolt holes so they sat reasonably central to the cast bosses noting their positions on the DRO before spot facing to give the nuts a good surface to tighten down onto.

Next the vertical face that the cylinder flange mates to was squared up, just taking off the bare minimum at the top and down low enough that the flange clears the step left by machining away the draft angle. I later blended that small step in to leave a smooth fillet where the vertical meets the horizontal as I'm fussy like that..

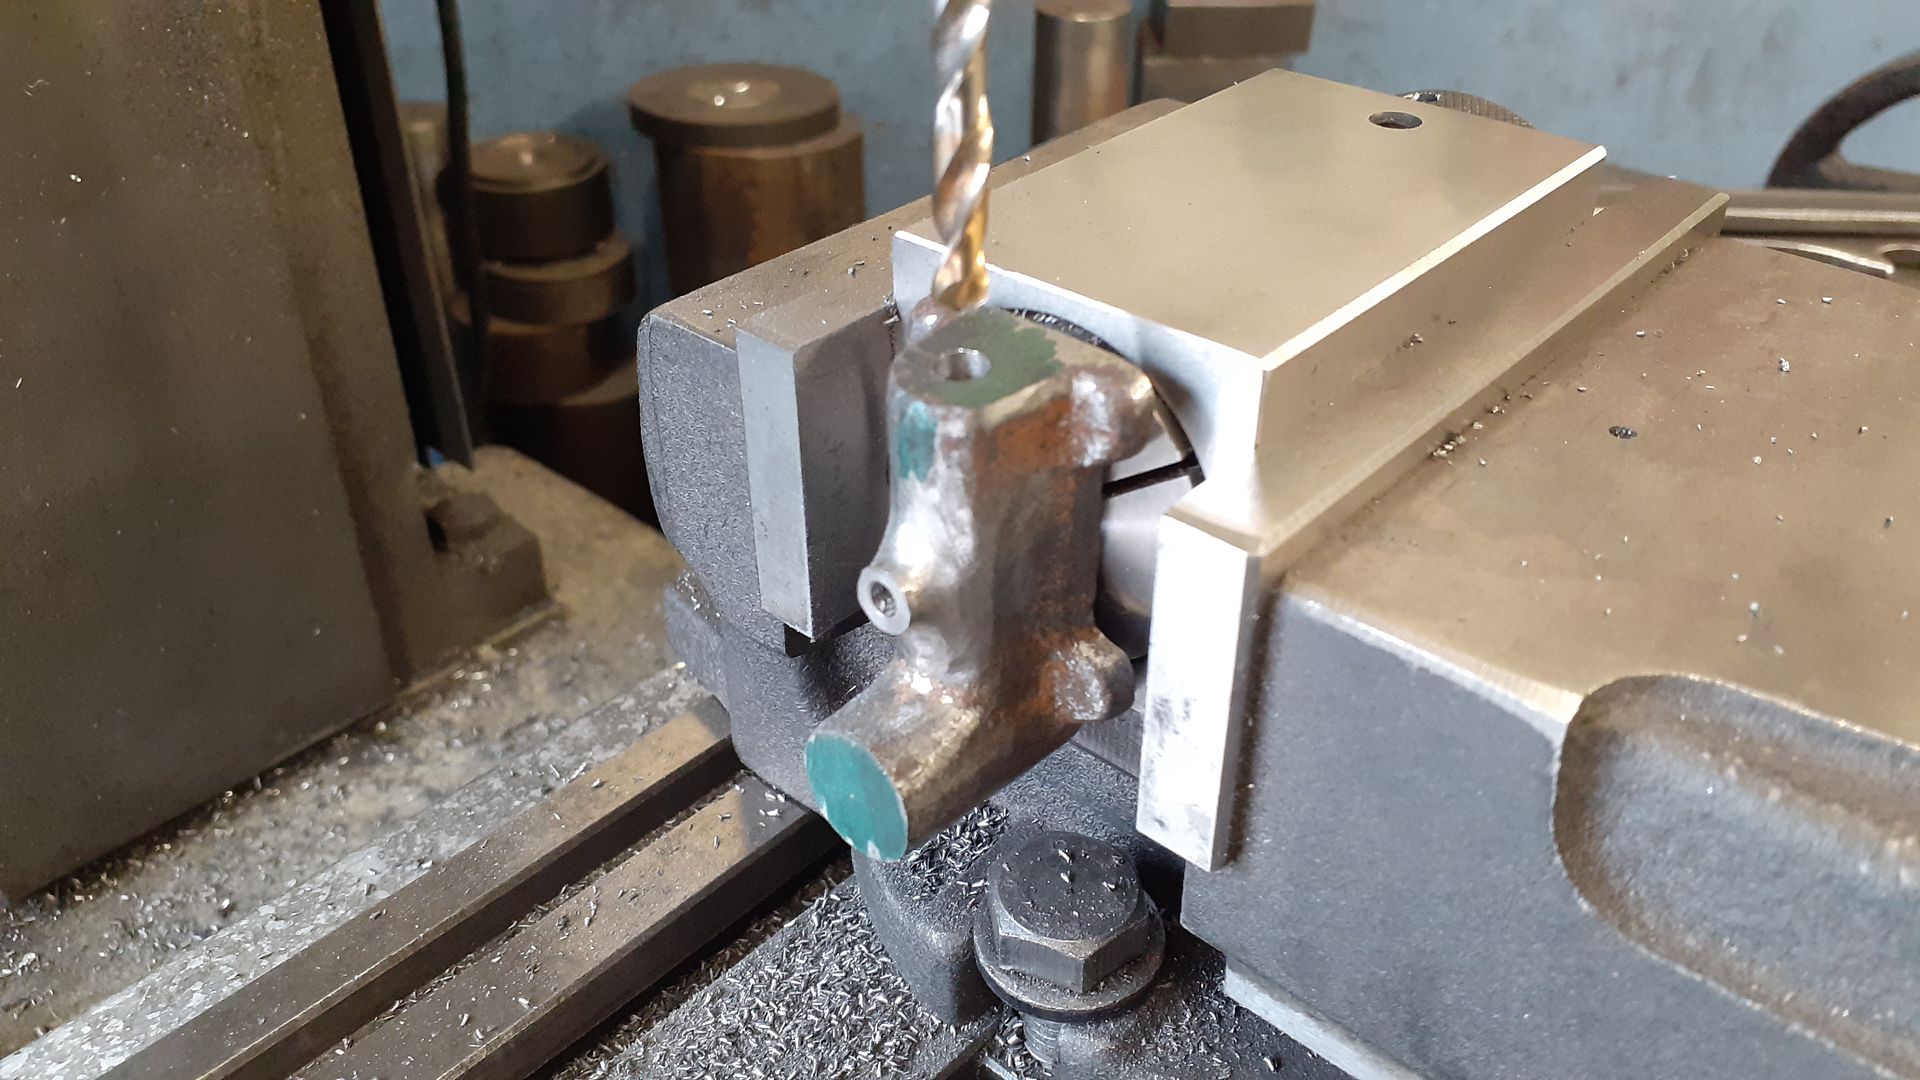
Moving to the other end of the casting the bearing split line was milled down to the required 41mm above the bottom of the base and the stud holes drilled and tapped M4. You can see in the photo that I'm using a spiral flute tap, I've almost gone over to these exclusively as they cut well, clean out the swarf as they go and it means you only need to tap once not two or three times as you do with the usual set of three taps.

For the following operations I like to use a machining plate as it gives good flat surfaces that you can run a DTI against when setting up the irregular shaped casting and also gives a good surface to clamp down.
Here I have clocked the long edge of my well used machining plate true along the mill's X-axis, located that edge and established my ctr line a known distance from it (50mm in this case) and then using the previously noted DRO positions drilled and tapped so the casting can be screwed to the plate. The bearing caps were then screwed into place ready for boring.

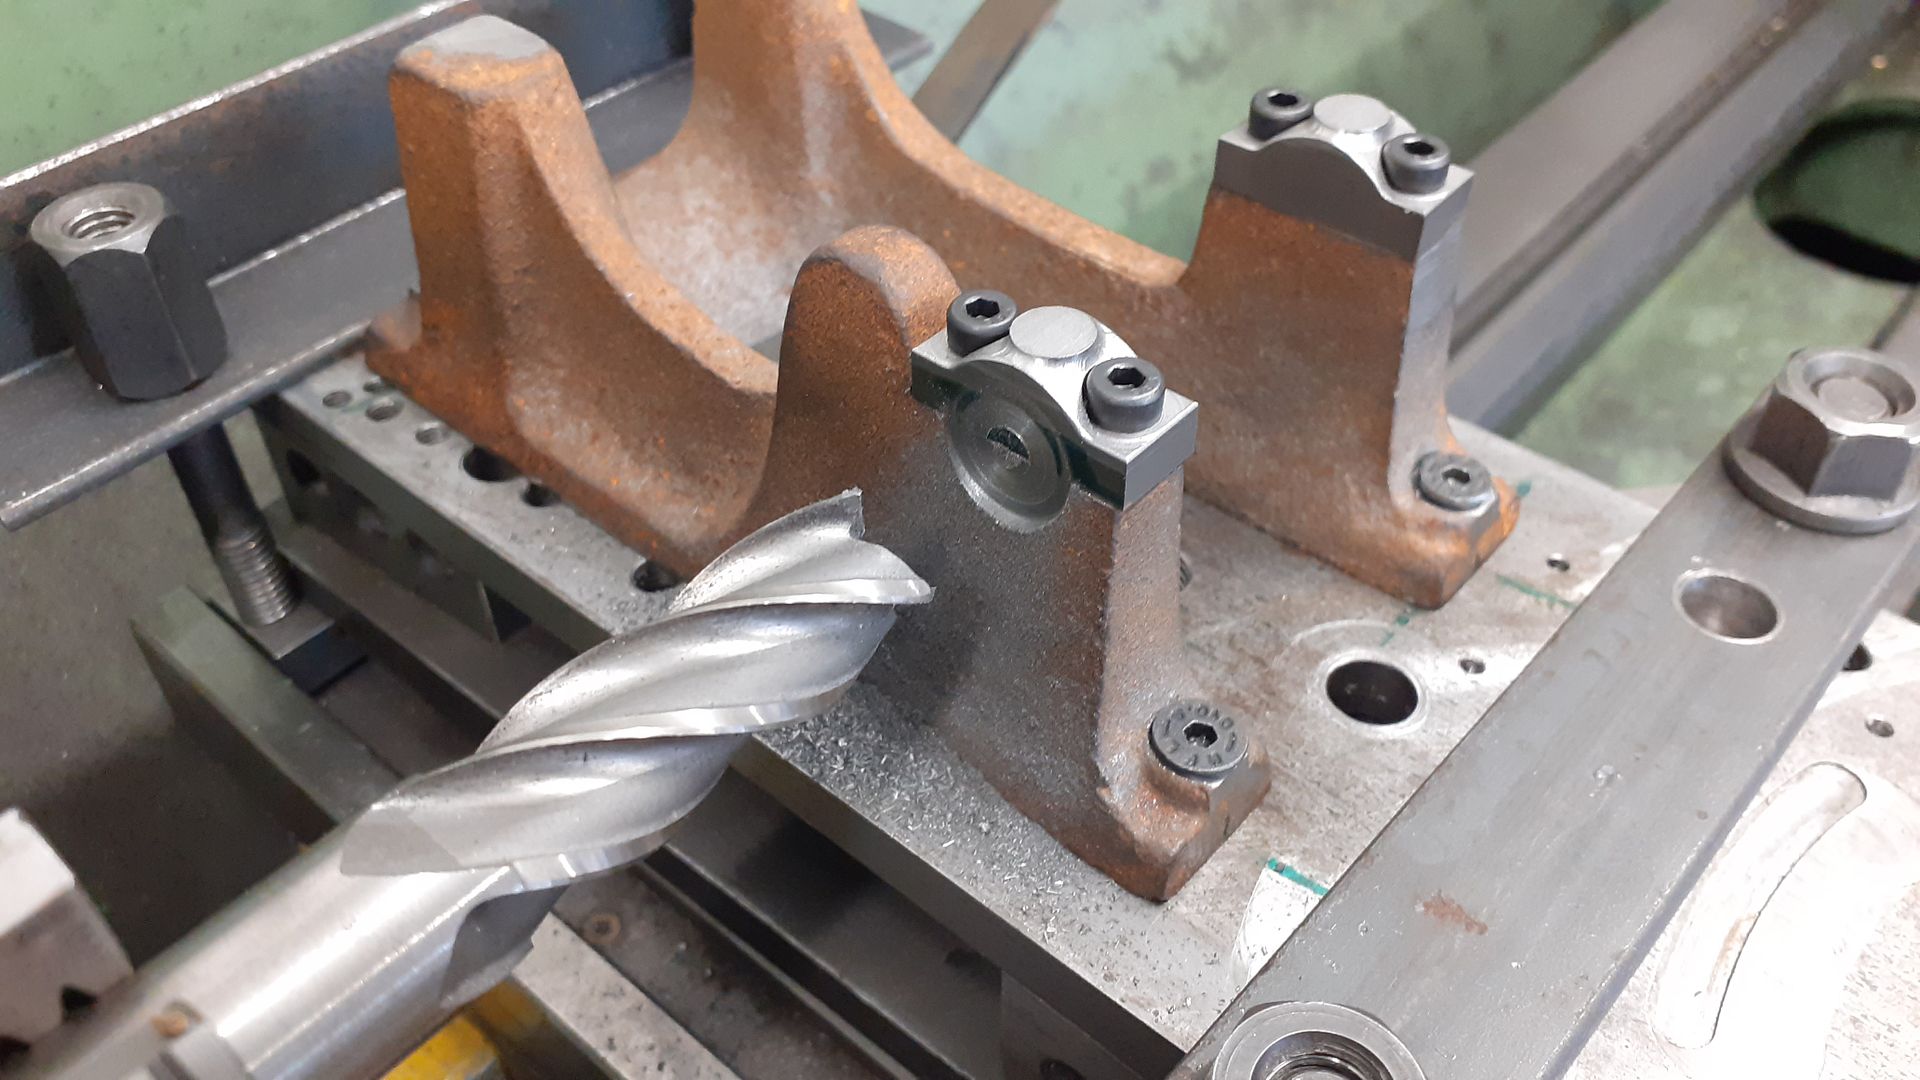
Knowing the exact lathe ctr height above my cross slide and the thickness of the plate it was simple to work out how much packing was needed to bring the bearing split line upto ctr height, clock the edge of the plate true across the lathe and then start machining. First I used a 16mm 4-flute cutter to produce a flat edge by machining away the draft on the base and stopping just as the cutter touched the bearing cap. I followed up with a 6mm ctr cutting 3-flute cutter to remove the pip left by the conventional non ctr cutting endmill.

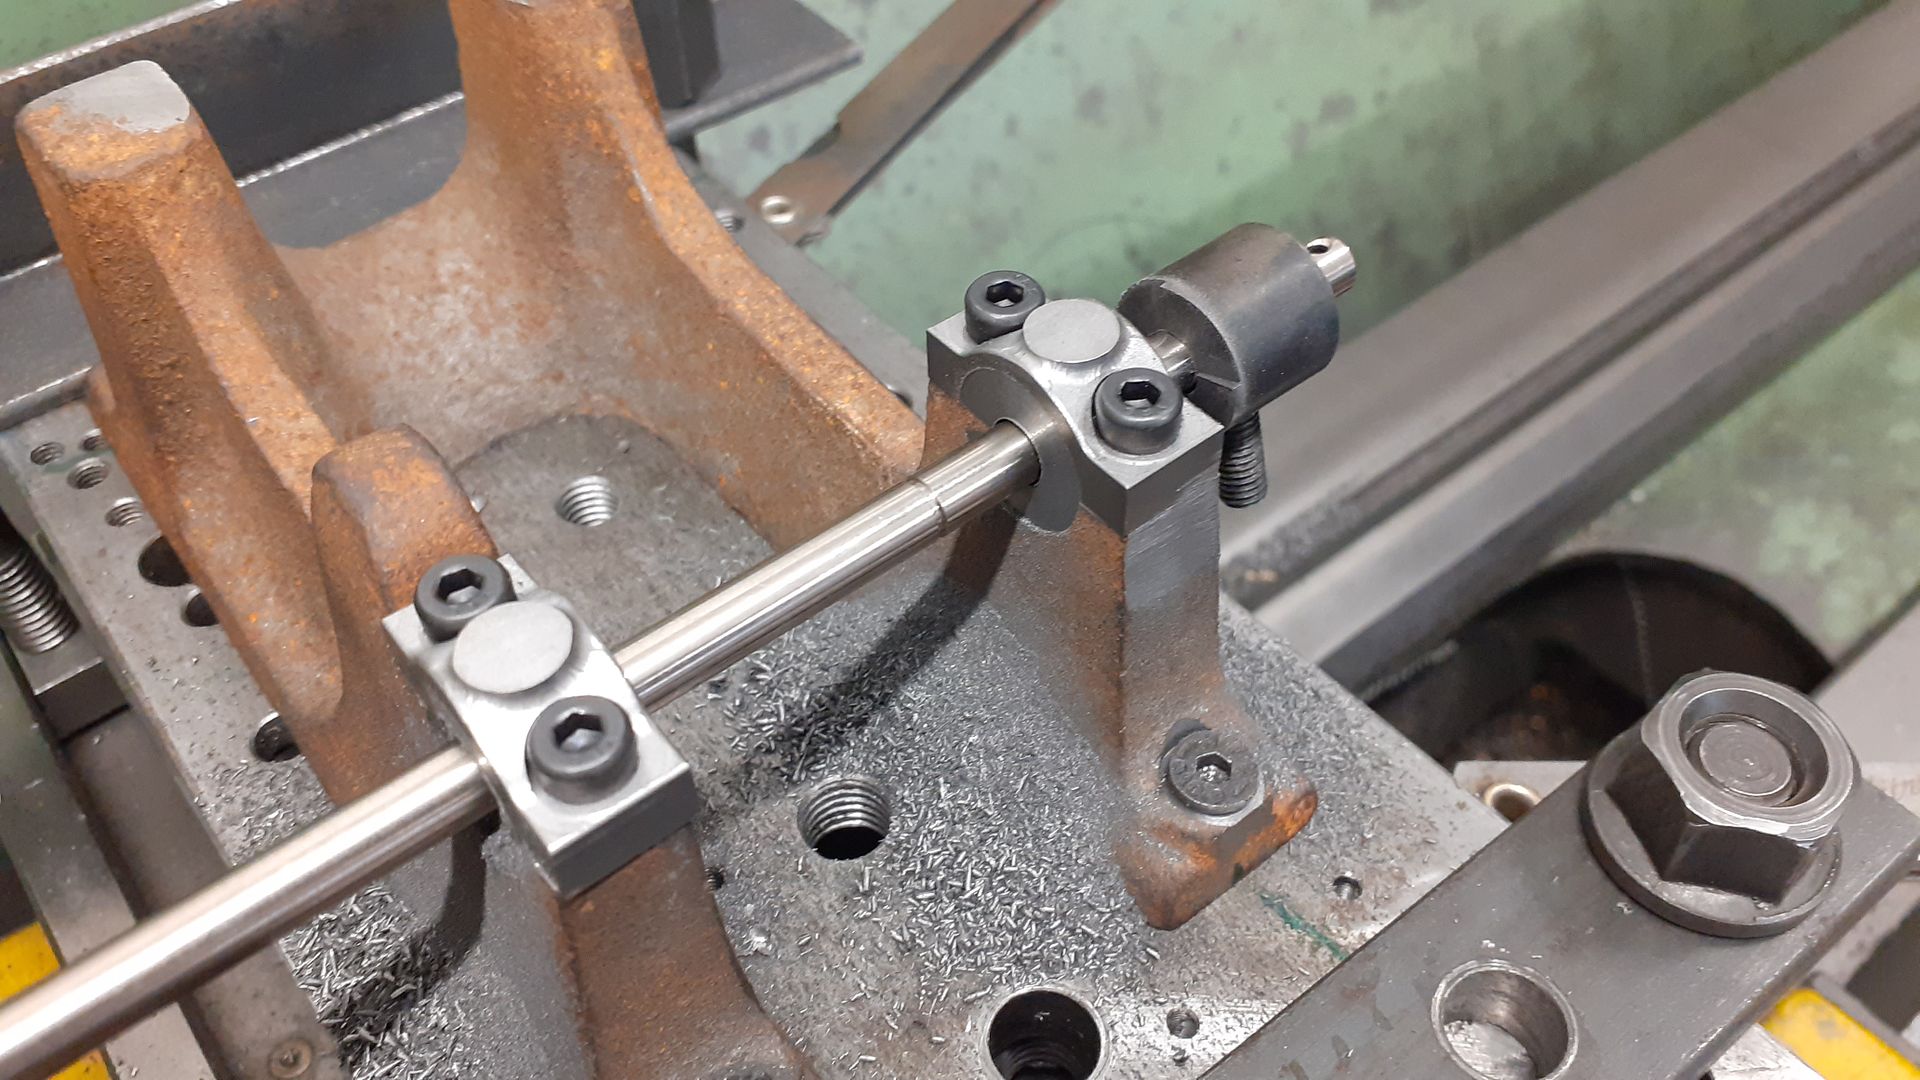
This flat surface could then be spot drilled followed by a 6mm stub drill and then the far end was done with long series ctr and 6mm drills. Following that a spot facer I had made for a previous engine was used to flatten the remaining three faces.

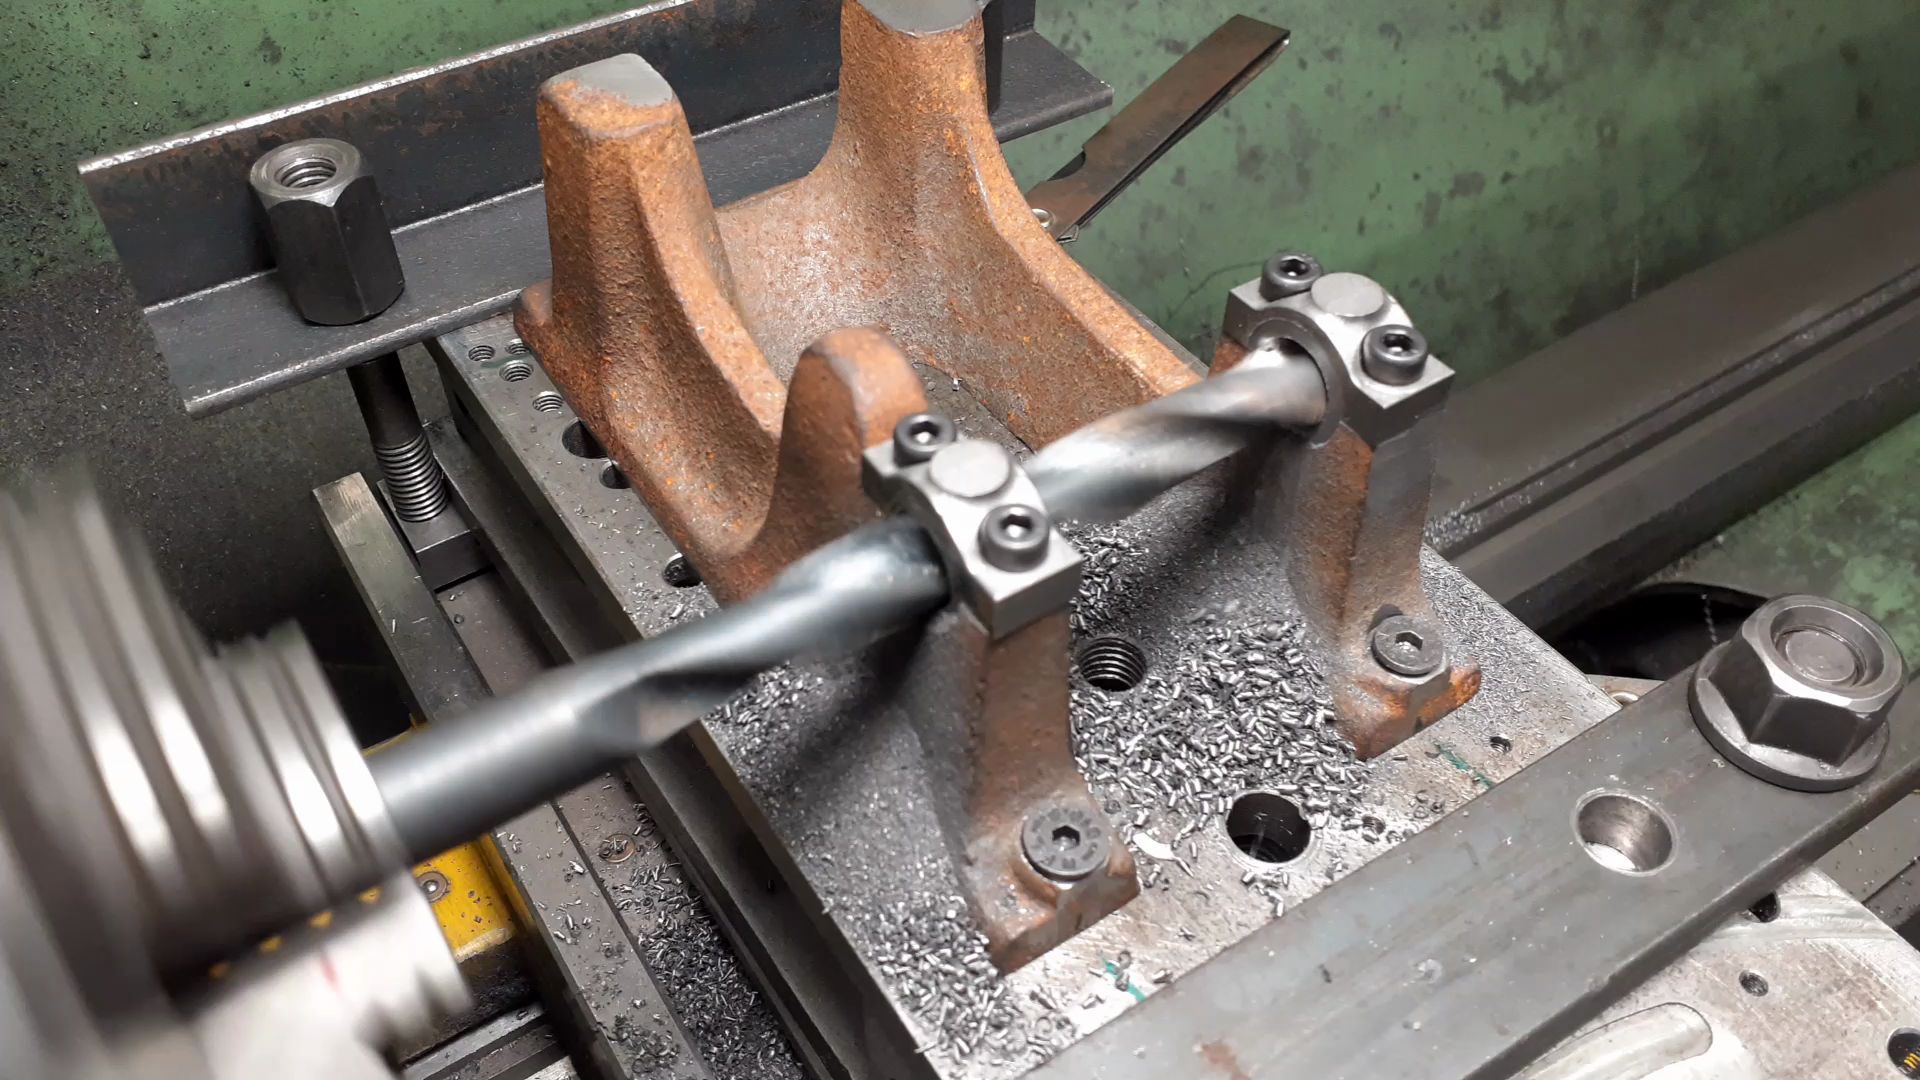
I could then drill out 10mm followed by reaming size for 12mm. If you want to take the option of having the crankshaft run in the cast iron then just drill to 9.7mm and then ream 10mm
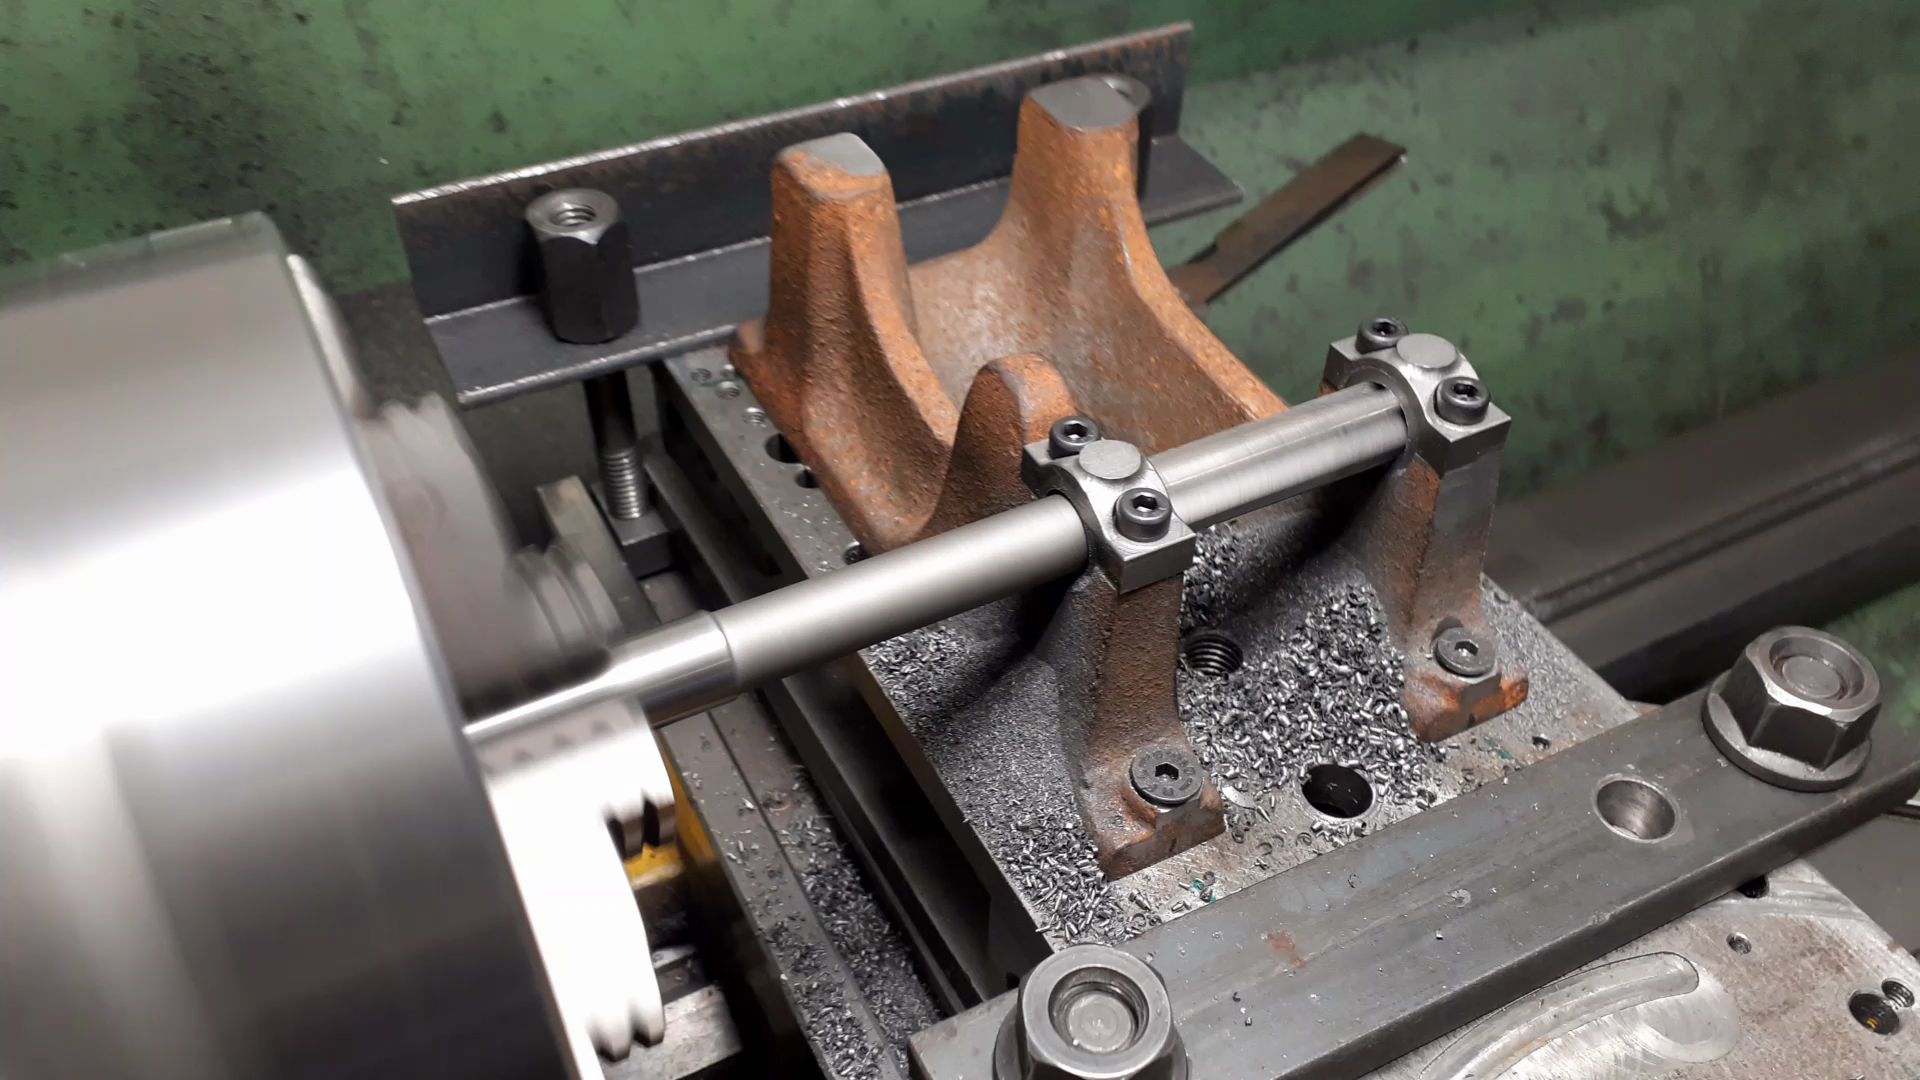
A machine reamer was used to finish the holes to 12mm ready to accept the bearings.
That's enough for one night, next time the crankcase can be completed and these three main castings brought together. In the meantime a quick vid of the drilling and boring on the lathe and no the reamer is not going backwards!
3 August 2023 at 18:55 #655055 JasonBModerator@jasonb
While the crankcase was still mounted to the machining plate I clocked it vertical on the mill, located ctr and cylinder height and then off set each side to drill and tap for the two studs to hold the cylinder in place

Once I knew the ctr to ctr distance of these holes I did the clearance ones in the cylinder's flange. When it was in the lathe I had scribed a horizontal line at mid point across the flange. Here I have clamped a parallel to that scribed line and clocked it true along the X-axis, located ctr of bore and then offset each side to drill the holes

While held like this I used a smaller homemade reverse spot facing tool to machine a nice surface for the nuts to sit on.

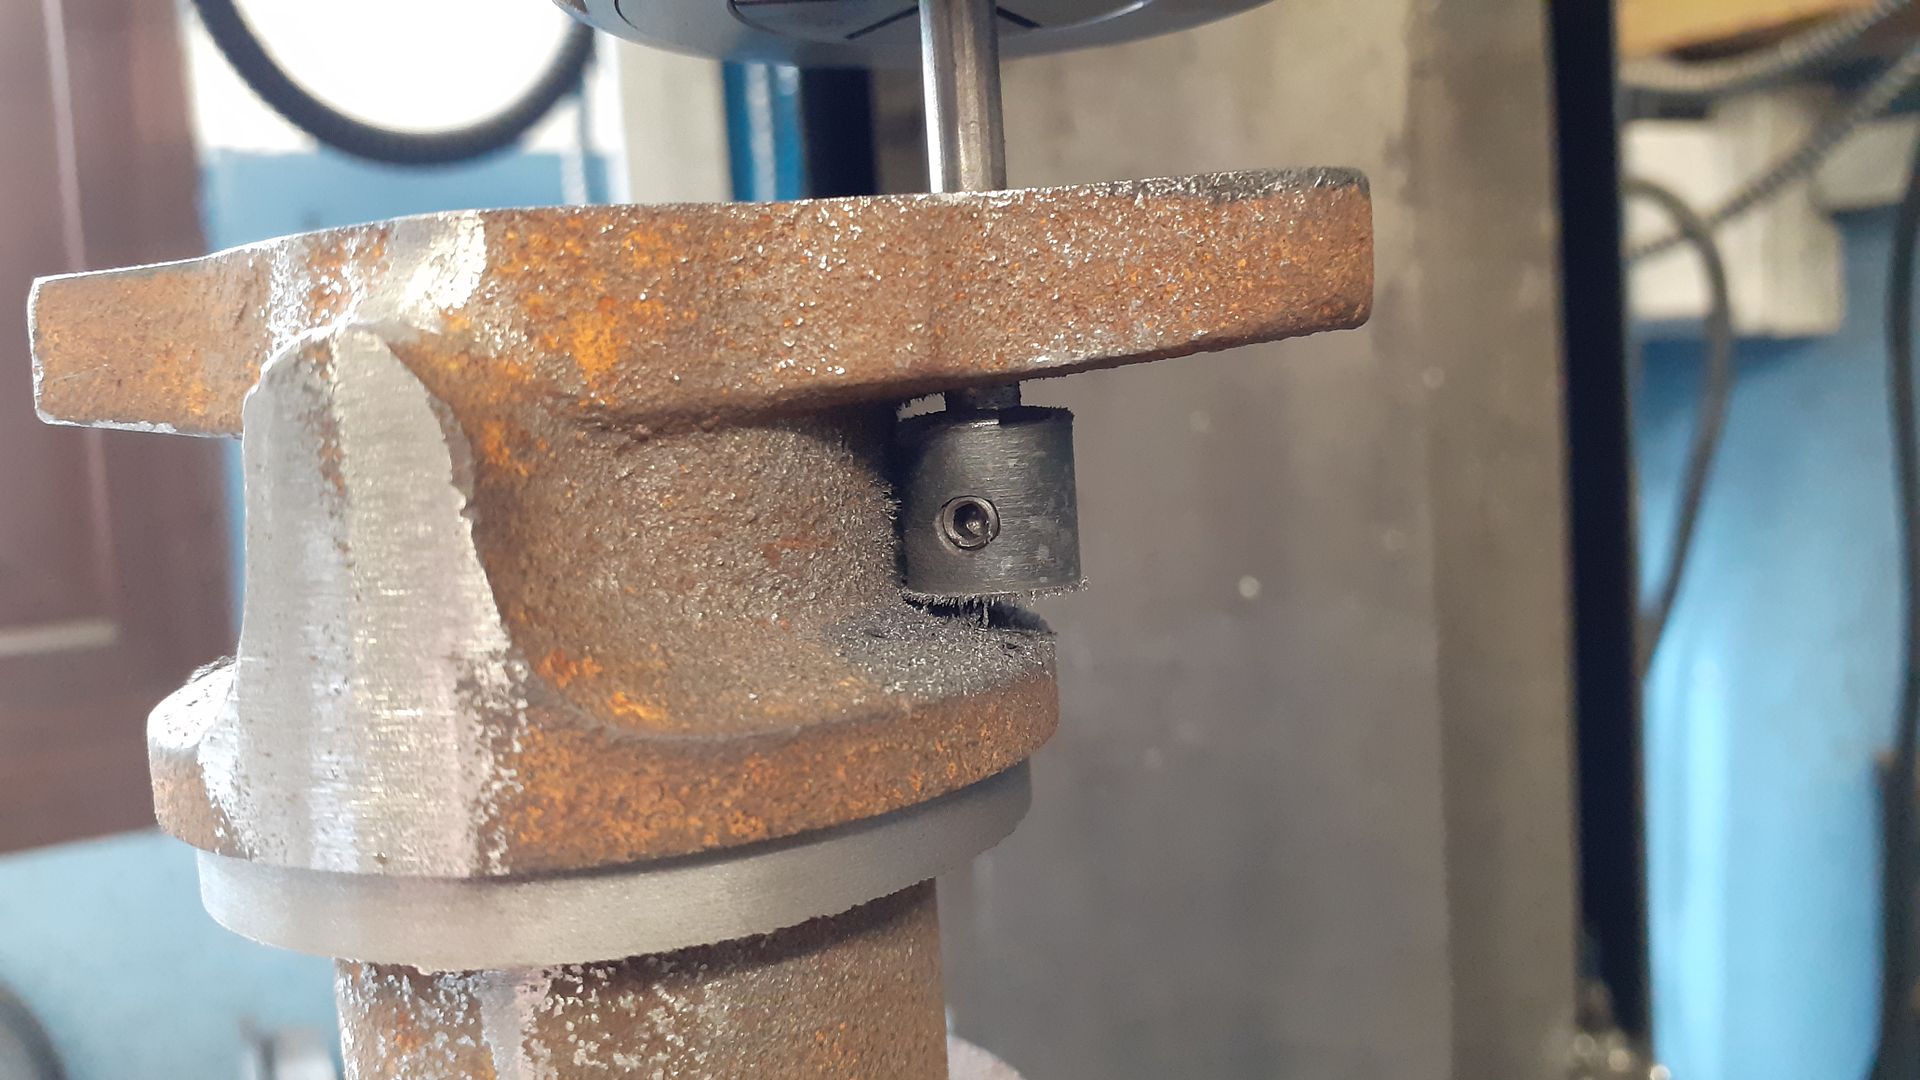
Using the heads of a couple of cap head screws poked into the holes and resting them on a parallel the cylinder could be clamped horizontal to an angle plate to flatten the area around the lubricator hole which was also drilled and tapped.

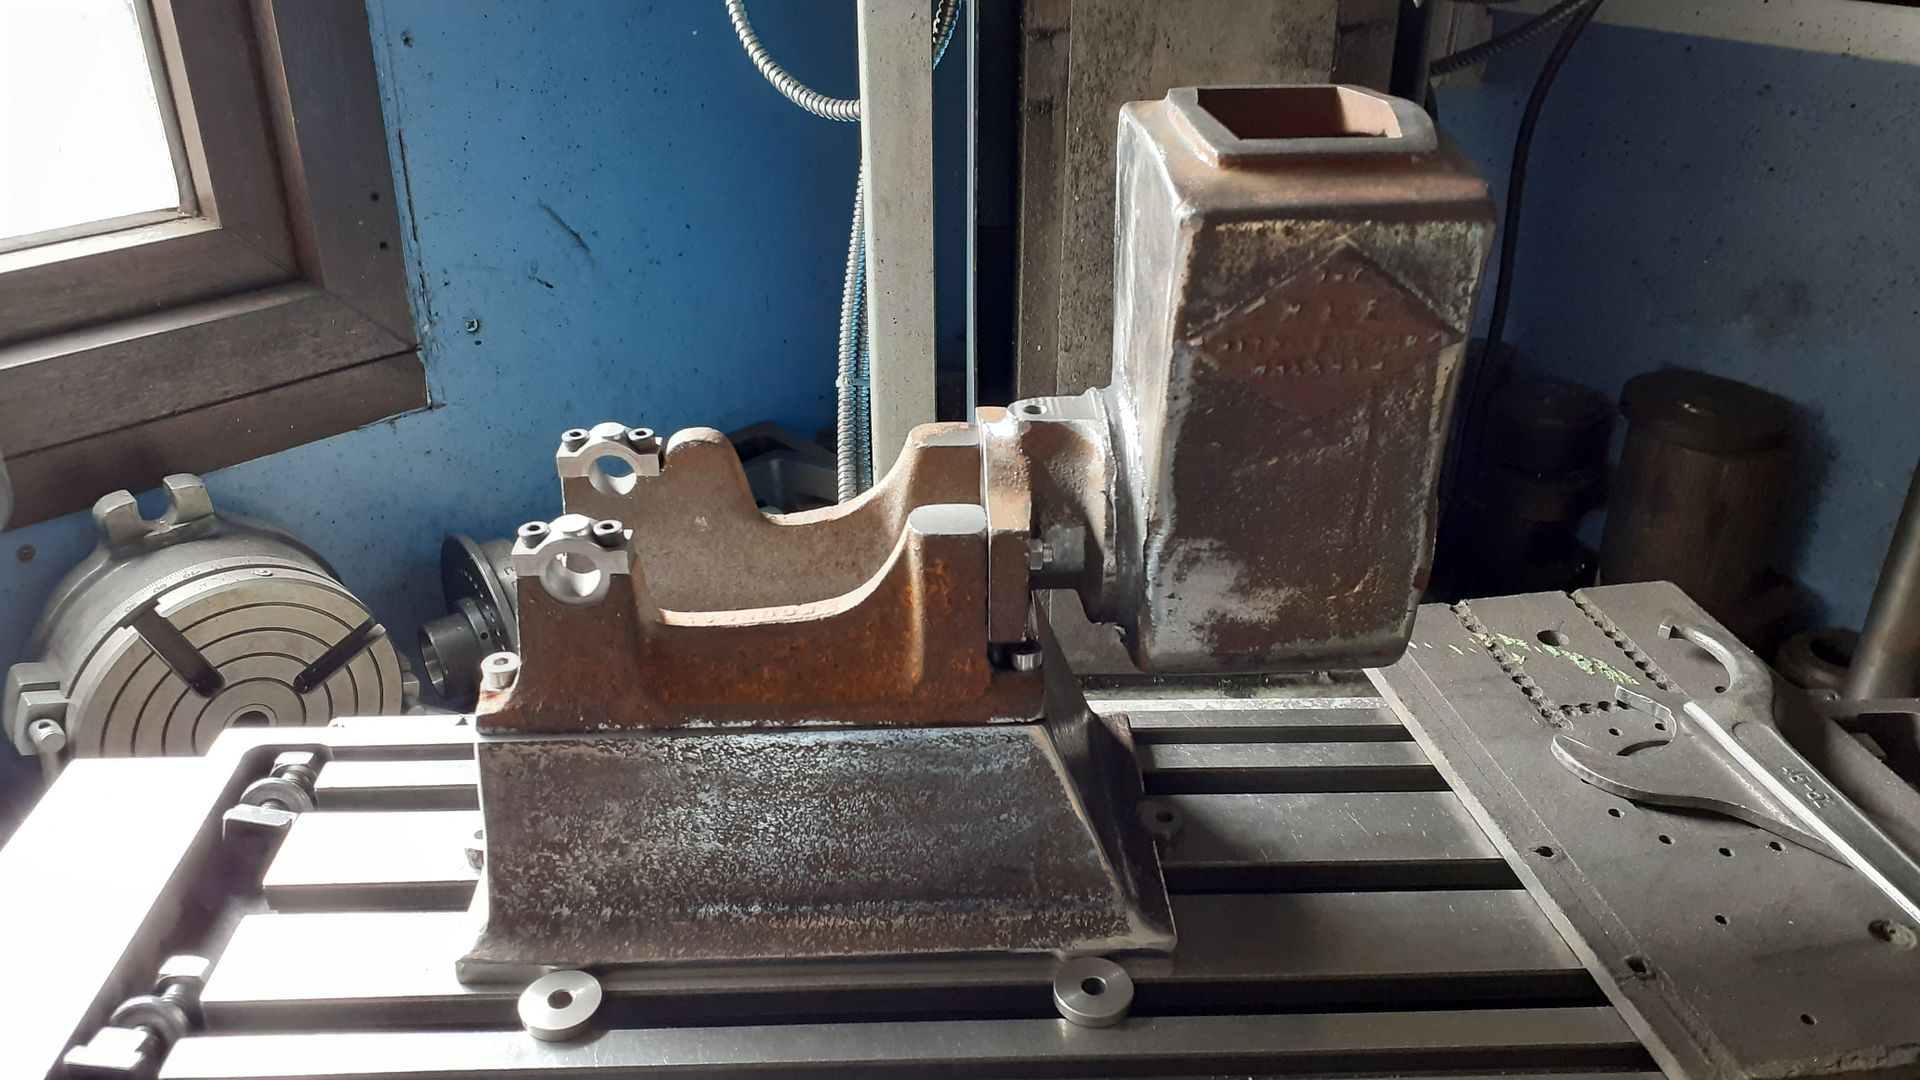
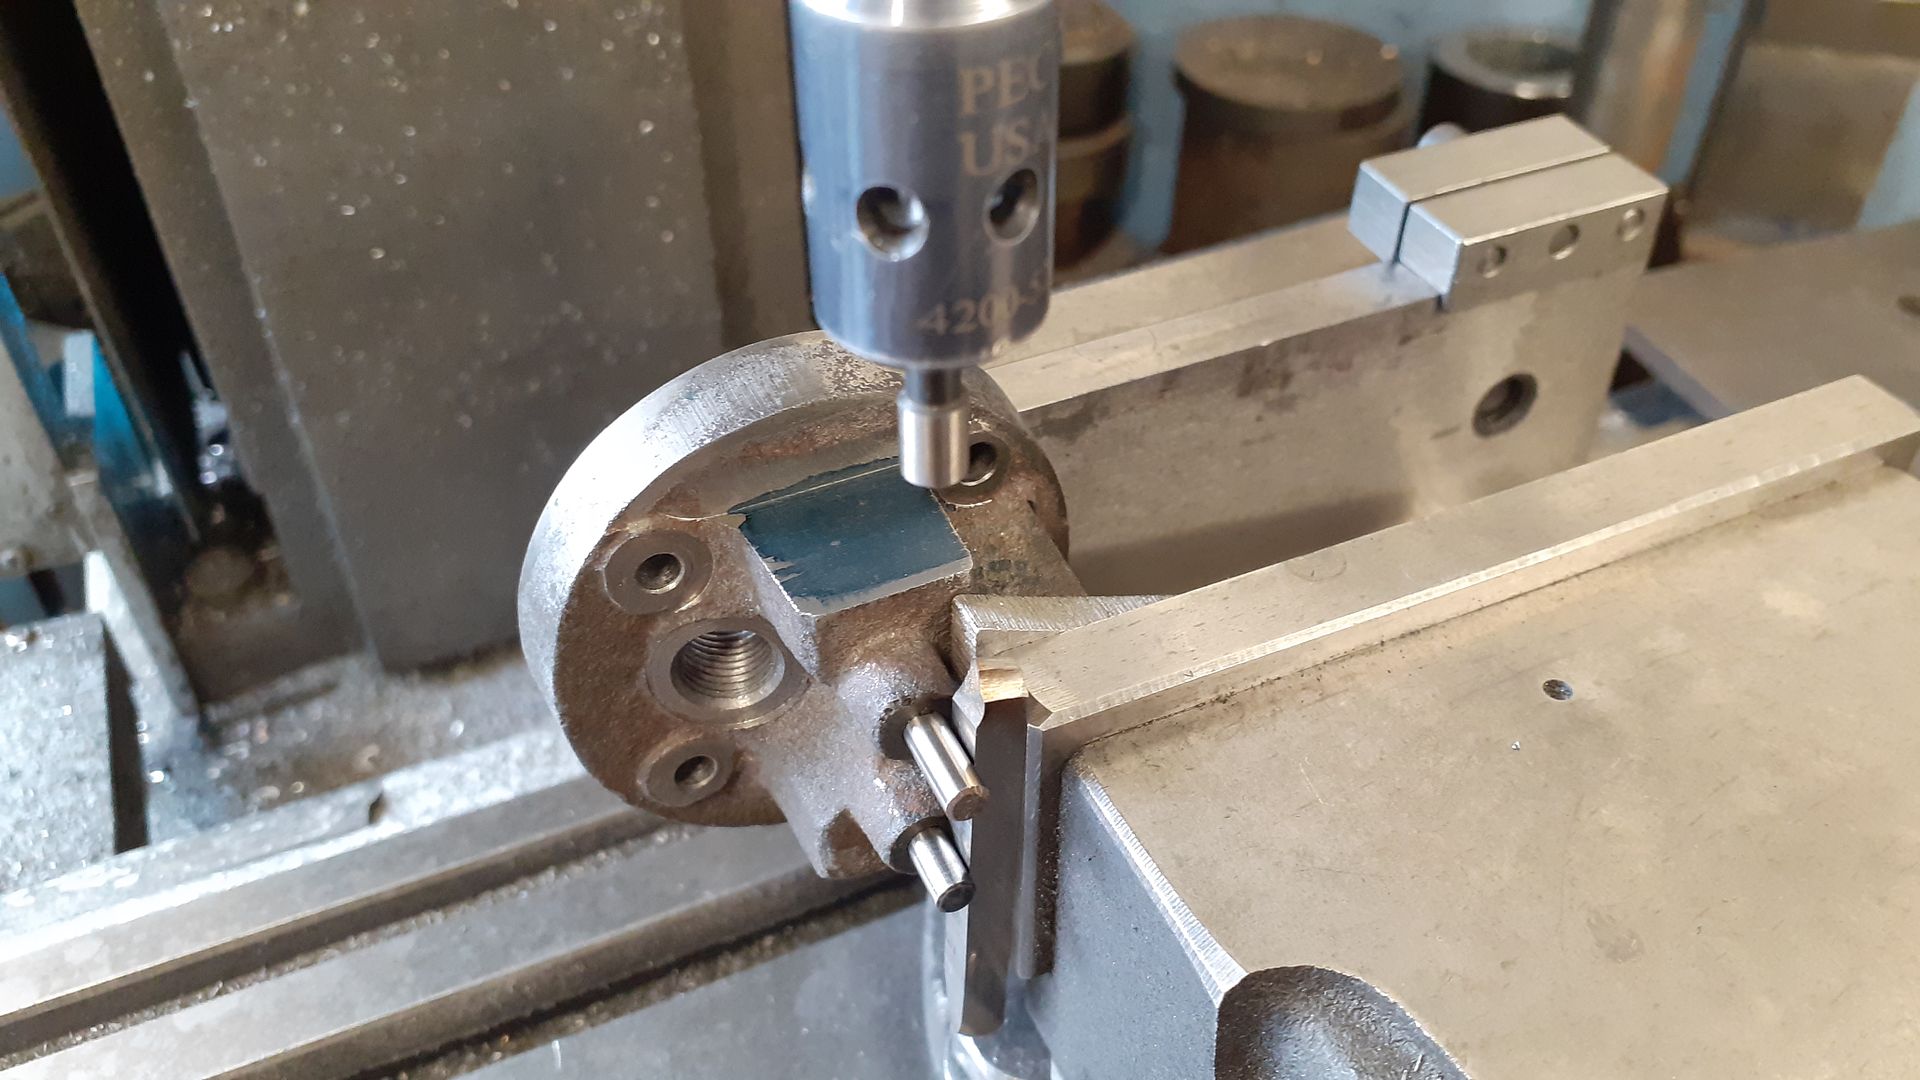
Next was to bond the hopper onto the cylinder, I opted for high temp Loctite 648 on the cylindrical surfaces and a small amount of JB Weld on the radial step towards the crank end of the hopper. To make sure the hopper was sitting upright I mounted the crankcase to the base and the cylinder to the case, a couple of stops in a tee slot set the base true along the X-axis and then an edge finder between the two bearing caps set the engines ctr line in Y. You may just be able to see at the top edge of the image towards the right hand side a pointer in the mill spindle, this was lined up with the central parting line of the hopper so all was centred up and left to set.

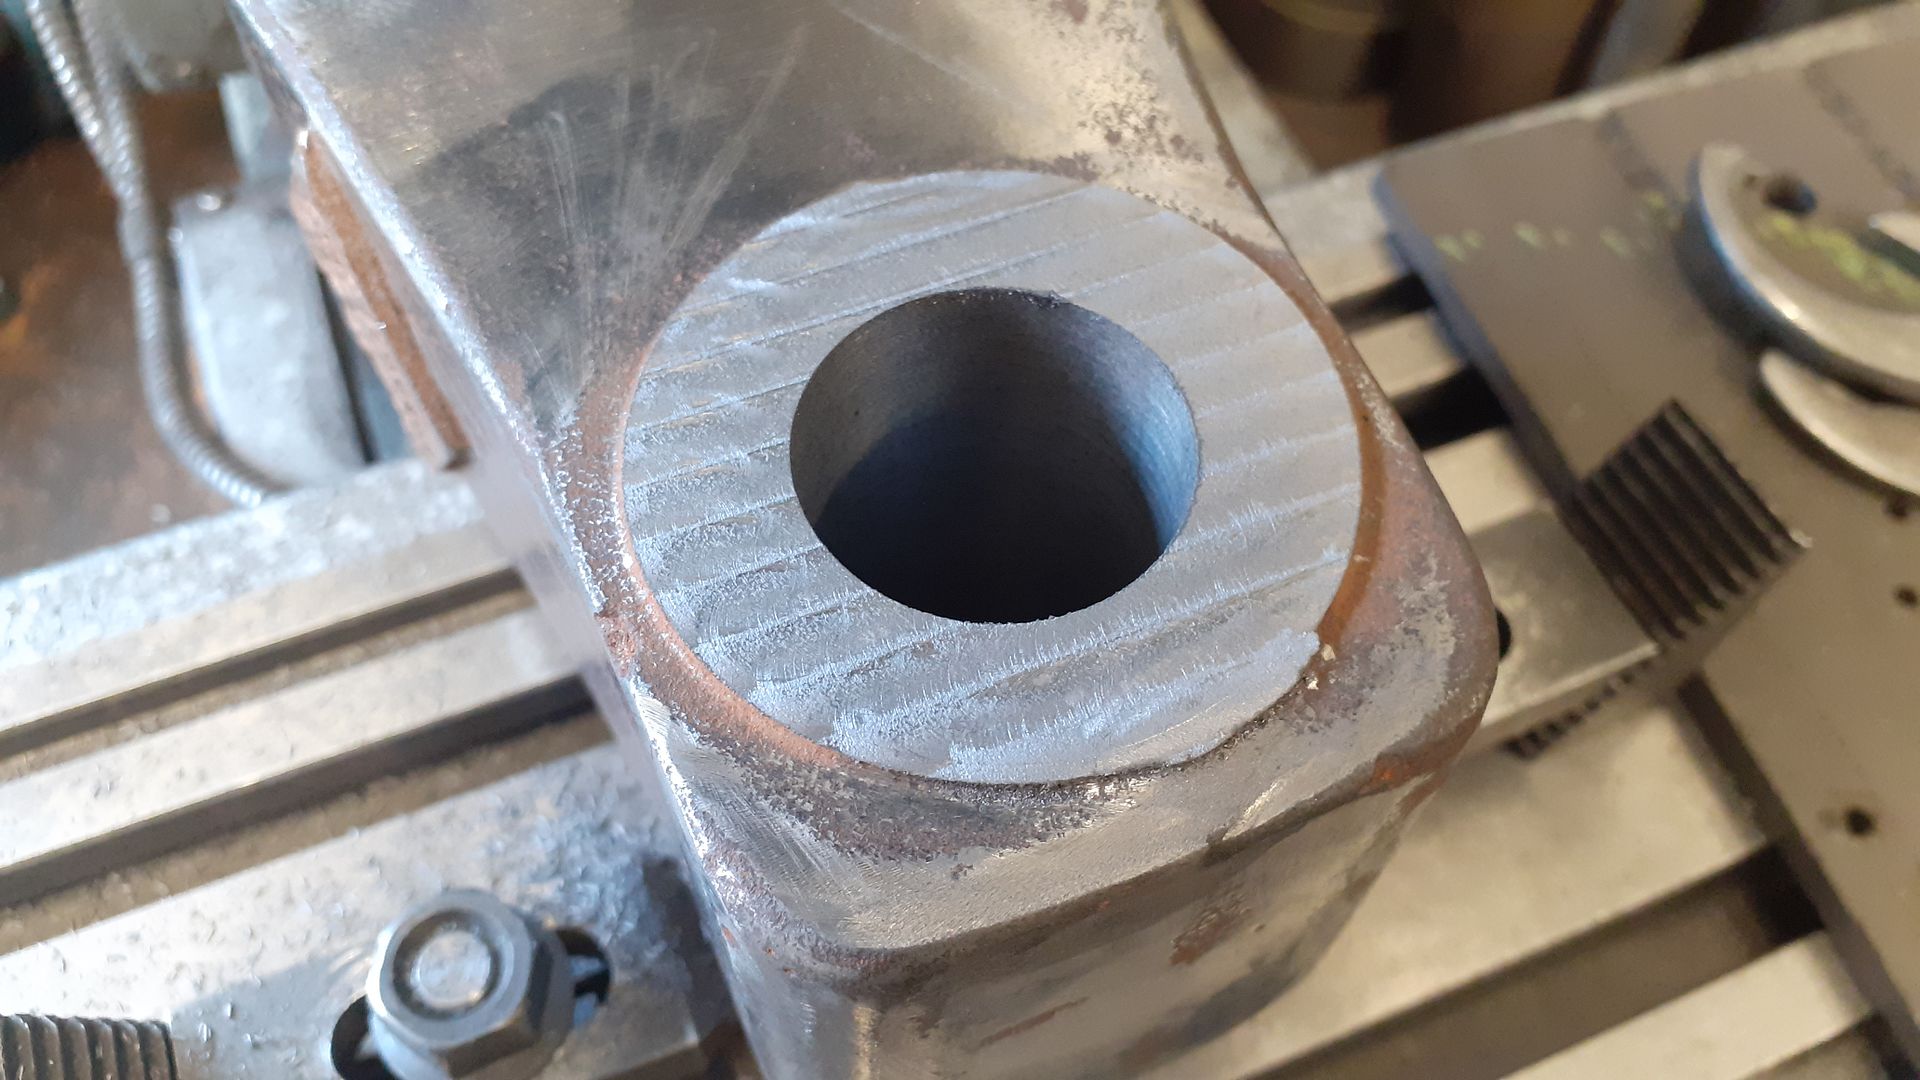
After a couple of days the hopper and cylinder were machined to final length at the head end, quite happy with the joint which can barely be seen.
 3 August 2023 at 19:05 #655059
Ches Green UK
Participant@chesgreenukGood stuff. And all done and posted quickly, certainly by my timescales

homemade reverse spot facing tool
Ah, that's neat. Kinda like the collapsible de-burring tool. I always wondered how folks managed to spot-face seemingly inaccessible faces.
Ches
7 August 2023 at 19:21 #655550 JasonBModerator@jasonb
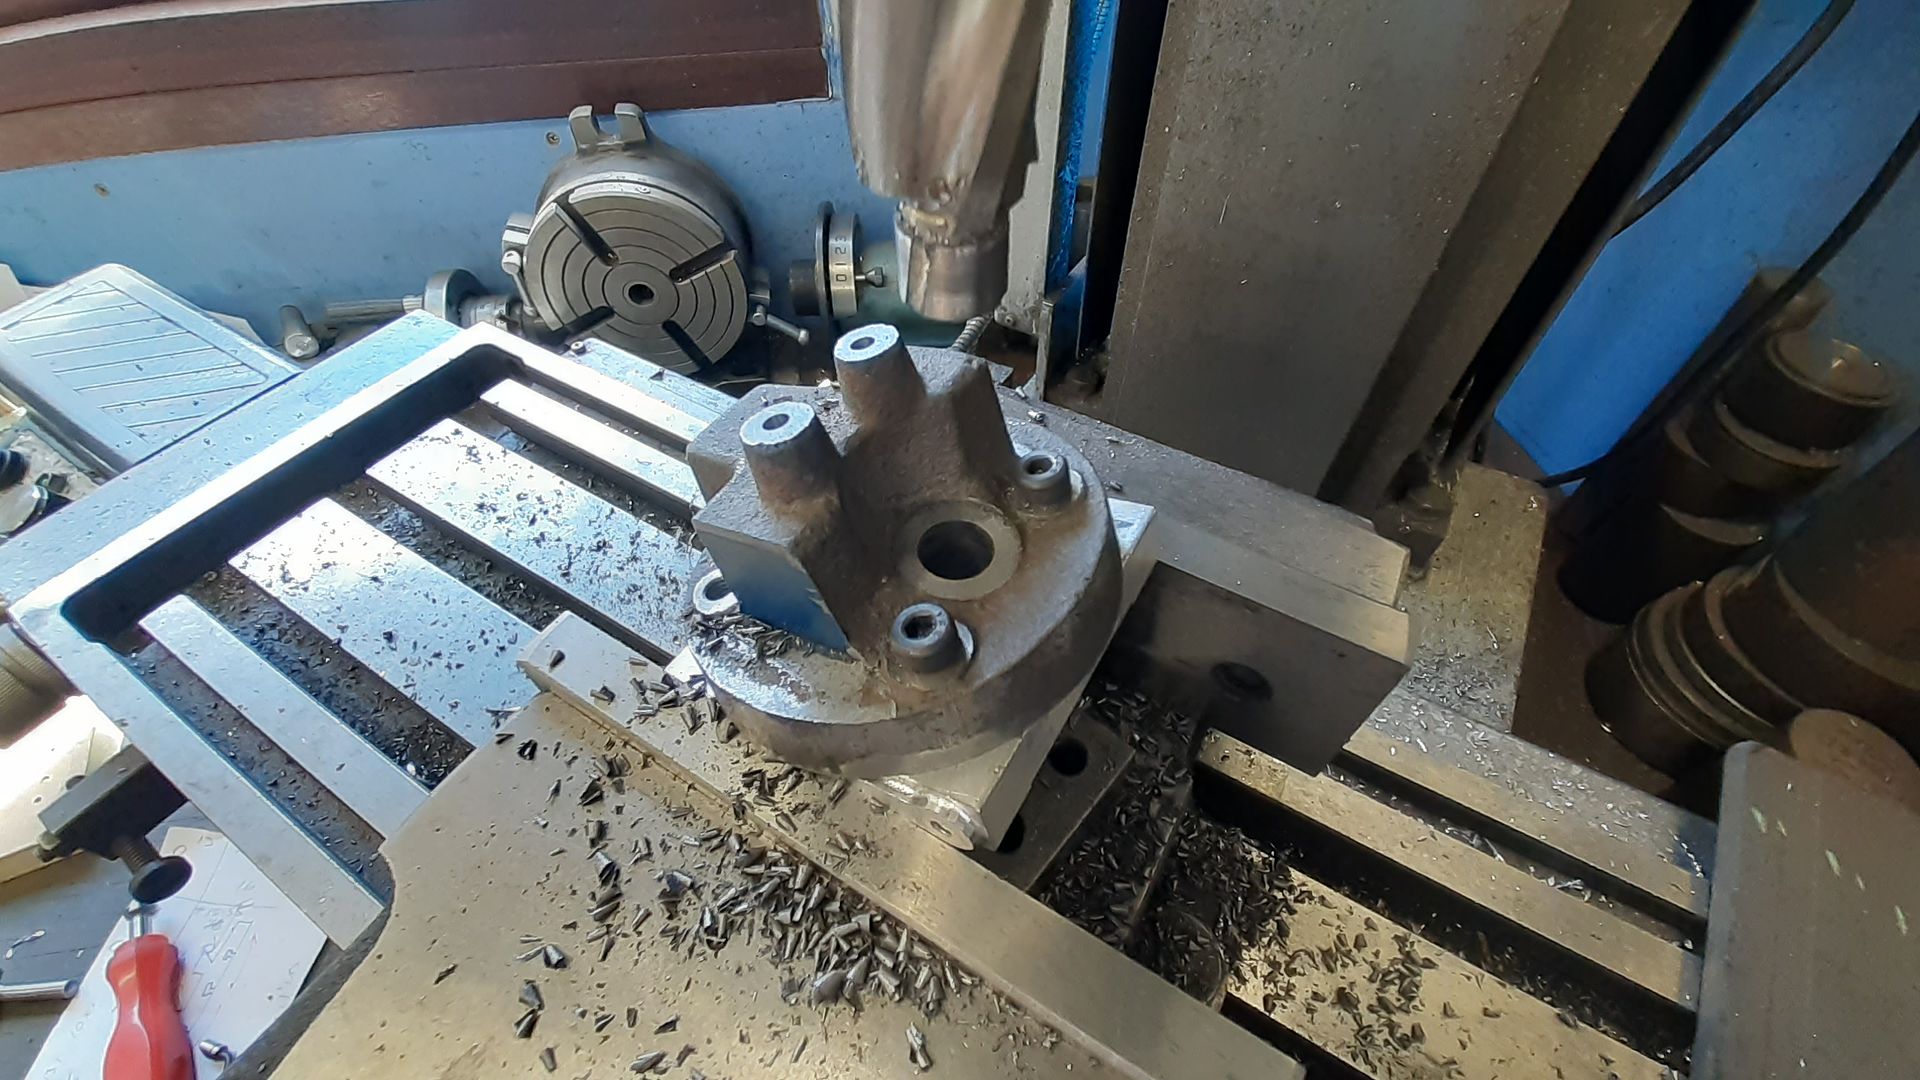
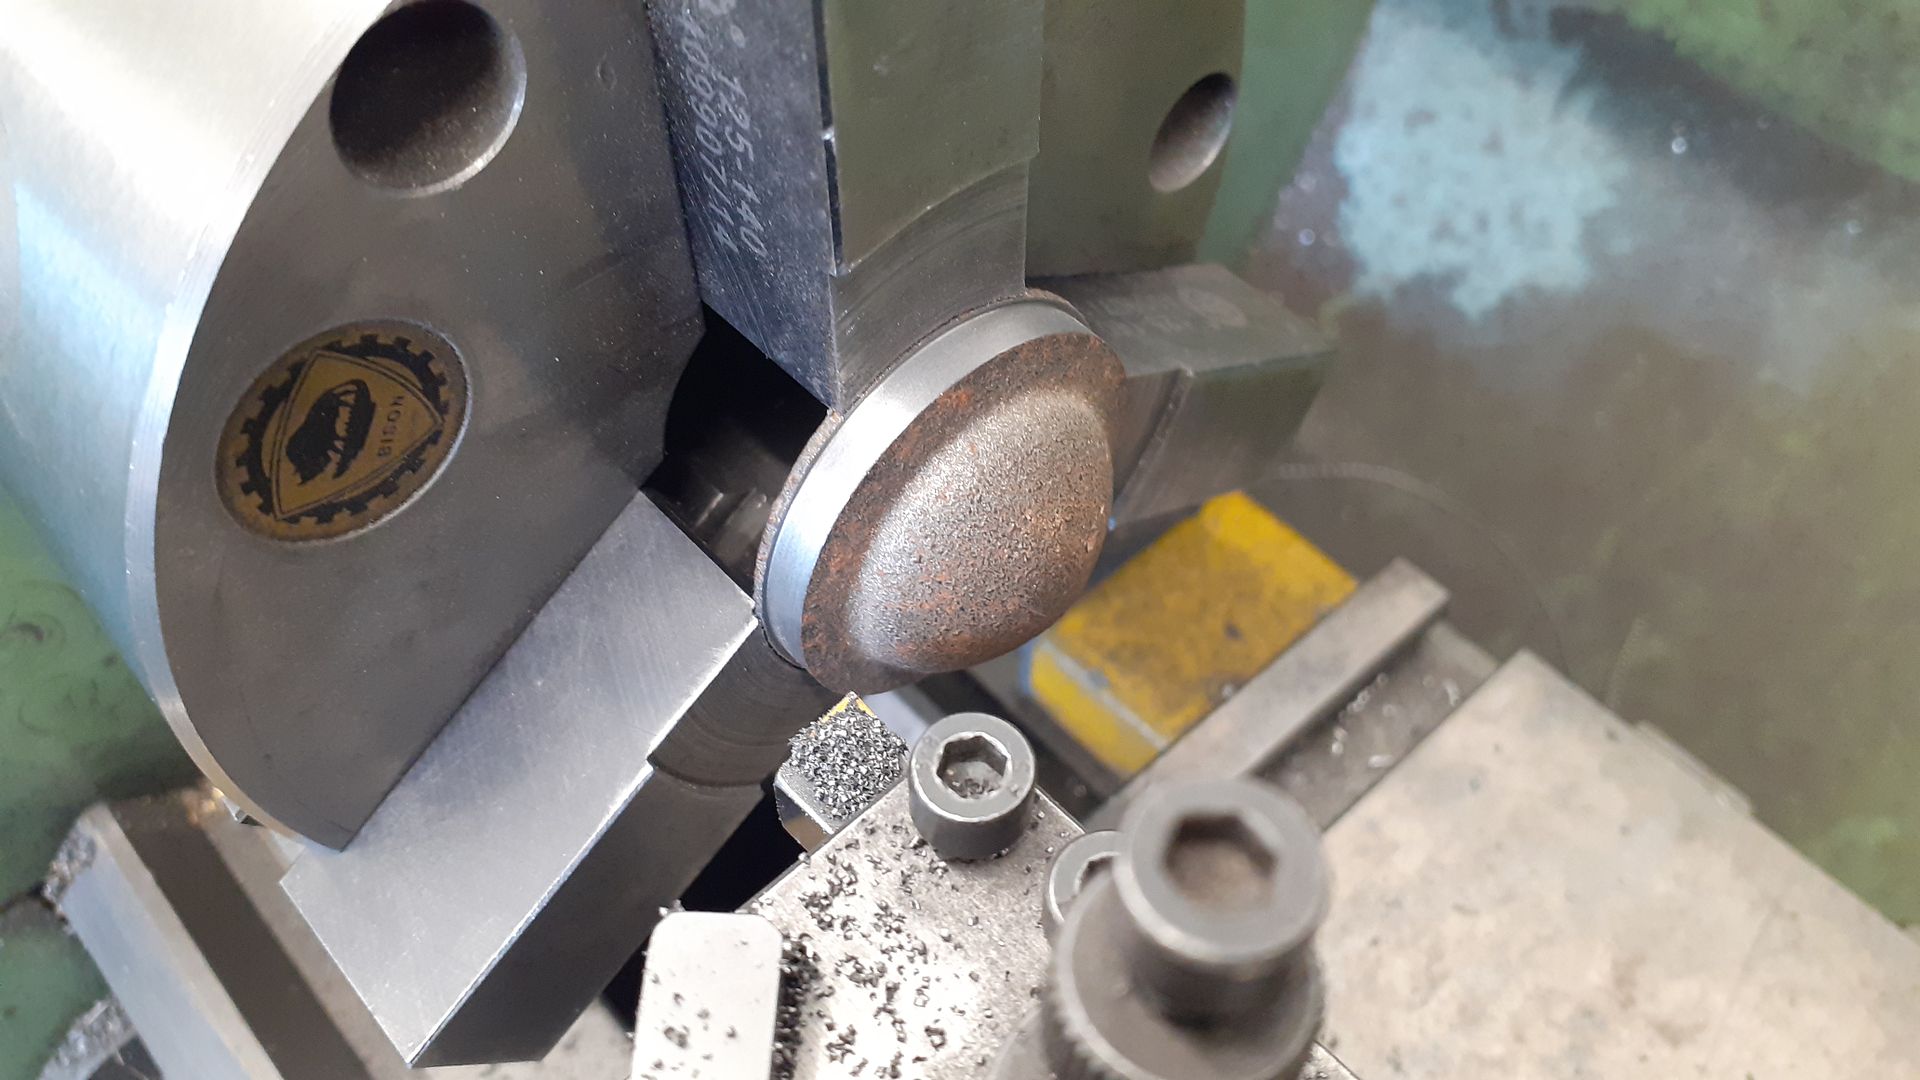
I suppose the cylinder head is the next logical casting to get out the way. After a quick clean up I made a start by holding it in the 4-jaw slipping a parallel under each of the stud bosses in turn to make sure the outer cast surface was reasonably true across the lathe's axis and than machined the underside of the head so I had a good flat surface to work with. I also took the smallest of cuts off the OD to get the head round but not far enough up the sides to remove the draft angle.

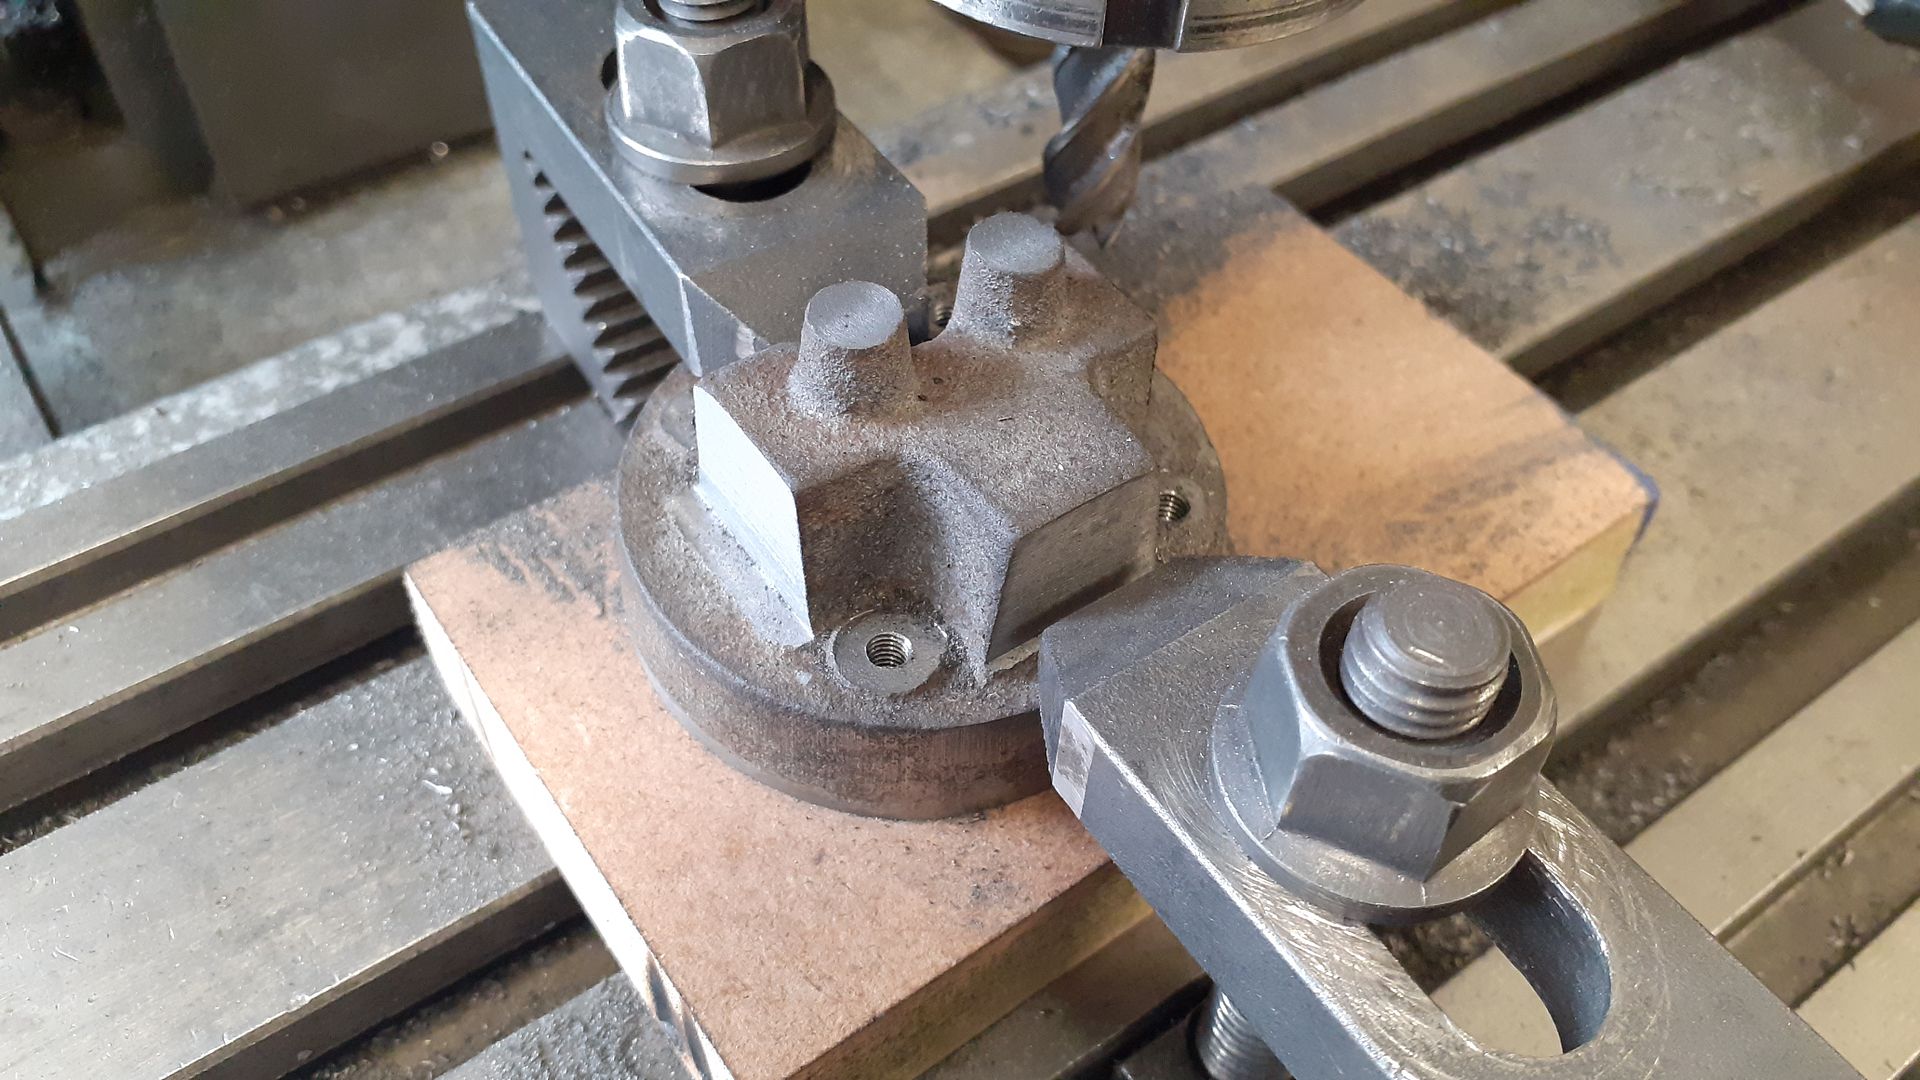
Next the head was clamped to the mill table on a piece of MDF, I held a straight edge against the two valve bosses and eyed that up along the X-axis so the valves would sit horizontally. Then the three ends of the "Tee" where milled flat, the inlet and exhaust ones just want the minimum taking off so you get as much thread depth as possible for the pipes but the one for the rocker bracket should be machined to dimension. The clamps will need moving about to allow access to all three faces. The tops of the valve bosses can also be levelled off at this stage.
The bosses for the four head studs are not equally spaced around the head so I spend a bit of time getting the best centre for each boss and noting the DRO readings before spot facing and drilling 4mm. Ignore the fact they are tapped in the photo, I was going to hold the head one way for the next op but did it another.

I like to do the valve guide, valve cavity and valve seat on the lathe rather than use a CSK bit in the mill which can chatter and I've not yet had to make a valve seat cutting tool for any of my engines doing the seats with the topslide set over. So I made some simple standoffs from tube and screwed the head to a scrap piece of square aluminium plate which could then be held in the 4-jaw to position each valve hole in turn.

The square piece of plate also made it easy to index the head around to drill and tap the inlet and exhaust connections. The M3 tapped hole for the rocker could also be done at this stage though I did mine later as I wanted to tweak the rocker post casting to suit having the exhaust valve on the far side

Still holding you the plate the spark plug hole was drilled, spot faced and then tapped M10 x 1 for a CM-6 plug

When I did get round to doing the holes for the rocker post this is how I set it up to do the tapped hole using two drill bit sin the valve holes to set the work vertical and then using the side of a drill bit to run the edge finder against.

The two drill bits were used again for the 3mm clearance hole being pressed against a table tee slot to line up the head and run the edge finder against then the hole was drilled and the opposite side countersunk.

lastly the carefully noted stud hole positions can be used to locate the holes in the cylinder so they can be drilled and tapped making sure not to go too deep and break into the water space. You could spot the positions from the head but I seldom use that method since fitting the DRO.
 12 August 2023 at 18:32 #656260
 JasonBModerator@jasonb
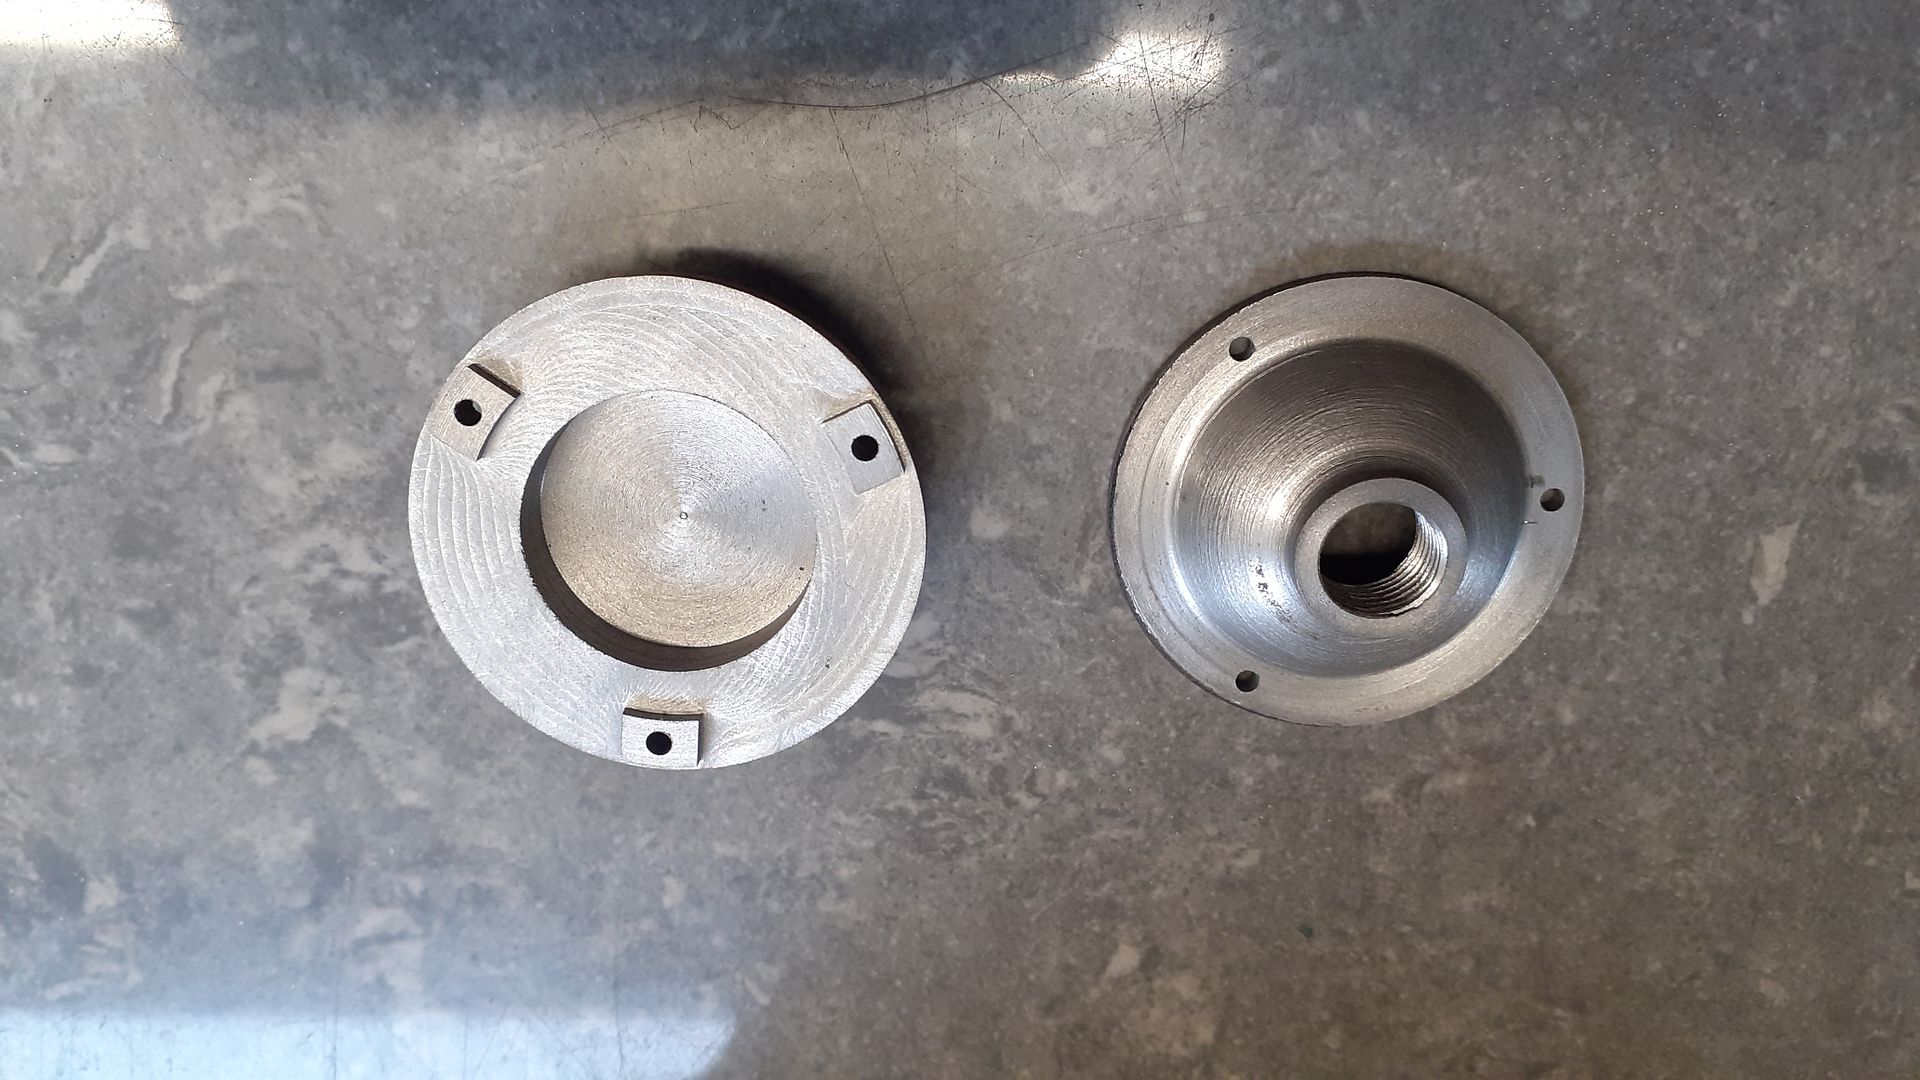
While up at the head end of the engine I thought I would get the last couple of small castings out the way. Starting with the silencer (muffler) halves these were held in soft jaws to turn the overall diameter and the cast surface was cleaned up a bit at the same time.

The halves could now be held the other way around and the flange machined to thickness, a cavity turned with a boring bar and in the case of the half that screws to the exhaust pipe that was drilled and tapped 1/8" BSP.

Most builders will probably opt to turn three spacers to fit between the halves but I left the flange on one half thicker so I could mill most of the material away and just leave three integral spacers.

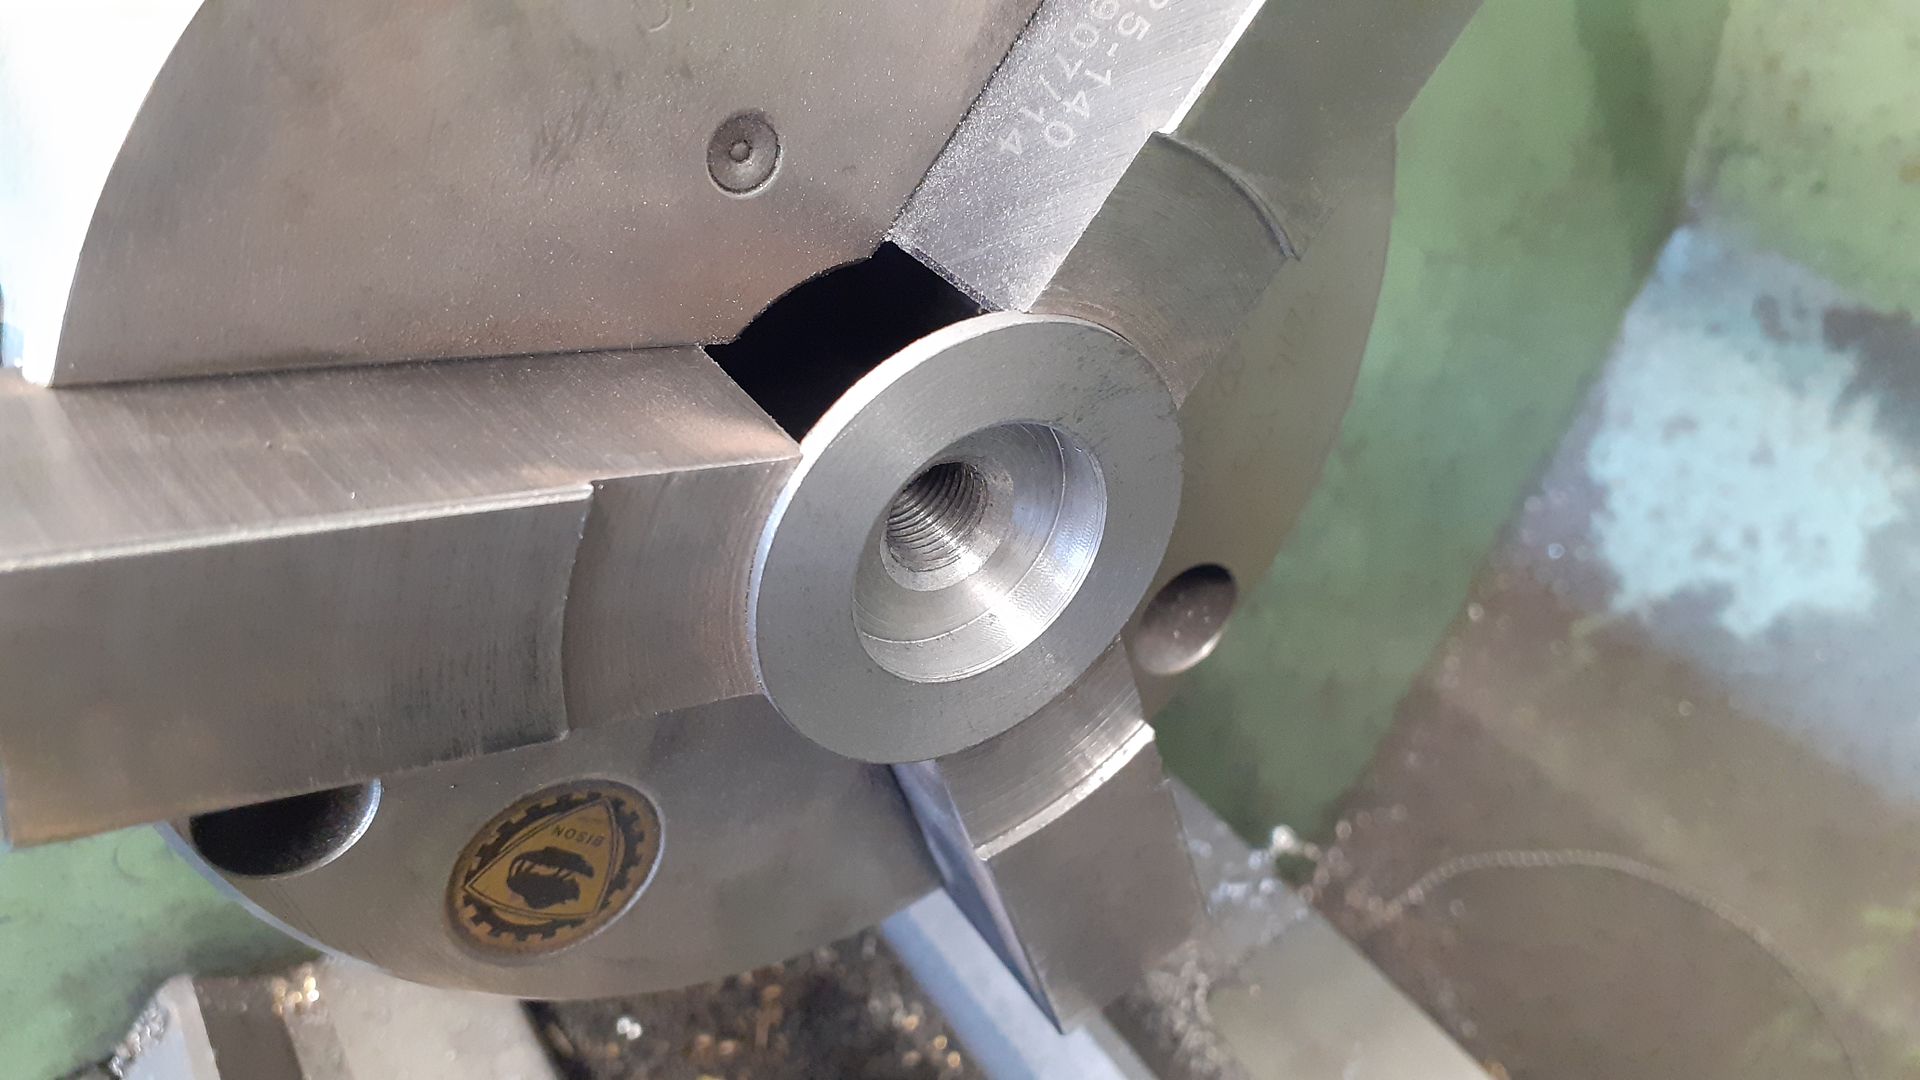
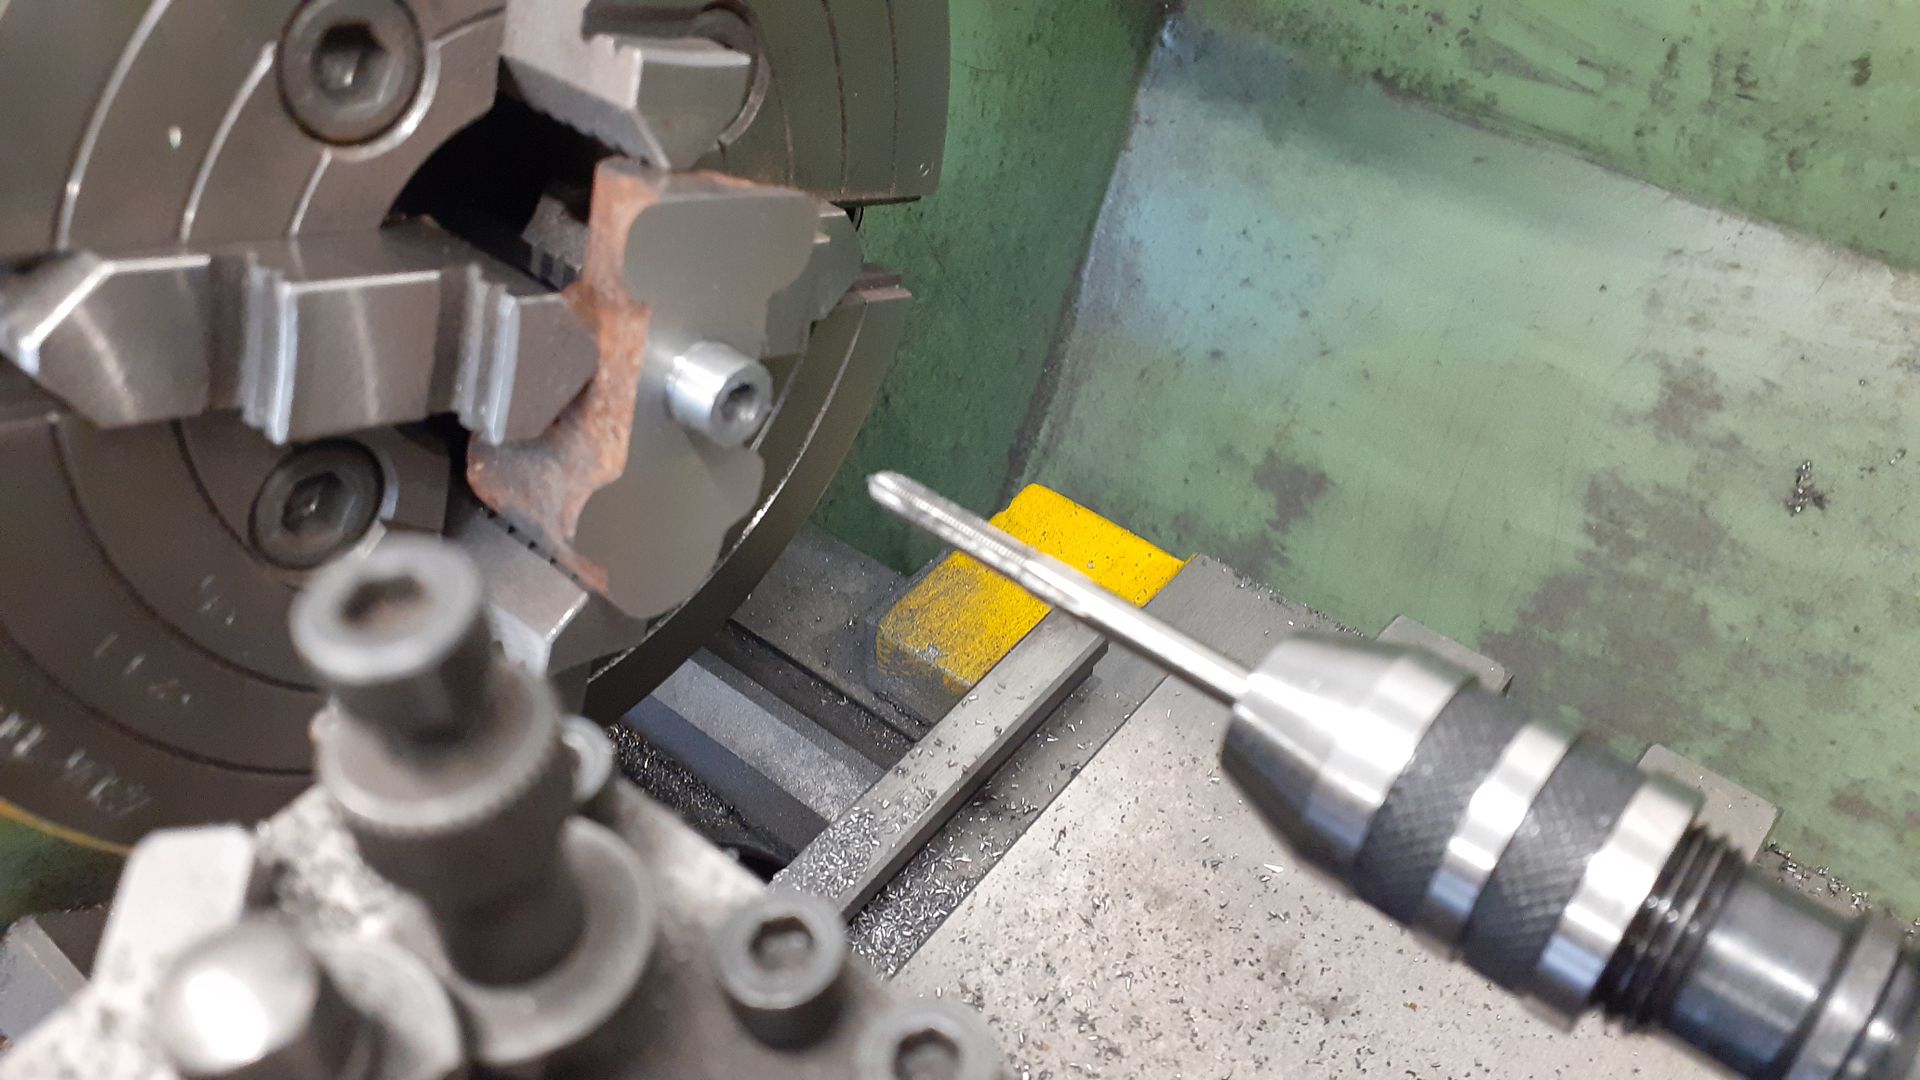
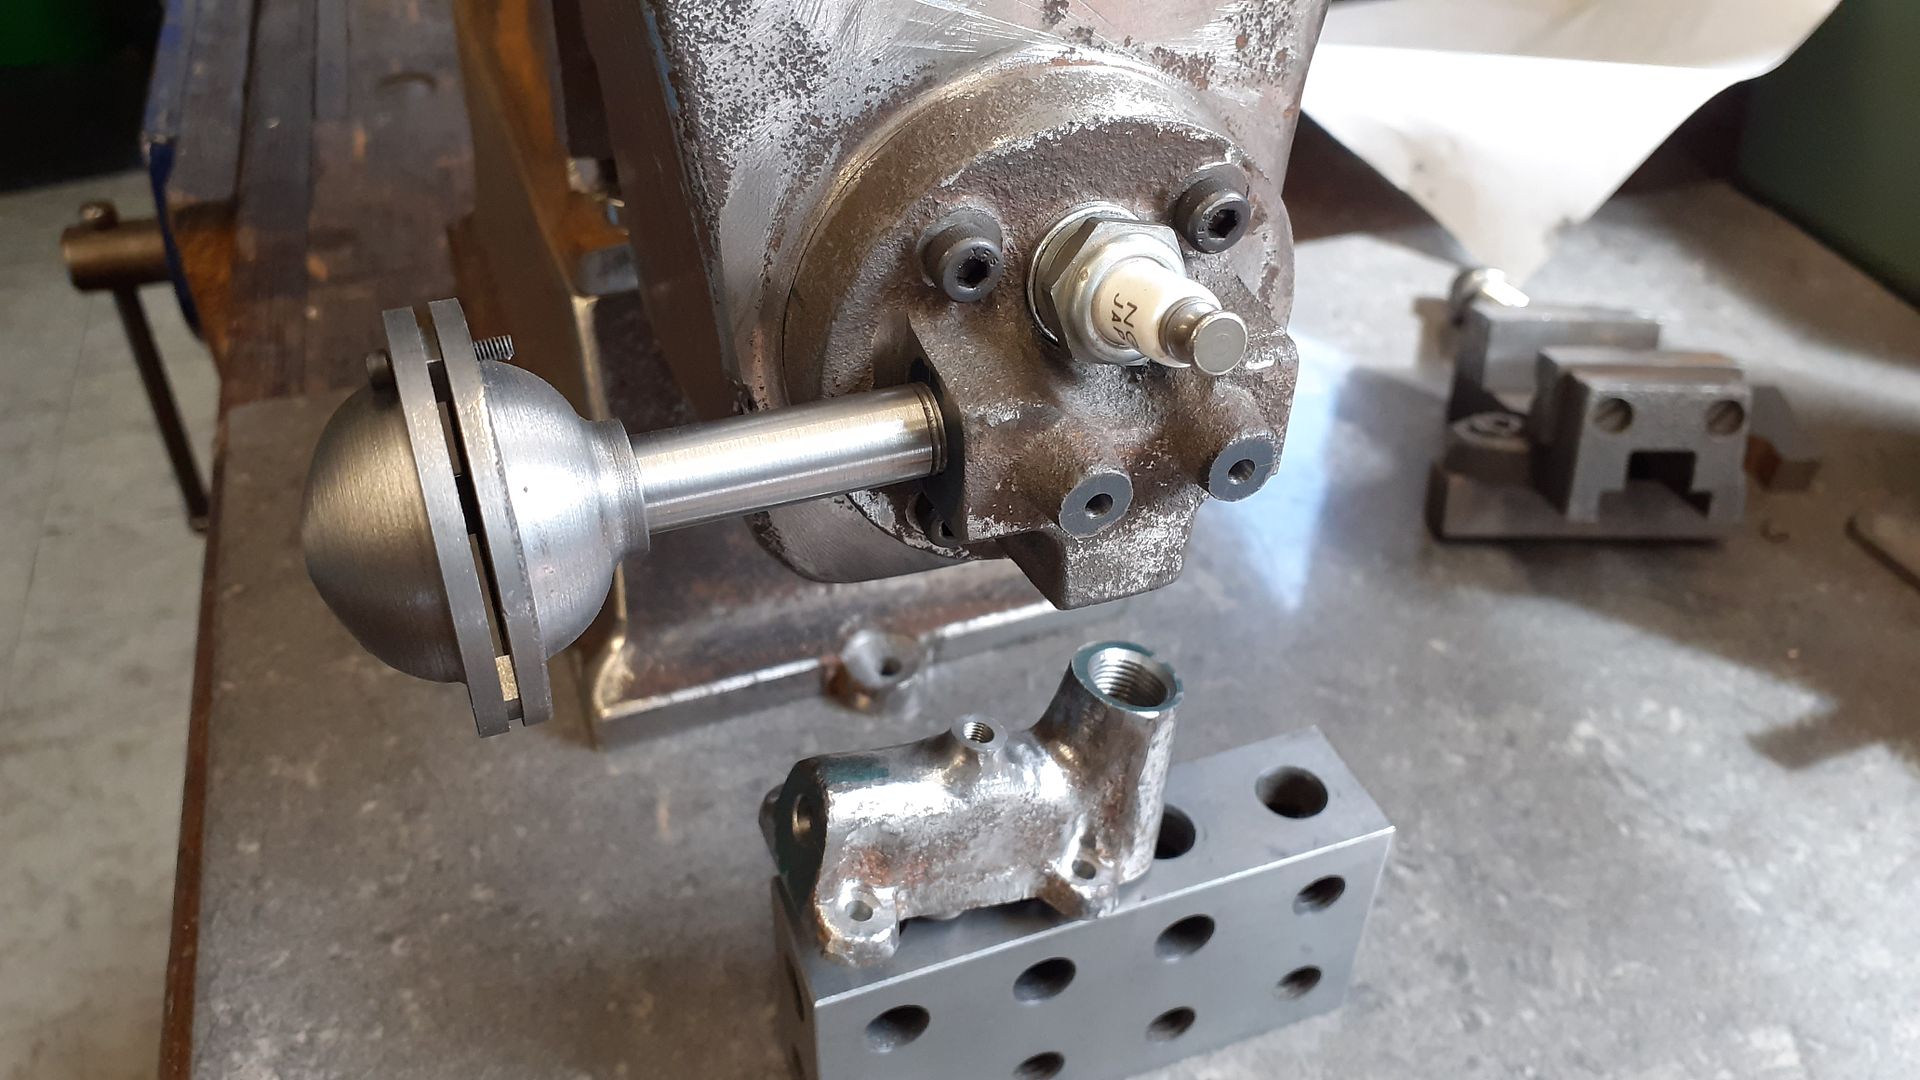
The other casting that can be dealt with now is the Mk2 carb. I started by holding it in the 4-jaw and got the needle boss to run as true as possible then faced the bottom and the stub that can be drilled part way and tapped M8 x 1 before continuing the hole right through and tapping M4 x 0.5 for the needle.

Holding by the spigot in a square collet block I could index the casting about to drill the long inlet hole and also drill and tap for the pipe that joins carb to head.

The last thing to do was spot face the four mounting holes with am 8mm milling cutter and then drill through 3mm for the screws that will hold the carb to the fuel tank top. Make a note of where the hole positions end up so they can be used when tapping the tank.

A quick group shot of the exhaust parts and carb.
 18 August 2023 at 19:20 #657047
 JasonBModerator@jasonb
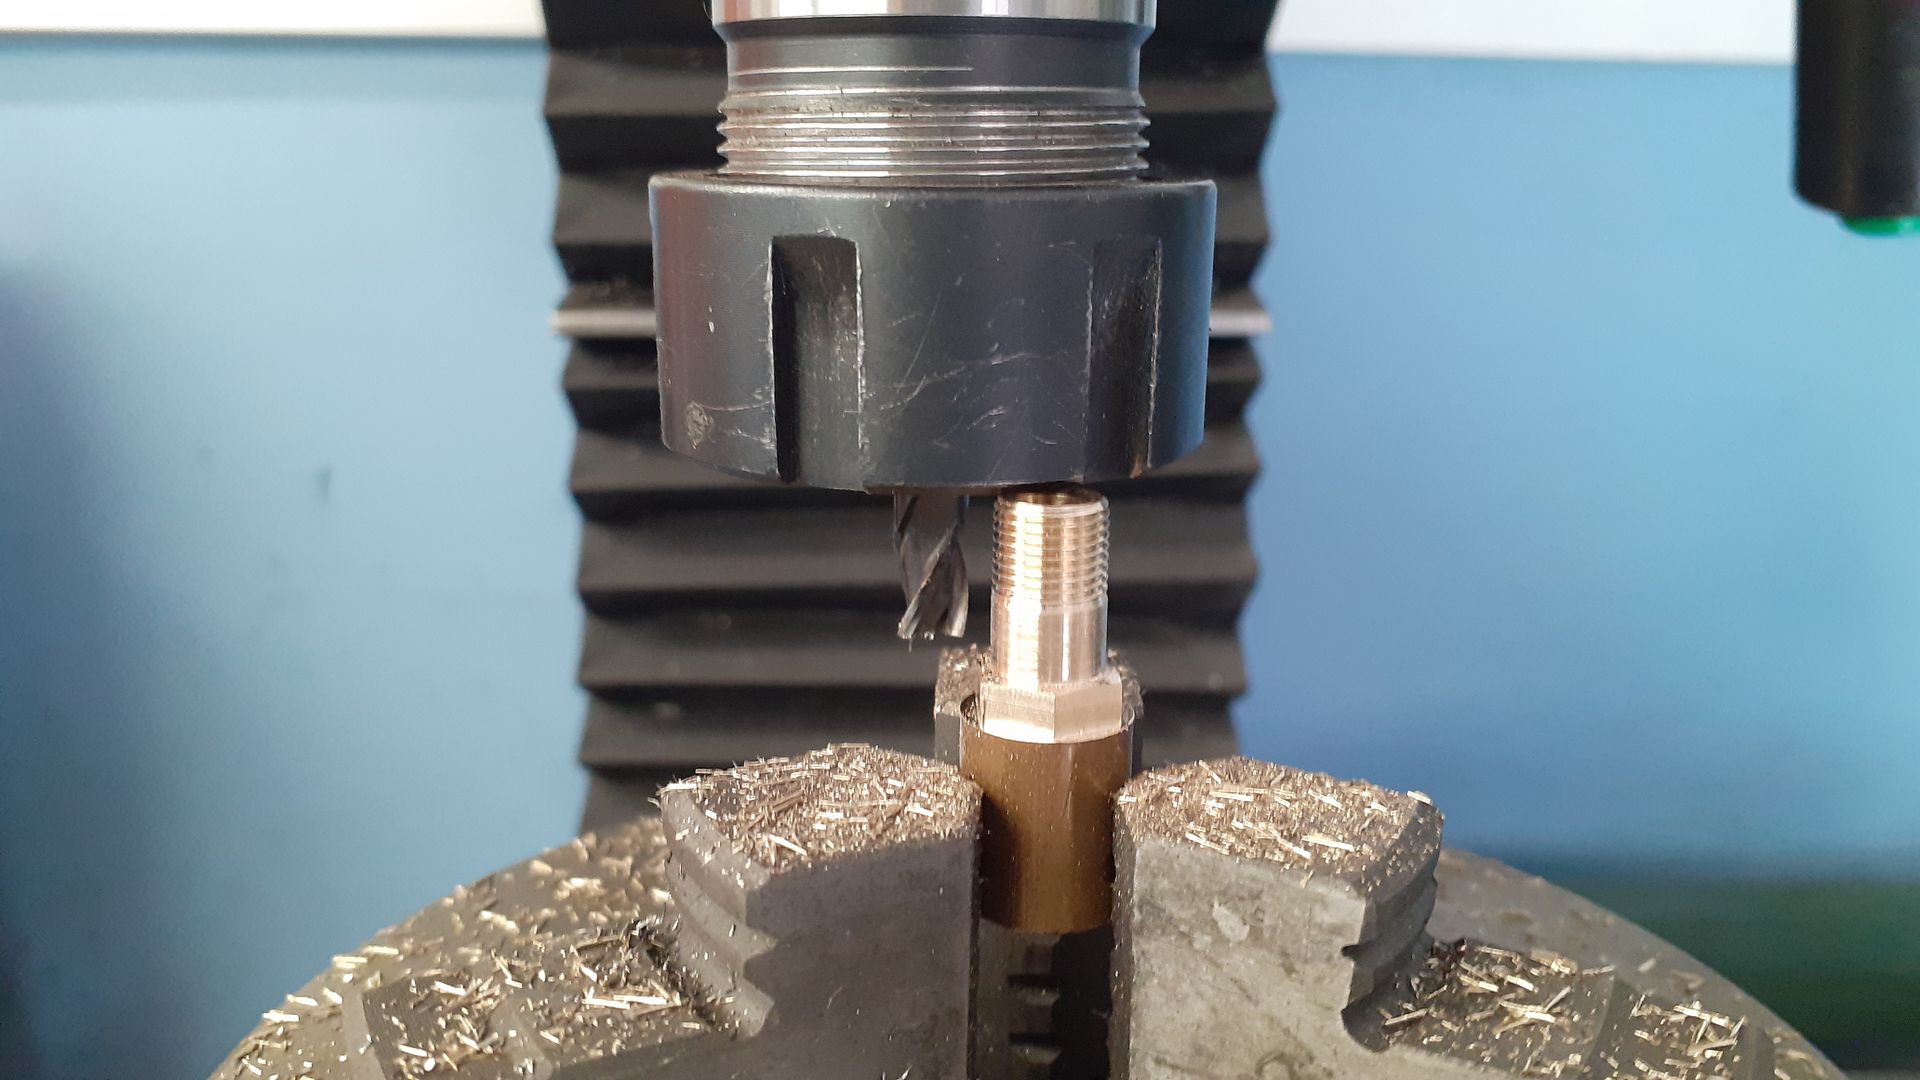
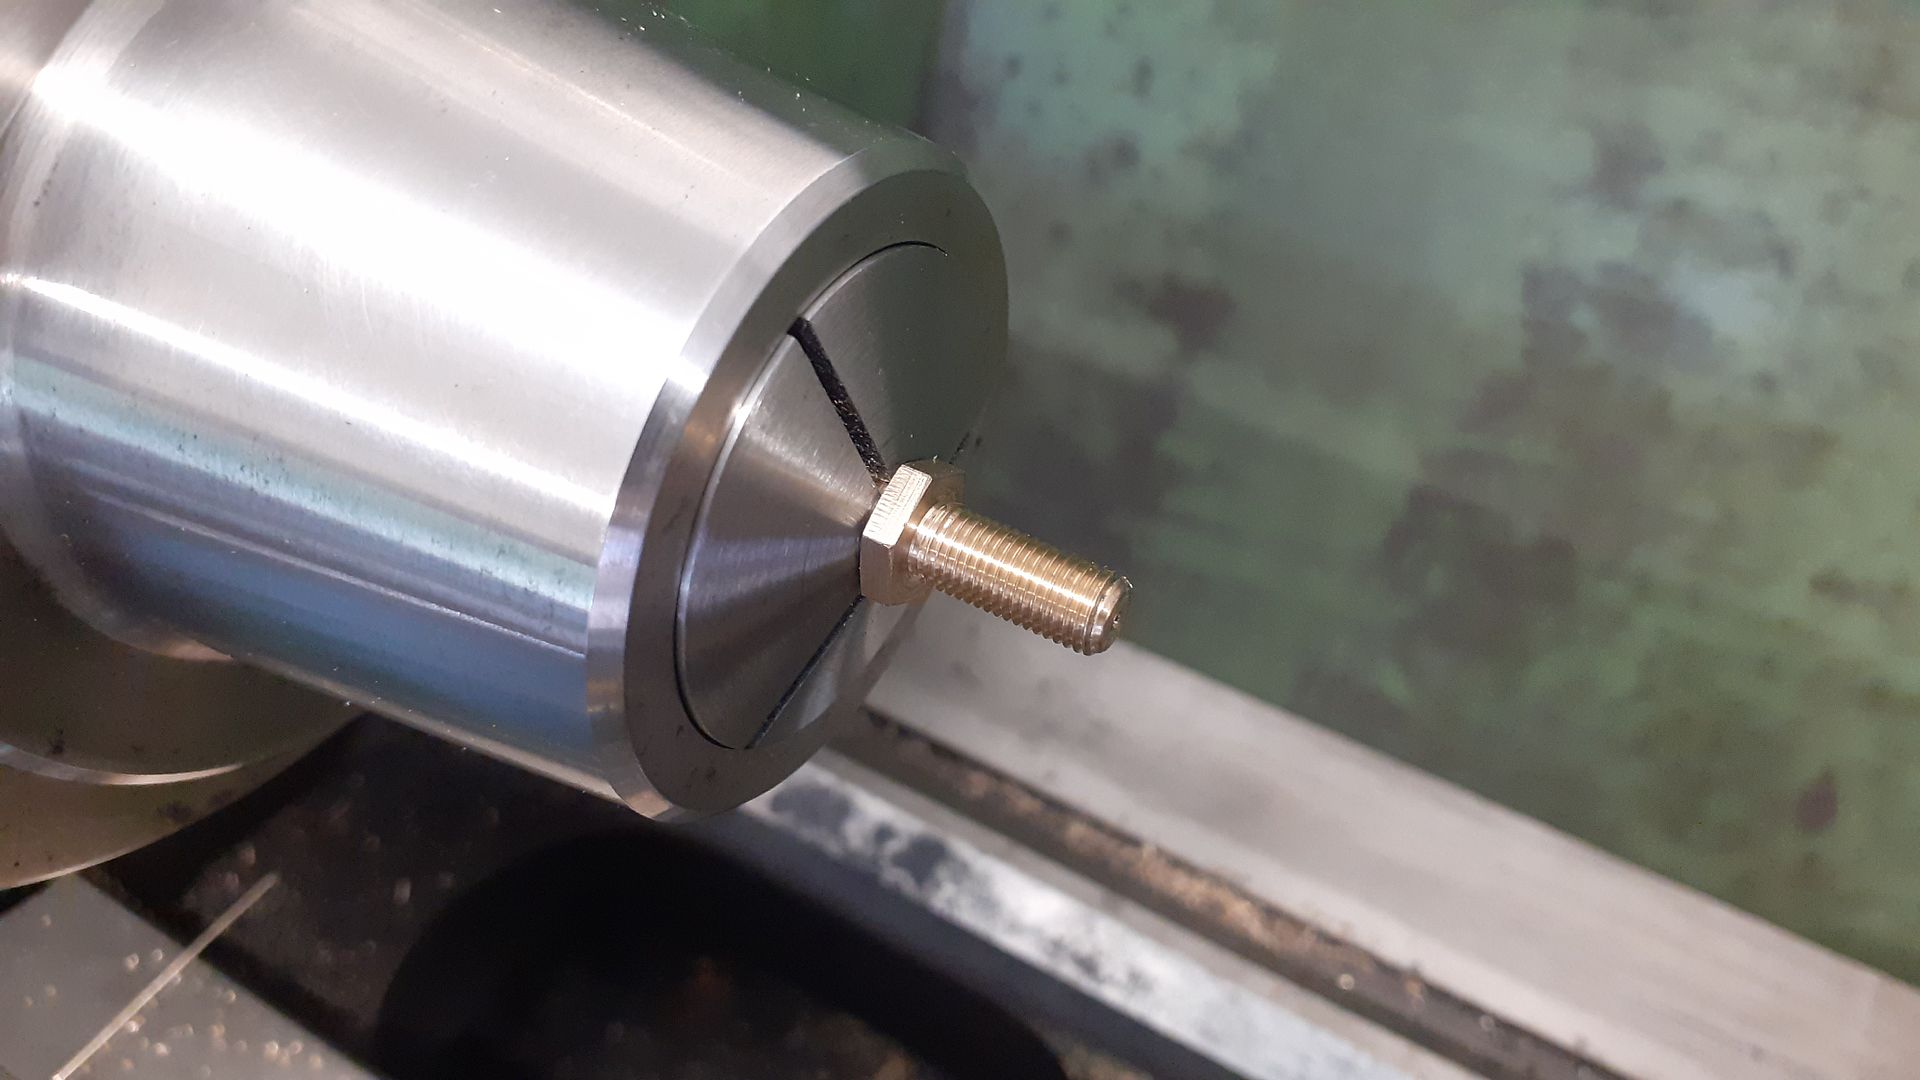
The spigot on the bottom of the carb takes a non return valve that sits just off the bottom of the fuel tank. This is a fairly simple turning/milling job from a piece of brass stock I started by turning down one end of some bar to 8mm dia and threading M8 x 1 then drilled a cavity for the ball that acts as the valve. Next I milled a 10mm AF hex.

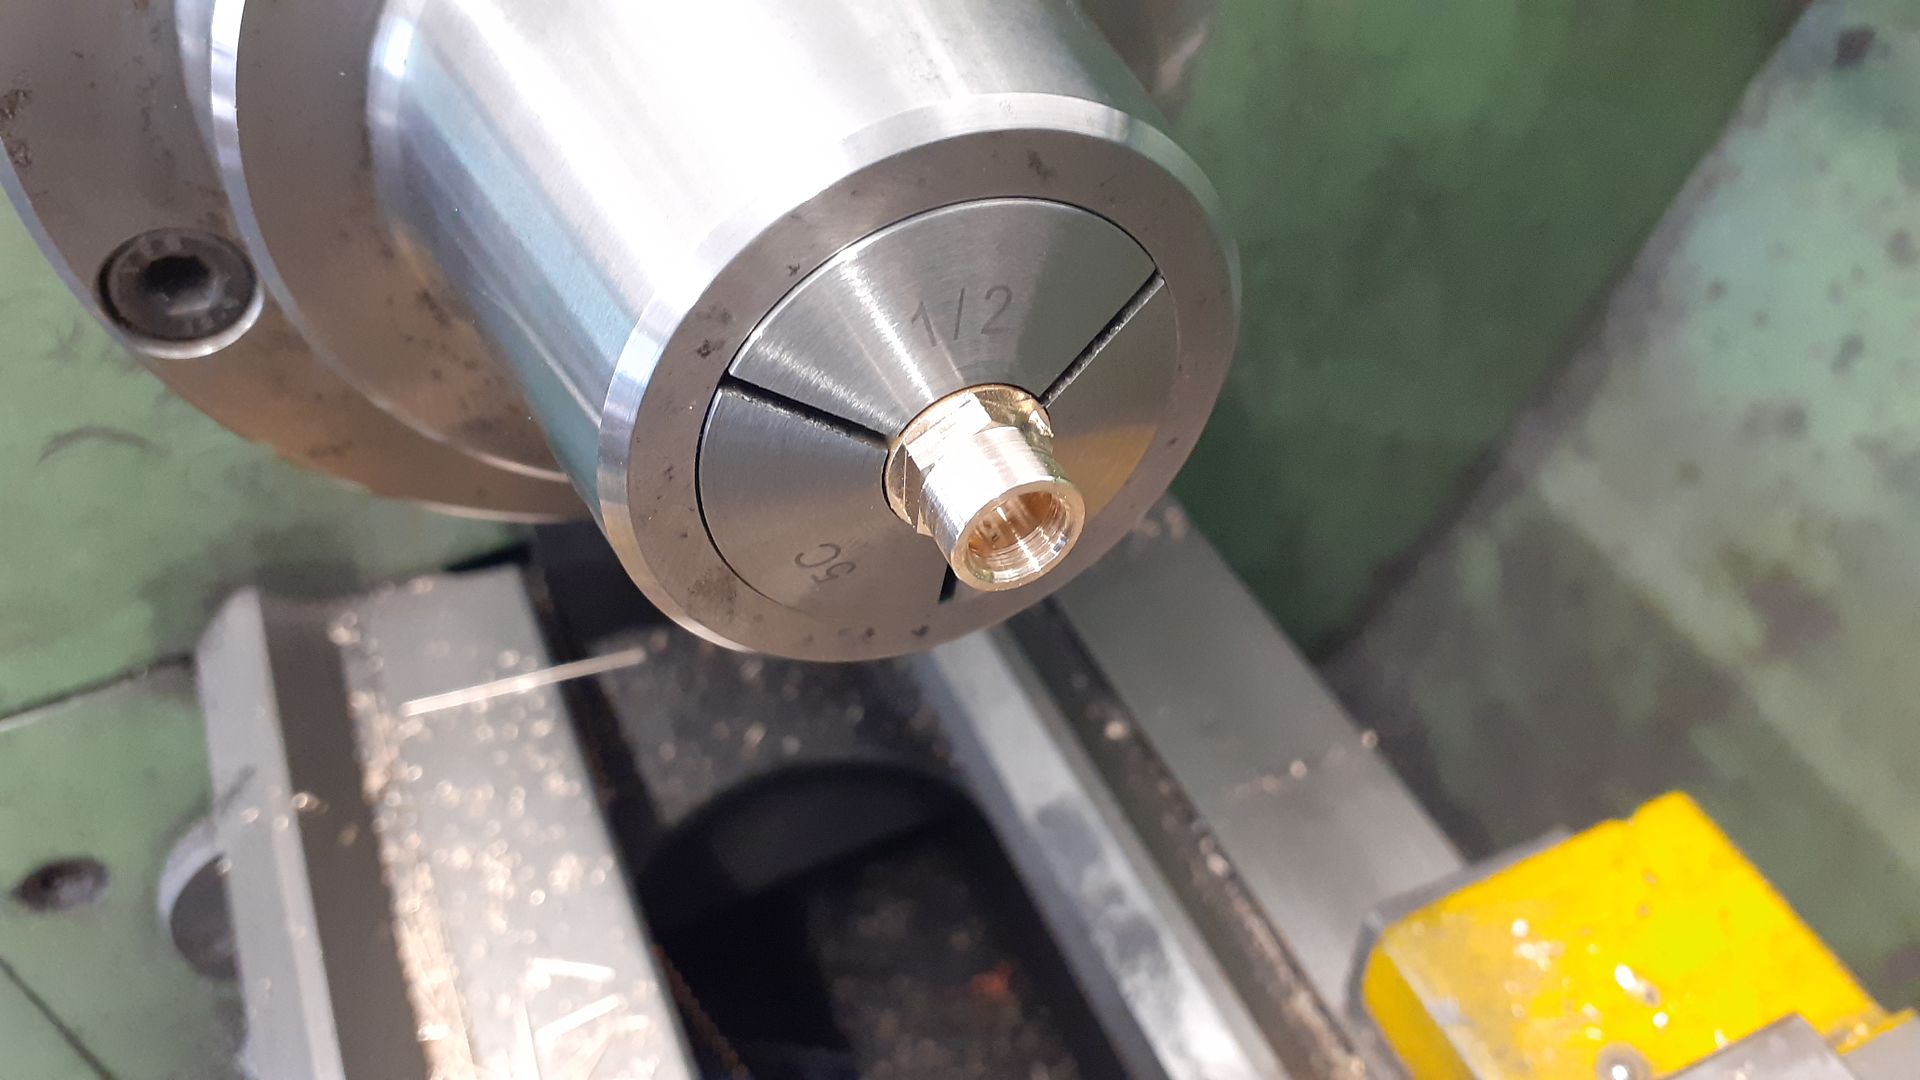
Now holding by the 8mm diameter the other end was turned and tapped so it could be screwed into the carb body and a small hole drilled to receive the end of the needle

The cap that goes onto the end of the M8 thread to retain the ball was turned and bored with a generous undercut to ensure the threads screwed all the way home.

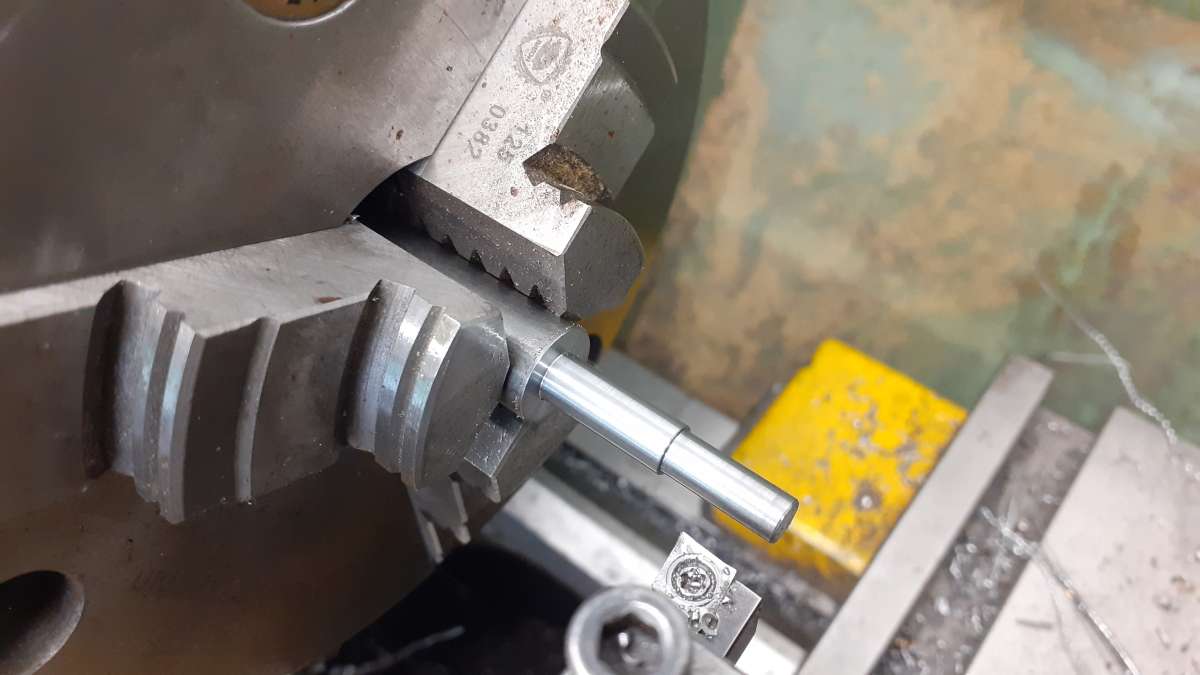
The final part was the needle which was turned, threaded and knurled from some 303 stainless.
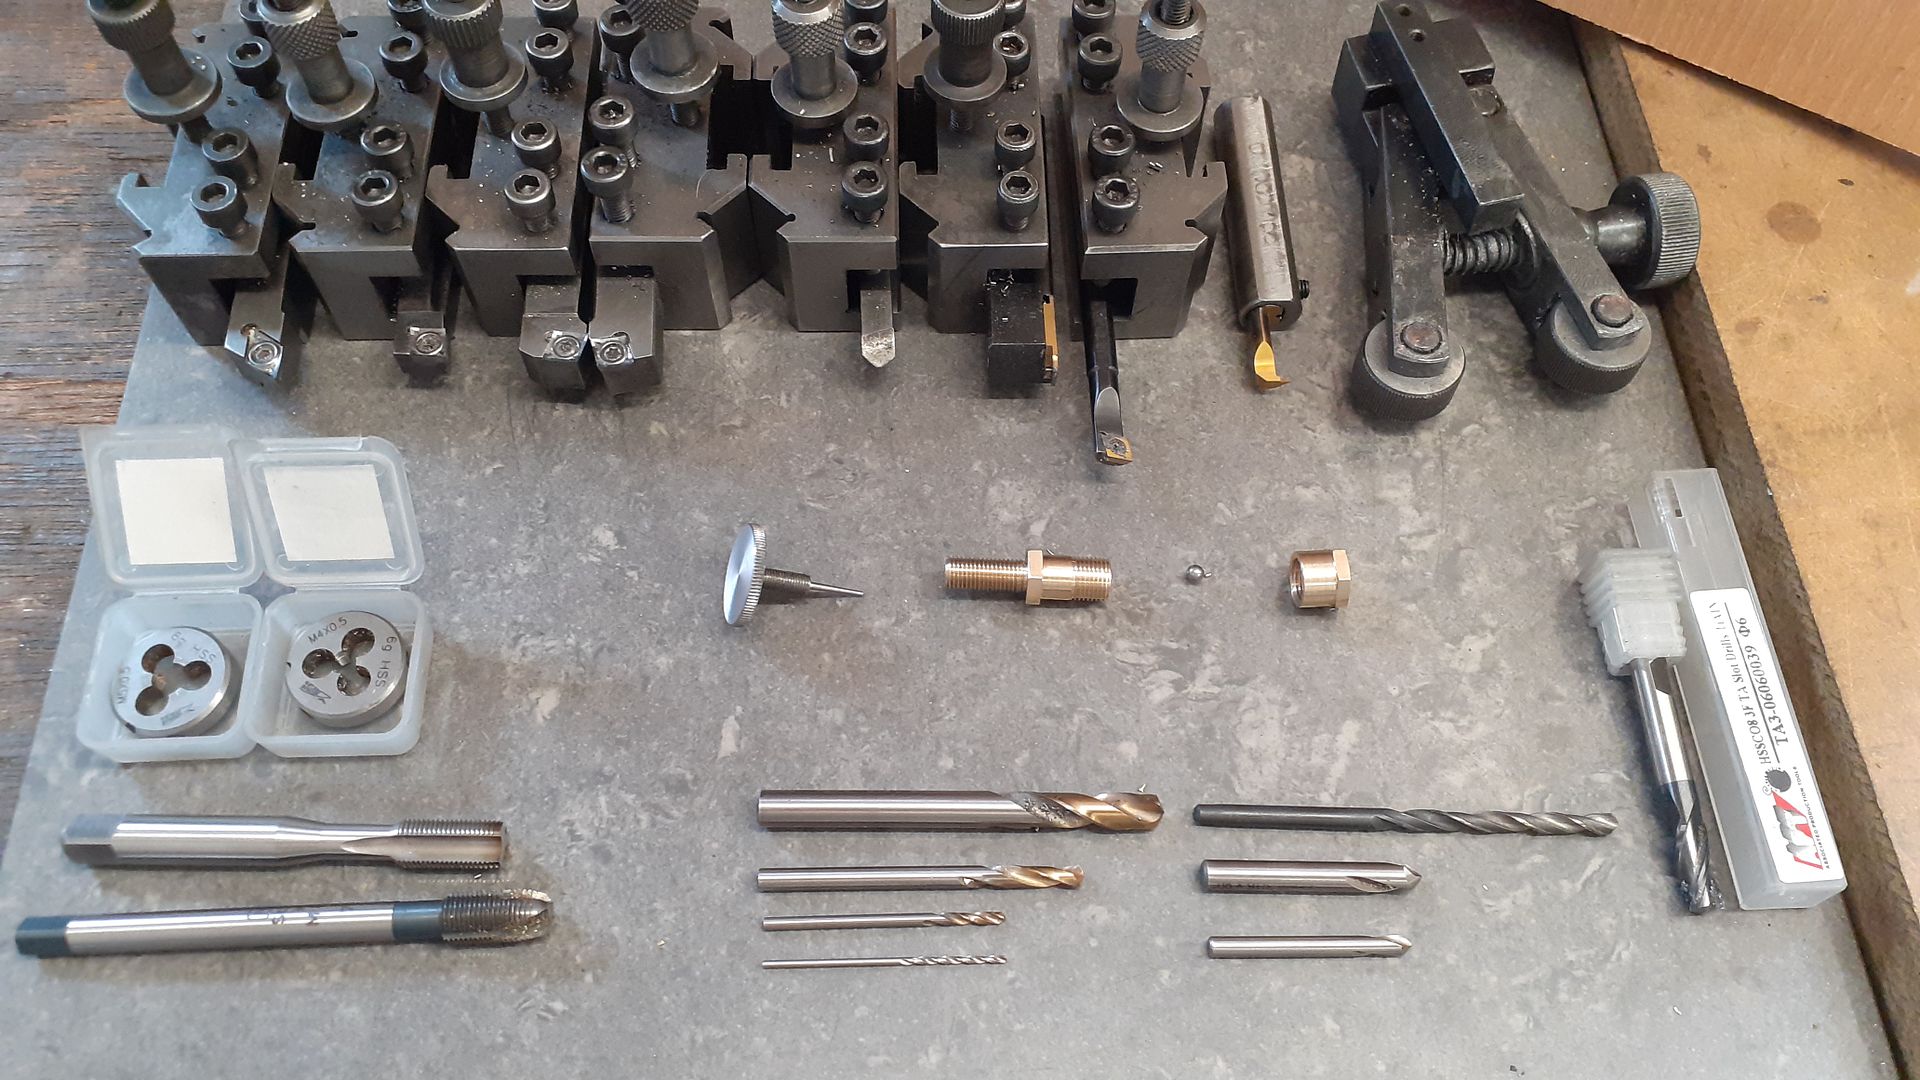
The was a discussion recently about QCTPs and how many tools are needed for a simple part or two. This pic shows the three parts and all the tools that were used in their making though there is one die missing.

Rather than trawl the supermarket or tobaconists shelves for a suitable flat round tin to use as a fuel tank I decided to make mine from scratch as I wanted the sides to have that bead rolled look that you often see on round sheet metal containers.
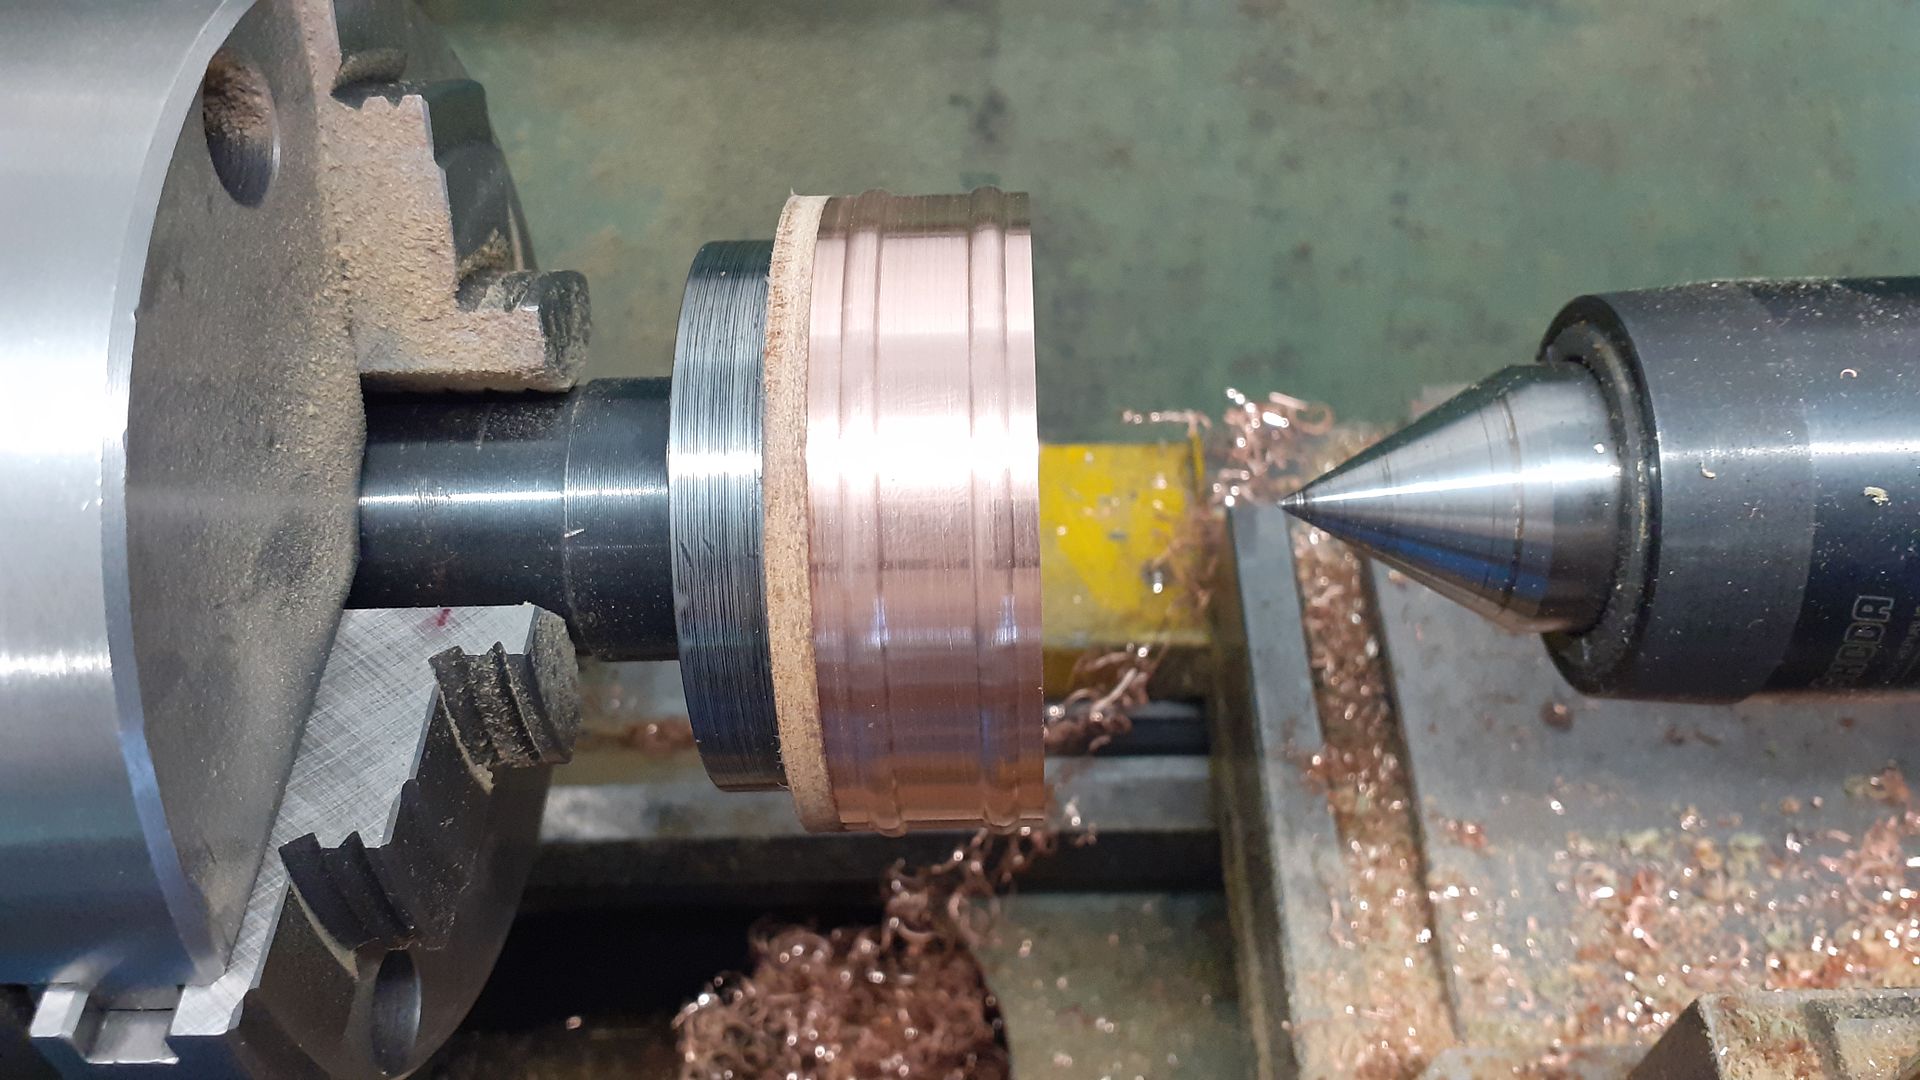
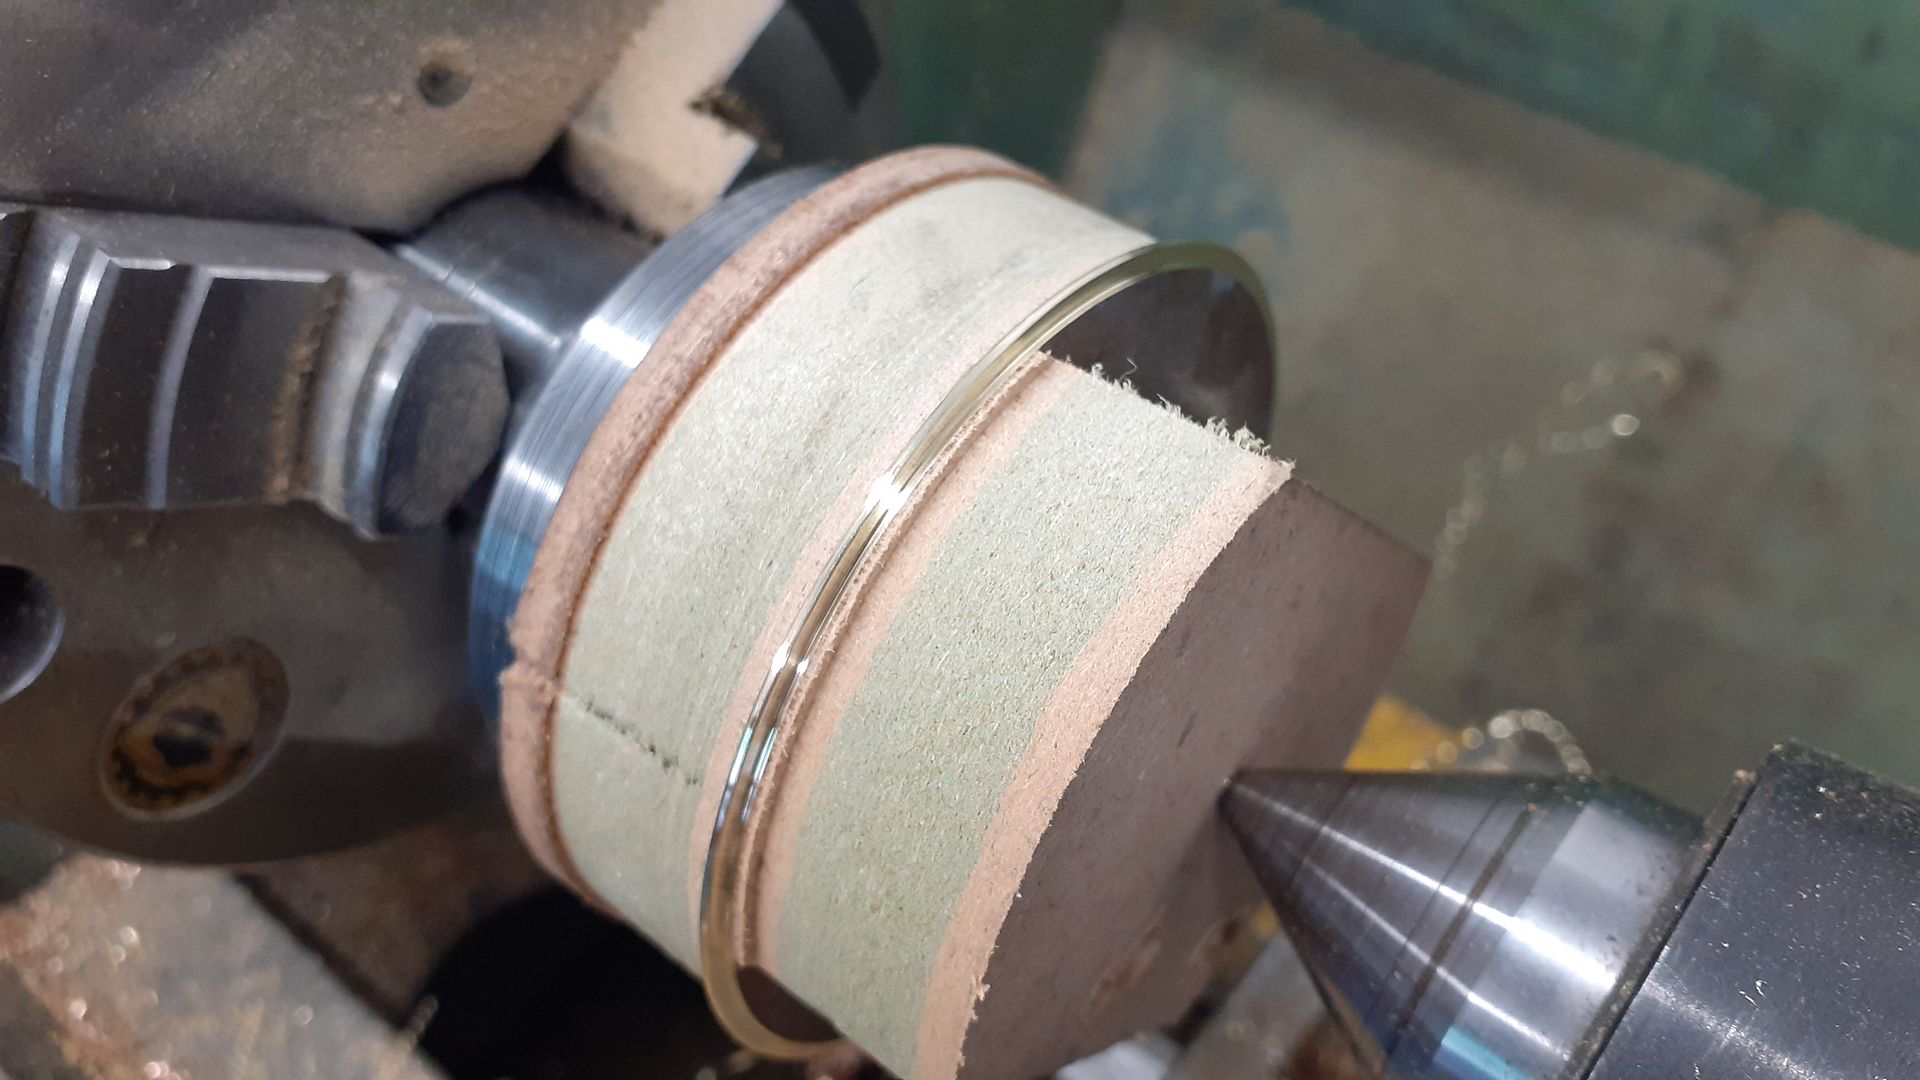
I started by cutting a slice off some 3" x 16g copper tube that I had and then turned a piece of MDF so that the tube was a tight push fit onto that so the ends could be finish turned. Then using a sharp DCGT insert the OD was reduced to leave two flat bands that were then rounded off by hand to represent the bead rolls.

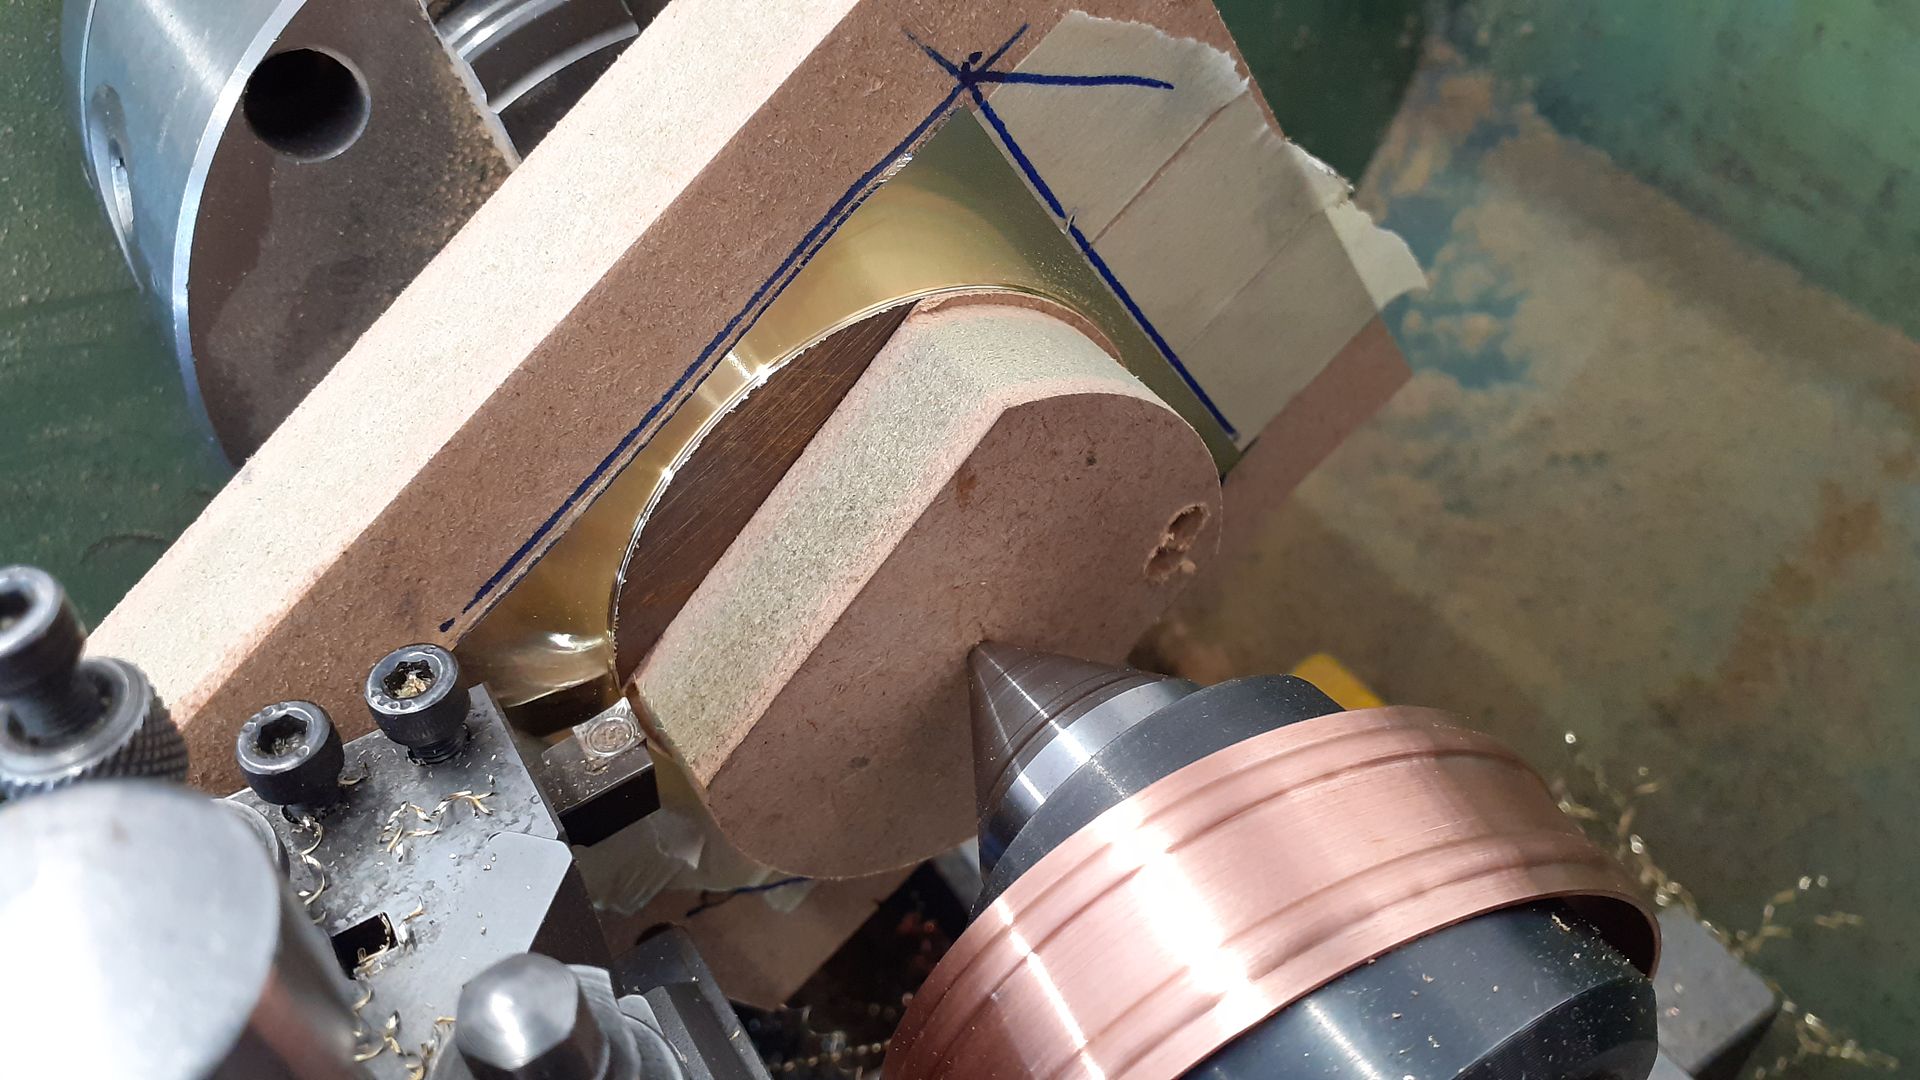
A piece of 1.5mm brass sheet was sandwiched between two pieces of MDF and turned to diameter once the corners had been sawn off. I then turned a 0.5mm tall spigot to a tight fit into the pipe. Having the pipe in place on the tailstock makes it easy to test fit without having to keep retracting the tailstock support. The remaining 1mm thick edge was rounded over with a file.

I did similar again for the bottom but left the sheet square

The four mounting holes were then drilled and used to make sure the work stayed put while the external shape was milled to incorporate the four mounting lugs.

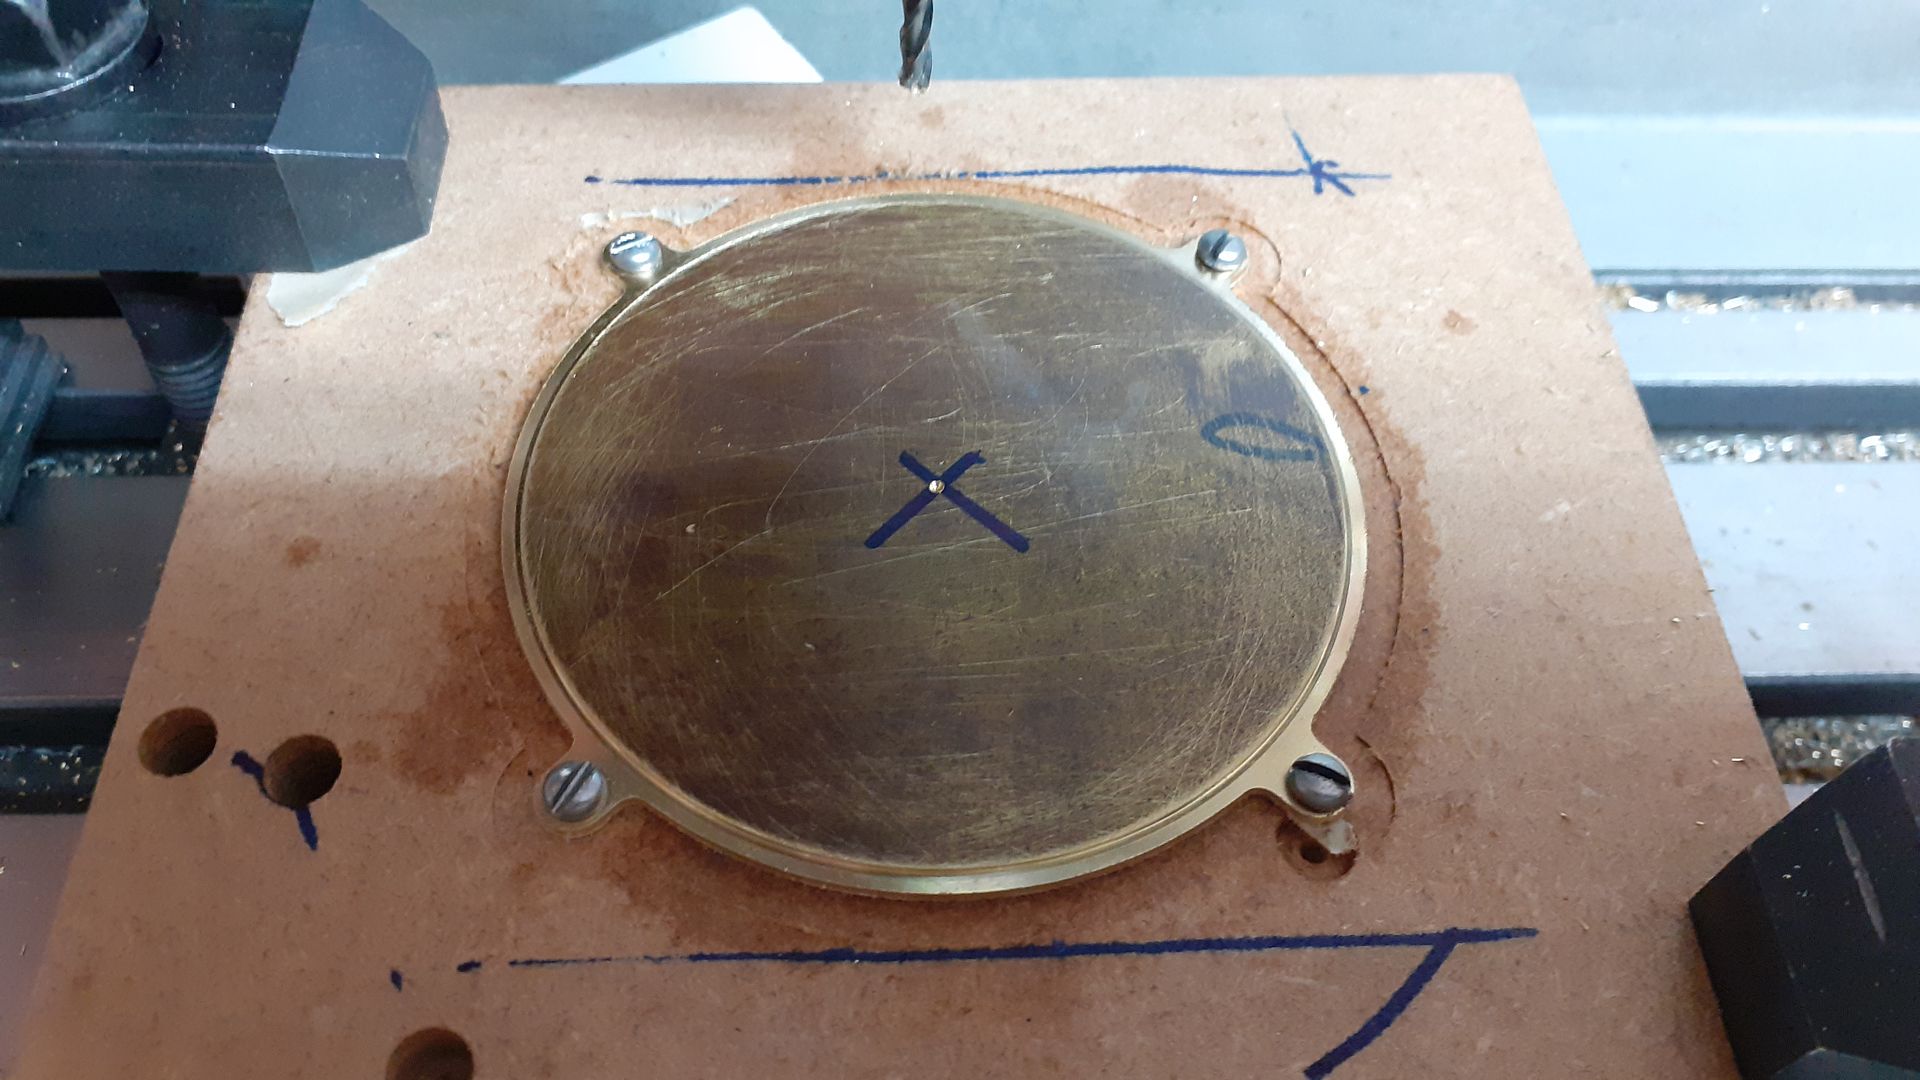
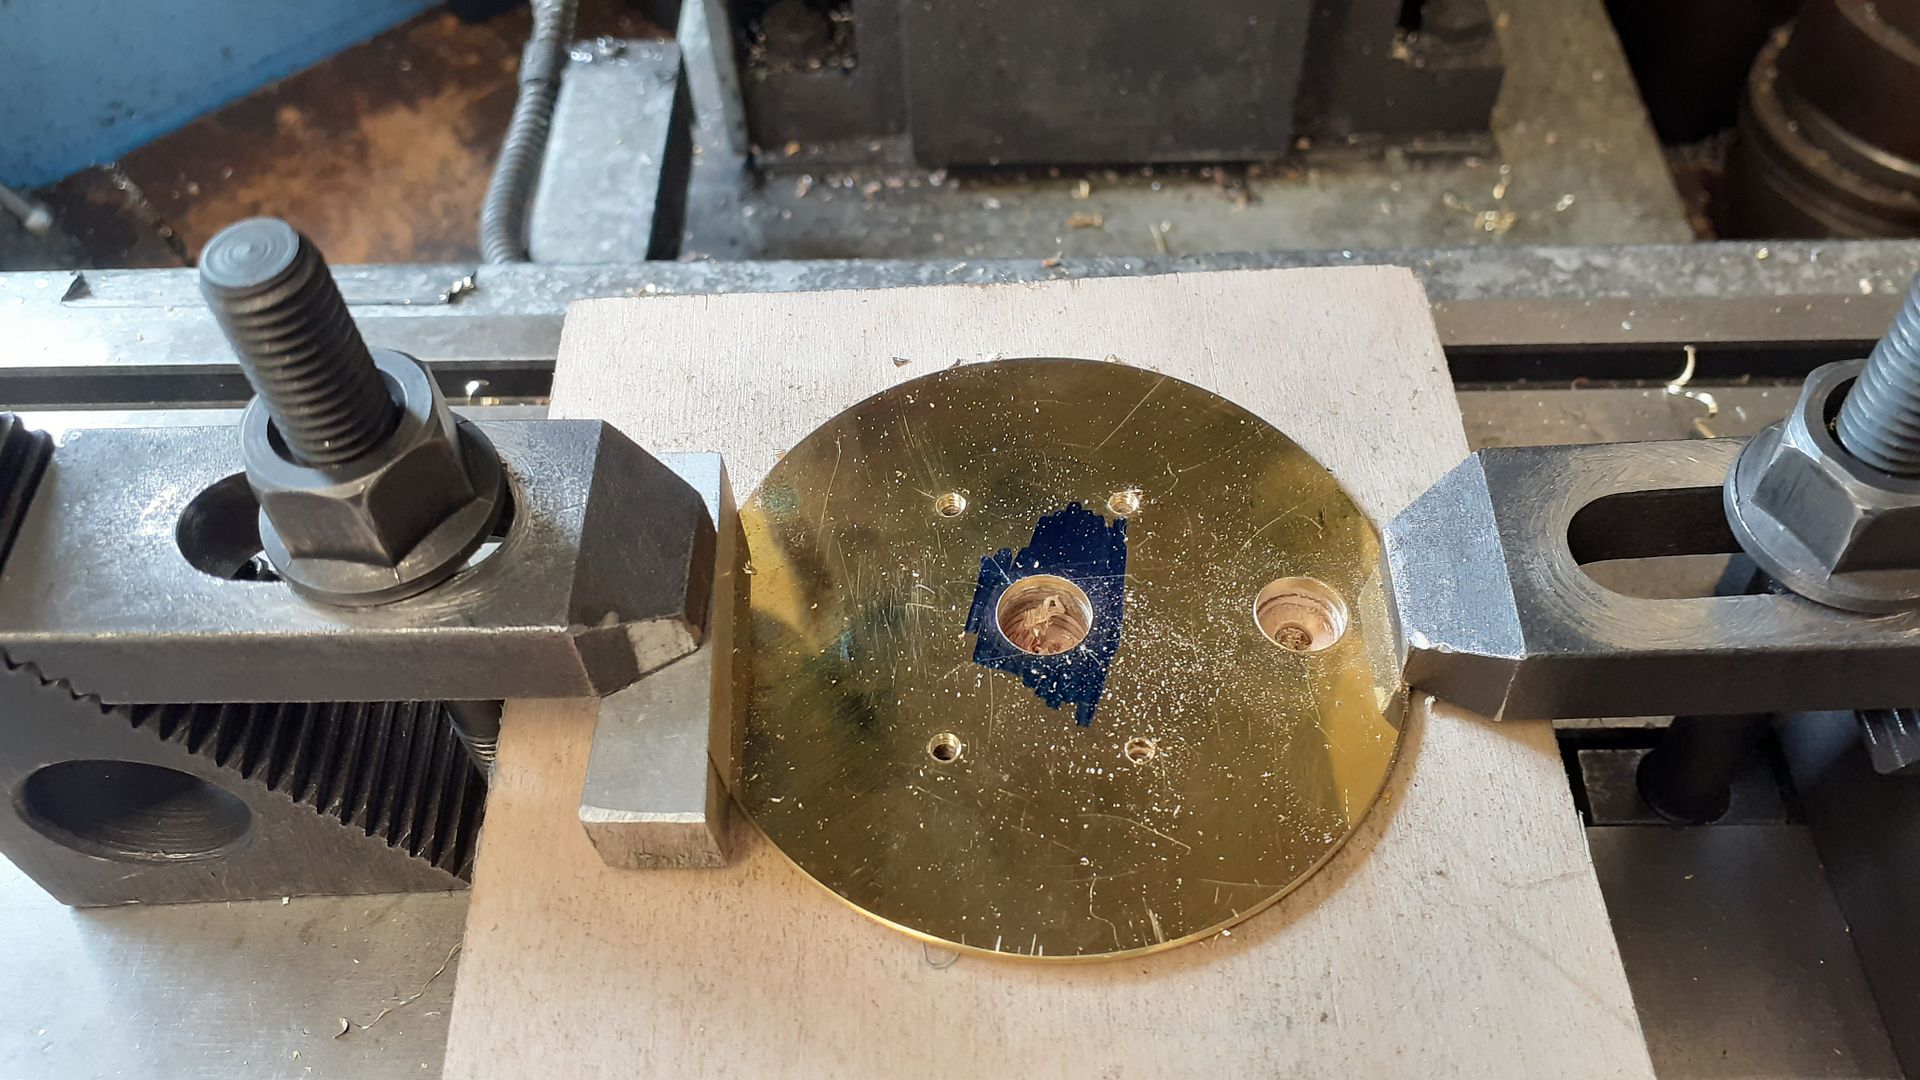
The top was drilled centrally to clear the hex of the non return valve, Drilled and tapped for four screws to hold the carb body using the recorded DRO readings from when that was machined and finally a hole off to one side for the filler neck.

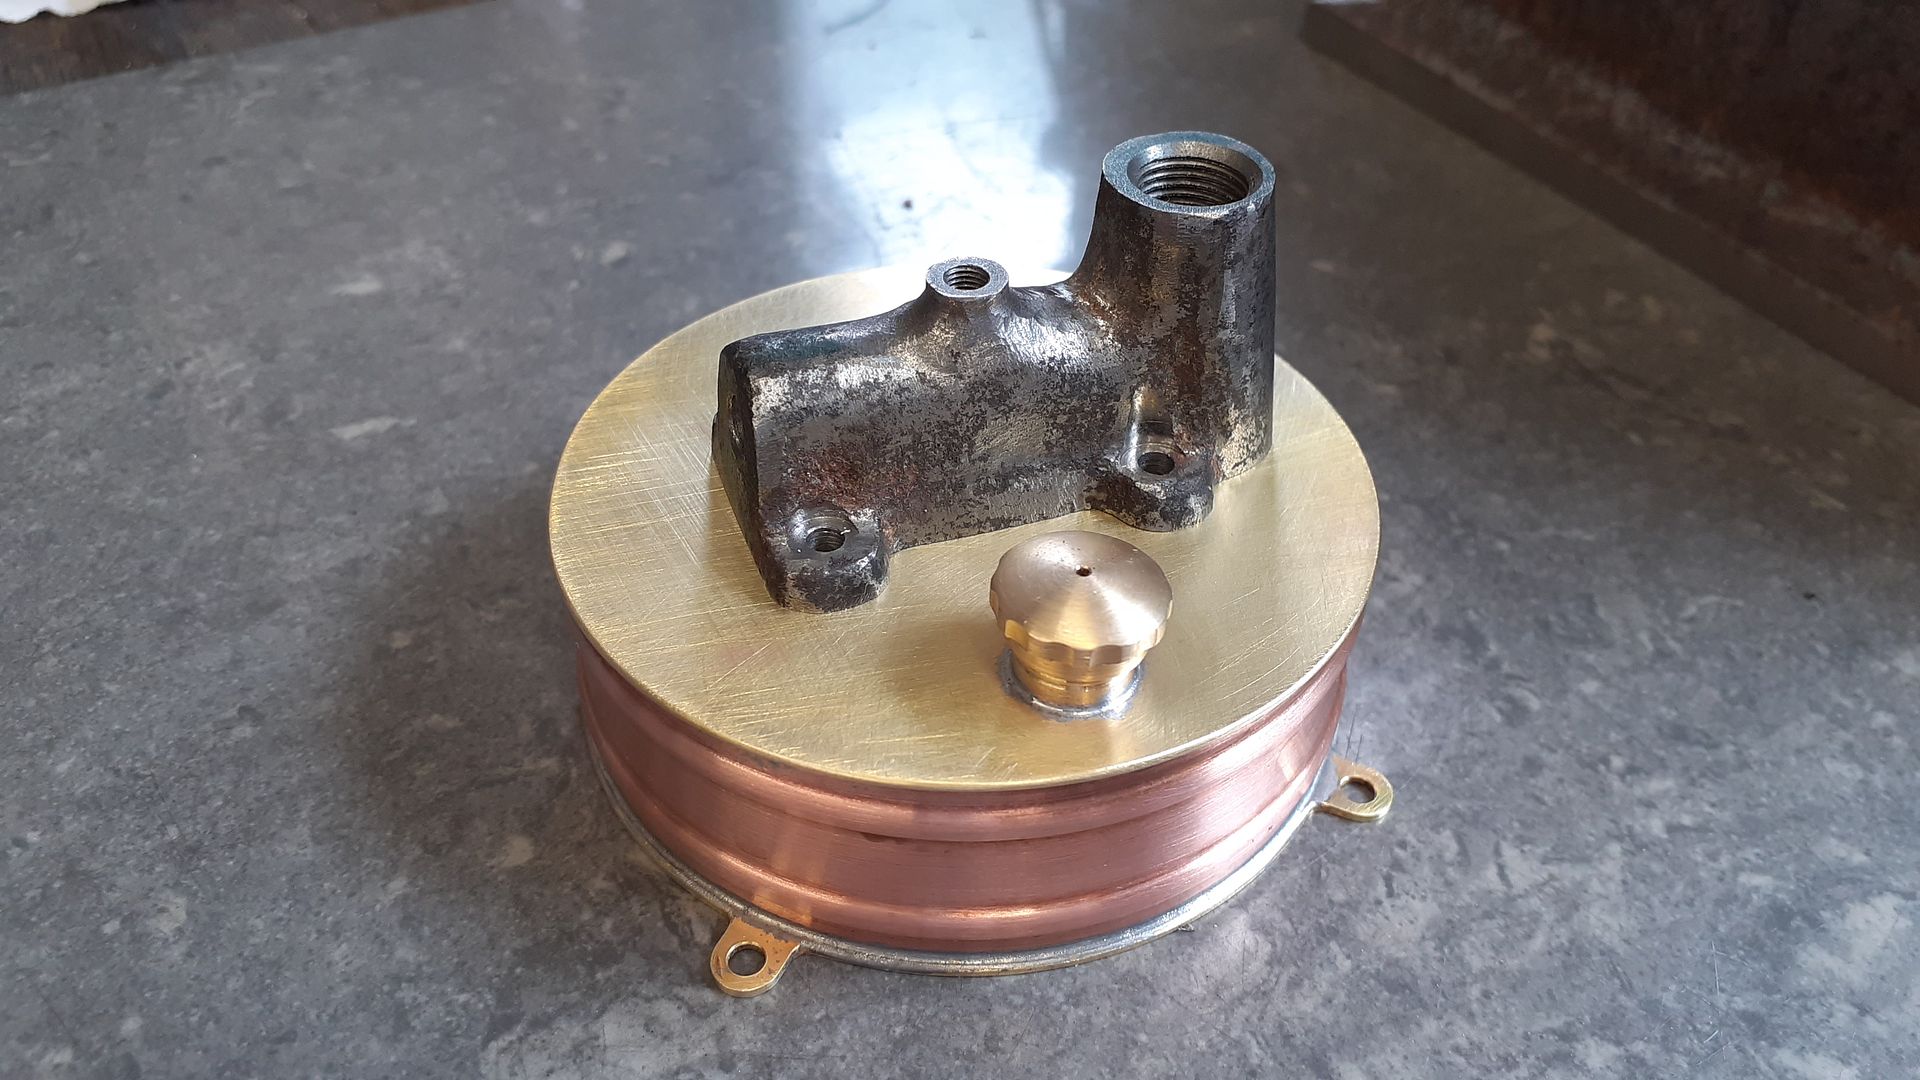
The parts could then all be soft soldered together, here is the finished tank complete with vented cap and the carb body in place. It won't be staying bare metal as I want it to look like a galvanised tank, might even go for a stencilled "Alyn" on the side.
 29 November 2023 at 19:09 #694856
 JasonBModerator@jasonb
It’s about time I wrote up a bit more of this engine build.
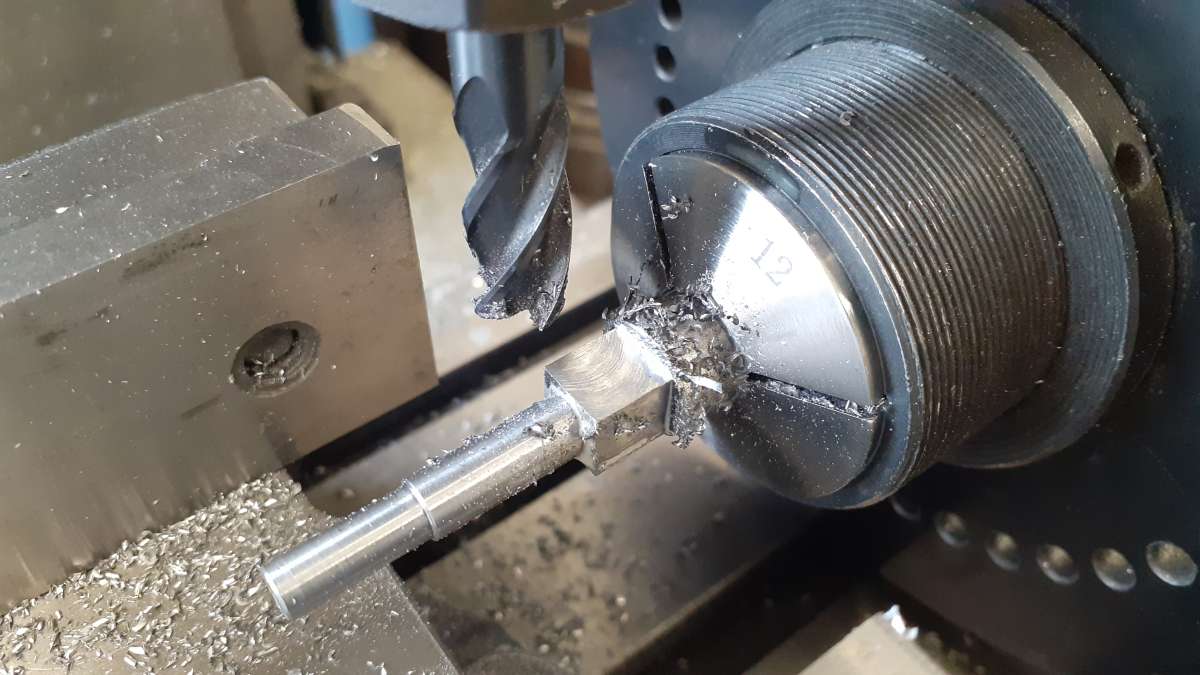
With a view to getting the gearing done I made the cam gear post first. Starting with some stock that wa slarge enough to get the rectangular head out of I turned two diameters, the larger for the gear to run on and the smaller to go into the hole in the engine frame.

Then into the spin indexer to shape the clevis.

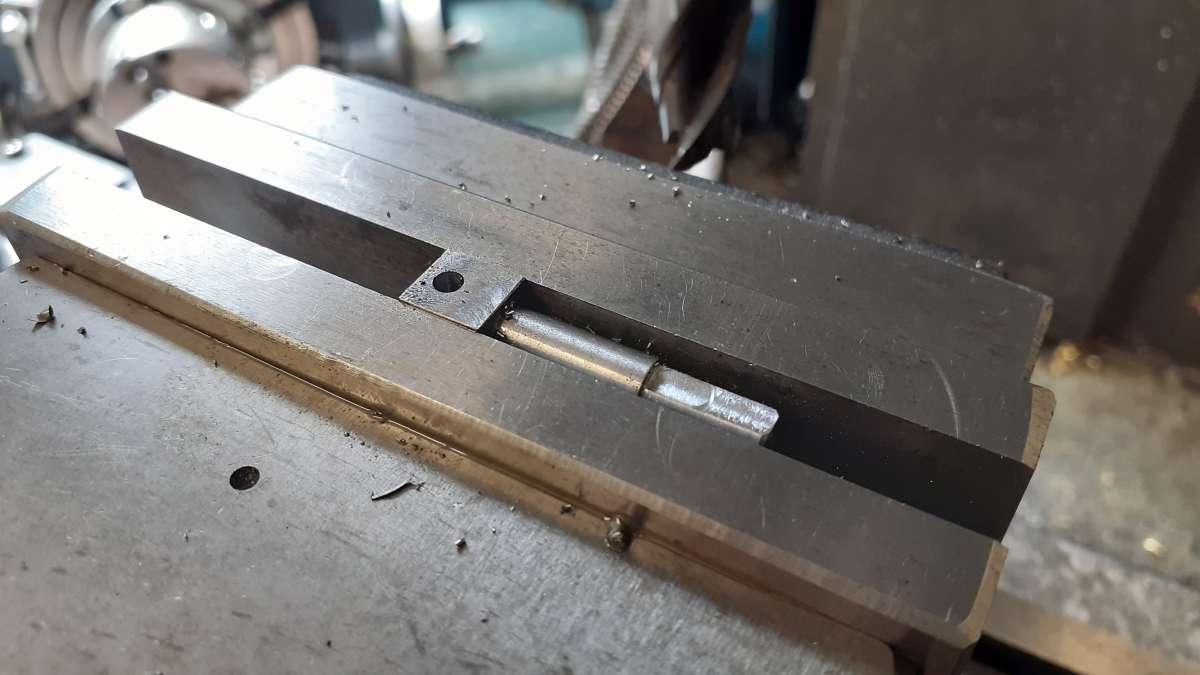
After reaming the pivot pin hole and milling a flat on the spigot the clevis was slotted for the latch and then rounded over

I spent some time working out different combinations of metric gear size and numbers of teeth and in the end settled on a 50/25T combination using MOD0.7 which are available online for those that want to buy or cutters can be bought quite cheaply.
I started by roughing out a blank for the cam gear and then machined the cam profile which I made with a little less lift to suit the lever lengths of the newer head layout that has the exhaust valve further from the rocker arm pivot

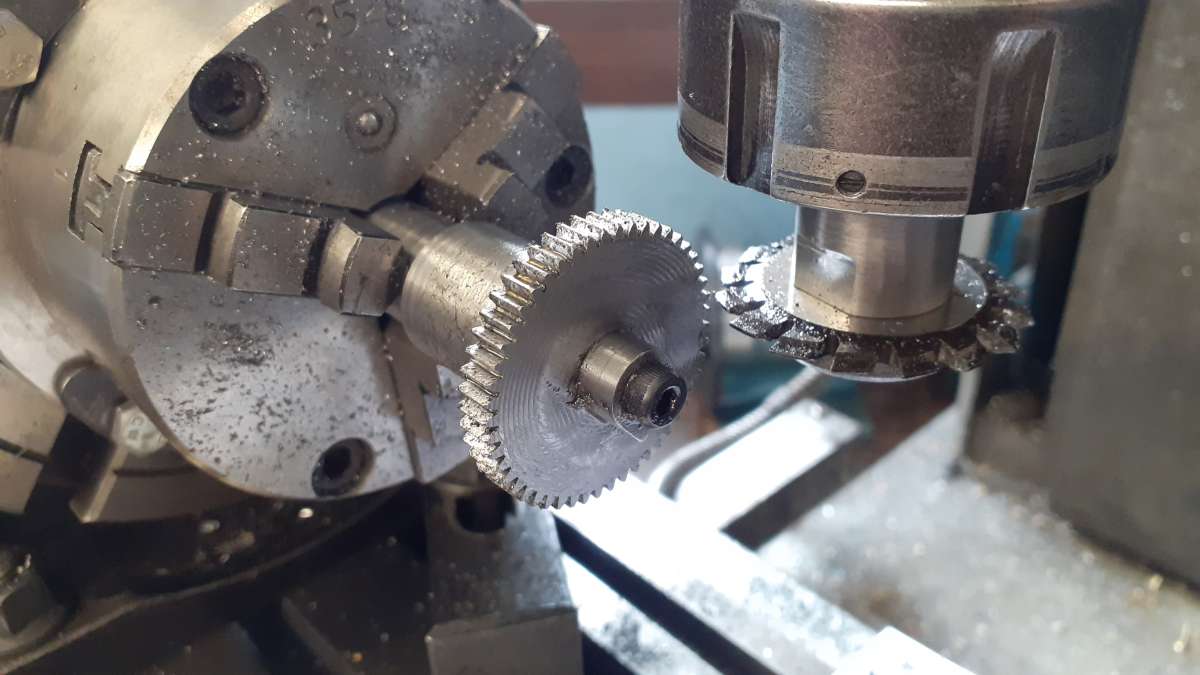
Then with the gear blank mounted on an arbor set about cutting the teeth using the rotary table with dividing plates

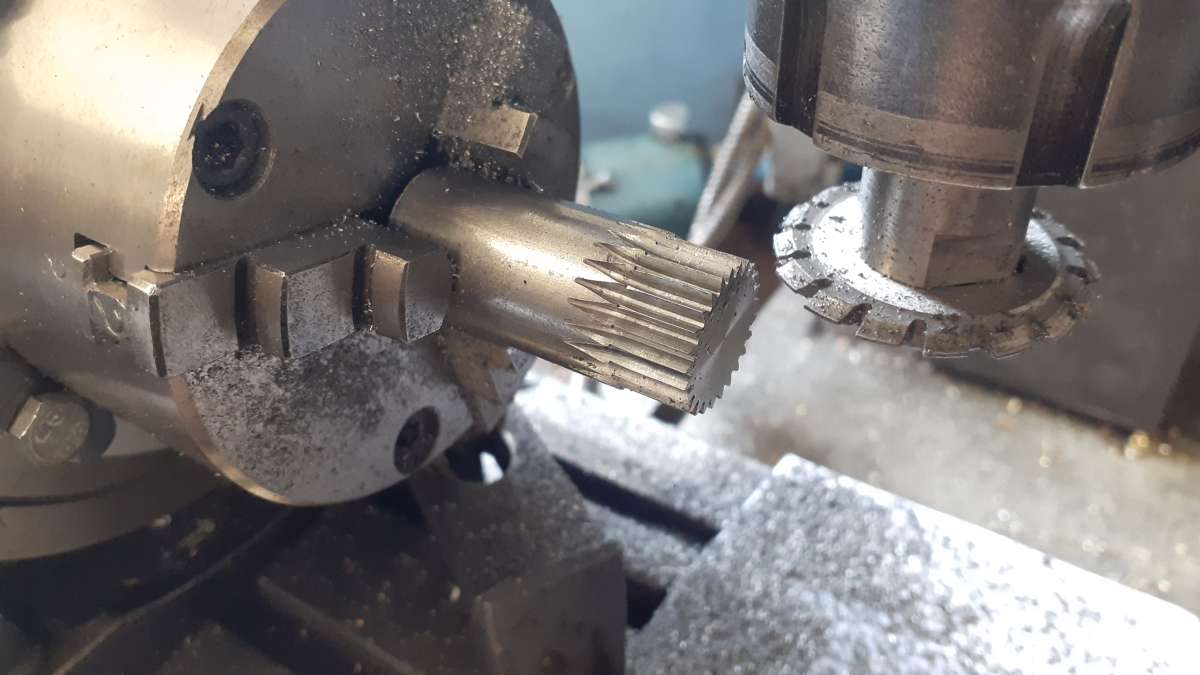
The 25T crankshaft gear was cut in a similar way except I did it on the end of a bar before reaming and parting off once the teeth were done.

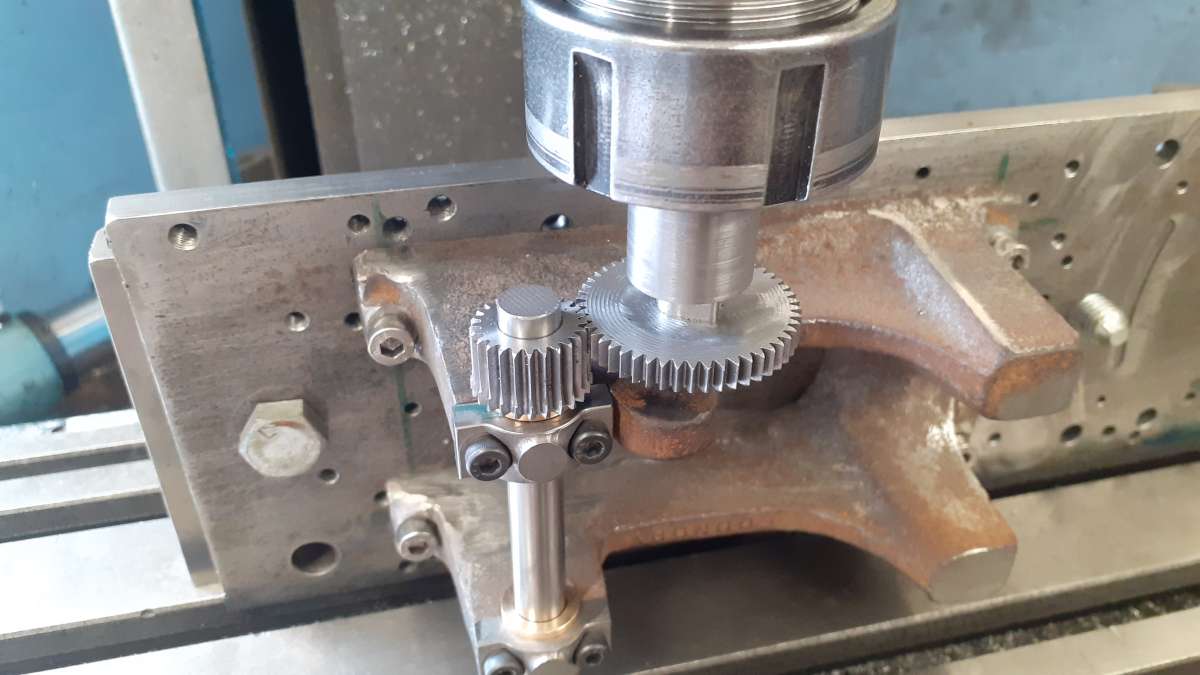
I like to set the gear positions using the actual gears so with a temporary crank shaft in place the small gear was slipped onto that and the larger gear on an arbor held in the mill’s collet chuck and the running fit and backlash adjusted by moving the engine’s frame in the X axis. Once happy the DRO was zeroed.

After which a flat was milled and a hole drilled and reamed

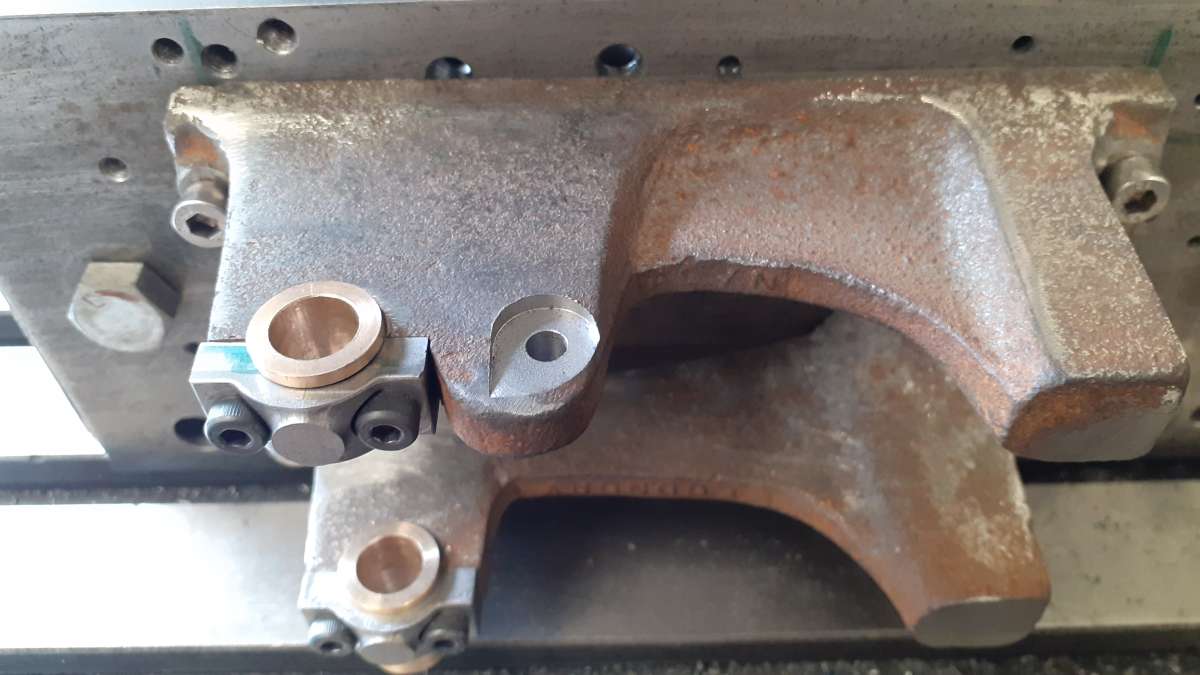
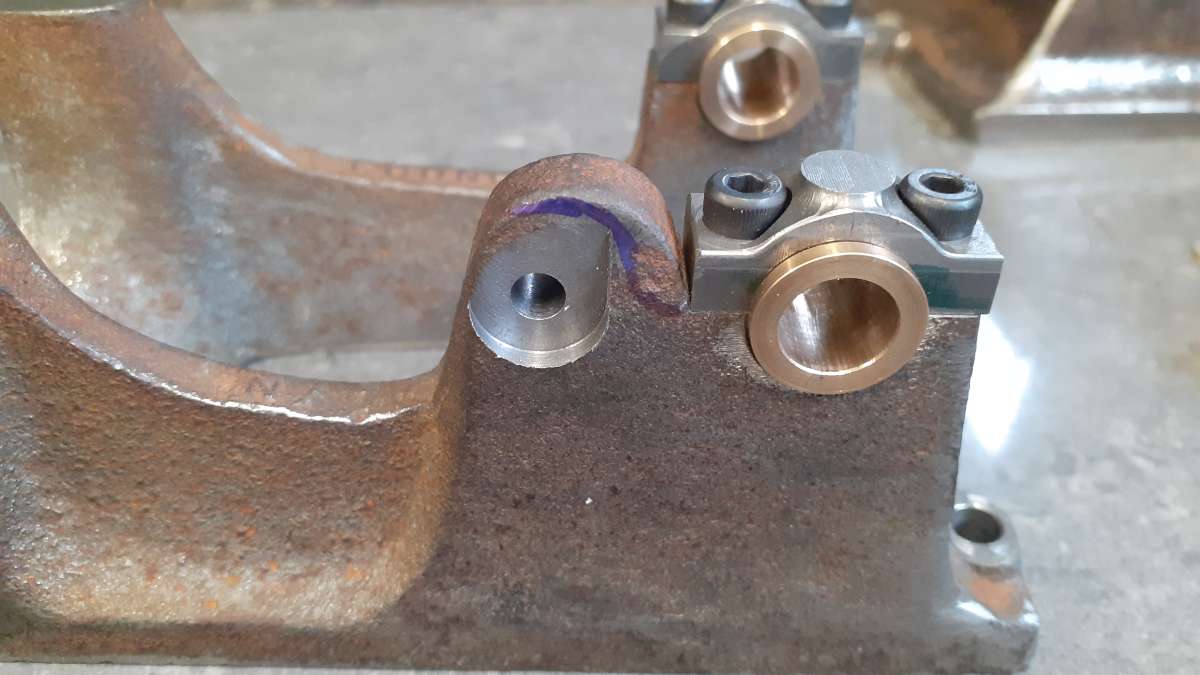
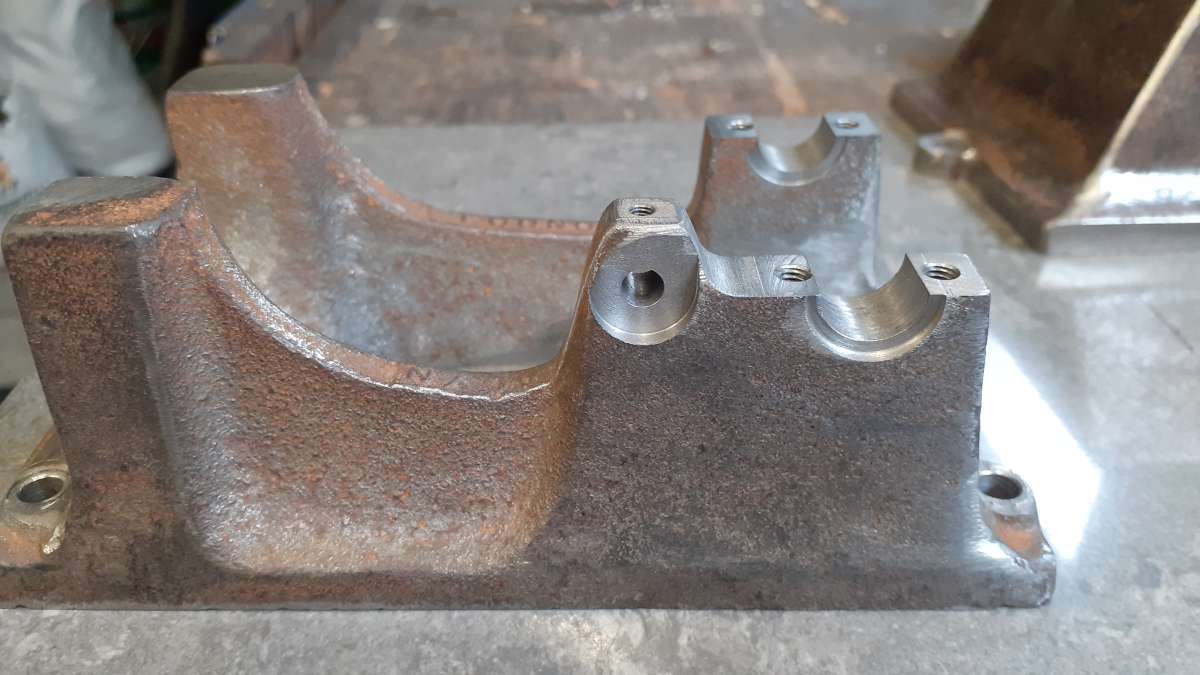
The MOD0.7 25/50 combination has a slightly larger PCD than the original design’s 1″ which put the hole a bit out of ctr to the cast lug.

A bit of milling and filing soon had that sorted out and a hole drilled and tapped for the screw that retains the cam gear post.
 10 December 2023 at 20:20 #698543
 JasonBModerator@jasonb
The rocker arm pivot is supplied as a casting but if used for the reversed valve layout does not put the pivot very centrally in the rocker arm so I spent a while studying the casting and working out a cunning plan that would still allow the casting to be used but shift the pivot point nearer to the valve.
The first job was to just take enough off the casting to remove the draft angles on the two edges that will mount to the head and also set these at 90 degrees to each other so I had a datum to work with.


I also skimmed the draft off around the pivot so that I could get a decent grip of the casting to bring it to thickness.


The casting was offered up to the head and a line scribed to mark where the mating area stopped and a ball nosed cutter used to tidy up that area to the line

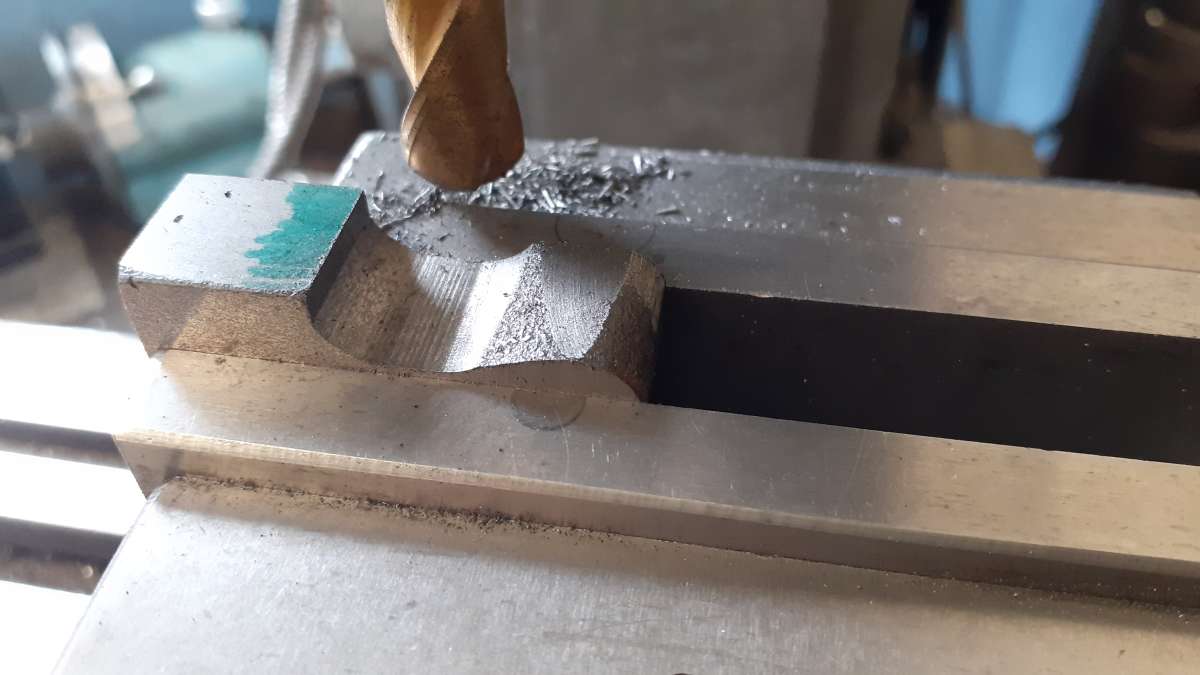
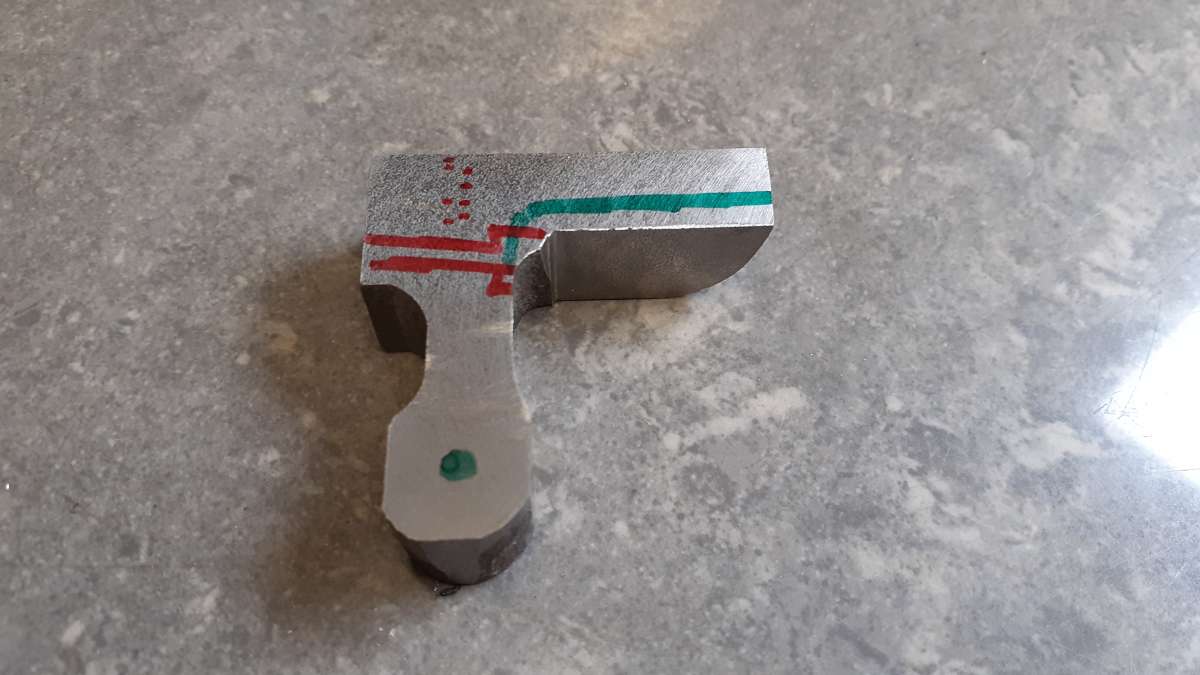
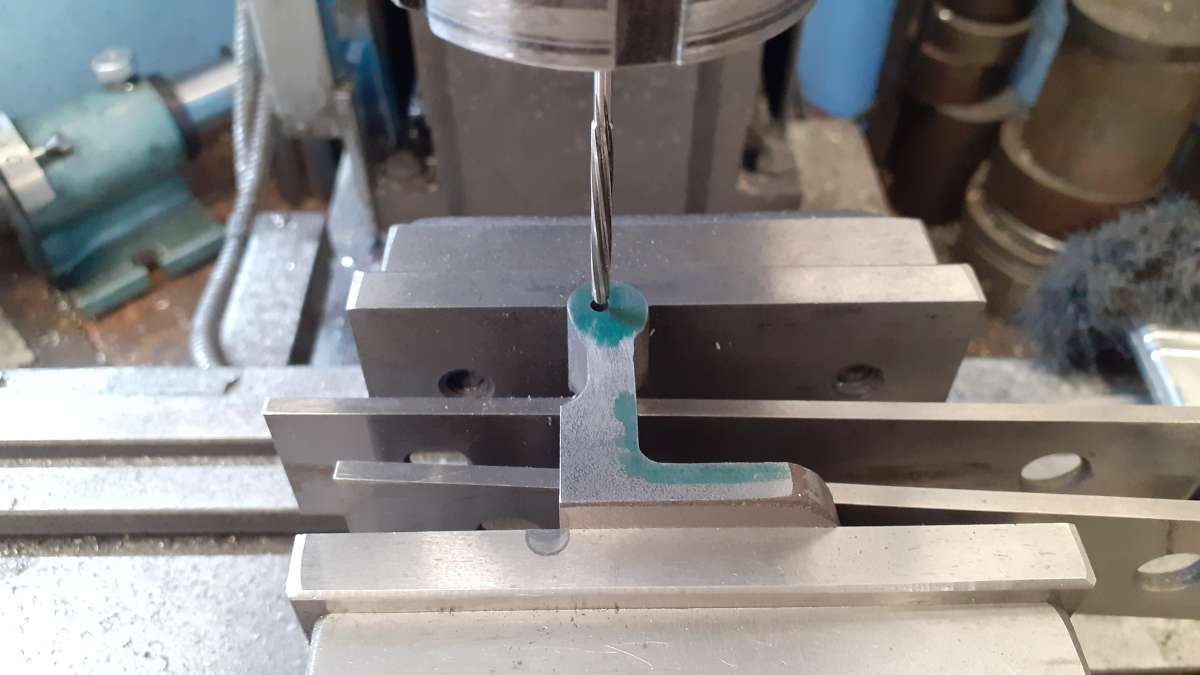
Then it was out with the Sharpies to refine the shape, I left as much material as possible on the face that was machined earlier which moved the pivot point further from the head so the green pen marks where the opposite edge needs the excess material removed and the red shows where the screws will go to mount it to the head.

Drilling and reaming 3mm for the pivot pin

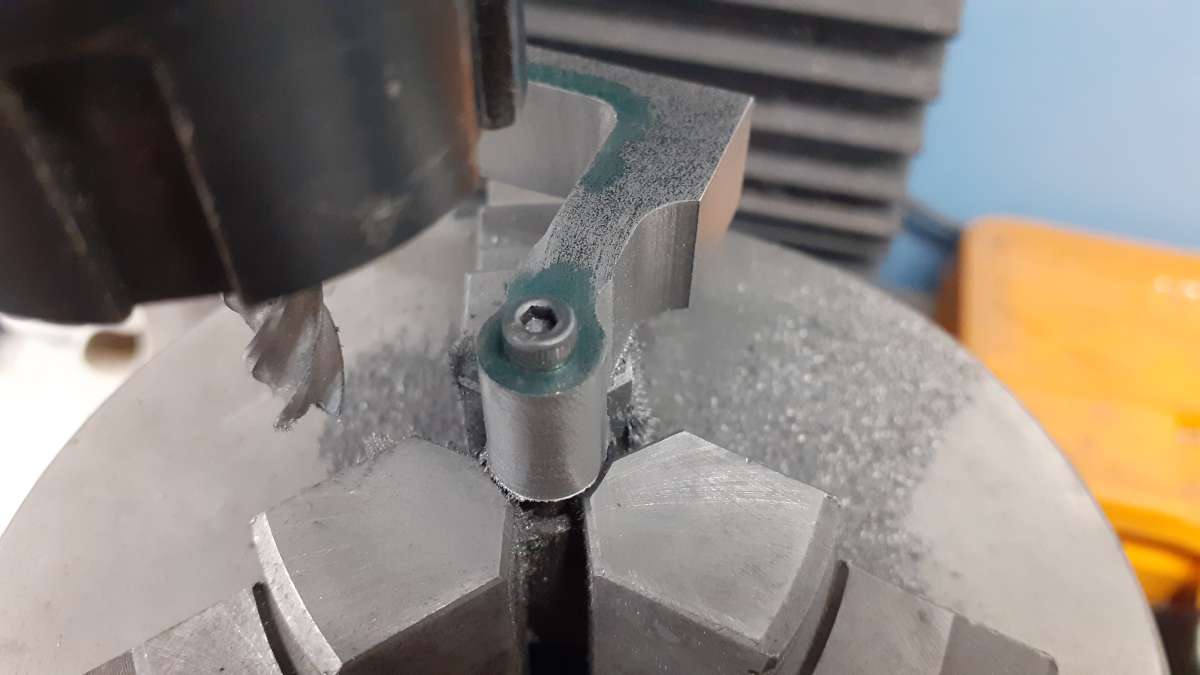
Then rounding around the pin hole on the rotary table

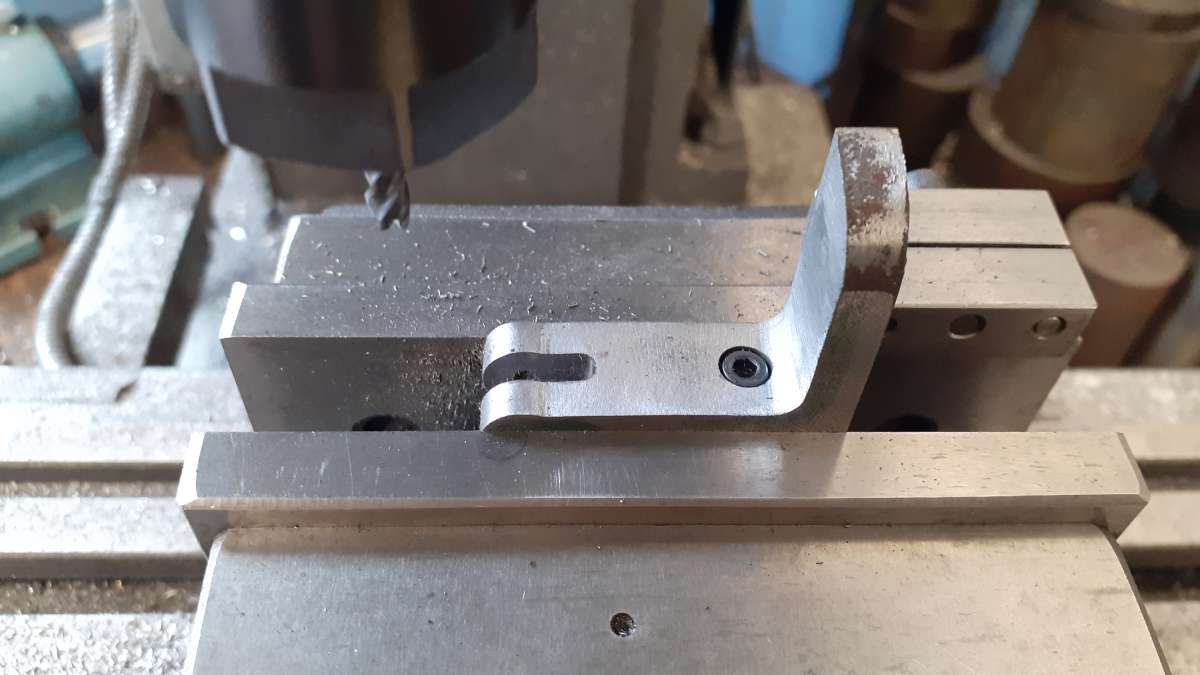
Last bit of machining for now was the slot for the rocker arm.

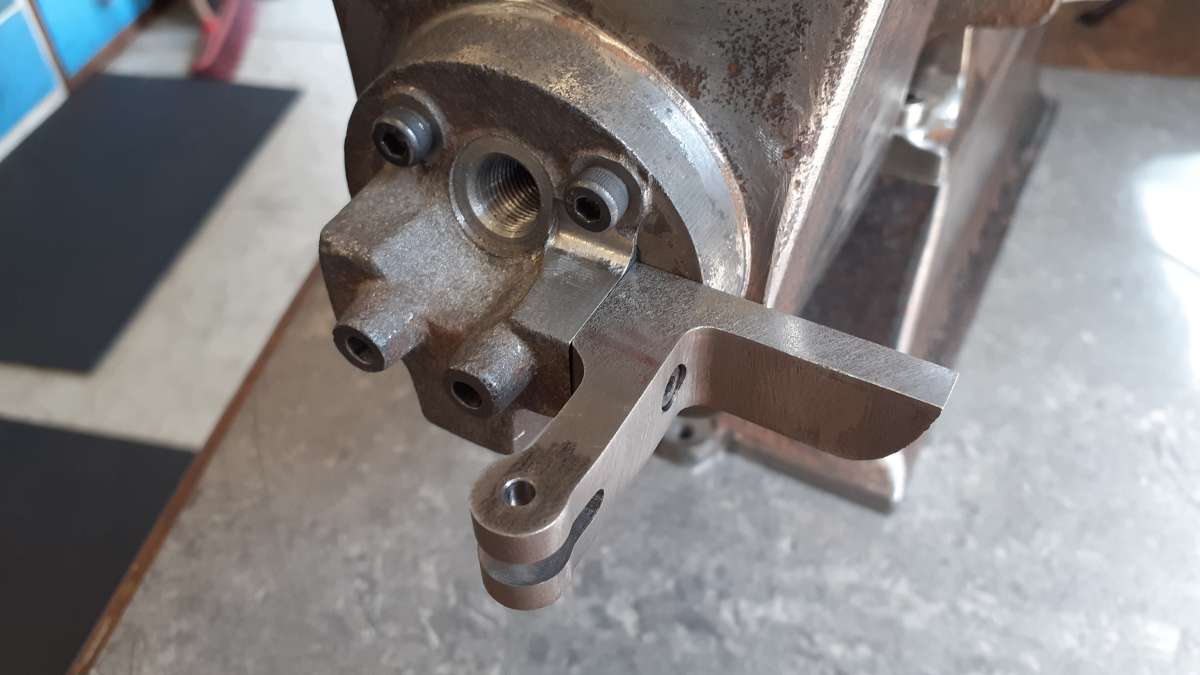
Finally the bracket in place, I have removed a bit of material from the head so it matches the depth of the bracket. After test running it will be bonded on and filleted with JB Weld so that it looks like an integral part of the head casting. Edges will also be eased to make it look like a casting. There is still work to be done where the push rod goes but more of that later
 10 December 2023 at 21:21 #698551
Diogenes
Participant@diogenesStill following – nice to see some building!
-
AuthorPosts
- Please log in to reply to this topic. Registering is free and easy using the links on the menu at the top of this page.
Latest Replies
Home › Forums › I/C Engines › Topics
-
- Topic
- Voices
- Posts
- Last Post
-
-
Flattening brass plates
Started by:
t1krt in: Workshop Techniques
- 2
- 2
-
5 April 2025 at 15:34
 Bazyle
-
Problem getting the right parameters on a VFD
Started by:
Robert Graham in: Electronics in the Workshop
- 5
- 6
-
5 April 2025 at 15:24
David Jupp
-
Myford S7 Taistock Adjustment
Started by:
 Harry Wilkes
in: General Questions
- 9
- 12
-
5 April 2025 at 15:17
 Harry Wilkes
-
How to wire up 3 phase motor and 3 phase converter?
Started by:
ell81 in: Beginners questions
- 7
- 13
-
5 April 2025 at 12:35
 Robert Atkinson 2
-
Morse Key
Started by:
Steve Withnell in: Work In Progress and completed items
- 2
- 2
-
5 April 2025 at 11:43
SillyOldDuffer
-
James Coombes Drawing Error (or mine?)
Started by:
Steve Withnell in: Drawing Errors and Corrections
- 4
- 5
-
5 April 2025 at 10:51
Steve Withnell
-
Measuring increments on boring head
Started by:
Bill Phinn in: Workshop Techniques
- 15
- 18
-
5 April 2025 at 08:48
Bo’sun
-
Flexispeed Meteor 2
Started by:
ferroequinologist in: Manual machine tools
- 11
- 19
-
5 April 2025 at 07:01
ferroequinologist
-
What Did You Do Today 2025
1
2
3
4
Started by:
 JasonB
in: The Tea Room
- 23
- 78
-
4 April 2025 at 20:57
Nigel Graham 2
-
Powered hacksaw – blade lift for the return stroke
Started by:
 Sonic Escape
in: General Questions
- 8
- 17
-
4 April 2025 at 20:00
 Nicholas Farr
-
Damp proofing concrete floors
Started by:
Duff Machinist in: General Questions
- 13
- 13
-
4 April 2025 at 19:57
 Bazyle
-
New member old lathe
Started by:
t1krt in: Introduce Yourself – New members start here!
- 8
- 16
-
4 April 2025 at 19:52
t1krt
-
Elliott Omnimill Quill Clamp
Started by:
dangermouse in: Manual machine tools
- 3
- 3
-
4 April 2025 at 19:23
 Bazyle
-
Tangential tooling
1
2
Started by:
Keith Matheson in: Workshop Tools and Tooling
- 13
- 29
-
4 April 2025 at 18:14
Howard Lewis
-
Which lathes have drawbars in the headstock?
1
2
Started by:
ell81 in: Beginners questions
- 17
- 26
-
4 April 2025 at 18:04
Howard Lewis
-
Stripped aluminum threads. Now what?
1
2
Started by:
brucemc777 in: Beginners questions
- 19
- 33
-
4 April 2025 at 16:34
old mart
-
gear cutting with the shaper
Started by:
jacques maurel in: Workshop Techniques
- 5
- 6
-
4 April 2025 at 15:15
Andrew Tinsley
-
Machinery Handbook
1
2
Started by:
Dalboy in: Books
- 30
- 37
-
4 April 2025 at 12:27
SillyOldDuffer
-
Electric motor vibrations
Started by:
 Sonic Escape
in: General Questions
- 8
- 12
-
4 April 2025 at 07:38
 JasonB
-
Build Your Own Metal Working Shop From Scrap (7 book series)
Started by:
Dr_GMJN in: Books
- 6
- 7
-
4 April 2025 at 06:39
Pete
-
Scraping
Started by:
ryan.carter848 in: Books
- 7
- 10
-
4 April 2025 at 05:11
Pete
-
Ml10
Started by:
keel in: Beginners questions
- 5
- 7
-
3 April 2025 at 23:06
duncan webster 1
-
Warrington Model Engineering Developments
1
2
Started by:
colin wilkinson in: General Questions
- 14
- 41
-
3 April 2025 at 20:26
keel
-
Vice as Broaching Press
1
2
Started by:
James Hall 3 in: Beginners questions
- 16
- 37
-
3 April 2025 at 20:00
 JasonB
-
UK consumer protection laws?
Started by:
 Fulmen
in: General Questions
- 8
- 10
-
3 April 2025 at 19:07
 Fulmen
-
Flattening brass plates
-
Latest Issue
Newsletter Sign-up
Latest Replies
- Flattening brass plates
- Problem getting the right parameters on a VFD
- Myford S7 Taistock Adjustment
- How to wire up 3 phase motor and 3 phase converter?
- Morse Key
- James Coombes Drawing Error (or mine?)
- Measuring increments on boring head
- Flexispeed Meteor 2
- What Did You Do Today 2025
- Powered hacksaw – blade lift for the return stroke


