Maybe I should have posted this in 'What did you do today (2016) ? Anyway, here it is in 'Workshop Tools & Tooling' in case it helps anyone else.
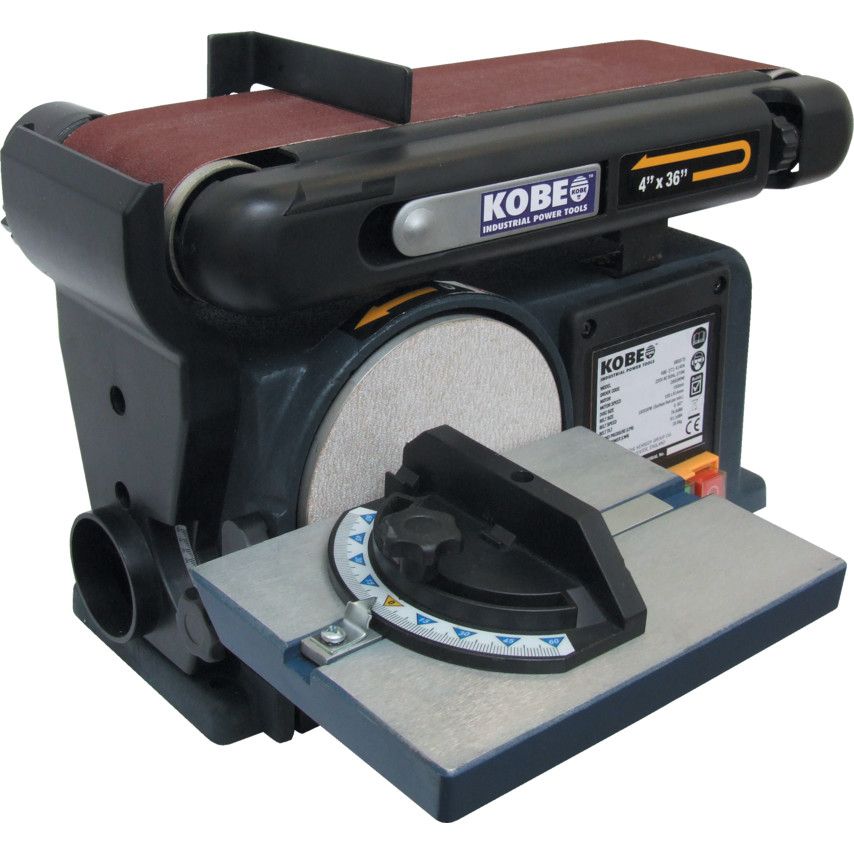
A friend offered to let me use his Kobe belt sander if I fixed it! The problem was that pressing the green button would start the motor but the motor stopped as soon as the green button was released.
Here's a picture of the sander:
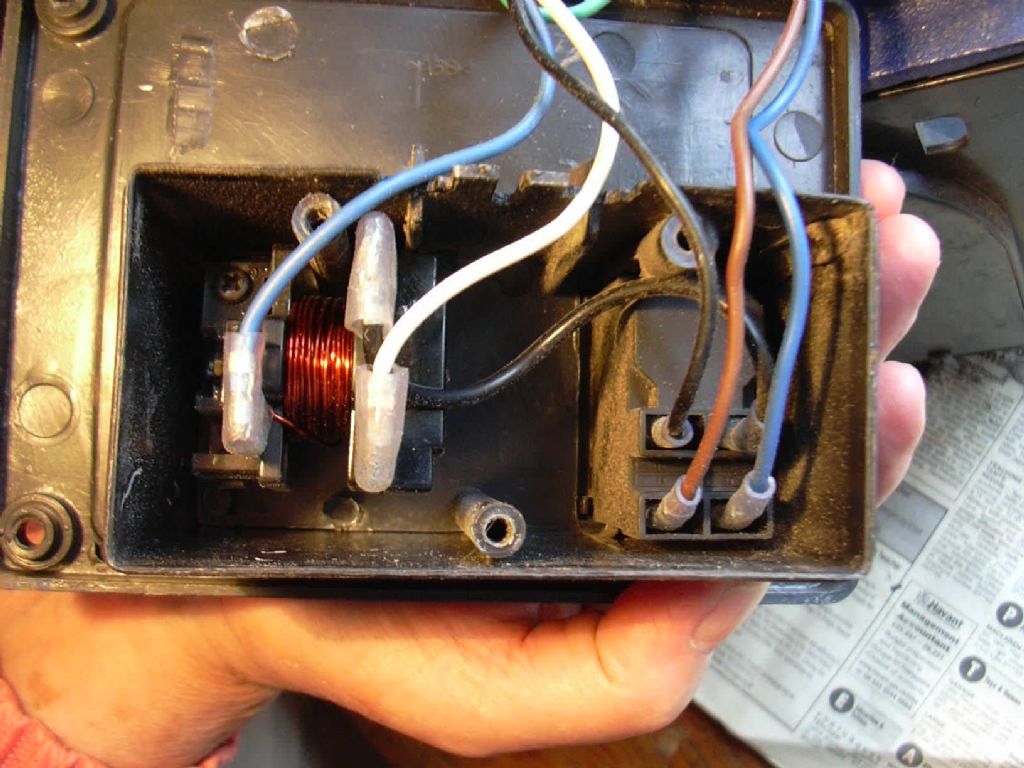
I released the control panel from the sander body – here's a rear view:
(The main object of this photo is to help me reconnect after the repair.)
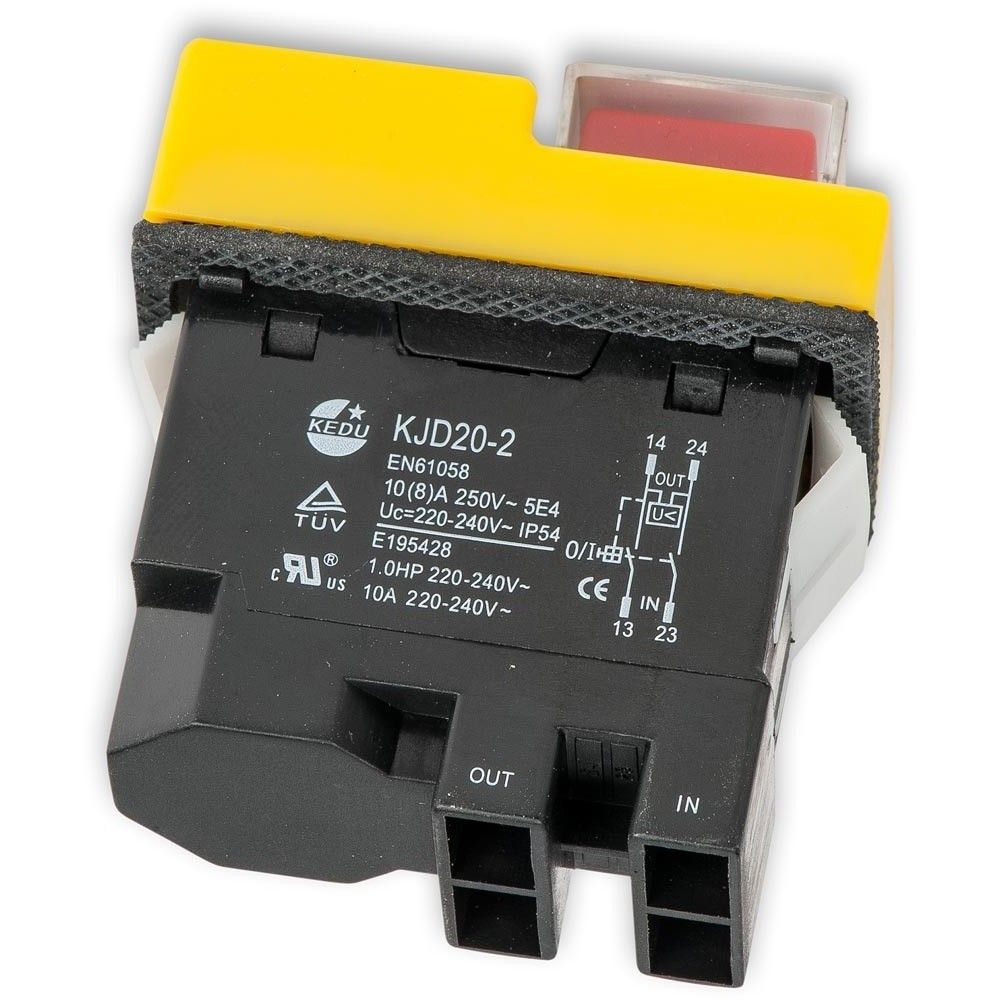
The gizmo on the right is the NVR switch – here's another view of that:
I've found a replacement NVR switch on the web and ordered one. The NVR switch is held in to the rectangular hole in the panel by two springy plastic tabs. Releasing these required liberal quantities of perseverance, tea and 'holding my mouth right'!
The gizmo on the left is, I think, the starter relay. When the panel is mounted in the sander the connection on the left (blue wire) is uppermost. This is consistent with an arrow marked 'up' moulded into the relay body.
Referring to Workshop Practice Volume 24, the motor in this sander appears to be the type with no centrifugal switch. The starter relay is operated by the initial inrush current and connects the starter winding. When the motor is up to speed, the current falls and the relay drops out, de-energising the starter winding.
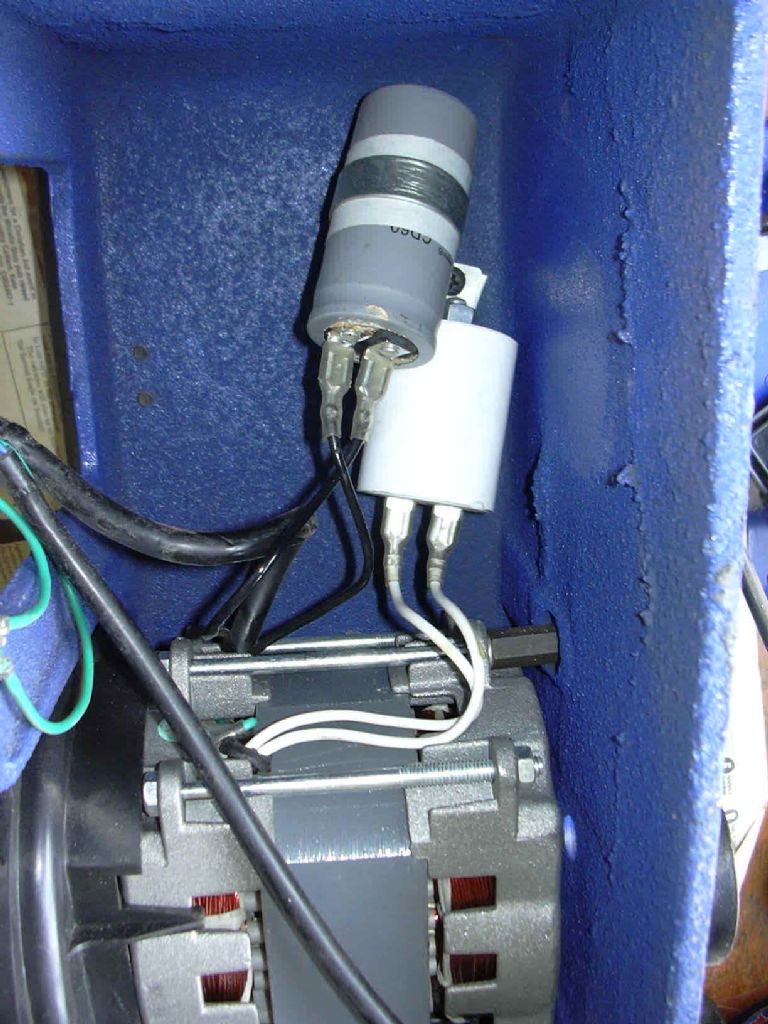
The motor, intriguingly, has eight connections! One of these is a ground, then there are three wires for 'run', 'start' & 'common'. The remaining four wires (two pairs) connect to TWO capacitors. I'll take a few more photos and upload them here soon. I'll return to this aspect in a later post.
I decided not to test the NVR switch with a knife & fork but to throw money at the problem and test by substitution when the replacement component arrives. So, this post should be taken as a preliminary account of a repair that's 'work in progress'. Watch this space.
If anyone else has 'trod this path before', please feel free to contributeto the thread.
I think it is most likely that the NVR switch is the cause of the problem. You can check this just by removing the wires from the out connectors and connecting a mains voltage bulb in their place. If the light goes out when the green button is released then it is the NVR switch that is faulty. I would not bother tracing the rest of the motor wiring at this stage as I cannot think of any way anything else could cause these symptoms.
My take on this is the same as yours – that's why I've ordered a replacement NVR without doing any 'knife & fork' diagnosis.
I'm still intrigued by the motor having TWO capacitors. It can't be 'capacitor start, capacitor run' because the capacitors connect into the motor and there aren't enough wires from the motor to the starter relay. Also, I didn't mention it in my initial post but one of the capacitors is showing signs of electrolyte leakage so that deserves some attention once I've got the motor running under control.
Hi Swarf,
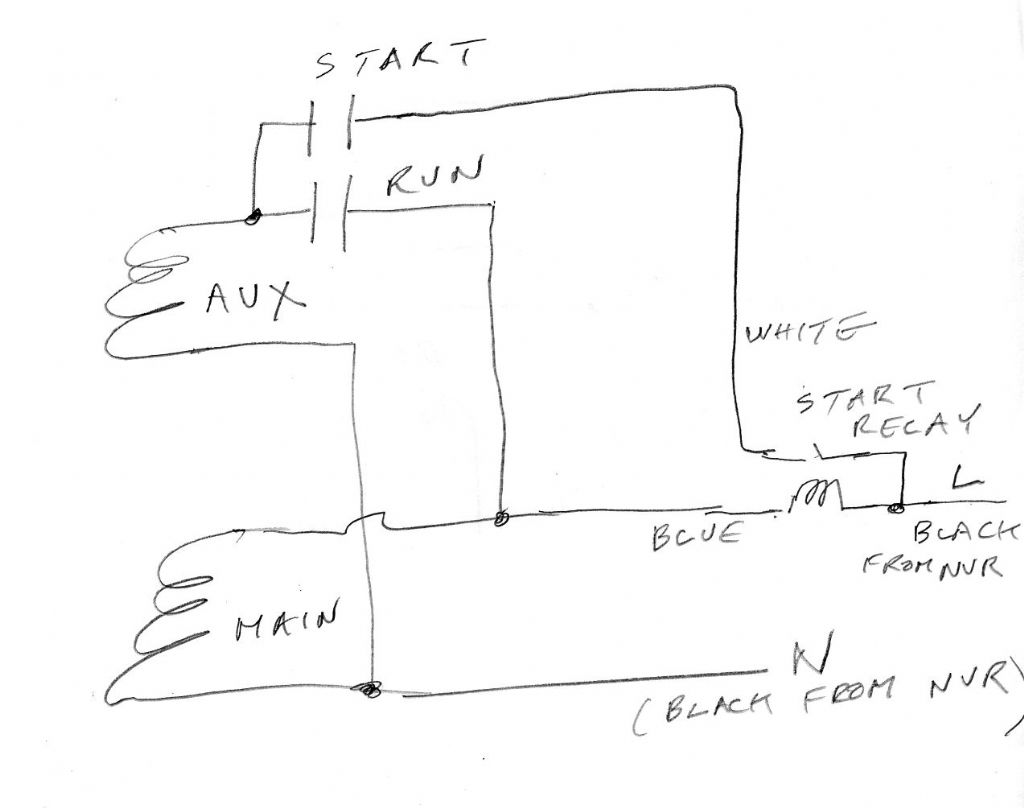
I think it could be wired something like this.
Les.
Full marks, Les, I hadn't thought of that configuration. I'll buzz through the connections and check it out. One thing I don't like about the wiring of this device is that all the switching is on the neutral side rather then on the live.
That's true of the NVR but I don't know where I'd find a replacement for the starter relay if that went duff. I don't see much future in putting 'up' into Google! That's the nearest thing to a part number anywhere on the starter relay!
Here's a photograph of the interior of the sander showing the capacitors and part of the motor:
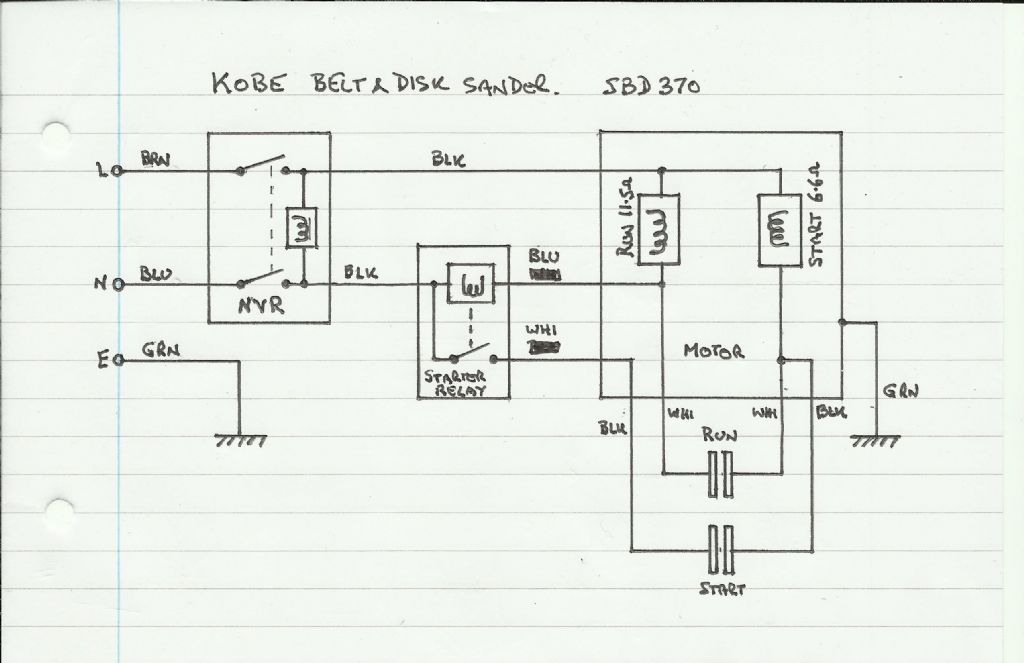
As promised, I've done a bit more circuit investigation. Here's the circuit as rendered by my tame drafting spider:
It's basically the same as suggested by Les except that I've shown how the capacitors are connected via junctions within the motor body. Also, as I mentioned in an earlier post, Kobe have opted to have all the complexity on the neutral side rather than the live (sorry, 'phase'! ) side. The capacitor mounting clips obscure the capacitor values and I didn't want to disturb them at this stage so their values remain a mystery for now. I have noted the motor winding resistances.
Now for rebuild & test!
Oh, in the interests of historical accuracy, my friend didn't actually say I could borrow it if I mended it – he actually said 'you're welcome to borrow it but you'll need to mend it'. A small but important difference!
Best regards,
Swarf, Mostly!
Edited By Swarf, Mostly! on 05/09/2016 14:23:34
Edited By Swarf, Mostly! on 05/09/2016 14:27:53
Author
Posts
Viewing 12 posts - 1 through 12 (of 12 total)
Please log in to reply to this topic. Registering is free and easy using the links on the menu at the top of this page.