Alternative methods to using abrasive blasting to achieve a paint key

Advert

Alternative methods to using abrasive blasting to achieve a paint key

Home Forums Workshop Techniques Alternative methods to using abrasive blasting to achieve a paint key

Viewing 13 posts - 1 through 13 (of 13 total)
  • Author
    Posts
  • #609508
    Greensands
    Participant
      @greensands

      I have been giving some thought to painting my model locomotive and have carefully taken note of the good advice given in Christopher Vine’s book “How (not) to paint a locomotive” in which he strongly advises the use of abrasive blasting to achieve the all important paint key. Even to acquire a basic set-up however involves a fairly expensive outlay to say nothing of the demands on space and safety considerations which does make one ask if there might be cheaper alternative methods of achieving the desired results more suited to those of limited space and budget. I would be interested to hear the views of other model makers faced with similar issues and how they have tacked the problem.

      Advert
      #16397
      Greensands
      Participant
        @greensands
        #609510
        John Rudd
        Participant
          @johnrudd16576

          How about entrusting the work to someone local that does vapour blasting?

          #609512
          Greensands
          Participant
            @greensands

            I think the problems with going to a local concern are essentially two fold. 1) They have to be able to fit your essentially one-off job into their batch run orientated system and 2) Potential issues as they see it of your job contaminating their plant.

            #609515
            Dave Wootton
            Participant
              @davewootton

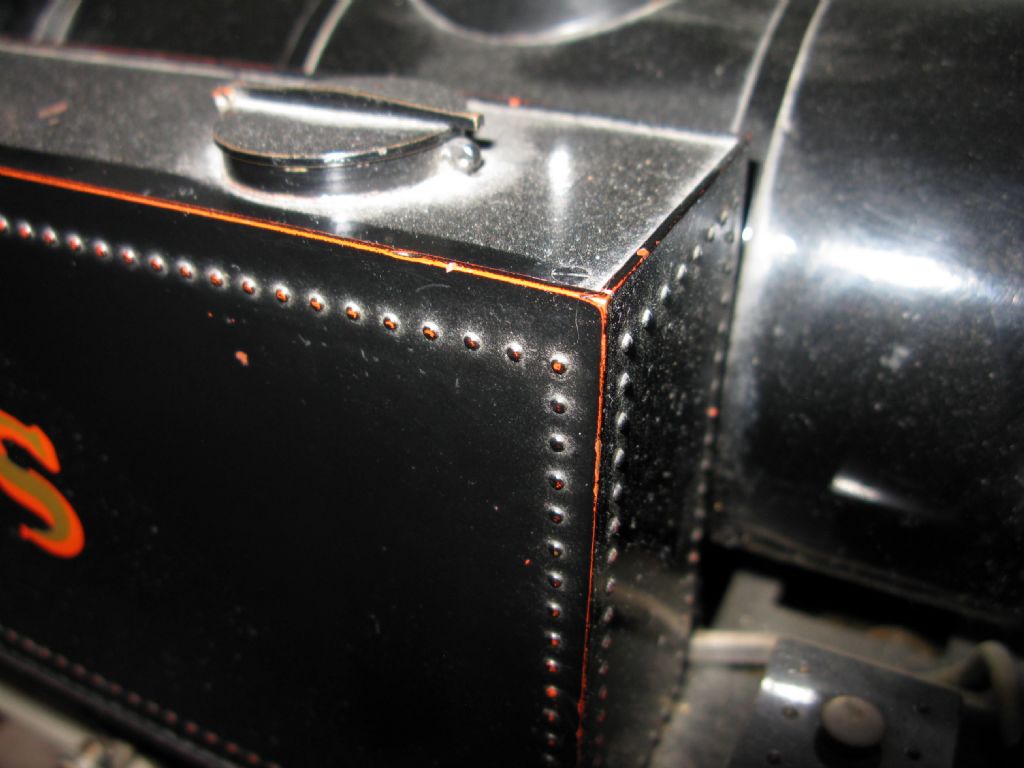
              I used 3M scotchbrite pads to prepare the brass on my simplex before priming with PP etch primer, its been on thirty plus years and although the paint has suffered a lot of wear, none of it has peeled or fallen off. At that time the Upol spray primer was not readily available, but I've since found it excellent.

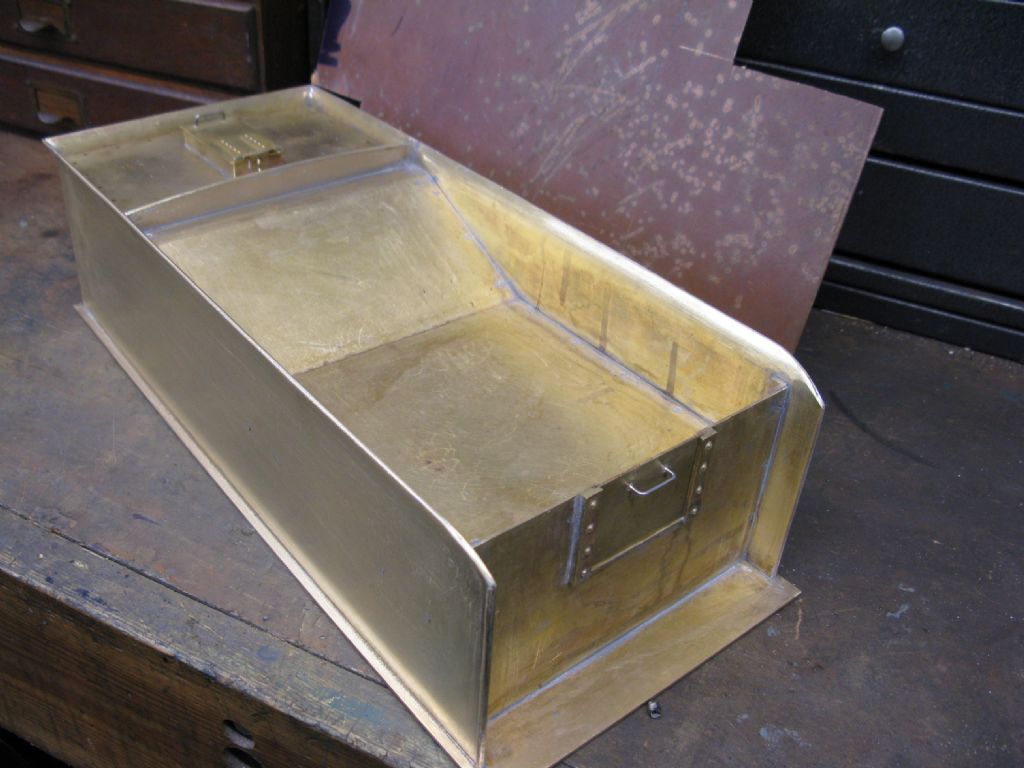
              I've recently tried Mirka handy strips for brass preparing on a part built tender body I started 47 years ago! this was very tarnished having been left in a damp potting shed. Very impressed with how easily it dealt with the brown coating on the brass, I found the 120 grade followed by 180 seemed to work well, and used a fibreglass pencil for the very fiddly corners. A trial pack of assorted handy strips is available from ebay and amazon, I'm now going to just buy the grades I need.

              If you are cosidering getting someone to vapour blast or bead plast parts emphasise the need for caution with fiddly fragile bits like lamp irons, I got an old B-L tender body and cab bead blasted and despite assurances the blaster managed to distort the very thin material slightly, fortunately recoverable. I used to get a lot of motorcycle parts vapour blasted and would estimate something like a tender body in 5" gauge would be around £ 50 -70 slightly less for bead blasting . A set of british motorcycle crankcases cost about £60 two years ago.

              I'll try to get a picture of the cleaned up tender body sometime today and post it here, good luck and please let us know how you get on.

              Dave

              Just seen your reply I've found that firms that advertise for car and motorcycle work are much more accomodating than industrial concerns, i can recommend a couple I have used but they are both in Kent.

              Edited By Dave Wootton on 14/08/2022 09:59:03

              #609517
              JasonB
              Moderator
                @jasonb

                Assuming you have a compressor then a small blast cabinet and sack of abrasive can be had for £150. For a one off then total loss will do so you don't need the cabinet just a cheap Aldi gun. Just make sure you don't slip over if using glass beads on a relatively smooth floor.

                #609518
                Paul Lousick
                Participant
                  @paullousick59116

                  Etch primers contain a mild acid that etch/bite into the surface to give better adhesion on brass and aluminium. Refer to the instructions for preparing the surface prior to application. Some require a primer as well before adding the top colour coats.

                  #609526
                  Clive Brown 1
                  Participant
                    @clivebrown1

                    Christopher Vine's methods are undoubtedly the councel of perfection with many excellent ideas but, I feel in a few respects , he is OTT for the average modelmaker. Follow his advice if you wish / can afford,, but my 5" loco. was painted over 3 decades ago without any blast preparation . All surfaces were thoroughly cleaned and degreased of course and brass platework was treated to the lightest spray of etch primer. The paint is still firmly in place.

                    I find that the greatest enemy of a good finish is avoiding dust. That needs a lot of care, especially where fairly large surfaces are concerned.

                    #609540
                    Dave Wootton
                    Participant
                      @davewootton

                      img_0192.jpgHopefully a couple of pictures attached one is of the tender body mentioned above, cleaned with the Mirka abrasive, not yet to a painting standard but so as I could solder it all together. there is a piece of the brass sheet used behind to show the level of oxidisation, which was removed surprisingly easily.

                      The other shows my much neglected Simplex, painted with etch primer and followed by red oxide and black topcoat, both car aerosol cellulose, the paint has worn very badly, just wiped over with an oily and gritty rag after running, but the paint has not flaked or lost its hold on the brass underneath. As Clive says above it was just abraded with scotchbrite and thoroughly degreased. It's been on there over thirty years and was fairly thin coats applied in a hurry as I wanted to play with it!.img_0193.jpg

                      Edited By Dave Wootton on 14/08/2022 13:20:19

                      Edited By Dave Wootton on 14/08/2022 13:22:08

                      #609569
                      Greensands
                      Participant
                        @greensands

                        Dave – Have now ordered some P360 Mirka Mirlon Scotch Brite pads to try out on my steel smokebox.

                        #609671
                        Kiwi Bloke
                        Participant
                          @kiwibloke62605

                          I know nothing of how different types of paint adhere to different metals. I suspect some rely mainly on mechanical keying (think Velcro), whereas others probably rely more on intermolecular forces. Perhaps someone will tell us. All the advice above is no doubt tried and tested. Mechanically stripping the surface of contaminants, whilst simultaneously roughening it, is clearly a good idea, but the surface must then be kept free from contaminants, including finger-prints. Roughening not only provides something for the paint to grab onto, but also increases the surface area, so even a weak paint-to-substrate bond is strengthened.

                          Getting rid of greasy contaminants is important, because they may prevent the paint from wetting the surface adequately. It isn't good enough to wipe the surface with a solvent-soaked rag. That just makes the contaminant film thinner. It is difficult to remove the last few layers of molecules. Scouring powders, elbow grease and (preferably distilled) water removes contaminants and roughens the surface in one go.

                          Test for wettability by dripping on some (distilled) water. It should spread out uniformly, as a very thin film. If it beads, the surface isn't clean enough. Rinse and repeat…

                          #609693
                          Dave Halford
                          Participant
                            @davehalford22513
                            Posted by JasonB on 14/08/2022 10:12:48:

                            Assuming you have a compressor then a small blast cabinet and sack of abrasive can be had for £150. For a one off then total loss will do so you don't need the cabinet just a cheap Aldi gun. Just make sure you don't slip over if using glass beads on a relatively smooth floor.

                            Or you can still get a Clarke grit blast gun for £20 and build a skeleton box big enough to take the item from scrap wood, cover it with medium weight plastic sheet, keep the media for later and most of the grit off you.

                            #609771
                            Matt C
                            Participant
                              @mattc

                              Have a look at this YouTube video. It describes several methods of surface preparation:

                              **LINK**

                              It's a Dan Gelbart video on Coatings (part 6 of series on prototyping).

                            Viewing 13 posts - 1 through 13 (of 13 total)
                            • Please log in to reply to this topic. Registering is free and easy using the links on the menu at the top of this page.

                            Advert

                            Latest Replies

                            Home Forums Workshop Techniques Topics

                            Viewing 25 topics - 1 through 25 (of 25 total)
                            Viewing 25 topics - 1 through 25 (of 25 total)

                            View full reply list.

                            Advert

                            Newsletter Sign-up