Getting the most out of your Brushless Mill
Introduction
Over the next few articles I will be looking at how to get the best out of brushless hobby mills particularly in regards to speeds and feeds. Several recent threads on Model Engineer Forum have prompted this as some of the more traditional approaches which are often based on using belt/gear driven more rigid machines don’t always work so well when applied to the smaller bench top hobby type mills. To help demonstrate the optimum feed rates I was sent an power feed unit from ARC Euro Trade to fit to the SIEG SX2.7 that featured in the “milling for Beginners” Series and I will cover fitting that first..
Enjoy more Model Engineer reading in the monthly magazine.
Click here to subscribe & save.
Power feed for the SX2.7 Mill
I have had a similar power feed to this one fitted to my SIEG X3 for just over seven years which was sent to me by ARC to evaluate when they were originally considering stocking this item. However some recent threads on ME forum related to feed rates when cutting with shell/face mills prompted fitting a unit to the SX2.7 mill with a standard table that I also have in the workshop.
As usual a large sturdy box arrived next day from ARC Euro Trade and inside that along with some shredded cardboard packaging was a slightly smaller box containing all the necessary parts which were individually bagged and held within rigid foam dividers.
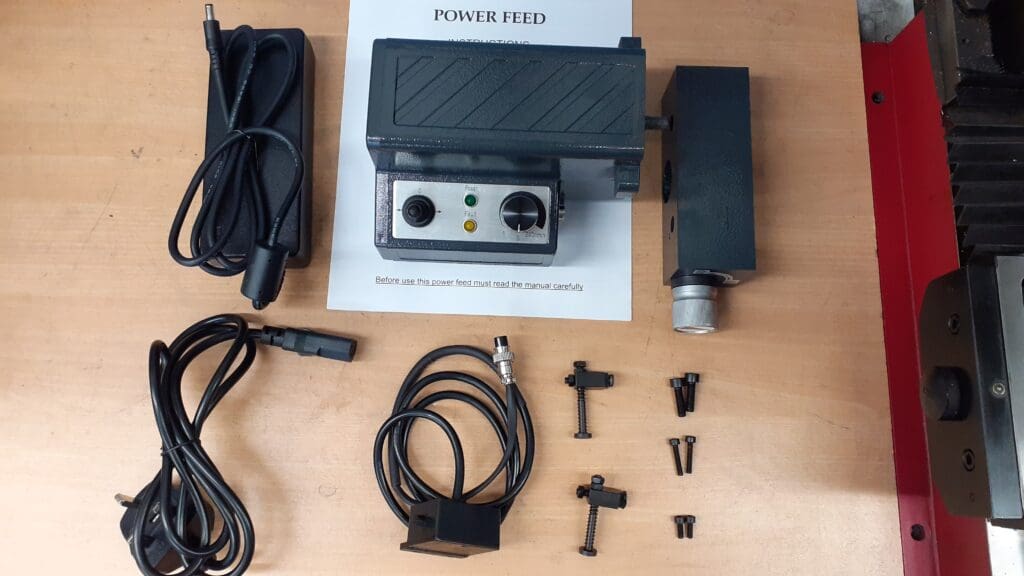
Photo 1. Shows the contents of the package starting in the top middle an working anti-clockwise we have: The main feed unit with variable speed knob, left/right toggle switch and two LEDs to indicate power and fault. A 240V AC to 24V DC transformer. Power lead for the transformer fitted with UK 3 pin plug top. A small enclosure with the limit switches and attached lead. Two adjustable limit stops . Selection of socket head screws needed to attach the feed to the mill. The final item is the clutch/adaptor block which varies according to which mill/table combination the package is intended to fit, so make sure you order the correct one for your particular machine. The instruction booklet covers fitting the unit to the various mills within the SIEG range.
Fitting
Before commencing fitment of the power feed it is a good idea to check that the gib strips are correctly adjusted particularly checking that there is no decrease in ease of movement at the two extremes of travel and to lubricate the ways and lead screw. Then move the table to a position just short of it’s maximum to the right which gets the nut close to the end of the lead screw.
The first thing to do is to remove the existing end plate from the left hand end of the table by unscrewing the two M6 socket head screws and then gently ease the plate away from the table. There are two location dowels that may make it a bit stiff to remove but mine came off quite easily. Photo 2. Also worth noting that with the end plate removed access to the two backlash adjusting screws at the top of the lead screw nut is a lot easier so they can also be adjusted now if they need it.
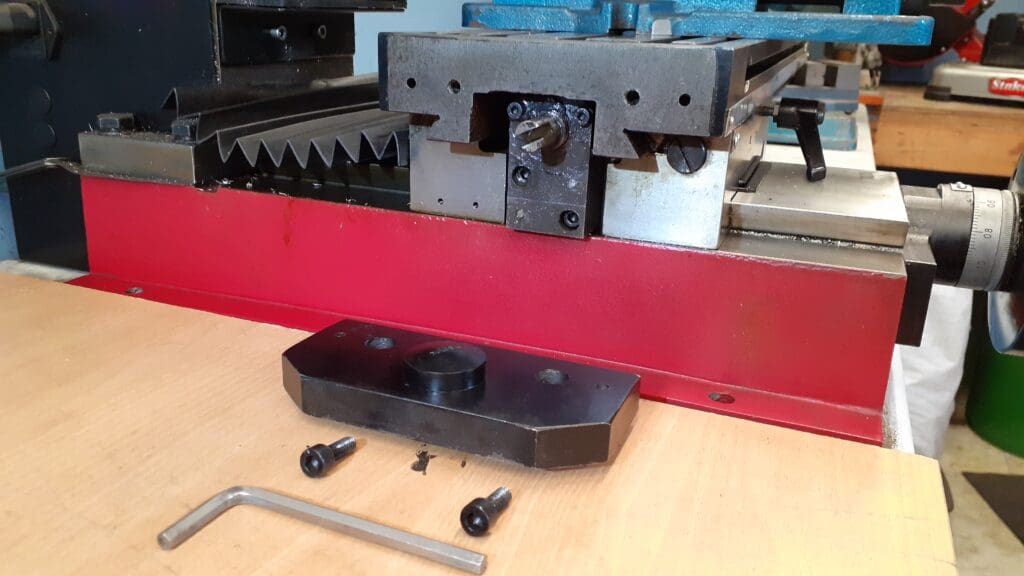
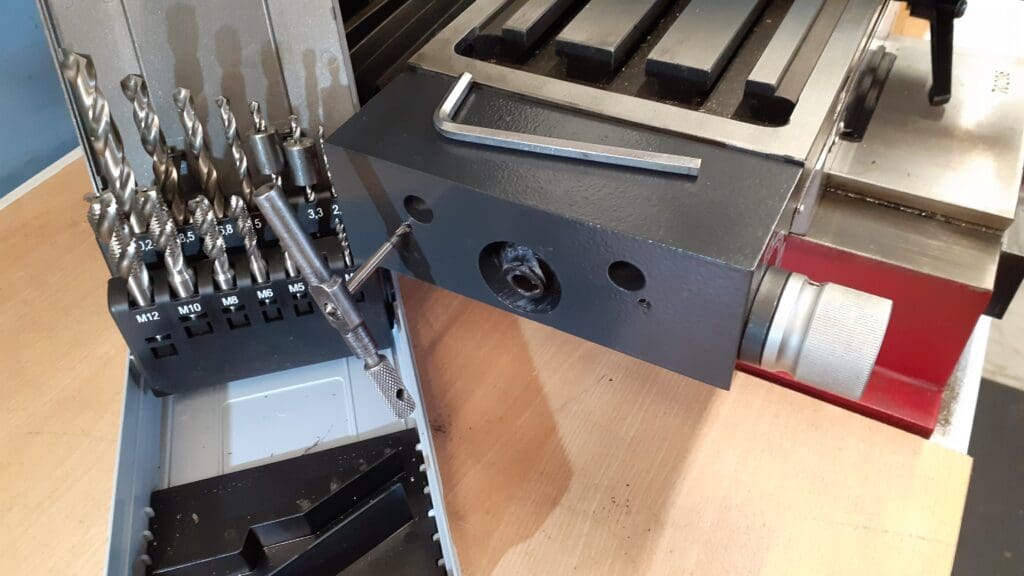
The clutch/adaptor block can now be screwed into place using the two longer M6 Socket head screws provided. Take care to ensure that the slot in the end of the lead screw lines up correctly with the mating male part in the clutch, you may need to turn the X axis hand wheel back and forth as the screws draw the block into place to get the correct engagement. Before fully tightening the screws check that the hand wheel turns with a similar effort to when you started and that the block is not pulling the end of the lead screw out of line. Photo 3
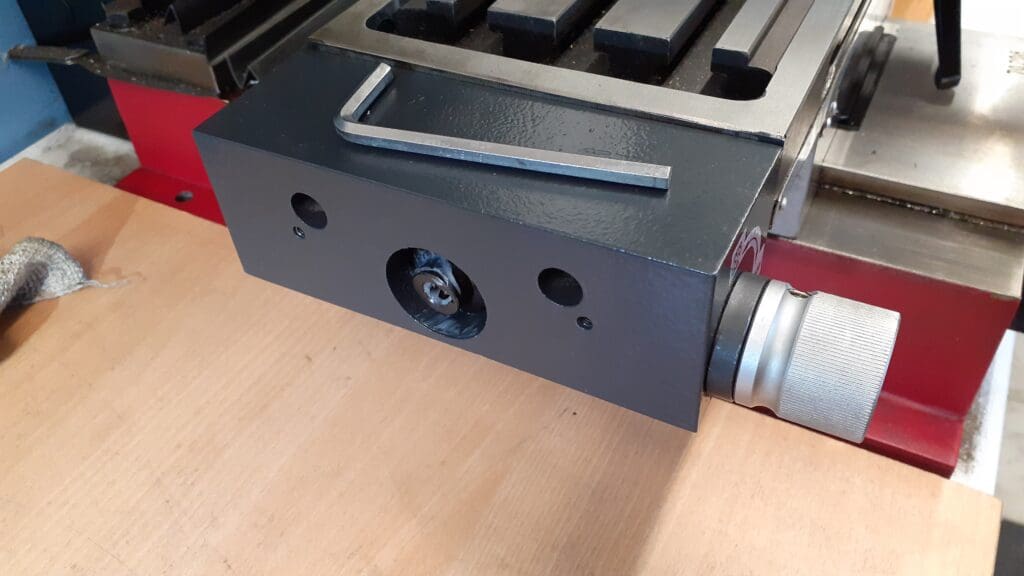
The SX2.7 already comes with two M3 tapped holes in the front of the table which makes for easy no drill mounting of the limit switch box using the provided screws through the backing plate that protrudes below the bottom of the box. The two adjustable stops can also be fitted to the table’s front tee slot and nipped up. I find most of the time they can be left at the ends of the slot simply as a safety feature if you forget to stop the feed but can also be positioned as required when wanting to stop the table in preset positions. Photo 4.
Before mounting the actual feed unit connect the limit switch wire into it’s socket and make sure the wire is secure through the “P” clip strain relief. Photo 5. I also found that the two tapped holes in the clutch/adaptor block had some paint in them so quickly cleaned out the threads with an M4 tap. Photo 6.
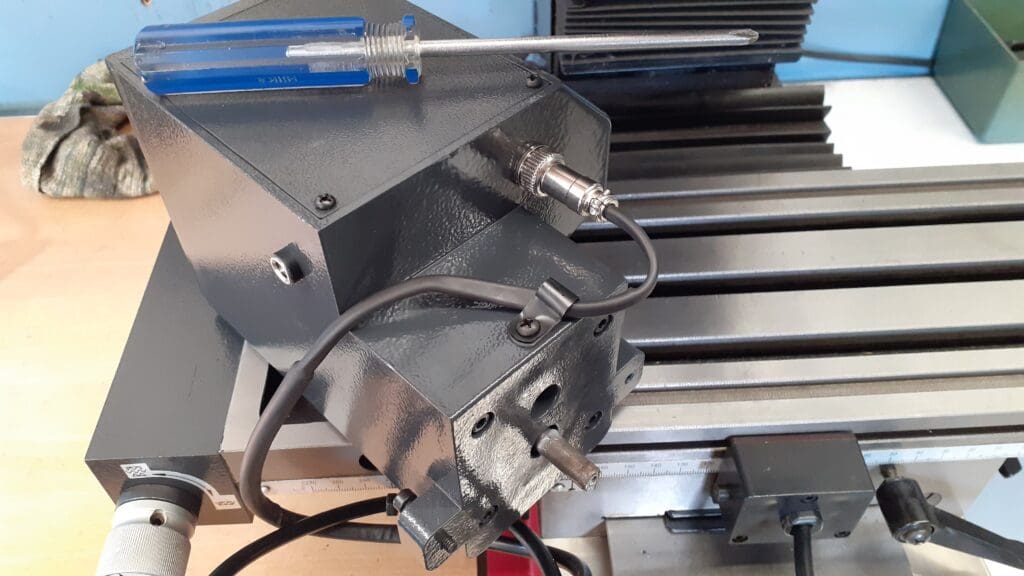
The completed installation can be seem in Photo 7. The green LED indicates when there is power to the unit and the amber one when there is a fault. The fault light will tend to come on if the mains power is turned on when the speed control knob is in any position other than off, so acts as a safety feature preventing the table moving after a power cut or just unintentionally when first powered up. It is easily cleared by turning the speed control knob to the off position (fully anti-clockwise until it clicks) and then you are ready to go.

To engage the feed the clutch knob is turned 90 degrees clockwise so that the arrow is horizontal, you will probably have to turn the x-axis hand wheel a little at the same time to get the two halves of the dog clutch to line up and fully engage. The speed knob can then be turned to the required position and the toggle switch flicked left or right depending on the direction you want the table to move. The knob needs to be turned to approximately the 10 o’clock position before the gear head motor overcomes any sticktion and the table begin to move. The slowest rate therefore works out at approx 75mm/min round to the fastest of approx 450mm/min. See link to video at the end of this article. To return to manual feed simply turn the clutch knob anticlockwise until the arrow is vertical. In use it is still possible to use the hand wheel while the unit is engaged but as there is a lot more resistance due to having to turn the motor as well it is best just used for small movements such as when toughing off to establish height or locate an edge rather than hand feeding a cut.
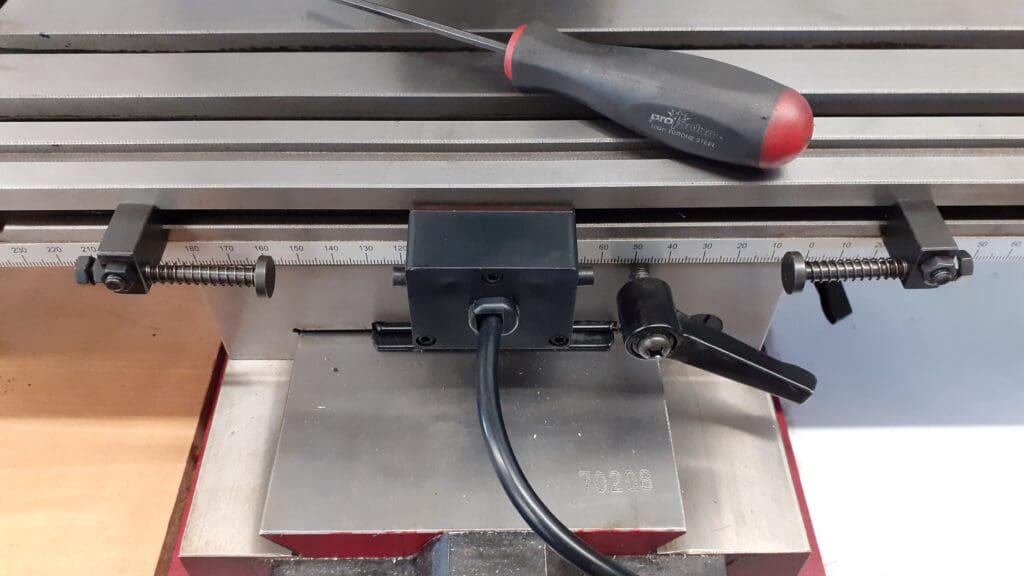
If the stops are to be used then they can be placed roughly where required buy loosening the M8 nut at the front, sliding into place an tightening the nut again. Fine adjustment is then possible by altering the length of the sprung adjusters. Note that depending on the speed of travel there will be some compression of the stop adjuster and switch plunger before the unit switches off. See second video in link.
Summary
The Power feed unit was very easy to fit and if my other one is anything to go buy should give many years of trouble free use. Although not something you must have or even need to use all the time once fitted, the Power feed does enable the use of higher feed rates for insert tools than it is possible to turn the hand wheel at as well as slow and steady feeds needed for things like traditional HSS fly cutters both of which result in better finishes. Or it can simply be used as a fast traverse to return a tool to the start of a cut or when clocking in long work pieces.
A small safety note, when using the power feed it is good practice to disengage the X-axis hand wheel so that it does not spin round wildly and hit you, it also reduces vibration that can affect the finish of the work piece. In the videos that accompany this and the following articles I have removed the spring so the handle stays engaged as it gives a simple visual indication of how fast the hand wheel is rotating.
Operation of the SIEG SX2.7 Power feed as featured in MEW 339
Supplied by and available from ARC Euro Trade https://www.arceurotrade.co.uk/Catalogue/Machines-Accessories/Milling-Machines/SIEG-SX27-Mill/SX27-Mill-Accessories/Powerfeed-for-SIEG-X27-and-SX27-Mills